headlamp FORD F250 2009 User Guide
[x] Cancel search | Manufacturer: FORD, Model Year: 2009, Model line: F250, Model: FORD F250 2009Pages: 419, PDF Size: 3.58 MB
Page 97 of 419
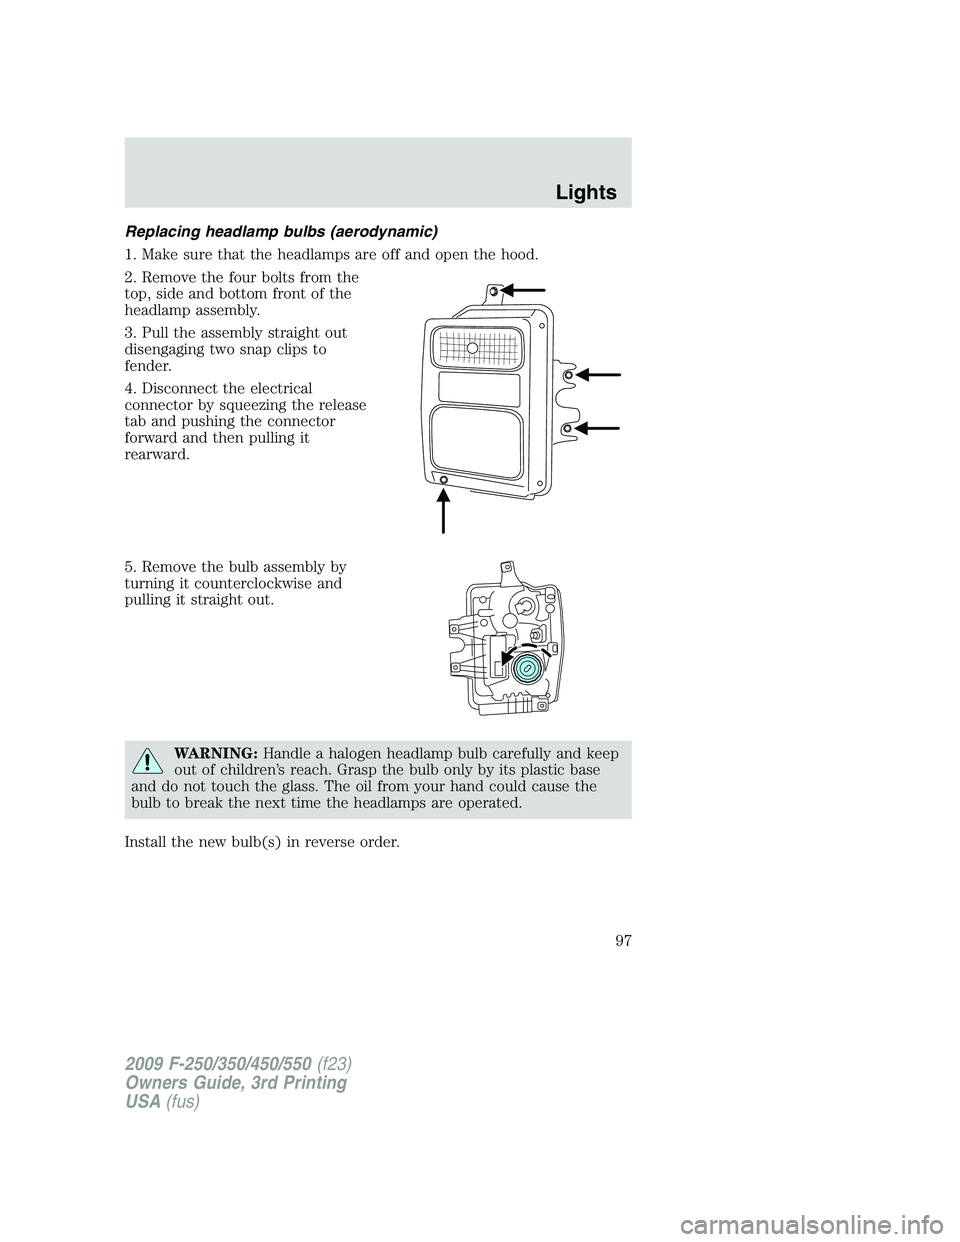
Replacing headlamp bulbs (aerodynamic)
1. Make sure that the headlamps are off and open the hood.
2. Remove the four bolts from the
top, side and bottom front of the
headlamp assembly.
3. Pull the assembly straight out
disengaging two snap clips to
fender.
4. Disconnect the electrical
connector by squeezing the release
tab and pushing the connector
forward and then pulling it
rearward.
5. Remove the bulb assembly by
turning it counterclockwise and
pulling it straight out.
WARNING:Handle a halogen headlamp bulb carefully and keep
out of children’s reach. Grasp the bulb only by its plastic base
and do not touch the glass. The oil from your hand could cause the
bulb to break the next time the headlamps are operated.
Install the new bulb(s) in reverse order.
2009 F-250/350/450/550(f23)
Owners Guide, 3rd Printing
USA(fus)
Lights
97
Page 98 of 419
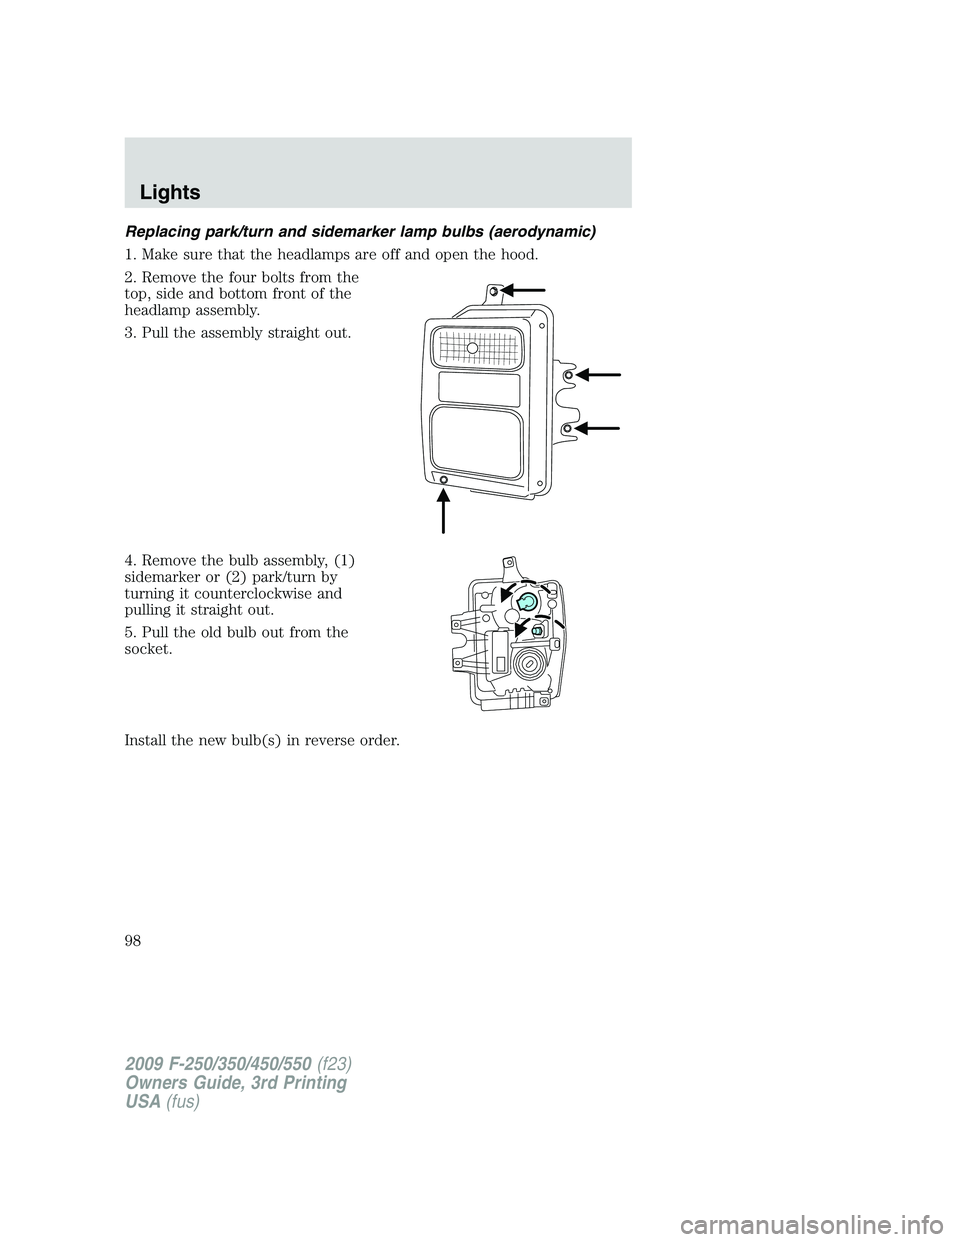
Replacing park/turn and sidemarker lamp bulbs (aerodynamic)
1. Make sure that the headlamps are off and open the hood.
2. Remove the four bolts from the
top, side and bottom front of the
headlamp assembly.
3. Pull the assembly straight out.
4. Remove the bulb assembly, (1)
sidemarker or (2) park/turn by
turning it counterclockwise and
pulling it straight out.
5. Pull the old bulb out from the
socket.
Install the new bulb(s) in reverse order.
2009 F-250/350/450/550(f23)
Owners Guide, 3rd Printing
USA(fus)
Lights
98
Page 99 of 419
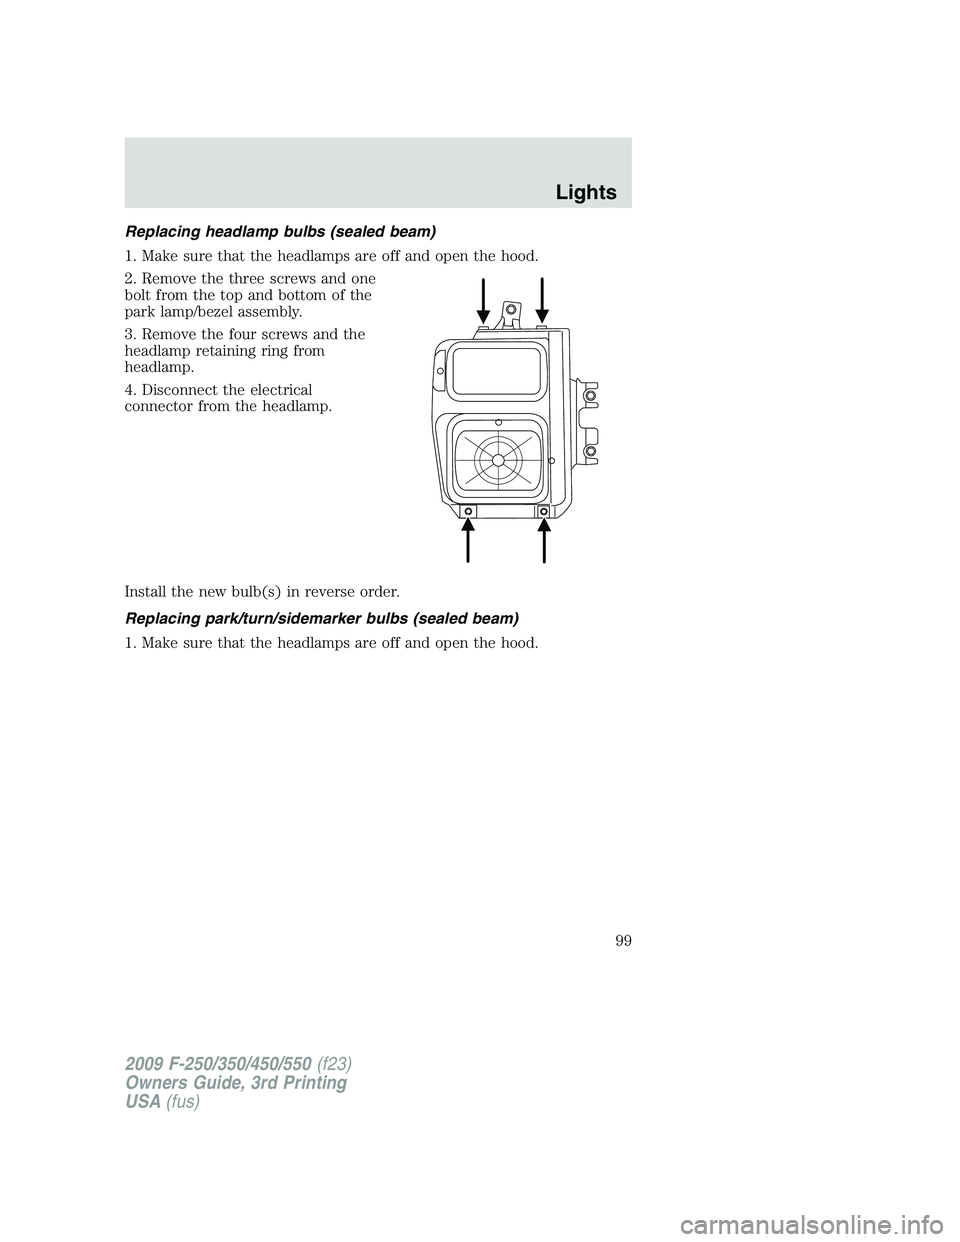
Replacing headlamp bulbs (sealed beam)
1. Make sure that the headlamps are off and open the hood.
2. Remove the three screws and one
bolt from the top and bottom of the
park lamp/bezel assembly.
3. Remove the four screws and the
headlamp retaining ring from
headlamp.
4. Disconnect the electrical
connector from the headlamp.
Install the new bulb(s) in reverse order.
Replacing park/turn/sidemarker bulbs (sealed beam)
1. Make sure that the headlamps are off and open the hood.
2009 F-250/350/450/550(f23)
Owners Guide, 3rd Printing
USA(fus)
Lights
99
Page 100 of 419
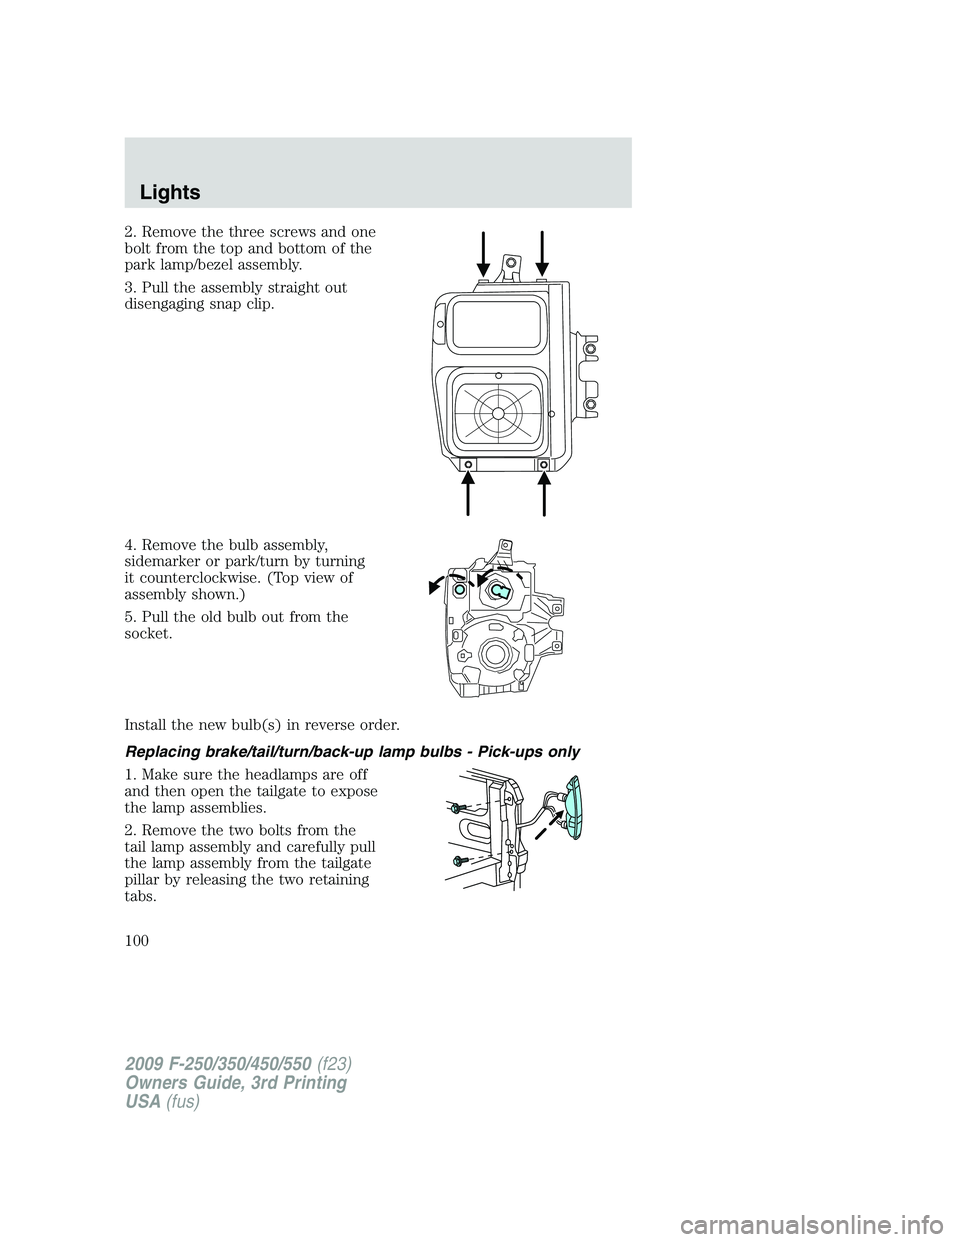
2. Remove the three screws and one
bolt from the top and bottom of the
park lamp/bezel assembly.
3. Pull the assembly straight out
disengaging snap clip.
4. Remove the bulb assembly,
sidemarker or park/turn by turning
it counterclockwise. (Top view of
assembly shown.)
5. Pull the old bulb out from the
socket.
Install the new bulb(s) in reverse order.
Replacing brake/tail/turn/back-up lamp bulbs - Pick-ups only
1. Make sure the headlamps are off
and then open the tailgate to expose
the lamp assemblies.
2. Remove the two bolts from the
tail lamp assembly and carefully pull
the lamp assembly from the tailgate
pillar by releasing the two retaining
tabs.
2009 F-250/350/450/550(f23)
Owners Guide, 3rd Printing
USA(fus)
Lights
100
Page 101 of 419
3. Rotate the bulb socket counterclockwise and remove from lamp
assembly.
4. Pull the bulb straight out of the socket.
Install the new bulb(s) in reverse order.
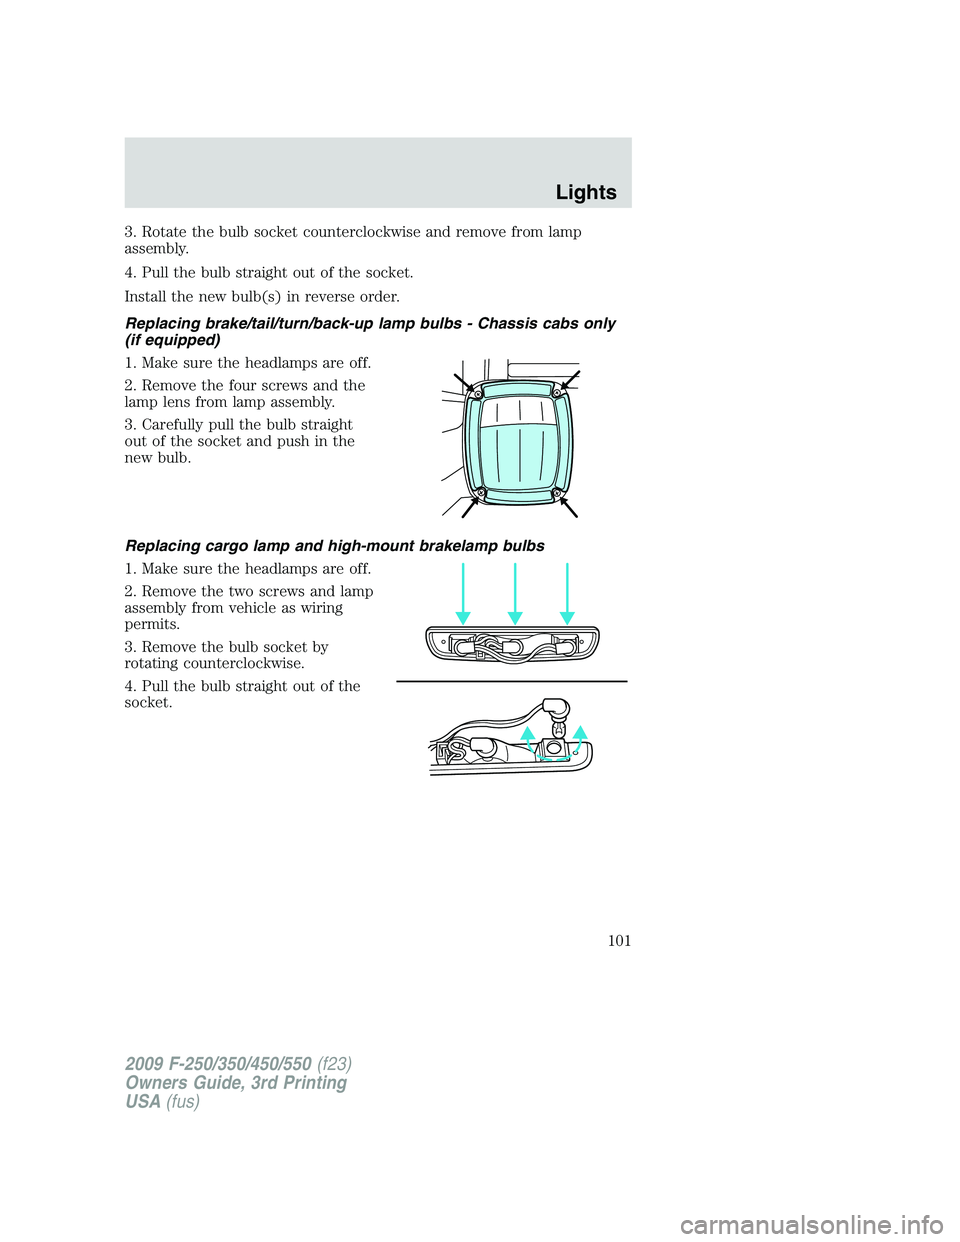
Replacing brake/tail/turn/back-up lamp bulbs - Chassis cabs only
(if equipped)
1. Make sure the headlamps are off.
2. Remove the four screws and the
lamp lens from lamp assembly.
3. Carefully pull the bulb straight
out of the socket and push in the
new bulb.
Replacing cargo lamp and high-mount brakelamp bulbs
1. Make sure the headlamps are off.
2. Remove the two screws and lamp
assembly from vehicle as wiring
permits.
3. Remove the bulb socket by
rotating counterclockwise.
4. Pull the bulb straight out of the
socket.
2009 F-250/350/450/550(f23)
Owners Guide, 3rd Printing
USA(fus)
Lights
101
Page 102 of 419
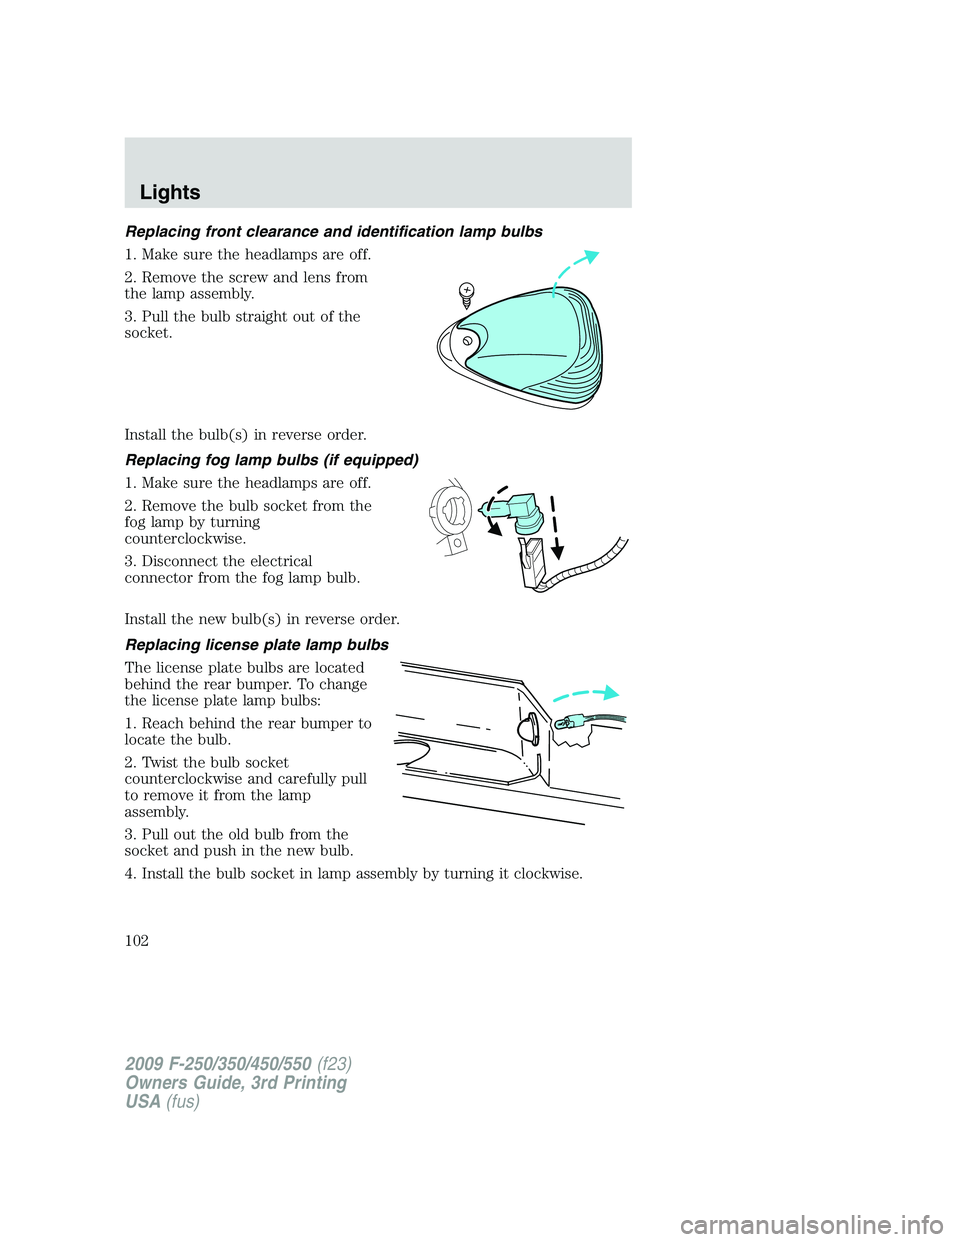
Replacing front clearance and identification lamp bulbs
1. Make sure the headlamps are off.
2. Remove the screw and lens from
the lamp assembly.
3. Pull the bulb straight out of the
socket.
Install the bulb(s) in reverse order.
Replacing fog lamp bulbs (if equipped)
1. Make sure the headlamps are off.
2. Remove the bulb socket from the
fog lamp by turning
counterclockwise.
3. Disconnect the electrical
connector from the fog lamp bulb.
Install the new bulb(s) in reverse order.
Replacing license plate lamp bulbs
The license plate bulbs are located
behind the rear bumper. To change
the license plate lamp bulbs:
1. Reach behind the rear bumper to
locate the bulb.
2. Twist the bulb socket
counterclockwise and carefully pull
to remove it from the lamp
assembly.
3. Pull out the old bulb from the
socket and push in the new bulb.
4. Install the bulb socket in lamp assembly by turning it clockwise.
2009 F-250/350/450/550(f23)
Owners Guide, 3rd Printing
USA(fus)
Lights
102
Page 104 of 419
Windshield wiper rainlamp feature (if equipped with Autolamp)
When the windshield wipers are turned on during daylight, and the
headlamp control is in the autolamp position, the exterior lamps will turn
on after a brief delay and will remain on until the wipers are turned off.
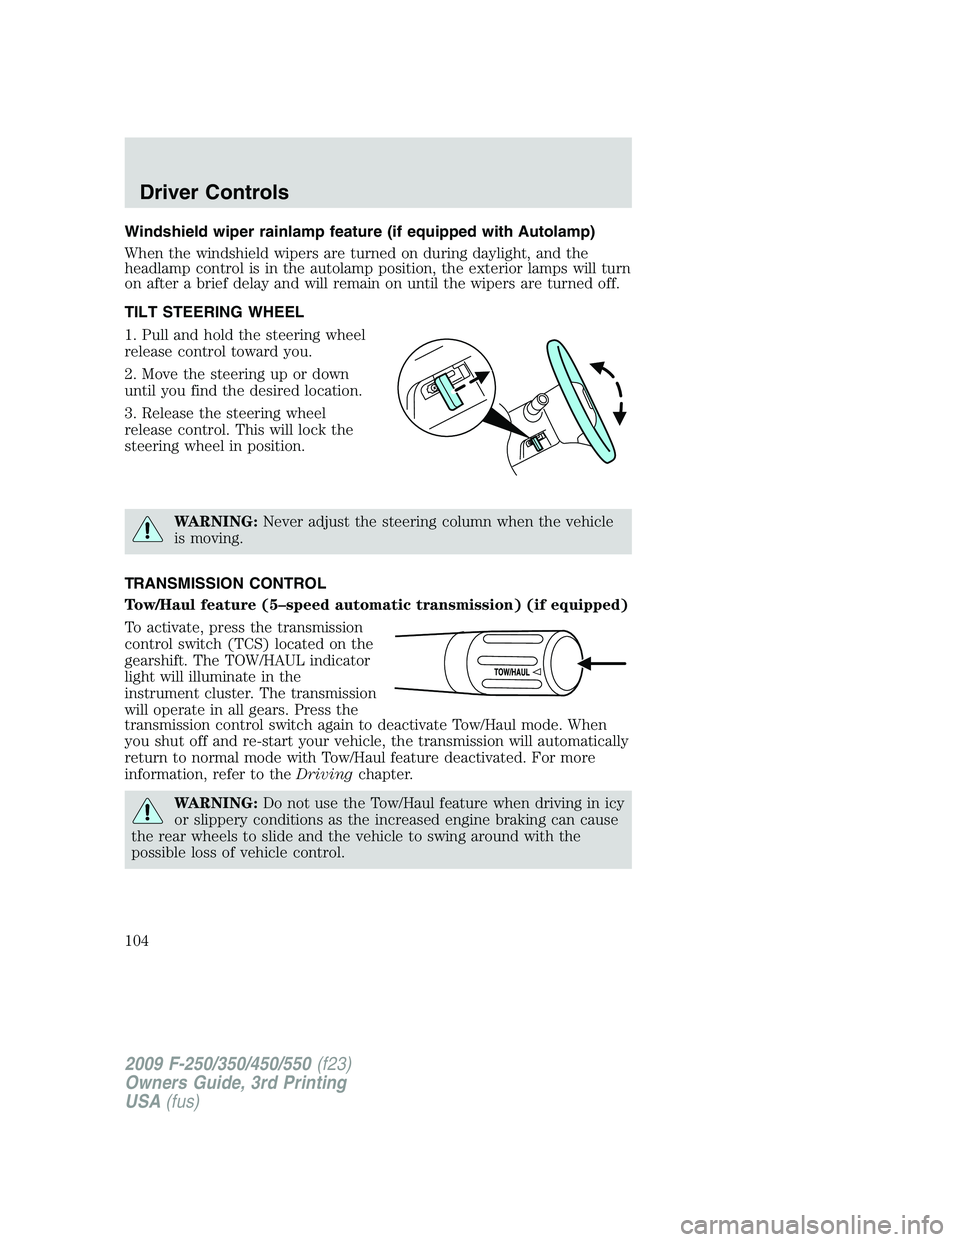
TILT STEERING WHEEL
1. Pull and hold the steering wheel
release control toward you.
2. Move the steering up or down
until you find the desired location.
3. Release the steering wheel
release control. This will lock the
steering wheel in position.
WARNING:Never adjust the steering column when the vehicle
is moving.
TRANSMISSION CONTROL
Tow/Haul feature (5–speed automatic transmission) (if equipped)
To activate, press the transmission
control switch (TCS) located on the
gearshift. The TOW/HAUL indicator
light will illuminate in the
instrument cluster. The transmission
will operate in all gears. Press the
transmission control switch again to deactivate Tow/Haul mode. When
you shut off and re-start your vehicle, the transmission will automatically
return to normal mode with Tow/Haul feature deactivated. For more
information, refer to theDrivingchapter.
WARNING:Do not use the Tow/Haul feature when driving in icy
or slippery conditions as the increased engine braking can cause
the rear wheels to slide and the vehicle to swing around with the
possible loss of vehicle control.
2009 F-250/350/450/550(f23)
Owners Guide, 3rd Printing
USA(fus)
Driver Controls
104
Page 115 of 419
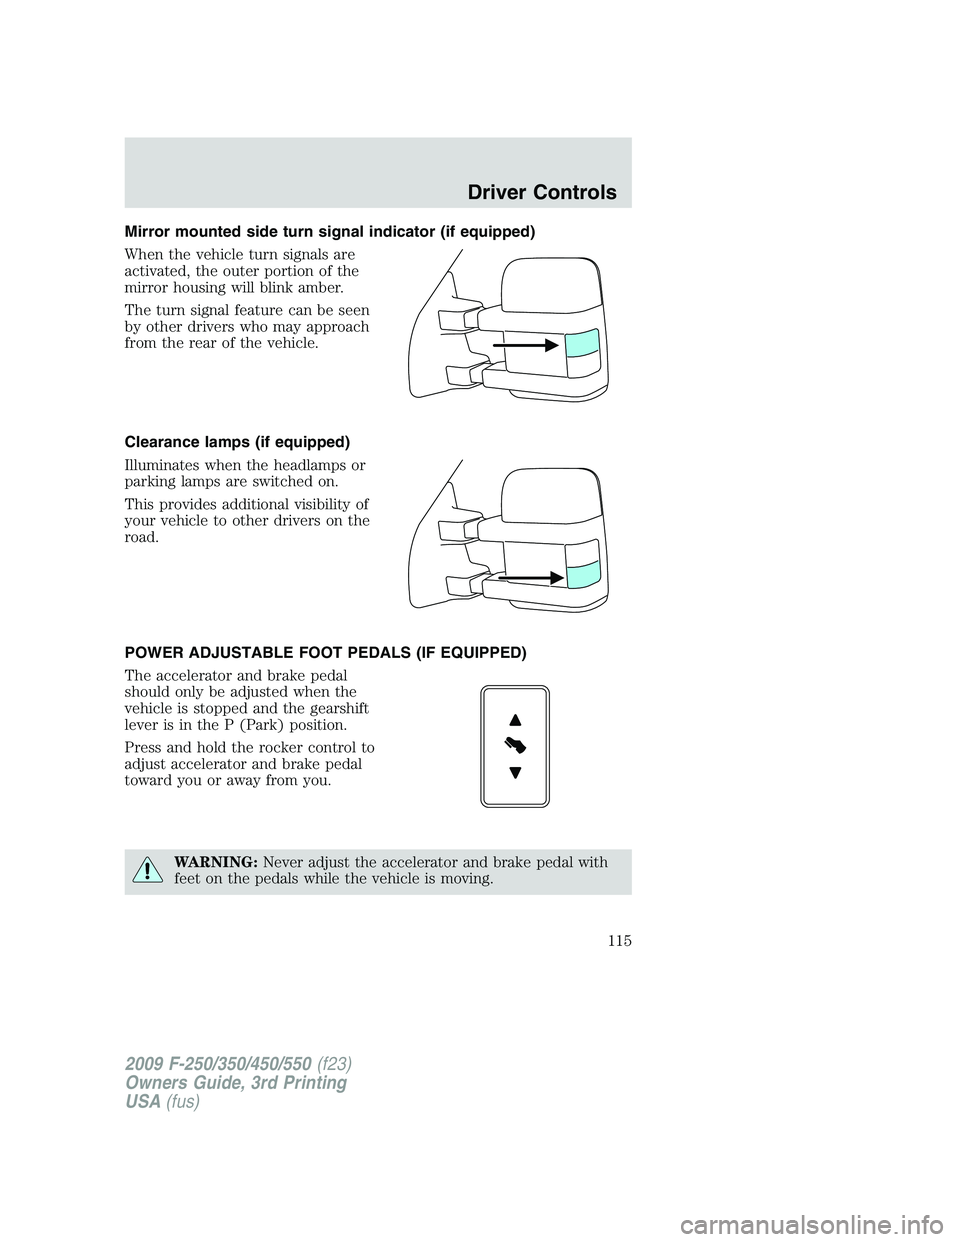
Mirror mounted side turn signal indicator (if equipped)
When the vehicle turn signals are
activated, the outer portion of the
mirror housing will blink amber.
The turn signal feature can be seen
by other drivers who may approach
from the rear of the vehicle.
Clearance lamps (if equipped)
Illuminates when the headlamps or
parking lamps are switched on.
This provides additional visibility of
your vehicle to other drivers on the
road.
POWER ADJUSTABLE FOOT PEDALS (IF EQUIPPED)
The accelerator and brake pedal
should only be adjusted when the
vehicle is stopped and the gearshift
lever is in the P (Park) position.
Press and hold the rocker control to
adjust accelerator and brake pedal
toward you or away from you.
WARNING:Never adjust the accelerator and brake pedal with
feet on the pedals while the vehicle is moving.
2009 F-250/350/450/550(f23)
Owners Guide, 3rd Printing
USA(fus)
Driver Controls
115
Page 127 of 419
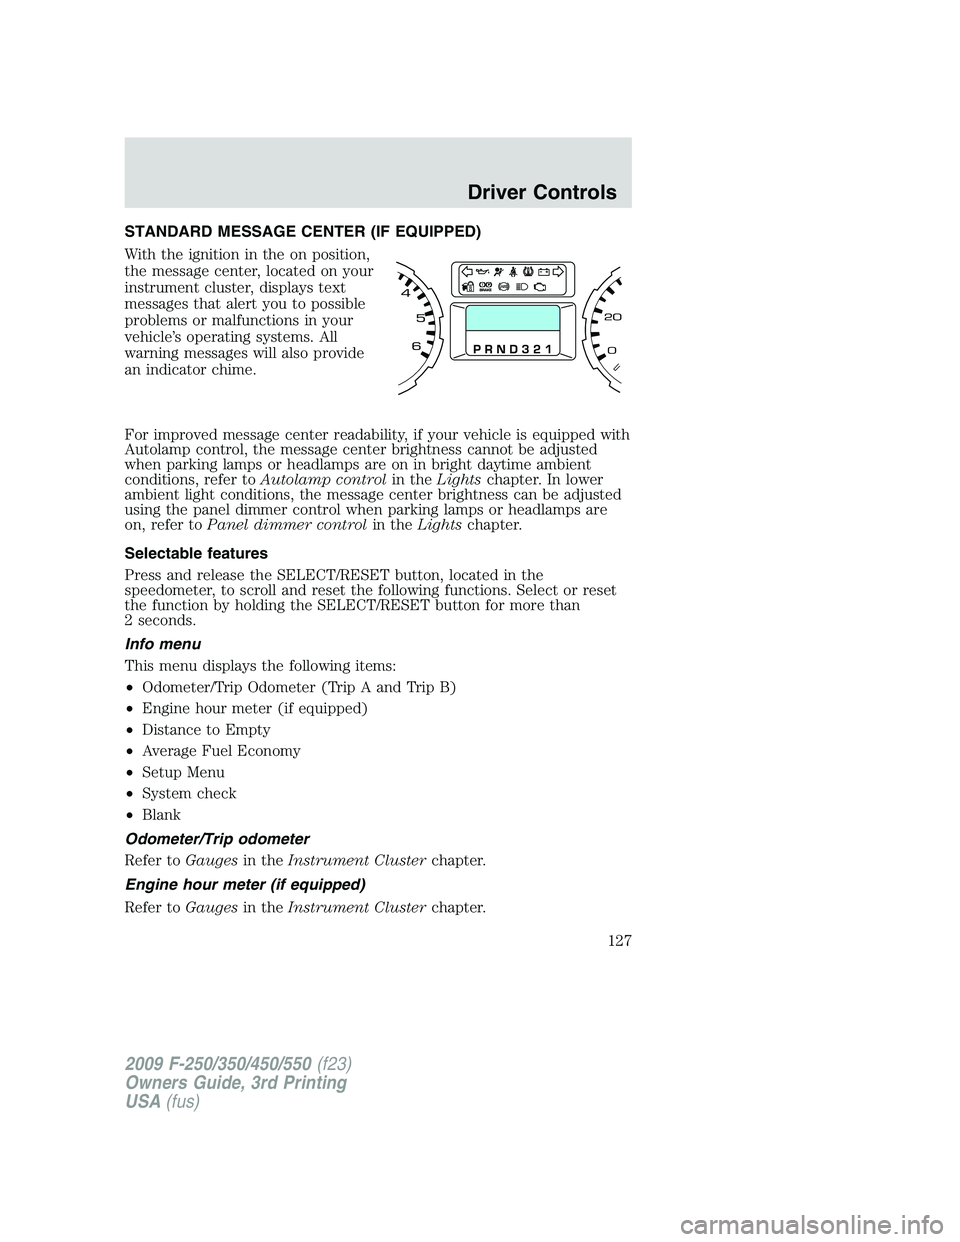
STANDARD MESSAGE CENTER (IF EQUIPPED)
With the ignition in the on position,
the message center, located on your
instrument cluster, displays text
messages that alert you to possible
problems or malfunctions in your
vehicle’s operating systems. All
warning messages will also provide
an indicator chime.
For improved message center readability, if your vehicle is equipped with
Autolamp control, the message center brightness cannot be adjusted
when parking lamps or headlamps are on in bright daytime ambient
conditions, refer toAutolamp controlin theLightschapter. In lower
ambient light conditions, the message center brightness can be adjusted
using the panel dimmer control when parking lamps or headlamps are
on, refer toPanel dimmer controlin theLightschapter.
Selectable features
Press and release the SELECT/RESET button, located in the
speedometer, to scroll and reset the following functions. Select or reset
the function by holding the SELECT/RESET button for more than
2 seconds.
Info menu
This menu displays the following items:
•Odometer/Trip Odometer (Trip A and Trip B)
•Engine hour meter (if equipped)
•Distance to Empty
•Average Fuel Economy
•Setup Menu
•System check
•Blank
Odometer/Trip odometer
Refer toGaugesin theInstrument Clusterchapter.
Engine hour meter (if equipped)
Refer toGaugesin theInstrument Clusterchapter.
2009 F-250/350/450/550(f23)
Owners Guide, 3rd Printing
USA(fus)
Driver Controls
127
Page 137 of 419
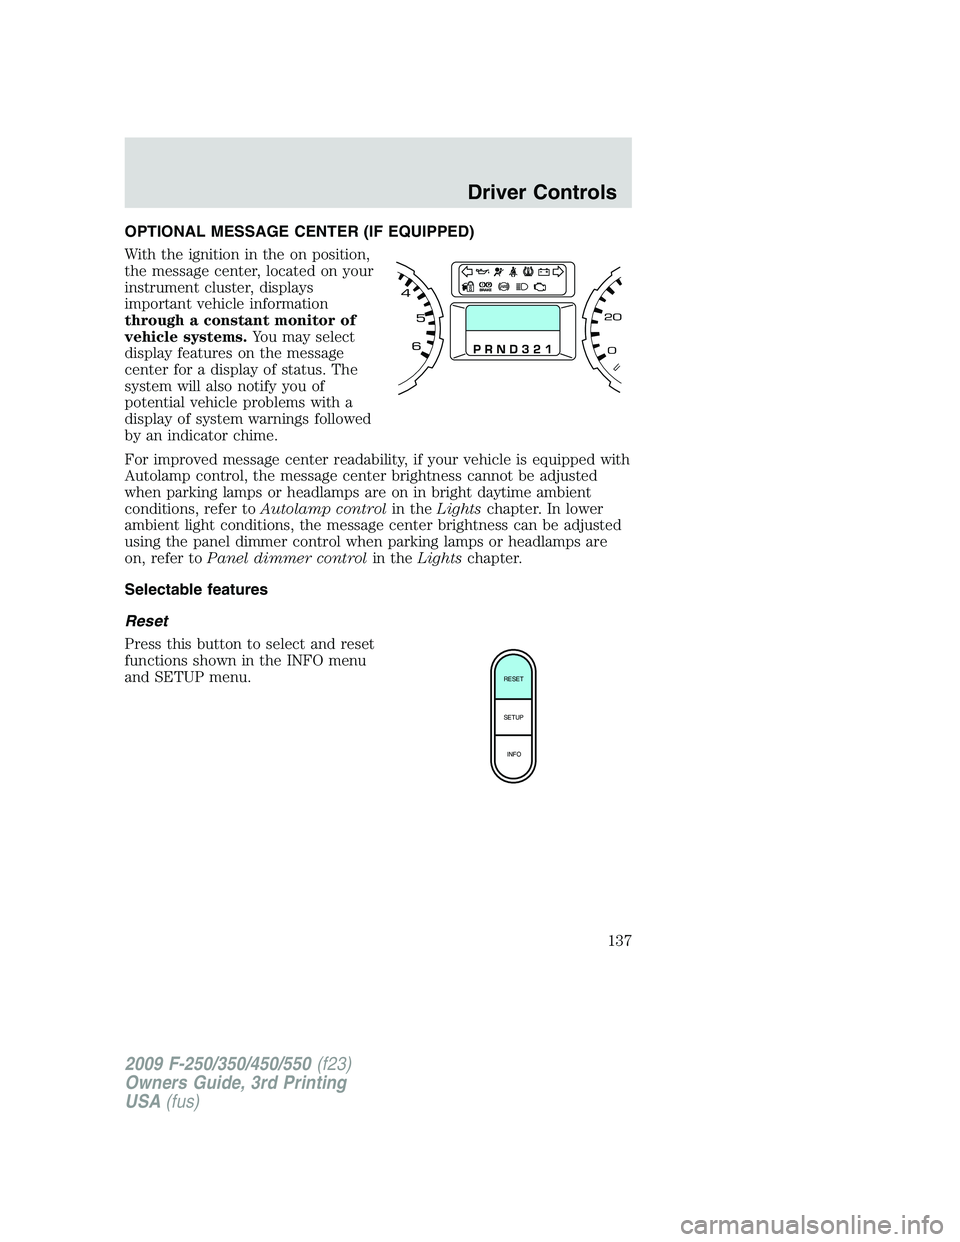
OPTIONAL MESSAGE CENTER (IF EQUIPPED)
With the ignition in the on position,
the message center, located on your
instrument cluster, displays
important vehicle information
through a constant monitor of
vehicle systems.You may select
display features on the message
center for a display of status. The
system will also notify you of
potential vehicle problems with a
display of system warnings followed
by an indicator chime.
For improved message center readability, if your vehicle is equipped with
Autolamp control, the message center brightness cannot be adjusted
when parking lamps or headlamps are on in bright daytime ambient
conditions, refer toAutolamp controlin theLightschapter. In lower
ambient light conditions, the message center brightness can be adjusted
using the panel dimmer control when parking lamps or headlamps are
on, refer toPanel dimmer controlin theLightschapter.
Selectable features
Reset
Press this button to select and reset
functions shown in the INFO menu
and SETUP menu.
RESET
SETUP
INFO
2009 F-250/350/450/550(f23)
Owners Guide, 3rd Printing
USA(fus)
Driver Controls
137