clutch FORD F250 SUPER DUTY 2005 Owners Manual
[x] Cancel search | Manufacturer: FORD, Model Year: 2005, Model line: F250 SUPER DUTY, Model: FORD F250 SUPER DUTY 2005Pages: 312, PDF Size: 4.8 MB
Page 64 of 312
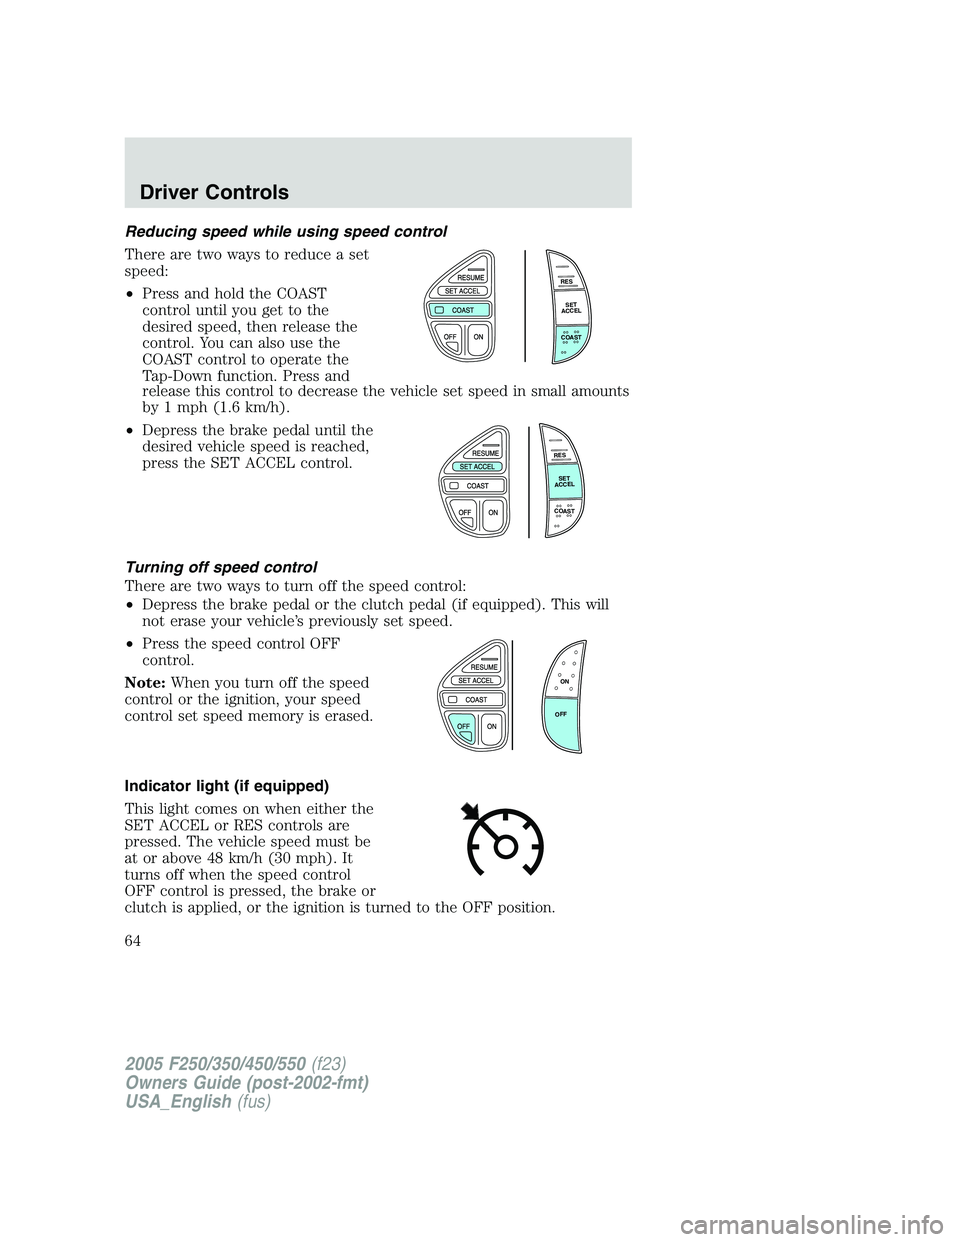
Reducing speed while using speed control
There are two ways to reduce a set
speed:
• Press and hold the COAST
control until you get to the
desired speed, then release the
control. You can also use the
COAST control to operate the
Tap-Down function. Press and
release this control to decrease the vehicle set speed in small amounts
by 1 mph (1.6 km/h).
• Depress the brake pedal until the
desired vehicle speed is reached,
press the SET ACCEL control.
Turning off speed control
There are two ways to turn off the speed control:
• Depress the brake pedal or the clutch pedal (if equipped). This will
not erase your vehicle’s previously set speed.
• Press the speed control OFF
control.
Note: When you turn off the speed
control or the ignition, your speed
control set speed memory is erased.
Indicator light (if equipped)
This light comes on when either the
SET ACCEL or RES controls are
pressed. The vehicle speed must be
at or above 48 km/h (30 mph). It
turns off when the speed control
OFF control is pressed, the brake or
clutch is applied, or the ignition is turned to the OFF position. R E S
S E T
A C C E L
C O A S T
R E S
S E T
A C C E L
C O A S T
ON
OFF
2005 F250/350/450/550 (f23)
Owners Guide (post-2002-fmt)
USA_English (fus)Driver Controls
64
Page 180 of 312
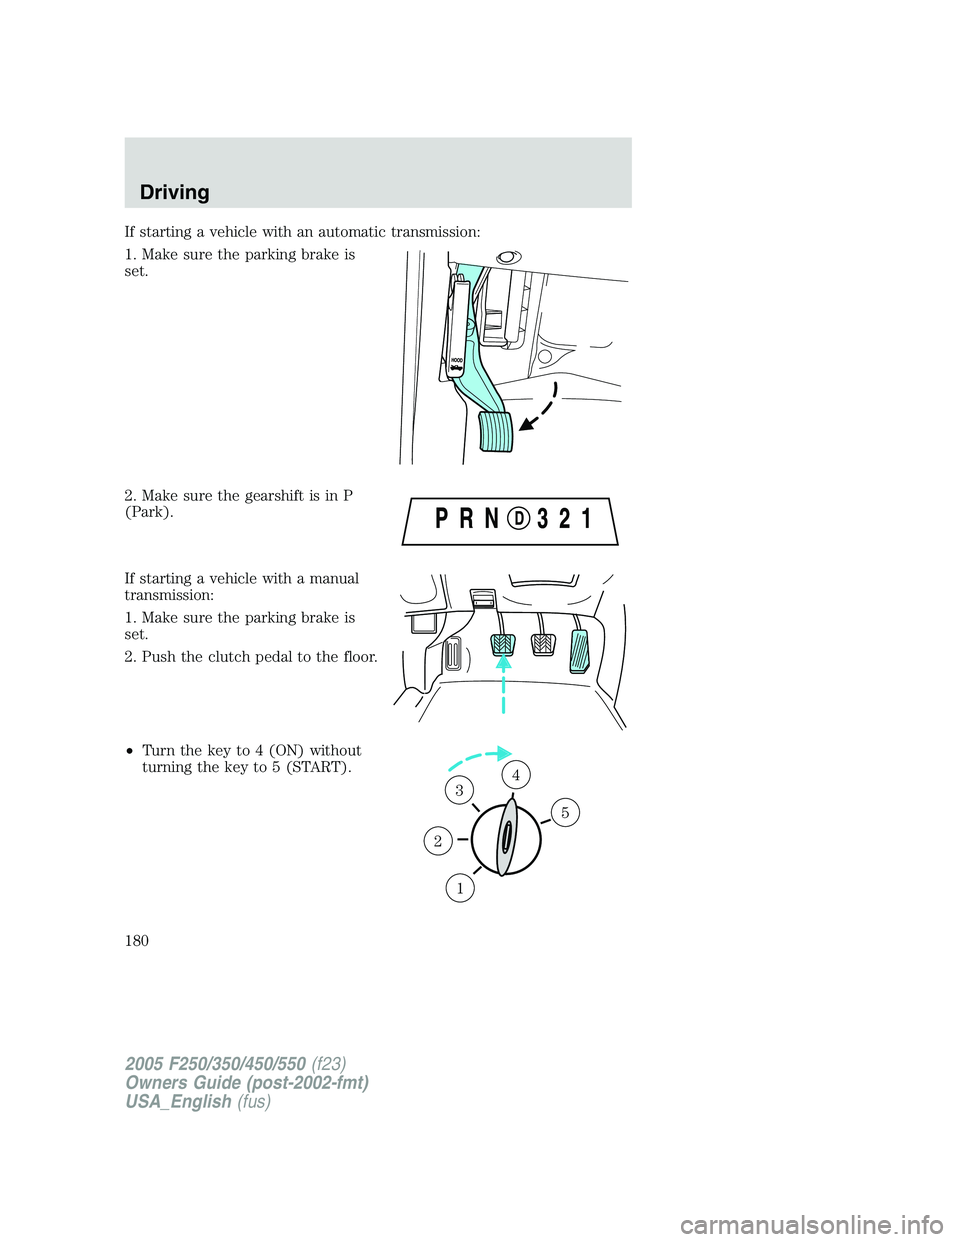
If starting a vehicle with an automatic transmission:
1. Make sure the parking brake is
set.
2. Make sure the gearshift is in P
(Park).
If starting a vehicle with a manual
transmission:
1. Make sure the parking brake is
set.
2. Push the clutch pedal to the floor.
• Turn the key to 4 (ON) without
turning the key to 5 (START).
12 3 4
5
2005 F250/350/450/550 (f23)
Owners Guide (post-2002-fmt)
USA_English (fus)Driving
180
Page 191 of 312
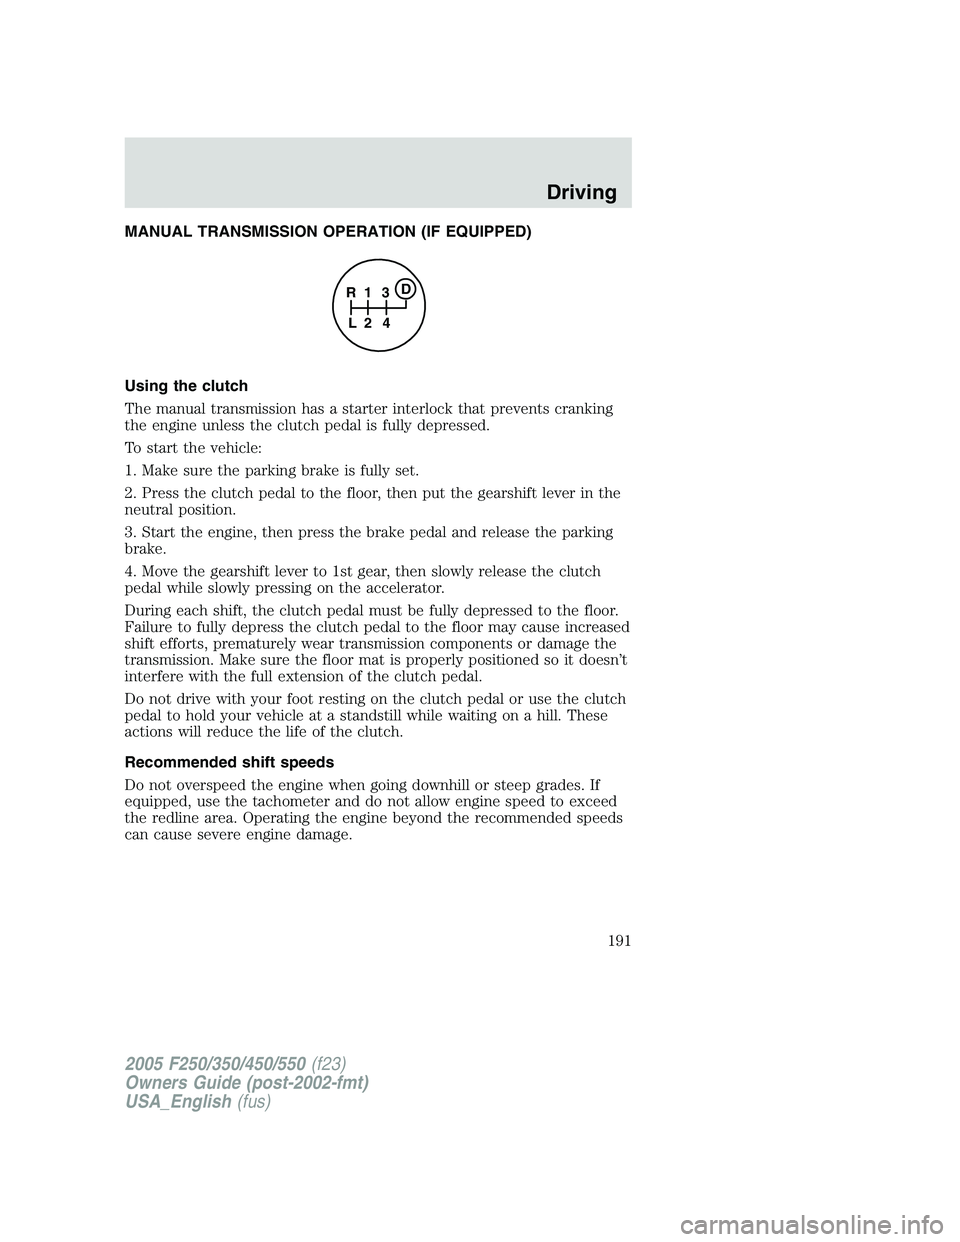
MANUAL TRANSMISSION OPERATION (IF EQUIPPED)
Using the clutch
The manual transmission has a starter interlock that prevents cranking
the engine unless the clutch pedal is fully depressed.
To start the vehicle:
1. Make sure the parking brake is fully set.
2. Press the clutch pedal to the floor, then put the gearshift lever in the
neutral position.
3. Start the engine, then press the brake pedal and release the parking
brake.
4. Move the gearshift lever to 1st gear, then slowly release the clutch
pedal while slowly pressing on the accelerator.
During each shift, the clutch pedal must be fully depressed to the floor.
Failure to fully depress the clutch pedal to the floor may cause increased
shift efforts, prematurely wear transmission components or damage the
transmission. Make sure the floor mat is properly positioned so it doesn’t
interfere with the full extension of the clutch pedal.
Do not drive with your foot resting on the clutch pedal or use the clutch
pedal to hold your vehicle at a standstill while waiting on a hill. These
actions will reduce the life of the clutch.
Recommended shift speeds
Do not overspeed the engine when going downhill or steep grades. If
equipped, use the tachometer and do not allow engine speed to exceed
the redline area. Operating the engine beyond the recommended speeds
can cause severe engine damage. 1
24R
L 3 D
2005 F250/350/450/550 (f23)
Owners Guide (post-2002-fmt)
USA_English (fus) Driving
191
Page 198 of 312
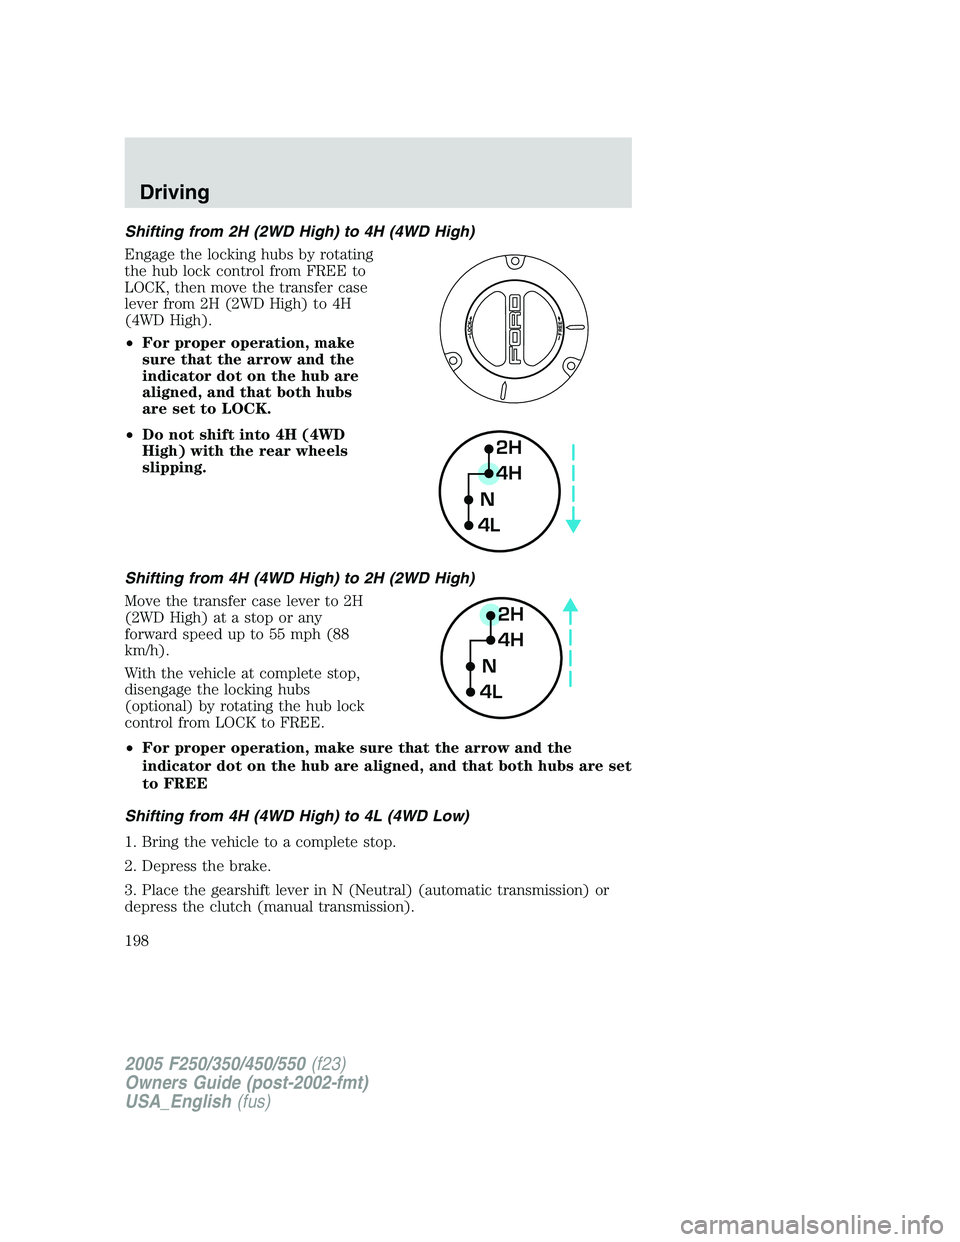
Shifting from 2H (2WD High) to 4H (4WD High)
Engage the locking hubs by rotating
the hub lock control from FREE to
LOCK, then move the transfer case
lever from 2H (2WD High) to 4H
(4WD High).
• For proper operation, make
sure that the arrow and the
indicator dot on the hub are
aligned, and that both hubs
are set to LOCK.
• Do not shift into 4H (4WD
High) with the rear wheels
slipping.
Shifting from 4H (4WD High) to 2H (2WD High)
Move the transfer case lever to 2H
(2WD High) at a stop or any
forward speed up to 55 mph (88
km/h).
With the vehicle at complete stop,
disengage the locking hubs
(optional) by rotating the hub lock
control from LOCK to FREE.
• For proper operation, make sure that the arrow and the
indicator dot on the hub are aligned, and that both hubs are set
to FREE
Shifting from 4H (4WD High) to 4L (4WD Low)
1. Bring the vehicle to a complete stop.
2. Depress the brake.
3. Place the gearshift lever in N (Neutral) (automatic transmission) or
depress the clutch (manual transmission). 2H
4H
4L N
2H
4H
4L N
2005 F250/350/450/550 (f23)
Owners Guide (post-2002-fmt)
USA_English (fus)Driving
198
Page 199 of 312
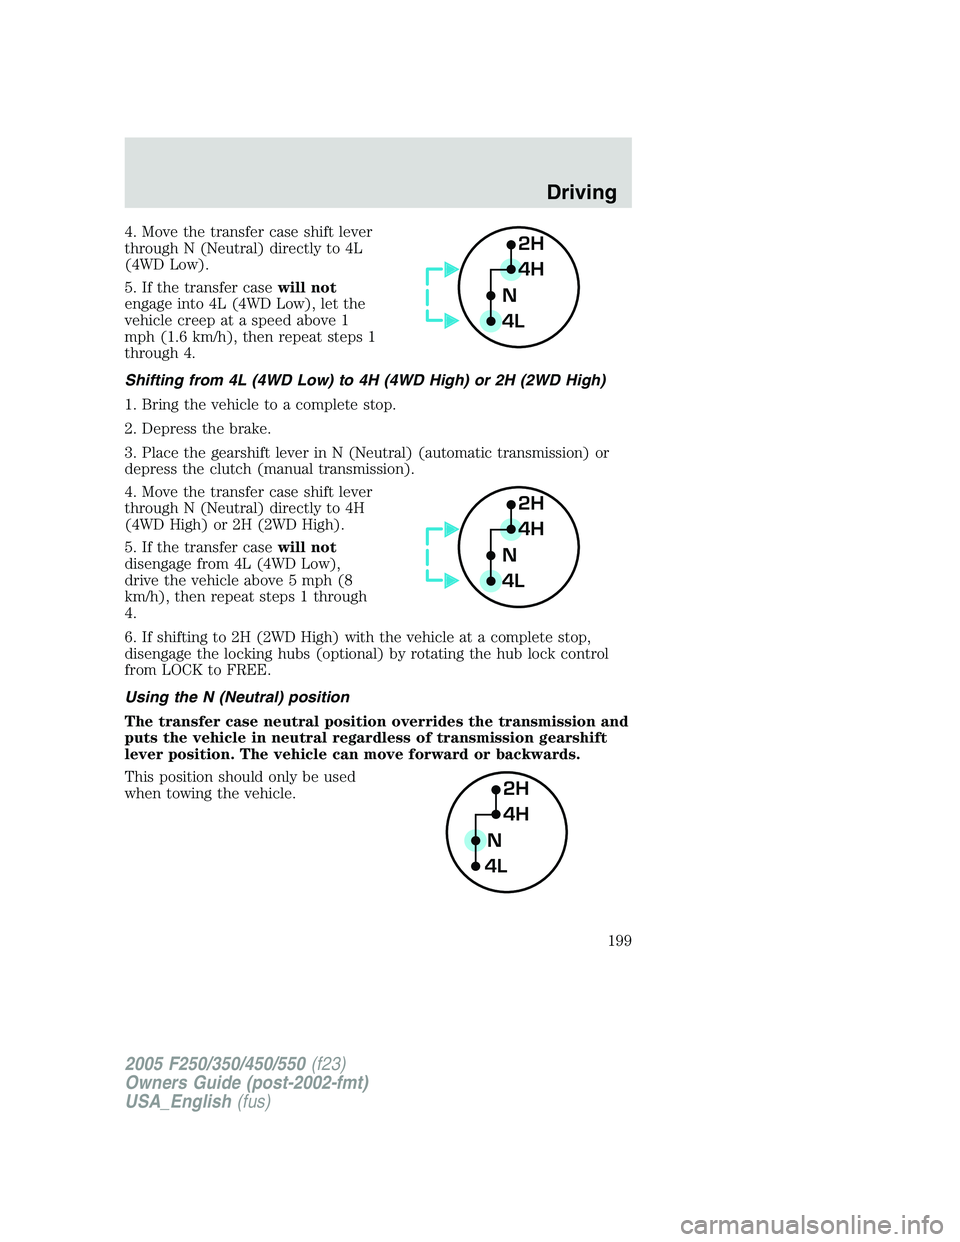
4. Move the transfer case shift lever
through N (Neutral) directly to 4L
(4WD Low).
5. If the transfer case will not
engage into 4L (4WD Low), let the
vehicle creep at a speed above 1
mph (1.6 km/h), then repeat steps 1
through 4.
Shifting from 4L (4WD Low) to 4H (4WD High) or 2H (2WD High)
1. Bring the vehicle to a complete stop.
2. Depress the brake.
3. Place the gearshift lever in N (Neutral) (automatic transmission) or
depress the clutch (manual transmission).
4. Move the transfer case shift lever
through N (Neutral) directly to 4H
(4WD High) or 2H (2WD High).
5. If the transfer case will not
disengage from 4L (4WD Low),
drive the vehicle above 5 mph (8
km/h), then repeat steps 1 through
4.
6. If shifting to 2H (2WD High) with the vehicle at a complete stop,
disengage the locking hubs (optional) by rotating the hub lock control
from LOCK to FREE.
Using the N (Neutral) position
The transfer case neutral position overrides the transmission and
puts the vehicle in neutral regardless of transmission gearshift
lever position. The vehicle can move forward or backwards.
This position should only be used
when towing the vehicle. 2H
4H
4L N
2H
4H
4L N
2H
4H
4L N
2005 F250/350/450/550 (f23)
Owners Guide (post-2002-fmt)
USA_English (fus) Driving
199
Page 201 of 312
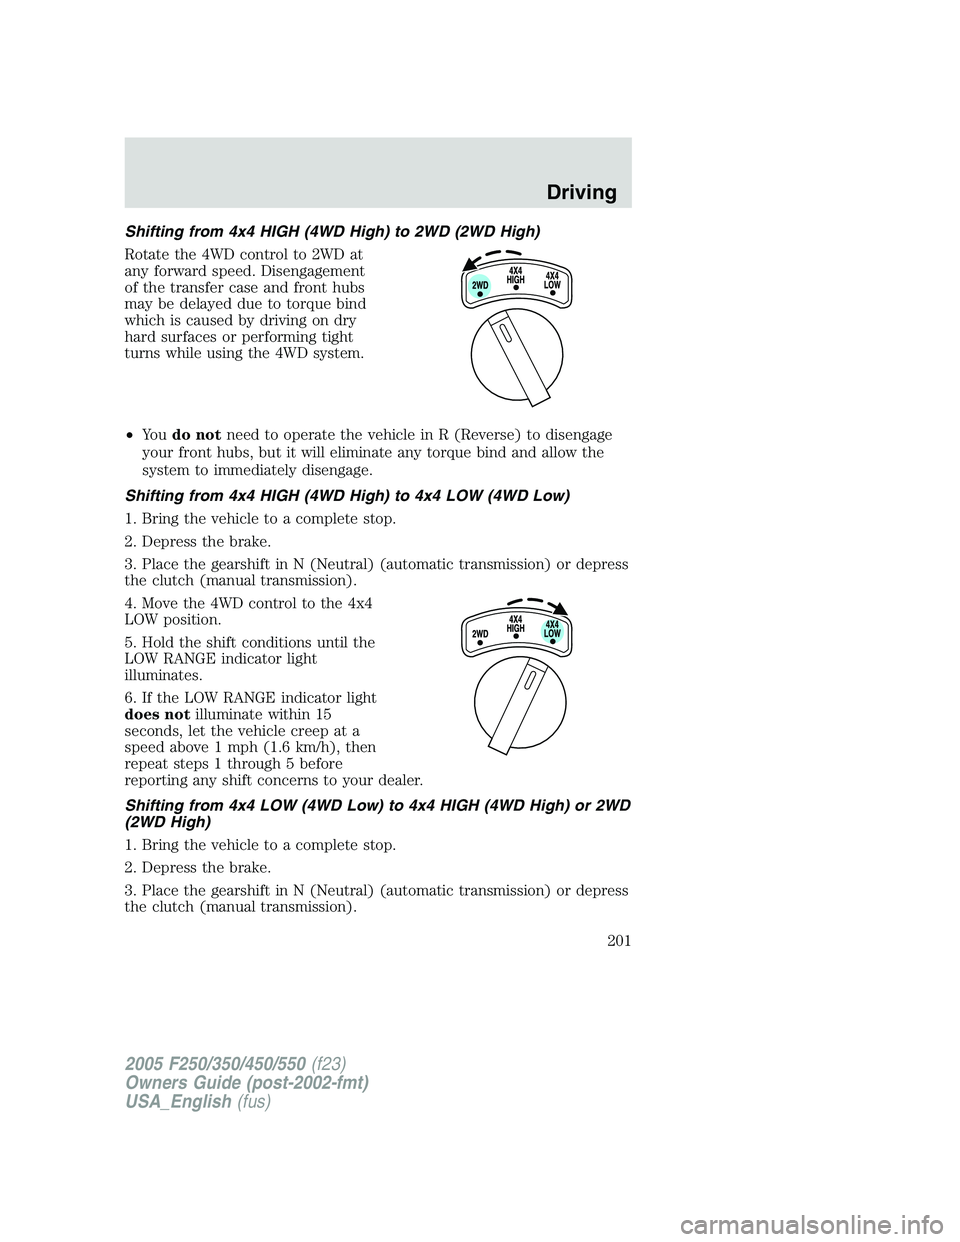
Shifting from 4x4 HIGH (4WD High) to 2WD (2WD High)
Rotate the 4WD control to 2WD at
any forward speed. Disengagement
of the transfer case and front hubs
may be delayed due to torque bind
which is caused by driving on dry
hard surfaces or performing tight
turns while using the 4WD system.
• Yo u do not need to operate the vehicle in R (Reverse) to disengage
your front hubs, but it will eliminate any torque bind and allow the
system to immediately disengage.
Shifting from 4x4 HIGH (4WD High) to 4x4 LOW (4WD Low)
1. Bring the vehicle to a complete stop.
2. Depress the brake.
3. Place the gearshift in N (Neutral) (automatic transmission) or depress
the clutch (manual transmission).
4. Move the 4WD control to the 4x4
LOW position.
5. Hold the shift conditions until the
LOW RANGE indicator light
illuminates.
6. If the LOW RANGE indicator light
does not illuminate within 15
seconds, let the vehicle creep at a
speed above 1 mph (1.6 km/h), then
repeat steps 1 through 5 before
reporting any shift concerns to your dealer.
Shifting from 4x4 LOW (4WD Low) to 4x4 HIGH (4WD High) or 2WD
(2WD High)
1. Bring the vehicle to a complete stop.
2. Depress the brake.
3. Place the gearshift in N (Neutral) (automatic transmission) or depress
the clutch (manual transmission).
2005 F250/350/450/550 (f23)
Owners Guide (post-2002-fmt)
USA_English (fus) Driving
201
Page 223 of 312
Fuse/Relay
Location Fuse Amp
Rating Power Distribution Box
Description
12 2A** Brake pressure switch
13 15A** Daytime Running Lamps (DRL)
14 — Not used
15 15A** IDM logic (Diesel engine only)
16 — Not used
17 10A** A/C clutch
18 10A** IDM relay (Diesel engine only)
19 — Not used
20 10A** Trailer tow back-up lamps
21 — Not used
22 60A*** ABS (Coils)
23 60A*** ABS (Pump)
201 1
� 2
ISO relay Trailer tow right turn signal/stop
lamp
202 1
� 2
ISO relay Trailer tow left turn signal/stop
lamp
203 1
� 2
ISO relay A/C clutch
204 — Not used
205 1
� 2
ISO relay DRL #1
206 1
� 2
ISO relay DRL #2
301 Full ISO relay DRL #3
302 Full ISO relay HFCM
303 Full ISO relay Blower
304 High-current
relay IDM (Diesel engine only)
* Cartdrige Fuse ** Mini Fuses *** Maxi fuse
2005 F250/350/450/550 (f23)
Owners Guide (post-2002-fmt)
USA_English (fus) Roadside Emergencies
223
Page 247 of 312
SERVICE RECOMMENDATIONS
To help you service your vehicle:
• We highlight do-it-yourself items in the engine compartment for easy
location.
• We provide a scheduled maintenance guide which makes tracking
routine service easy.
If your vehicle requires professional service, your dealership can provide
the necessary parts and service. Check your Warranty Guide/Owner
Information Guide to find out which parts and services are covered.
Use only recommended fuels, lubricants, fluids and service parts
conforming to specifications. Motorcraft parts are designed and built to
provide the best performance in your vehicle.
PRECAUTIONS WHEN SERVICING YOUR VEHICLE
• Do not work on a hot engine.
• Make sure that nothing gets caught in moving parts.
• Do not work on a vehicle with the engine running in an enclosed
space, unless you are sure you have enough ventilation.
• Keep all open flames and other burning (cigarettes) material away
from the battery and all fuel related parts.
Working with the engine off
• Automatic transmission:
1. Set the parking brake and shift to P (Park).
2. Turn off the engine and remove the key.
3. Block the wheels.
• Manual transmission:
1. Set the parking brake, depress the clutch and place the gearshift in 1
(First).
2. Turn off the engine and remove the key.
3. Block the wheels.
Working with the engine on
• Automatic transmission:
1. Set the parking brake and shift to P (Park).
2. Block the wheels.
2005 F250/350/450/550 (f23)
Owners Guide (post-2002-fmt)
USA_English (fus)Maintenance and Specifications
Maintenance and Specifications
247
Page 248 of 312
• Manual transmission:
1. Set the parking brake, depress the clutch and place the gearshift in N
(Neutral).
2. Block the wheels.
Note: Do not start your engine with the air cleaner removed and do not
remove it while the engine is running.
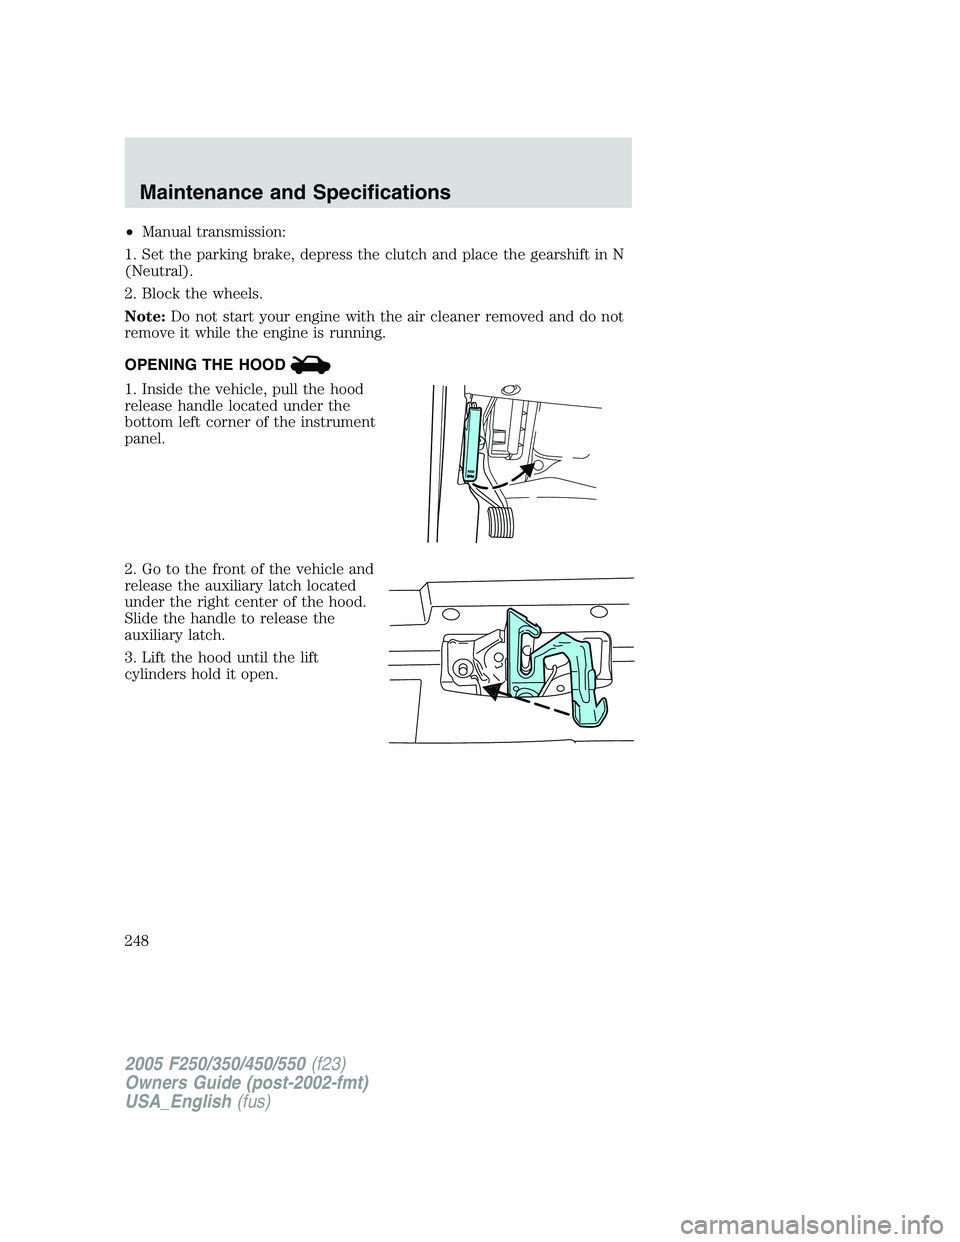
OPENING THE HOOD
1. Inside the vehicle, pull the hood
release handle located under the
bottom left corner of the instrument
panel.
2. Go to the front of the vehicle and
release the auxiliary latch located
under the right center of the hood.
Slide the handle to release the
auxiliary latch.
3. Lift the hood until the lift
cylinders hold it open.
2005 F250/350/450/550 (f23)
Owners Guide (post-2002-fmt)
USA_English (fus)Maintenance and Specifications
248
Page 249 of 312
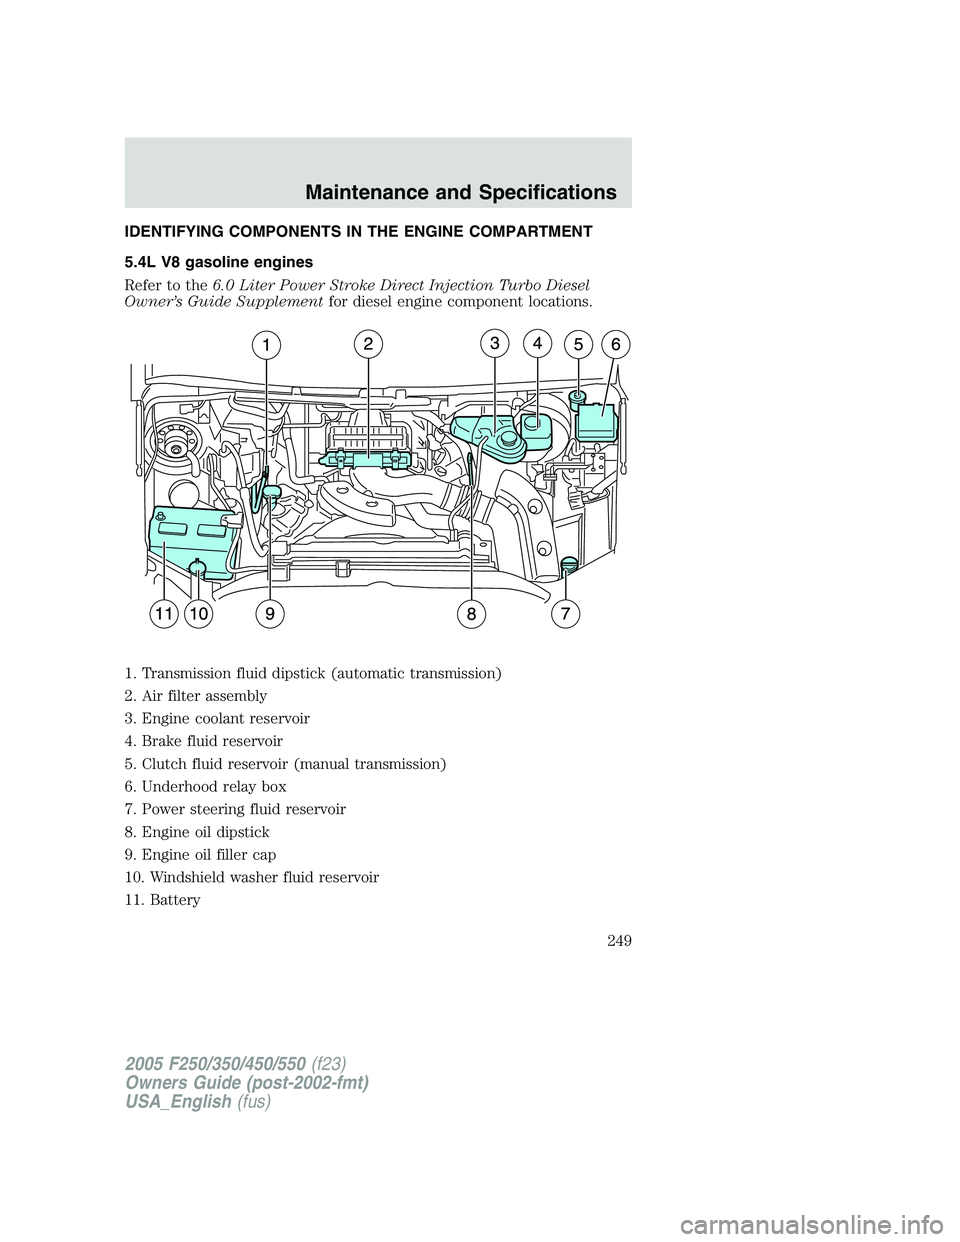
IDENTIFYING COMPONENTS IN THE ENGINE COMPARTMENT
5.4L V8 gasoline engines
Refer to the 6.0 Liter Power Stroke Direct Injection Turbo Diesel
Owner’s Guide Supplement for diesel engine component locations.
1. Transmission fluid dipstick (automatic transmission)
2. Air filter assembly
3. Engine coolant reservoir
4. Brake fluid reservoir
5. Clutch fluid reservoir (manual transmission)
6. Underhood relay box
7. Power steering fluid reservoir
8. Engine oil dipstick
9. Engine oil filler cap
10. Windshield washer fluid reservoir
11. Battery
2005 F250/350/450/550 (f23)
Owners Guide (post-2002-fmt)
USA_English (fus) Maintenance and Specifications
249