clock setting FORD F250 SUPER DUTY 2014 Owners Manual
[x] Cancel search | Manufacturer: FORD, Model Year: 2014, Model line: F250 SUPER DUTY, Model: FORD F250 SUPER DUTY 2014Pages: 460, PDF Size: 6.55 MB
Page 119 of 460
VENTILATED SEATS (IF EQUIPPED)
The ventilated seats will only functionwhen the engine is running.
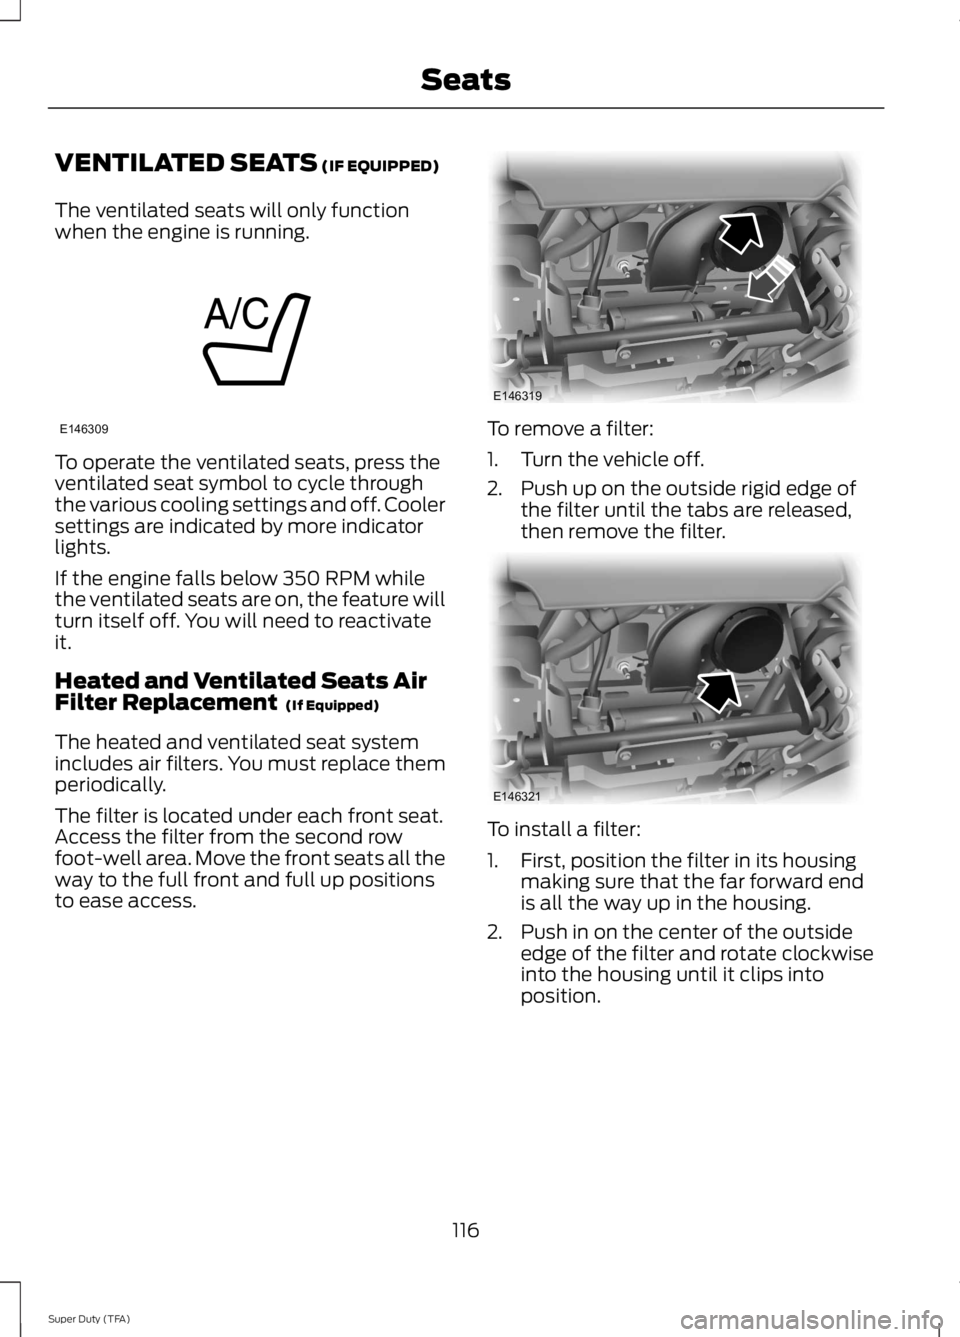
To operate the ventilated seats, press theventilated seat symbol to cycle throughthe various cooling settings and off. Coolersettings are indicated by more indicatorlights.
If the engine falls below 350 RPM whilethe ventilated seats are on, the feature willturn itself off. You will need to reactivateit.
Heated and Ventilated Seats AirFilter Replacement (If Equipped)
The heated and ventilated seat systemincludes air filters. You must replace themperiodically.
The filter is located under each front seat.Access the filter from the second rowfoot-well area. Move the front seats all theway to the full front and full up positionsto ease access.
To remove a filter:
1. Turn the vehicle off.
2. Push up on the outside rigid edge ofthe filter until the tabs are released,then remove the filter.
To install a filter:
1. First, position the filter in its housingmaking sure that the far forward endis all the way up in the housing.
2. Push in on the center of the outsideedge of the filter and rotate clockwiseinto the housing until it clips intoposition.
116
Super Duty (TFA)
SeatsE146309 E146319 E146321
Page 239 of 460
Note:Electrical or electronic accessoriesor components added to the vehicle by thedealer or the owner may adversely affectbattery performance and durability.
Your vehicle is equipped with a Motorcraftmaintenance-free battery which normallydoes not require additional water duringits life of service.
For longer, trouble-free operation, keep thetop of the battery clean and dry. Also,make certain the battery cables are alwaystightly fastened to the battery terminals.
If you see any corrosion on the battery orterminals, remove the cables from theterminals and clean with a wire brush. Youcan neutralize the acid with a solution ofbaking soda and water.
It is recommended that the negativebattery cable terminal be disconnectedfrom the battery if you plan to store yourvehicle for an extended period of time.
Because your vehicle’s engine iselectronically controlled by a computer,some control conditions are maintainedby power from the battery. When thebattery is disconnected or a new batteryis installed, the engine must relearn its idleand fuel trim strategy for optimumdriveability and performance. Flexible fuelvehicles (FFV) must also relearn theethanol content of the fuel for optimumdriveability and performance. To begin thisprocess
1. With the vehicle at a complete stop,set the parking brake.
2. Put the gearshift in P, turn off allaccessories.
3. Start the engine. Run the engine untilit reaches normal operatingtemperature.
4.Allow the engine to idle for at least oneminute.
5. Turn the A/C on and allow the engineto idle for at least one minute.
6. Release the parking brake. With yourfoot on the brake pedal and with theA/C on, put the vehicle in D and allowthe engine to idle for at least oneminute.
•If you do not allow the engine torelearn its idle trim, the idle qualityof your vehicle may be adverselyaffected until the idle trim iseventually relearned.
7. Drive the vehicle to complete therelearning process
•The vehicle may need to be driven10 mi (16 km) or more to relearn theidle and fuel trim strategy alongwith the ethanol content for flexiblefuel vehicles.
•For flexible fuel vehicles, if you areoperating on E85, you mayexperience poor starts or aninability to start the engine anddriveability problems until the fueltrim and ethanol content have beenrelearned.
If the battery has been disconnected or anew battery has been installed, the clockand radio settings must be reset once thebattery is reconnected.
Always dispose of automotivebatteries in a responsible manner.Follow your local authorized standardsfor disposal. Call your local authorizedrecycling center to find out more aboutrecycling automotive batteries.
Battery Management System (IfEquipped)
The battery management system (BMS)monitors battery conditions and takesactions to extend battery life. If excessivebattery drain is detected, the system maytemporarily disable certain electricalfeatures to protect the battery. Thoseelectrical accessories affected include therear defrost, heated/cooled seats, climate
236
Super Duty (TFA)
Maintenance
Page 281 of 460
•To reduce the chances of interferencefrom another vehicle, perform thesystem reset procedure at least threefeet (one meter) away from anotherFord Motor Company vehicleundergoing the system reset procedureat the same time.
•Do not wait more than two minutesbetween resetting each tire sensor orthe system will time-out and the entireprocedure will have to be repeated onall four wheels.
•A double horn will sound indicating theneed to repeat the procedure.
Performing the System Reset Procedure
Read the entire procedure beforeattempting.
1. Drive the vehicle above 20 mph (32km/h) for at least two minutes, thenpark in a safe location where you caneasily get to all four tires and haveaccess to an air pump.
2.Place the ignition in the off position andkeep the key in the ignition.
3. Cycle the ignition to the on positionwith the engine off.
4. Turn the hazard flashers on then offthree times. You must accomplish thiswithin 10 seconds. If the reset modehas been entered successfully, the hornwill sound once, the system indicatorwill flash and a message is shown inthe information display. If this does notoccur, please try again starting at Step2. If after repeated attempts to enterthe reset mode, the horn does notsound, the system indicator does notflash and no message is shown in theinformation display, seek service fromyour authorized dealer.
5. Train the tire pressure monitoringsystem sensors in the tires using thefollowing system reset sequencestarting with the left front tire in thefollowing clockwise order: Left front(driver's side front tire), Right front(passenger's side front tire), Right rear(passenger's side rear tire), Left rear(driver's side rear tire)
6. Remove the valve cap from the valvestem on the left front tire. Decrease theair pressure until the horn sounds.Note: The single horn chirp confirmsthat the sensor identification code hasbeen learned by the module for thisposition. If a double horn is heard, thereset procedure was unsuccessful, andyou must repeat it.
7. Remove the valve cap from the valvestem on the right front tire. Decreasethe air pressure until the horn sounds.
8. Remove the valve cap from the valvestem on the right rear tire. Decrease theair pressure until the horn sounds.
9. Remove the valve cap from the valvestem on the left rear tire. Decrease theair pressure until the horn sounds.Training is complete after the hornsounds for the last tire trained (driver'sside rear tire), the system indicatorstops flashing, and a message is shownin the information display.
10.Turn the ignition off. If two short hornbeeps are heard, the reset procedurewas unsuccessful and you mustrepeat it. If after repeating theprocedure and two short beeps areheard when the ignition is turned tooff, seek assistance from yourauthorized dealer.
278
Super Duty (TFA)
Wheels and Tires
Page 306 of 460
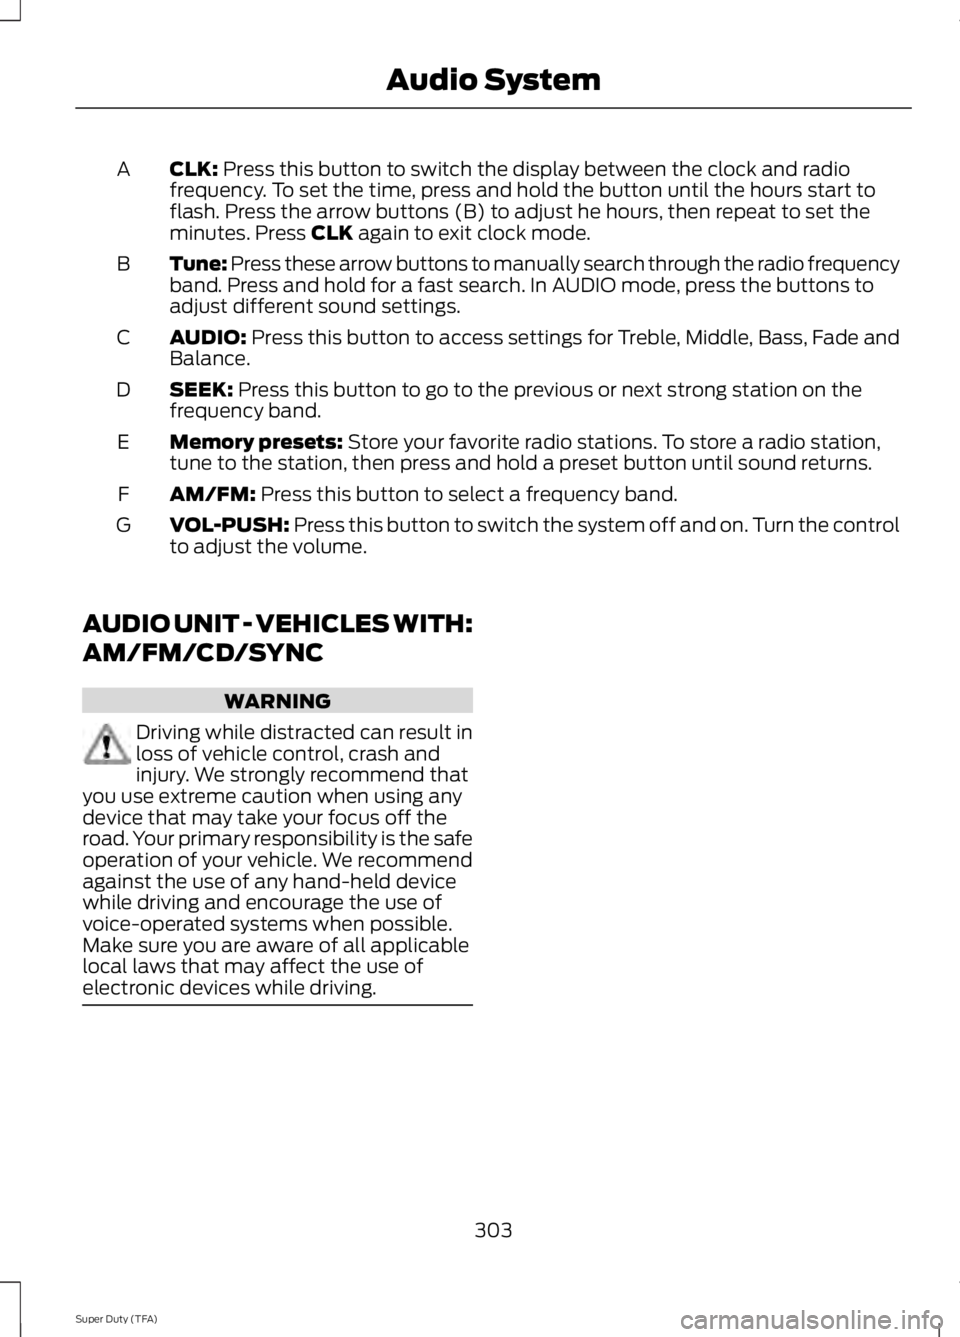
CLK: Press this button to switch the display between the clock and radiofrequency. To set the time, press and hold the button until the hours start toflash. Press the arrow buttons (B) to adjust he hours, then repeat to set theminutes. Press CLK again to exit clock mode.
A
Tune: Press these arrow buttons to manually search through the radio frequencyband. Press and hold for a fast search. In AUDIO mode, press the buttons toadjust different sound settings.
B
AUDIO: Press this button to access settings for Treble, Middle, Bass, Fade andBalance.C
SEEK: Press this button to go to the previous or next strong station on thefrequency band.D
Memory presets: Store your favorite radio stations. To store a radio station,tune to the station, then press and hold a preset button until sound returns.E
AM/FM: Press this button to select a frequency band.F
VOL-PUSH: Press this button to switch the system off and on. Turn the controlto adjust the volume.G
AUDIO UNIT - VEHICLES WITH:
AM/FM/CD/SYNC
WARNING
Driving while distracted can result inloss of vehicle control, crash andinjury. We strongly recommend thatyou use extreme caution when using anydevice that may take your focus off theroad. Your primary responsibility is the safeoperation of your vehicle. We recommendagainst the use of any hand-held devicewhile driving and encourage the use ofvoice-operated systems when possible.Make sure you are aware of all applicablelocal laws that may affect the use ofelectronic devices while driving.
303
Super Duty (TFA)
Audio System
Page 353 of 460
This system uses a four-corner strategy toprovide quick access to several vehiclefeatures and settings. The touchscreenprovides easy interaction with your cellularphone, multimedia, climate control andnavigation system. The corners display anyactive modes within those menus, such asphone status or the climate temperature.
Note:Some features are not available whileyour vehicle is moving.
Note:Your system is equipped with afeature that allows you to access andcontrol audio features for 30 minutes afteryou switch the ignition off (and no doorsopen).
PHONE
Press to select any of the following:
•Phone
•Quick Dial
•Phonebook
•History
•Messaging
•Settings
NAVIGATION
Press to select any of the following:
•My Home
•Favorites
•Previous Destinations
•Point of Interest
•Emergency
•Street Address
•Intersection
•City Center
•Map
•Edit Route
•Cancel Route
CLIMATE
Press to select any of the following:
•Driver Settings
•Recirculated Air
•Auto
•Dual
•Passenger Settings
•A/C
•Defrost
SETTINGS
Press to select any of the following:
•Clock
•Display
•Sound
•Vehicle
•Settings
•Help
HOME
Press to access your homescreen. Depending on yourvehicle’s option package and software,your screens may vary in appearance fromthe descriptions in this section. Yourfeatures may also be limited depending onyour market. Check with an authorizeddealer for availability.
INFORMATION
Press to select any of the following:
•Services
•Travel Link
•Alerts
•Calendar
•Apps
ENTERTAINMENT
350
Super Duty (TFA)
MyFord Touch™ (If Equipped)E142607 E142613 E142608
Page 359 of 460
Voice settings using voice commands
"Interaction mode novice"
"Media candidate lists off"
"Media candidate lists on"
"Phone candidate lists off"
"Phone candidate lists on"
"Help"
Using Voice Commands with theTouchscreen Options
Your voice system has a dual mode featurewhich allows you to switch between usingvoice commands and making on-screenselections. This is available only when thesystem displays a list of candidatesgenerated during a voice session. Forexample, when entering in a street addressor trying to call a contact from the phoneyou paired to the system.
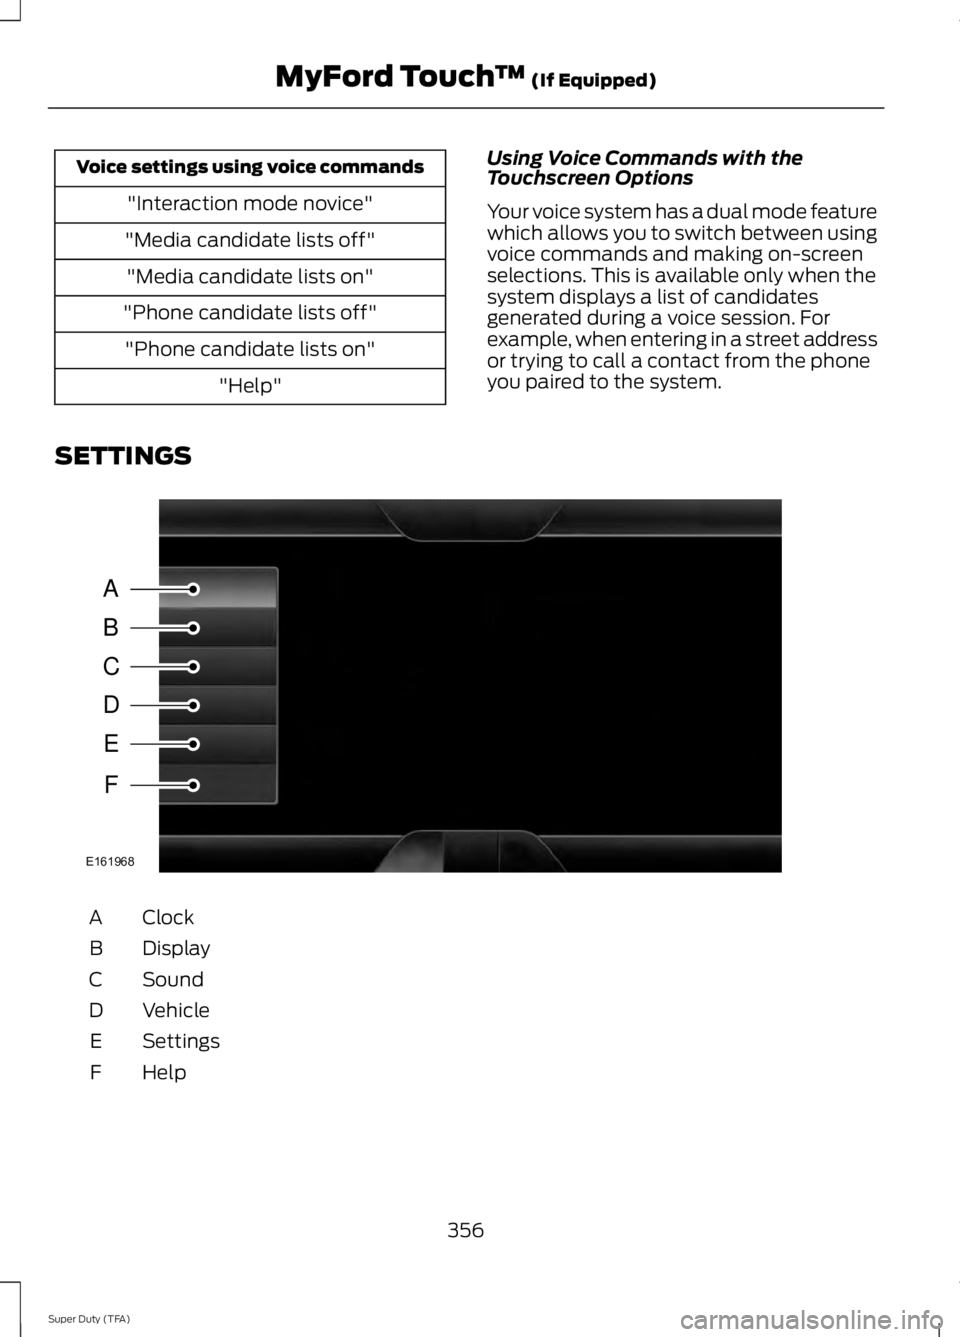
SETTINGS
ClockA
DisplayB
SoundC
VehicleD
SettingsE
HelpF
356
Super Duty (TFA)
MyFord Touch™ (If Equipped)A
B
C
D
E
F
E161968
Page 360 of 460
Under this menu, you can setyour clock, access and adjust thedisplay, sound and vehiclesettings as well as access settings forspecific modes or the help feature.
Clock
Note:You cannot manually set the date.Your vehicle’s GPS does this for you.
Note:If the battery has been disconnected,your vehicle needs to acquire a GPS signalto update the clock. Once your vehicleacquires the signal, it may take a fewminutes for the update to display the correcttime.
1. Press the Settings icon > Clock.
2. Press + and - to adjust the time.
From this screen, you can also make otheradjustments such as 12-hour or 24-hourmode, activate GPS time synchronizationand have the system automatically updatenew time zones.
You can also turn the outside airtemperature display off and on. It appearsat the top center of the touchscreen, nextto the time and date.
The system automatically saves anyupdates you make to the settings.
Display
You can adjust the touchscreen displaythrough the touchscreen or by pressing thevoice button on your steering wheelcontrols and when prompted, say, "Displaysettings".
Press the Settings icon >Display, to access and makeadjustments using thetouchscreen.
•Brightness allows you to make thescreen display brighter or dimmer.
•Auto DIM, when set to On, lets you usethe Auto Dim Manual Offset feature.When set to Off, screen brightnessdoes not change.
•Mode allows you to set the screen toa certain brightness or have the systemautomatically change based on theoutside light level, or turn the displayoff.
•If you select AUTO or NIGHT, youhave the options of turning thedisplay's Auto Dim feature on or offand changing the Auto Dim ManualOffset feature.
•Auto Dim Manual Offset allows youto adjust screen dimming as theoutside lighting conditions change fromday to night. This feature also allowsyou to adjust screen brightness usingthe instrument panel dimming control.
•Edit Wallpaper
•You can have your touchscreendisplay the default photo or uploadyour own.
Uploading Photos for Your HomeScreen Wallpaper
Note:You cannot load photos directly fromyour camera. You must access the photoseither from your USB mass storage deviceor from an SD card.
Note:Photographs with extremely largedimensions (such as 2048 x 1536) may notbe compatible and appear as a blank(black) image on the display.
Your system allows you to upload and viewup to 32 photos.
To access, press the Settingsicon > Display > EditWallpaper, and then follow thesystem prompts to upload yourphotographs.
357
Super Duty (TFA)
MyFord Touch™ (If Equipped)E142607 E142607 E142607 E142607
Page 402 of 460
Recirculated air: Touch to turn the recirculated air on or off which may reducethe amount of time needed to cool down the interior and help reduce odorsfrom reaching the interior. Recirculated air also engages automatically whenyou select MAX A/C and may turn on manually in any airflow mode exceptdefrost. It may also turn off in all airflow modes except MAX A/C to reduce fogpotential.
D
MAX A/C: Touch to cool your vehicle with recirculated air. Touch again fornormal A/C operation. MAX A/C distributes air through instrument panel ventsand may help reduce odors from entering your vehicle. MAX A/C is moreeconomical and efficient than normal A/C mode.
E
A/C: Touch to turn the air conditioning on or off. Use A/C with recirculated airto improve cooling performance and efficiency. A/C engages automatically inMAX A/C, defrost and floor/defrost.
F
AUTO: Touch to engage automatic operation, then set the temperature usingthe temperature control. The system automatically controls fan speed, airflowdistribution, A/C on or off and the use of fresh or recirculated air.
G
Rear defrost: Touch to turn the rear window defroster and heated mirrors.H
Defrost: Touch to clear the windshield of fog and thin ice. Touch again to returnto the previous airflow selection. When on, defrost provides outside air to reducewindow fogging and distributes air through the windshield defroster vents anddemister vents.
I
Manual airflow distribution controls:Floor and Defrost: Distributes airthrough the windshield defroster vents, demister vents, floor vents and rearseat floor vents, and provides outside air to reduce window fogging.Panel:Distributes air through the instrument panel vents.Panel and Floor: Distributesair through the instrument panel vents, demister vents, floor vents and rear seatfloor vents.Floor: Distributes air through the demister vents, floor vents andrear seat floor vents.
J
Driver settings: Touch + or – adjust the temperature. Touch the heated seaticon to control the heated seat. Touch the cooled seat icon to control the cooledseat. See Seats (page 108). Touch and hold MyTemp to select a temperatureyou would like your vehicle to remember and maintain for you. If your vehicleis equipped with a heated steering wheel, touch the heated steering wheel iconto warm the steering wheel.
K
Note:If your vehicle is equipped with awood-trimmed steering wheel, it does notheat between the 10 o'clock and 2 o'clockpositions.
Climate Control Voice Commands
Press the voice button on thesteering wheel controls. Whenprompted, say any of thefollowing commands:
399
Super Duty (TFA)
MyFord Touch™ (If Equipped)E142599
Page 456 of 460
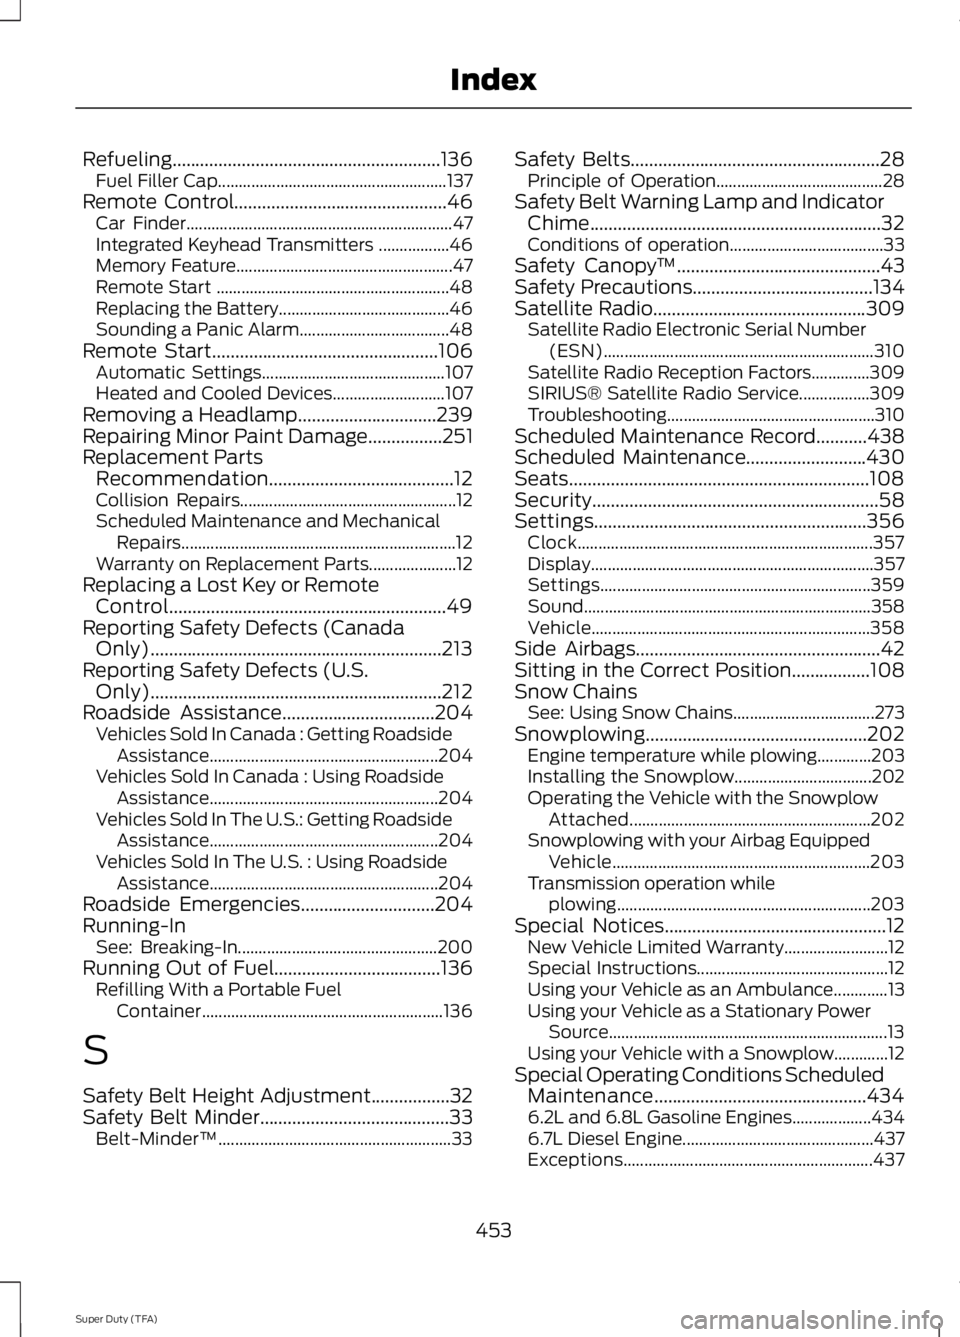
Refueling..........................................................136Fuel Filler Cap.......................................................137Remote Control..............................................46Car Finder................................................................47Integrated Keyhead Transmitters .................46Memory Feature....................................................47Remote Start ........................................................48Replacing the Battery.........................................46Sounding a Panic Alarm....................................48Remote Start.................................................106Automatic Settings............................................107Heated and Cooled Devices...........................107Removing a Headlamp..............................239Repairing Minor Paint Damage................251Replacement PartsRecommendation........................................12Collision Repairs....................................................12Scheduled Maintenance and MechanicalRepairs..................................................................12Warranty on Replacement Parts.....................12Replacing a Lost Key or RemoteControl............................................................49Reporting Safety Defects (CanadaOnly)...............................................................213Reporting Safety Defects (U.S.Only)...............................................................212Roadside Assistance.................................204Vehicles Sold In Canada : Getting RoadsideAssistance.......................................................204Vehicles Sold In Canada : Using RoadsideAssistance.......................................................204Vehicles Sold In The U.S.: Getting RoadsideAssistance.......................................................204Vehicles Sold In The U.S. : Using RoadsideAssistance.......................................................204Roadside Emergencies.............................204Running-InSee: Breaking-In................................................200Running Out of Fuel....................................136Refilling With a Portable FuelContainer..........................................................136
S
Safety Belt Height Adjustment.................32Safety Belt Minder.........................................33Belt-Minder™........................................................33
Safety Belts......................................................28Principle of Operation........................................28Safety Belt Warning Lamp and IndicatorChime...............................................................32Conditions of operation.....................................33Safety Canopy™............................................43Safety Precautions.......................................134Satellite Radio..............................................309Satellite Radio Electronic Serial Number(ESN).................................................................310Satellite Radio Reception Factors..............309SIRIUS® Satellite Radio Service.................309Troubleshooting..................................................310Scheduled Maintenance Record...........438Scheduled Maintenance..........................430Seats.................................................................108Security..............................................................58Settings...........................................................356Clock.......................................................................357Display....................................................................357Settings.................................................................359Sound.....................................................................358Vehicle...................................................................358Side Airbags.....................................................42Sitting in the Correct Position.................108Snow ChainsSee: Using Snow Chains..................................273Snowplowing................................................202Engine temperature while plowing.............203Installing the Snowplow.................................202Operating the Vehicle with the SnowplowAttached..........................................................202Snowplowing with your Airbag EquippedVehicle..............................................................203Transmission operation whileplowing.............................................................203Special Notices................................................12New Vehicle Limited Warranty.........................12Special Instructions..............................................12Using your Vehicle as an Ambulance.............13Using your Vehicle as a Stationary PowerSource...................................................................13Using your Vehicle with a Snowplow.............12Special Operating Conditions ScheduledMaintenance..............................................4346.2L and 6.8L Gasoline Engines...................4346.7L Diesel Engine..............................................437Exceptions............................................................437
453
Super Duty (TFA)
Index