window FORD F250 SUPER DUTY 2014 Owners Manual
[x] Cancel search | Manufacturer: FORD, Model Year: 2014, Model line: F250 SUPER DUTY, Model: FORD F250 SUPER DUTY 2014Pages: 460, PDF Size: 6.55 MB
Page 5 of 460
Lighting
Lighting Control..............................................65
Autolamps........................................................65
Instrument Lighting Dimmer.....................66
Daytime Running Lamps............................66
Front Fog Lamps............................................67
Direction Indicators........................................67
Interior Lamps.................................................67
Windows and Mirrors
Power Windows.............................................69
Global Opening...............................................70
Exterior Mirrors................................................70
Interior Mirror....................................................72
Sun Visors..........................................................73
Moonroof...........................................................73
Instrument Cluster
Gauges................................................................75
Warning Lamps and Indicators..................77
Audible Warnings and Indicators............80
Information Displays
General Information.......................................81
Information Messages..................................92
Climate Control
Manual Climate Control............................103
Automatic Climate Control......................104
Hints on Controlling the InteriorClimate.........................................................105
Heated Windows and Mirrors..................106
Remote Start.................................................106
Seats
Sitting in the Correct Position.................108
Head Restraints............................................108
Manual Seats..................................................110
Power Seats......................................................111
Memory Function............................................111
Rear Seats........................................................112
Heated Seats...................................................115
Ventilated Seats............................................116
Front Seat Armrest........................................117
Rear Seat Armrest.........................................118
Universal Garage DoorOpener
Universal Garage Door Opener................119
Auxiliary Power Points
Auxiliary Power Points.................................127
Storage Compartments
Center Console..............................................129
Overhead Console........................................129
Starting and Stopping theEngine
General Information....................................130
Ignition Switch...............................................130
Starting a Gasoline Engine.........................131
Engine Block Heater.....................................132
Fuel and Refueling
Safety Precautions.......................................134
Fuel Quality.....................................................135
Running Out of Fuel....................................136
Refueling..........................................................136
Fuel Consumption........................................138
Emission Control System..........................139
Transmission
Automatic Transmission............................142
Power Take-Off.............................................148
Four-Wheel Drive
Using Four-Wheel Drive.............................149
2
Super Duty (TFA)
Table of Contents
Page 7 of 460
Fuse Specification Chart............................215
Maintenance
General Information....................................223
Opening and Closing the Hood..............223
Under Hood Overview - 6.2L...................224
Under Hood Overview - 6.8L...................225
Engine Oil Dipstick......................................226
Engine Oil Check..........................................226
Engine Coolant Check................................227
Automatic Transmission FluidCheck.............................................................231
Transfer Case Fluid Check........................234
Brake Fluid Check........................................234
Power Steering Fluid Check.....................234
Washer Fluid Check....................................235
Fuel Filter........................................................235
Changing the 12V Battery.........................235
Checking the Wiper Blades......................237
Changing the Wiper Blades......................237
Adjusting the Headlamps.........................238
Removing a Headlamp..............................239
Changing a Bulb............................................241
Bulb Specification Chart...........................243
Changing the Engine Air Filter................245
Vehicle Care
General Information....................................247
Cleaning Products.......................................247
Cleaning the Exterior..................................247
Waxing.............................................................248
Cleaning the Engine...................................248
Cleaning the Exhaust.................................249
Cleaning the Windows and WiperBlades..........................................................249
Cleaning the Interior...................................250
Cleaning the Instrument Panel andInstrument Cluster Lens.......................250
Cleaning Leather Seats..............................251
Repairing Minor Paint Damage................251
Cleaning the Alloy Wheels........................251
Vehicle Storage.............................................252
Wheels and Tires
General Information...................................254
Tire Care..........................................................256
Using Snow Chains......................................273
Tire Pressure Monitoring System...........273
Changing a Road Wheel............................279
Technical Specifications..........................290
Capacities and Specific-ations
Engine Specifications................................292
Motorcraft Parts...........................................293
Vehicle Identification Number................294
Vehicle Certification Label.......................294
Transmission Code Designation............295
Technical Specifications..........................296
Audio System
General Information....................................301
Audio unit - Vehicles With: AM/FM......302
Audio unit - Vehicles With: AM/FM/CD/SYNC............................................................303
Audio unit - Vehicles With: Sony AM/FM/CD.................................................................305
Digital Radio..................................................306
Satellite Radio..............................................309
Audio Input Jack.............................................311
USB Port...........................................................312
Media Hub.......................................................312
SYNC™
General Information....................................313
Using Voice Recognition............................315
Using SYNC™ With Your Phone.............317
SYNC™ Applications and Services......328
Using SYNC™ With Your MediaPlayer...........................................................335
4
Super Duty (TFA)
Table of Contents
Page 11 of 460
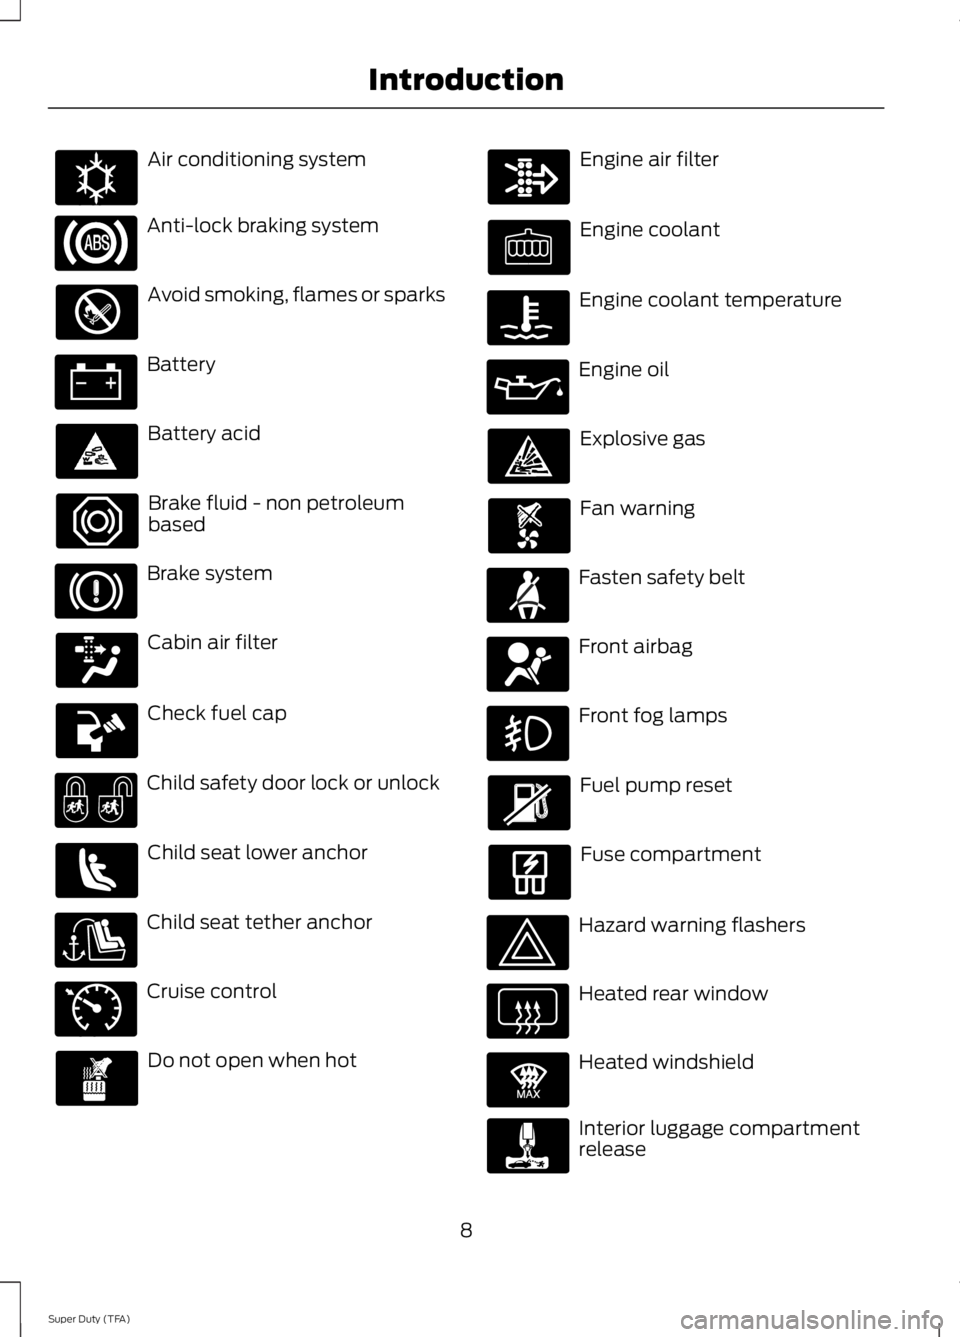
Air conditioning system
Anti-lock braking system
Avoid smoking, flames or sparks
Battery
Battery acid
Brake fluid - non petroleumbased
Brake system
Cabin air filter
Check fuel cap
Child safety door lock or unlock
Child seat lower anchor
Child seat tether anchor
Cruise control
Do not open when hot
Engine air filter
Engine coolant
Engine coolant temperature
Engine oil
Explosive gas
Fan warning
Fasten safety belt
Front airbag
Front fog lamps
Fuel pump reset
Fuse compartment
Hazard warning flashers
Heated rear window
Heated windshield
Interior luggage compartmentrelease
8
Super Duty (TFA)
IntroductionE162384 E71340 E91392
Page 12 of 460
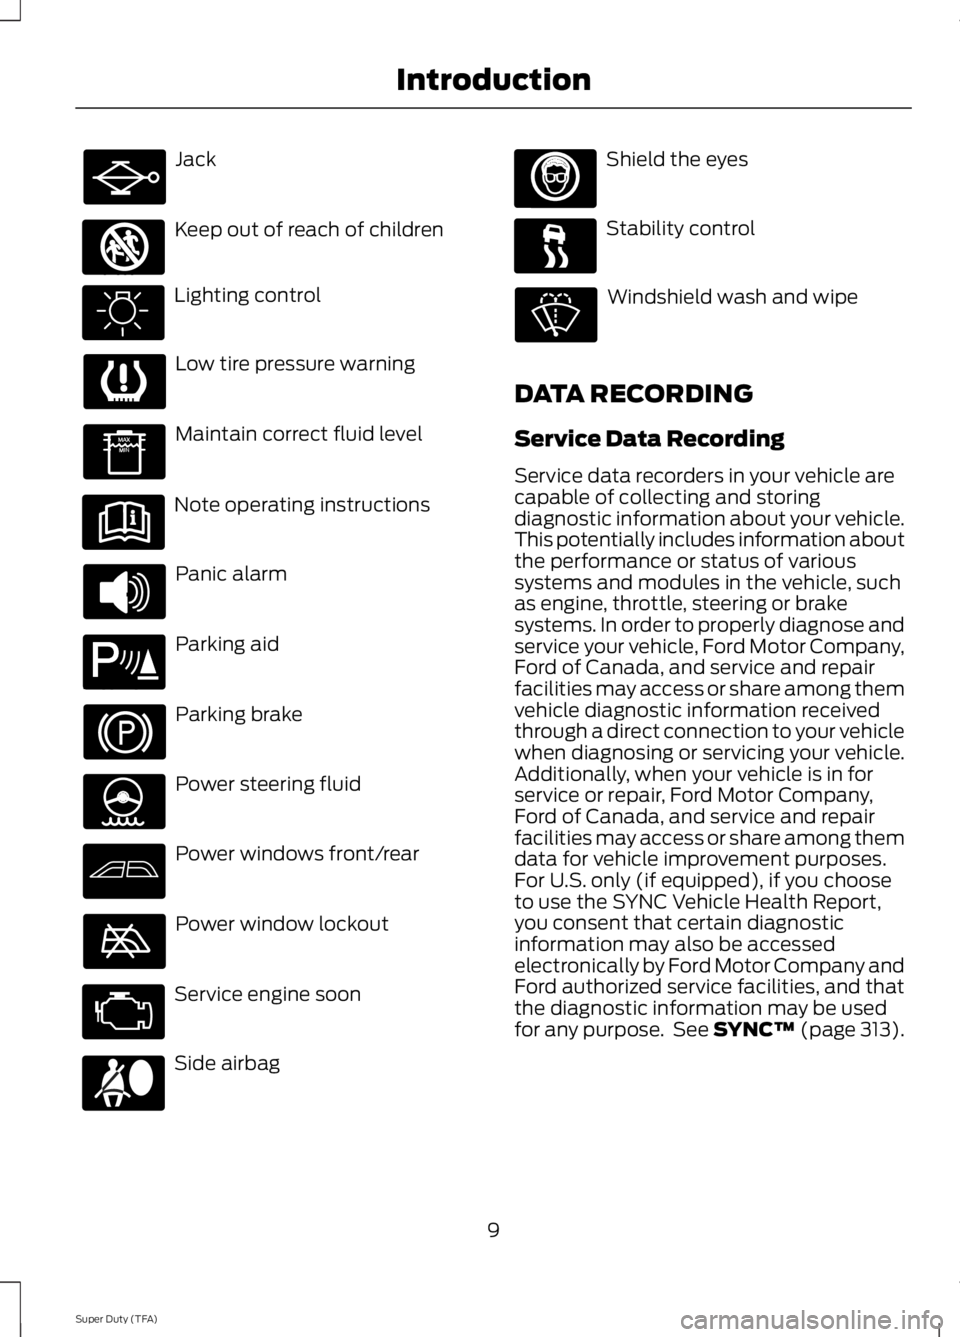
Jack
Keep out of reach of children
Lighting control
Low tire pressure warning
Maintain correct fluid level
Note operating instructions
Panic alarm
Parking aid
Parking brake
Power steering fluid
Power windows front/rear
Power window lockout
Service engine soon
Side airbag
Shield the eyes
Stability control
Windshield wash and wipe
DATA RECORDING
Service Data Recording
Service data recorders in your vehicle arecapable of collecting and storingdiagnostic information about your vehicle.This potentially includes information aboutthe performance or status of varioussystems and modules in the vehicle, suchas engine, throttle, steering or brakesystems. In order to properly diagnose andservice your vehicle, Ford Motor Company,Ford of Canada, and service and repairfacilities may access or share among themvehicle diagnostic information receivedthrough a direct connection to your vehiclewhen diagnosing or servicing your vehicle.Additionally, when your vehicle is in forservice or repair, Ford Motor Company,Ford of Canada, and service and repairfacilities may access or share among themdata for vehicle improvement purposes.For U.S. only (if equipped), if you chooseto use the SYNC Vehicle Health Report,you consent that certain diagnosticinformation may also be accessedelectronically by Ford Motor Company andFord authorized service facilities, and thatthe diagnostic information may be usedfor any purpose. See SYNC™ (page 313).
9
Super Duty (TFA)
Introduction E161353 E139213 E167012
Page 26 of 460
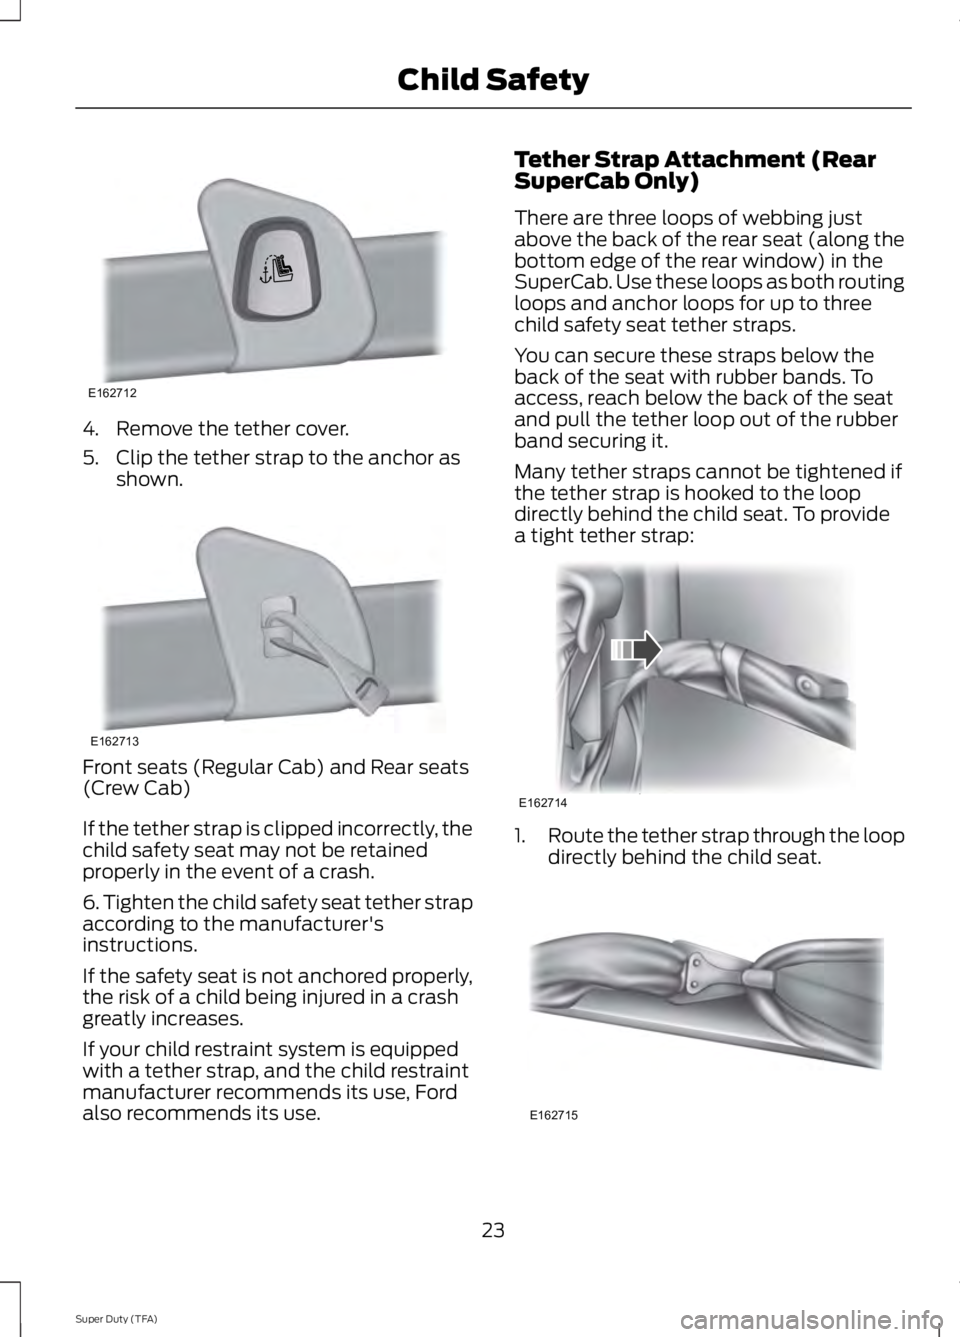
4. Remove the tether cover.
5. Clip the tether strap to the anchor asshown.
Front seats (Regular Cab) and Rear seats(Crew Cab)
If the tether strap is clipped incorrectly, thechild safety seat may not be retainedproperly in the event of a crash.
6. Tighten the child safety seat tether strapaccording to the manufacturer'sinstructions.
If the safety seat is not anchored properly,the risk of a child being injured in a crashgreatly increases.
If your child restraint system is equippedwith a tether strap, and the child restraintmanufacturer recommends its use, Fordalso recommends its use.
Tether Strap Attachment (RearSuperCab Only)
There are three loops of webbing justabove the back of the rear seat (along thebottom edge of the rear window) in theSuperCab. Use these loops as both routingloops and anchor loops for up to threechild safety seat tether straps.
You can secure these straps below theback of the seat with rubber bands. Toaccess, reach below the back of the seatand pull the tether loop out of the rubberband securing it.
Many tether straps cannot be tightened ifthe tether strap is hooked to the loopdirectly behind the child seat. To providea tight tether strap:
1.Route the tether strap through the loopdirectly behind the child seat.
23
Super Duty (TFA)
Child SafetyE162712 E162713 E162714 E162715
Page 47 of 460
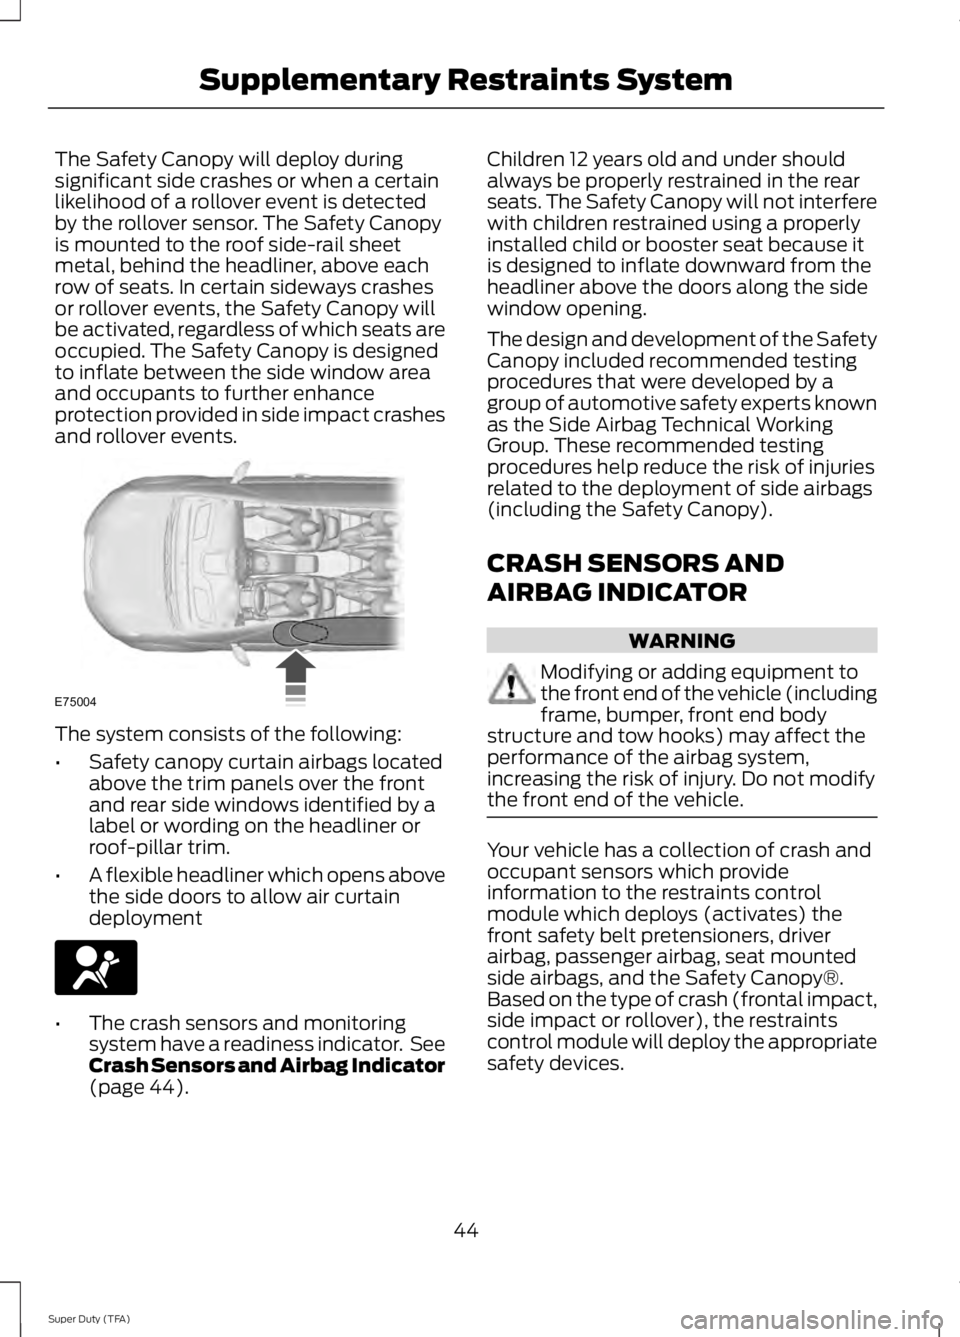
The Safety Canopy will deploy duringsignificant side crashes or when a certainlikelihood of a rollover event is detectedby the rollover sensor. The Safety Canopyis mounted to the roof side-rail sheetmetal, behind the headliner, above eachrow of seats. In certain sideways crashesor rollover events, the Safety Canopy willbe activated, regardless of which seats areoccupied. The Safety Canopy is designedto inflate between the side window areaand occupants to further enhanceprotection provided in side impact crashesand rollover events.
The system consists of the following:
•Safety canopy curtain airbags locatedabove the trim panels over the frontand rear side windows identified by alabel or wording on the headliner orroof-pillar trim.
•A flexible headliner which opens abovethe side doors to allow air curtaindeployment
•The crash sensors and monitoringsystem have a readiness indicator. SeeCrash Sensors and Airbag Indicator(page 44).
Children 12 years old and under shouldalways be properly restrained in the rearseats. The Safety Canopy will not interferewith children restrained using a properlyinstalled child or booster seat because itis designed to inflate downward from theheadliner above the doors along the sidewindow opening.
The design and development of the SafetyCanopy included recommended testingprocedures that were developed by agroup of automotive safety experts knownas the Side Airbag Technical WorkingGroup. These recommended testingprocedures help reduce the risk of injuriesrelated to the deployment of side airbags(including the Safety Canopy).
CRASH SENSORS AND
AIRBAG INDICATOR
WARNING
Modifying or adding equipment tothe front end of the vehicle (includingframe, bumper, front end bodystructure and tow hooks) may affect theperformance of the airbag system,increasing the risk of injury. Do not modifythe front end of the vehicle.
Your vehicle has a collection of crash andoccupant sensors which provideinformation to the restraints controlmodule which deploys (activates) thefront safety belt pretensioners, driverairbag, passenger airbag, seat mountedside airbags, and the Safety Canopy®.Based on the type of crash (frontal impact,side impact or rollover), the restraintscontrol module will deploy the appropriatesafety devices.
44
Super Duty (TFA)
Supplementary Restraints SystemE75004
Page 51 of 460
Sounding a Panic Alarm
Note:The panic alarm will only operatewhen the ignition is off.
Press the button to activate thealarm. Press the button again orturn the ignition on to deactivateit.
Remote Start (If Equipped)
WARNING
To avoid exhaust fumes, do not useremote start if your vehicle is parkedindoors or areas that are not wellventilated.
Note:Do not use remote start if your vehicleis low on fuel.
The remote start button is on thetransmitter.
This feature allows you to start yourvehicle from outside the vehicle. Thetransmitter has an extended operatingrange.
Vehicles with automatic climate controlcan be set to operate when you remotestart the vehicle. See Climate Control(page 103). A manual climate controlsystem will run at the setting it was set towhen you switch the vehicle off.
Many states and provinces haverestrictions for the use of remote start.Check your local and state or provinciallaws for specific requirements regardingremote start systems.
The remote start system will not work if:
•the ignition is on
•the alarm system is triggered
•you disable the feature
•the hood is open
•the transmission is not in P
•the vehicle battery voltage is too low
•the service engine soon indicator is on.
Remote Starting the Vehicle
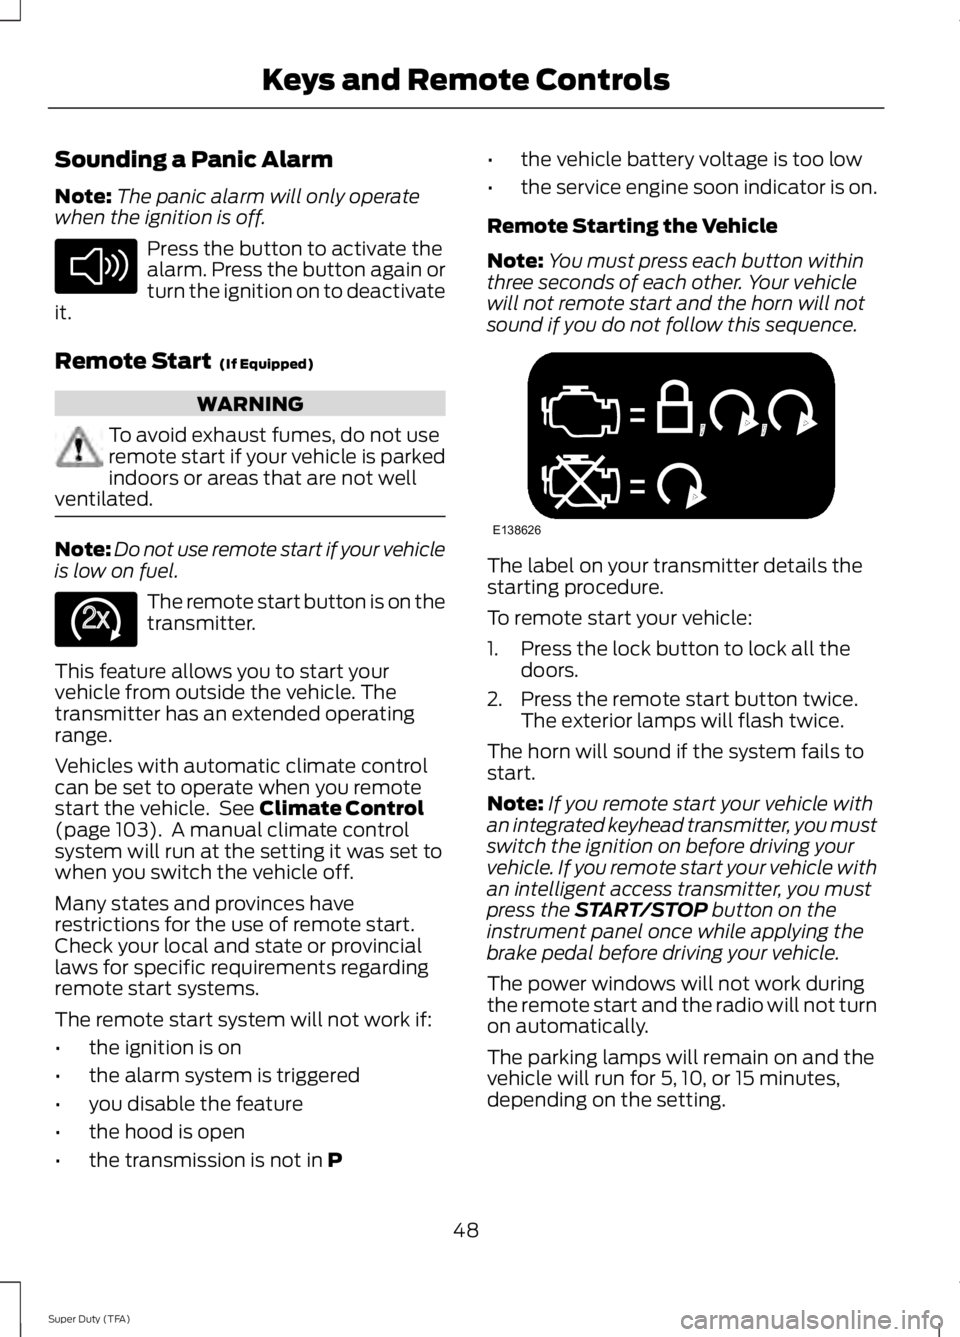
Note:You must press each button withinthree seconds of each other. Your vehiclewill not remote start and the horn will notsound if you do not follow this sequence.
The label on your transmitter details thestarting procedure.
To remote start your vehicle:
1. Press the lock button to lock all thedoors.
2. Press the remote start button twice.The exterior lamps will flash twice.
The horn will sound if the system fails tostart.
Note:If you remote start your vehicle withan integrated keyhead transmitter, you mustswitch the ignition on before driving yourvehicle. If you remote start your vehicle withan intelligent access transmitter, you mustpress the START/STOP button on theinstrument panel once while applying thebrake pedal before driving your vehicle.
The power windows will not work duringthe remote start and the radio will not turnon automatically.
The parking lamps will remain on and thevehicle will run for 5, 10, or 15 minutes,depending on the setting.
48
Super Duty (TFA)
Keys and Remote ControlsE138624 E138625 E138626
Page 58 of 460
The autolock feature will unlock all thedoors when:
•autolock has locked the doors
•you stop the vehicle and switch theignition off or to accessory mode, and
•you open the driver door within 10minutes.
Note:The doors will not autounlock if youhave electronically locked them beforeopening the driver door.
Enabling or Disabling
You can enable or disable these featuresin the information display or yourauthorized dealer can do it for you. SeeGeneral Information (page 81).
Note:You can enable or disable theautolock and autounlock featuresindependently of each other.
Illuminated Entry
The interior lamps and select exteriorlamps will illuminate when you unlock thedoors with the remote entry system.
The illuminated entry system will turn offthe lights if:
•the ignition is on
•you press the remote control lockbutton, or
•after 25 seconds of illumination.
The dome lamp will not turn on if thecontrol is set to the off position.
The lights will not turn off if:
•you turn them on with the dimmercontrol, or
•any door is open.
Battery Saver
The battery saver turns off the interiorlamps 30 minutes after you switch theignition off if a door is open and the domelamp switch is on. It turns off the interiorlamps after 10 minutes if the dome lampswitch is off.
KEYLESS ENTRY (IF EQUIPPED)
SECURICODE™ KEYLESS ENTRYKEYPAD
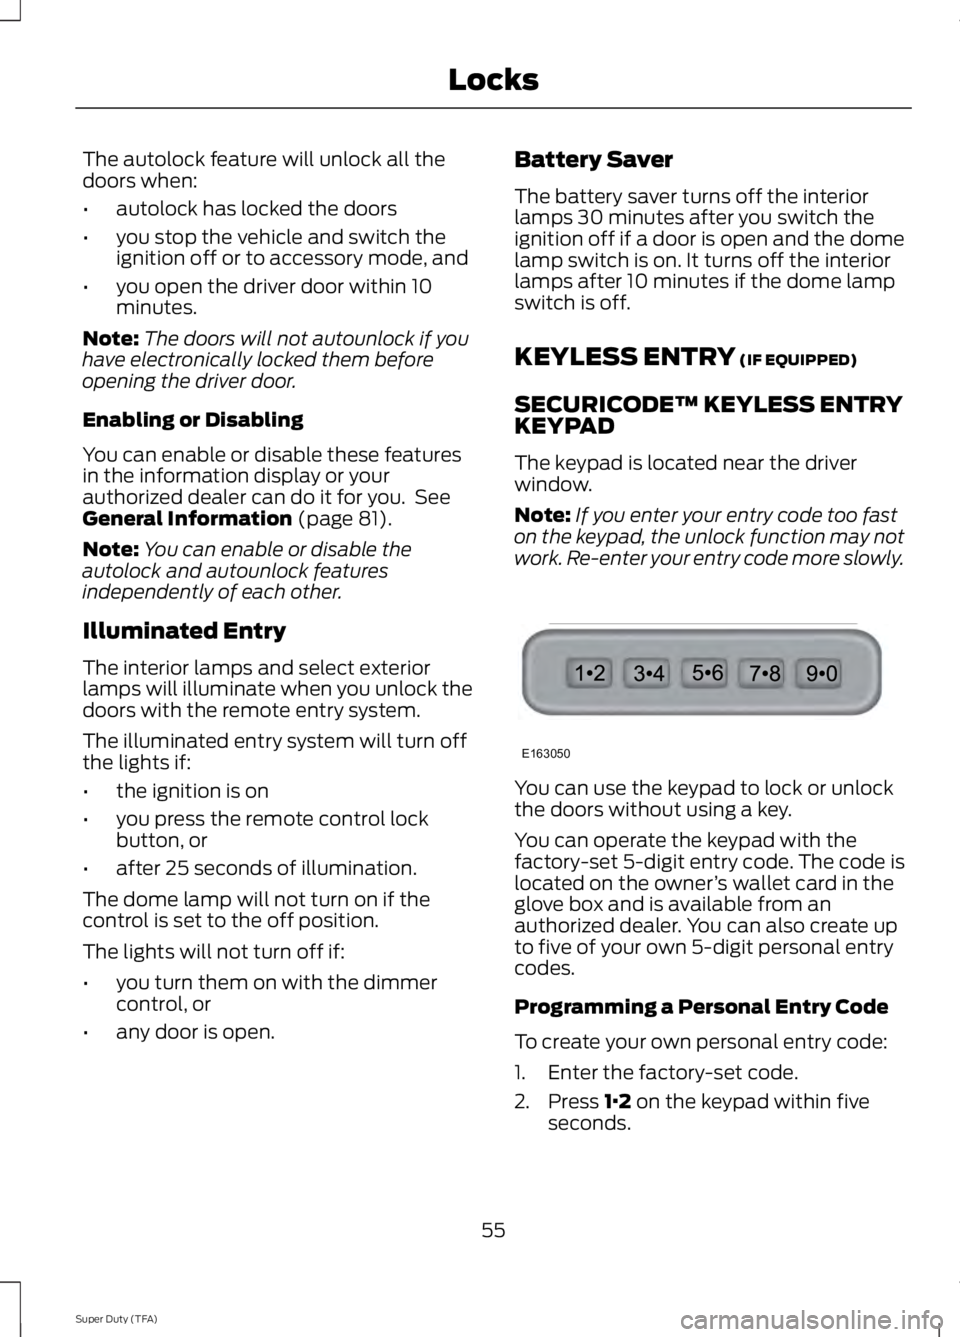
The keypad is located near the driverwindow.
Note:If you enter your entry code too faston the keypad, the unlock function may notwork. Re-enter your entry code more slowly.
You can use the keypad to lock or unlockthe doors without using a key.
You can operate the keypad with thefactory-set 5-digit entry code. The code islocated on the owner’s wallet card in theglove box and is available from anauthorized dealer. You can also create upto five of your own 5-digit personal entrycodes.
Programming a Personal Entry Code
To create your own personal entry code:
1. Enter the factory-set code.
2. Press 1·2 on the keypad within fiveseconds.
55
Super Duty (TFA)
LocksE163050
Page 72 of 460
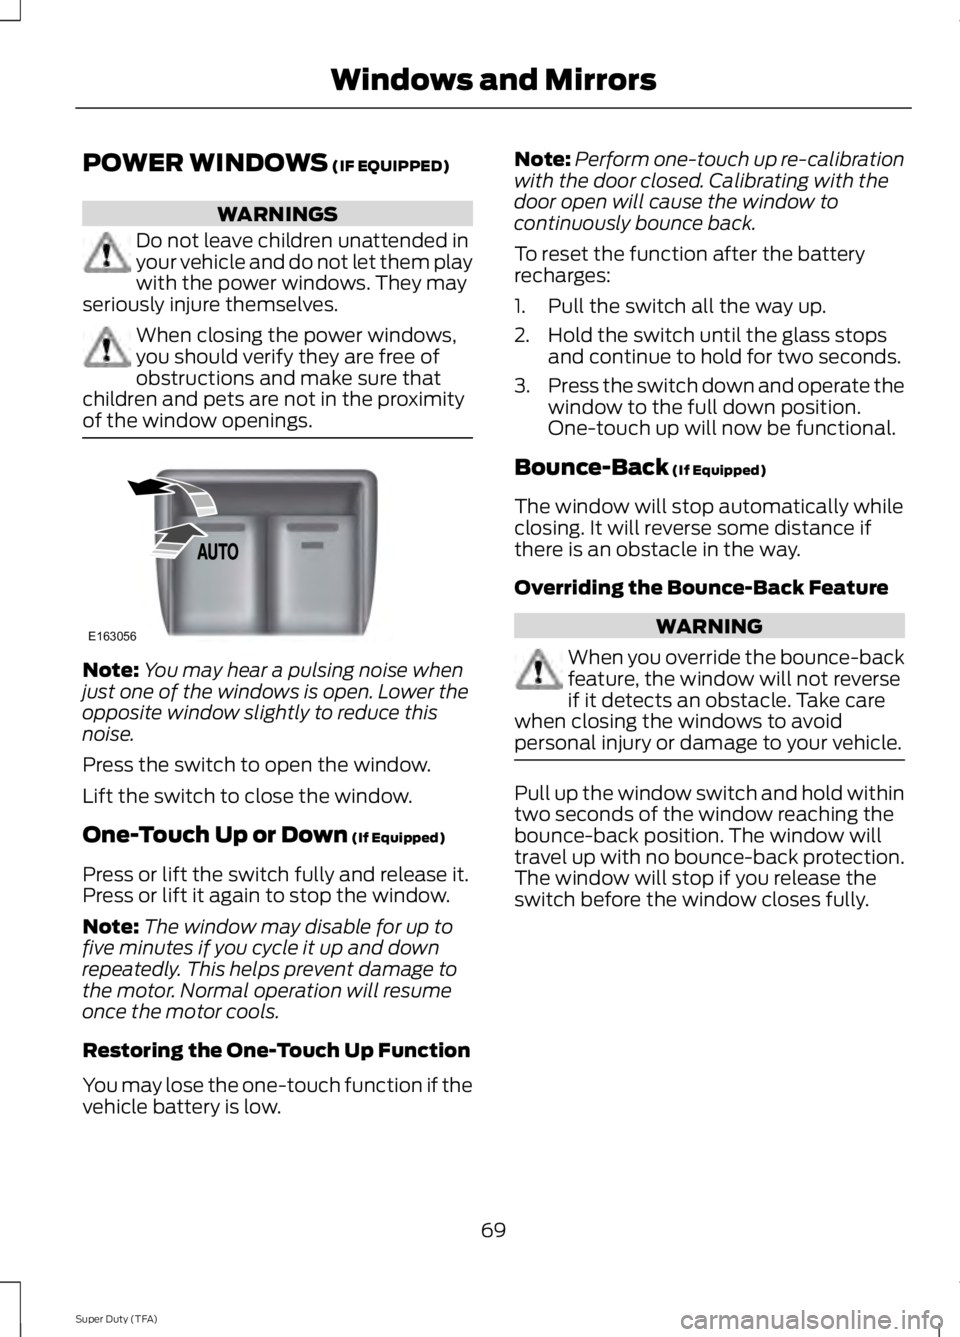
POWER WINDOWS (IF EQUIPPED)
WARNINGS
Do not leave children unattended inyour vehicle and do not let them playwith the power windows. They mayseriously injure themselves.
When closing the power windows,you should verify they are free ofobstructions and make sure thatchildren and pets are not in the proximityof the window openings.
Note:You may hear a pulsing noise whenjust one of the windows is open. Lower theopposite window slightly to reduce thisnoise.
Press the switch to open the window.
Lift the switch to close the window.
One-Touch Up or Down (If Equipped)
Press or lift the switch fully and release it.Press or lift it again to stop the window.
Note:The window may disable for up tofive minutes if you cycle it up and downrepeatedly. This helps prevent damage tothe motor. Normal operation will resumeonce the motor cools.
Restoring the One-Touch Up Function
You may lose the one-touch function if thevehicle battery is low.
Note:Perform one-touch up re-calibrationwith the door closed. Calibrating with thedoor open will cause the window tocontinuously bounce back.
To reset the function after the batteryrecharges:
1. Pull the switch all the way up.
2. Hold the switch until the glass stopsand continue to hold for two seconds.
3.Press the switch down and operate thewindow to the full down position.One-touch up will now be functional.
Bounce-Back (If Equipped)
The window will stop automatically whileclosing. It will reverse some distance ifthere is an obstacle in the way.
Overriding the Bounce-Back Feature
WARNING
When you override the bounce-backfeature, the window will not reverseif it detects an obstacle. Take carewhen closing the windows to avoidpersonal injury or damage to your vehicle.
Pull up the window switch and hold withintwo seconds of the window reaching thebounce-back position. The window willtravel up with no bounce-back protection.The window will stop if you release theswitch before the window closes fully.
69
Super Duty (TFA)
Windows and MirrorsE163056
Page 73 of 460
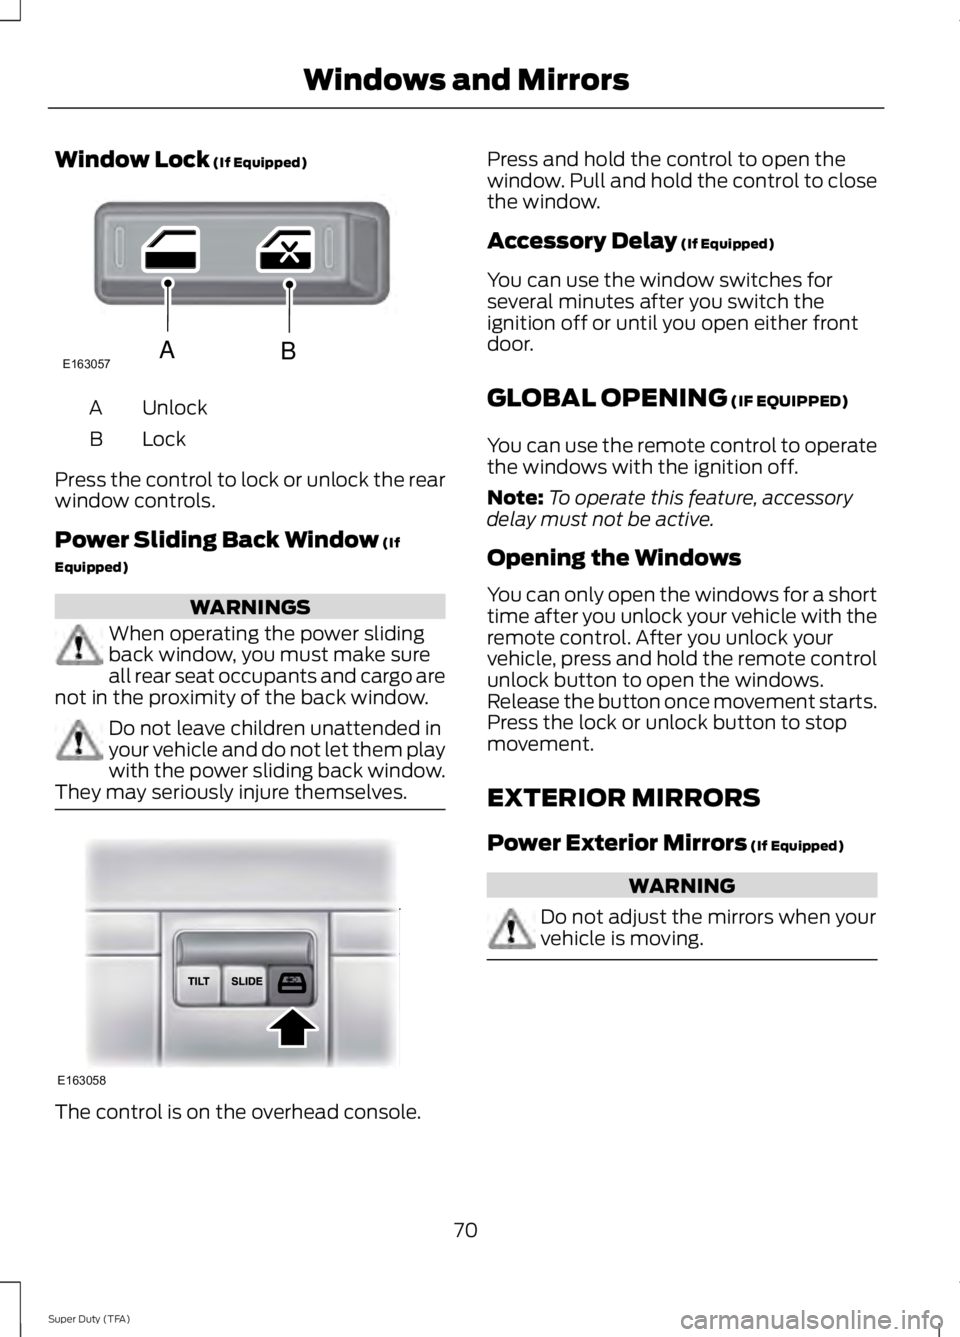
Window Lock (If Equipped)
UnlockA
LockB
Press the control to lock or unlock the rearwindow controls.
Power Sliding Back Window (If
Equipped)
WARNINGS
When operating the power slidingback window, you must make sureall rear seat occupants and cargo arenot in the proximity of the back window.
Do not leave children unattended inyour vehicle and do not let them playwith the power sliding back window.They may seriously injure themselves.
The control is on the overhead console.
Press and hold the control to open thewindow. Pull and hold the control to closethe window.
Accessory Delay (If Equipped)
You can use the window switches forseveral minutes after you switch theignition off or until you open either frontdoor.
GLOBAL OPENING (IF EQUIPPED)
You can use the remote control to operatethe windows with the ignition off.
Note:To operate this feature, accessorydelay must not be active.
Opening the Windows
You can only open the windows for a shorttime after you unlock your vehicle with theremote control. After you unlock yourvehicle, press and hold the remote controlunlock button to open the windows.Release the button once movement starts.Press the lock or unlock button to stopmovement.
EXTERIOR MIRRORS
Power Exterior Mirrors (If Equipped)
WARNING
Do not adjust the mirrors when yourvehicle is moving.
70
Super Duty (TFA)
Windows and MirrorsE163057AB E163058