engine FORD F250 SUPER DUTY 2015 Owners Manual
[x] Cancel search | Manufacturer: FORD, Model Year: 2015, Model line: F250 SUPER DUTY, Model: FORD F250 SUPER DUTY 2015Pages: 470, PDF Size: 18.27 MB
Page 5 of 470
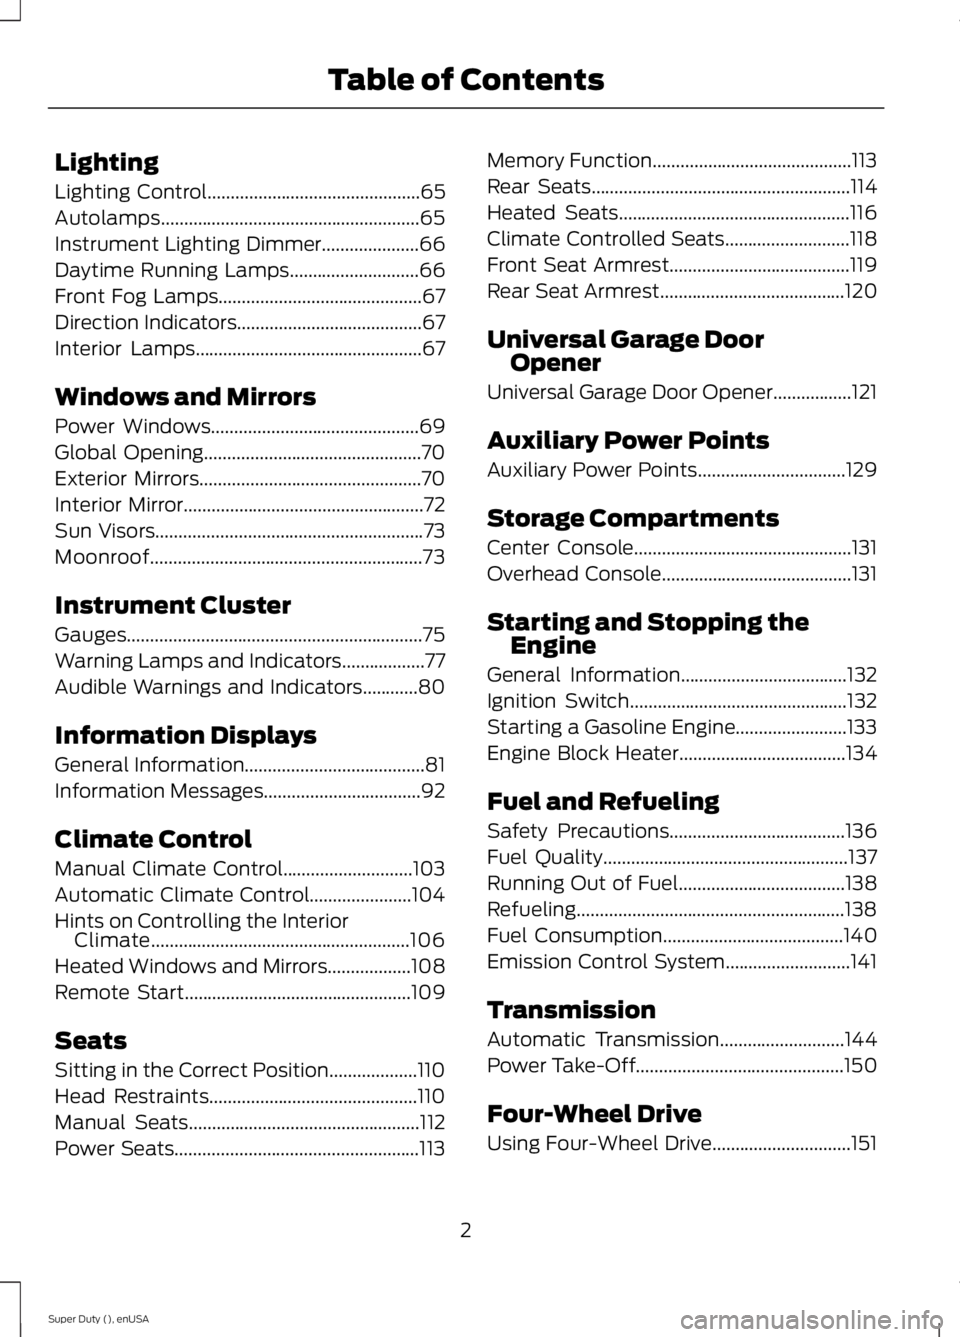
Lighting
Lighting Control..............................................65
Autolamps........................................................65
Instrument Lighting Dimmer.....................66
Daytime Running Lamps............................66
Front Fog Lamps............................................67
Direction Indicators........................................67
Interior Lamps.................................................67
Windows and Mirrors
Power Windows.............................................69
Global Opening...............................................70
Exterior Mirrors................................................70
Interior Mirror....................................................72
Sun Visors..........................................................73
Moonroof...........................................................73
Instrument Cluster
Gauges................................................................75
Warning Lamps and Indicators..................77
Audible Warnings and Indicators............80
Information Displays
General Information.......................................81
Information Messages..................................92
Climate Control
Manual Climate Control............................103
Automatic Climate Control......................104
Hints on Controlling the InteriorClimate........................................................106
Heated Windows and Mirrors..................108
Remote Start.................................................109
Seats
Sitting in the Correct Position...................110
Head Restraints.............................................110
Manual Seats..................................................112
Power Seats.....................................................113
Memory Function...........................................113
Rear Seats........................................................114
Heated Seats..................................................116
Climate Controlled Seats...........................118
Front Seat Armrest.......................................119
Rear Seat Armrest........................................120
Universal Garage DoorOpener
Universal Garage Door Opener.................121
Auxiliary Power Points
Auxiliary Power Points................................129
Storage Compartments
Center Console...............................................131
Overhead Console.........................................131
Starting and Stopping theEngine
General Information....................................132
Ignition Switch...............................................132
Starting a Gasoline Engine........................133
Engine Block Heater....................................134
Fuel and Refueling
Safety Precautions......................................136
Fuel Quality.....................................................137
Running Out of Fuel....................................138
Refueling..........................................................138
Fuel Consumption.......................................140
Emission Control System...........................141
Transmission
Automatic Transmission...........................144
Power Take-Off.............................................150
Four-Wheel Drive
Using Four-Wheel Drive..............................151
2
Super Duty (), enUSA
Table of Contents
Page 7 of 470
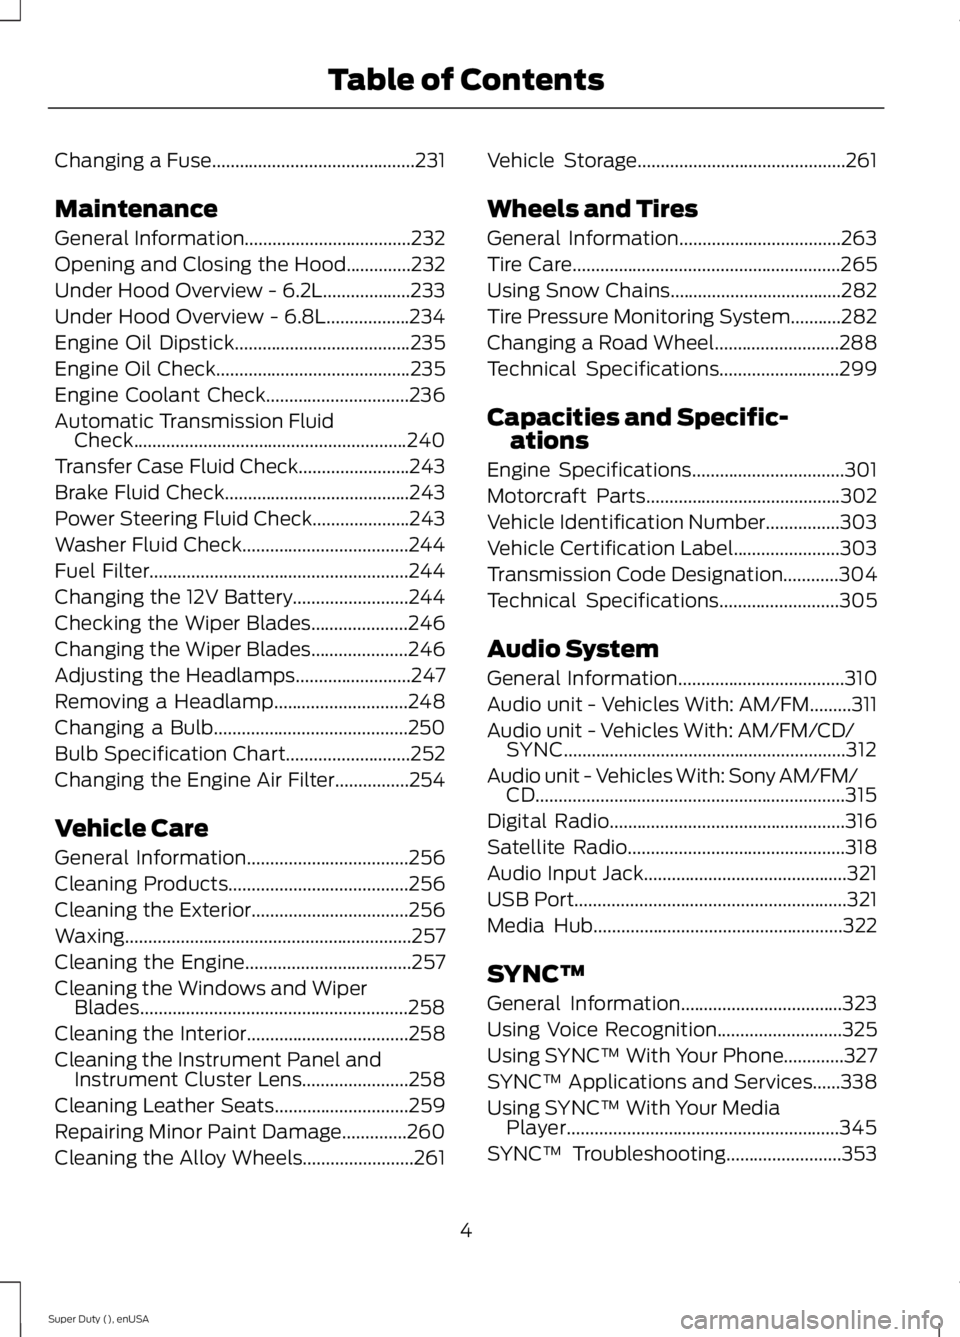
Changing a Fuse............................................231
Maintenance
General Information....................................232
Opening and Closing the Hood..............232
Under Hood Overview - 6.2L...................233
Under Hood Overview - 6.8L..................234
Engine Oil Dipstick......................................235
Engine Oil Check..........................................235
Engine Coolant Check...............................236
Automatic Transmission FluidCheck...........................................................240
Transfer Case Fluid Check........................243
Brake Fluid Check........................................243
Power Steering Fluid Check.....................243
Washer Fluid Check....................................244
Fuel Filter........................................................244
Changing the 12V Battery.........................244
Checking the Wiper Blades.....................246
Changing the Wiper Blades.....................246
Adjusting the Headlamps.........................247
Removing a Headlamp.............................248
Changing a Bulb..........................................250
Bulb Specification Chart...........................252
Changing the Engine Air Filter................254
Vehicle Care
General Information...................................256
Cleaning Products.......................................256
Cleaning the Exterior..................................256
Waxing..............................................................257
Cleaning the Engine....................................257
Cleaning the Windows and WiperBlades..........................................................258
Cleaning the Interior...................................258
Cleaning the Instrument Panel andInstrument Cluster Lens.......................258
Cleaning Leather Seats.............................259
Repairing Minor Paint Damage..............260
Cleaning the Alloy Wheels........................261
Vehicle Storage.............................................261
Wheels and Tires
General Information...................................263
Tire Care..........................................................265
Using Snow Chains.....................................282
Tire Pressure Monitoring System...........282
Changing a Road Wheel...........................288
Technical Specifications..........................299
Capacities and Specific-ations
Engine Specifications.................................301
Motorcraft Parts..........................................302
Vehicle Identification Number................303
Vehicle Certification Label.......................303
Transmission Code Designation............304
Technical Specifications..........................305
Audio System
General Information....................................310
Audio unit - Vehicles With: AM/FM.........311
Audio unit - Vehicles With: AM/FM/CD/SYNC.............................................................312
Audio unit - Vehicles With: Sony AM/FM/CD...................................................................315
Digital Radio...................................................316
Satellite Radio...............................................318
Audio Input Jack............................................321
USB Port...........................................................321
Media Hub......................................................322
SYNC™
General Information...................................323
Using Voice Recognition...........................325
Using SYNC™ With Your Phone.............327
SYNC™ Applications and Services......338
Using SYNC™ With Your MediaPlayer...........................................................345
SYNC™ Troubleshooting.........................353
4
Super Duty (), enUSA
Table of Contents
Page 11 of 470
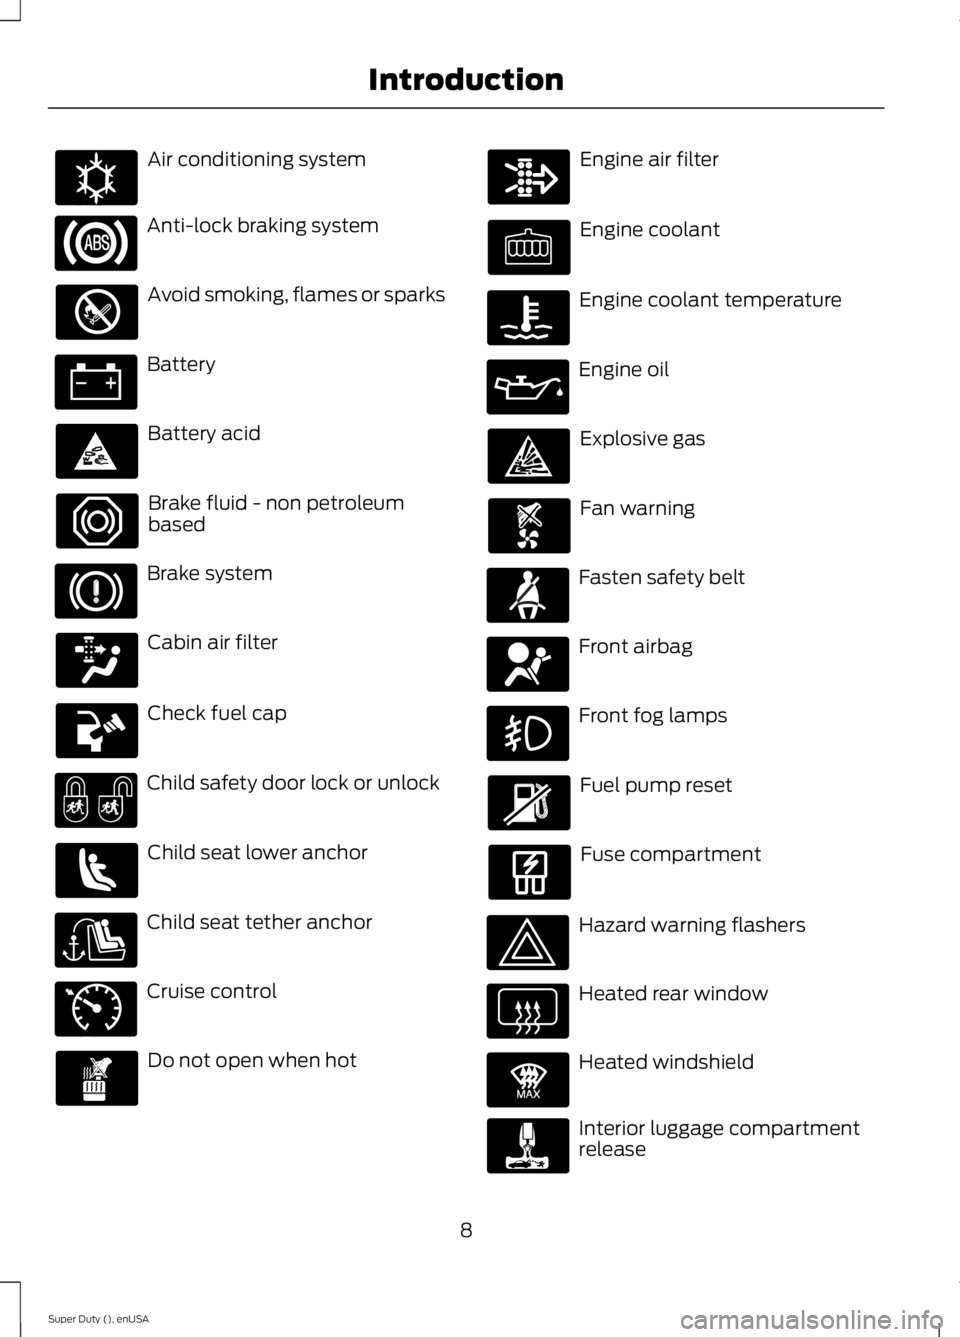
Air conditioning system
Anti-lock braking system
Avoid smoking, flames or sparks
Battery
Battery acid
Brake fluid - non petroleumbased
Brake system
Cabin air filter
Check fuel cap
Child safety door lock or unlock
Child seat lower anchor
Child seat tether anchor
Cruise control
Do not open when hot
Engine air filter
Engine coolant
Engine coolant temperature
Engine oil
Explosive gas
Fan warning
Fasten safety belt
Front airbag
Front fog lamps
Fuel pump reset
Fuse compartment
Hazard warning flashers
Heated rear window
Heated windshield
Interior luggage compartmentrelease
8
Super Duty (), enUSA
IntroductionE162384 E71340 E91392
Page 12 of 470
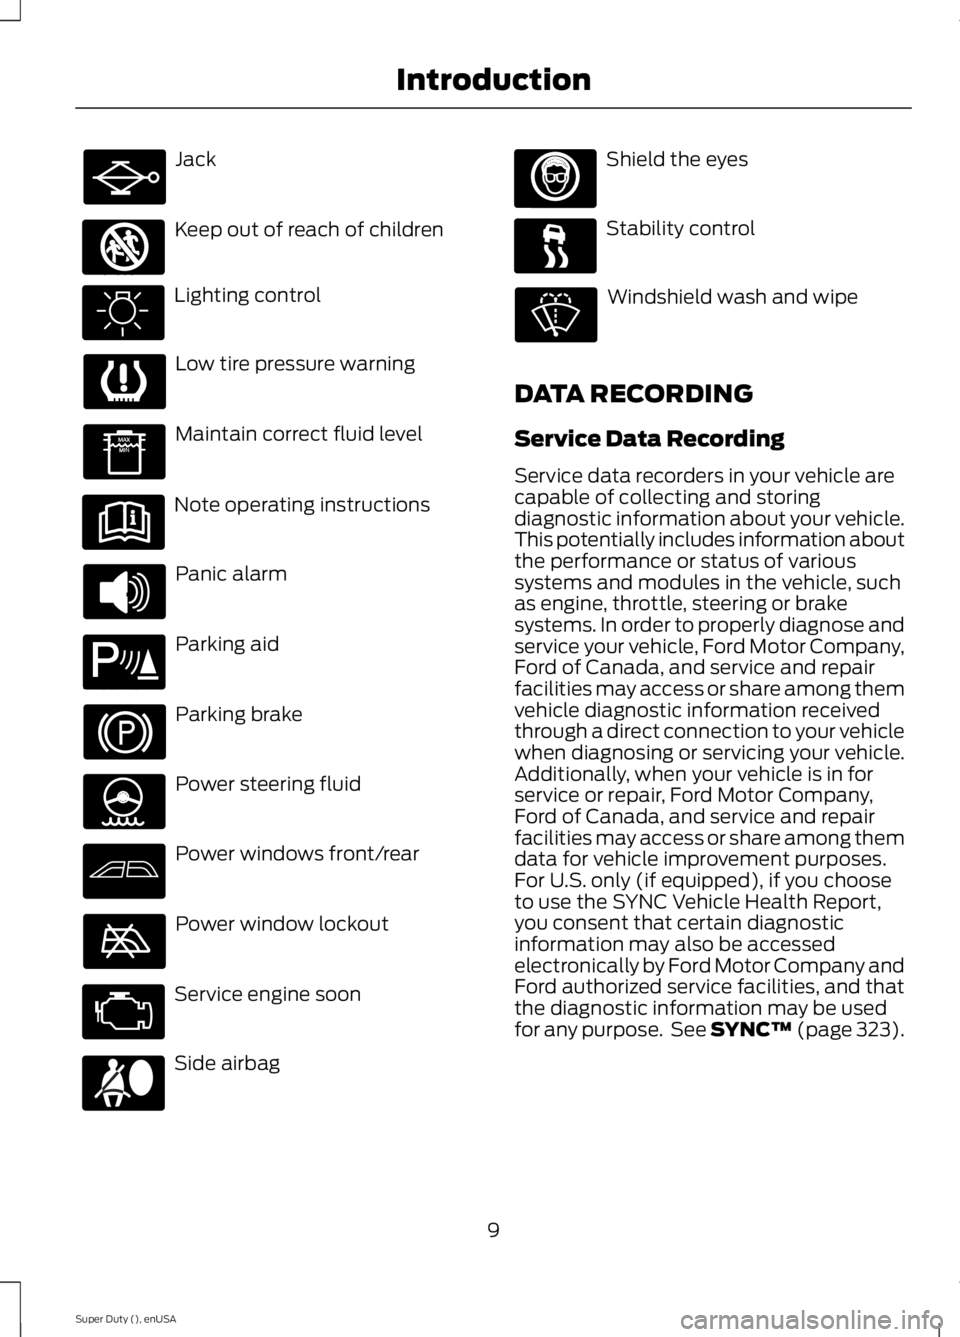
Jack
Keep out of reach of children
Lighting control
Low tire pressure warning
Maintain correct fluid level
Note operating instructions
Panic alarm
Parking aid
Parking brake
Power steering fluid
Power windows front/rear
Power window lockout
Service engine soon
Side airbag
Shield the eyes
Stability control
Windshield wash and wipe
DATA RECORDING
Service Data Recording
Service data recorders in your vehicle arecapable of collecting and storingdiagnostic information about your vehicle.This potentially includes information aboutthe performance or status of varioussystems and modules in the vehicle, suchas engine, throttle, steering or brakesystems. In order to properly diagnose andservice your vehicle, Ford Motor Company,Ford of Canada, and service and repairfacilities may access or share among themvehicle diagnostic information receivedthrough a direct connection to your vehiclewhen diagnosing or servicing your vehicle.Additionally, when your vehicle is in forservice or repair, Ford Motor Company,Ford of Canada, and service and repairfacilities may access or share among themdata for vehicle improvement purposes.For U.S. only (if equipped), if you chooseto use the SYNC Vehicle Health Report,you consent that certain diagnosticinformation may also be accessedelectronically by Ford Motor Company andFord authorized service facilities, and thatthe diagnostic information may be usedfor any purpose. See SYNC™ (page 323).
9
Super Duty (), enUSA
Introduction E161353 E139213 E167012
Page 14 of 470
Note:Including to the extent that anylaw pertaining to Event Data Recordersapplies to SYNC or its features, pleasenote the following: Once 911 Assist (ifequipped) is enabled (set ON), 911 Assistmay, through any paired and connectedcell phone, disclose to emergencyservices that the vehicle has been in acrash involving the deployment of anairbag or, in certain vehicles, theactivation of the fuel pump shut-off.Certain versions or updates to 911 Assistmay also be capable of being used toelectronically or verbally provide to 911operators the vehicle location (such aslatitude and longitude), and/or otherdetails about the vehicle or crash orpersonal information about theoccupants to assist 911 operators toprovide the most appropriate emergencyservices. If you do not want to disclosethis information, do not activate the 911Assist feature. See SYNC™ (page 323).
Additionally, when you connect toTraffic, Directions and Information (ifequipped, U.S. only), the service usesGPS technology and advanced vehiclesensors to collect the vehicle’s currentlocation, travel direction, and speed(“vehicle travel information”), only tohelp provide you with the directions,traffic reports, or business searchesthat you request. If you do not wantFord or its vendors to receive thisinformation, do not activate theservice. For more information, seeTraffic, Directions and Information,Terms and Conditions. See SYNC™(page 323).
CALIFORNIA PROPOSITION 65
WARNING
Some constituents of engineexhaust, certain vehicle components,certain fluids contained in vehiclesand certain products of component wearcontain or emit chemicals known to theState of California to cause cancer andbirth defects or other reproductive harm.
PERCHLORATE
Certain components in your vehicle suchas airbag modules, safety beltpretensioners and remote control batteriesmay contain perchlorate material. Specialhandling may apply for service or vehicleend of life disposal. For more informationvisit:
Web Address
www.dtsc.ca.gov/hazardouswaste/perchlorate
FORD CREDIT
(U.S. Only)
Ford Credit offers a full range of financingand lease plans to help you acquire yourvehicle. If you have financed or leased yourvehicle through Ford Credit, thank you foryour business.
For your convenience we offer a numberof ways to contact us, as well as helpmanage your account.
Phone: 1-800-727-7000
For more information regarding Ford Credit,as well as access Account Manager, pleasego to www.fordcredit.com.
11
Super Duty (), enUSA
Introduction
Page 16 of 470
Using your Vehicle as anAmbulance
If your light truck is equipped with the FordAmbulance Preparation Package, it maybe utilized as an ambulance. Ford urgesambulance manufacturers to follow therecommendations of the Ford IncompleteVehicle Manual, Ford Truck Body Builder’sLayout Book and the Qualified VehicleModifiers (QVM) Guidelines as well aspertinent supplements. For additionalinformation, please contact the Truck BodyBuilders Advisory Service athttp://www.fleet.ford.com/truckbbas/and then by selecting Contact Us or byphone at 1–877–840–4338.
Use of your Ford light truck as anambulance, without the Ford AmbulancePreparation Package voids the Ford NewVehicle Limited Warranty and may voidthe emissions warranties. In addition,ambulance usage without the preparationpackage could cause high underbodytemperatures, overpressurized fuel and arisk of spraying fuel which could lead tofires.
If your vehicle is equipped with the FordAmbulance Preparation Package, it will beindicated on the Safety ComplianceCertification Label. The label is located onthe driver’s side door pillar or on the rearedge of the driver’s door. You candetermine whether the ambulancemanufacturer followed Ford’srecommendations by directly contactingthat manufacturer. Ford AmbulancePreparation Package is only available oncertain Diesel engine equipped vehicles.
Using your Vehicle as a StationaryPower Source
Information and guidelines for operating avehicle equipped with an aftermarketpower take-off system can be found in thisOwner's Manual. See Power Take-Off(page 150).
MOBILE COMMUNICATIONS
EQUIPMENT
Using mobile communications equipmentis becoming increasingly important in theconduct of business and personal affairs.However, you must not compromise yourown or others’ safety when using suchequipment. Mobile communications canenhance personal safety and security whenappropriately used, particularly inemergency situations. Safety must beparamount when using mobilecommunications equipment to avoidnegating these benefits. Mobilecommunication equipment includes, butis not limited to, cellular phones, pagers,portable email devices, text messagingdevices and portable two-way radios.
WARNING
Driving while distracted can result inloss of vehicle control, crash andinjury. We strongly recommend thatyou use extreme caution when using anydevice that may take your focus off theroad. Your primary responsibility is the safeoperation of your vehicle. We recommendagainst the use of any hand-held devicewhile driving and encourage the use ofvoice-operated systems when possible.Make sure you are aware of all applicablelocal laws that may affect the use ofelectronic devices while driving.
EXPORT UNIQUE OPTIONS
For your particular global region, yourvehicle may be equipped with features andoptions that are different from the featuresand options that are described in thisOwner’s Manual. A market uniquesupplement may be supplied thatcomplements this book. By referring to themarket unique supplement, if provided,you can properly identify those features,recommendations and specifications that
13
Super Duty (), enUSA
Introduction
Page 37 of 470
Then...If...
The Belt-Minder feature will not activate.The driver's safety belt is buckled beforethe ignition switch is turned to the on posi-tion or less than 1-2 minutes have elapsedsince the ignition switch has been turnedto on...
The Belt-Minder feature is activated - thesafety belt warning light illuminates andthe warning chime sounds for six secondsevery 25 seconds, repeating for about fiveminutes or until the safety belts arebuckled.
The driver's safety belt is not buckled whenthe vehicle has reached at least 6 mph (9.7km/h) and 1-2 minutes have elapsed sincethe ignition switch has been turned to on...
The Belt-Minder feature is activated - thesafety belt warning light illuminates andthe warning chime sounds for six secondsevery 25 seconds, repeating for about fiveminutes or until the safety belts arebuckled.
The driver's safety belt becomes unbuckledfor about one minute while the vehicle istraveling at least 6 mph (9.7 km/h) andmore than 1-2 minutes have elapsed sincethe ignition switch has been turned to on...
Deactivating and Activating theBelt-Minder Feature (Driver Only)
WARNING
While the system allows you todeactivate it, this system is designedto improve your chances of beingsafely belted and surviving an accident.We recommend you leave the systemactivated for yourself and others who mayuse the vehicle. To reduce the risk of injury,do not deactivate or activate the systemwhile driving the vehicle.
Note:If you are using MyKey, you cannotdisable the Belt-Minder. Also, if theBelt-Minder has been previously disabled,it will be re-enabled during the use ofMyKey. See MyKey™ (page 50).
Read Steps 1 - 4 thoroughly beforeproceeding with the programmingprocedure.
Deactivate or activate the system byperforming the following procedure:
Before following the procedure, make surethat:
•The parking brake is set.
•The transmission is in park (P).
•The ignition is off.
•All vehicle doors are closed.
•The driver's safety belt is unbuckled.
1. Turn the ignition on. Do not start theengine.
2. Wait until the safety belt warning lightturns off (about one minute). Step 3must be completed within 30 secondsafter the safety belt warning light turnsoff.
3. Buckle then unbuckle the safety beltthree times at a moderate speed,ending with the safety belt in theunbuckled state. After Step 3, thesafety belt warning light will turn on.
34
Super Duty (), enUSA
Safety Belts
Page 51 of 470
Sounding a Panic Alarm
Note:The panic alarm will only operatewhen the ignition is off.
Press the button to activate thealarm. Press the button again orturn the ignition on to deactivateit.
Remote Start (If Equipped)
WARNING
To avoid exhaust fumes, do not useremote start if your vehicle is parkedindoors or areas that are not wellventilated.
Note:Do not use remote start if your vehicleis low on fuel.
The remote start button is on thetransmitter.
This feature allows you to start yourvehicle from outside the vehicle. Thetransmitter has an extended operatingrange.
Vehicles with automatic climate controlcan be set to operate when you remotestart the vehicle. See Climate Control(page 103). A manual climate controlsystem will run at the setting it was set towhen you switch the vehicle off.
Many states and provinces haverestrictions for the use of remote start.Check your local and state or provinciallaws for specific requirements regardingremote start systems.
The remote start system will not work if:
•the ignition is on
•the alarm system is triggered
•you disable the feature
•the hood is open
•the transmission is not in P
•the vehicle battery voltage is too low
•the service engine soon indicator is on.
Remote Starting the Vehicle
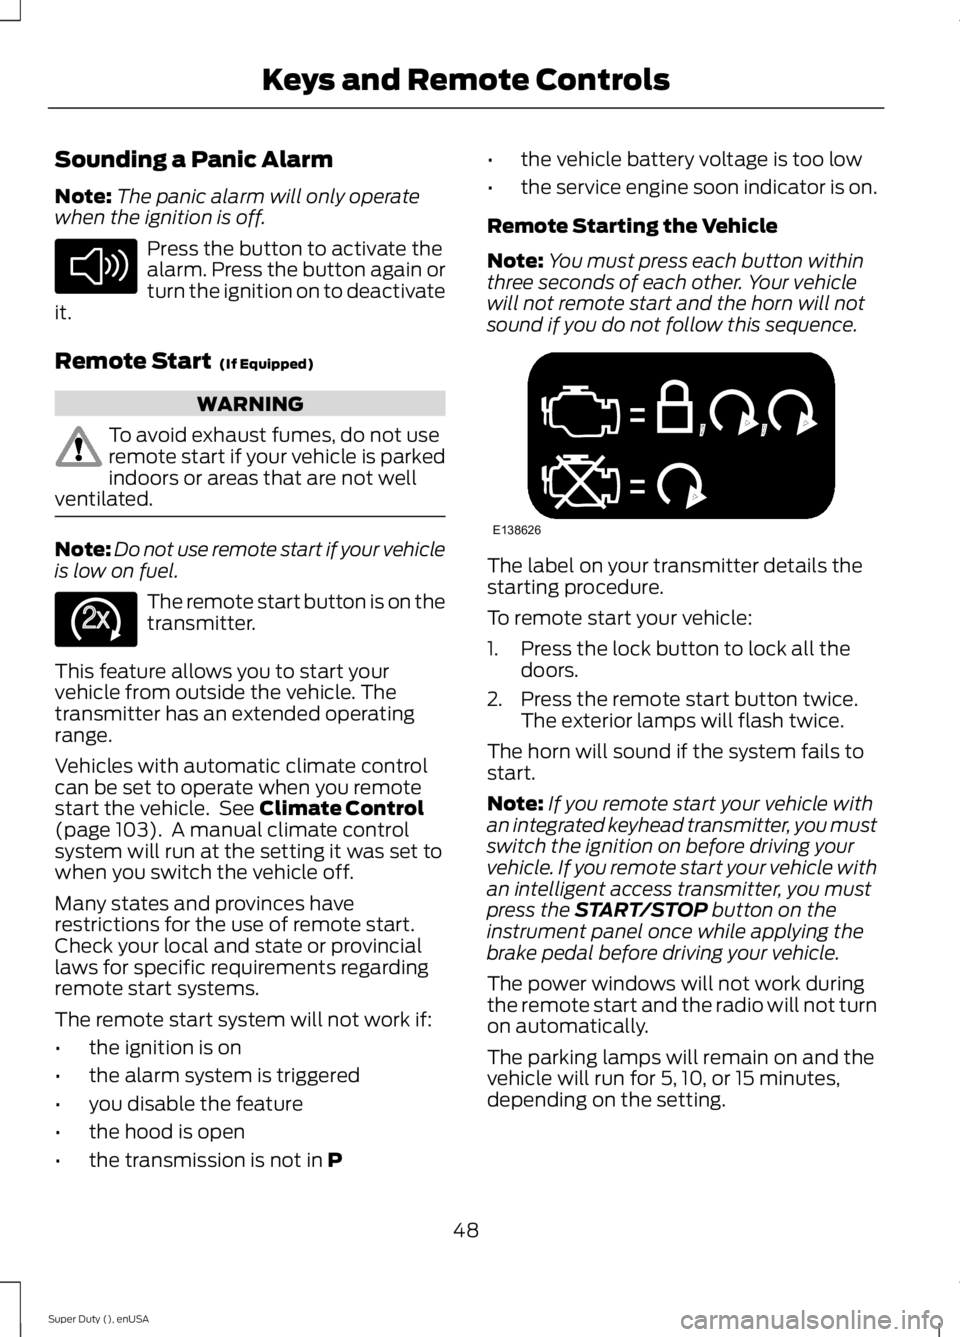
Note:You must press each button withinthree seconds of each other. Your vehiclewill not remote start and the horn will notsound if you do not follow this sequence.
The label on your transmitter details thestarting procedure.
To remote start your vehicle:
1. Press the lock button to lock all thedoors.
2. Press the remote start button twice.The exterior lamps will flash twice.
The horn will sound if the system fails tostart.
Note:If you remote start your vehicle withan integrated keyhead transmitter, you mustswitch the ignition on before driving yourvehicle. If you remote start your vehicle withan intelligent access transmitter, you mustpress the START/STOP button on theinstrument panel once while applying thebrake pedal before driving your vehicle.
The power windows will not work duringthe remote start and the radio will not turnon automatically.
The parking lamps will remain on and thevehicle will run for 5, 10, or 15 minutes,depending on the setting.
48
Super Duty (), enUSA
Keys and Remote ControlsE138624 E138625 E138626
Page 55 of 470
Note:You can clear or change your MyKeysettings at any time during the same keycycle as you created the MyKey. Once youhave switched the engine off, however, youwill need an admin key to change or clearyour MyKey settings.
CLEARING ALL MYKEYS
You can clear all MyKeys within the samekey cycle as you created the MyKey. If youswitch your ignition off, however, you willneed to use an admin key to clear yourMyKeys.
Note:When you clear your MyKeys, youremove all restrictions and return all MyKeysto their original admin key status at once.
To clear all MyKeys of all MyKey settings,use the information display. There are twotypes of information displays, and theircontrols and messaging vary. To determinewhich type of display you have, you willneed to reference another chapter. SeeGeneral Information (page 81).
If You Have a Type 1 InformationDisplay:
1.Press SETUP until PRESS RESET TOCLEAR MYKEY displays.
2. Press and release the RESET button.The display will show HOLD RESETTO CONFIRM CLEAR.
3. Press and hold the RESET button fortwo seconds until ALL MYKEYSCLEARED displays.
If You Have a Type 2 InformationDisplay:
1. Access the main menu and selectSETTINGS, then MYKEY.
2.Scroll to CLEAR ALL and press the OKbutton.
3. Hold the OK button until ALLMYKEYS CLEARED displays.
CHECKING MYKEY SYSTEM
STATUS
You can find information about yourprogrammed MyKeys by using theinformation display.
MYKEY DISTANCE
Tracks the distance when drivers use aMyKey. The only way to delete theaccumulated distance is by using an adminkey to clear your MyKey. If the distancedoes not accumulate as expected, thenthe intended user is not using the MyKey,or an admin key user recently cleared andthen recreated a MyKey.
NUMBER OF MYKEY(S)
Indicates the number of MyKeysprogrammed to your vehicle. Use thisfeature to detect how many MyKeys youhave for your vehicle and determine whena MyKey has been deleted.
NUMBER OF ADMIN KEY(S)
Indicates how many admin keys areprogrammed to your vehicle. Use thisfeature to determine how manyunrestricted keys you have for your vehicle,and detect if an additional MyKey has beenprogrammed.
USING MYKEY WITH REMOTE
START SYSTEMS
MyKey is not compatible with nonFord-approved, aftermarket remote startsystems. If you choose to install a remotestart system, see an authorized dealer fora Ford-approved remote start system.
52
Super Duty (), enUSA
MyKey™
Page 61 of 470
PASSIVE ANTI-THEFT
SYSTEM (IF EQUIPPED)
Note:The system is not compatible withnon-Ford aftermarket remote start systems.Use of these systems may result in vehiclestarting problems and a loss of securityprotection.
Note:Metallic objects, electronic devicesor a second coded key on the same keychain may cause vehicle starting problemsif they are too close to the key when startingthe engine. Prevent these objects fromtouching the coded key while starting theengine. Switch the ignition off, move allobjects on the key chain away from thecoded key and restart the engine if aproblem occurs.
Note:Do not leave a duplicate coded keyin the vehicle. Always take your keys andlock all doors when leaving the vehicle.
SecuriLock™
The system is an engine immobilizationsystem. It helps prevent the engine fromstarting unless you use a coded keyprogrammed to your vehicle. Using thewrong key may prevent the engine fromstarting. A message may appear in theinformation display.
If you are unable to start the engine with acorrectly coded key, the system hasmalfunctioned. A message may appear inthe information display.
Automatic Arming
The system arms immediately after youswitch the ignition off.
Automatic Disarming
Switching the ignition on with a coded keydisarms the system.
Replacement Keys
Note:Your vehicle may have two integratedkeyhead transmitters.
The integrated keyhead transmitterfunctions as a programmed ignition key. Itoperates all the locks, starts the vehicleand acts as a remote control.
If your programmed transmitters orstandard SecuriLock coded keys are lostor stolen and you do not have an extracoded key, you will need to have yourvehicle towed to an authorized dealer. Youneed to erase the key codes from yourvehicle and program new coded keys.
Store an extra programmed key away fromyour vehicle in a safe place to help preventany inconveniences. See an authorizeddealer to purchase additional spare orreplacement keys.
Programming a Spare Key
Note:You can program a maximum of eightcoded keys to your vehicle. Only four ofthese can be integrated keyheadtransmitters.
You can program your own integratedkeyhead transmitter or standardSecuriLock coded keys to your vehicle. Thisprocedure will program both the engineimmobilizer keycode and the remote entryportion of the remote control to yourvehicle.
Only use integrated keyhead transmittersor standard SecuriLock keys.
You must have two previouslyprogrammed coded keys and the newunprogrammed key readily accessible. Seean authorized dealer to have the spare keyprogrammed if two previouslyprogrammed coded keys are not available.
Read and understand the entire procedurebefore you begin.
58
Super Duty (), enUSA
Security