set clock FORD F350 2002 Owners Manual
[x] Cancel search | Manufacturer: FORD, Model Year: 2002, Model line: F350, Model: FORD F350 2002Pages: 264, PDF Size: 2.37 MB
Page 18 of 264
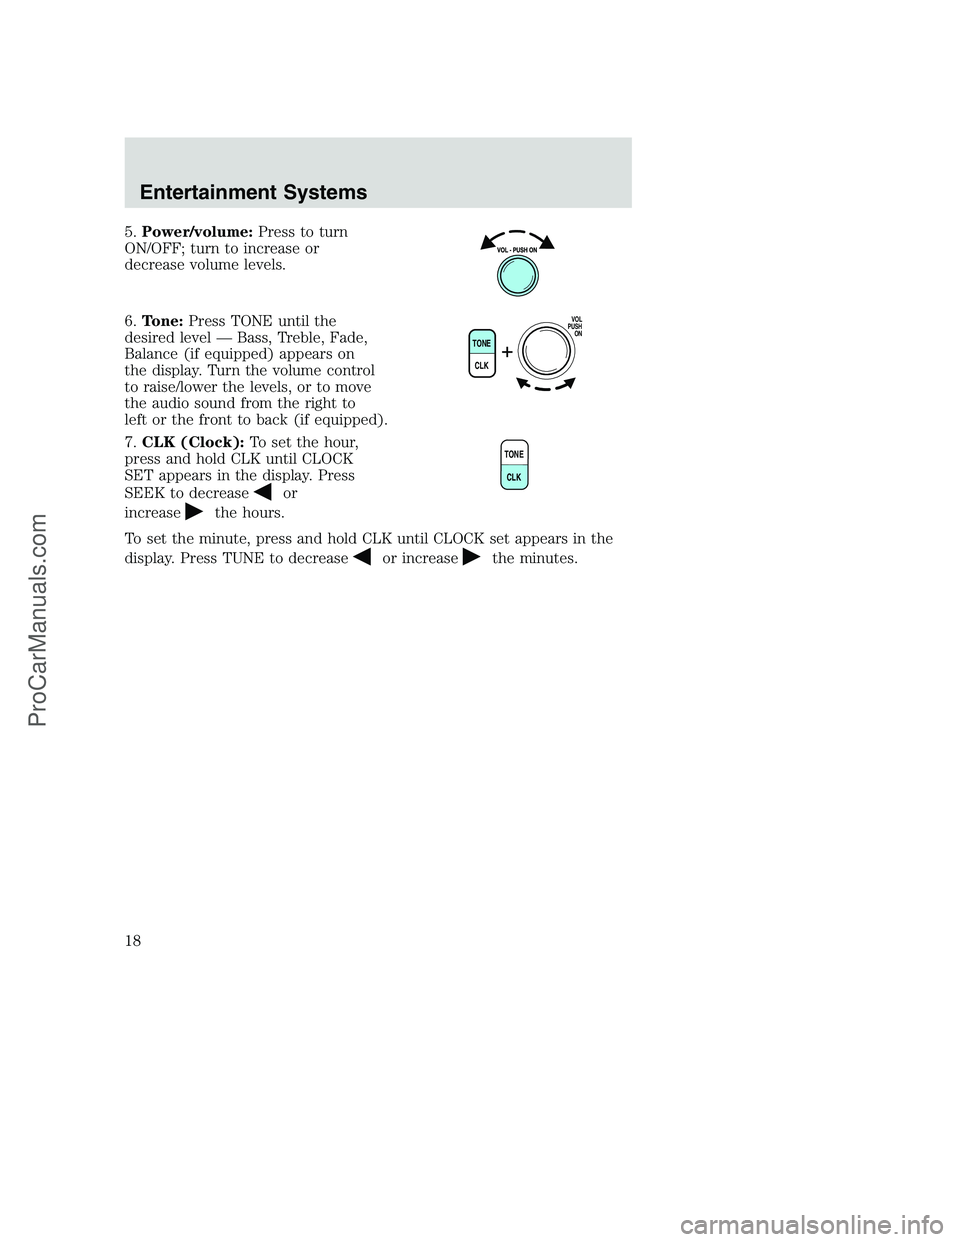
5.Power/volume:Press to turn
ON/OFF; turn to increase or
decrease volume levels.
6.Tone:Press TONE until the
desired level — Bass, Treble, Fade,
Balance (if equipped) appears on
the display. Turn the volume control
to raise/lower the levels, or to move
the audio sound from the right to
left or the front to back (if equipped).
7.CLK (Clock):To set the hour,
press and hold CLK until CLOCK
SET appears in the display. Press
SEEK to decrease
or
increase
the hours.
To set the minute, press and hold CLK until CLOCK set appears in the
display. Press TUNE to decrease
or increasethe minutes.
TONE
CLK
VOL
PUSH
ON
TONE
CLK
Entertainment Systems
18
ProCarManuals.com
Page 22 of 264
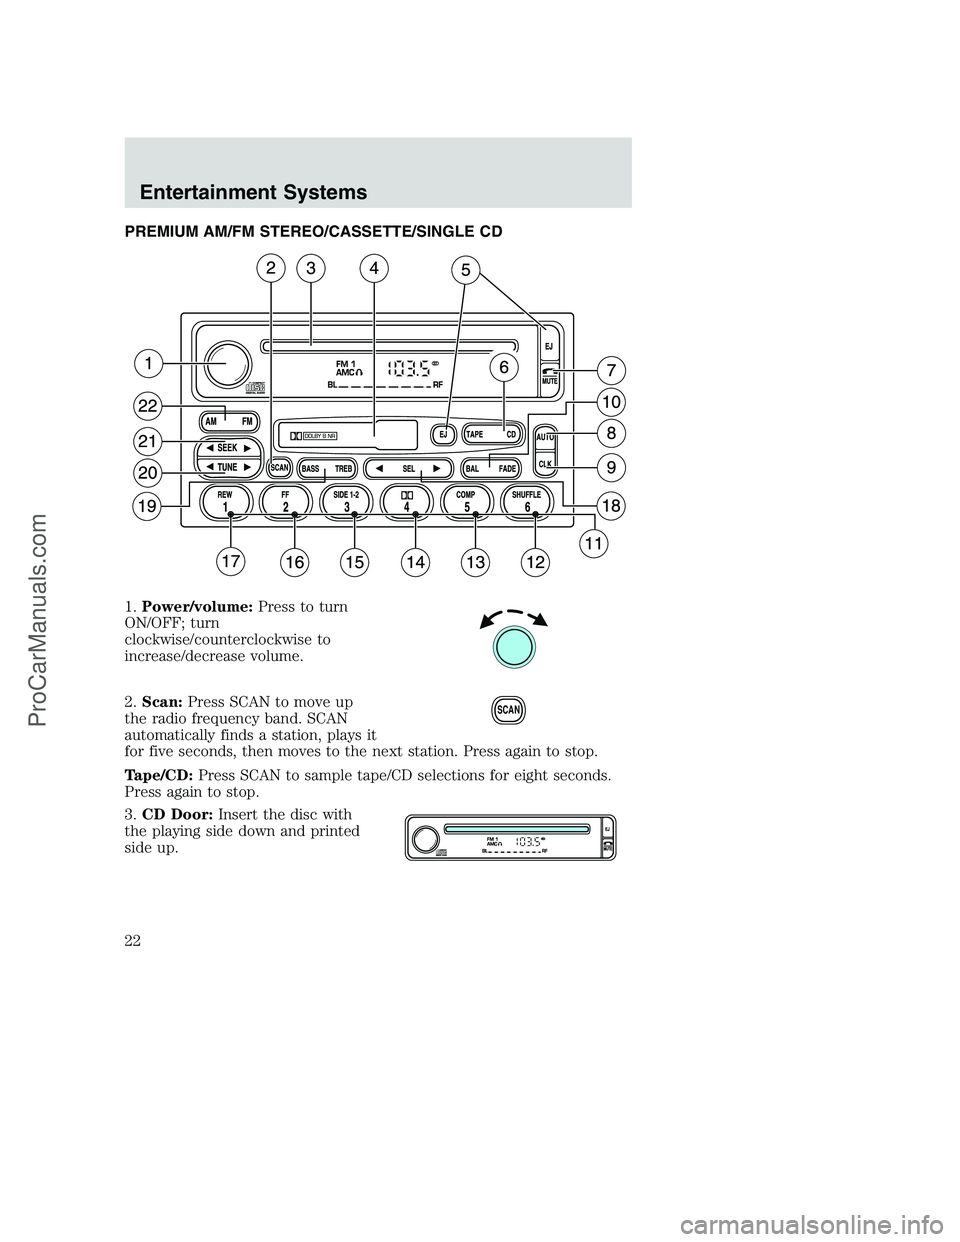
PREMIUM AM/FM STEREO/CASSETTE/SINGLE CD
1.Power/volume:Press to turn
ON/OFF; turn
clockwise/counterclockwise to
increase/decrease volume.
2.Scan:Press SCAN to move up
the radio frequency band. SCAN
automatically finds a station, plays it
for five seconds, then moves to the next station. Press again to stop.
Tape/CD:Press SCAN to sample tape/CD selections for eight seconds.
Press again to stop.
3.CD Door:Insert the disc with
the playing side down and printed
side up.
SCAN
Entertainment Systems
22
ProCarManuals.com
Page 23 of 264
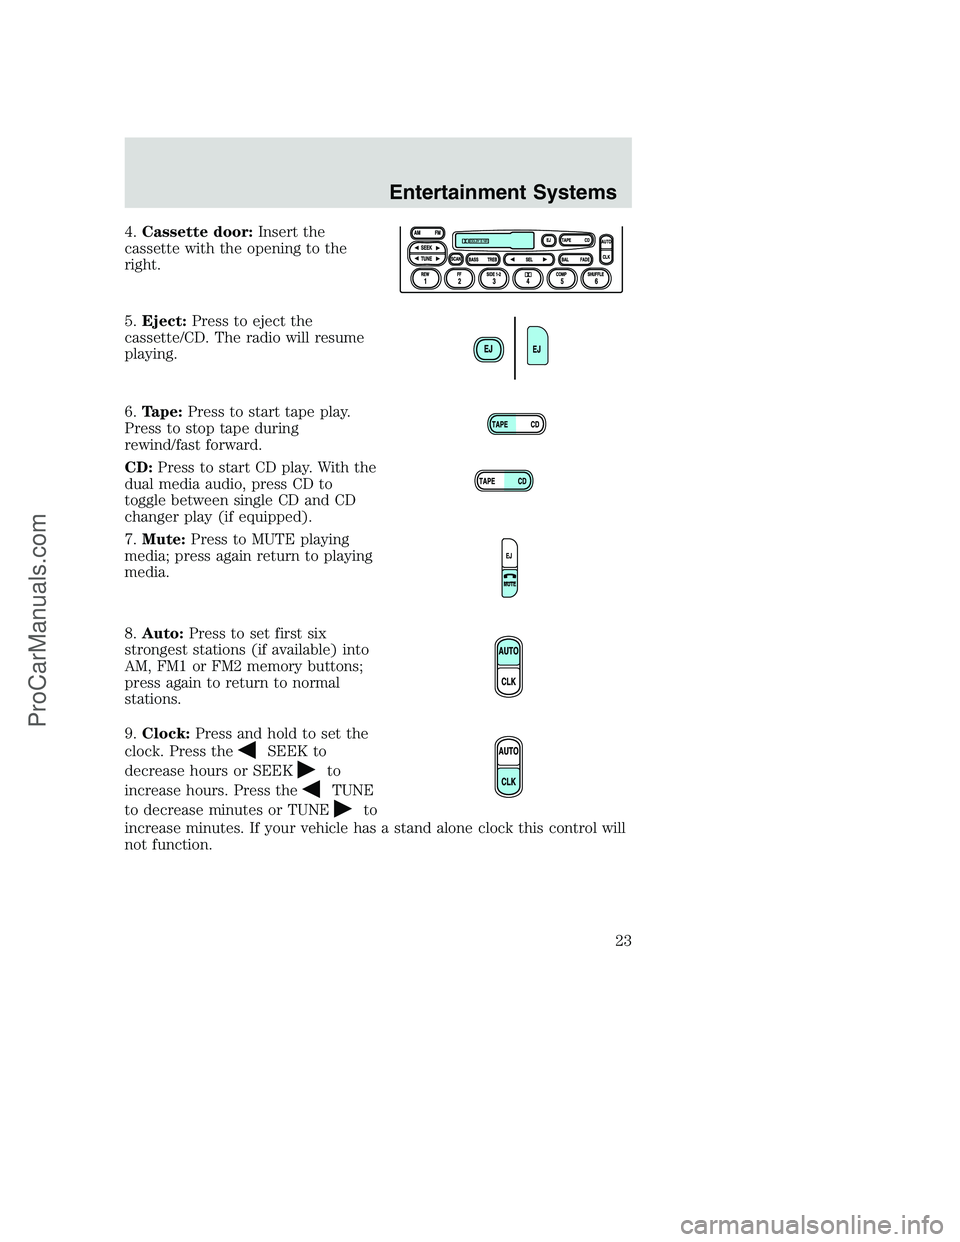
4.Cassette door:Insert the
cassette with the opening to the
right.
5.Eject:Press to eject the
cassette/CD. The radio will resume
playing.
6.Tape:Press to start tape play.
Press to stop tape during
rewind/fast forward.
CD:Press to start CD play. With the
dual media audio, press CD to
toggle between single CD and CD
changer play (if equipped).
7.Mute:Press to MUTE playing
media; press again return to playing
media.
8.Auto:Press to set first six
strongest stations (if available) into
AM, FM1 or FM2 memory buttons;
press again to return to normal
stations.
9.Clock:Press and hold to set the
clock. Press the
SEEK to
decrease hours or SEEK
to
increase hours. Press the
TUNE
to decrease minutes or TUNE
to
increase minutes. If your vehicle has a stand alone clock this control will
not function.
Entertainment Systems
23
ProCarManuals.com
Page 27 of 264
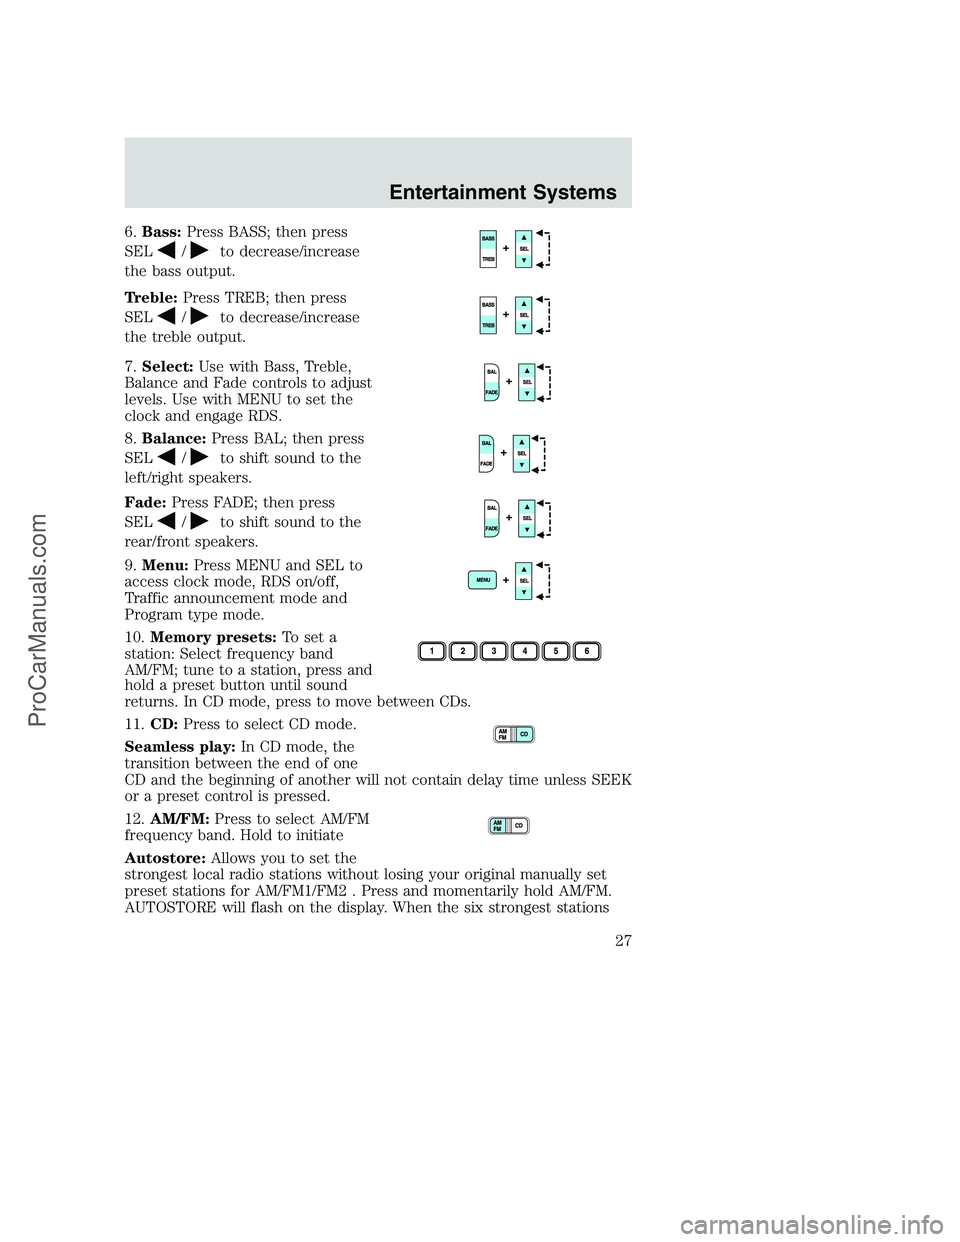
6.Bass:Press BASS; then press
SEL
/to decrease/increase
the bass output.
Treble:Press TREB; then press
SEL
/to decrease/increase
the treble output.
7.Select:Use with Bass, Treble,
Balance and Fade controls to adjust
levels. Use with MENU to set the
clock and engage RDS.
8.Balance:Press BAL; then press
SEL
/to shift sound to the
left/right speakers.
Fade:Press FADE; then press
SEL
/to shift sound to the
rear/front speakers.
9.Menu:Press MENU and SEL to
access clock mode, RDS on/off,
Traffic announcement mode and
Program type mode.
10.Memory presets:To set a
station: Select frequency band
AM/FM; tune to a station, press and
hold a preset button until sound
returns. In CD mode, press to move between CDs.
11.CD:Press to select CD mode.
Seamless play:In CD mode, the
transition between the end of one
CD and the beginning of another will not contain delay time unless SEEK
or a preset control is pressed.
12.AM/FM:Press to select AM/FM
frequency band. Hold to initiate
Autostore:Allows you to set the
strongest local radio stations without losing your original manually set
preset stations for AM/FM1/FM2 . Press and momentarily hold AM/FM.
AUTOSTORE will flash on the display. When the six strongest stations
Entertainment Systems
27
ProCarManuals.com
Page 167 of 264
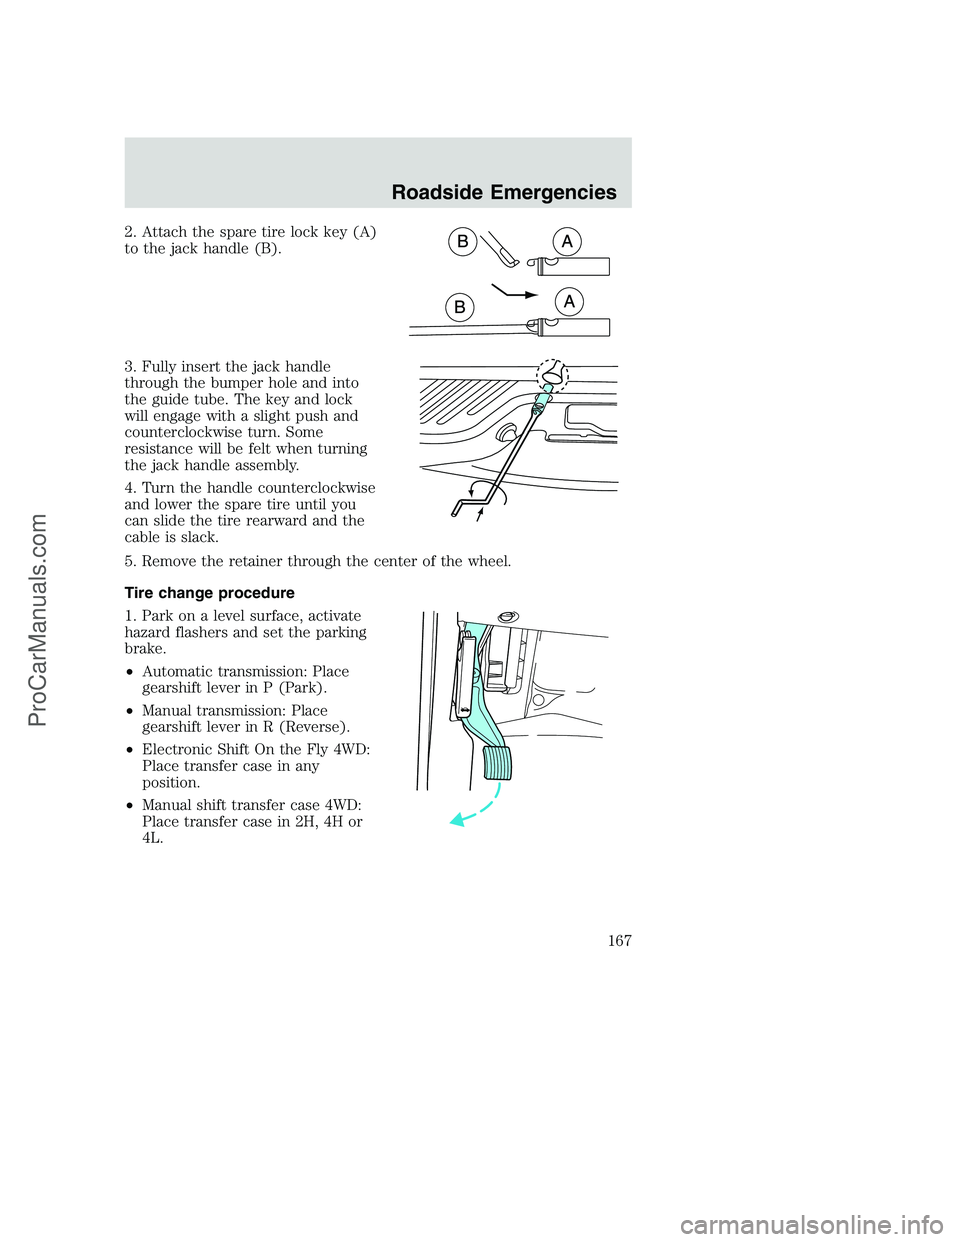
2. Attach the spare tire lock key (A)
to the jack handle (B).
3. Fully insert the jack handle
through the bumper hole and into
the guide tube. The key and lock
will engage with a slight push and
counterclockwise turn. Some
resistance will be felt when turning
the jack handle assembly.
4. Turn the handle counterclockwise
and lower the spare tire until you
can slide the tire rearward and the
cable is slack.
5. Remove the retainer through the center of the wheel.
Tire change procedure
1. Park on a level surface, activate
hazard flashers and set the parking
brake.
•Automatic transmission: Place
gearshift lever in P (Park).
•Manual transmission: Place
gearshift lever in R (Reverse).
•Electronic Shift On the Fly 4WD:
Place transfer case in any
position.
•Manual shift transfer case 4WD:
Place transfer case in 2H, 4H or
4L.
Roadside Emergencies
167
ProCarManuals.com
Page 168 of 264
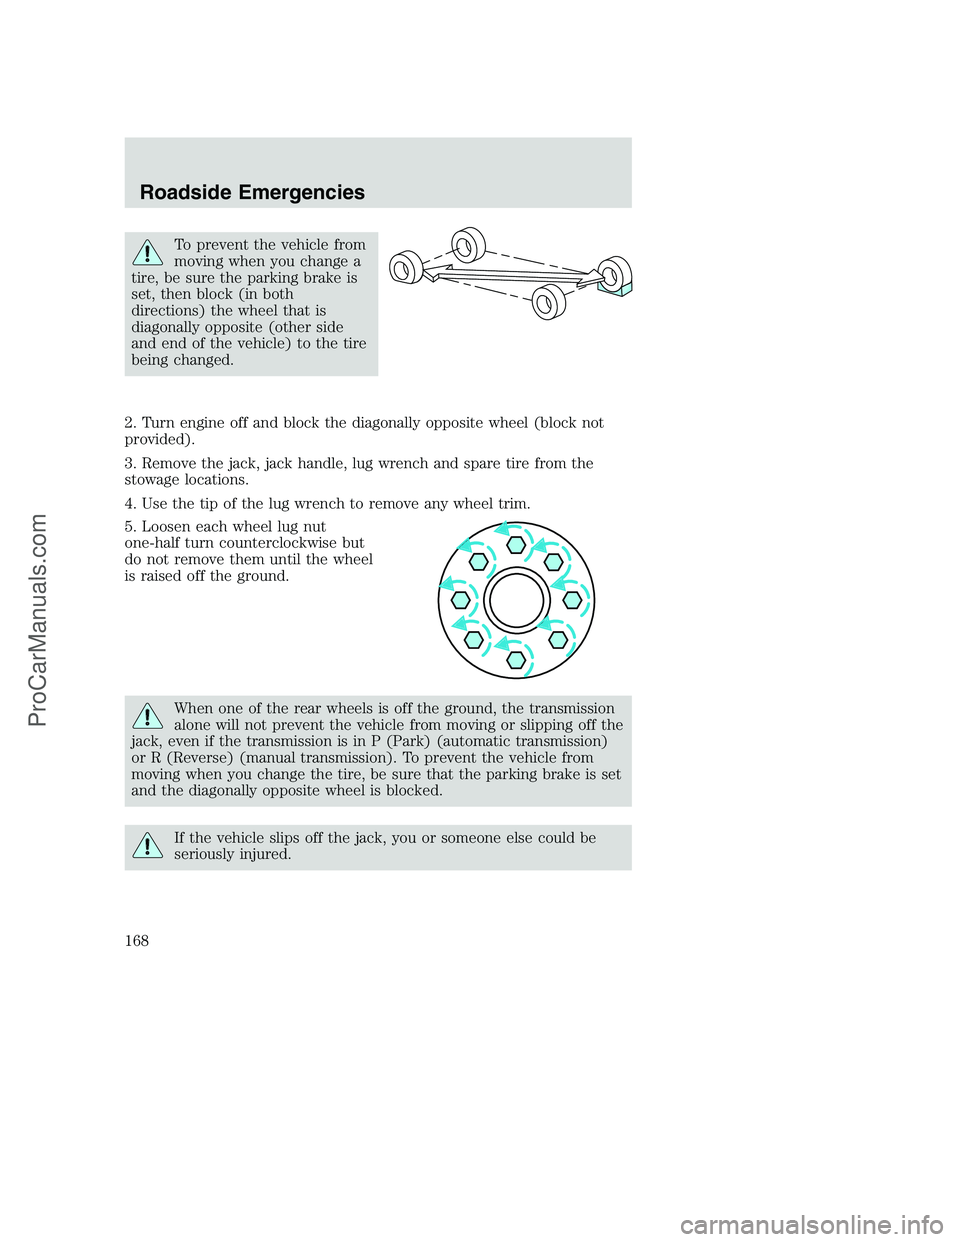
To prevent the vehicle from
moving when you change a
tire, be sure the parking brake is
set, then block (in both
directions) the wheel that is
diagonally opposite (other side
and end of the vehicle) to the tire
being changed.
2. Turn engine off and block the diagonally opposite wheel (block not
provided).
3. Remove the jack, jack handle, lug wrench and spare tire from the
stowage locations.
4. Use the tip of the lug wrench to remove any wheel trim.
5. Loosen each wheel lug nut
one-half turn counterclockwise but
do not remove them until the wheel
is raised off the ground.
When one of the rear wheels is off the ground, the transmission
alone will not prevent the vehicle from moving or slipping off the
jack, even if the transmission is in P (Park) (automatic transmission)
or R (Reverse) (manual transmission). To prevent the vehicle from
moving when you change the tire, be sure that the parking brake is set
and the diagonally opposite wheel is blocked.
If the vehicle slips off the jack, you or someone else could be
seriously injured.
Roadside Emergencies
168
ProCarManuals.com
Page 203 of 264
When lifting a plastic-cased battery, excessive pressure on the
end walls could cause acid to flow through the vent caps,
resulting in personal injury and/or damage to the vehicle or battery.
Lift the battery with a battery carrier or with your hands on opposite
corners.
Keep batteries out of reach of children. Batteries contain sulfuric
acid. Avoid contact with skin, eyes or clothing. Shield your eyes
when working near the battery to protect against possible splashing of
acid solution. In case of acid contact with skin or eyes, flush
immediately with water for a minimum of 15 minutes and get prompt
medical attention. If acid is swallowed, call a physician immediately.
Battery posts, terminals and related accessories contain lead and
lead compounds.Wash hands after handling.
For information on transmission operation after the battery has been
disconnected see “Shift strategy” in the driving section.
Because your vehicle’s engine is also electronically controlled by a
computer, some control conditions are maintained by power from the
battery. When the battery is disconnected or a new battery is installed,
the engine must relearn its idle and fuel trim strategy for optimum
driveability and performance. To begin this process:
1. With the vehicle at a complete stop, set the parking brake.
2. Put the gearshift in P (Park) (automatic transmission) or the neutral
position (manual transmission), turn off all accessories and start the
engine.
3. Run the engine until it reaches normal operating temperature.
4. Allow the engine to idle for at least one minute.
5. Turn the A/C on and allow the engine to idle for at least one minute.
6. Drive the vehicle to complete the relearning process.
•The vehicle may need to be driven 16 km (10 miles) or more to
relearn the idle and fuel trim strategy.
•If you do not allow the engine to relearn its idle trim, the idle
quality of your vehicle may be adversely affected until the idle
trim is eventually relearned.
If the battery has been disconnected or a new battery has been installed,
the clock and the preset radio stations must be reset once the battery is
reconnected.
Maintenance and Specifications
203
ProCarManuals.com