keyless FORD F450 SUPER DUTY 2018 User Guide
[x] Cancel search | Manufacturer: FORD, Model Year: 2018, Model line: F450 SUPER DUTY, Model: FORD F450 SUPER DUTY 2018Pages: 656, PDF Size: 9.34 MB
Page 175 of 656
12 Volt DC Power Point
WARNING
Do not plug optional electrical
accessories into the cigar lighter
socket. Incorrect use of the cigar
lighter can cause damage not covered by
the vehicle warranty, and can result in fire
or serious injury. Note:
When you switch the ignition on, you
can use the socket to power 12 volt
appliances with a maximum current rating
of 20 amps.
Note: Do not plug in any device that
supplies power to the vehicle through the
power points, this may result in damage to
vehicle systems.
Note: Do not hang any accessory from the
accessory plug.
Note: Do not use the power point over the
vehicle capacity of 12 volt DC 240 watts or
a fuse may blow.
Note: Always keep the power point caps
closed when not in use.
Do not insert objects other than an
accessory plug into the power point. This
damages the power point and may blow
the fuse.
Run the vehicle for full capacity use of the
power point.
To prevent the battery from running out of
charge:
• Do not use the power point longer than
necessary when the vehicle is not
running.
• Do not leave devices plugged in
overnight or when you park your vehicle
for extended periods. Locations
Note:
Timed power points remain on for 30
minutes if the vehicle is in accessory mode.
If you switch the vehicle off, the timed
power points remain on for 75 minutes.
Power points may be in the following
locations:
• On the instrument panel.
• Inside the center console.
• On the rear of the center console.
• In the seat bin.
110 Volt - 400 Watt Capacity AC
Power Outlet WARNING
Do not keep electrical devices
plugged in the power point whenever
the device is not in use. Do not use
any extension cord with the 110 volt AC
power point, since it will defeat the safety
protection design. Doing so may cause the
power point to overload due to powering
multiple devices that can reach beyond
the 400 watt load limit and could result in
fire or serious injury. Note:
This feature works only when the
vehicle is running.
Note: This feature has a maximum output
of 400 watts when the vehicle is in park (P).
Note: While in drive (D), the maximum
outlet output is 300 watts.
Note: When powering electric devices that
require more than 10 watts in vehicles
equipped with keyless start, the vehicle
must remain running. It does not allow you
to switch the ignition off or switch the
ignition to accessory mode.
You can use the power point for electric
devices that require up to 400 watts. It is
on the instrument panel and rear of the
center console.
172
Super Duty (TFE) Canada/United States of America, enUSA, Edition date: 201709, First Printing Auxiliary Power Points
Page 181 of 656
D (start) - Cranks the engine.
KEYLESS STARTING
Note: The system may not function if the
intelligent access key is close to metal
objects or electronic devices, for example
keys or a cell phone.
Note: A valid intelligent access key must
be located inside your vehicle to switch the
ignition on and start your vehicle.
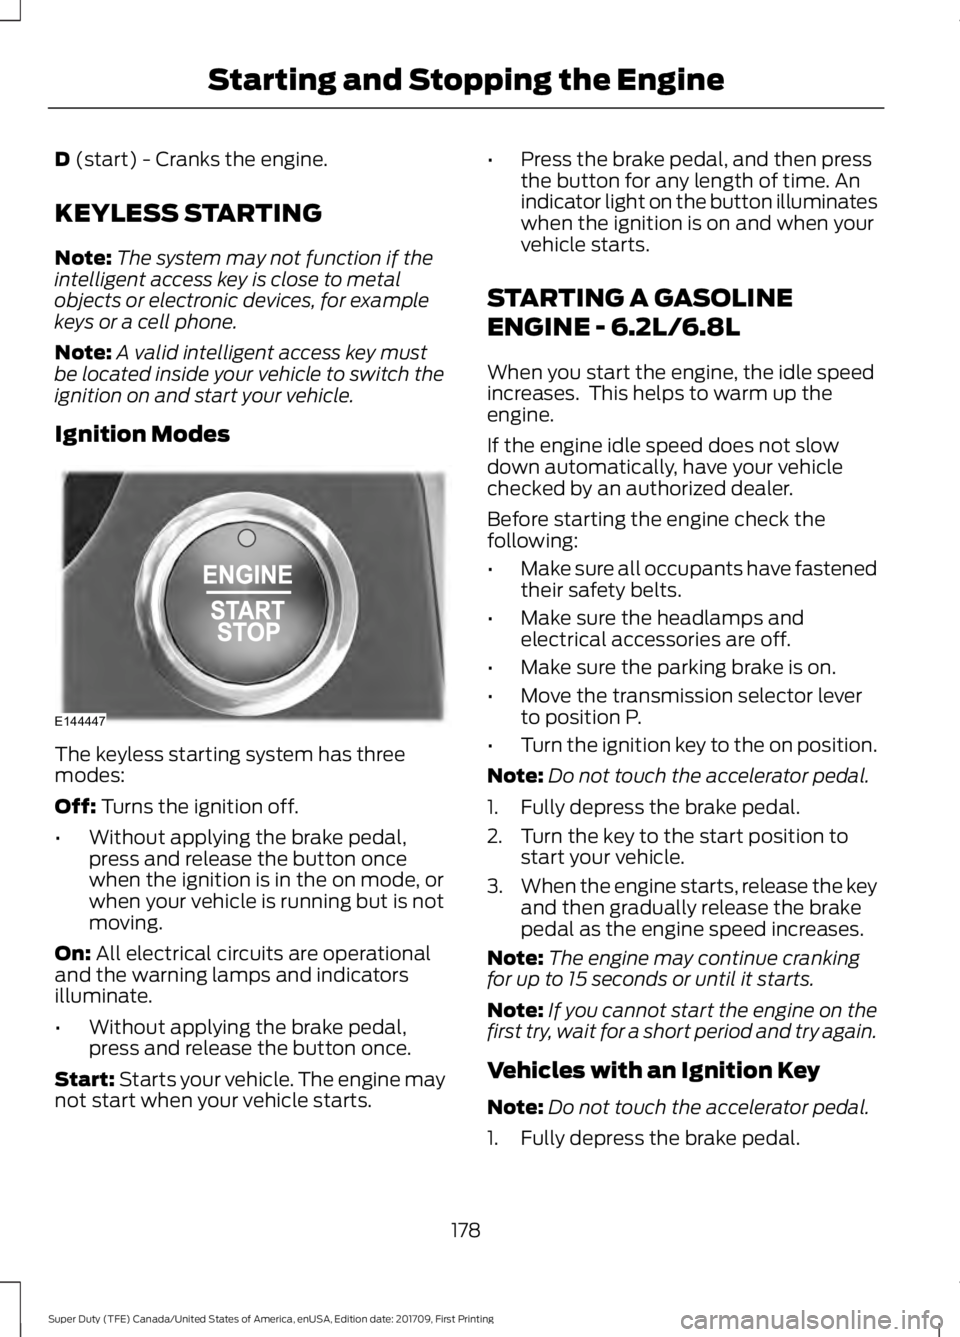
Ignition Modes The keyless starting system has three
modes:
Off:
Turns the ignition off.
• Without applying the brake pedal,
press and release the button once
when the ignition is in the on mode, or
when your vehicle is running but is not
moving.
On:
All electrical circuits are operational
and the warning lamps and indicators
illuminate.
• Without applying the brake pedal,
press and release the button once.
Start:
Starts your vehicle. The engine may
not start when your vehicle starts. •
Press the brake pedal, and then press
the button for any length of time. An
indicator light on the button illuminates
when the ignition is on and when your
vehicle starts.
STARTING A GASOLINE
ENGINE - 6.2L/6.8L
When you start the engine, the idle speed
increases. This helps to warm up the
engine.
If the engine idle speed does not slow
down automatically, have your vehicle
checked by an authorized dealer.
Before starting the engine check the
following:
• Make sure all occupants have fastened
their safety belts.
• Make sure the headlamps and
electrical accessories are off.
• Make sure the parking brake is on.
• Move the transmission selector lever
to position P.
• Turn the ignition key to the on position.
Note: Do not touch the accelerator pedal.
1. Fully depress the brake pedal.
2. Turn the key to the start position to start your vehicle.
3. When the engine starts, release the key
and then gradually release the brake
pedal as the engine speed increases.
Note: The engine may continue cranking
for up to 15 seconds or until it starts.
Note: If you cannot start the engine on the
first try, wait for a short period and try again.
Vehicles with an Ignition Key
Note: Do not touch the accelerator pedal.
1. Fully depress the brake pedal.
178
Super Duty (TFE) Canada/United States of America, enUSA, Edition date: 201709, First Printing Starting and Stopping the EngineE144447
Page 182 of 656
2. Turn the key to position D to start the
engine.
3. When the engine starts, release the brake pedal.
Do not crank the engine for more than 10
seconds as starter damage may occur. If
the engine does not start, switch the
ignition off and wait 30 seconds before
trying again.
Vehicles with Keyless Start
Note: Do not touch the accelerator pedal.
Note: If the push button ignition switch is
pressed again prior to the engine starting
the ignition will switch to accessory mode
and will not start.
Note: If the brake pedal is released before
the engine has started, follow the engine
start sequence again.
1. Fully depress the brake pedal.
2. Press the center of the push button ignition switch.
3. When the engine starts, release the brake pedal.
Failure to Start
If you cannot start the engine after three
attempts, wait 10 seconds and follow this
procedure:
1. Fully depress the brake pedal.
2. Fully press the accelerator pedal and hold it there.
3. Start the engine.
Stopping the Engine When Your
Vehicle is Stationary
1. When your vehicle has stopped, shift into park (P) and switch the ignition
off.
2. Apply the parking brake. Stopping the Engine When Your
Vehicle is Moving WARNING
Switching off the engine when your
vehicle is still moving results in a
significant decrease in braking
assistance. Higher effort is required to
apply the brakes and to stop your vehicle.
A significant decrease in steering
assistance could also occur. The steering
does not lock, but higher effort could be
required to steer your vehicle. When you
switch the ignition off, some electrical
circuits, for example airbags, also turn off.
If you unintentionally switch the ignition
off, shift into neutral (N) and restart the
engine. 1. Put the transmission into neutral (N)
and use the brakes to bring your vehicle
to a safe stop.
2. When your vehicle has stopped, shift into park (P) and switch the ignition
off.
3. Apply the parking brake.
Automatic Engine Shutdown
If your vehicle is equipped with a keyless
ignition, it has a feature that automatically
shuts down the engine if it has been idling
for an extended period of time. The ignition
also turns off in order to save battery
power. Before the engine shuts down, a
message appears in the information
display showing a timer counting down
from 30 seconds. If you do not intervene
within 30 seconds, the engine shuts down.
Another message appears in the
information display to inform you that the
engine has shut down in order to save fuel.
Start your vehicle as you normally do.
179
Super Duty (TFE) Canada/United States of America, enUSA, Edition date: 201709, First Printing Starting and Stopping the Engine
Page 184 of 656
preventing engine damage due to lack of
proper lubrication. After the 30 second
warm-up period, the accelerator pedal will
be operational again and a message
appears informing you the vehicle is ok to
drive.
When you start the engine in extremely
cold temperatures -15°F (-26°C), we
recommend that you allow the engine to
idle for several minutes before you drive
the vehicle.
Before starting the engine check the
following:
• Make sure all occupants have fastened
their seatbelts.
• Make sure the headlamps and
electrical accessories are off.
• Make sure the parking brake is on.
• Make sure the transmission is in park
(P).
Note: Do not press the accelerator during
starting.
Vehicles with an Ignition Key
Note: Do not touch the accelerator pedal.
1. Fully depress the brake pedal.
2. Turn the key to position
C
Note: A message will appear Engine Start
Pending, Please Wait.
3. Wait until the engine glow-plug indicator turns off.
4. Turn the key to position
D to start the
engine.
5. When the engine starts, release the brake pedal.
Do not crank the engine for more than 10
seconds as starter damage may occur. If
the engine does not start, switch the
ignition off and wait 30 seconds before
trying again. Vehicles with Keyless Start
Note:
Do not touch the accelerator pedal.
Note: If the push button ignition switch is
pressed again prior to the engine starting
the ignition will switch to accessory mode
and will not start.
Note: If the brake pedal is released before
the engine has started, follow the engine
start sequence again.
1. Fully depress the brake pedal.
2. Press the center of the push button ignition switch.
Note: A message will appear Engine Start
Pending, Please Wait.
3. When the engine starts, release the brake pedal.
Diesel Engine Fast Start Glow Plug
System
The diesel engine glow system consists of:
• Eight glow plugs (one per cylinder)
• Glow Plug Control Module
• Engine Coolant Temperature sensor
• Barometric pressure sensor
• Environmental temperature sensor
The powertrain and glow plug control
modules electronically control the glow
plug system. After you switch the ignition
on, the glow plug control module
immediately energizes the glow plugs. The
glow plug control module uses the engine
coolant temperature, barometric pressure
sensor and environmental temperature
sensor to determine how long the glow
plugs stay energized. The required time for
the glow plugs to be energized decreases
as the coolant temperature, barometric
pressure and environmental temperature
increase.
181
Super Duty (TFE) Canada/United States of America, enUSA, Edition date: 201709, First Printing Starting and Stopping the Engine
Page 185 of 656
Automatic Engine Shutdown
If your vehicle is equipped with a keyless
ignition, it has a feature that automatically
shuts down the engine if it has been idling
for an extended period. The ignition also
turns off in order to save battery power.
Before the engine shuts down, a message
appears in the information display showing
a timer counting down from 30 seconds.
If you do not intervene within 30 seconds,
the engine shuts down. Another message
appears in the information display to
inform you that the engine has shut down
in order to save fuel. Start your vehicle as
you normally do.
Cold Weather Starting
WARNINGS
Do not use starting fluid, for example
ether, in the air intake system. Such
fluid could cause immediate
explosive damage to the engine and
possible personal injury. Do not add gasoline, gasohol, alcohol
or kerosene to diesel fuel. This
creates a serious fire hazard and
causes engine performance problems. We recommend that the engine block
heater be used for starting when the
temperature is -9°F (-23°C) or colder. See
Engine Block Heater (page 185).
When operating in cold weather, you may
use Motorcraft® cetane improvers or
non-alcohol-based cetane improvers from
a reputable manufacturer as needed. Switch the ignition on. Do not
start the engine until the
glow-plug indicator turns off. When the glow plug pre-heat indicator
turns off, turn the key to start. After you
start the engine, the glow plugs may
remain on for a period. If you do not start
the engine before the glow plug activation
time ends, you will need to reset the glow
plugs by switching the ignition off. After
the engine starts, allow it to idle for about
15 seconds. This protects the engine. Do
not increase engine speed until the oil
pressure gauge indicates normal pressure.
Cold Weather Operation
Note:
Idling in cold weather does not heat
the engine to its normal operating
temperature. Long periods of idling,
especially in cold weather, can cause a
buildup of deposits which can cause engine
damage.
Change to a lighter grade engine oil to
make starting easier under these
conditions. Refer to engine oil
specifications. See
Capacities and
Specifications (page 433).
Diesel fuel is adjusted seasonally for cold
temperatures. Diesel fuel which has not
been properly formulated for the ambient
conditions may gel which can clog the fuel
filters. One indication that the fuel filter(s)
may be clogged is if the engine starts, stalls
after a short time, and then does not
restart. If you have been using biodiesel,
you may need to use a fuel with lower
biodiesel content, try another brand, or
discontinue using biodiesel. Do not use
alcohol based additives to correct fuel
gelling. This may result in damage to the
fuel injectors and system. Use the proper
anti-gel and performance improvement
product. See
Capacities and
Specifications (page 433).
182
Super Duty (TFE) Canada/United States of America, enUSA, Edition date: 201709, First Printing Starting and Stopping the Engine
Page 195 of 656
•
Fuels containing metallic-based
additives, including manganese-based
compounds.
• Fuels containing the octane booster
additive, methylcyclopentadienyl
manganese tricarbonyl (MMT).
• Leaded fuel (using leaded fuel is
prohibited by law).
The use of fuels with metallic compounds
such as methylcyclopentadienyl
manganese tricarbonyl (commonly known
as MMT), which is a manganese-based
fuel additive, will impair engine
performance and affect the emission
control system.
Do not be concerned if the engine
sometimes knocks lightly. However, if the
engine knocks heavily while using fuel with
the recommended octane rating, contact
an authorized dealer to prevent any engine
damage.
RUNNING OUT OF FUEL
Avoid running out of fuel because this
situation may have an adverse effect on
engine components.
If you have run out of fuel:
• You may need to cycle the ignition from
off to on several times after refueling
to allow the fuel system to pump the
fuel from the tank to the engine. On
restarting, cranking time will take a few
seconds longer than normal. With
keyless ignition, just start the engine.
Crank time will be longer than usual.
• Normally, adding 1 gal (4 L) of fuel is
enough to restart the engine. If the
vehicle is out of fuel and on a steep
grade, more than
1 gal (4 L) may be
required. REFUELING - GASOLINE WARNINGS
Fuel vapor burns violently and a fuel
fire can cause severe injuries.
Read and follow all the instructions
on the pump island.
Turn off your engine when you are
refueling.
Do not smoke if you are near fuel or
refueling your vehicle.
Keep sparks, flames and smoking
materials away from fuel.
Stay outside your vehicle and do not
leave the fuel pump unattended
when refueling your vehicle. This is
against the law in some places. Keep children away from the fuel
pump; never let children pump fuel.
Do not use personal electronic
devices while refueling.
Wait at least 10 seconds before
removing the fuel pump nozzle to
allow any residual fuel to drain into
the fuel tank. Stop refueling after the fuel pump
nozzle automatically shuts off for the
second time. Failure to follow this
will fill the expansion space in the fuel tank
and could lead to fuel overflowing. Do not remove the fuel pump nozzle
from its fully inserted position when
refueling.
192
Super Duty (TFE) Canada/United States of America, enUSA, Edition date: 201709, First Printing Fuel and Refueling
Page 300 of 656
Four-wheel Drive Vehicles Equipped
with a Manual-shift Transfer Case
1. Put the transmission in neutral (N).
2. Put the transfer case in neutral (N).
3.
Put the hub locks in the FREE position.
Always make sure that both hub locks
are set to the same position.
Four-wheel Drive Vehicles Equipped
with an Electronic-shift Transfer Case
Only tow a four-wheel drive vehicle that
has an electronic-shift transfer case with
all wheels on the ground. To do this, place
the transfer case in its neutral position and
engage the four-wheel-down towing
feature.
Perform the steps in the following section
after positioning your vehicle behind the
tow vehicle and properly securing them
together.
Note: Make sure you properly secure your
vehicle to the tow vehicle.
Four-wheel-down Towing
1. Put the ignition in the on position, but do not start the engine. If your vehicle
has an ignition key, turn the key to on.
If your vehicle has intelligent access,
press the engine START/STOP button
once without pressing the brake pedal.
2. Press and hold the brake pedal.
3. Rotate the four-wheel drive switch to 2H.
4. Shift the transmission to neutral (N).
5. Rotate the four-wheel drive switch from
2H to 4L and back to 2H five
times within seven seconds.
Note: If completed successfully, the
information display shows a message
indicating that your vehicle is safe to tow
with all wheels on the ground. Note:
If you do not see the message in the
display, you must perform the procedure
again from the beginning.
Note: You may hear an audible noise as the
transfer case shifts into its neutral position.
This is normal.
6. Leave the transmission in neutral (N) and turn the ignition as far as it will go
toward the off position (it will not turn
fully off when the transmission is in
neutral). If your vehicle has an ignition
key, you must leave the key in the
ignition while towing. To lock and
unlock your vehicle, use the keyless
entry keypad or extra set of keys. If your
vehicle has intelligent access, press the
engine
START/STOP button once
without pressing the brake pedal. You
do not need to leave your keys in the
vehicle. You can lock and unlock your
vehicle as you normally do.
7. Release the brake pedal. WARNINGS
Do not disconnect the battery during
recreational towing. It prevents the
transfer case from shifting properly
and may cause the vehicle to roll, even if
the transmission is in park (P). Shifting the transfer case to its
neutral position for recreational
towing may cause the vehicle to roll,
even if the transmission is in park (P). It
may injure the driver and others. Make sure
you press the foot brake and the vehicle is
in a secure, safe position when you shift to
neutral (N). Note:
Failing to put the transfer case in its
neutral position while towing with all four
wheels on the ground will damage vehicle
components.
297
Super Duty (TFE) Canada/United States of America, enUSA, Edition date: 201709, First Printing Towing
Page 577 of 656
For a complete listing of the accessories
that are available for your vehicle, please
contact your authorized dealer or visit the
online store web site:
Web Address (United States)
www.Accessories.Ford.com Web Address (Canada)
www.Accessories.Ford.ca
Ford Custom Accessories are available for
your vehicle through an authorized dealer.
Ford Motor Company will repair or replace
any properly authorized dealer-installed
Ford Original Accessory found to be
defective in factory-supplied materials or
workmanship during the warranty period,
as well as any component damaged by the
defective accessories.
Ford Motor Company will warrant your
vehicle through the warranty that provides
the greatest benefit:
• 24 months, unlimited mileage.
• The remainder of your new vehicle
limited warranty.
Contact an authorized dealer for details
and a copy of the warranty.
Exterior style
• Commercial graphics*.
• Commercial LED warning strobe
lights*.
• Hood deflectors.
• Exhaust tip.
• Running boards.
• Side window deflectors*.
• Splash guards.
• Stainless-steel wheel covers*. •
Step bars.
• Wheel well liners.
Interior style
• Ambient lighting.
• Cargo organizers.
• Custom seat covers*.
• Floor liners.
• Floor mats.
Lifestyle
• Ash cup/smoker's package.
• Bed cargo net, tie down plates and
cleats.
• Bed extender.
• Bedliners and bedmats.
• Bed ramps.
• Hitches.
• Racks and carriers*.
• Sportliner cargo liner*.
• Tonneau/bed cover*.
• Tow hooks.
• Towing accessories.
• Trailer back-up camera.
• Trailer brake control.
• Truck bed camping tent*.
• Trailer TPMS.
Peace of mind
• Back-up alarm*.
• Bed hooks*.
• Bumper and hitch-mounted parking
sensors*.
• Ford Telematics.
• Keyless entry keypad.
• Protective seat covers*.
• Remote start and alarms.
• Roadside assistance kits*.
574
Super Duty (TFE) Canada/United States of America, enUSA, Edition date: 201709, First Printing Accessories
Page 650 of 656
Front Seat Tether Strap Attachment
(Regular Cab)................................................... 30
Rear Seat Tether Strap Attachment (Crew Cab and Super Cab)........................................ 31
Use of Inboard Lower Anchors from the Outboard Seating Positions (Center
Seating Use) .................................................... 28
Using Inflatable Seatbelts (Rear Seat Outboard Positions)...................................... 25
Using Lap and Shoulder Belts (Except Front Center Position of Super Cab and Crew
Cab)....................................................................... 21
Using Lap and Shoulder Belts (Front Center Position of Super Cab and Crew
Cab)...................................................................... 23
Using Lower Anchors and Tethers for CHildren (LATCH)............................................ 27
Using Tether Straps............................................. 29
Instrument Cluster.......................................105
Instrument Lighting Dimmer.....................90 Vehicles With Front Fog Lamps...................... 91
Vehicles Without Front Fog Lamps................91
Instrument Panel Overview.........................17
Interior Lamps.................................................94
Front Interior Lamps........................................... 94
Rear Interior Lamps............................................ 96
Interior Mirror
...................................................101
Automatic Dimming Mirror............................. 102
Manual Dimming Mirror.................................... 101
Introduction.........................................................7
J
Jump Starting the Vehicle........................306 Connecting the Jumper Cables................... 306
Jump Starting...................................................... 307
Preparing Your Vehicle.................................... 306
Removing the Jumper Cables....................... 307
K
Keyless Entry
....................................................70
SECURICODE™ KEYLESS ENTRY
KEYPAD............................................................... 70
Keyless Starting
.............................................178
Ignition Modes...................................................... 178
Keys and Remote Controls.........................56 L
Lane Keeping System
.................................252
Switching the System On and Off...............252
System Display................................................... 253
System Settings................................................. 252
Troubleshooting................................................. 253
Lighting Control
..............................................89
Headlamp Flasher............................................... 90
Headlamp High Beam....................................... 89
Lighting..............................................................89 General Information........................................... 89
Limited Slip Differential............................225
Load Carrying
................................................266
Load Limit......................................................266
Special Loading Instructions for Owners of
Pick-up Trucks and Utility-type
Vehicles............................................................. 270
Vehicle Loading - with and without a Trailer................................................................ 266
Locking and Unlocking.................................67 Activating Intelligent Access............................ 67
Autolock.................................................................. 69
Battery Saver......................................................... 70
Illuminated Entry.................................................. 69
Power Door Locks................................................. 67
Remote Control..................................................... 67
Smart Unlock........................................................ 68
Smart Unlocks for Intelligent Access Keys...................................................................... 68
Lug Nuts See: Changing a Road Wheel....................... 408
M
Maintenance.................................................329 General Information......................................... 329
Manual Climate Control............................148
Manual Seats
.................................................158
Manual Lumbar .................................................. 159
Moving the Seat Backward and Forward............................................................. 159
Recline Adjustment........................................... 159
Memory Function..........................................161 Easy Entry and Exit Feature............................ 162
Linking a PreSet Position to your Remote Control or Intelligent Access Key Fob
........................................................................\
...... 162
647
Super Duty (TFE) Canada/United States of America, enUSA, Edition date: 201709, First Printing Index
Page 653 of 656
Phone....................................................................
548
Radio....................................................................... 551
Sound.................................................................... 546
Valet Mode.......................................................... 560
Vehicle................................................................... 558
Voice Control....................................................... 559
Wi-Fi & Hotspot................................................. 556
Side Airbags.....................................................52
Sitting in the Correct Position..................156
Sliding Windows...........................................102
Power Sliding Back Window.......................... 102
Snow Chains See: Using Snow Chains................................ 400
Snowplowing
.................................................301
Engine temperature while plowing.............302
Installing the Snowplow.................................. 301
Operating the Vehicle with the Snowplow Attached.......................................................... 302
Snowplowing with your Airbag Equipped Vehicle.............................................................. 302
Transmission operation while plowing............................................................. 303
Spare Wheel See: Changing a Road Wheel....................... 408
Special Notices
................................................13
New Vehicle Limited Warranty......................... 13
On Board Diagnostics Data Link Connector............................................................ 13
Special Instructions.............................................. 13
Using a Slide-In Camper..................................... 13
Using your Vehicle as an Ambulance............14
Using your Vehicle as a Stationary Power Source................................................................... 14
Using your Vehicle With a Snowplow............13
Special Operating Conditions Scheduled Maintenance..............................................589
Diesel Engine....................................................... 592
Exceptions............................................................ 597
Gasoline Engine................................................. 589
Speed Control See: Cruise Control............................................ 245
Spot Lamps......................................................93 Cargo and Trailer Hookup Lamps.................. 94
Stability Control
...........................................232
Principle of Operation...................................... 232
Starter Switch See: Ignition Switch............................................ 177Starting a Diesel Engine - 6.7L
Diesel.............................................................180
........................................................................\
........... 180
Automatic Engine Shutdown......................... 182
Cold Weather Operation.................................. 182
Cold Weather Starting...................................... 182
Diesel Engine Fast Start Glow Plug System................................................................ 181
Vehicles with an Ignition Key........................... 181
Vehicles with Keyless Start.............................. 181
Starting a Gasoline Engine - 6.2L/ 6.8L.................................................................178
Automatic Engine Shutdown......................... 179
Cold Weather Starting (Flexible Fuel Vehicles Only)................................................ 180
Failure to Start..................................................... 179
Guarding Against Exhaust Fumes...............180
Important Ventilating Information..............180
Stopping the Engine When Your Vehicle is Moving................................................................ 179
Stopping the Engine When Your Vehicle is Stationary......................................................... 179
Vehicles with an Ignition Key.......................... 178
Vehicles with Keyless Start............................. 179
Starting and Stopping the Engine...........177 General Information........................................... 177
Steering............................................................261 Adaptive Steering.............................................. 262
Power Steering.................................................... 261
Steering Wheel...............................................82
Storage Compartments
.............................174
Sunroof See: Moonroof..................................................... 103
Sun Visors
........................................................102
Illuminated Vanity Mirror................................. 103
Supplementary Restraints System.........46 Principle of Operation........................................ 46
Switching Off the Engine - 6.7L Diesel.............................................................185
Symbols Glossary.............................................8
SYNC™ 3
.......................................................498
General Information......................................... 498
SYNC™ 3 Troubleshooting
.....................560
SYNC™ Applications and Services........................................................476
911 Assist............................................................... 476
SYNC Mobile Apps............................................ 478
650
Super Duty (TFE) Canada/United States of America, enUSA, Edition date: 201709, First Printing Index