automatic transmission fluid FORD F650 2007 11.G Owners Manual
[x] Cancel search | Manufacturer: FORD, Model Year: 2007, Model line: F650, Model: FORD F650 2007 11.GPages: 280, PDF Size: 1.93 MB
Page 15 of 280
Engine starting (parking brake applied)
Parking brake:Check that the parking brake will hold the
vehicle by gently trying to pull forward with
the parking brake applied.
Automatic
transmission fluid:With the engine idling at normal operating
temperature and the parking brake applied,
check the automatic transmission fluid. If fluid
needs to be added, place the transmission in
the appropriate gear as specified in the
transmission operator’s manual and refer to
Transmission fluidin theMaintenance and
Specificationschapter.
Front of vehicle
Lights:Make sure all lights illuminate and are clean.
Make sure headlights function on both high
and low beams. Make sure reflectors are clean
and unbroken and of proper color (red on
rear, amber elsewhere). Make sure the running
lights are also clean and unbroken.
Steering gear:Look for missing or loose fasteners, power
steering fluid leaks and damage to power
steering hoses.
Steering linkage:Make sure connecting links, arms and rods are
not worn or cracked; joints, sockets and boot
seals are not worn or loose and that there are
no loose or missing cotter keys, nuts or bolts.
Tow hooks:Front and rear tow hooks should be inspected
for damage or loose mounting. This is
particularly important on vehicles where tow
hooks are frequently used.
2007 F-650/750(f67)
Supplement
USA(fus)
Vehicle Inspection Guide
15
Page 21 of 280
Trailer
If you are pulling a trailer, an inspection of the trailer similar to that of
the tractor should be done. Such an inspection should follow trailer
manufacturer recommendation and should include at a minimum: general
condition, landing gear, doors, sides, lights, reflectors, suspension,
brakes, tires, wheels, cargo placement, stability and tie-downs.
Transmission
If your vehicle is equipped with an automatic transmission, regularly
check the transmission’s neutral start switch. The engine should only
start in the N (Neutral) or P (Park) positions.
If the unit starts in gear and/or the neutral start switch is not
functioning correctly, the vehicle may inadvertently move which
could result in property damage, personal injury or death.
Check the transmission fluid level and shift linkage for proper operation.
2007 F-650/750(f67)
Supplement
USA(fus)
Vehicle Inspection Guide
21
Page 29 of 280
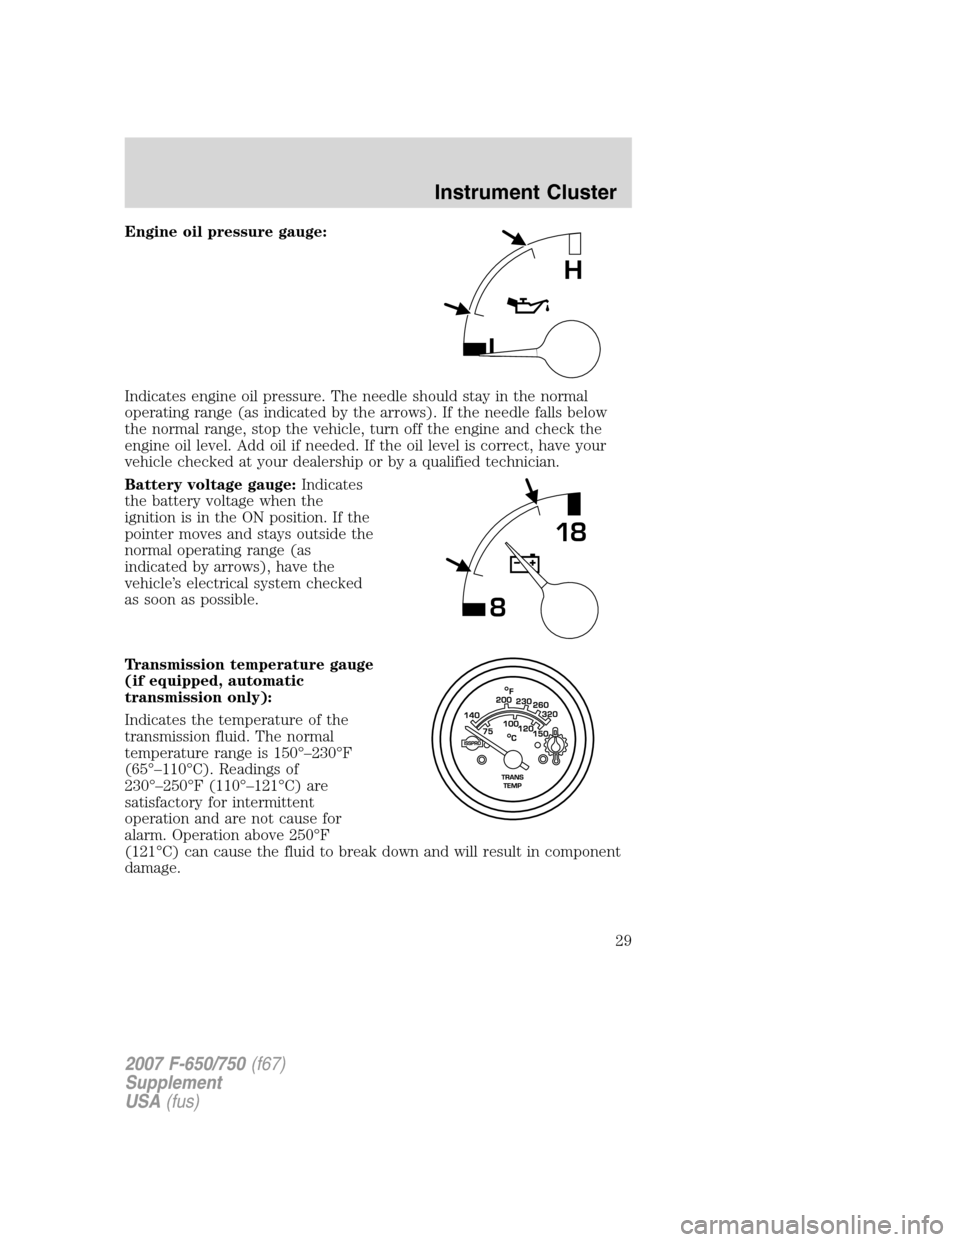
Engine oil pressure gauge:
Indicates engine oil pressure. The needle should stay in the normal
operating range (as indicated by the arrows). If the needle falls below
the normal range, stop the vehicle, turn off the engine and check the
engine oil level. Add oil if needed. If the oil level is correct, have your
vehicle checked at your dealership or by a qualified technician.
Battery voltage gauge:Indicates
the battery voltage when the
ignition is in the ON position. If the
pointer moves and stays outside the
normal operating range (as
indicated by arrows), have the
vehicle’s electrical system checked
as soon as possible.
Transmission temperature gauge
(if equipped, automatic
transmission only):
Indicates the temperature of the
transmission fluid. The normal
temperature range is 150°–230°F
(65°–110°C). Readings of
230°–250°F (110°–121°C) are
satisfactory for intermittent
operation and are not cause for
alarm. Operation above 250°F
(121°C) can cause the fluid to break down and will result in component
damage.
L
H
818
2007 F-650/750(f67)
Supplement
USA(fus)
Instrument Cluster
29
Page 106 of 280
Do not continue to operate the vehicle with a failure of one of
the systems. Take the vehicle to your dealer for service
immediately.
Air brake reservoir draining
Failure to drain air brake reservoirs can result in a reduction or
loss of braking ability due to fluid accumulation in the reservoir
and/or possible freeze-up during cold weather.
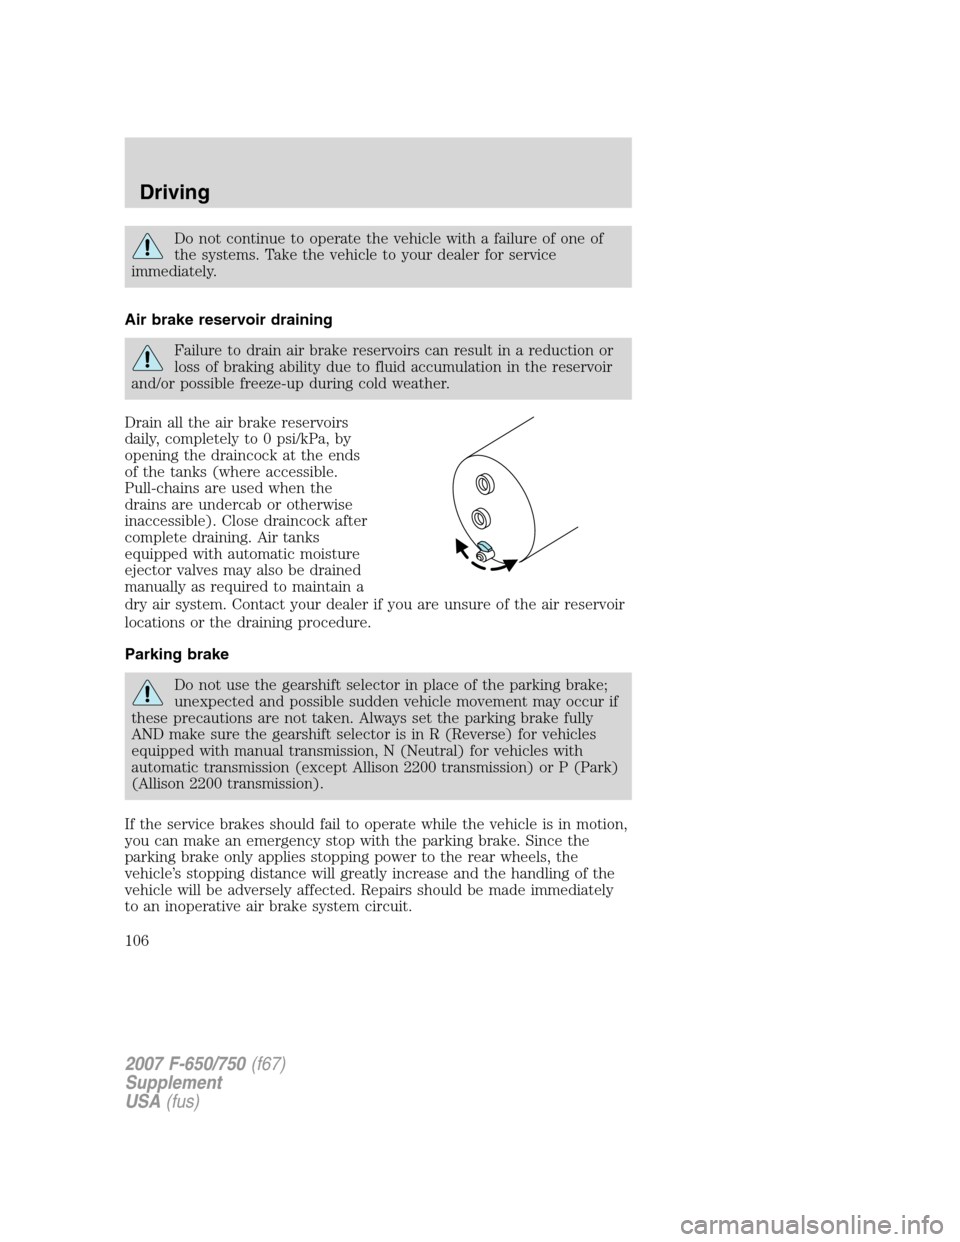
Drain all the air brake reservoirs
daily, completely to 0 psi/kPa, by
opening the draincock at the ends
of the tanks (where accessible.
Pull-chains are used when the
drains are undercab or otherwise
inaccessible). Close draincock after
complete draining. Air tanks
equipped with automatic moisture
ejector valves may also be drained
manually as required to maintain a
dry air system. Contact your dealer if you are unsure of the air reservoir
locations or the draining procedure.
Parking brake
Do not use the gearshift selector in place of the parking brake;
unexpected and possible sudden vehicle movement may occur if
these precautions are not taken. Always set the parking brake fully
AND make sure the gearshift selector is in R (Reverse) for vehicles
equipped with manual transmission, N (Neutral) for vehicles with
automatic transmission (except Allison 2200 transmission) or P (Park)
(Allison 2200 transmission).
If the service brakes should fail to operate while the vehicle is in motion,
you can make an emergency stop with the parking brake. Since the
parking brake only applies stopping power to the rear wheels, the
vehicle’s stopping distance will greatly increase and the handling of the
vehicle will be adversely affected. Repairs should be made immediately
to an inoperative air brake system circuit.
2007 F-650/750 (f67)
Supplement
USA (fus)
Driving
106
Page 123 of 280
RPM while maintaining adequate performance. The transmission will
automatically default to Performance mode when you start the engine.
Pressing MODE on the shifter will activate the Economy mode; this will
also illuminate the Mode ON lamp.
If the engine speed is above idle when a gear is selected using the
shifter, the vehicle will not move. To move the vehicle, the shifter must
be moved to re-select a gear after the engine speed returns to idle.
Note:For more information regarding the Allison 3000 Series, refer to
the separate Allison 3000 Series Operator’s Manual.
Torque lock
If your vehicle is parked on an incline and P (Park) is not properly
engaged (The parking brake is not applied before the transmission is
shifted into P [Park]), the weight of the vehicle may generate an
excessive amount of torque on the park pawl. In this situation, it may be
difficult to shift the transmission out of P (Park). Hold the brake pedal
down while shifting out of P (Park), then release the parking brake.
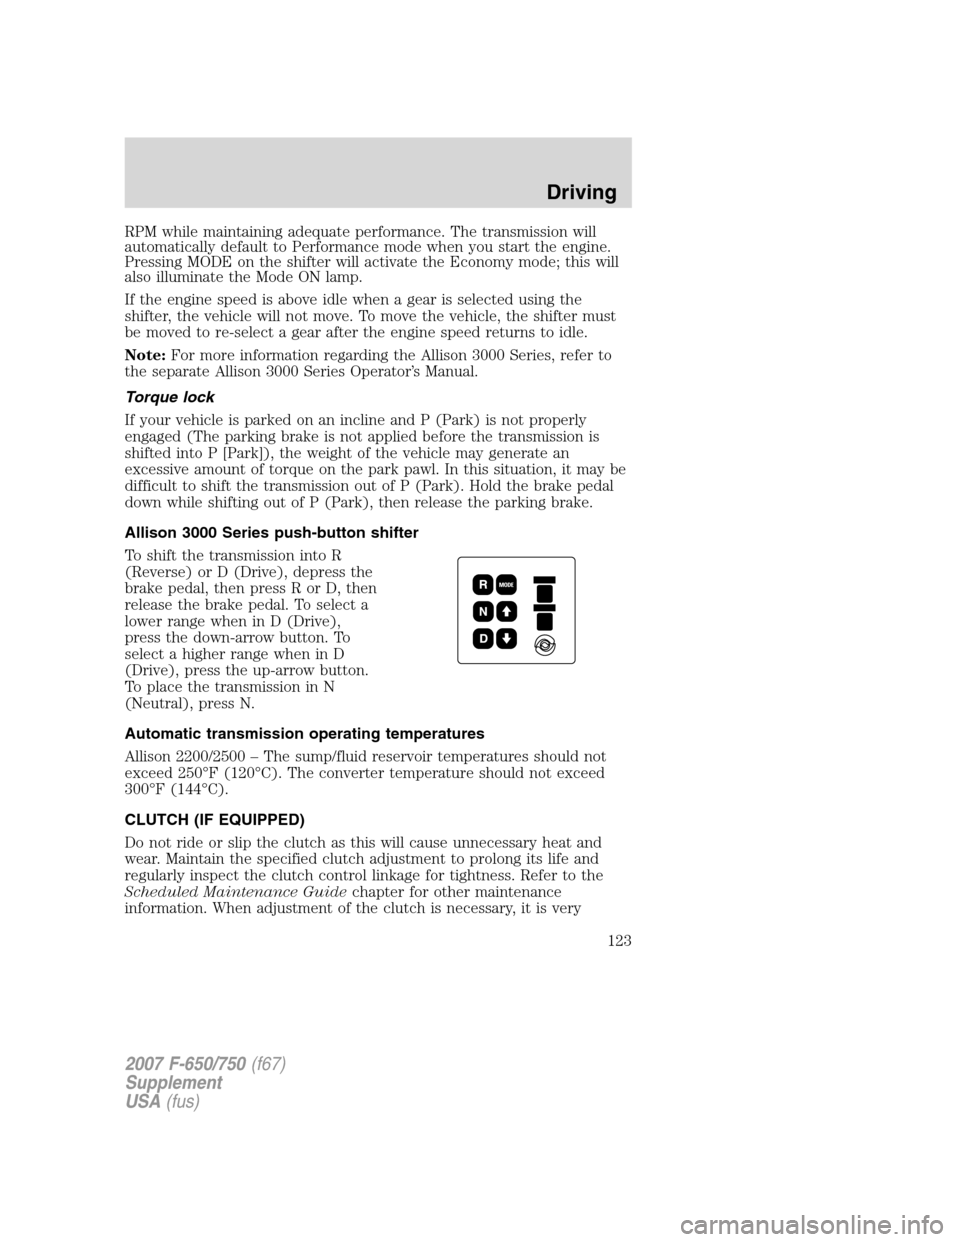
Allison 3000 Series push-button shifter
To shift the transmission into R
(Reverse) or D (Drive), depress the
brake pedal, then press R or D, then
release the brake pedal. To select a
lower range when in D (Drive),
press the down-arrow button. To
select a higher range when in D
(Drive), press the up-arrow button.
To place the transmission in N
(Neutral), press N.
Automatic transmission operating temperatures
Allison 2200/2500 – The sump/fluid reservoir temperatures should not
exceed 250°F (120°C). The converter temperature should not exceed
300°F (144°C).
CLUTCH (IF EQUIPPED)
Do not ride or slip the clutch as this will cause unnecessary heat and
wear. Maintain the specified clutch adjustment to prolong its life and
regularly inspect the clutch control linkage for tightness. Refer to the
Scheduled Maintenance Guide chapter for other maintenance
information. When adjustment of the clutch is necessary, it is very
2007 F-650/750 (f67)
Supplement
USA (fus)
Driving
123
Page 176 of 280
Do not put engine coolant in the washer fluid reservoir. Engine
coolant can severely reduce visibility if sprayed on the
windshield.
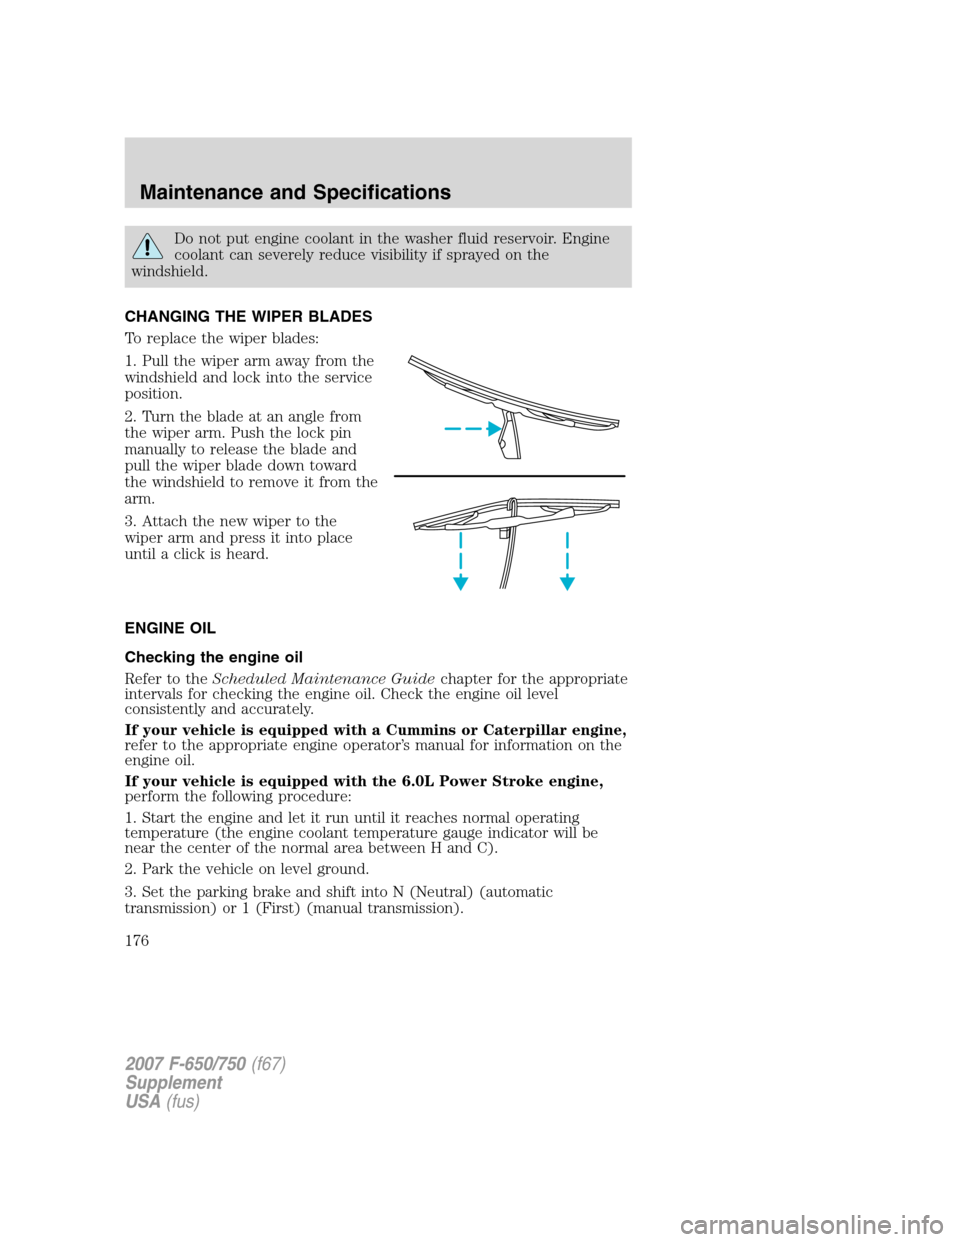
CHANGING THE WIPER BLADES
To replace the wiper blades:
1. Pull the wiper arm away from the
windshield and lock into the service
position.
2. Turn the blade at an angle from
the wiper arm. Push the lock pin
manually to release the blade and
pull the wiper blade down toward
the windshield to remove it from the
arm.
3. Attach the new wiper to the
wiper arm and press it into place
until a click is heard.
ENGINE OIL
Checking the engine oil
Refer to the Scheduled Maintenance Guide chapter for the appropriate
intervals for checking the engine oil. Check the engine oil level
consistently and accurately.
If your vehicle is equipped with a Cummins or Caterpillar engine,
refer to the appropriate engine operator’s manual for information on the
engine oil.
If your vehicle is equipped with the 6.0L Power Stroke engine,
perform the following procedure:
1. Start the engine and let it run until it reaches normal operating
temperature (the engine coolant temperature gauge indicator will be
near the center of the normal area between H and C).
2. Park the vehicle on level ground.
3. Set the parking brake and shift into N (Neutral) (automatic
transmission) or 1 (First) (manual transmission).
2007 F-650/750 (f67)
Supplement
USA (fus)
Maintenance and Specifications
176
Page 195 of 280
•Do a visual inspection for cracks or holes in the muffler and tail pipe.
•Always use the recommended parts when items need to be replaced.
•The tail pipe elbow or offset tail pipe orientation must not be changed
from the standard position as originally received.
•To avoid abnormal changes in vehicle sound levels, it is necessary for
the owner to perform inspections and necessary maintenance at the
intervals shown in theScheduled Maintenance Guidechapter.
POWER STEERING FLUID
Check the power steering fluid level using the following procedure. If
adding fluid is necessary, refer toLubricant Specificationsin this
chapter for the proper fluid type. Refer to theScheduled Maintenance
Guidechapter for the recommended service intervals.
1. Set the parking brake, shift into N (Neutral) (automatic transmission)
or 1 (First) (manual transmission) and turn the engine off.
2. Open the hood.
3. Clean the top of the power steering fluid reservoir.
4. Remove the dipstick from the reservoir and wipe the dipstick clean.
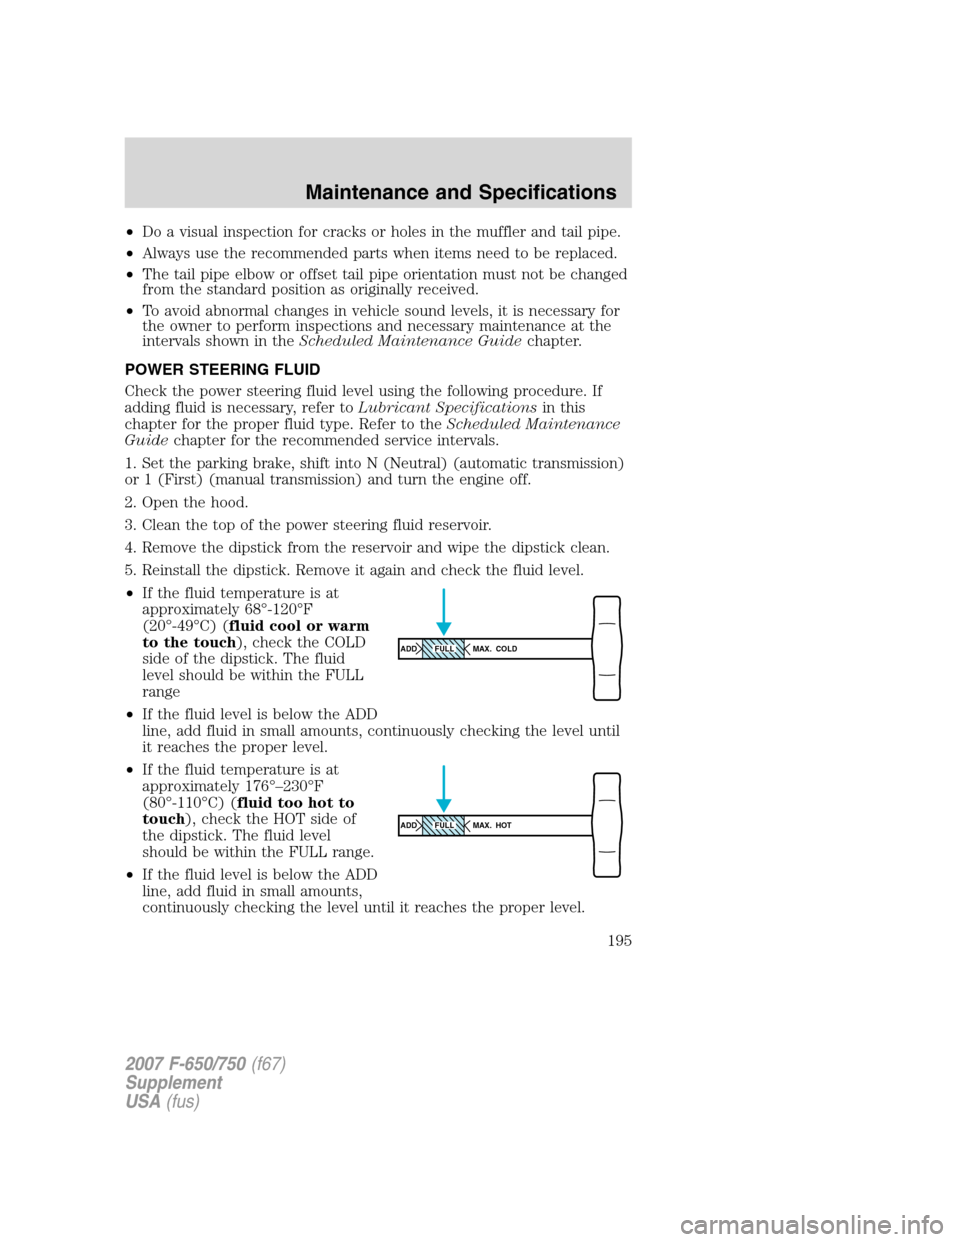
5. Reinstall the dipstick. Remove it again and check the fluid level.
•If the fluid temperature is at
approximately 68°-120°F
(20°-49°C) (fluid cool or warm
to the touch), check the COLD
side of the dipstick. The fluid
level should be within the FULL
range
•If the fluid level is below the ADD
line, add fluid in small amounts, continuously checking the level until
it reaches the proper level.
•If the fluid temperature is at
approximately 176°–230°F
(80°-110°C) (fluid too hot to
touch), check the HOT side of
the dipstick. The fluid level
should be within the FULL range.
•If the fluid level is below the ADD
line, add fluid in small amounts,
continuously checking the level until it reaches the proper level.
ADD MAX. COLDFULL
ADD MAX. HOTFULL
2007 F-650/750(f67)
Supplement
USA(fus)
Maintenance and Specifications
195
Page 198 of 280
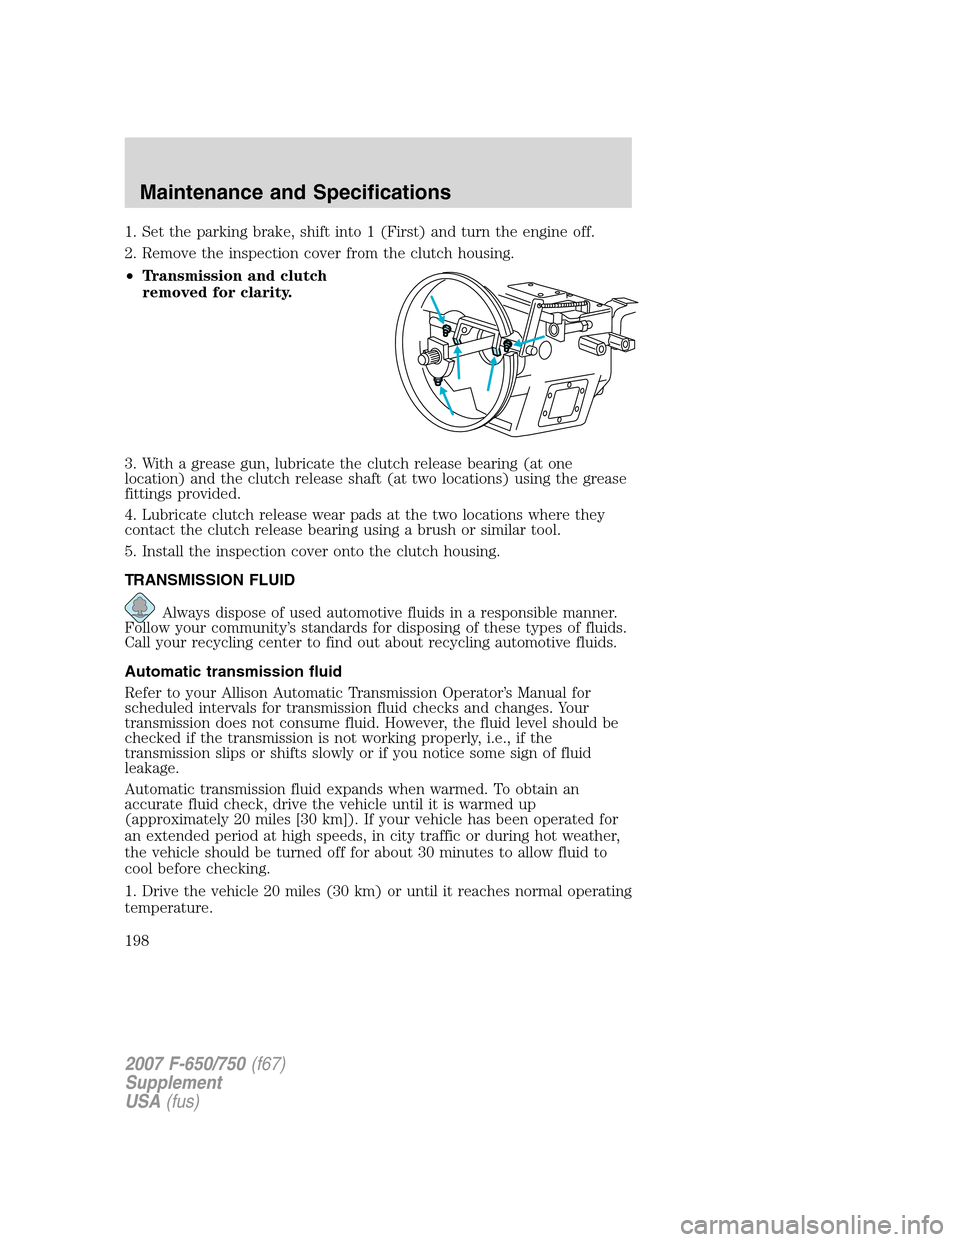
1. Set the parking brake, shift into 1 (First) and turn the engine off.
2. Remove the inspection cover from the clutch housing.
•Transmission and clutch
removed for clarity.
3. With a grease gun, lubricate the clutch release bearing (at one
location) and the clutch release shaft (at two locations) using the grease
fittings provided.
4. Lubricate clutch release wear pads at the two locations where they
contact the clutch release bearing using a brush or similar tool.
5. Install the inspection cover onto the clutch housing.
TRANSMISSION FLUID
Always dispose of used automotive fluids in a responsible manner.
Follow your community’s standards for disposing of these types of fluids.
Call your recycling center to find out about recycling automotive fluids.
Automatic transmission fluid
Refer to your Allison Automatic Transmission Operator’s Manual for
scheduled intervals for transmission fluid checks and changes. Your
transmission does not consume fluid. However, the fluid level should be
checked if the transmission is not working properly, i.e., if the
transmission slips or shifts slowly or if you notice some sign of fluid
leakage.
Automatic transmission fluid expands when warmed. To obtain an
accurate fluid check, drive the vehicle until it is warmed up
(approximately 20 miles [30 km]). If your vehicle has been operated for
an extended period at high speeds, in city traffic or during hot weather,
the vehicle should be turned off for about 30 minutes to allow fluid to
cool before checking.
1. Drive the vehicle 20 miles (30 km) or until it reaches normal operating
temperature.
2007 F-650/750(f67)
Supplement
USA(fus)
Maintenance and Specifications
198
Page 199 of 280
2. Park the vehicle on a level surface and engage the parking brake.
3. With the parking brake engaged and your foot on the brake pedal,
start the engine and move the gearshift lever through all of the gear
ranges. Allow sufficient time for each gear to engage.
4. Place the gearshift lever in N (Neutral) or P (Park) and leave the
engine running.
5. Remove the dipstick, wiping it clean with a clean, dry lint free rag.
6. Install the dipstick making sure it is fully seated in the filler tube.
7. Remove the dipstick and inspect the fluid level.
If you must add transmission fluid, make sure the correct type of fluid is
being used. The type of fluid used is indicated in your Allison Automatic
Transmission Operator’s Manual.
Fluid levels above the safe range may result in transmission failure; an
overfill condition of transmission fluid may cause shift and/or
engagement concerns and/or possible damage.
Use of a non-approved automatic transmission fluid may cause
internal transmission component damage.
Manual transmission fluid
Refer to theScheduled Maintenance Guidechapter for transmission
fluid level checks and fluid change intervals.
Your manual transmission may be filled with an optional synthetic fluid
which allows the use of extended service intervals. A tag on the filler
plug will identify the use of the synthetic fluid.
Use only fluid that meets manufacturer specifications (refer to
Lubricant specificationsin this chapter.
Use of a non-approved transmission fluid may cause internal
transmission component damage.
Check your transmission fluid level using the following procedure:
1. Park the vehicle on level ground.
2. Set the parking brake and shift into 1 (First) and turn the engine off.
3. Clean any dirt from around the filler plug.
4. Remove the filler plug and inspect the fluid level.
5. The fluid level should be up to the bottom of the filler plug opening.
6. If necessary, add enough fluid through the filler plug opening so that
the fluid level is at the bottom of the opening.
2007 F-650/750(f67)
Supplement
USA(fus)
Maintenance and Specifications
199
Page 204 of 280
REAR AXLE LUBRICANT
Refer to theScheduled Maintenance Guidechapter for rear axle
lubricant level checks and lubricant change intervals.
Your rear axle may be filled with an optional synthetic lubricant which
allows the use of extended service intervals. A tag on the filler plug will
identify the use of the synthetic lubricant.
Use only a lubricant that meets manufacturer specifications (refer to
Lubricant specificationsin this chapter).
Use of a non-approved rear axle lubricant may cause internal axle
component damage.
Checking the rear axle lubricant level
1. Park the vehicle on level ground.
2. Set the parking brake and shift into N (Neutral) (automatic
transmission) or 1 (First) (manual transmission) and turn the engine off.
3. Clean any dirt from around the rear axle filler plug.
4. Remove the filler plug and inspect the lubricant level.
5. The lubricant level should be up to the bottom of the filler plug
opening.
6. If necessary, add enough lubricant through the filler plug opening so
that the lubricant level is at the bottom of the opening.
7. Clean and install the filler plug securely.
Draining and refilling the rear axle lubricant
1. Drain the rear axle while the lubricant is warm.
2. Park the vehicle on level ground.
3. Set the parking brake and shift into N (Neutral) (automatic
transmission) or 1 (First) (manual transmission) and turn the engine off.
4. Clean any dirt from around the rear axle filler and drain plugs.
5. Remove the filler and drain plugs and drain the lubricant into a
suitable container. Dispose of all used automotive fluids in a responsible
manner following your local authorized standards.
6. Clean and install the drain plug securely.
7. Add enough lubricant through the filler plug opening so that the
lubricant level is up to the bottom of the opening.
8. Clean and install the filler plug securely.
2007 F-650/750(f67)
Supplement
USA(fus)
Maintenance and Specifications
204