tow FORD F650 2008 11.G User Guide
[x] Cancel search | Manufacturer: FORD, Model Year: 2008, Model line: F650, Model: FORD F650 2008 11.GPages: 273, PDF Size: 1.71 MB
Page 68 of 273
Press down on the switch to reduce
the firmness (lumbar support) of
the seatback.
Air-Ride seat with self-contained pump (if equipped)
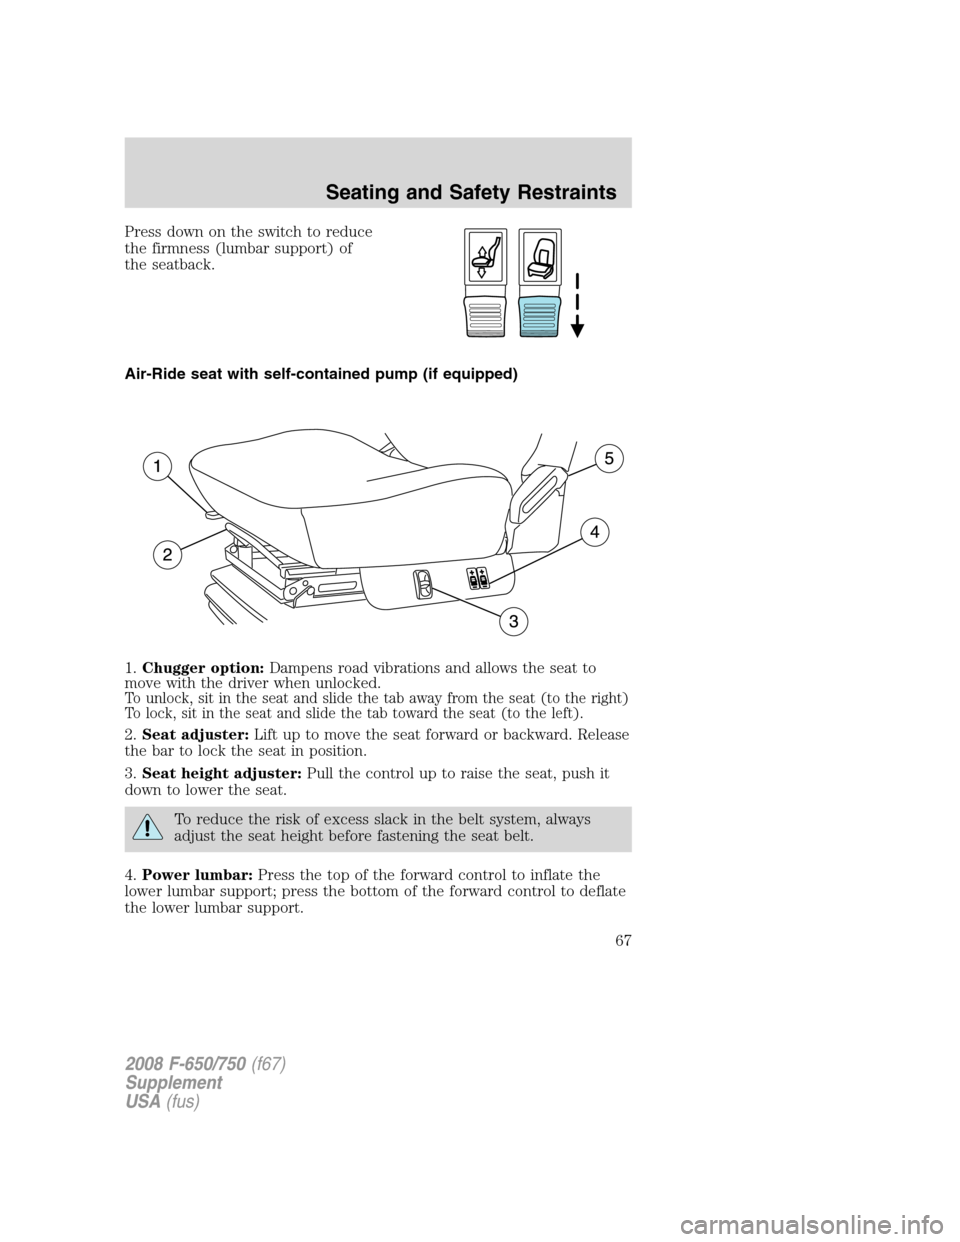
1.Chugger option:Dampens road vibrations and allows the seat to
move with the driver when unlocked.
To unlock, sit in the seat and slide the tab away from the seat (to the right)
To lock, sit in the seat and slide the tab toward the seat (to the left).
2.Seat adjuster:Lift up to move the seat forward or backward. Release
the bar to lock the seat in position.
3.Seat height adjuster:Pull the control up to raise the seat, push it
down to lower the seat.
To reduce the risk of excess slack in the belt system, always
adjust the seat height before fastening the seat belt.
4.Power lumbar:Press the top of the forward control to inflate the
lower lumbar support; press the bottom of the forward control to deflate
the lower lumbar support.
2008 F-650/750(f67)
Supplement
USA(fus)
Seating and Safety Restraints
67
Page 82 of 273
Follow all instructions provided by the manufacturer of the
booster seat.
Never put the shoulder belt under a child’s arm or behind the
back because it eliminates the protection for the upper part of
the body and may increase the risk of injury or death in a collision.
Never use pillows, books, or towels to boost a child. They can
slide around and increase the likelihood of injury or death in a
collision.
SAFETY SEATS FOR CHILDREN
Child and infant or child safety seats
Use a safety seat that is recommended for the size and weight of the
child. Carefully follow all of the manufacturer’s instructions with the
safety seat you put in your vehicle. If you do not install and use the
safety seat properly, the child may be injured in a sudden stop or
collision.
When installing a child safety seat:
•Use the correct safety belt buckle
for that seating position.
•Insert the belt tongue into the
proper buckle until you hear a
snap and feel it latch. Make sure
the tongue is securely fastened in
the buckle.
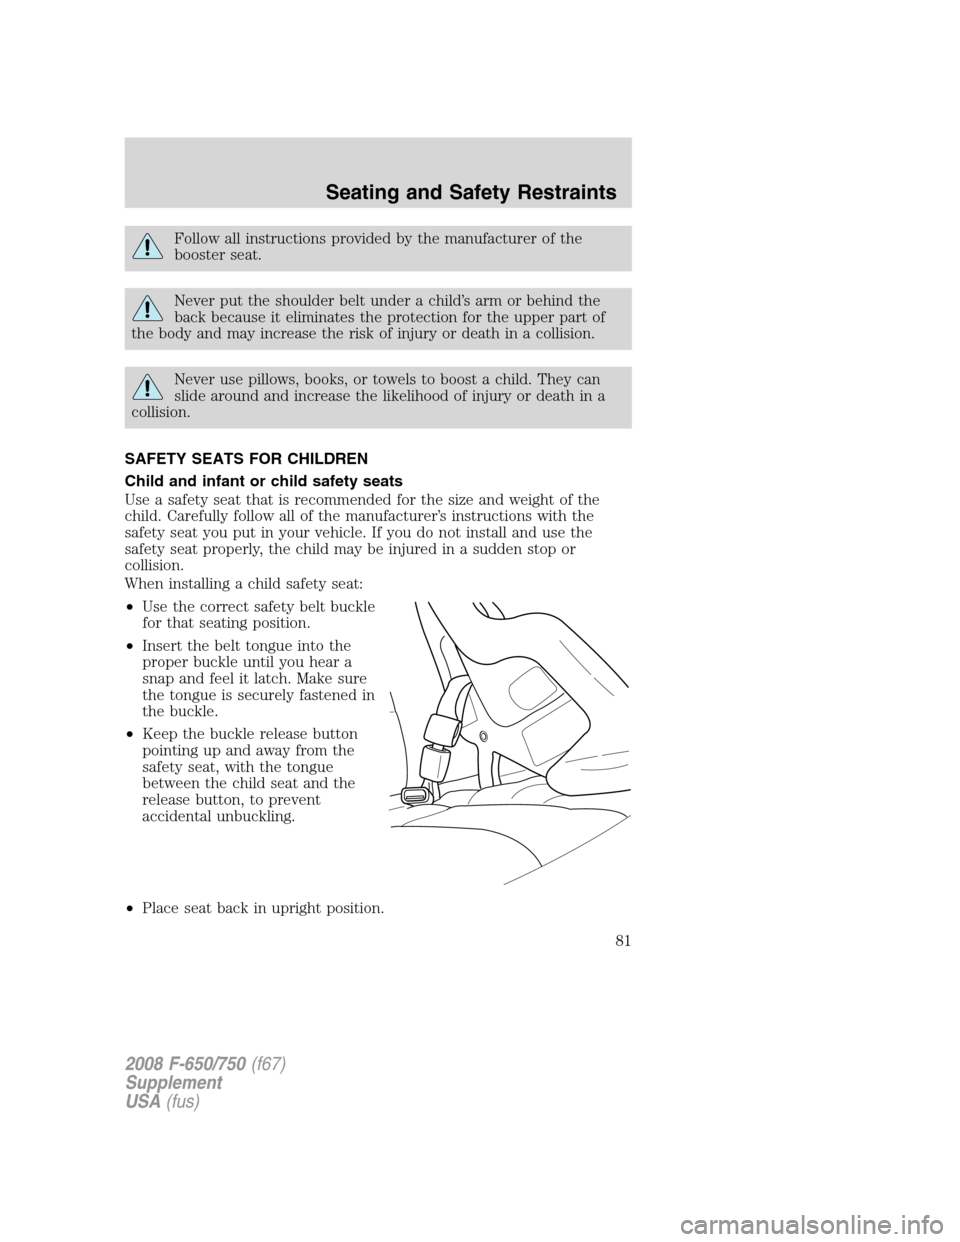
•Keep the buckle release button
pointing up and away from the
safety seat, with the tongue
between the child seat and the
release button, to prevent
accidental unbuckling.
•Place seat back in upright position.
2008 F-650/750(f67)
Supplement
USA(fus)
Seating and Safety Restraints
81
Page 102 of 273
Parking brake control (knob)
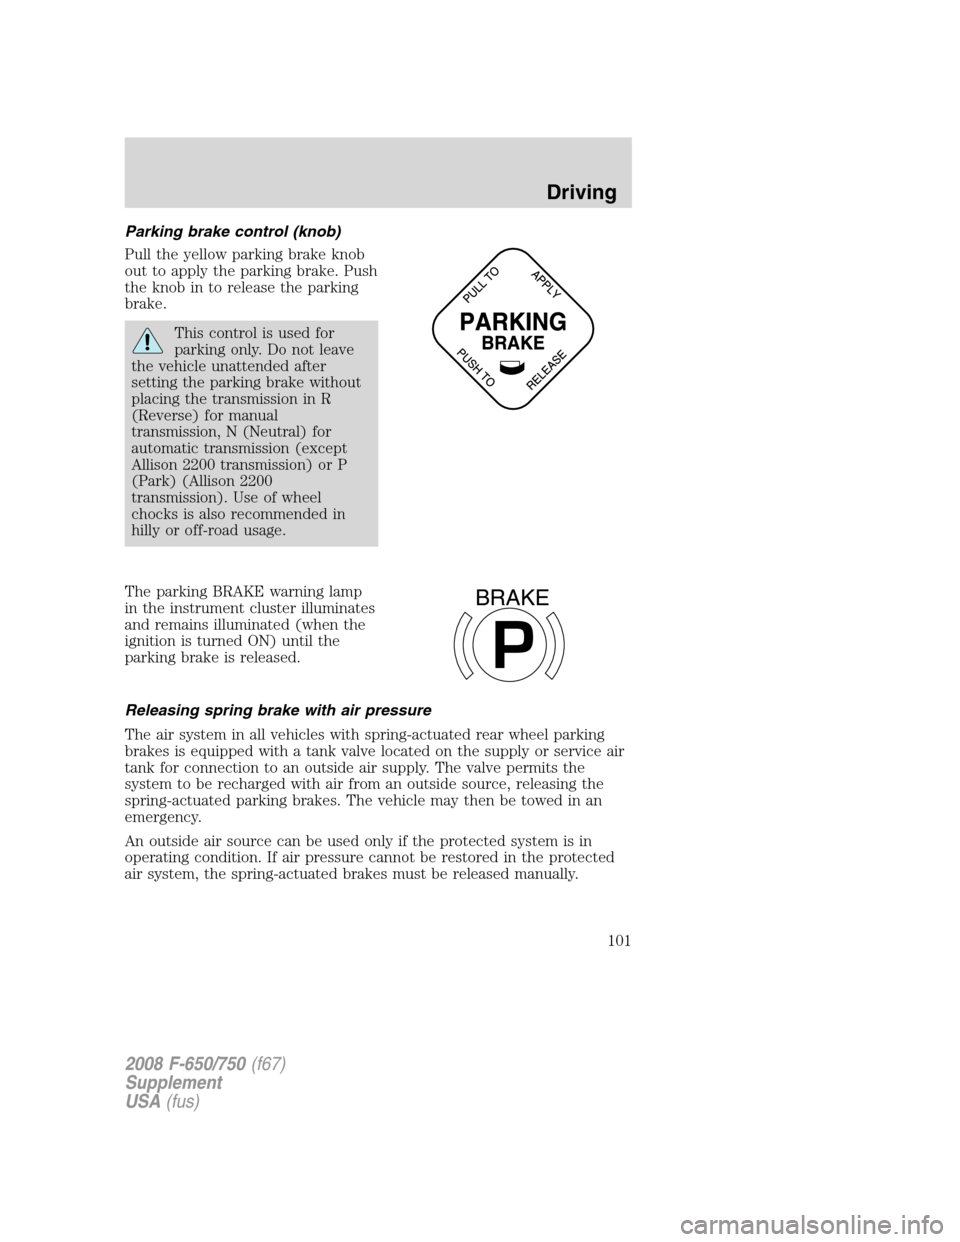
Pull the yellow parking brake knob
out to apply the parking brake. Push
the knob in to release the parking
brake.
This control is used for
parking only. Do not leave
the vehicle unattended after
setting the parking brake without
placing the transmission in R
(Reverse) for manual
transmission, N (Neutral) for
automatic transmission (except
Allison 2200 transmission) or P
(Park) (Allison 2200
transmission). Use of wheel
chocks is also recommended in
hilly or off-road usage.
The parking BRAKE warning lamp
in the instrument cluster illuminates
and remains illuminated (when the
ignition is turned ON) until the
parking brake is released.
Releasing spring brake with air pressure
The air system in all vehicles with spring-actuated rear wheel parking
brakes is equipped with a tank valve located on the supply or service air
tank for connection to an outside air supply. The valve permits the
system to be recharged with air from an outside source, releasing the
spring-actuated parking brakes. The vehicle may then be towed in an
emergency.
An outside air source can be used only if the protected system is in
operating condition. If air pressure cannot be restored in the protected
air system, the spring-actuated brakes must be released manually.
P
BRAKE
2008 F-650/750(f67)
Supplement
USA(fus)
Driving
101
Page 130 of 273
When operating empty or lightly loaded, sudden or hard braking
may induce wheel lockup with loss of vehicle control and the
possibility of accident and serious injury, especially on wet or slippery
road surfaces.
TRAILER TOWING
Towing a trailer places an additional load on your vehicle’s engine,
transmission, axle, brakes, tires and suspension. Inspect these
components carefully prior to and after any towing operation.
Your vehicle’s load capacity is designated by weight, not by volume, so
you cannot necessarily use all available space when loading a vehicle.
2nd unit bodies are not included in maximum trailer weight ratings. The
weight of the additional “body” must be subtracted from the maximum
trailer weight.
Note:Do not exceed the GVWR or the GAWR specified on the
certification label.
Towing trailers beyond the maximum recommended gross trailer
weight exceeds the limit of the vehicle and could result in
engine damage, transmission damage, structural damage, loss of vehicle
control, vehicle rollover and personal injury.
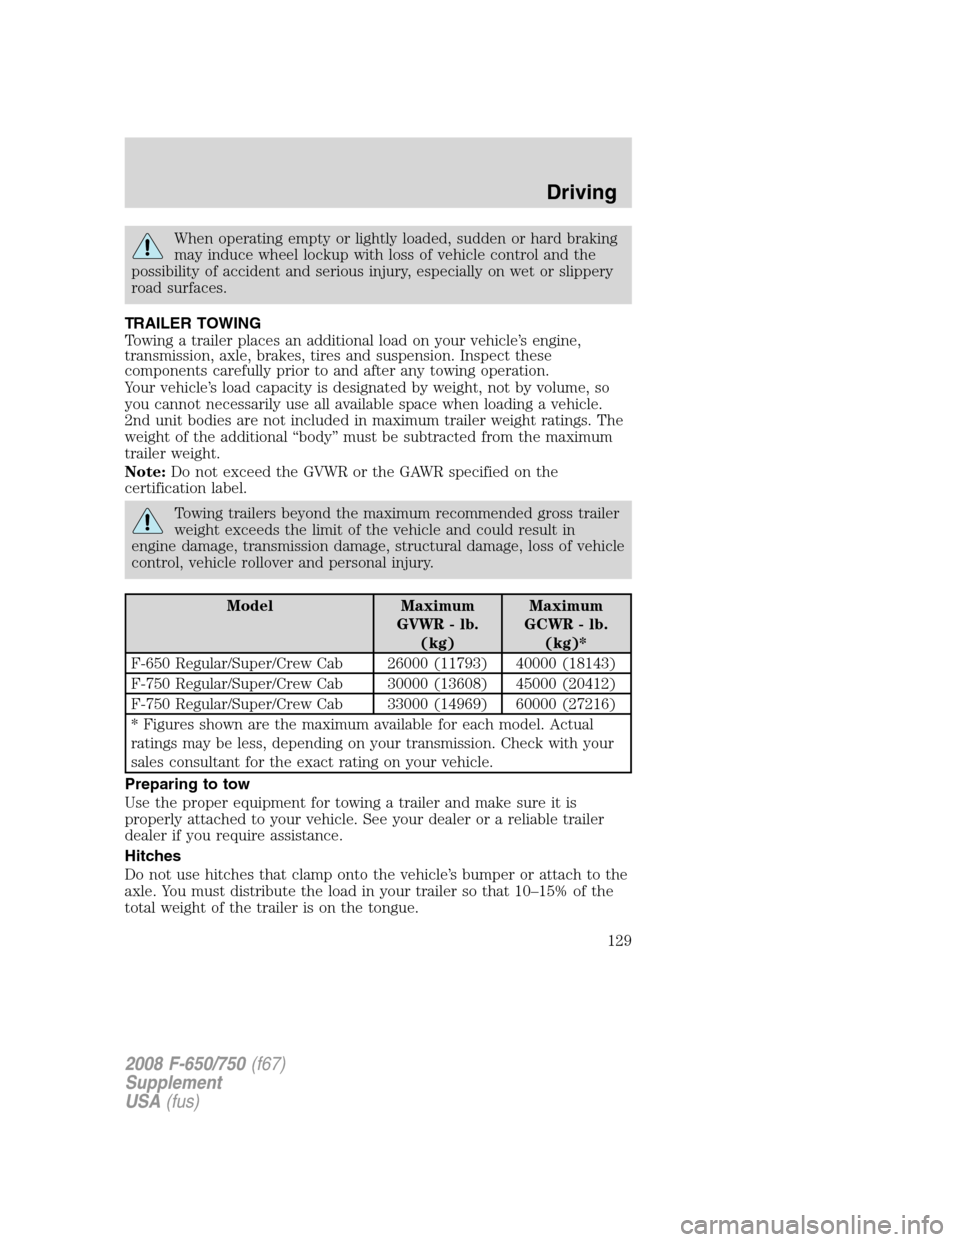
Model Maximum
GVWR - lb.
(kg)Maximum
GCWR - lb.
(kg)*
F-650 Regular/Super/Crew Cab 26000 (11793) 40000 (18143)
F-750 Regular/Super/Crew Cab 30000 (13608) 45000 (20412)
F-750 Regular/Super/Crew Cab 33000 (14969) 60000 (27216)
* Figures shown are the maximum available for each model. Actual
ratings may be less, depending on your transmission. Check with your
sales consultant for the exact rating on your vehicle.
Preparing to tow
Use the proper equipment for towing a trailer and make sure it is
properly attached to your vehicle. See your dealer or a reliable trailer
dealer if you require assistance.
Hitches
Do not use hitches that clamp onto the vehicle’s bumper or attach to the
axle. You must distribute the load in your trailer so that 10–15% of the
total weight of the trailer is on the tongue.
2008 F-650/750(f67)
Supplement
USA(fus)
Driving
129
Page 131 of 273
Safety chains
Always connect the trailer’s safety chains to the frame or hook retainers
of the vehicle hitch. To connect the trailer’s safety chains, cross the
chains under the trailer tongue and allow slack for turning corners.
If you use a rental trailer, follow the instructions that the rental agency
gives to you.
Do not attach safety chains to the bumper.
Trailer brakes
Electric brakes and manual, automatic or surge-type trailer brakes are
safe if installed properly and adjusted to the manufacturer’s
specifications. The trailer brakes must meet local and Federal
regulations.
Do not connect a trailer’s hydraulic brake system directly to your
vehicle’s brake system. Your vehicle may not have enough
braking power and your chances of having a collision greatly increase.
Trailer lamps
Trailer lamps are required on most towed vehicles. Your vehicle may be
equipped with one of two possible trailer wiring designs. Make sure all
running lights, brake lights, turn signals and hazard lights are working.
See your dealer or trailer rental agency for proper instructions and
equipment for hooking up trailer lamps.
Driving while you tow
When towing a trailer:
•Keep your speed no faster than 70 mph (112 km/h) during the first
500 miles (800 km) of towing a trailer, and don’t make full throttle
starts.
•Turn off the speed control. The speed control may shut off
automatically when you are towing on long, steep grades.
•Consult your local motor vehicle speed regulations for towing a trailer.
•To eliminate excessive transmission shifting, use a lower gear. This will
also assist in transmission cooling.
•Anticipate stops and brake gradually.
•Do not exceed the GCWR rating or transmission damage may occur.
Servicing after towing
If you tow a trailer for long distances, your vehicle will require more
frequent service intervals. Refer to yourScheduled Maintenance Guide
for more information.
2008 F-650/750(f67)
Supplement
USA(fus)
Driving
130
Page 132 of 273
Trailer towing tips
•Practice turning, stopping and backing up before starting on a trip to
get the feel of the vehicle trailer combination. When turning, make
wider turns so the trailer wheels will clear curbs and other obstacles.
•Allow more distance for stopping with a trailer attached.
•If you are driving down a long or steep hill, shift to a lower gear. Do
not apply the brakes continuously, as they may overheat and become
less effective.
•The trailer tongue weight should be 10–15% of the loaded trailer
weight.
•If you will be towing a trailer frequently in hot weather, hilly
conditions, at GCW, or any combination of these factors, consider
refilling your rear axle with synthetic gear lube if not already so
equipped. Refer toLubricant specificationsin theMaintenance and
Specificationschapter for the lubricant specification. Remember that
regardless of the rear axle lube used, do not tow a trailer for the first
500 miles (800 km) of a new vehicle, and that the first 500 miles
(800 km) of towing be done at no faster than 70 mph (112 km/h) with
no full throttle starts.
•After you have traveled 50 miles (80 km), thoroughly check your
hitch, electrical connections and trailer wheel lug nuts.
•To aid in engine/transmission cooling and A/C efficiency during hot
weather while stopped in traffic, place the gearshift lever in P (Park)
(if available on your automatic transmission) or N (Neutral) (manual
transmissions and automatic transmissions withoutaP[Park]
position).
•Vehicles with trailers should not be parked on a grade. If you must
park on a grade, place wheel chocks under the trailer’s wheels.
FIFTH WHEEL OPERATION
Failure to follow the fifth wheel manufacturer’s instructions for
hooking and unhooking as well as sliding the fifth wheel could
result in an accident, personal injury or death.
When the tractor and trailer are parked unattended, the trailer
brake hand control should never be used to apply the brake,
since air may leak from the system, allowing vehicle movement,
resulting in possible property damage, personal injury or death.
2008 F-650/750(f67)
Supplement
USA(fus)
Driving
131
Page 135 of 273
GETTING ROADSIDE ASSISTANCE
To fully assist you should you have a vehicle concern, Ford offers a
complimentary roadside assistance program. This program is separate
from the New Vehicle Limited Warranty and is not applicable to vehicles
sold in Canada. The service is available:
•24–hours, seven days a week
•for the New Vehicle Limited Warranty period (U.S.) of two years
(unlimited miles)
Roadside assistance will cover:
•battery jump start.
•lock out assistance (key replacement is customer responsibility).
•towing – Ford/Mercury/Lincoln eligible vehicle towed to the nearest
authorized dealer within 35 miles (56.3 km) of the disablement
location or to the nearest authorized dealer. If a member requests to
be towed to the nearest authorized dealer more than 35 miles
(56.3 km) from the disablement location, the member shall be
responsible for any mileage costs in excess of 35 miles (56.3 km).
Trailers shall be covered up to $100 if the disabled Eligible Vehicles
requires service at the nearest authorized dealer. If the trailer is disabled,
but the towing vehicle is operational, the trailer does not qualify for any
Roadside services.
Using roadside assistance
Complete the roadside assistance identification card and place it in your
wallet for quick reference. This card is found in the Owner Guide
portfolio in the glove compartment.
To receive roadside assistance in the United States, call 1-800-241-3673.
If you need to arrange roadside assistance for yourself, Ford will
reimburse a reasonable amount. To obtain information about
reimbursement, call 1-800-241-3673.
2008 F-650/750(f67)
Supplement
USA(fus)
Roadside Emergencies
134
Page 141 of 273
Fuse/Relay
LocationFuse Amp
RatingFuse Description
111 30A** Park lamps relay, Park lamps
112 40A** Blower motor relay, Blower motor
113 30A** Heated seats
114 25A** Hydraulic ABS ECU power
115 20A** Ignition switch, Central Junction Box fuses 8,
9, 10 and 11, Starter motor relay
116 30A** Left/Right turn relays, Back-up lamp relay
117 20A** Stoplamps relay
118 60A** Hydraulic brake vehicles (Trailer tow package
only)
119/120 60A** Hydraulic brake vehicle (Trailer tow package
only)
Air brake vehicles (Trailer tow package only)
121/122 60A** Hydraulic brake, ABS system
Air brake trailer tow fuse block
201 — Washer pump relay
202 — Wiper speed relay
203 — Wiper on/off relay
204 — Wiper power relay
205 — RH stop/turn relay
206 — LH stop/turn relay
207 — Hydraulic ABS event relay
208 — Back-up lamps relay
209 — Stoplamp relay
301 — Fuel heater/Fuel transfer pump relay
302 — Park lamps relay
303 — Blower motor relay
304 — Air ABS relay
Hydraulic modulator relay
* Mini fuse **Maxi fuse
2008 F-650/750(f67)
Supplement
USA(fus)
Roadside Emergencies
140
Page 142 of 273
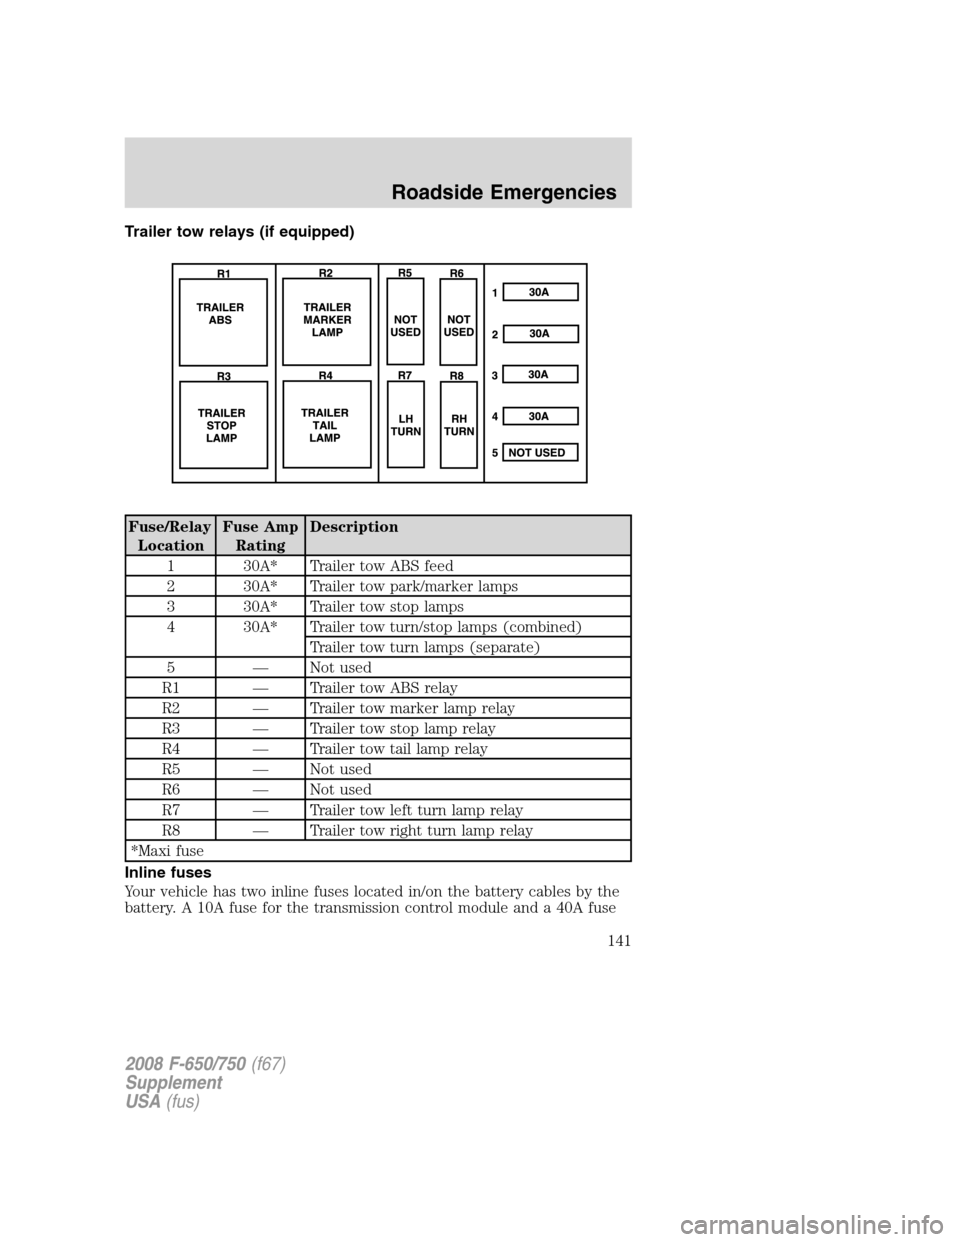
Trailer tow relays (if equipped)
Fuse/Relay
LocationFuse Amp
RatingDescription
1 30A* Trailer tow ABS feed
2 30A* Trailer tow park/marker lamps
3 30A* Trailer tow stop lamps
4 30A* Trailer tow turn/stop lamps (combined)
Trailer tow turn lamps (separate)
5 — Not used
R1 — Trailer tow ABS relay
R2 — Trailer tow marker lamp relay
R3 — Trailer tow stop lamp relay
R4 — Trailer tow tail lamp relay
R5 — Not used
R6 — Not used
R7 — Trailer tow left turn lamp relay
R8 — Trailer tow right turn lamp relay
*Maxi fuse
Inline fuses
Your vehicle has two inline fuses located in/on the battery cables by the
battery. A 10A fuse for the transmission control module and a 40A fuse
2008 F-650/750(f67)
Supplement
USA(fus)
Roadside Emergencies
141
Page 147 of 273
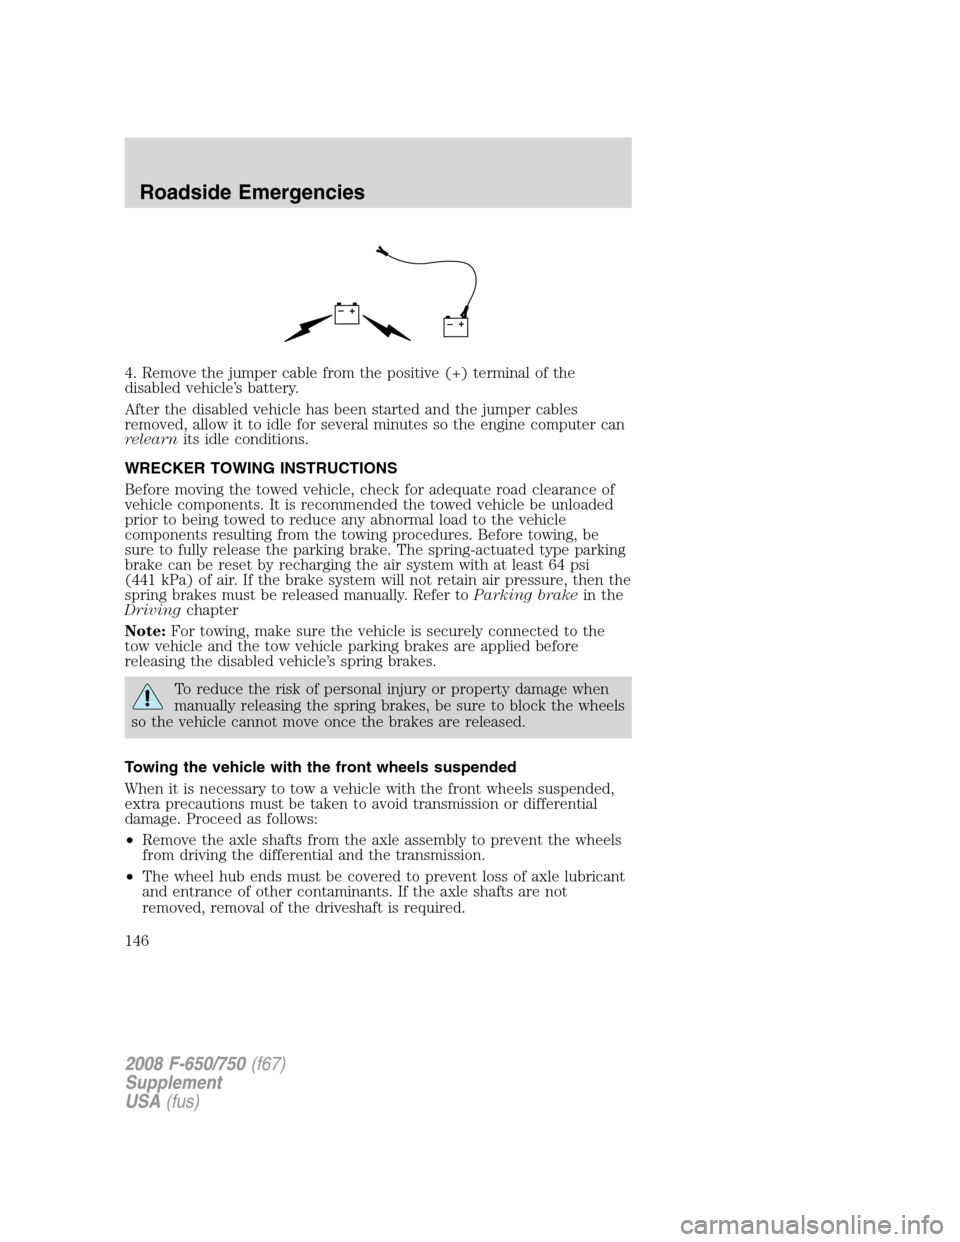
4. Remove the jumper cable from the positive (+) terminal of the
disabled vehicle’s battery.
After the disabled vehicle has been started and the jumper cables
removed, allow it to idle for several minutes so the engine computer can
relearnits idle conditions.
WRECKER TOWING INSTRUCTIONS
Before moving the towed vehicle, check for adequate road clearance of
vehicle components. It is recommended the towed vehicle be unloaded
prior to being towed to reduce any abnormal load to the vehicle
components resulting from the towing procedures. Before towing, be
sure to fully release the parking brake. The spring-actuated type parking
brake can be reset by recharging the air system with at least 64 psi
(441 kPa) of air. If the brake system will not retain air pressure, then the
spring brakes must be released manually. Refer toParking brakein the
Drivingchapter
Note:For towing, make sure the vehicle is securely connected to the
tow vehicle and the tow vehicle parking brakes are applied before
releasing the disabled vehicle’s spring brakes.
To reduce the risk of personal injury or property damage when
manually releasing the spring brakes, be sure to block the wheels
so the vehicle cannot move once the brakes are released.
Towing the vehicle with the front wheels suspended
When it is necessary to tow a vehicle with the front wheels suspended,
extra precautions must be taken to avoid transmission or differential
damage. Proceed as follows:
•Remove the axle shafts from the axle assembly to prevent the wheels
from driving the differential and the transmission.
•The wheel hub ends must be covered to prevent loss of axle lubricant
and entrance of other contaminants. If the axle shafts are not
removed, removal of the driveshaft is required.
+–+–
2008 F-650/750(f67)
Supplement
USA(fus)
Roadside Emergencies
146