FORD F650 2009 12.G Owners Manual
Manufacturer: FORD, Model Year: 2009, Model line: F650, Model: FORD F650 2009 12.GPages: 276, PDF Size: 1.75 MB
Page 121 of 276
WARNING:Aggressive driving in any road conditions can cause
you to lose control of your vehicle increasing the risk of severe
personal injury or property damage. The occurrence of a Traction
Control™ event is an indication that at least some of the tires have
exceeded their ability to grip the road; this may lead to an increased
risk of loss of vehicle control, vehicle rollover, personal injury and
death. If you experience a severe road event, SLOW DOWN.
AIR SUSPENSION (IF EQUIPPED)
Note:The vehicle must not be operated without air in the suspension
springs. Operating the vehicle without air in the air suspension springs
will damage the suspension, degrade ride performance and may cause
property damage.
The suspension system automatically adjusts to different loads to
maintain a constant frame height. The system allows for ease of vehicle
loading and provides improved vehicle ride and increased driver comfort.
Air suspension dump switch
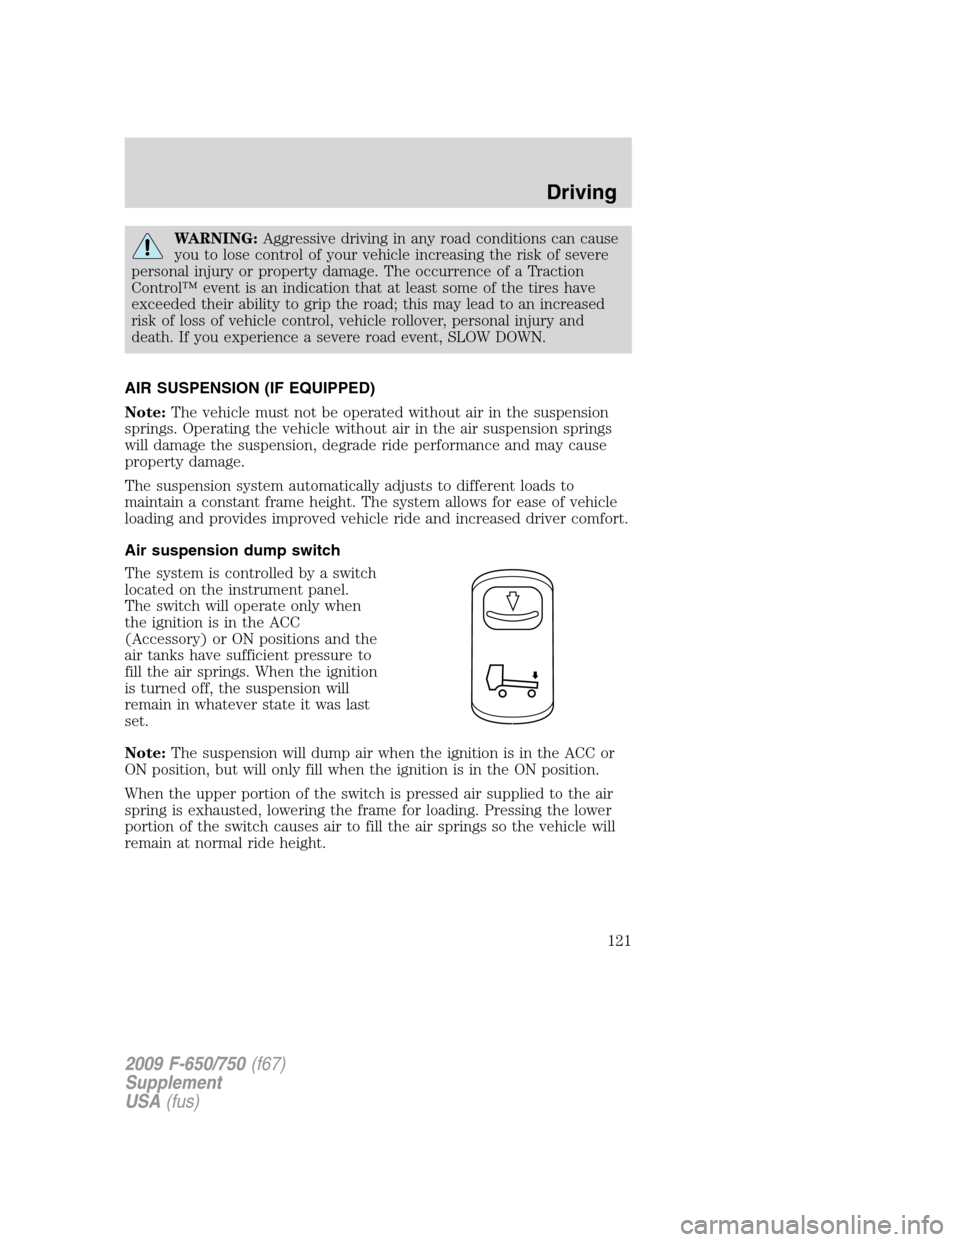
The system is controlled by a switch
located on the instrument panel.
The switch will operate only when
the ignition is in the ACC
(Accessory) or ON positions and the
air tanks have sufficient pressure to
fill the air springs. When the ignition
is turned off, the suspension will
remain in whatever state it was last
set.
Note:The suspension will dump air when the ignition is in the ACC or
ON position, but will only fill when the ignition is in the ON position.
When the upper portion of the switch is pressed air supplied to the air
spring is exhausted, lowering the frame for loading. Pressing the lower
portion of the switch causes air to fill the air springs so the vehicle will
remain at normal ride height.
2009 F-650/750(f67)
Supplement
USA(fus)
Driving
121
Page 122 of 276
Tractor-trailer connections
WARNING:To reduce the risk of personal injury, use extreme
caution when making brake and light connections. Inclement
weather and accumulated road contamination deposits on handhold
and stepping surfaces require extra care to avoid slip and falls. Provide
adequate lighting of working areas.
WARNING:Do not climb on the back of the tractor unless it
has been provided with a deck plate and handholds. Use a
three-point stance when climbing up and down from a deck plate. Do
not jump from the vehicle. Whenever possible, make all connections
while standing on the ground.
Connecting and disconnecting a trailer with air suspension
When connecting to a trailer:
•Press the lower portion of the switch and air will exhaust from the air
suspension system.
•After making the connection to the trailer, press the upper portion of
the switch, then raise the landing gear.
When disconnecting the trailer:
•Lower the landing gear, then press the lower portion of the switch.
•Disconnect the brake hoses, trailer-side and rear light connectors,
then pull the release lever on the fifth wheel.
The upper portion of the switch must be pressed before operating with a
trailer or operating in the bobtail mode.
Suspension conversions
It is not recommended, or approved, that suspension conversions be
performed. However, it is understood that, on occasion, aftermarket
add-on suspensions are installed by others on the truck chassis which
allow operator control for weight transfer from other axles (i.e., air lift
axles).
WARNING:When operating a loaded vehicle, the driver must
keep all adjustable axles on the ground at all times, supporting
their share of the vehicle’s load. Failure to do so can overload other
axles, tires, wheels, springs, steering components, brakes and frames,
resulting in early component failure, loss of vehicle control, possible
property damage and personal injury.
2009 F-650/750(f67)
Supplement
USA(fus)
Driving
122
Page 123 of 276
AUTOMATIC TRANSMISSION OPERATION (IF EQUIPPED)
Main transmission, auxiliary transmission, transfer case and power
take-off (PTO) control shift patterns can be found on a placard or decal
on the driver’s sun visor, on the instrument panel or on the shift control
itself.
The main transmission control is used to select the various gear ratios or
speeds of the transmission. Selecting D (Direct Drive), does not change
the transmission gear ratio, but is used where the gear ratios in the main
transmission are adequate to handle the vehicle operation.
If the transmission fails to shift properly, check the inline 10A fuse
located in the battery cables above the battery.
WARNING:Hold the brake pedal down while you move the
gearshift lever between positions. If you don’t hold the brake
pedal down, your vehicle may move unexpectedly and cause property
damage, personal injury or death.
Allison 2200 with park pawl feature
Note:For Allison automatic transmission-equipped vehicles, also refer to
the separateAllison Transmission Operator’s Manual.
A parking pawl effectively grounds the transmission’s output shaft
preventing rotation of the driveline. If the vehicle is stationary, selecting
the P (Park) position places the transmission in neutral and engages the
parking pawl (always use the parking brake, also).
Note:If the P (Park) position is selected when the vehicle is in motion,
the parking pawl mechanism will ratchet andNOThold the truck.
WARNING:Always set the parking brake fully. Do not use the
gearshift in place of the parking brake.
WARNING: To avoid sudden, unexpected vehicle
movement and possible personal injury or death:
1. Bring the vehicle to a complete stop.
2. Shift the transmission into P (Park). Slowly lift your foot from the
brake pedal to engage the transmission parking pawl mechanism.
3. Apply the parking brake and make sure it is holding properly. Do not
rely solely on the parking mechanism of the transmission.)
4. Turn the engine off when you leave the vehicle.Never leave the
vehicle unattended when the engine is running.
2009 F-650/750(f67)
Supplement
USA(fus)
Driving
123
Page 124 of 276
Allison 2500
This transmission is available with a column-mounted gearshift lever. The
gear positions are displayed on the RNDL in the instrument cluster.
WARNING: To avoid sudden, unexpected vehicle
movement and possible personal injury or death:
1. Bring the vehicle to a complete stop.
2. Shift the transmission into N (Neutral).
3. Apply the parking brake and make sure it is holding properly.
4. Turn the engine off when you leave the vehicle.Never leave the
vehicle unattended when the engine is running.
Allison 3000 series
Two modes are available for the Allison 3000 Series: Performance and
Economy. Performance mode will give you the best all-around
transmission operation; Economy provides operation at lower engine
RPM while maintaining adequate performance. The transmission will
automatically default to Performance mode when you start the engine.
Pressing MODE on the shifter will activate the Economy mode; this will
also illuminate the Mode ON lamp.
If the engine speed is above idle when a gear is selected using the
shifter, the vehicle will not move. To move the vehicle, the shifter must
be moved to re-select a gear after the engine speed returns to idle.
Note:For more information regarding the Allison 3000 Series, refer to
the separateAllison 3000 Series Operator’s Manual.
Torque lock
If your vehicle is parked on an incline and P (Park) is not properly
engaged (The parking brake is not applied before the transmission is
shifted into P [Park]), the weight of the vehicle may generate an
excessive amount of torque on the park pawl. In this situation, it may be
difficult to shift the transmission out of P (Park). Hold the brake pedal
down while shifting out of P (Park), then release the parking brake.
2009 F-650/750(f67)
Supplement
USA(fus)
Driving
124
Page 125 of 276
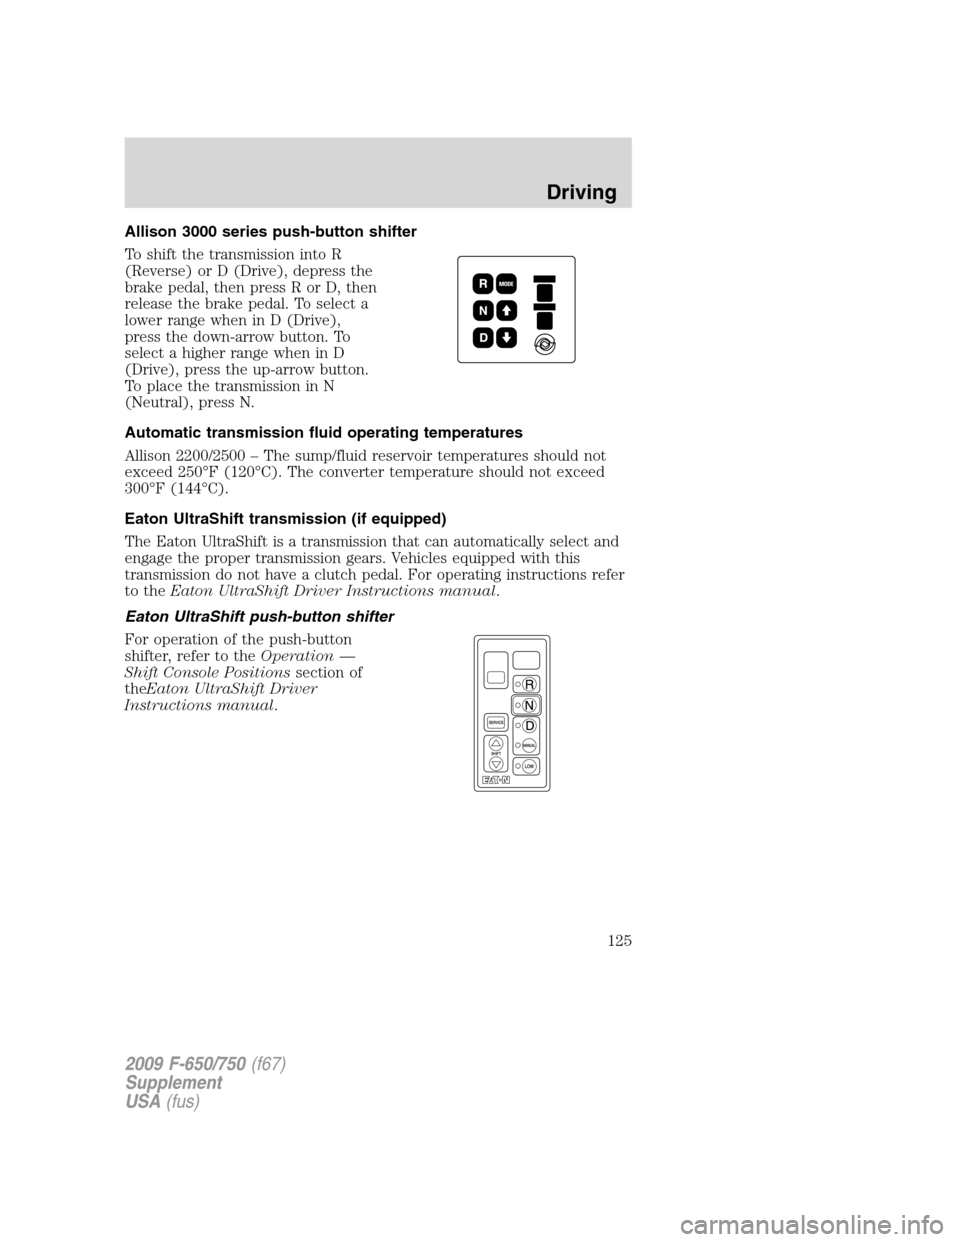
Allison 3000 series push-button shifter
To shift the transmission into R
(Reverse) or D (Drive), depress the
brake pedal, then press R or D, then
release the brake pedal. To select a
lower range when in D (Drive),
press the down-arrow button. To
select a higher range when in D
(Drive), press the up-arrow button.
To place the transmission in N
(Neutral), press N.
Automatic transmission fluid operating temperatures
Allison 2200/2500 – The sump/fluid reservoir temperatures should not
exceed 250°F (120°C). The converter temperature should not exceed
300°F (144°C).
Eaton UltraShift transmission (if equipped)
The Eaton UltraShift is a transmission that can automatically select and
engage the proper transmission gears. Vehicles equipped with this
transmission do not have a clutch pedal. For operating instructions refer
to theEaton UltraShift Driver Instructions manual.
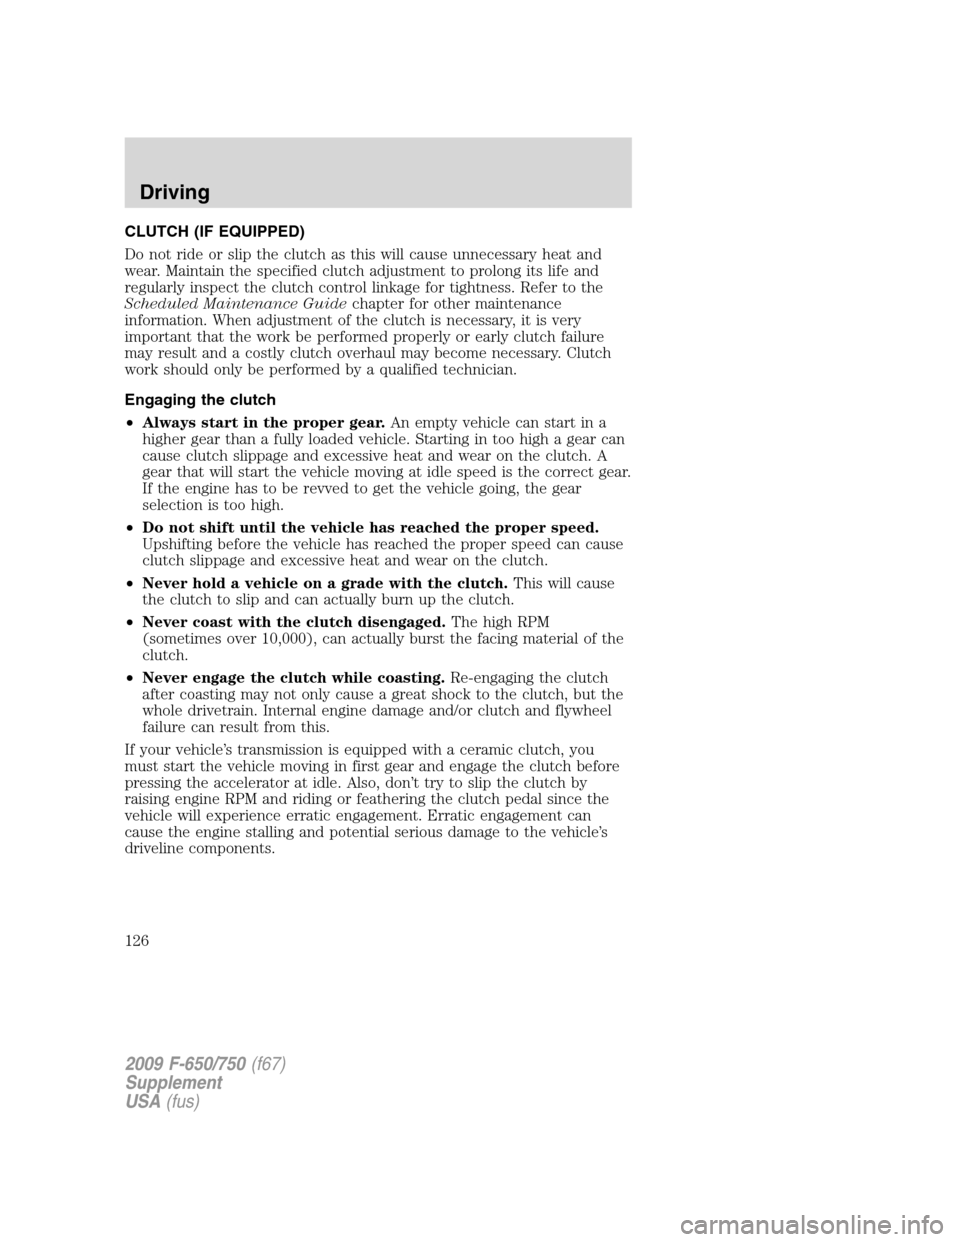
Eaton UltraShift push-button shifter
For operation of the push-button
shifter, refer to theOperation —
Shift Console Positionssection of
theEaton UltraShift Driver
Instructions manual.
2009 F-650/750(f67)
Supplement
USA(fus)
Driving
125
Page 126 of 276
CLUTCH (IF EQUIPPED)
Do not ride or slip the clutch as this will cause unnecessary heat and
wear. Maintain the specified clutch adjustment to prolong its life and
regularly inspect the clutch control linkage for tightness. Refer to the
Scheduled Maintenance Guidechapter for other maintenance
information. When adjustment of the clutch is necessary, it is very
important that the work be performed properly or early clutch failure
may result and a costly clutch overhaul may become necessary. Clutch
work should only be performed by a qualified technician.
Engaging the clutch
•Always start in the proper gear.An empty vehicle can start in a
higher gear than a fully loaded vehicle. Starting in too high a gear can
cause clutch slippage and excessive heat and wear on the clutch. A
gear that will start the vehicle moving at idle speed is the correct gear.
If the engine has to be revved to get the vehicle going, the gear
selection is too high.
•Do not shift until the vehicle has reached the proper speed.
Upshifting before the vehicle has reached the proper speed can cause
clutch slippage and excessive heat and wear on the clutch.
•Never hold a vehicle on a grade with the clutch.This will cause
the clutch to slip and can actually burn up the clutch.
•Never coast with the clutch disengaged.The high RPM
(sometimes over 10,000), can actually burst the facing material of the
clutch.
•Never engage the clutch while coasting.Re-engaging the clutch
after coasting may not only cause a great shock to the clutch, but the
whole drivetrain. Internal engine damage and/or clutch and flywheel
failure can result from this.
If your vehicle’s transmission is equipped with a ceramic clutch, you
must start the vehicle moving in first gear and engage the clutch before
pressing the accelerator at idle. Also, don’t try to slip the clutch by
raising engine RPM and riding or feathering the clutch pedal since the
vehicle will experience erratic engagement. Erratic engagement can
cause the engine stalling and potential serious damage to the vehicle’s
driveline components.
2009 F-650/750(f67)
Supplement
USA(fus)
Driving
126
Page 127 of 276
Clutch brake
(vehicles equipped with a non-synchronized transmission) -
Vehicle stationary
A clutch brake is used to stop transmission input shaft rotation so that
the initial 1 (First) or R (Reverse) gear selection can be accomplished
when the vehicle is stationary and the engine is running at idle speed.
Clutch brake application occurs in the last inch (25 mm) of clutch pedal
travel.
When using the clutch brake, fully depress the clutch pedal and shift the
transmission into 1 (First) or R (Reverse). If the transmission won’t go
into one of these gears, slowly release the clutch pedal while applying
light pressure on the transmission shift lever until it shifts into gear.
Note:After engagement of 1 (First) gear,do notuse the clutch brake
for upshifting or downshifting. If you do, clutch brake life will shorten
and gear selection shift efforts may increase.
Double-clutch procedures - vehicles equipped with a
non-synchronized transmission
In order to properly upshift or downshift, perform the following steps:
1. Depress the clutch pedal to disengage the clutch.
2. Shift the transmission into neutral.
3. Release the clutch pedal.
If upshifting, wait until the engine speed matches the transmission
speed of the gear you are selecting.
If downshifting,accelerate the engine until the engine speed matches
the input speed of the gear you are selecting. Depress the clutch pedal
immediately and shift into the desired gear, then release the clutch
pedal.
MANUAL TRANSMISSION OPERATION (IF EQUIPPED)
Note:Continued use of a damaged or worn clutch, prolonged clutch
slippage or downshifting at excessive speeds can result in a failure of the
engine, transmission or clutch components.
Note:To avoid premature clutch wear and failure, do not drive with
your foot resting on the clutch pedal or use it to hold the vehicle at a
standstill on an upgrade as when waiting for a traffic light.
2009 F-650/750(f67)
Supplement
USA(fus)
Driving
127
Page 128 of 276
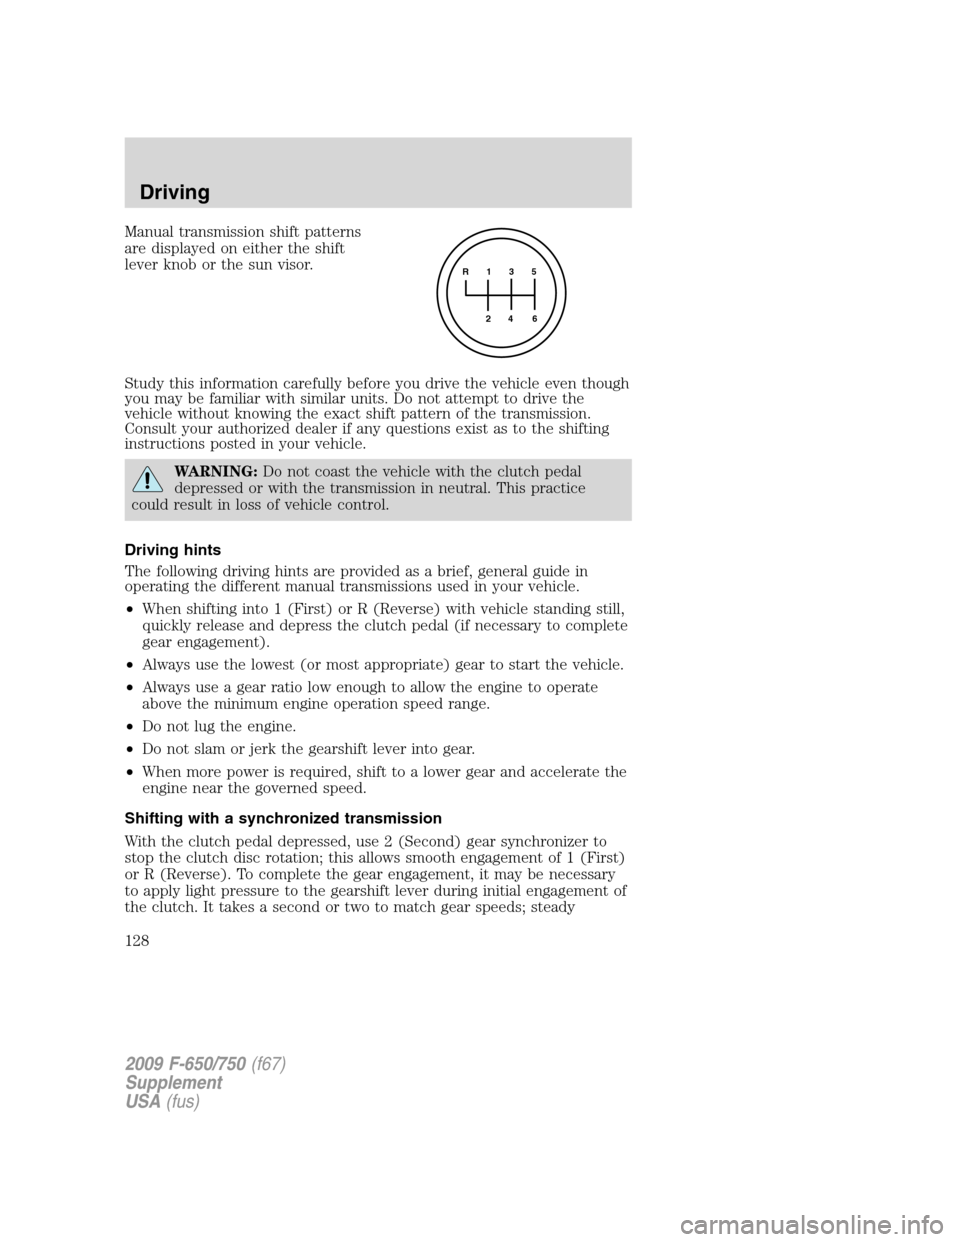
Manual transmission shift patterns
are displayed on either the shift
lever knob or the sun visor.
Study this information carefully before you drive the vehicle even though
you may be familiar with similar units. Do not attempt to drive the
vehicle without knowing the exact shift pattern of the transmission.
Consult your authorized dealer if any questions exist as to the shifting
instructions posted in your vehicle.
WARNING:Do not coast the vehicle with the clutch pedal
depressed or with the transmission in neutral. This practice
could result in loss of vehicle control.
Driving hints
The following driving hints are provided as a brief, general guide in
operating the different manual transmissions used in your vehicle.
•When shifting into 1 (First) or R (Reverse) with vehicle standing still,
quickly release and depress the clutch pedal (if necessary to complete
gear engagement).
•Always use the lowest (or most appropriate) gear to start the vehicle.
•Always use a gear ratio low enough to allow the engine to operate
above the minimum engine operation speed range.
•Do not lug the engine.
•Do not slam or jerk the gearshift lever into gear.
•When more power is required, shift to a lower gear and accelerate the
engine near the governed speed.
Shifting with a synchronized transmission
With the clutch pedal depressed, use 2 (Second) gear synchronizer to
stop the clutch disc rotation; this allows smooth engagement of 1 (First)
or R (Reverse). To complete the gear engagement, it may be necessary
to apply light pressure to the gearshift lever during initial engagement of
the clutch. It takes a second or two to match gear speeds; steady
R 1 3 5
4
6 2
2009 F-650/750(f67)
Supplement
USA(fus)
Driving
128
Page 129 of 276
pressure on the gearshift lever will help the synchronizer perform its job
more quickly. If the gearshift lever is forced into position, this action
defeats the purpose of the synchronizer by causing gear clash.
Shifting with a non-synchronized transmission
Refer toClutch brakeandDouble clutch proceduresin theClutch
section of this chapter.
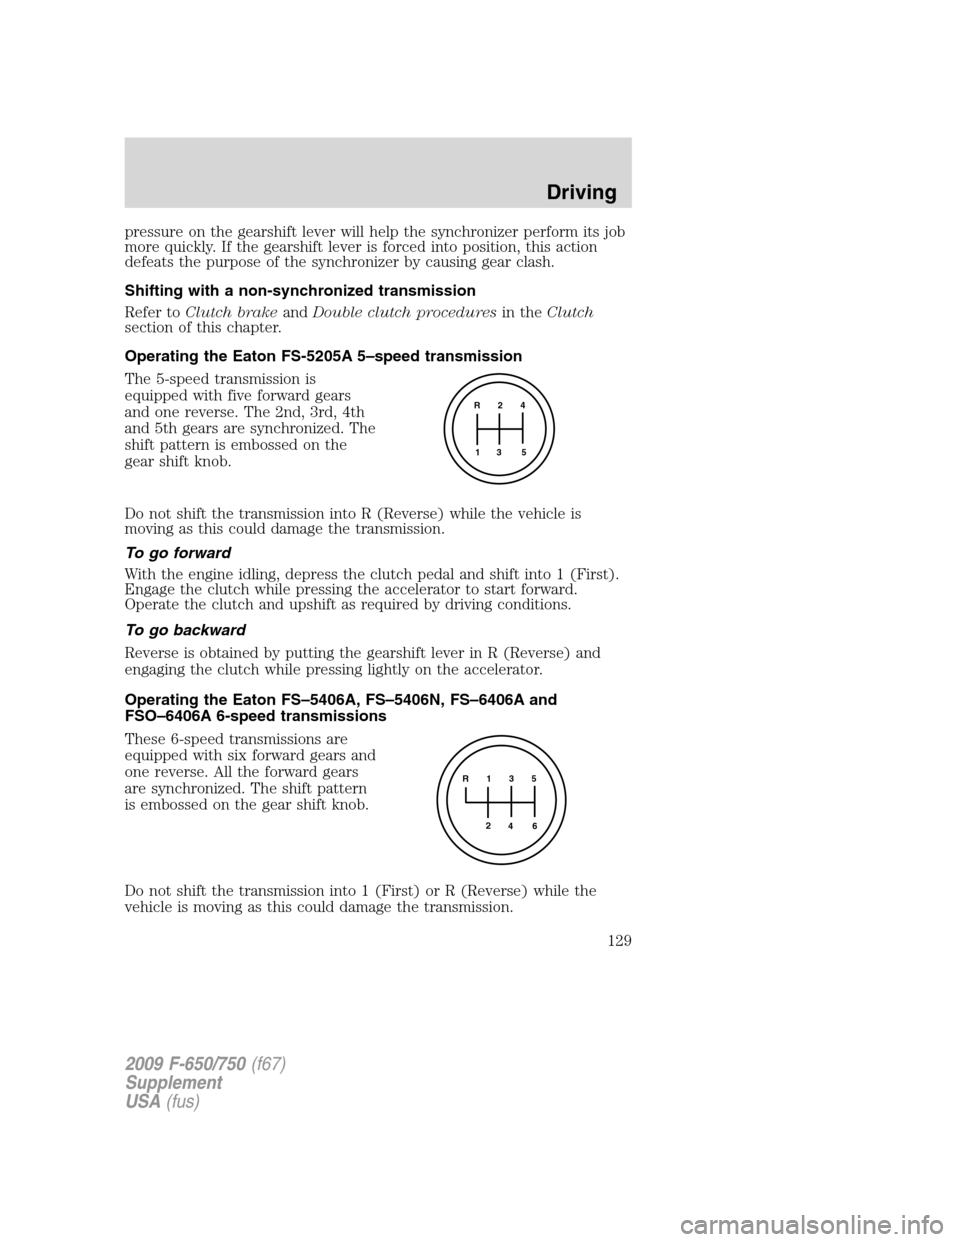
Operating the Eaton FS-5205A 5–speed transmission
The 5-speed transmission is
equipped with five forward gears
and one reverse. The 2nd, 3rd, 4th
and 5th gears are synchronized. The
shift pattern is embossed on the
gear shift knob.
Do not shift the transmission into R (Reverse) while the vehicle is
moving as this could damage the transmission.
To go forward
With the engine idling, depress the clutch pedal and shift into 1 (First).
Engage the clutch while pressing the accelerator to start forward.
Operate the clutch and upshift as required by driving conditions.
To go backward
Reverse is obtained by putting the gearshift lever in R (Reverse) and
engaging the clutch while pressing lightly on the accelerator.
Operating the Eaton FS–5406A, FS–5406N, FS–6406A and
FSO–6406A 6-speed transmissions
These 6-speed transmissions are
equipped with six forward gears and
one reverse. All the forward gears
are synchronized. The shift pattern
is embossed on the gear shift knob.
Do not shift the transmission into 1 (First) or R (Reverse) while the
vehicle is moving as this could damage the transmission.
R 2 4
3 5 1
R 1 3 5
4
6 2
2009 F-650/750(f67)
Supplement
USA(fus)
Driving
129
Page 130 of 276
To go forward
With the engine idling, depress the clutch pedal and shift into 1 (First).
Engage the clutch while pressing the accelerator to start forward.
Operate the clutch and upshift as required by driving conditions.
To go backward
Reverse is obtained by putting the gearshift lever in R (Reverse) and
engaging the clutch while pressing lightly on the accelerator.
Operating the Spicer ES56-7B and ES066-7B 7-speed
transmissions
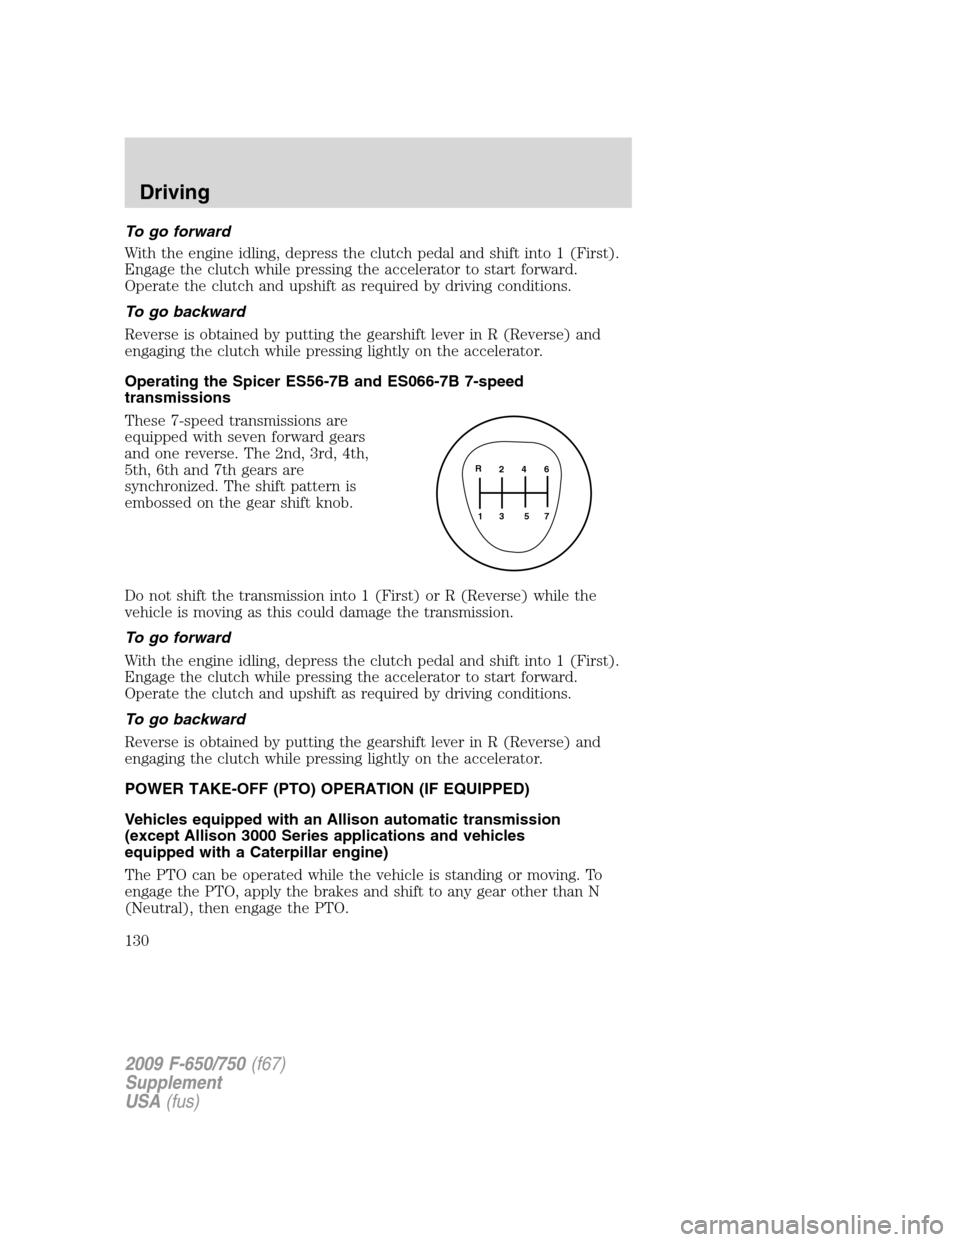
These 7-speed transmissions are
equipped with seven forward gears
and one reverse. The 2nd, 3rd, 4th,
5th, 6th and 7th gears are
synchronized. The shift pattern is
embossed on the gear shift knob.
Do not shift the transmission into 1 (First) or R (Reverse) while the
vehicle is moving as this could damage the transmission.
To go forward
With the engine idling, depress the clutch pedal and shift into 1 (First).
Engage the clutch while pressing the accelerator to start forward.
Operate the clutch and upshift as required by driving conditions.
To go backward
Reverse is obtained by putting the gearshift lever in R (Reverse) and
engaging the clutch while pressing lightly on the accelerator.
POWER TAKE-OFF (PTO) OPERATION (IF EQUIPPED)
Vehicles equipped with an Allison automatic transmission
(except Allison 3000 Series applications and vehicles
equipped with a Caterpillar engine)
The PTO can be operated while the vehicle is standing or moving. To
engage the PTO, apply the brakes and shift to any gear other than N
(Neutral), then engage the PTO.
2 4 6
3 5 71 R
2009 F-650/750(f67)
Supplement
USA(fus)
Driving
130