manual transmission FORD F650 2017 13.G User Guide
[x] Cancel search | Manufacturer: FORD, Model Year: 2017, Model line: F650, Model: FORD F650 2017 13.GPages: 382, PDF Size: 5.18 MB
Page 205 of 382
DRAINING THE FUEL FILTER
WATER TRAP - 6.7L DIESEL
Your vehicle is equipped with a diesel fuel
conditioner module located on the
frame-rail under the driver-side floorboard
near the transmission.
You should drain water from the
module assembly whenever the
warning light comes on and the
message center directs you to drain the
water separator. This will occur when
approximately 8.45 fl oz (250 ml) of water
accumulates in the module. If you allow
the water level to exceed this level, the
water may pass through to the engine and
may cause fuel injection equipment
damage.
Draining the Diesel Fuel
Conditioner Module (DFCM) WARNING
Your vehicle must be stopped with
the engine off when draining the
Diesel Fuel Conditioner Module. Fuel
may ignite if the separator is drained while
the engine is running or vehicle is moving. Note:
If you drain the diesel fuel conditioner
module while the system is running air will
enter into the fuel system. The engine will
not operate properly if air enters the system.
Note: With fuel tank levels above 3⁄4 tank
it may be necessary to loosen the bowl three
turns before opening the drain. This will
actuate an anti-siphon valve at the fuel and
water separator inlet and prevent the fuel
from siphoning out of the tank.
Note: A loose drain valve can allow air to
enter the fuel system and cause drivetrain
issues. The engine will not operate properly.
Be sure that you fully tighten the drain valve. 1. Stop your vehicle and shut off the
engine.
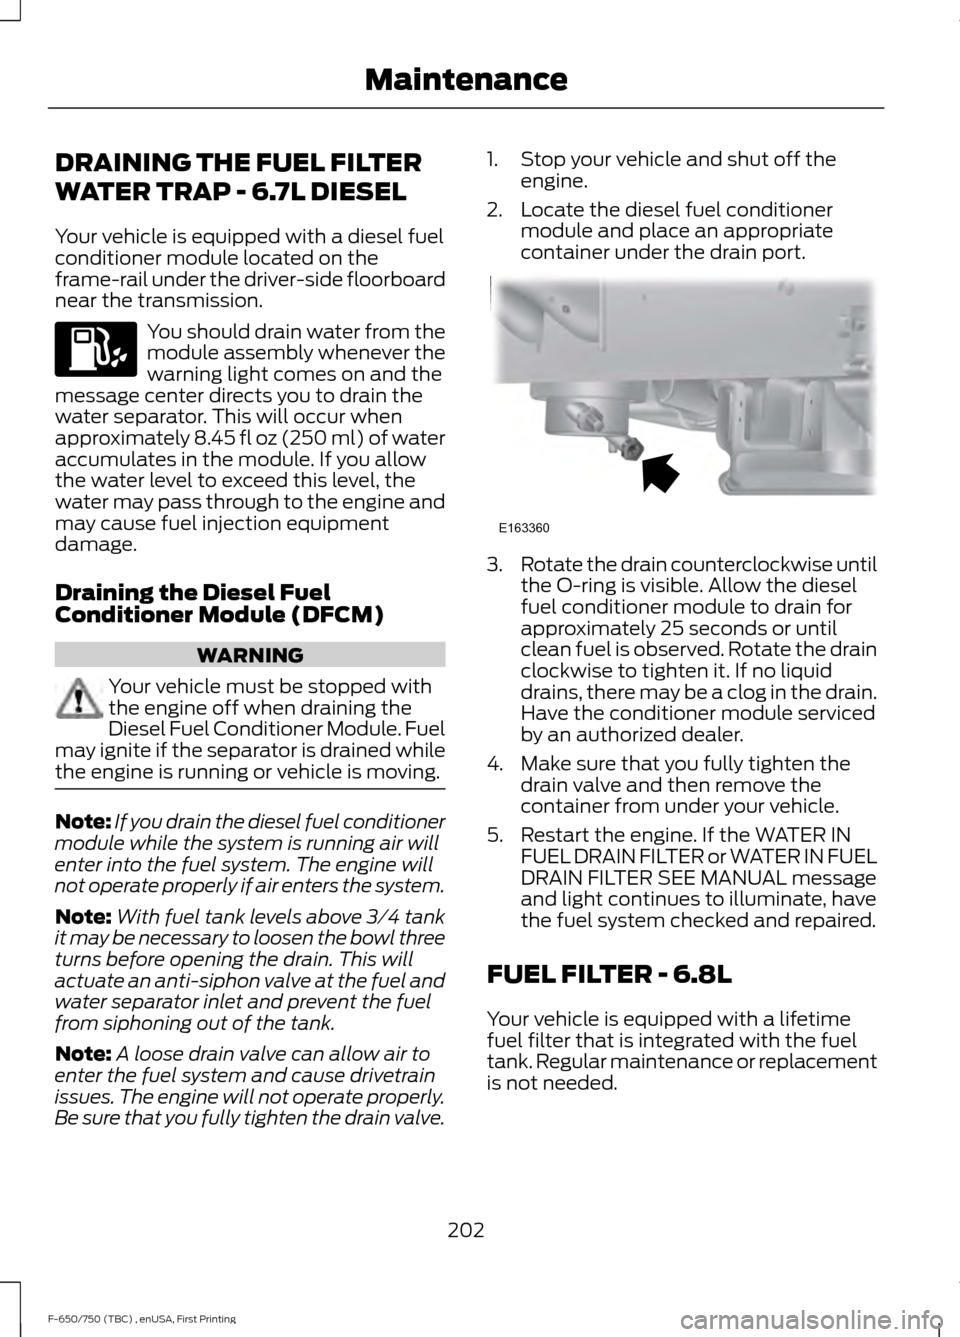
2. Locate the diesel fuel conditioner module and place an appropriate
container under the drain port. 3.
Rotate the drain counterclockwise until
the O-ring is visible. Allow the diesel
fuel conditioner module to drain for
approximately 25 seconds or until
clean fuel is observed. Rotate the drain
clockwise to tighten it. If no liquid
drains, there may be a clog in the drain.
Have the conditioner module serviced
by an authorized dealer.
4. Make sure that you fully tighten the drain valve and then remove the
container from under your vehicle.
5. Restart the engine. If the WATER IN FUEL DRAIN FILTER or WATER IN FUEL
DRAIN FILTER SEE MANUAL message
and light continues to illuminate, have
the fuel system checked and repaired.
FUEL FILTER - 6.8L
Your vehicle is equipped with a lifetime
fuel filter that is integrated with the fuel
tank. Regular maintenance or replacement
is not needed.
202
F-650/750 (TBC) , enUSA, First Printing Maintenance E163360
Page 220 of 382
2.
Rotate the filter fully counterclockwise
until the peg is at the far end of the slot.
3. Pull the filter straight up from the bracket and discard the filter.
Installation
1. Install the new filter into the filter bracket. Turn the filter clockwise to
lock it in place.
2. Reconnect the fuel lines.
3. Switch the ignition on for 30 seconds and then switch the ignition off. Repeat
this operation six times in a row to
purge any trapped air from the fuel
system.
ELECTRICAL SYSTEM
INSPECTION
Periodically inspect electrical connectors
on the outside of the cab and on the engine
and frame for corrosion and tightness.
Exposed terminals, such as the fuel sender,
cranking motor, alternator and
feed-through studs, should be cleaned and re-coated with a lubricant sealing grease
such as Motorcraft Silicone Brake Caliper
Grease and Dielectric Compound XG-3, or
equivalent. This should include the ground
cable connector for batteries, engine and
cab as well as the jump-starting stud.
Accessory Feed Connections
Vehicle electrical systems are complex and
often include powertrain components,
such as engine and transmission controls,
instrument panels and ABS. While most
systems operate on battery voltage (12
volts), some systems can be as high as 90
volts or as low as five volts. See the
Electrical Circuit Diagram Manuals,
available from your vehicle
’s manufacturer,
to make sure that any extra body lights and
accessory connections to circuits are both
appropriate and not overloaded. Do not
make modifications to any vehicle control
system without first contacting an
authorized dealer.
AIR INDUCTION SYSTEM
INSPECTION WARNING
When performing maintenance to
any turbocharged engine with engine
air inlet piping disconnected, keep
loose clothing, jewelry and long hair away
from the engine air inlet piping. A
turbocharger compressor air inlet
protective shield should be installed over
the turbocharger air inlet to reduce the risk
of personal injury or death. Perform a complete inspection of the air
induction system annually.
217
F-650/750 (TBC) , enUSA, First Printing MaintenanceE226214
2
3
Page 226 of 382
•
Maintaining proper steering gear and
power steering pump lubricant levels.
• Checking steering column joint bolts
and steering linkage, particularly for
body-to-chassis clearance.
Steering Column Joint Bolts
As a good maintenance practice, check
steering column joint bolt tightness every
60,000 mi (96,000 km) or annually,
whichever occurs first. Do not overtighten
the bolts.
Hydraulic System
Whenever draining and refilling the power
steering's hydraulic system for any reason,
bleed air from the system before returning
the vehicle to service. Failure to bleed the
hydraulic system properly can result in
degradation of power system performance.
Consult an authorized dealer who is aware
of the proper procedures for filling and
bleeding the system.
SUSPENSION SYSTEM
INSPECTION
Note: Do not adjust air suspension height
to any setting other than the specified
setting. Altering the height setting changes
the driveline angle and may result in
unwarrantable component damage, such
as transmission component damage.
Verify drive axle air suspension height and
height control valve performance at engine
oil change intervals.
Periodically check:
• Condition of spring leaves for evidence
of fatigue, bending or breakage.
• Condition of suspension mounting
brackets and bushings.
• Torque rod mounting fasteners for
tightness. •
For proper suspension alignment.
Maintain proper alignment at all times.
• U-bolts. After the chassis has been
operating under load for
1,000 mi
(1,600 km) or six months (whichever
comes first), the U-bolt nuts must be
re-torqued. Re-torque the U-bolt nuts
every
37,000 mi (60,000 km)
thereafter. Clean and lubricate the
U-bolt and nut threads and seats to
make sure a like new condition when
re-torqueing. See
Spring U-Bolt
Check (page 224).
FRAME AND TOW HOOK
INSPECTION
Your vehicle's chassis is manufactured
with frame rails of either HSLA steel or
heat-treated steel. Handle each in a
specific manner to make sure maximum
service life. Consult the service manual or
an authorized dealer before attempting
frame repair or modification.
It is important, particularly on vehicles that
use tow hooks frequently, to inspect the
front and rear tow hooks for damage or a
loose mounting.
REAR AXLE FLUID CHECK
Your rear axle may have an optional
synthetic lubricant that allows the use of
extended service intervals. A tag on the
filler plug identifies the use of the synthetic
lubricant.
Only use a lubricant that meets
manufacturer specifications. Only use a
lubricant that meets manufacturer
specifications. Use of a non-approved rear
axle lubricant may cause internal axle
component damage. See Capacities and
Specifications
(page 258).
223
F-650/750 (TBC) , enUSA, First Printing Maintenance
Page 288 of 382
The system creates candidate lists when
it has the same confidence level of several
options based on your voice command.
When turned on, it may prompt you with
as many as four possibilities for
clarification.
For example, say "Say 1 after the tone to
call John Doe at home. Say 2 after the tone
to call Johnny Doe on mobile. Say 3 after
the tone to call Jane Doe at home." You
could also say "Say 1 after the tone to play
John Doe, Say 2 after the tone to play
Johnny Doe."If you want the system to carry out the following
Voice command
Make a best guess from the media candidate list. You may
still occasionally be asked questions.
Media Candidate Lists
Off
Clarify your voice command for media candidates.
Media Candidate Lists On
Make a best guess from the phone candidate list. You may
still occasionally be asked questions.
Phone Candidate Lists
Off
Clarify your voice command for phone candidates.
Phone Candidate Lists
On
USING SYNC™ WITH YOUR
PHONE
Hands-free calling is one of the main
features of SYNC. While the system
supports a variety of features, many are
dependent on your cell phone's
functionality. At a minimum, most cell
phones with Bluetooth wireless technology
support the following functions:
• Answering an incoming call.
• Ending a call.
• Using privacy mode.
• Dialing a number.
• Redialing.
• Call waiting notification.
• Caller ID. Other features, such as text messaging
using Bluetooth and automatic phonebook
download, are cell phone-dependent
features. To check your cell phone's
compatibility, see your cell phone's manual
and visit www.SYNCMyRide.com,
www.SYNCMyRide.ca or
www.syncmaroute.ca.
Pairing a Cell Phone for the First
Time
Note:
SYNC can support downloading up
to approximately 1000 entries per
Bluetooth-enabled cell phone.
Note: Make sure to switch on the ignition
and the radio. Put the transmission in
position park (P).
Note: To scroll through the menus, press
the up and down arrows on your audio
system.
Wirelessly pairing your cell phone with
SYNC allows you to make and receive
hands-free calls.
285
F-650/750 (TBC) , enUSA, First Printing SYNC™ (If Equipped)
Page 289 of 382
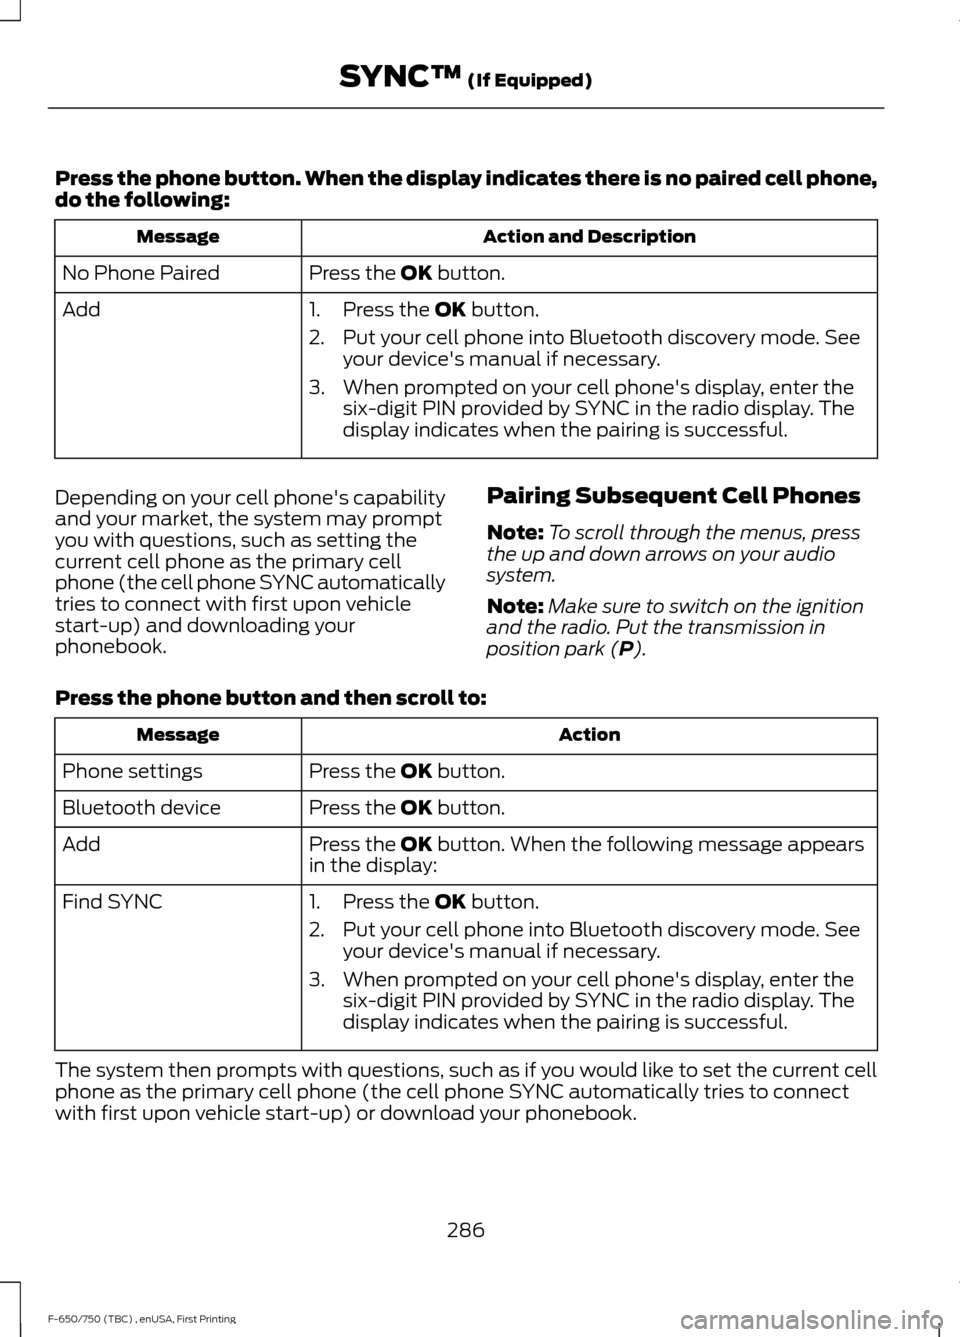
Press the phone button. When the display indicates there is no paired cell phone,
do the following:
Action and Description
Message
Press the OK button.
No Phone Paired
Add 1. Press the
OK button.
2. Put your cell phone into Bluetooth discovery mode. See your device's manual if necessary.
3. When prompted on your cell phone's display, enter the six-digit PIN provided by SYNC in the radio display. The
display indicates when the pairing is successful.
Depending on your cell phone's capability
and your market, the system may prompt
you with questions, such as setting the
current cell phone as the primary cell
phone (the cell phone SYNC automatically
tries to connect with first upon vehicle
start-up) and downloading your
phonebook. Pairing Subsequent Cell Phones
Note:
To scroll through the menus, press
the up and down arrows on your audio
system.
Note: Make sure to switch on the ignition
and the radio. Put the transmission in
position park (
P).
Press the phone button and then scroll to: Action
Message
Press the
OK button.
Phone settings
Press the
OK button.
Bluetooth device
Press the
OK button. When the following message appears
in the display:
Add
Find SYNC
1. Press the
OK button.
2. Put your cell phone into Bluetooth discovery mode. See your device's manual if necessary.
3. When prompted on your cell phone's display, enter the six-digit PIN provided by SYNC in the radio display. The
display indicates when the pairing is successful.
The system then prompts with questions, such as if you would like to set the current cell
phone as the primary cell phone (the cell phone SYNC automatically tries to connect
with first upon vehicle start-up) or download your phonebook.
286
F-650/750 (TBC) , enUSA, First Printing SYNC™
(If Equipped)
Page 374 of 382
2
2-Speed Rear Axle........................................118
Axle Shifting.......................................................... 118
A
A/C See: Climate Control........................................... 70
About This Manual...........................................7
Diesel Engine Information................................... 8
Minor Troubleshooting Guide............................ 9
Warnings.................................................................... 8
ABS See: Brakes............................................................ 119
ABS driving hints See: Hints on Driving With Anti-Lock
Brakes................................................................ 120
Accessories.....................................................312
Accessories See: Replacement Parts
Recommendation............................................ 13
Adjusting the Headlamps........................205 Horizontal Aim Adjustment.......................... 206
Vertical Aim Adjustment................................ 205
Adjusting the Steering Wheel
...................44
Air Brakes.........................................................123 Air Chamber Stroke Indication...................... 124
Cam Brakes - Automatic Slack Adjusters........................................................... 124
Emergency Air Brake.......................................... 124
Air Conditioning See: Climate Control........................................... 70
Air Filter See: Changing the Engine Air Filter - 6.7L
Diesel.................................................................. 210
See: Changing the Engine Air Filter - 6.8L.................................................................... 209
Air Induction System Inspection.............217 Chassis-mounted Charge Air Cooler...........218
Air Suspension
...............................................136
Air Suspension Dump Button........................ 136
Connecting and Disconnecting a Trailer with Air Suspension and Air Suspension
Dump Button................................................... 136
Suspension Conversions................................. 136
System Indicator Light...................................... 136
Appendices....................................................348 Audible Warnings and Indicators..............61
Beltminder Warning............................................. 61
Door Ajar................................................................... 61
Headlamps On Warning Chime....................... 61
Key in Ignition Warning Chime......................... 61
Parking Brake On Warning Chime................... 61
Audio Control
..................................................44
Media........................................................................\
45
Seek, Next or Previous........................................ 45
Audio Input Jack...........................................279
Audio System
.................................................272
General Information.......................................... 272
Audio Unit - Vehicles With: AM/FM/CD/ SYNC..............................................................274
Audio Unit - Vehicles With: AM/FM
......273
Automatic Transmission.............................112
Brake-Shift Interlock.......................................... 115
If Your Vehicle Gets Stuck In Mud or Snow................................................................... 116
Understanding the Shift Positions of a 6– Speed Automatic Transmission..........112
Understanding your SelectShift™ Automatic transmission............................... 113
Automatic Transmission Fluid Check.............................................................198
Transmission Fluid Level................................. 199
Auxiliary Power Points..................................81 110 Volt AC Power Points.................................... 81
12 Volt DC Power Point........................................ 81
Locations.................................................................. 81
Auxiliary Switches
........................................312
Axle Inspection.............................................222
Front Axle.............................................................. 222
B
Battery See: Changing the 12V Battery..................... 203
Bonnet Lock See: Opening and Closing the Hood............181
Booster Seats..................................................25 Types of Booster Seats...................................... 25
Brake Fluid Check.......................................200
Brakes................................................................119 General Information........................................... 119
Brake System Inspection...........................219 Air Brakes............................................................... 219
Driveline Parking Brake..................................... 221
371
F-650/750 (TBC) , enUSA, First Printing Index
Page 379 of 382
Message Center
See: Information Displays................................. 62
Mirrors See: Windows and Mirrors................................ 50
Mobile Communications Equipment......14
Motorcraft Parts - 6.7L Diesel.................255
Motorcraft Parts - 6.8L..............................254
N
Noise Pollution Control.................................16 Air Intake System.................................................. 16
Body........................................................................\
... 16
Cooling System...................................................... 16
Engine........................................................................\
16
Exhaust System..................................................... 16
Transmission Enclosure...................................... 16
Normal Scheduled Maintenance...........323 Intelligent Oil-Life Monitor™ (Diesel Engine
Only).................................................................. 323
Normal Maintenance Intervals..................... 324
O
Oil Change Indicator Reset.......................189
Oil Check See: Engine Oil Check - 6.7L Diesel.............186
See: Engine Oil Check - 6.8L.......................... 185
Opening and Closing the Hood................181 Closing the Hood................................................ 182
Opening the Hood............................................... 181
Ordering Additional Owner's Literature......................................................159
Obtaining a French Owner ’s Manual..........159
Overhead Console
.........................................83
P
Parking Brake.................................................120 Air Brakes................................................................ 121
Hydraulic Brakes................................................. 120
Passive Anti-Theft System.........................42 SecuriLock®........................................................... 42
PATS See: Passive Anti-Theft System..................... 42
Perchlorate........................................................13
Power Door Locks See: Locking and Unlocking............................. 40Power Seats
.....................................................76
Air-Ride Seat........................................................... 77
Power Steering Fluid Check
.....................201
Power Take-Off..............................................116
Power Windows.............................................50
Bounce-Back......................................................... 50
One-Touch Up or Down.................................... 50
Window Lock......................................................... 50
Protecting the Environment........................16
R
Rear Axle Fluid Check
.................................223
Changing the Fluid............................................ 224
Checking the Fluid Level................................. 224
Rear Axle
...........................................................117
General Information............................................ 117
Rear Seat Armrest.........................................80
Rear Seats
.........................................................78
Folding the Rear Seat Back (Crew Cab)
........................................................................\
........ 78
Folding up the Rear Seat Cushion.................. 78
Returning the Seat to the Seating Position............................................................... 78
Recommended Towing Weights............139
Refueling - Diesel..........................................101 Fuel Filler Cap....................................................... 101
Fuel Fill Rate......................................................... 102
Refueling - Gasoline
...................................100
Fuel Filler Cap...................................................... 100
Remote Control..............................................38 Car Finder................................................................ 39
Integrated Keyhead Transmitters .................38
Replacing the Battery......................................... 38
Sounding a Panic Alarm.................................... 39
Removing a Headlamp..............................207
Repairing Minor Paint Damage..............229
Replacement Parts Recommendation........................................13
Collision Repairs.................................................... 13
Scheduled Maintenance and Mechanical Repairs.................................................................. 13
Warranty on Replacement Parts..................... 14
Replacing a Lost Key or Remote Control............................................................39
Reporting Safety Defects (Canada Only)..............................................................160
376
F-650/750 (TBC) , enUSA, First Printing Index