check oil FORD F650 2017 13.G Owners Manual
[x] Cancel search | Manufacturer: FORD, Model Year: 2017, Model line: F650, Model: FORD F650 2017 13.GPages: 382, PDF Size: 5.18 MB
Page 6 of 382
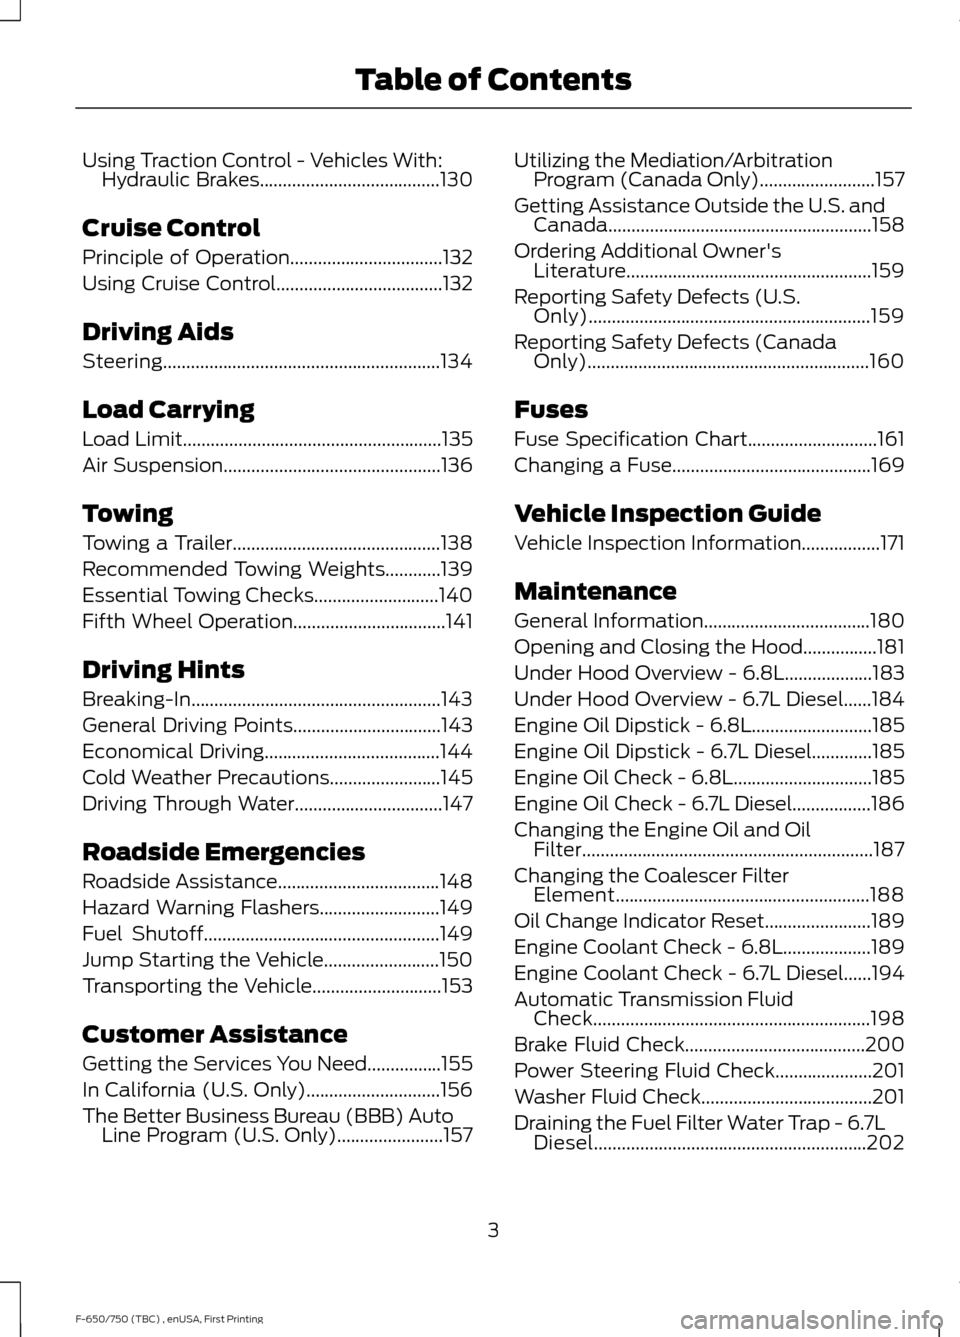
Using Traction Control - Vehicles With:
Hydraulic Brakes.......................................130
Cruise Control
Principle of Operation.................................132
Using Cruise Control....................................132
Driving Aids
Steering............................................................134
Load Carrying
Load Limit
........................................................135
Air Suspension
...............................................136
Towing
Towing a Trailer.............................................138
Recommended Towing Weights............139
Essential Towing Checks...........................140
Fifth Wheel Operation
.................................141
Driving Hints
Breaking-In......................................................143
General Driving Points
................................143
Economical Driving......................................144
Cold Weather Precautions........................145
Driving Through Water................................147
Roadside Emergencies
Roadside Assistance
...................................148
Hazard Warning Flashers
..........................149
Fuel Shutoff
...................................................149
Jump Starting the Vehicle.........................150
Transporting the Vehicle
............................153
Customer Assistance
Getting the Services You Need................155
In California (U.S. Only).............................156
The Better Business Bureau (BBB) Auto Line Program (U.S. Only).......................157 Utilizing the Mediation/Arbitration
Program (Canada Only).........................157
Getting Assistance Outside the U.S. and Canada.........................................................158
Ordering Additional Owner's Literature.....................................................159
Reporting Safety Defects (U.S. Only).............................................................159
Reporting Safety Defects (Canada Only).............................................................160
Fuses
Fuse Specification Chart
............................161
Changing a Fuse...........................................169
Vehicle Inspection Guide
Vehicle Inspection Information.................171
Maintenance
General Information....................................180
Opening and Closing the Hood................181
Under Hood Overview - 6.8L...................183
Under Hood Overview - 6.7L Diesel......184
Engine Oil Dipstick - 6.8L..........................185
Engine Oil Dipstick - 6.7L Diesel.............185
Engine Oil Check - 6.8L
..............................185
Engine Oil Check - 6.7L Diesel.................186
Changing the Engine Oil and Oil Filter...............................................................187
Changing the Coalescer Filter Element.......................................................188
Oil Change Indicator Reset.......................189
Engine Coolant Check - 6.8L...................189
Engine Coolant Check - 6.7L Diesel......194
Automatic Transmission Fluid Check............................................................198
Brake Fluid Check.......................................200
Power Steering Fluid Check
.....................201
Washer Fluid Check
.....................................201
Draining the Fuel Filter Water Trap - 6.7L Diesel...........................................................202
3
F-650/750 (TBC) , enUSA, First Printing Table of Contents
Page 12 of 382
If these modified engine performance
characteristics persist for an extended
period and either the service engine soon
or powertrain malfunction, reduced power,
electronic throttle control light is
illuminated, have the system checked by
an authorized dealer.
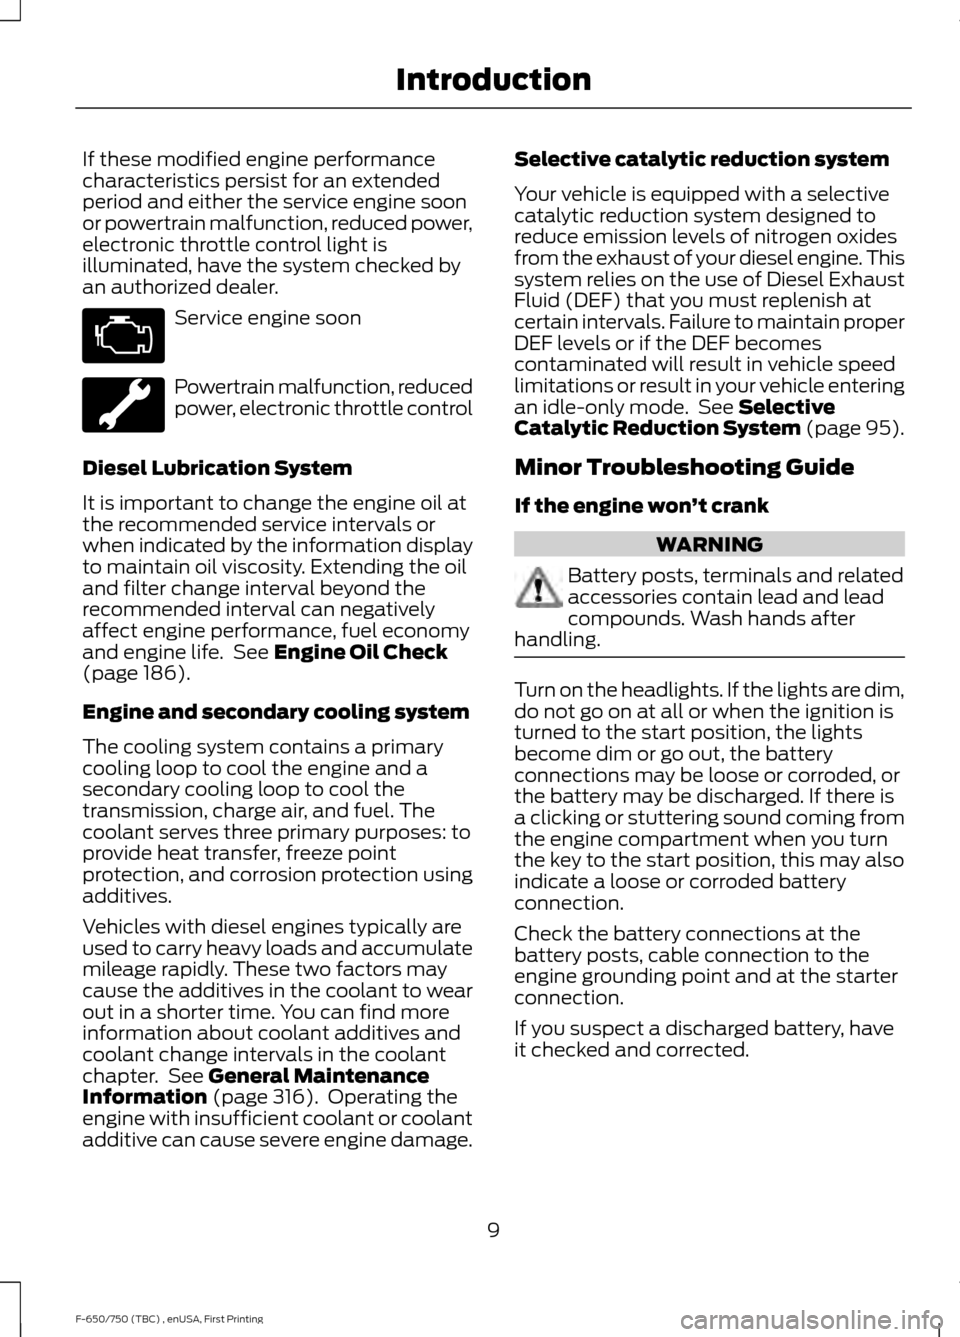
Service engine soon
Powertrain malfunction, reduced
power, electronic throttle control
Diesel Lubrication System
It is important to change the engine oil at
the recommended service intervals or
when indicated by the information display
to maintain oil viscosity. Extending the oil
and filter change interval beyond the
recommended interval can negatively
affect engine performance, fuel economy
and engine life. See Engine Oil Check
(page 186).
Engine and secondary cooling system
The cooling system contains a primary
cooling loop to cool the engine and a
secondary cooling loop to cool the
transmission, charge air, and fuel. The
coolant serves three primary purposes: to
provide heat transfer, freeze point
protection, and corrosion protection using
additives.
Vehicles with diesel engines typically are
used to carry heavy loads and accumulate
mileage rapidly. These two factors may
cause the additives in the coolant to wear
out in a shorter time. You can find more
information about coolant additives and
coolant change intervals in the coolant
chapter. See
General Maintenance
Information (page 316). Operating the
engine with insufficient coolant or coolant
additive can cause severe engine damage. Selective catalytic reduction system
Your vehicle is equipped with a selective
catalytic reduction system designed to
reduce emission levels of nitrogen oxides
from the exhaust of your diesel engine. This
system relies on the use of Diesel Exhaust
Fluid (DEF) that you must replenish at
certain intervals. Failure to maintain proper
DEF levels or if the DEF becomes
contaminated will result in vehicle speed
limitations or result in your vehicle entering
an idle-only mode. See
Selective
Catalytic Reduction System (page 95).
Minor Troubleshooting Guide
If the engine won ’t crank WARNING
Battery posts, terminals and related
accessories contain lead and lead
compounds. Wash hands after
handling. Turn on the headlights. If the lights are dim,
do not go on at all or when the ignition is
turned to the start position, the lights
become dim or go out, the battery
connections may be loose or corroded, or
the battery may be discharged. If there is
a clicking or stuttering sound coming from
the engine compartment when you turn
the key to the start position, this may also
indicate a loose or corroded battery
connection.
Check the battery connections at the
battery posts, cable connection to the
engine grounding point and at the starter
connection.
If you suspect a discharged battery, have
it checked and corrected.
9
F-650/750 (TBC) , enUSA, First Printing Introduction
Page 13 of 382
•
The gearshift lever must be in P (Park)
or N (Neutral) in order for the starter
to operate.
• Try operating the starter switch several
times. This operation may clean
potentially corroded contacts or make
the switch temporarily operable until
you can reach the dealer.
• If all electrical connections are tight
and you need assistance to start, See
Jump Starting the Vehicle (page 150).
If engine cranks but won ’t start
Prolonged starter cranking (in excess of 10
seconds) could cause damage to the
starter motor or the high-pressure fuel
pump.
• Check the fuel gauge. You may be out
of fuel. If the gauge shows that there
is fuel in the tank, the trouble may be
in the electrical system or the fuel
system. If equipped with an auxiliary
tank, be sure that the tank control
switch is set for the tank with fuel and
not on an empty tank.
• Leaving your ignition key turned to on
for over two minutes without starting
may make starting difficult because
the glow plugs will cease activation.
Reset the system by turning the ignition
key to off and then back to on again.
Note: If the system is out of fuel and the
engine will not start, do not continue
cranking the engine. Continued cranking can
damage the high-pressure fuel pump.
If the engine runs hot
The following could cause the engine to
overheat:
• Lack of coolant
• Dirty cooling system.
• Plugged radiator fins, A/C condenser
and/or oil cooler
• Malfunctioning fan drive •
Driving with frozen coolant
• Sticking thermostat
• Overloading or pulling heavy trailers
during hot weather
• Grill or radiator air blockage
• Slipping or missing drive belt
• Plugged or very dirty air filter
If fuses burn out WARNING
Replacement fuses and circuit
breakers must always be the same
rating as the original equipment
shown. Never replace a fuse or circuit
breaker with one of a higher rating. Higher
rated fuses or circuit breakers could allow
circuit overloading in the event of a circuit
malfunction, resulting in severe vehicle
damage or personal injury due to fire. Burned-out or blown fuses usually indicate
an electrical short-circuit, although a fuse
may occasionally burn out from vibration.
Insert a second fuse. If this fuse
immediately burns out and you cannot
locate the cause, return your vehicle to
your dealer for a circuit check. See
Changing a Fuse
(page 169).
Selective catalytic reduction system
speed limit and Idle-only modes
If the vehicle ’s speed is limited or in an
idle-only mode, the selective catalytic
reduction system may be limiting the
vehicle ’s functions due to low or
contaminated DEF. Check the DEF. See
Selective Catalytic Reduction System
(page
95).
SYMBOLS GLOSSARY
These are some of the symbols you may
see on your vehicle.
10
F-650/750 (TBC) , enUSA, First Printing Introduction
Page 14 of 382
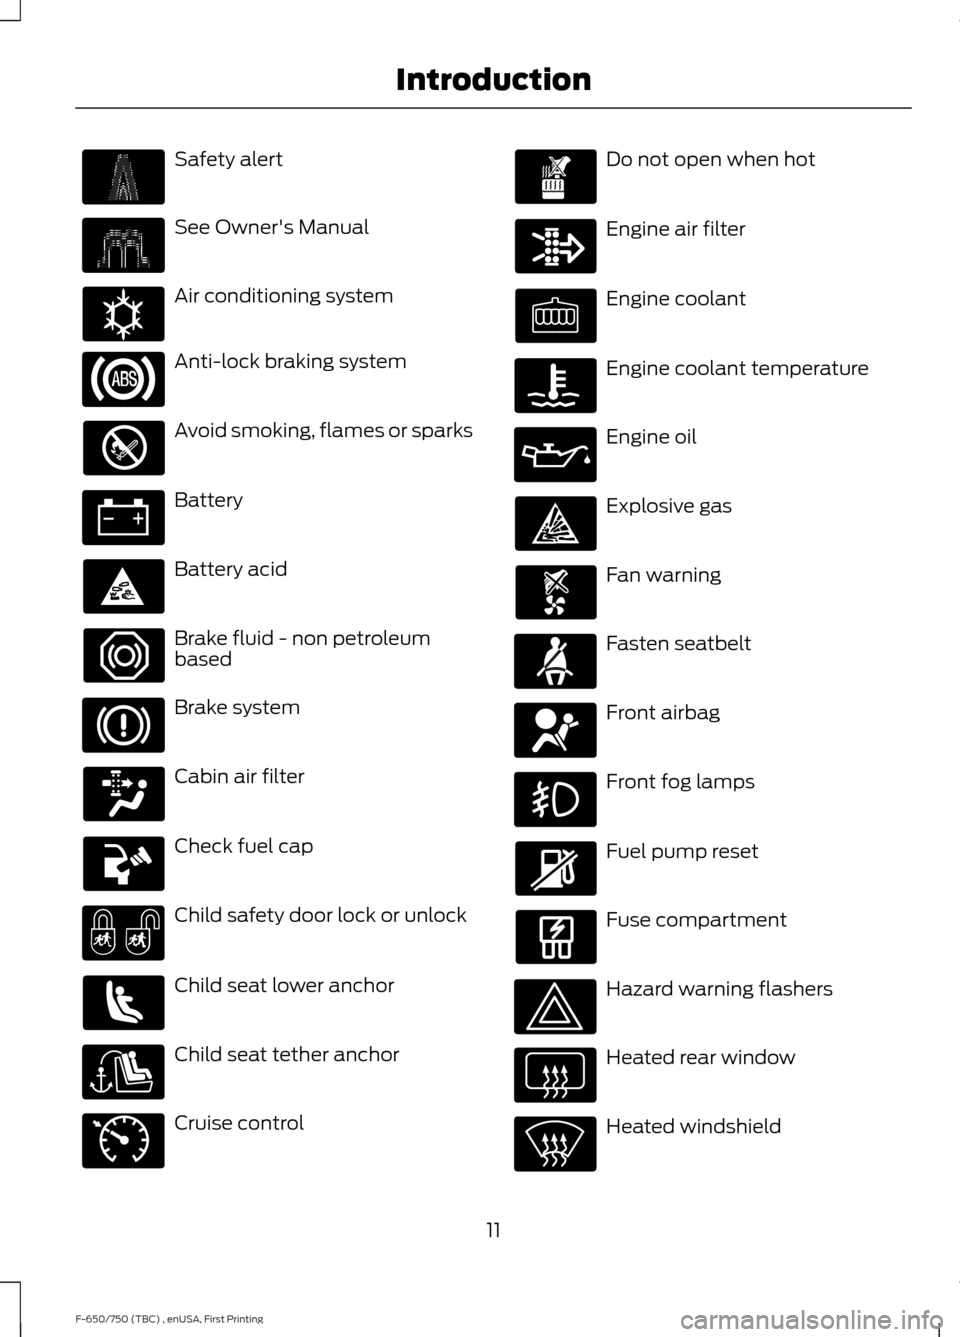
Safety alert
See Owner's Manual
Air conditioning system
Anti-lock braking system
Avoid smoking, flames or sparks
Battery
Battery acid
Brake fluid - non petroleum
based
Brake system
Cabin air filter
Check fuel cap
Child safety door lock or unlock
Child seat lower anchor
Child seat tether anchor
Cruise control Do not open when hot
Engine air filter
Engine coolant
Engine coolant temperature
Engine oil
Explosive gas
Fan warning
Fasten seatbelt
Front airbag
Front fog lamps
Fuel pump reset
Fuse compartment
Hazard warning flashers
Heated rear window
Heated windshield
11
F-650/750 (TBC) , enUSA, First Printing Introduction E162384 E71340
Page 19 of 382
PROTECTING THE
ENVIRONMENT
You must play your part in protecting the
environment. Correct vehicle usage and
the authorized disposal of waste, cleaning
and lubrication materials are significant
steps toward this aim.
NOISE POLLUTION CONTROL
In order to keep to the federal exterior
noise regulations, your vehicle may be
equipped with noise emission items.
Depending on your vehicle configuration,
it may have all or some of the following
items:
Air Intake System
Inspect the air cleaner. Do not alter its
location. Do not alter inlet and outlet
piping.
Body
Inspect wheel well splash shields, cab
shields and under hood insulation for
deterioration, dislocation and orientation.
Cooling System
•
Inspect the fan for blade damage. If
you find any damage, replace with the
recommended parts. Inspect for
fan-to-shroud interference and any
damage to shroud, such as cracks and
holes.
• Do not change fan ratio or alter fan
spacer dimensions and positions.
• Inspect fan clutch for proper operation.
Make sure the fan is disengaged when
cooling of the engine is not required.
• Inspect radiator shutters (if equipped)
for proper operation. The shutters
should be open during normal
operating temperatures. Engine
Valve covers and block covers damp-out
engine mechanical noise. If they need
replacing, make sure to replace them with
the recommended parts. Check for
mechanical isolations.
Transmission Enclosure
Inspect for cracks, holes and tears. Clean
any deposits, such as oil, dirt and stones.
Exhaust System
•
Inspect for leaks at various joint
connections and loose clamps.
• Perform a visual inspection for cracks
or holes in the muffler and tail pipe.
• Always use the recommended
replacement parts.
• Do not change the tail pipe elbow or
offset tail pipe orientation from the
standard position as originally received.
• To avoid abnormal changes in vehicle
sound levels, it is necessary for the
owner to perform inspections and
necessary maintenance at specified
intervals. See Scheduled
Maintenance (page 316).
16
F-650/750 (TBC) , enUSA, First Printing Environment
Page 58 of 382
Engine Oil Pressure Gauge
Indicates engine oil pressure. The needle
should stay in the normal operating range
(between L and H). If the needle falls
below the normal range, stop the vehicle,
switch off the engine and check the engine
oil level. Add oil if needed. If the oil level is
correct, have your vehicle checked by an
authorized dealer.
Engine Coolant Temperature
Gauge
WARNING
Never remove the coolant reservoir
cap while the engine is running or hot.
Indicates engine coolant temperature. At
normal operating temperature, the level
indicator is in the normal range. If the
engine coolant temperature exceeds the
normal range, stop the vehicle as soon as
safely possible, switch off the engine and
let the engine cool.
Transmission Fluid Temperature
Gauge
Indicates transmission fluid temperature.
At normal operating temperature, the level
indicator is in the normal range. If the
transmission fluid temperature exceeds
the normal range, stop the vehicle as soon
as safely possible and verify the airflow is
not restricted such as snow or debris
blocking airflow through the grille.
Special operating conditions, such as
snowplowing, towing or off-road use, can
cause higher than normal operating
temperatures. See Special Operating
Conditions Scheduled Maintenance
(page
328). Operating the transmission for extended
periods with the gauge in the higher than
normal area may cause internal
transmission damage. We recommend
altering the severity of the driving
conditions to lower the transmission
temperature into the normal range. If the
gauge continues to show high
temperatures, contact an authorized
dealer.
Fuel Gauge
Note:
The fuel gauge may vary slightly
when your vehicle is moving or on a gradient.
Switch the ignition on. The fuel gauge
indicates approximately how much fuel is
in the fuel tank. The arrow adjacent to the
fuel pump symbol indicates on which side
of your vehicle the fuel filler door is located.
The needle should move toward F when
you refuel your vehicle. If the needle points
to E after adding fuel, this indicates your
vehicle needs service soon.
After refueling, some variability in needle
position is normal:
• It may take a short time for the needle
to reach F after leaving the gas station.
This is normal and depends upon the
slope of pavement at the gas station.
• The fuel amount dispensed into the
tank is a little less or more than the
gauge indicated. This is normal and
depends upon the slope of pavement
at the gas station.
• If the gas station nozzle shuts off
before the tank is full, try a different
gas pump nozzle.
Gauge Package
(If Equipped)
If your vehicle is equipped with the optional
gauge package, it has some or all of the
following gauges:
55
F-650/750 (TBC) , enUSA, First Printing Instrument Cluster
Page 60 of 382
Fuel gauge.
D
Speedometer.
E
Information display.
F
Tachometer.
G
Engine Oil Pressure Gauge
Indicates engine oil pressure. The needle
should stay in the normal operating range
(between L and H). If the needle falls
below the normal range, stop the vehicle,
switch off the engine and check the engine
oil level. Add oil if needed. If the oil level is
correct, have your vehicle checked by an
authorized dealer.
Engine Coolant Temperature
Gauge WARNING
Never remove the coolant reservoir
cap while the engine is running or hot.
Indicates engine coolant temperature. At
normal operating temperature, the level
indicator is in the normal range. If the
engine coolant temperature exceeds the
normal range, stop the vehicle as soon as
safely possible, switch off the engine and
let the engine cool.
Diesel Exhaust Fluid (DEF) Gauge
Indicates the fluid level in the DEF tank.
Fuel Gauge
Note:
The fuel gauge may vary slightly
when your vehicle is moving or on a gradient.
Switch the ignition on. The fuel gauge
indicates approximately how much fuel is
in the fuel tank. The arrow adjacent to the
fuel pump symbol indicates on which side
of your vehicle the fuel filler door is located. The needle should move toward F when
you refuel your vehicle. If the needle points
to E after adding fuel, this indicates your
vehicle needs service soon.
After refueling, some variability in needle
position is normal:
•
It may take a short time for the needle
to reach F after leaving the gas station.
This is normal and depends upon the
slope of pavement at the gas station.
• The fuel amount dispensed into the
tank is a little less or more than the
gauge indicated. This is normal and
depends upon the slope of pavement
at the gas station.
• If the gas station nozzle shuts off
before the tank is full, try a different
gas pump nozzle.
Gauge Package (If Equipped)
If your vehicle is equipped with the optional
gauge package, it has some or all of the
following gauges:
• Transmission temperature gauge:
Displays the transmission fluid
temperature at the transmission sump.
• Hourmeter:
Displays the hours of
engine run time.
• Voltmeter:
Displays electrical system
voltage.
Information Display
Odometer
Located in the bottom of the information
display. Registers the accumulated
distance your vehicle has traveled.
57
F-650/750 (TBC) , enUSA, First Printing Instrument Cluster
Page 62 of 382
Diesel Particulate Filter (Diesel
Engine Only)
Illuminates when the soot level in the
diesel particulate filter has reached a point
where it requires operator assistance. See
Diesel Particulate Filter (page 87).
Direction Indicator Illuminates when you switch on
the left or right direction
indicator or when you switch on
the hazard warning flashers. If the
indicators stay on or flash faster, check for
a burned out bulb.
Door Ajar Displays when the ignition is on
and any door is not completely
closed.
Electronic Locking Differential
(If
Equipped) Illuminates when using the
electronic locking differential.
Engine Oil Pressure If it illuminates with the engine
running, or when you are driving,
this indicates a malfunction.
Stop your vehicle as soon as it is safe to
do so and switch off the engine. Check the
engine oil level.
Note: Do not resume your journey if it
illuminates despite the level being correct.
Have the system checked by an authorized
dealer immediately.
Exhaust Brake On The exhaust brake indicator light
illuminates when you switch the
exhaust brake on. Fasten Seatbelt Illuminates and a tone sounds
to remind you to fasten your
seatbelt.
High Beam Illuminates when you switch on
the high beam headlamps. It
flashes when you use the
headlamp flasher.
Hydromax Illuminates to indicate normal
hydromax booster reserve
system activation when the
engine is off and the service brake pedal is
applied. This light may also illuminate
momentarily if the engine is running and
the driver turns the steering wheel fully in
one direction while braking. If the light
remains on while the engine is running, this
indicates inadequate hydraulic booster
pressure or reserve pump system failure.
Stop the vehicle as soon as possible and
seek service immediately by your
authorized dealer.
Low Fuel Level (Gasoline Engine
Only) Illuminates when the fuel level
is low or the fuel tank is nearly
empty. Refuel as soon as
possible.
Parking Brake Warning Illuminates briefly when you
switch the ignition to the on
position (with the engine off). It
also illuminates when you apply the
parking brake. If the park brake lamp does
not illuminate at these times, seek service
immediately. Vehicles equipped with the
power park parking brake option: If the park
59
F-650/750 (TBC) , enUSA, First Printing Instrument Cluster E163170 E171217 E146190 E208810
Page 66 of 382
TRIP A/B
Registers the distance of individual
journeys. Press and release the INFO
button until TRIP A/B appears in the
display (this represents the trip mode).
Press and hold the RESET button to reset.
XXX MILES (km) TO E
This displays an estimate of approximately
how far you can drive with the fuel
remaining in your tank under normal driving
conditions. Remember to turn the ignition
off when refueling to allow this feature to
detect the correct amount of added fuel.
The system calculates the distance to
empty by using a running average fuel
economy, which uses your recent driving
history of 500 miles (800 km).
This value is not the same as the average
fuel economy display. The running average
fuel economy resets to a factory default
value if the battery is disconnected.
XX.X AVG MPG (L/100km)
Average fuel economy displays your
average fuel economy in miles per gallon
or liters/100 km.
MPG (L/km)
Displays the instantaneous fuel economy
as a bar graph. Your vehicle must be
moving to calculate instantaneous fuel
economy. You cannot reset the
instantaneous fuel economy.
TIMER
Displays the trip elapsed drive time. Press
and release RESET to pause the timer.
Press and hold RESET to reset the timer.
EXHAUST FILTER
Displays information about the status of
the exhaust filter.
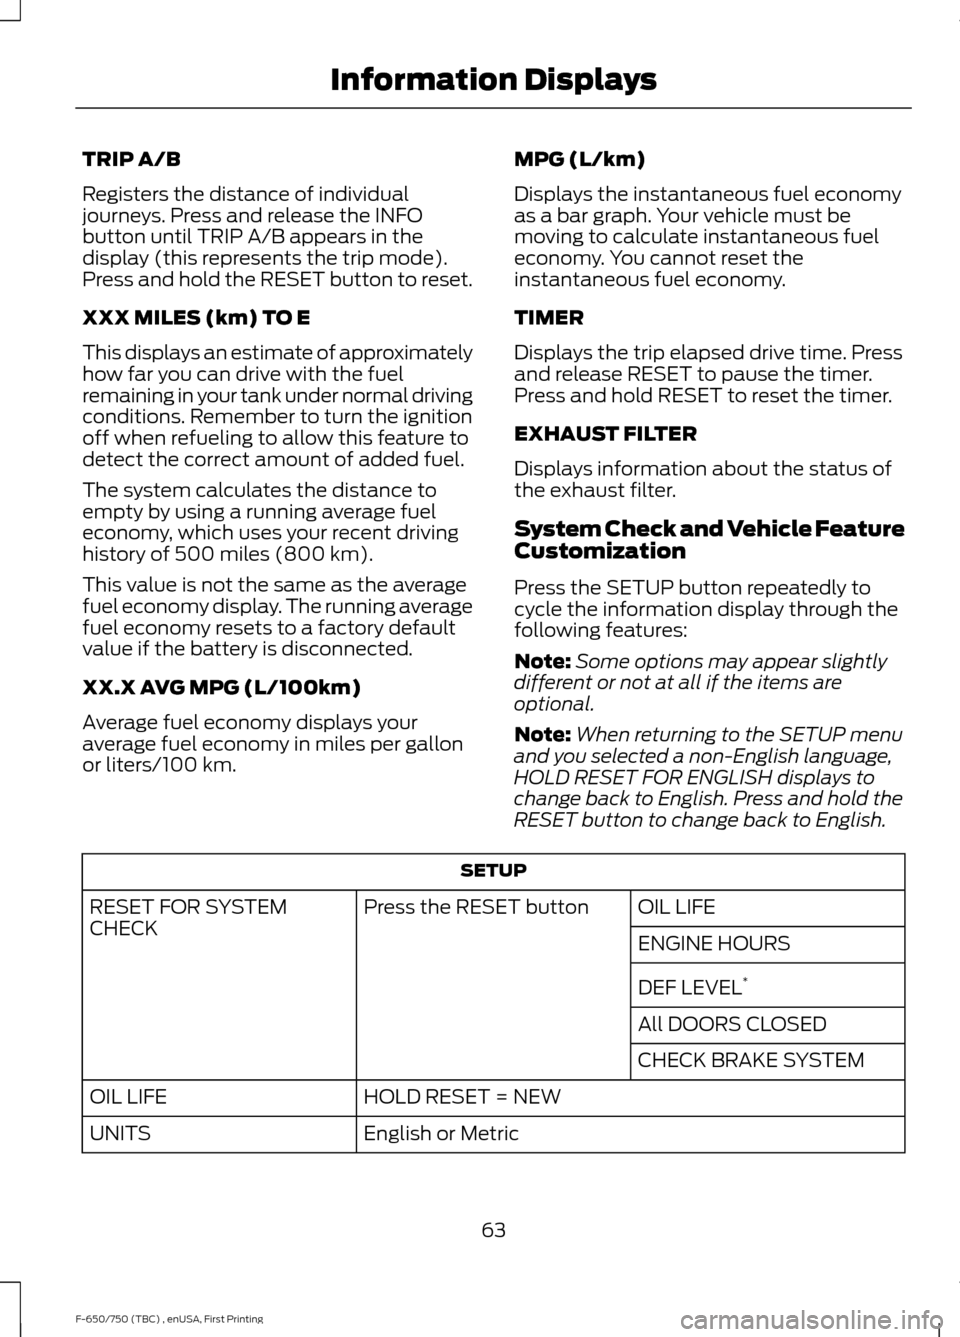
System Check and Vehicle Feature
Customization
Press the SETUP button repeatedly to
cycle the information display through the
following features:
Note:
Some options may appear slightly
different or not at all if the items are
optional.
Note: When returning to the SETUP menu
and you selected a non-English language,
HOLD RESET FOR ENGLISH displays to
change back to English. Press and hold the
RESET button to change back to English. SETUP
OIL LIFE
Press the RESET button
RESET FOR SYSTEM
CHECK
ENGINE HOURS
DEF LEVEL*
All DOORS CLOSED
CHECK BRAKE SYSTEM
HOLD RESET = NEW
OIL LIFE
English or Metric
UNITS
63
F-650/750 (TBC) , enUSA, First Printing Information Displays
Page 67 of 382
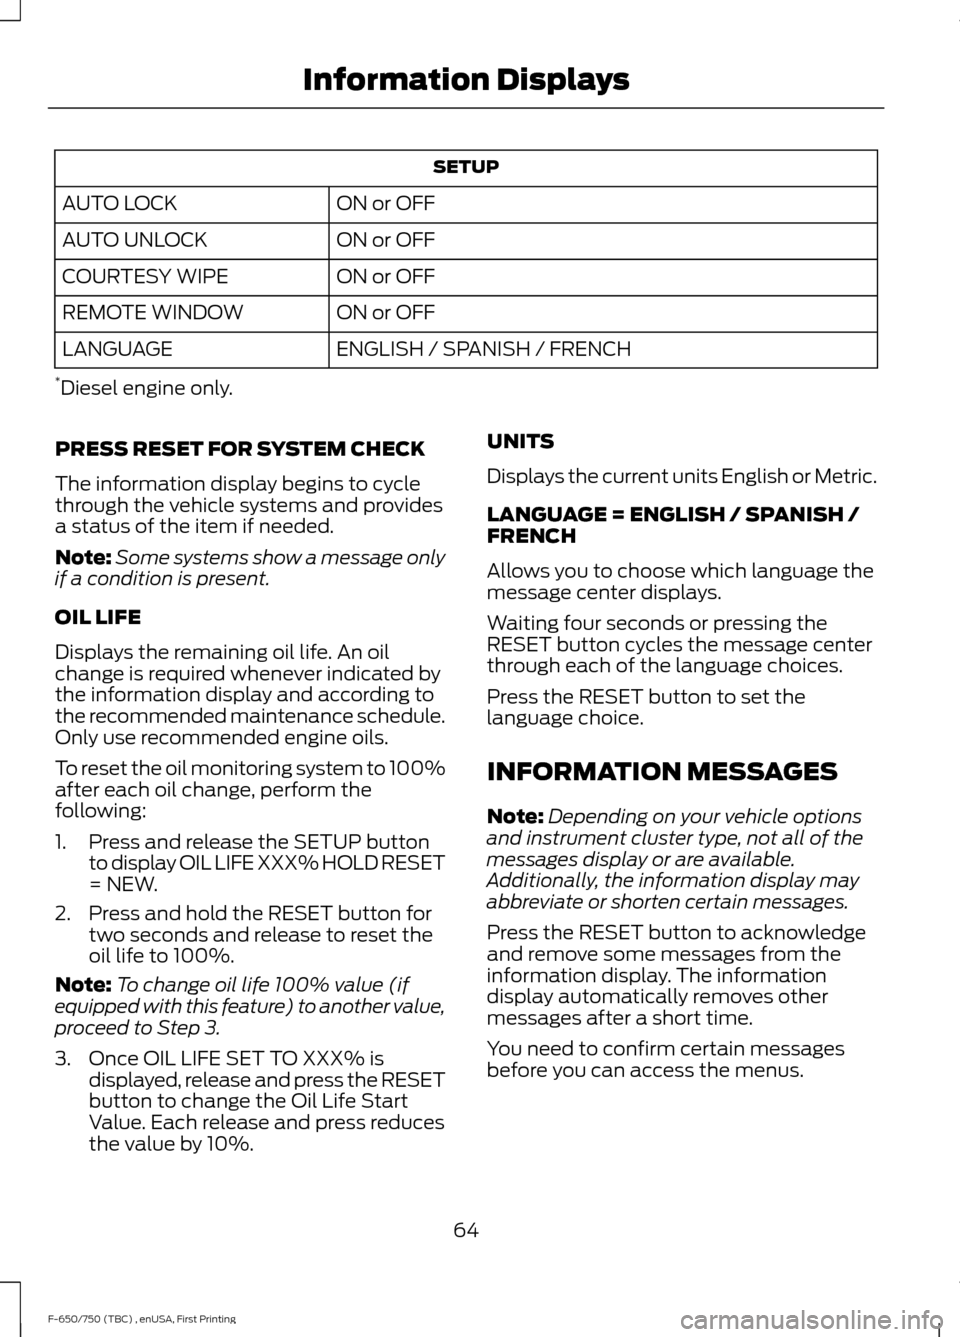
SETUP
ON or OFF
AUTO LOCK
ON or OFF
AUTO UNLOCK
ON or OFF
COURTESY WIPE
ON or OFF
REMOTE WINDOW
ENGLISH / SPANISH / FRENCH
LANGUAGE
* Diesel engine only.
PRESS RESET FOR SYSTEM CHECK
The information display begins to cycle
through the vehicle systems and provides
a status of the item if needed.
Note: Some systems show a message only
if a condition is present.
OIL LIFE
Displays the remaining oil life. An oil
change is required whenever indicated by
the information display and according to
the recommended maintenance schedule.
Only use recommended engine oils.
To reset the oil monitoring system to 100%
after each oil change, perform the
following:
1. Press and release the SETUP button to display OIL LIFE XXX% HOLD RESET
= NEW.
2. Press and hold the RESET button for two seconds and release to reset the
oil life to 100%.
Note: To change oil life 100% value (if
equipped with this feature) to another value,
proceed to Step 3.
3. Once OIL LIFE SET TO XXX% is displayed, release and press the RESET
button to change the Oil Life Start
Value. Each release and press reduces
the value by 10%. UNITS
Displays the current units English or Metric.
LANGUAGE = ENGLISH / SPANISH /
FRENCH
Allows you to choose which language the
message center displays.
Waiting four seconds or pressing the
RESET button cycles the message center
through each of the language choices.
Press the RESET button to set the
language choice.
INFORMATION MESSAGES
Note:
Depending on your vehicle options
and instrument cluster type, not all of the
messages display or are available.
Additionally, the information display may
abbreviate or shorten certain messages.
Press the RESET button to acknowledge
and remove some messages from the
information display. The information
display automatically removes other
messages after a short time.
You need to confirm certain messages
before you can access the menus.
64
F-650/750 (TBC) , enUSA, First Printing Information Displays