Instrument FORD F650/750 2019 User Guide
[x] Cancel search | Manufacturer: FORD, Model Year: 2019, Model line: F650/750, Model: FORD F650/750 2019Pages: 387, PDF Size: 4.78 MB
Page 64 of 387
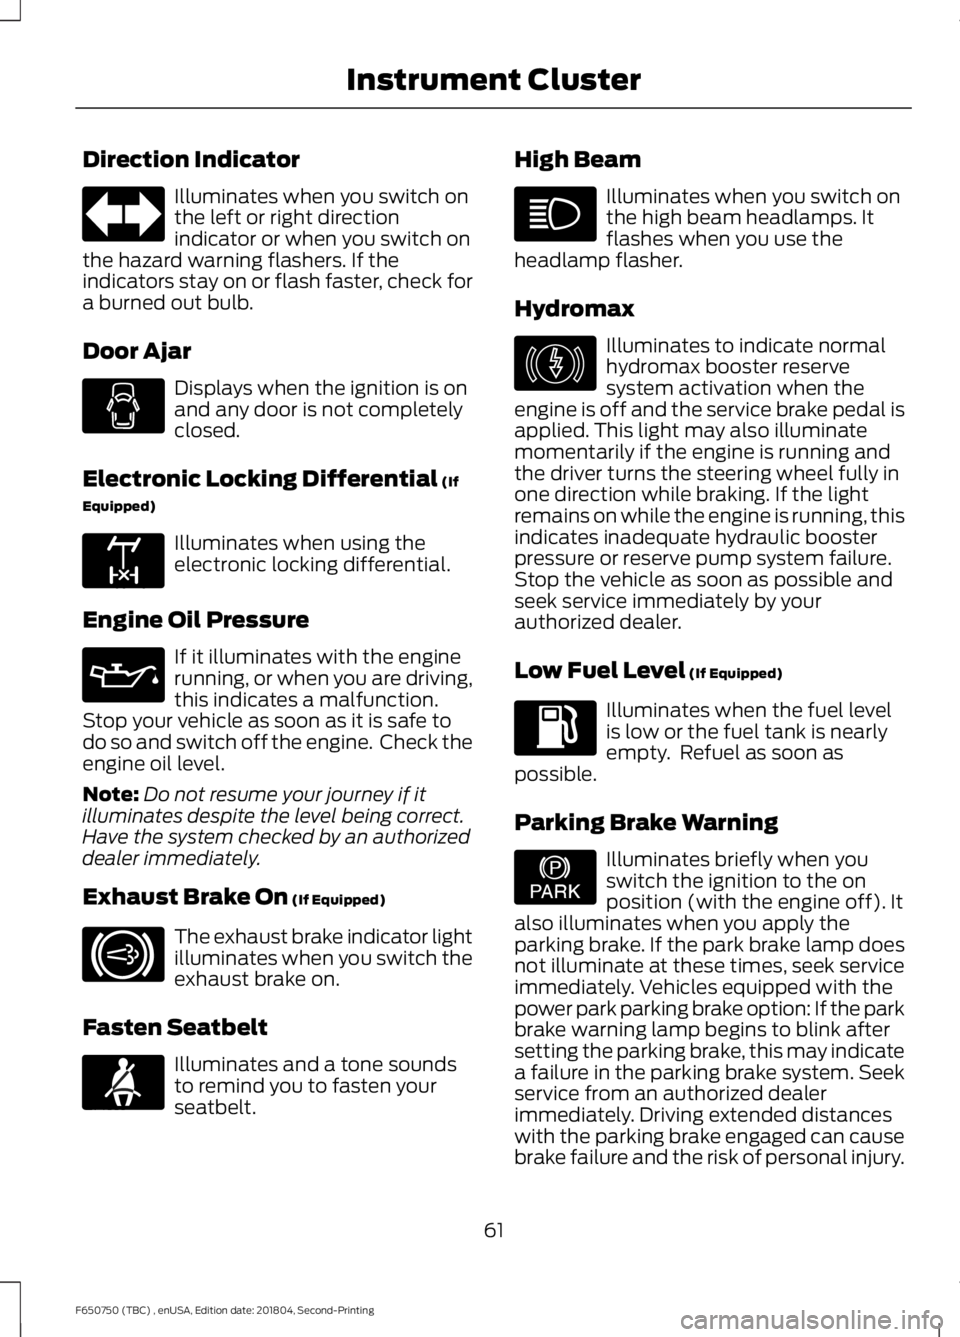
Direction Indicator
Illuminates when you switch on
the left or right direction
indicator or when you switch on
the hazard warning flashers. If the
indicators stay on or flash faster, check for
a burned out bulb.
Door Ajar Displays when the ignition is on
and any door is not completely
closed.
Electronic Locking Differential (If
Equipped) Illuminates when using the
electronic locking differential.
Engine Oil Pressure If it illuminates with the engine
running, or when you are driving,
this indicates a malfunction.
Stop your vehicle as soon as it is safe to
do so and switch off the engine. Check the
engine oil level.
Note: Do not resume your journey if it
illuminates despite the level being correct.
Have the system checked by an authorized
dealer immediately.
Exhaust Brake On
(If Equipped) The exhaust brake indicator light
illuminates when you switch the
exhaust brake on.
Fasten Seatbelt Illuminates and a tone sounds
to remind you to fasten your
seatbelt. High Beam Illuminates when you switch on
the high beam headlamps. It
flashes when you use the
headlamp flasher.
Hydromax Illuminates to indicate normal
hydromax booster reserve
system activation when the
engine is off and the service brake pedal is
applied. This light may also illuminate
momentarily if the engine is running and
the driver turns the steering wheel fully in
one direction while braking. If the light
remains on while the engine is running, this
indicates inadequate hydraulic booster
pressure or reserve pump system failure.
Stop the vehicle as soon as possible and
seek service immediately by your
authorized dealer.
Low Fuel Level
(If Equipped) Illuminates when the fuel level
is low or the fuel tank is nearly
empty. Refuel as soon as
possible.
Parking Brake Warning Illuminates briefly when you
switch the ignition to the on
position (with the engine off). It
also illuminates when you apply the
parking brake. If the park brake lamp does
not illuminate at these times, seek service
immediately. Vehicles equipped with the
power park parking brake option: If the park
brake warning lamp begins to blink after
setting the parking brake, this may indicate
a failure in the parking brake system. Seek
service from an authorized dealer
immediately. Driving extended distances
with the parking brake engaged can cause
brake failure and the risk of personal injury.
61
F650750 (TBC) , enUSA, Edition date: 201804, Second-Printing Instrument Cluster E163170 E171217 E71880 E146190 E208810
Page 65 of 387
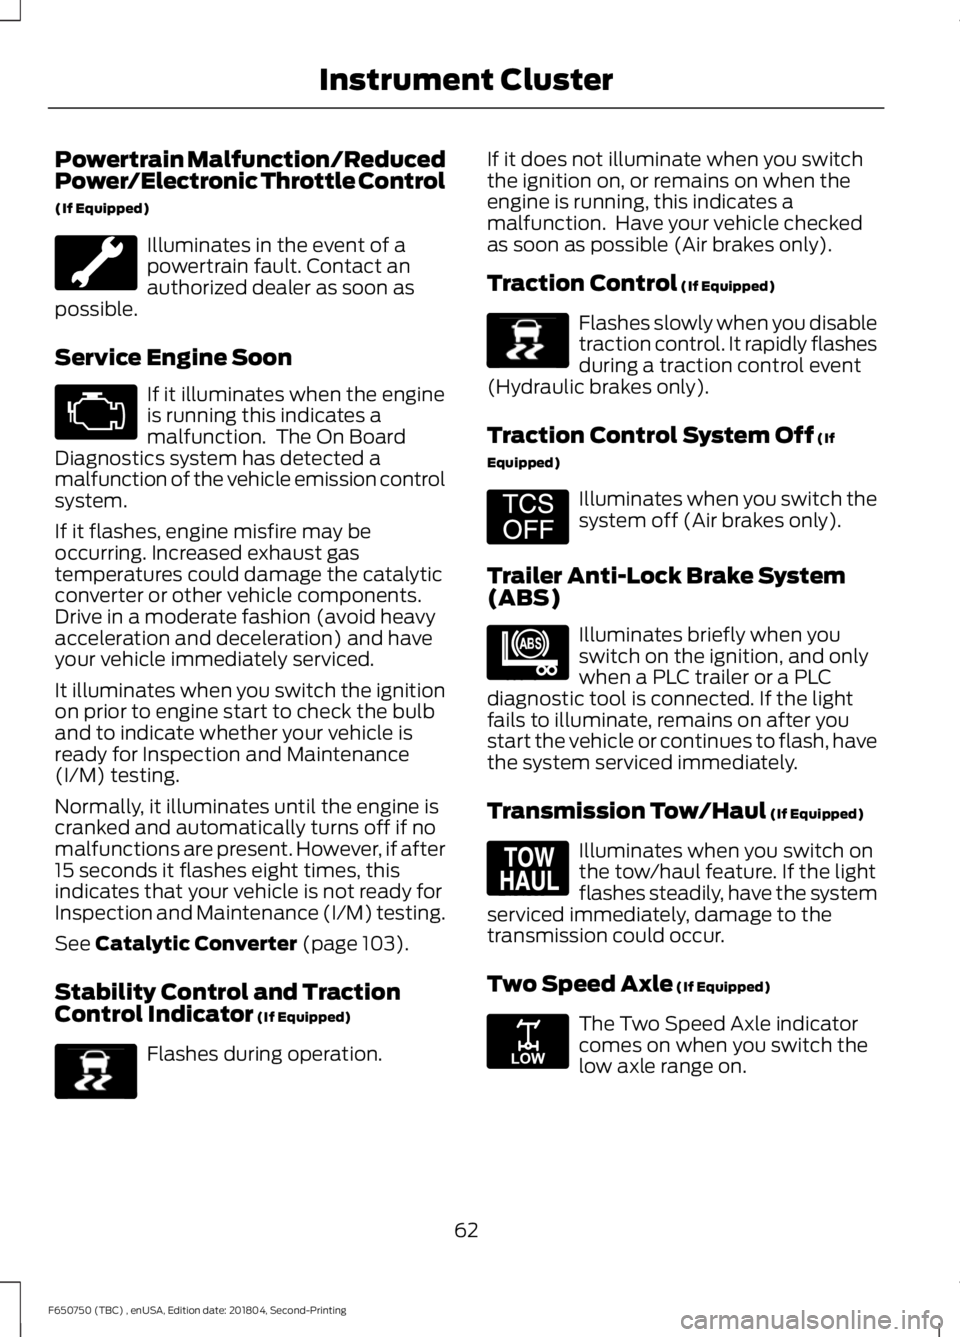
Powertrain Malfunction/Reduced
Power/Electronic Throttle Control
(If Equipped)
Illuminates in the event of a
powertrain fault. Contact an
authorized dealer as soon as
possible.
Service Engine Soon If it illuminates when the engine
is running this indicates a
malfunction. The On Board
Diagnostics system has detected a
malfunction of the vehicle emission control
system.
If it flashes, engine misfire may be
occurring. Increased exhaust gas
temperatures could damage the catalytic
converter or other vehicle components.
Drive in a moderate fashion (avoid heavy
acceleration and deceleration) and have
your vehicle immediately serviced.
It illuminates when you switch the ignition
on prior to engine start to check the bulb
and to indicate whether your vehicle is
ready for Inspection and Maintenance
(I/M) testing.
Normally, it illuminates until the engine is
cranked and automatically turns off if no
malfunctions are present. However, if after
15 seconds it flashes eight times, this
indicates that your vehicle is not ready for
Inspection and Maintenance (I/M) testing.
See Catalytic Converter (page 103).
Stability Control and Traction
Control Indicator
(If Equipped) Flashes during operation. If it does not illuminate when you switch
the ignition on, or remains on when the
engine is running, this indicates a
malfunction. Have your vehicle checked
as soon as possible (Air brakes only).
Traction Control
(If Equipped) Flashes slowly when you disable
traction control. It rapidly flashes
during a traction control event
(Hydraulic brakes only).
Traction Control System Off
(If
Equipped) Illuminates when you switch the
system off (Air brakes only).
Trailer Anti-Lock Brake System
(ABS) Illuminates briefly when you
switch on the ignition, and only
when a PLC trailer or a PLC
diagnostic tool is connected. If the light
fails to illuminate, remains on after you
start the vehicle or continues to flash, have
the system serviced immediately.
Transmission Tow/Haul
(If Equipped) Illuminates when you switch on
the tow/haul feature. If the light
flashes steadily, have the system
serviced immediately, damage to the
transmission could occur.
Two Speed Axle
(If Equipped) The Two Speed Axle indicator
comes on when you switch the
low axle range on.
62
F650750 (TBC) , enUSA, Edition date: 201804, Second-Printing Instrument Cluster E138639 E138639 E194301 E209040 E161509 E208809
Page 66 of 387
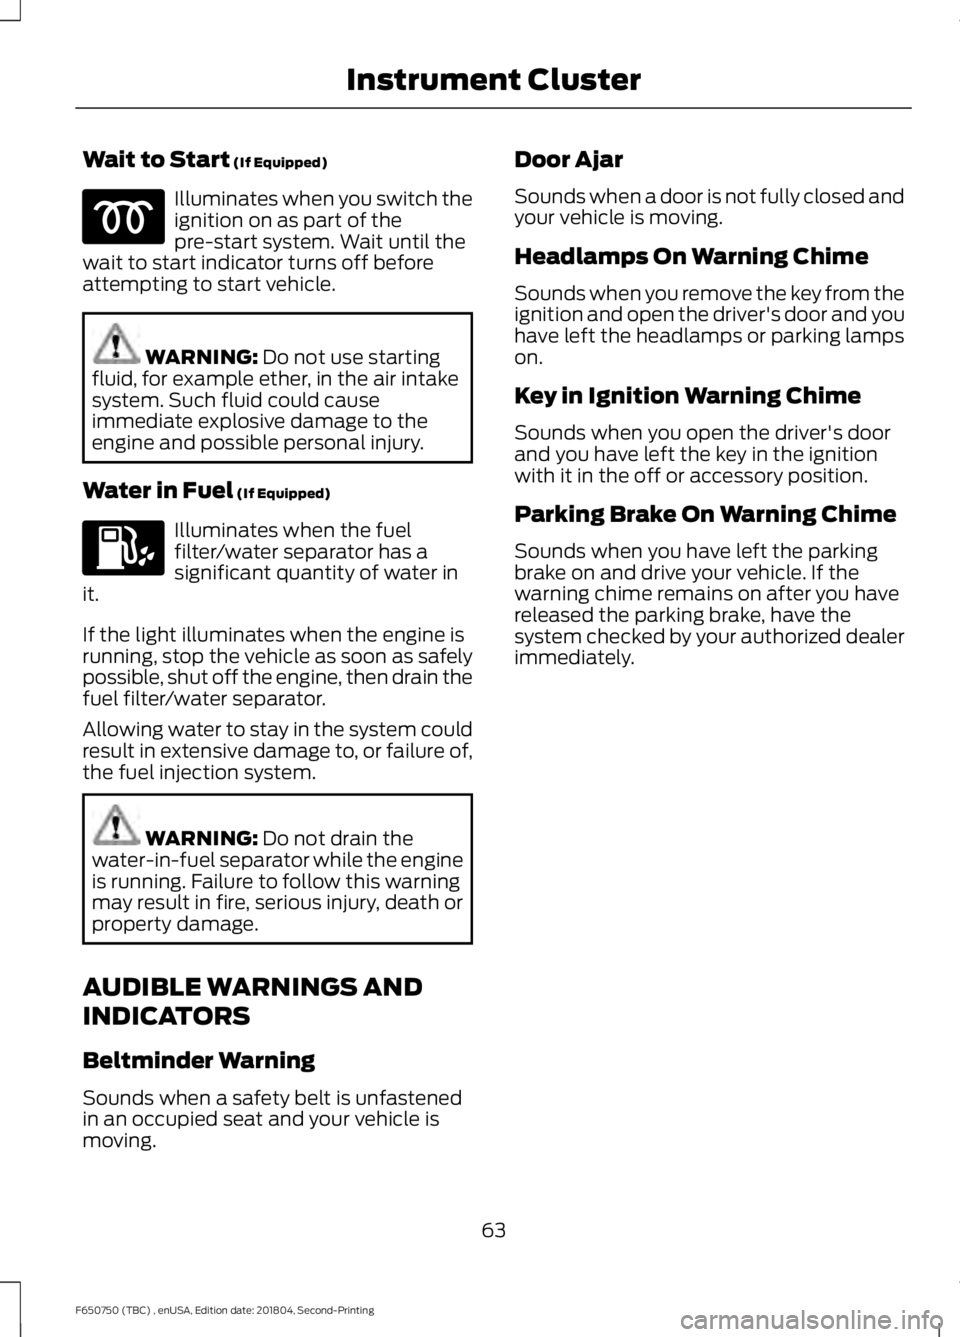
Wait to Start (If Equipped)
Illuminates when you switch the
ignition on as part of the
pre-start system. Wait until the
wait to start indicator turns off before
attempting to start vehicle. WARNING:
Do not use starting
fluid, for example ether, in the air intake
system. Such fluid could cause
immediate explosive damage to the
engine and possible personal injury.
Water in Fuel
(If Equipped) Illuminates when the fuel
filter/water separator has a
significant quantity of water in
it.
If the light illuminates when the engine is
running, stop the vehicle as soon as safely
possible, shut off the engine, then drain the
fuel filter/water separator.
Allowing water to stay in the system could
result in extensive damage to, or failure of,
the fuel injection system. WARNING:
Do not drain the
water-in-fuel separator while the engine
is running. Failure to follow this warning
may result in fire, serious injury, death or
property damage.
AUDIBLE WARNINGS AND
INDICATORS
Beltminder Warning
Sounds when a safety belt is unfastened
in an occupied seat and your vehicle is
moving. Door Ajar
Sounds when a door is not fully closed and
your vehicle is moving.
Headlamps On Warning Chime
Sounds when you remove the key from the
ignition and open the driver's door and you
have left the headlamps or parking lamps
on.
Key in Ignition Warning Chime
Sounds when you open the driver's door
and you have left the key in the ignition
with it in the off or accessory position.
Parking Brake On Warning Chime
Sounds when you have left the parking
brake on and drive your vehicle. If the
warning chime remains on after you have
released the parking brake, have the
system checked by your authorized dealer
immediately.
63
F650750 (TBC) , enUSA, Edition date: 201804, Second-Printing Instrument Cluster
Page 70 of 387
3. Once OIL LIFE SET TO XXX% is
displayed, release and press the RESET
button to change the Oil Life Start
Value. Each release and press reduces
the value by 10%.
UNITS
Displays the current units English or Metric.
LANGUAGE = ENGLISH / SPANISH /
FRENCH
Allows you to choose which language the
message center displays.
Waiting four seconds or pressing the
RESET button cycles the message center
through each of the language choices.
Press the RESET button to set the
language choice. INFORMATION MESSAGES
Note:
Depending on your vehicle options
and instrument cluster type, not all of the
messages display or are available.
Additionally, the information display may
abbreviate or shorten certain messages.
Press the RESET button to acknowledge
and remove some messages from the
information display. The information
display automatically removes other
messages after a short time.
You need to confirm certain messages
before you can access the menus.
Diesel Messages WARNING: When the CLEANING
EXHAUST FILTER message appears in
the information display, do not park near
flammable materials, vapors or
structures until filter cleaning is
complete. Action
Message
The coolant additive needs checking.
CHECK COOLANT
ADDITIVE
Your vehicle has entered the cleaning mode. Various engine
actions raise the exhaust temperature in the diesel particulate filter system to burn off the particles (exhaust soot). After
the vehicle burns off the particles, the exhaust temperature returns to normal levels. This message is normal.
CLEANING EXHAUST
FILTER
The diesel particulate filter is full of particles (exhaust soot)
and you are not operating the vehicle in a manner that allows normal cleaning. One of these messages stays on until the
exhaust filter cleaning has begun, at which time the CLEANING EXHAUST FILTER message displays. We recommend you
drive the vehicle above 30 mph (48 km/h) until the CLEANING EXHAUST FILTER message turns off.
EXHAUST OVER-
LOADED DRIVE TO CLEAN
EXHAUST AT LIMIT
DRIVE TO CLEAN NOW
67
F650750 (TBC) , enUSA, Edition date: 201804, Second-Printing Information Displays
Page 75 of 387
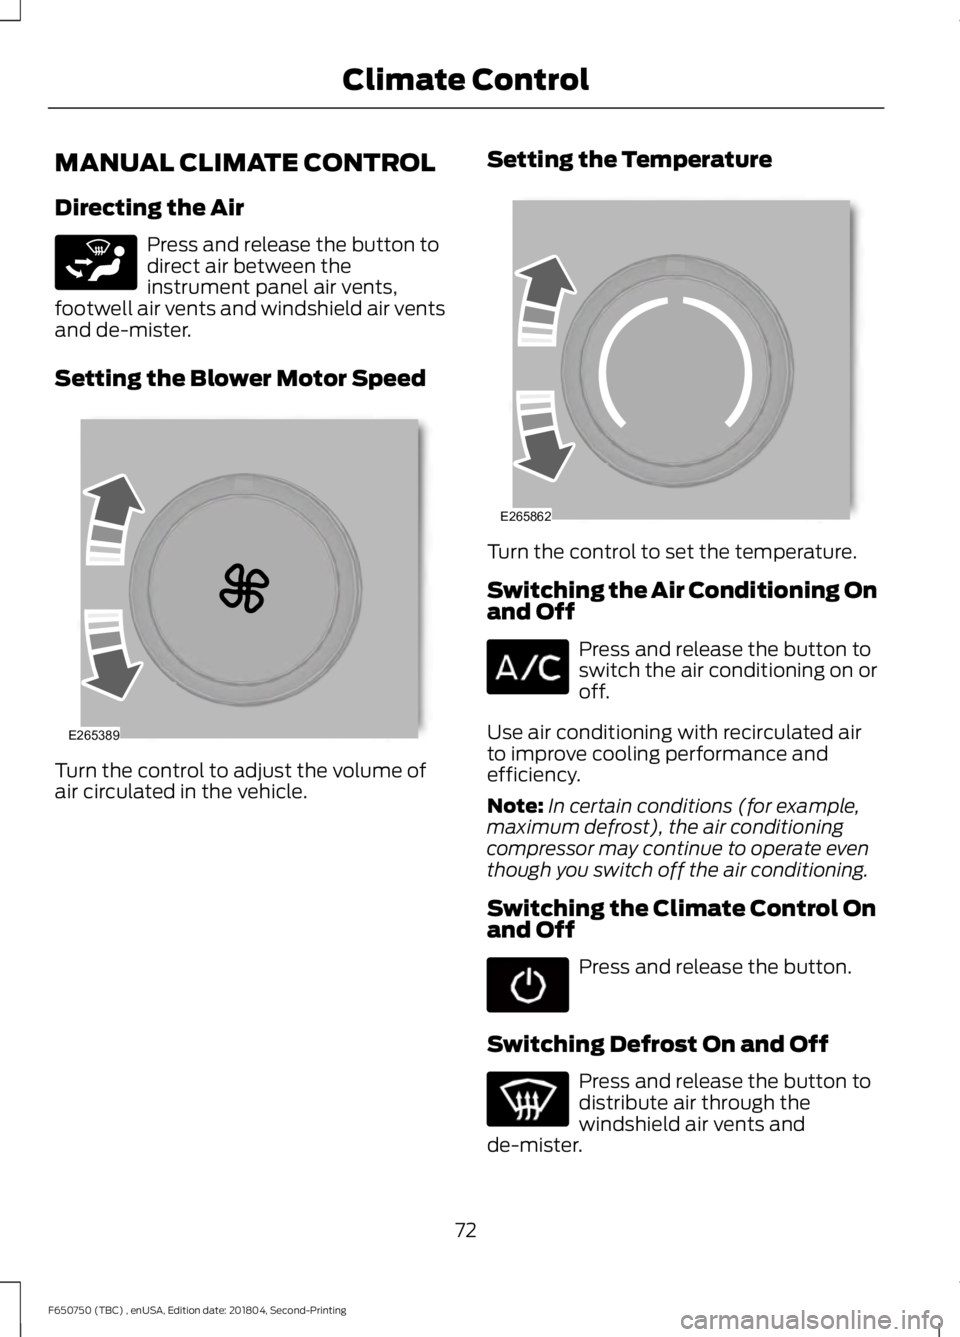
MANUAL CLIMATE CONTROL
Directing the Air
Press and release the button to
direct air between the
instrument panel air vents,
footwell air vents and windshield air vents
and de-mister.
Setting the Blower Motor Speed Turn the control to adjust the volume of
air circulated in the vehicle. Setting the Temperature Turn the control to set the temperature.
Switching the Air Conditioning On
and Off
Press and release the button to
switch the air conditioning on or
off.
Use air conditioning with recirculated air
to improve cooling performance and
efficiency.
Note: In certain conditions (for example,
maximum defrost), the air conditioning
compressor may continue to operate even
though you switch off the air conditioning.
Switching the Climate Control On
and Off Press and release the button.
Switching Defrost On and Off Press and release the button to
distribute air through the
windshield air vents and
de-mister.
72
F650750 (TBC) , enUSA, Edition date: 201804, Second-Printing Climate ControlE265283 E265389 E265862
Page 76 of 387
Air directed to the instrument panel and
footwell air vents turns off. You can also
use this setting to defog and clear the
windshield of a thin covering of ice.
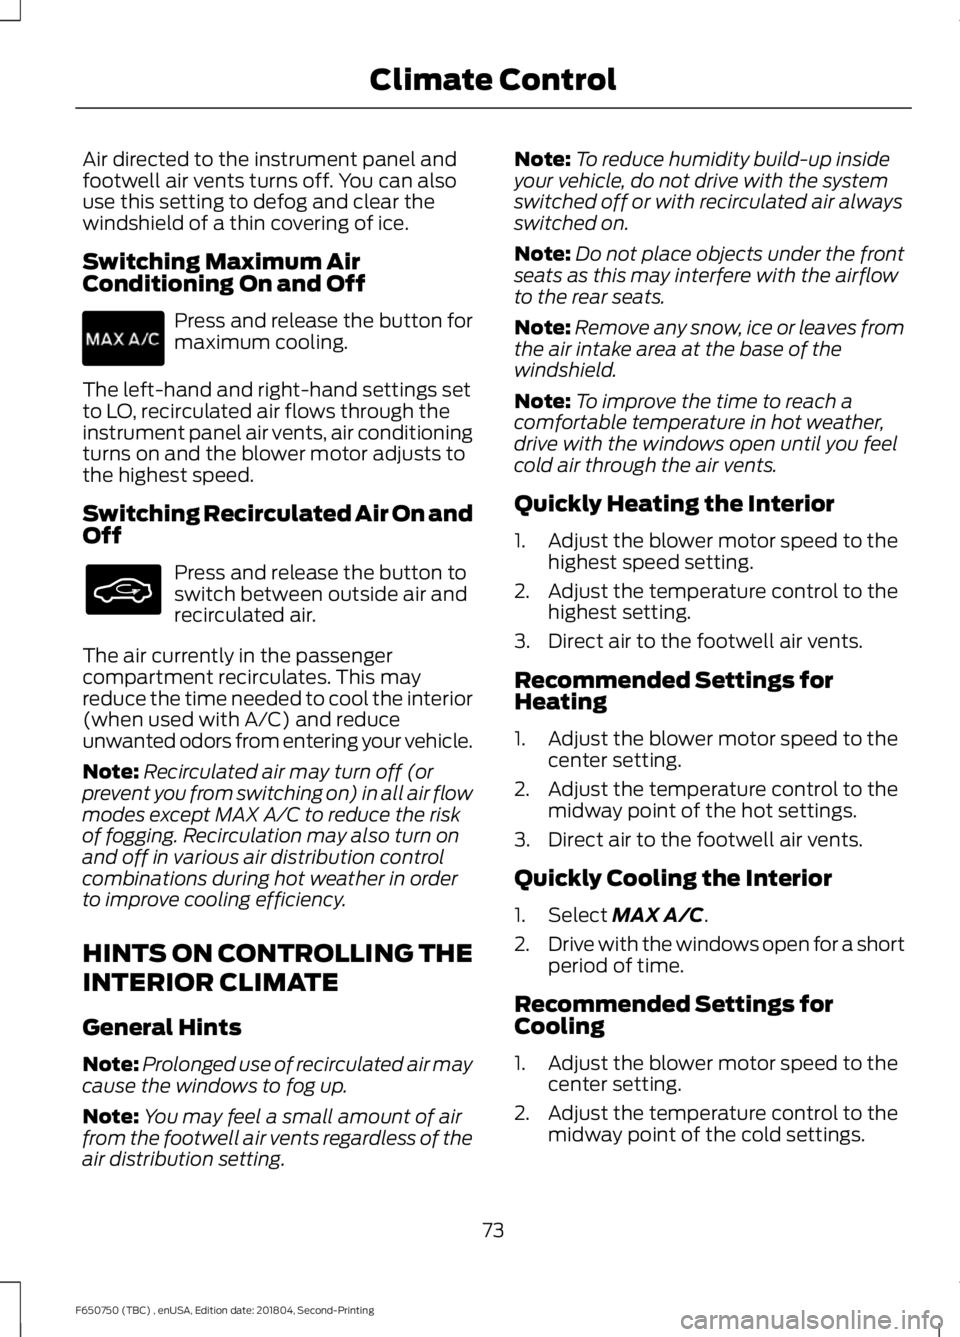
Switching Maximum Air
Conditioning On and Off
Press and release the button for
maximum cooling.
The left-hand and right-hand settings set
to LO, recirculated air flows through the
instrument panel air vents, air conditioning
turns on and the blower motor adjusts to
the highest speed.
Switching Recirculated Air On and
Off Press and release the button to
switch between outside air and
recirculated air.
The air currently in the passenger
compartment recirculates. This may
reduce the time needed to cool the interior
(when used with A/C) and reduce
unwanted odors from entering your vehicle.
Note: Recirculated air may turn off (or
prevent you from switching on) in all air flow
modes except MAX A/C to reduce the risk
of fogging. Recirculation may also turn on
and off in various air distribution control
combinations during hot weather in order
to improve cooling efficiency.
HINTS ON CONTROLLING THE
INTERIOR CLIMATE
General Hints
Note: Prolonged use of recirculated air may
cause the windows to fog up.
Note: You may feel a small amount of air
from the footwell air vents regardless of the
air distribution setting. Note:
To reduce humidity build-up inside
your vehicle, do not drive with the system
switched off or with recirculated air always
switched on.
Note: Do not place objects under the front
seats as this may interfere with the airflow
to the rear seats.
Note: Remove any snow, ice or leaves from
the air intake area at the base of the
windshield.
Note: To improve the time to reach a
comfortable temperature in hot weather,
drive with the windows open until you feel
cold air through the air vents.
Quickly Heating the Interior
1. Adjust the blower motor speed to the highest speed setting.
2. Adjust the temperature control to the highest setting.
3. Direct air to the footwell air vents.
Recommended Settings for
Heating
1. Adjust the blower motor speed to the center setting.
2. Adjust the temperature control to the midway point of the hot settings.
3. Direct air to the footwell air vents.
Quickly Cooling the Interior
1. Select MAX A/C.
2. Drive with the windows open for a short
period of time.
Recommended Settings for
Cooling
1. Adjust the blower motor speed to the center setting.
2. Adjust the temperature control to the midway point of the cold settings.
73
F650750 (TBC) , enUSA, Edition date: 201804, Second-Printing Climate Control
Page 77 of 387
3. Direct air to the instrument panel air
vents.
Vehicle Stationary for Extended
Periods During Extreme High
Ambient Temperatures
1. Apply the parking brake.
2. Place your vehicle in park (P) or neutral.
3. Select MAX A/C.
4. Adjust the blower motor speed to the lowest speed setting.
Defogging the Side Windows in
Cold Weather
1. Direct air to the instrument panel and windshield air vents.
2. Press and release
A/C.
3. Adjust the temperature control to the setting you prefer.
4. Adjust the blower motor speed to the highest setting.
5. Direct air toward the side windows.
6. Close the instrument panel air vents.
HEATED EXTERIOR MIRRORS Press the button to clear the
exterior mirrors of thin ice and
fog. Press the button again to
switch them off. They switch off after a
short period of time.
Note: Do not remove ice from the mirrors
with a scraper or adjust the mirror glass
when it is frozen in place. These actions
could cause damage to the glass and
mirrors.
Note: Do not clean the mirror housing or
glass with harsh abrasives, fuel or other
petroleum-based cleaning products.
74
F650750 (TBC) , enUSA, Edition date: 201804, Second-Printing Climate Control
Page 86 of 387
12 Volt DC Power Point
WARNING: Do not plug optional
electrical accessories into the cigar
lighter socket. Incorrect use of the cigar
lighter can cause damage not covered
by the vehicle warranty, and can result
in fire or serious injury.
Note: When you switch the ignition on, you
can use the socket to power 12 volt
appliances with a maximum current rating
of 15 amps.
If the power supply does not work after you
switch the ignition off, switch the ignition
on.
Note: Do not hang any accessory from the
accessory plug.
Note: Do not use the power point over the
vehicle capacity of 12 volt DC 180 watts or
a fuse may blow.
Note: Always keep the power point caps
closed when not in use.
Do not insert objects other than an
accessory plug into the power point. This
damages the power point and may blow
the fuse.
Run the vehicle for full capacity use of the
power point.
To prevent the battery from running out of
charge:
• Do not use the power point longer than
necessary when the vehicle is not
running.
• Do not leave devices plugged in
overnight or when you park your vehicle
for extended periods. Locations
Power points may be in the following
locations:
•
On the instrument panel (two
locations).
• Inside the front under-seat storage
compartment.
• Inside the rear under-seat storage
compartment.
110 Volt AC Power Point
(If Equipped) WARNING: Do not keep electrical
devices plugged in the power point
whenever the device is not in use. Do not
use any extension cord with the 110 volt
AC power point, since it will defeat the
safety protection design. Doing so may
cause the power point to overload due
to powering multiple devices that can
reach beyond the 150 watt load limit and
could result in fire or serious injury.
Note: The power point turns off when you
switch the ignition off, or when the battery
voltage drops below 11 volts.
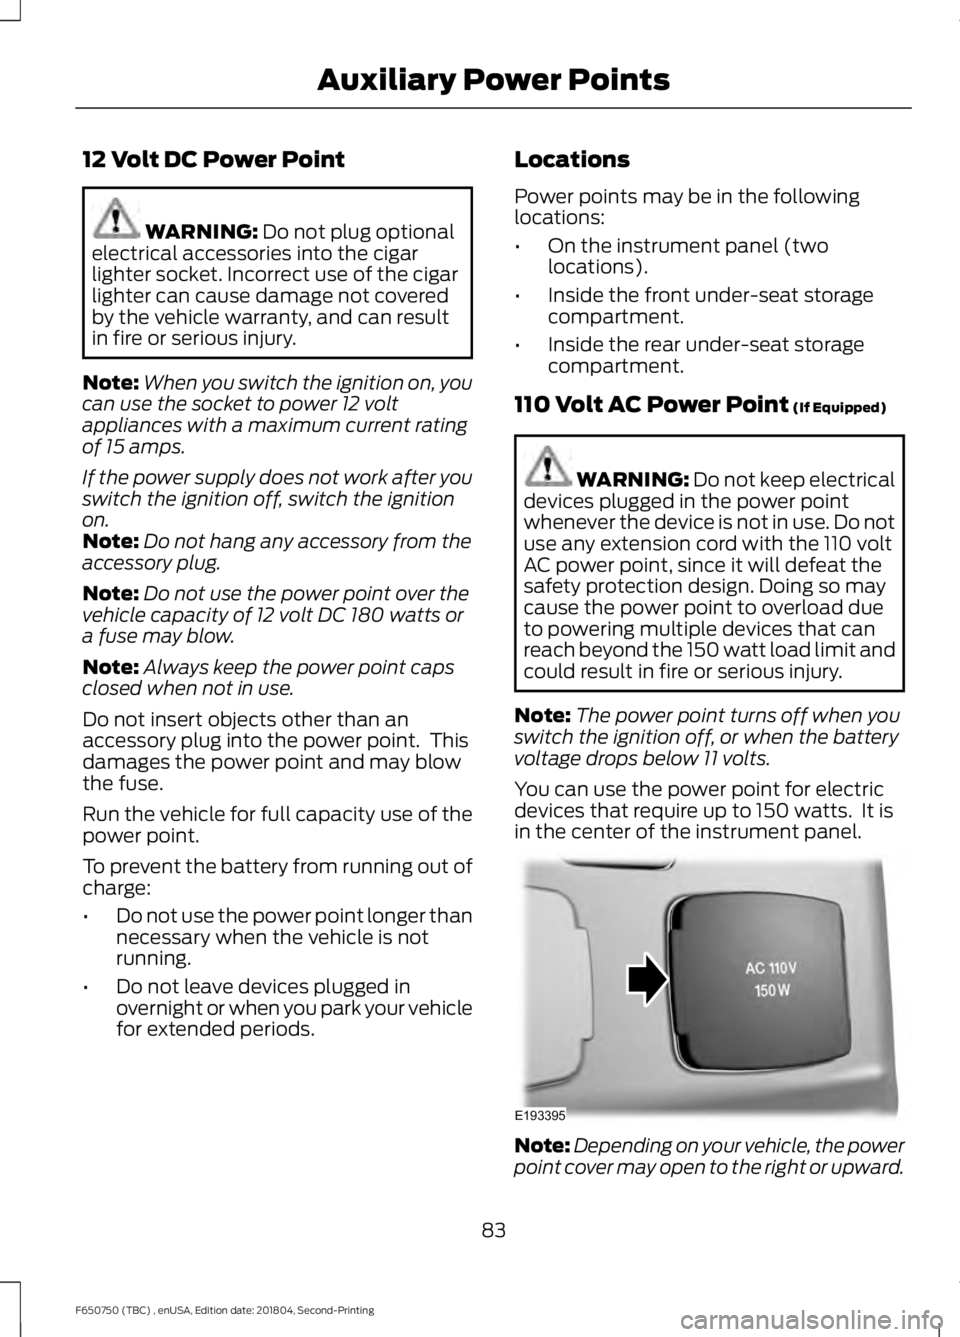
You can use the power point for electric
devices that require up to 150 watts. It is
in the center of the instrument panel. Note:
Depending on your vehicle, the power
point cover may open to the right or upward.
83
F650750 (TBC) , enUSA, Edition date: 201804, Second-Printing Auxiliary Power PointsE193395
Page 101 of 387
Fuel Filler Cap
WARNING: The fuel system may
be under pressure. If you hear a hissing
sound near the fuel filler inlet, do not
refuel until the sound stops. Otherwise,
fuel may spray out, which could cause
serious personal injury. WARNING:
If you do not use the
correct fuel filler cap, excessive pressure
or vacuum in the fuel tank may damage
the fuel system or cause the fuel cap to
disengage in a crash. Failure to follow
this warning could result in serious
personal injury.
The fuel tank has a threaded fuel filler cap.
Note: If you must replace the fuel filler cap,
replace it with a fuel filler cap that is
designed for your vehicle. The vehicle
Warranty may be void for any damage to
the fuel tank or fuel system if the correct
genuine Ford, Motorcraft or other certified
fuel filler cap is not used.
When refueling the vehicle fuel tank do the
following.
1. When your vehicle has stopped, shift into neutral (N) or park (P).
2. Apply the parking brake and switch the
ignition off.
3. Turn the fuel filler cap counterclockwise and remove it.
4. Refuel your vehicle as required.
5. Replace the fuel filler cap, turn it clockwise until you feel a strong
resistance.
If the fuel cap warning lamp or a warning
message appears in the instrument cluster,
you may not have installed the fuel filler
cap correctly. If the fuel cap warning lamp remains on,
at the next opportunity, safely pull off of
the road, remove the fuel filler cap, align
the cap properly and reinstall it. The check
fuel cap warning lamp or warning message
may not reset immediately. It may take
several driving cycles for the indicators to
turn off. A driving cycle consists of an
engine start-up (after four or more hours
with the engine off) followed by normal
city and highway driving.
Fuel Fill Rate
Your vehicle has a fuel fill pipe that is able
to accept fuel up to
20 gal (75 L) per
minute from a fuel-dispensing nozzle.
Pumping fuel at greater flow rates may
result in premature nozzle shut-off or spit
back.
Truck stops have fuel pumps and nozzles
designed for larger, heavy-duty trucks. If
you are refueling your vehicle at a truck
stop and the nozzle shuts off repeatedly,
wait 5-10 seconds, then use a slower fill
rate.
REFUELING - GASOLINE WARNING:
Fuel vapor burns
violently and a fuel fire can cause severe
injuries. WARNING:
Read and follow all
the instructions on the pump island. WARNING: When refueling always
shut the engine off and never allow
sparks or open flames near the fuel tank
filler valve. Never smoke or use a cell
phone while refueling. Fuel vapor is
extremely hazardous under certain
conditions. Avoid inhaling excess fumes.
98
F650750 (TBC) , enUSA, Edition date: 201804, Second-Printing Fuel and Refueling
Page 102 of 387
WARNING: Stay outside your
vehicle and do not leave the fuel pump
unattended when refueling your vehicle. WARNING:
Keep children away
from the fuel pump; never let children
pump fuel. WARNING:
Wait at least 10
seconds before removing the fuel pump
nozzle to allow any residual fuel to drain
into the fuel tank. WARNING:
Stop refueling after
the fuel pump nozzle automatically
shuts off for the second time. Failure to
follow this will fill the expansion space
in the fuel tank and could lead to fuel
overflowing. WARNING: Do not remove the fuel
pump nozzle from its fully inserted
position when refueling.
Use the following guidelines to avoid
electrostatic charge build-up when filling
an ungrounded fuel container:
• Place approved fuel container on the
ground.
• Do not fill a fuel container while it is in
the vehicle (including the cargo area).
• Keep the fuel pump nozzle in contact
with the fuel container while filling.
• Do not use a device that would hold
the fuel pump handle in the fill position. Fuel Filler Cap WARNING:
The fuel system may
be under pressure. If you hear a hissing
sound near the fuel filler inlet, do not
refuel until the sound stops. Otherwise,
fuel may spray out, which could cause
serious personal injury. WARNING:
If you do not use the
correct fuel filler cap, excessive pressure
or vacuum in the fuel tank may damage
the fuel system or cause the fuel cap to
disengage in a crash. Failure to follow
this warning could result in serious
personal injury.
The fuel tank has a threaded fuel filler cap.
Note: If you must replace the fuel filler cap,
replace it with a fuel filler cap that is
designed for your vehicle. The vehicle
Warranty may be void for any damage to
the fuel tank or fuel system if the correct
genuine Ford, Motorcraft or other certified
fuel filler cap is not used.
When refueling the vehicle fuel tank do the
following.
1. When your vehicle has stopped, shift into neutral (N) or park (P).
2. Apply the parking brake and switch the
ignition off.
3. Turn the fuel filler cap counterclockwise and remove it.
4. Refuel your vehicle as required.
5. Replace the fuel filler cap, turn it clockwise until you feel a strong
resistance.
If the fuel cap warning lamp or a warning
message appears in the instrument cluster,
you may not have installed the fuel filler
cap correctly.
99
F650750 (TBC) , enUSA, Edition date: 201804, Second-Printing Fuel and Refueling