FORD F750 2003 10.G Repair Manual
Manufacturer: FORD, Model Year: 2003, Model line: F750, Model: FORD F750 2003 10.GPages: 248, PDF Size: 2.54 MB
Page 61 of 248
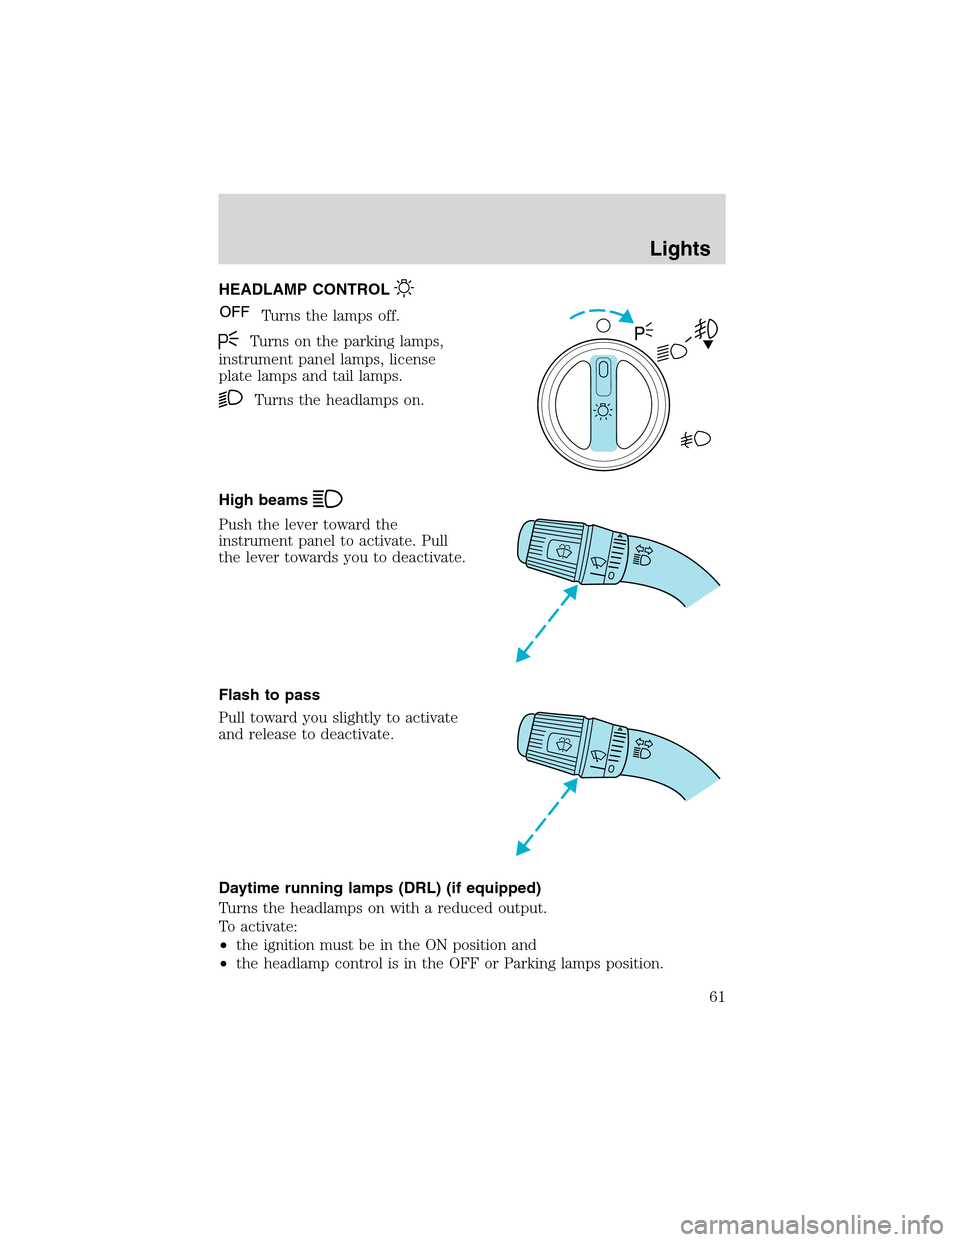
HEADLAMP CONTROL
Turns the lamps off.
Turns on the parking lamps,
instrument panel lamps, license
plate lamps and tail lamps.
Turns the headlamps on.
High beams
Push the lever toward the
instrument panel to activate. Pull
the lever towards you to deactivate.
Flash to pass
Pull toward you slightly to activate
and release to deactivate.
Daytime running lamps (DRL) (if equipped)
Turns the headlamps on with a reduced output.
To activate:
•the ignition must be in the ON position and
•the headlamp control is in the OFF or Parking lamps position.
Lights
61
Page 62 of 248
Always remember to turn on your headlamps at dusk or during
inclement weather. The Daytime Running Lamp (DRL) system
does not activate with your tail lamps and generally may not provide
adequate lighting during these conditions. Failure to activate your
headlamps under these conditions may result in a collision.
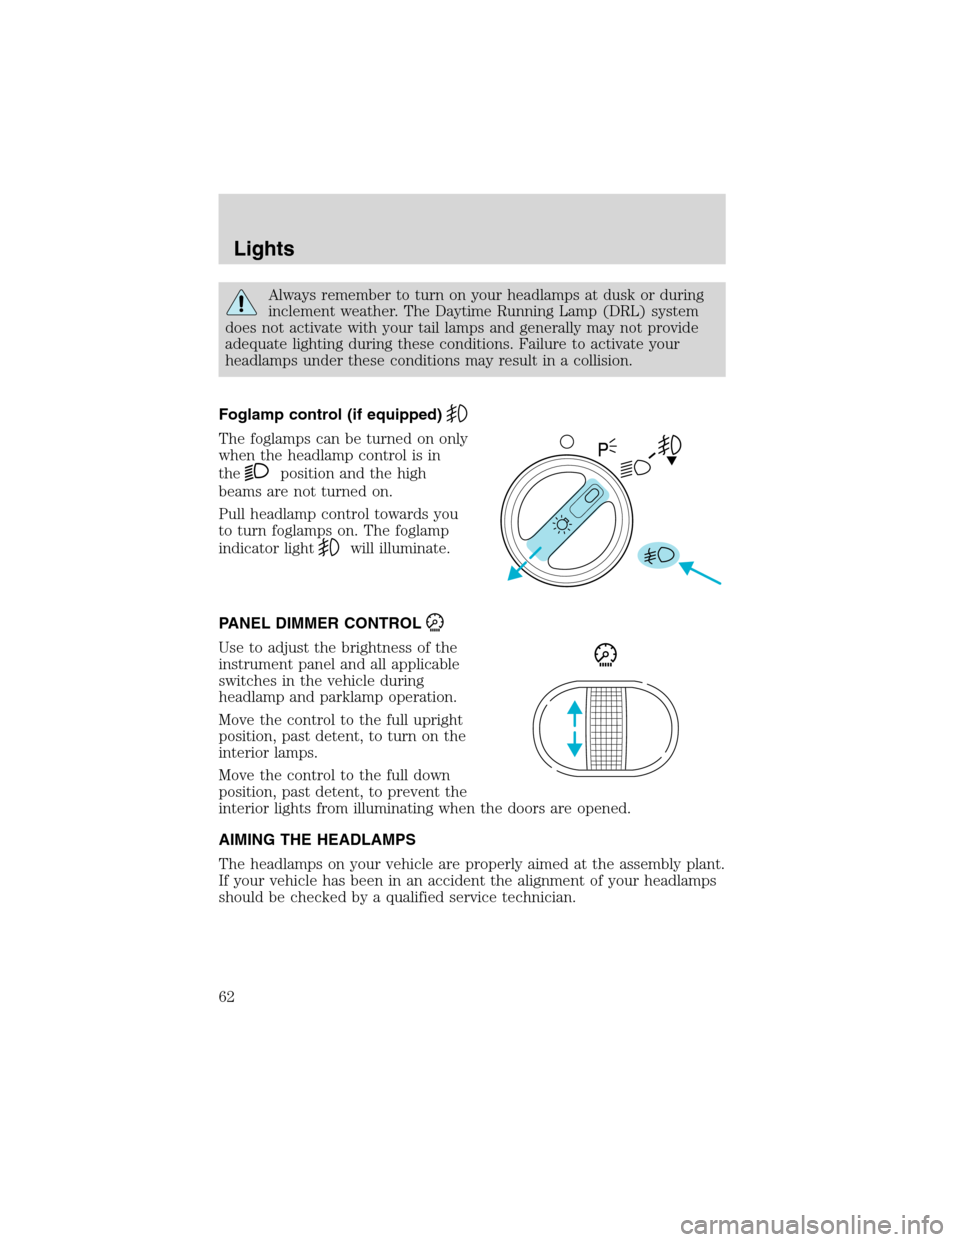
Foglamp control (if equipped)
The foglamps can be turned on only
when the headlamp control is in
the
position and the high
beams are not turned on.
Pull headlamp control towards you
to turn foglamps on. The foglamp
indicator light
will illuminate.
PANEL DIMMER CONTROL
Use to adjust the brightness of the
instrument panel and all applicable
switches in the vehicle during
headlamp and parklamp operation.
Move the control to the full upright
position, past detent, to turn on the
interior lamps.
Move the control to the full down
position, past detent, to prevent the
interior lights from illuminating when the doors are opened.
AIMING THE HEADLAMPS
The headlamps on your vehicle are properly aimed at the assembly plant.
If your vehicle has been in an accident the alignment of your headlamps
should be checked by a qualified service technician.
Lights
62
Page 63 of 248
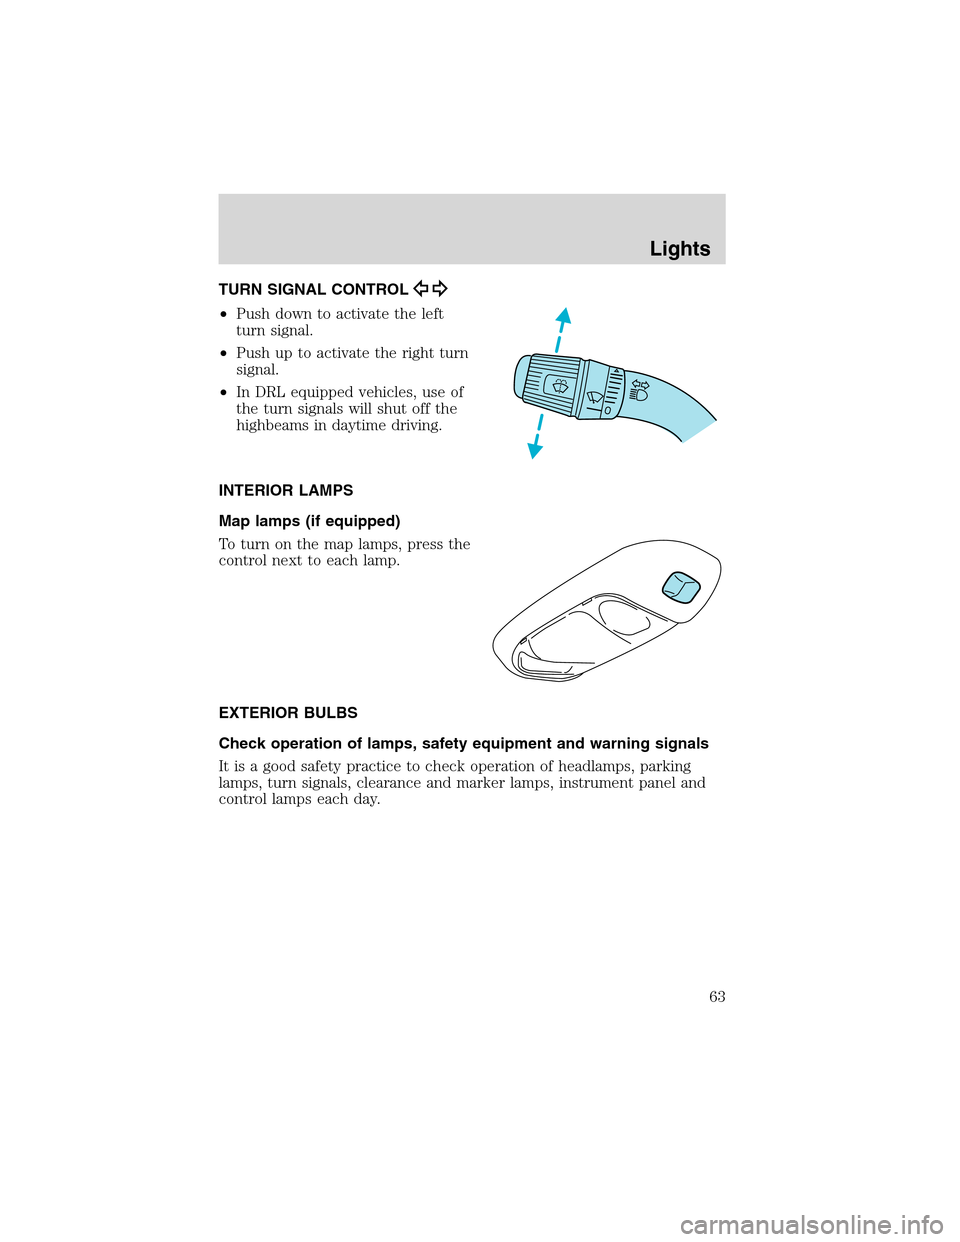
TURN SIGNAL CONTROL
•Push down to activate the left
turn signal.
•Push up to activate the right turn
signal.
•In DRL equipped vehicles, use of
the turn signals will shut off the
highbeams in daytime driving.
INTERIOR LAMPS
Map lamps (if equipped)
To turn on the map lamps, press the
control next to each lamp.
EXTERIOR BULBS
Check operation of lamps, safety equipment and warning signals
It is a good safety practice to check operation of headlamps, parking
lamps, turn signals, clearance and marker lamps, instrument panel and
control lamps each day.
Lights
63
Page 64 of 248
Using the right bulbs
Function Number of
bulbsTrade number
Headlamps 2 4652
Park/turn signal 2 1157
Sidemarker/rear marker lamp 5 red 12
(amber)194
Tail/stop lamp 4 2057
Backup 4 1156
Foglamp 2 899
Running board/courtesy lamp 6 194
License plate lamp 2 194
Cabmarker 5 168
Exterior visor lamp (if equipped) 4 194
Rear fender clearance 4
(a)
Rear identification 3 194
Dome lamp 1 105
To replace all instrument panel lights - see your dealer
(a)Replace entire lamp assembly; bulb is not serviceable.
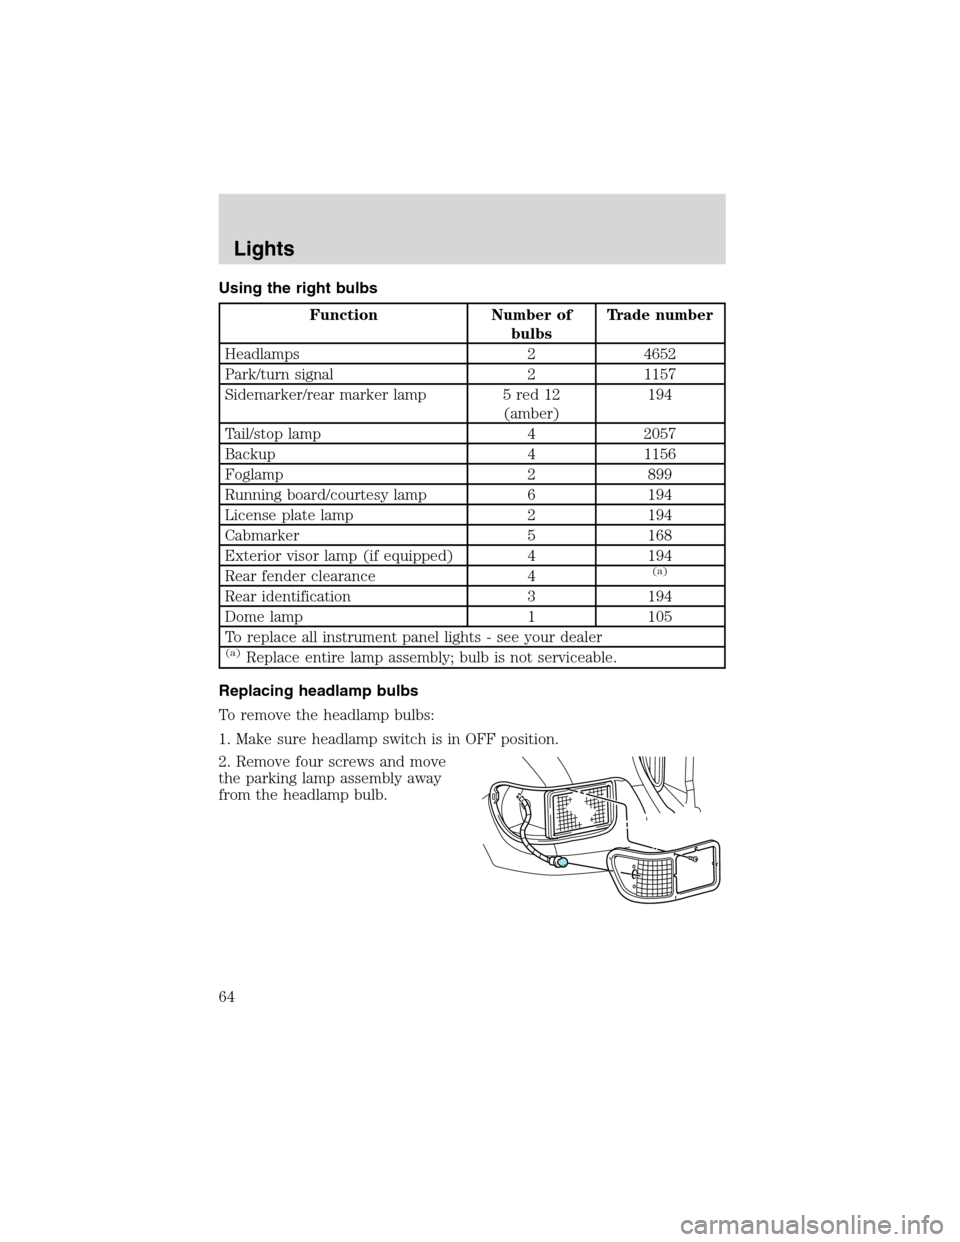
Replacing headlamp bulbs
To remove the headlamp bulbs:
1. Make sure headlamp switch is in OFF position.
2. Remove four screws and move
the parking lamp assembly away
from the headlamp bulb.
Lights
64
Page 65 of 248

3. Remove four screws and the
retaining bracket from the headlamp
bulb.
4. Pull headlamp bulb out of the
housing, disconnect the electrical
connector and remove the headlamp
bulb.
5. To complete installation, follow
the removal procedure in reverse
order.
Replacing front parking lamp/turn signal bulbs
To remove the parking/turn signal bulbs:
1. Make sure the headlamp control is in the OFF position.
2. Remove four screws from the
lamp assembly.
3. Carefully lower lamp assembly
and pull the bulb socket straight out
of the lamp assembly.
4. Carefully pull the bulb straight
out of the socket and push in the
new bulb.
5. To complete installation, follow
the removal procedure in reverse order.
Lights
65
Page 66 of 248
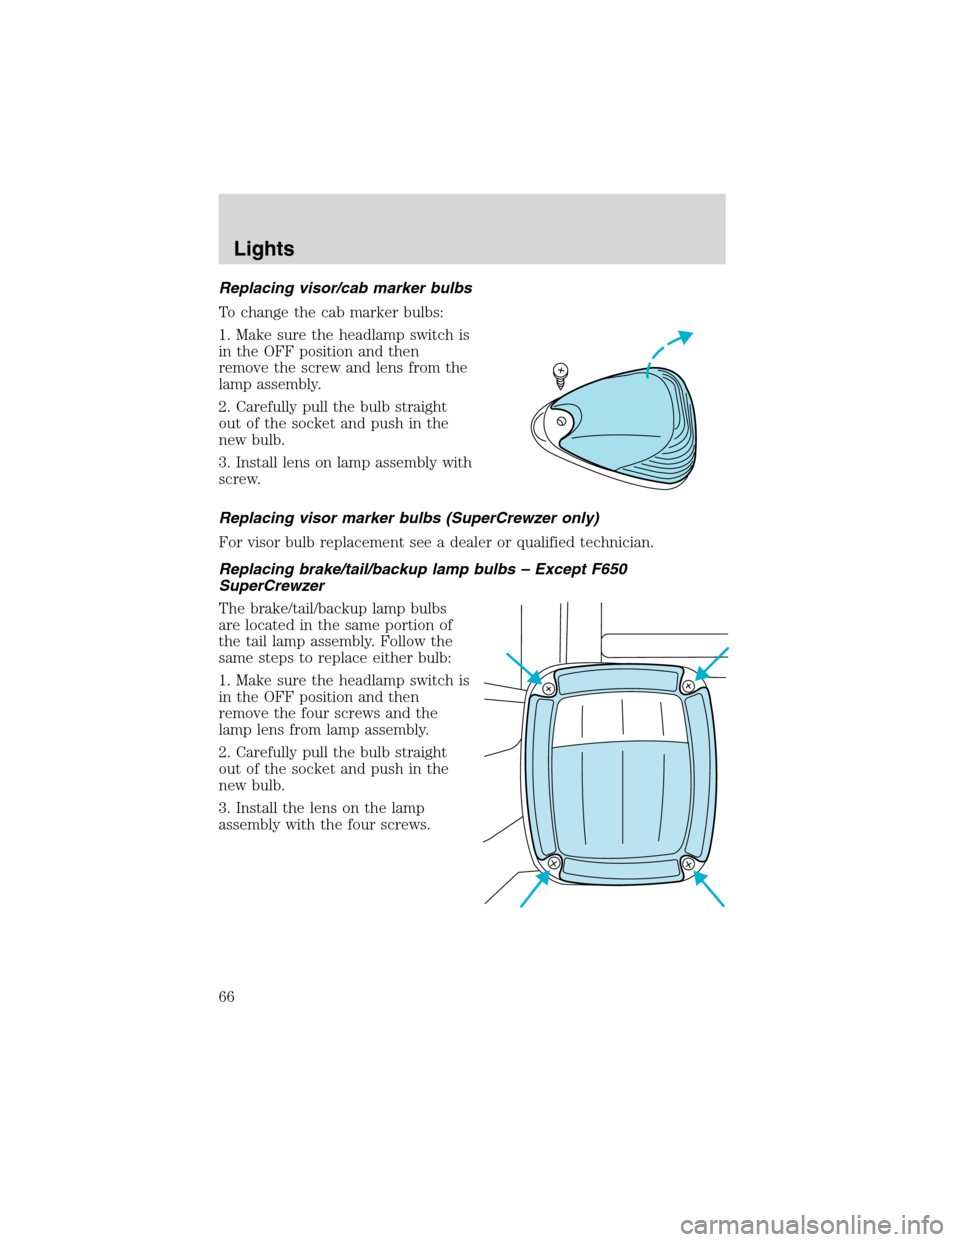
Replacing visor/cab marker bulbs
To change the cab marker bulbs:
1. Make sure the headlamp switch is
in the OFF position and then
remove the screw and lens from the
lamp assembly.
2. Carefully pull the bulb straight
out of the socket and push in the
new bulb.
3. Install lens on lamp assembly with
screw.
Replacing visor marker bulbs (SuperCrewzer only)
For visor bulb replacement see a dealer or qualified technician.
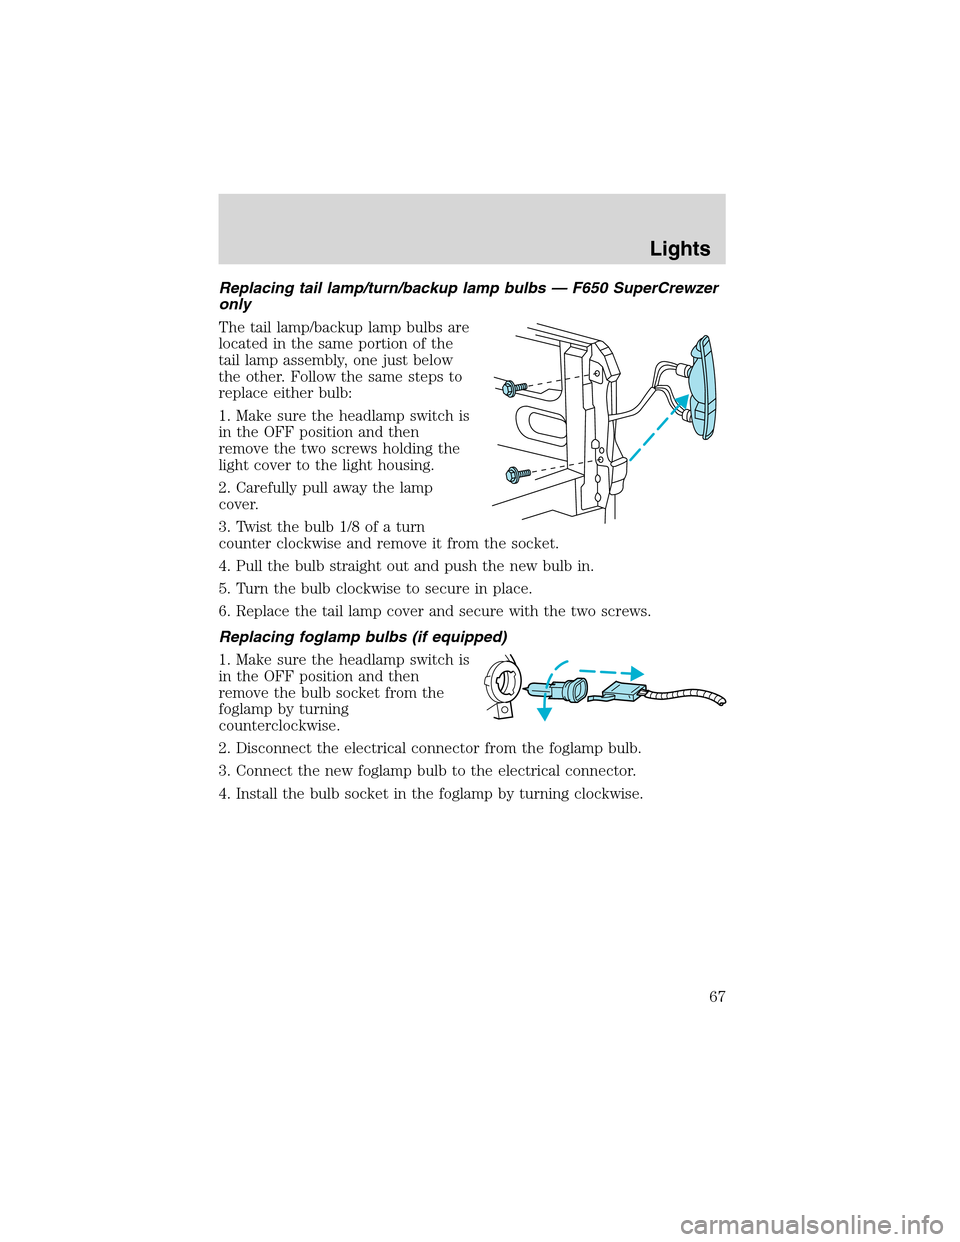
Replacing brake/tail/backup lamp bulbs – Except F650
SuperCrewzer
The brake/tail/backup lamp bulbs
are located in the same portion of
the tail lamp assembly. Follow the
same steps to replace either bulb:
1. Make sure the headlamp switch is
in the OFF position and then
remove the four screws and the
lamp lens from lamp assembly.
2. Carefully pull the bulb straight
out of the socket and push in the
new bulb.
3. Install the lens on the lamp
assembly with the four screws.
Lights
66
Page 67 of 248
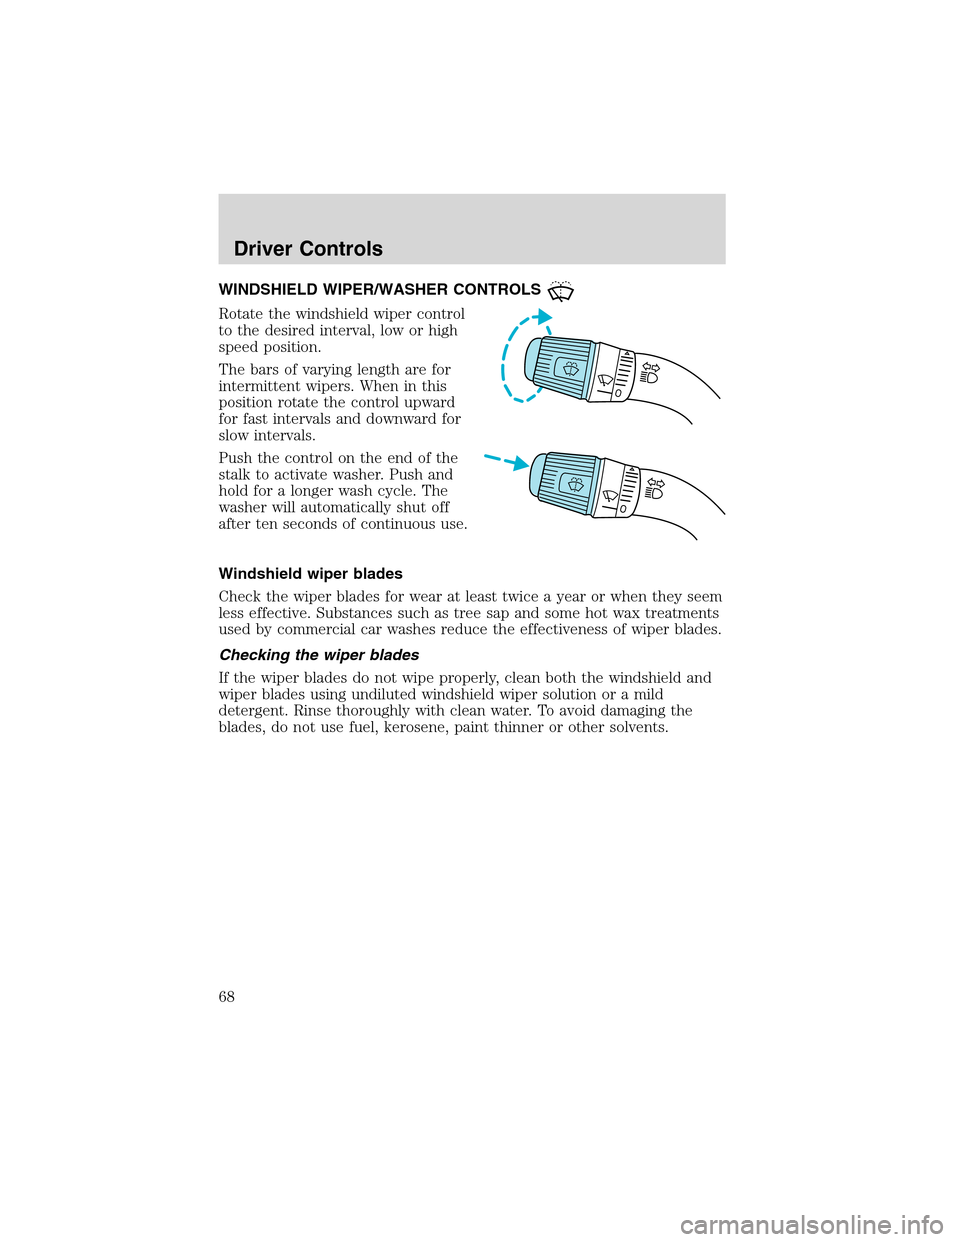
Replacing tail lamp/turn/backup lamp bulbs—F650 SuperCrewzer
only
The tail lamp/backup lamp bulbs are
located in the same portion of the
tail lamp assembly, one just below
the other. Follow the same steps to
replace either bulb:
1. Make sure the headlamp switch is
in the OFF position and then
remove the two screws holding the
light cover to the light housing.
2. Carefully pull away the lamp
cover.
3. Twist the bulb 1/8 of a turn
counter clockwise and remove it from the socket.
4. Pull the bulb straight out and push the new bulb in.
5. Turn the bulb clockwise to secure in place.
6. Replace the tail lamp cover and secure with the two screws.
Replacing foglamp bulbs (if equipped)
1. Make sure the headlamp switch is
in the OFF position and then
remove the bulb socket from the
foglamp by turning
counterclockwise.
2. Disconnect the electrical connector from the foglamp bulb.
3. Connect the new foglamp bulb to the electrical connector.
4. Install the bulb socket in the foglamp by turning clockwise.
Lights
67
Page 68 of 248
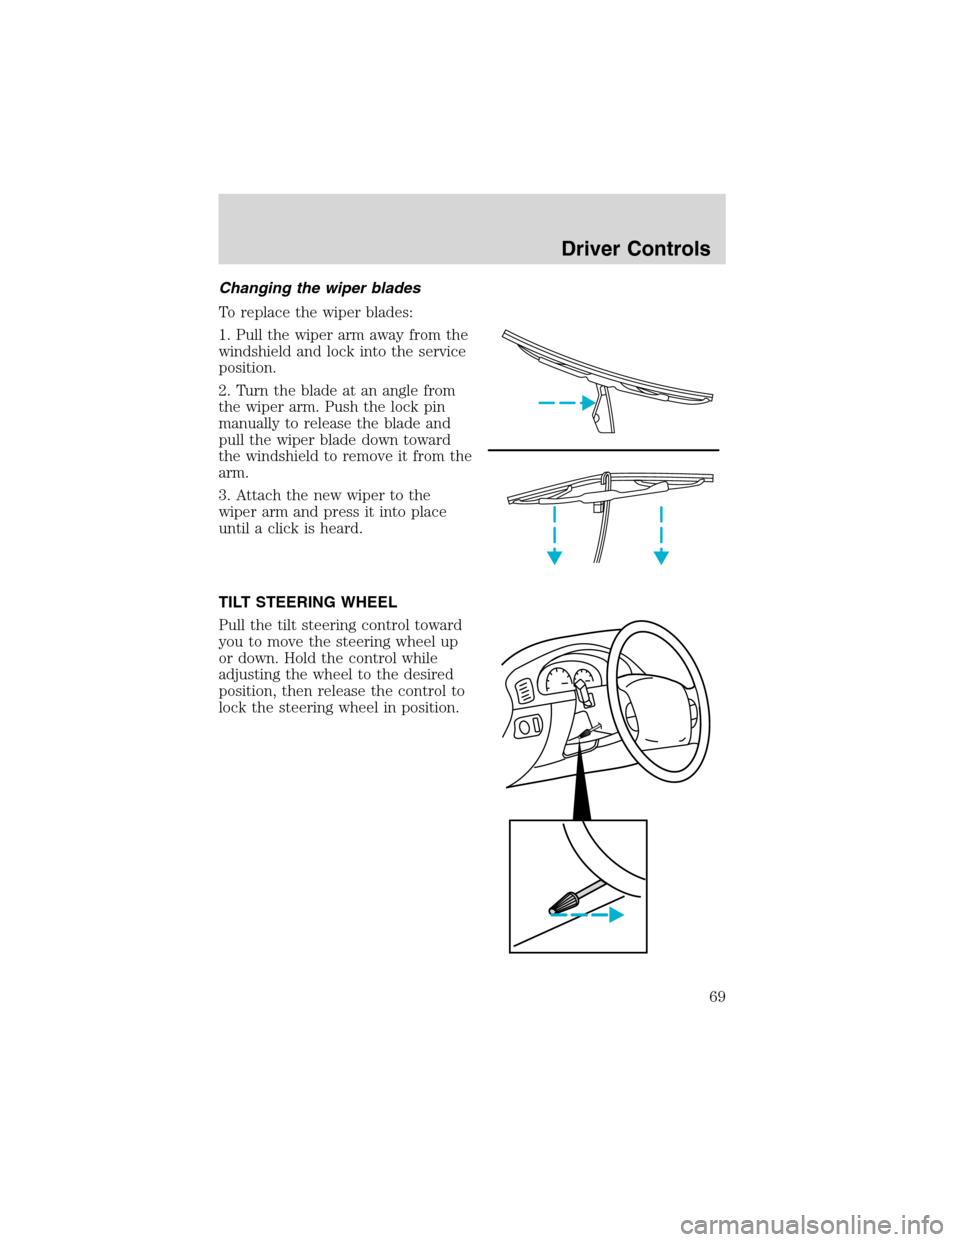
WINDSHIELD WIPER/WASHER CONTROLS
Rotate the windshield wiper control
to the desired interval, low or high
speed position.
The bars of varying length are for
intermittent wipers. When in this
position rotate the control upward
for fast intervals and downward for
slow intervals.
Push the control on the end of the
stalk to activate washer. Push and
hold for a longer wash cycle. The
washer will automatically shut off
after ten seconds of continuous use.
Windshield wiper blades
Check the wiper blades for wear at least twice a year or when they seem
less effective. Substances such as tree sap and some hot wax treatments
used by commercial car washes reduce the effectiveness of wiper blades.
Checking the wiper blades
If the wiper blades do not wipe properly, clean both the windshield and
wiper blades using undiluted windshield wiper solution or a mild
detergent. Rinse thoroughly with clean water. To avoid damaging the
blades, do not use fuel, kerosene, paint thinner or other solvents.
Driver Controls
68
Page 69 of 248
Changing the wiper blades
To replace the wiper blades:
1. Pull the wiper arm away from the
windshield and lock into the service
position.
2. Turn the blade at an angle from
the wiper arm. Push the lock pin
manually to release the blade and
pull the wiper blade down toward
the windshield to remove it from the
arm.
3. Attach the new wiper to the
wiper arm and press it into place
until a click is heard.
TILT STEERING WHEEL
Pull the tilt steering control toward
you to move the steering wheel up
or down. Hold the control while
adjusting the wheel to the desired
position, then release the control to
lock the steering wheel in position.
Driver Controls
69
Page 70 of 248
Never adjust the steering wheel when the vehicle is moving.
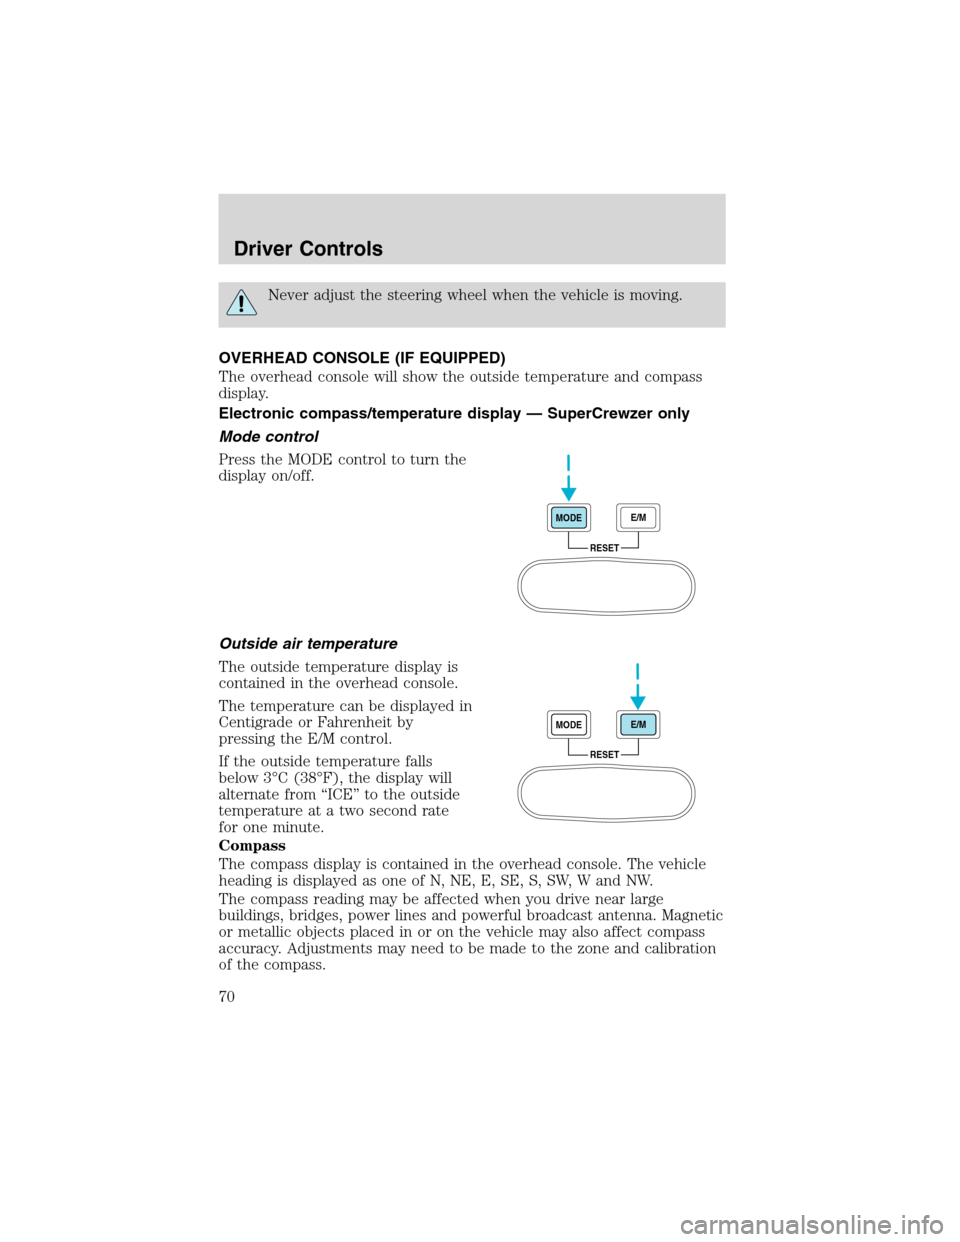
OVERHEAD CONSOLE (IF EQUIPPED)
The overhead console will show the outside temperature and compass
display.
Electronic compass/temperature display—SuperCrewzer only
Mode control
Press the MODE control to turn the
display on/off.
Outside air temperature
The outside temperature display is
contained in the overhead console.
The temperature can be displayed in
Centigrade or Fahrenheit by
pressing the E/M control.
If the outside temperature falls
below 3°C (38°F), the display will
alternate from“ICE”to the outside
temperature at a two second rate
for one minute.
Compass
The compass display is contained in the overhead console. The vehicle
heading is displayed as one of N, NE, E, SE, S, SW, W and NW.
The compass reading may be affected when you drive near large
buildings, bridges, power lines and powerful broadcast antenna. Magnetic
or metallic objects placed in or on the vehicle may also affect compass
accuracy. Adjustments may need to be made to the zone and calibration
of the compass.
RESET MODEE/M
RESET MODEE/M
Driver Controls
70