ignition FORD FIESTA 2014 6.G Quick Reference Guide
[x] Cancel search | Manufacturer: FORD, Model Year: 2014, Model line: FIESTA, Model: FORD FIESTA 2014 6.GPages: 8, PDF Size: 2.47 MB
Page 3 of 8

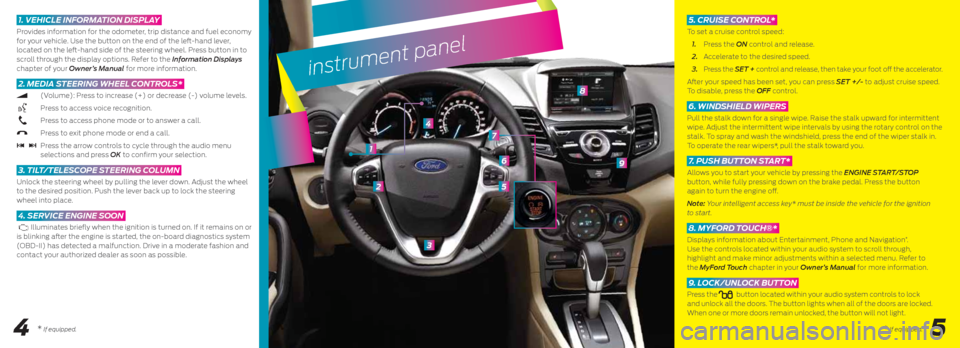
instrument panel
2
3
4
5
6
8
9
1
4
1. Vehicle information Display
Provides information for the odometer, trip distance and fuel economy
for your vehicle. Use the button on the end of the left-hand lever,
located on the left-hand side of the steering wheel. Press button in to
scroll through the display options. Refer to the Information Displays
chapter of your Owner’s Manual for more information.
2. meDia steering Wheel c ontrols*
(Volume): Press to increase (+) or decrease (-) volume levels.
Press to access voice recognition.
Press to access phone mode or to answer a call.
Press to exit phone mode or end a call.
Press the arrow controls to cycle through the audio menu
selections and press OK to confirm your selection.
3. tilt/telescope s teering column
Unlock the steering wheel by pulling the lever down. Adjust the wheel
to the desired position. Push the lever back up to lock the steering
wheel into place.
4. serVice engine soon
Illuminates briefly when the ignition is turned on. If it remains on or
is blinking after the engine is started, the on-board diagnostics system
(OBD-II) has detected a malfunction. Drive in a moderate fashion and
contact your authorized dealer as soon as possible.
5. cruise c ontrol*
To set a cruise control speed:
1. Press the ON control and release.
2. Accelerate to the desired speed.
3. Press the SET + control and release, then take your foot off the accelerator.
After your speed has been set, you can press SET +/- to adjust cruise speed.
To disable, press the OFF control.
6. WinD shielD Wipers
Pull the stalk down for a single wipe. Raise the stalk upward for intermittent
wipe. Adjust the intermittent wipe intervals by using the rotary control on the
stalk. To spray and wash the windshield, press the end of the wiper stalk in.
To operate the rear wipers*, pull the stalk toward you.
7. push Button s tart*
Allows you to start your vehicle by pressing the ENGINE START/STOP
button, while fully pressing down on the brake pedal. Press the button
again to turn the engine off.
Note: Your intelligent access key* must be inside the vehicle for the ignition
to start.
8. myforD touch®*
Displays information about Entertainment, Phone and Navigation*.
Use the controls located within your audio system to scroll through,
highlight and make minor adjustments within a selected menu. Refer to
the MyFord Touch chapter in your Owner’s Manual for more information.
9. l ock/unlock Button
Press thebutton located within your audio system controls to lock
and unlock all the doors. The button lights when all of the doors are locked.
When one or more doors remain unlocked, the button will not light.
* If equipped.5
7
* If equipped.
Page 4 of 8

SYNC
®*
pairing y our phone
With sync
In order to use many of the features of
SYNC, such as making a phone call,
receiving a text or using SYNC services,
you must first connect or pair your phone
with SYNC.
To pair your phone for the first time:
1. Make sure that your vehicle is in
(P) park and your ignition and radio
are turned on.
2. Press the phone button, when the
display indicates No Phone Found
press OK.
3. When Add Bluetooth Device?
appears in the display press OK.
4. When Find SYNC appears in the
display press OK. When prompted on
your phone’s display, enter the PIN
provided by SYNC into your phone.
5. The display will indicate when the
pairing is successful.
GettInG S taRted
wIth YOUR SYnC SYS tem
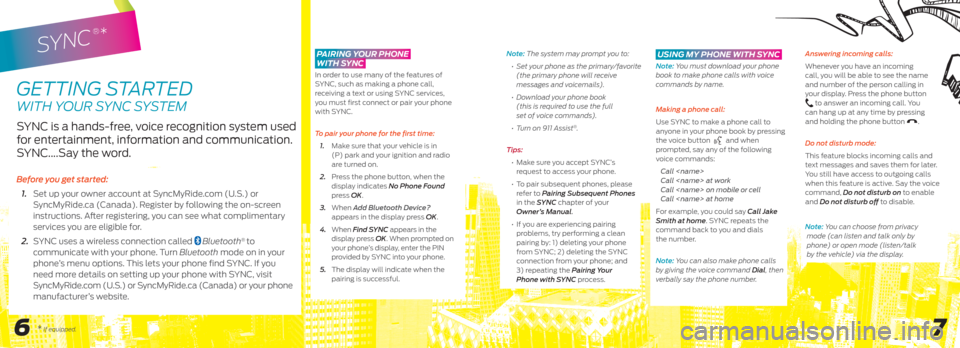
SYNC is a hands-free, voice recognition system used
for entertainment, information and communication.
SYNC….Say the word.
Before you get started:
1. Set up your owner account at SyncMyRide.com (U.S.) or
SyncMyRide.ca (Canada). Register by following the on-screen
instructions. After registering, you can see what complimentary
services you are eligible for.
2. SYNC uses a wireless connection called
Bluetooth® to
communicate with your phone. Turn Bluetooth mode on in your
phone’s menu options. This lets your phone find SYNC. If you
need more details on setting up your phone with SYNC, visit
SyncMyRide.com (U.S.) or SyncMyRide.ca (Canada) or your phone
manufacturer’s website.
6 7
Note: the system may prompt you to:
• Set your phone as the primary/favorite
(the primary phone will receive
messages and voicemails).
• Download your phone book
(this is required to use the full
set of voice commands).
• Turn on 911 Assist
®.
Tips:
• Make sure you accept SYNC’s
request to access your phone.
• To pair subsequent phones, please
refer to Pairing Subsequent Phones
in the SYNC chapter of your
Owner’s Manual.
• If you are experiencing pairing
problems, try performing a clean
pairing by: 1) deleting your phone
from SYNC; 2) deleting the SYNC
connection from your phone; and
3) repeating the Pairing Your
Phone with SYNC process.
using my phone With sync
Note: You must download your phone
book to make phone calls with voice
commands by name.
Making a phone call:
Use SYNC to make a phone call to
anyone in your phone book by pressing
the voice button
and when
prompted, say any of the following
voice commands:
Call
Call
Call
Call
For example, you could say Call Jake
Smith at home. SYNC repeats the
command back to you and dials
the number.
Note: You can also make phone calls
by giving the voice command Dial, then
verbally say the phone number. Answering incoming calls:
Whenever you have an incoming
call, you will be able to see the name
and number of the person calling in
your display. Press the phone button
to answer an incoming call. You
can hang up at any time by pressing
and holding the phone button
.
Do not disturb mode:
This feature blocks incoming calls and
text messages and saves them for later.
You still have access to outgoing calls
when this feature is active. Say the voice
command, Do not disturb on to enable
and Do not disturb off to disable.
Note: You can choose from privacy
mode (can listen and talk only by
phone) or open mode (listen/talk
by the vehicle) via the display.
* If equipped.
Page 5 of 8

89
Before you get started:
• Pair your phone to SYNC before using MyFord Touch
(see Getting started with your SYNC system in this guide
for instructions).
• With the navigation
* feature, make sure that your SD card is
inserted into the media port (located in the center console)
or your navigation
* will not work.
• The touchscreen is sensitive, so make sure you press the
desired icon accurately and firmly.
•
If you press the wrong icon and enter the wrong screen,
you can always press the home
icon to access your
home screen.
sync applink™:
Voice a ccess to your moBile apps
The available SYNC AppLink allows you voice access to select
mobile applications that you already have or can download to
your Android
TM BlackBerry® or iPhone®.
Current apps include Pandora
® Internet Radio, Stitcher Smart
RadioTM, OpenBeak (BlackBerry-exclusive), IHeartRadio, Slacker,
NPR News and SYNC Destinations with even more releases
on the way. Visit SyncMyRide.com (U.S) or SyncMyRide.ca
(Canada) for more details.
Using SYNC AppLink
1. Make sure that you have an active account created online
for the app you want and make sure you have it set up the
way you like it. Some apps just work automatically with no
set-up.
2. Download or update to the latest mobile app through your
smartphone’s marketplace.
3. Turn on your ignition.
4. Pair the phone to your vehicle. If your phone is already
paired to the vehicle, it connects automatically when
you enter. 5.
If you’re an iPhone owner, you must also connect the
Apple
®-provided USB cable and start the application you
want to use on your iPhone to access the apps through
SYNC. Android and BlackBerry connect wirelessly using
SYNC AppLink.
6. Now you’re ready to voice-access the app by pressing the
voice button and saying Mobile apps, and then the name of
the app you want.
Note: appLink not currently available in Canada.
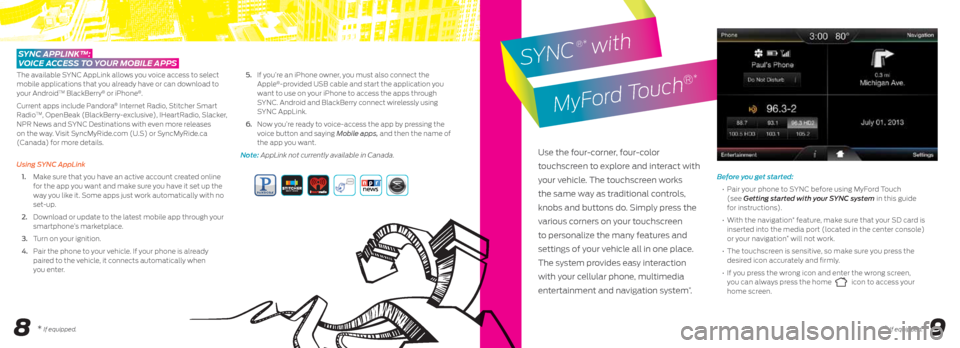
Use the four-corner, four-color
touchscreen to explore and interact with
your vehicle. The touchscreen works
the same way as traditional controls,
knobs and buttons do. Simply press the
various corners on your touchscreen
to personalize the many features and
settings of your vehicle all in one place.
The system provides easy interaction
with your cellular phone, multimedia
entertainment and navigation system
*.
SYNC
®* with
MyFord Touch
®*
* If equipped.* If equipped.
Page 8 of 8

poWershift™ automatic transmission*
Designed for fun-to-drive performance while offering outstanding
fuel economy, this transmission will sound and feel differently
than what you may be used to. See the t ransmissions chapter
of your Owner's manual for details.
selectshift® automatic transmission
Gives you the ability to manually change gears if
you’d like. To use:
• Move the gearshift lever from D (Drive) to S (Sport).
• Activate SelectShift by using the + / - thumb
toggle located on the side of your gearshift lever
to manually make shifts.
• Press the (+) button to upshift. Press the (-) button to downshift.
hill start assist
Hill start assist makes it easier to pull away when your vehicle
is parked on a slope without using a parking brake. When active,
this feature allows your vehicle to remain stationary on a slope
for up to two to three seconds after you release the brake pedal
thereby giving you time to move your foot to the accelerator
and pull away. This feature is activated automatically if the
sensors detect that the vehicle is on a slope.
toWing your Vehicle
Towing your vehicle behind an RV or any other vehicle may be
limited. Refer to t owing the Vehicle on Four w heels section in
the t owing chapter of your Owner’s manual.
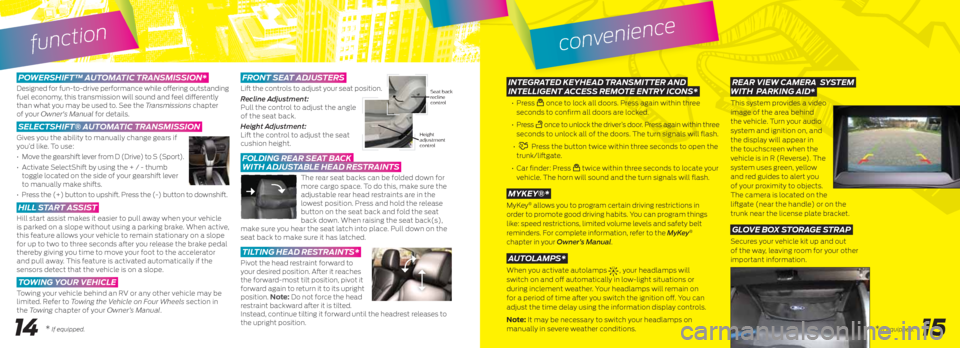
front seat aD justers
Lift the controls to adjust your seat position.
Recline Adjustment:
Pull the control to adjust the angle
of the seat back.
Height Adjustment:
Lift the control to adjust the seat
cushion height.
folDing rear seat Back
With aD justaBle heaD restraints
The rear seat backs can be folded down for
more cargo space. To do this, make sure the
adjustable rear head restraints are in the
lowest position. Press and hold the release
button on the seat back and fold the seat
back down. When raising the seat back(s),
make sure you hear the seat latch into place. Pull down on the
seat back to make sure it has latched.
tilting heaD restraints*
Pivot the head restraint forward to
your desired position. After it reaches
the forward-most tilt position, pivot it
forward again to return it to its upright
position. note: Do not force the head
restraint backward after it is tilted.
Instead, continue tilting it forward until the headrest releases to
the upright position.
function
14
Height
adjustment
control
Seat back
recline
control integrateD keyheaD transmitter anD
intelligent a ccess remote entry icons*
• Pressonce to lock all doors. Press again within three
seconds to confirm all doors are locked.
•
Press
once to unlock the driver’s door. Press again within three
seconds to unlock all of the doors. The turn signals will flash.
•
Press the button twice within three seconds to open the
trunk/liftgate.
•
Car finder: Press
twice within three seconds to locate your
vehicle. The horn will sound and the turn signals will flash.
mykey®*
MyKey® allows you to program certain driving restrictions in
order to promote good driving habits. You can program things
like: speed restrictions, limited volume levels and safety belt
reminders. For complete information, refer to the MyKey
®
chapter in your Owner’s Manual.
a utolamps*
When you activate autolamps , your headlamps will
switch on and off automatically in low-light situations or
during inclement weather. Your headlamps will remain on
for a period of time after you switch the ignition off. You can
adjust the time delay using the information display controls.
note: It may be necessary to switch your headlamps on
manually in severe weather conditions.
convenience
rear VieW c amera system
With p arking aiD*
This system provides a video
image of the area behind
the vehicle. Turn your audio
system and ignition on, and
the display will appear in
the touchscreen when the
vehicle is in R (Reverse). The
system uses green, yellow
and red guides to alert you
of your proximity to objects.
The camera is located on the
liftgate (near the handle) or on the
trunk near the license plate bracket.
gloVe Box s torage s trap
Secures your vehicle kit up and out
of the way, leaving room for your other
important information.
15* If equipped.* If equipped.