key FORD FLEX 2011 1.G Workshop Manual
[x] Cancel search | Manufacturer: FORD, Model Year: 2011, Model line: FLEX, Model: FORD FLEX 2011 1.GPages: 418, PDF Size: 2.92 MB
Page 263 of 418
During trailer sway control events, the stability control light in the
instrument cluster will flash momentarily. The cluster message center
will also displayTRAILER SWAY REDUCE SPEED. In some cases
when trailer sway is detected, the vehicle speed is too high and may be
at or above a speed at which trailer sway will grow continuously. This
may cause the system to activate multiple times, causing a gradual
reduction in speed.
Disabling trailer sway control
Trailer sway control can be disabled during any key cycle. To disable
trailer sway control, refer to theMessage centerin theInstrument
Clusterchapter. Note that regardless of chosen enable state, trailer sway
control will be re-enabled each new key cycle.
WARNING:Turning off trailer sway control increases the risk of
loss of vehicle control, serious injury, or death. Ford does not
recommend disabling this feature except in situations where speed
reduction may be detrimental (e.g., hill climbing), the driver has
significant trailer towing experience, and can control trailer sway and
maintain safe operation.
STEERING
3.5L EcoBoost™ engine:Your vehicle is equipped with an Electric
Power Steering (EPS) system. There is no fluid reservoir to check or fill.
If your vehicle loses electrical power while you are driving (or if the
ignition is turned off), you can steer the vehicle manually, but it takes
more effort. Extreme continuous steering may increase the effort it takes
for you to steer. This occurs to prevent internal overheating and
permanent damage to your steering system. If this should occur, you will
neither lose the ability to steer the vehicle manually nor will it cause
permanent damage. Typical steering and driving maneuvers will allow the
system to cool and steering assist will return to normal.
The EPS system has diagnostic checks that continuously monitor the
EPS system to ensure proper operation. When a system error is
detected, the following message SERVICE POWER STEERING, SERVICE
POWER STEERING NOW or POWER STEERING ASSIST FAULT may
display in the message center, refer to theMessage centerin the
Instrument Clusterchapter for more information.
Driving
263
2011 Flex(471)
Owners Guide, 1st Printing
USA(fus)
Page 264 of 418
WARNING:The EPS system has diagnostics checks that
continuously monitor the EPS system to ensure proper operation
of the electronic system. When an electronic error is detected, the
message POWER STEERING ASSIST FAULT will be displayed in the
message center. If this happens, stop the vehicle in a safe place, and
turn off the engine. After at least 10 seconds, reset the system by
restarting the engine, and watch the message center for POWER
STEERING ASSIST FAULT. If the message returns, or returns while
driving, take the vehicle to your dealer to have it checked. With the
message displayed, the steering assist is turned off, making the vehicle
harder to steer.
WARNING:If the message SERVICE POWER STEERING is
displayed in the message center, the EPS system has detected a
problem with the system function. On the next key cycle the message
SERVICE POWER STEERING NOW will be displayed and steering
assist will be removed until the steering system is serviced. Have your
vehicle taken to the nearest dealer as soon as possible.
3.5L Duratec V6 engine:Your vehicle is equipped with a hydraulic
steering system.
To help prevent damage to the power steering system, never hold the
steering wheel at its furthest turning points (until it stops) for more than
a few seconds when the engine is running. If the power steering system
breaks down (or if the engine is turned off), you can steer the vehicle
manually, but it takes more effort.
•Do not operate the vehicle with a low power steering pump fluid level
(below the MIN mark on the reservoir).
•Some noise is normal during operation. If excessive, check for low
power steering pump fluid level before seeking service by your
authorized dealer.
•Heavy or uneven steering efforts may be caused by low power steering
pump fluid level. Check for low power steering pump fluid level before
seeking service by your authorized dealer.
•Do not fill the power steering pump reservoir above the MAX mark on
the reservoir, as this may result in leaks from the reservoir.
Driving
264
2011 Flex(471)
Owners Guide, 1st Printing
USA(fus)
Page 265 of 418
If the steering wanders or pulls equipped with either EPS or hydraulic
steering system, check for:
•an improperly inflated tire
•uneven tire wear
•loose or worn suspension components
•loose or worn steering components
•improper vehicle alignment
A high crown in the road or high crosswinds may also make the steering
seem to wander/pull.
BRAKE-SHIFT INTERLOCK
This vehicle is equipped with a brake-shift interlock feature that prevents
the gearshift lever from being moved from P (Park) when the ignition is
in the on position unless the brake pedal is pressed.
If you cannot move the gearshift lever out of P (Park) with ignition in
the on position and the brake pedal pressed, it is possible that a fuse has
blown or the vehicle’s brake lamps are not operating properly. Refer to
Fuses and relaysin theRoadside Emergencieschapter.
If the fuse is not blown and the brake lamps are working properly, the
following procedure will allow you to move the gearshift lever from P
(Park):
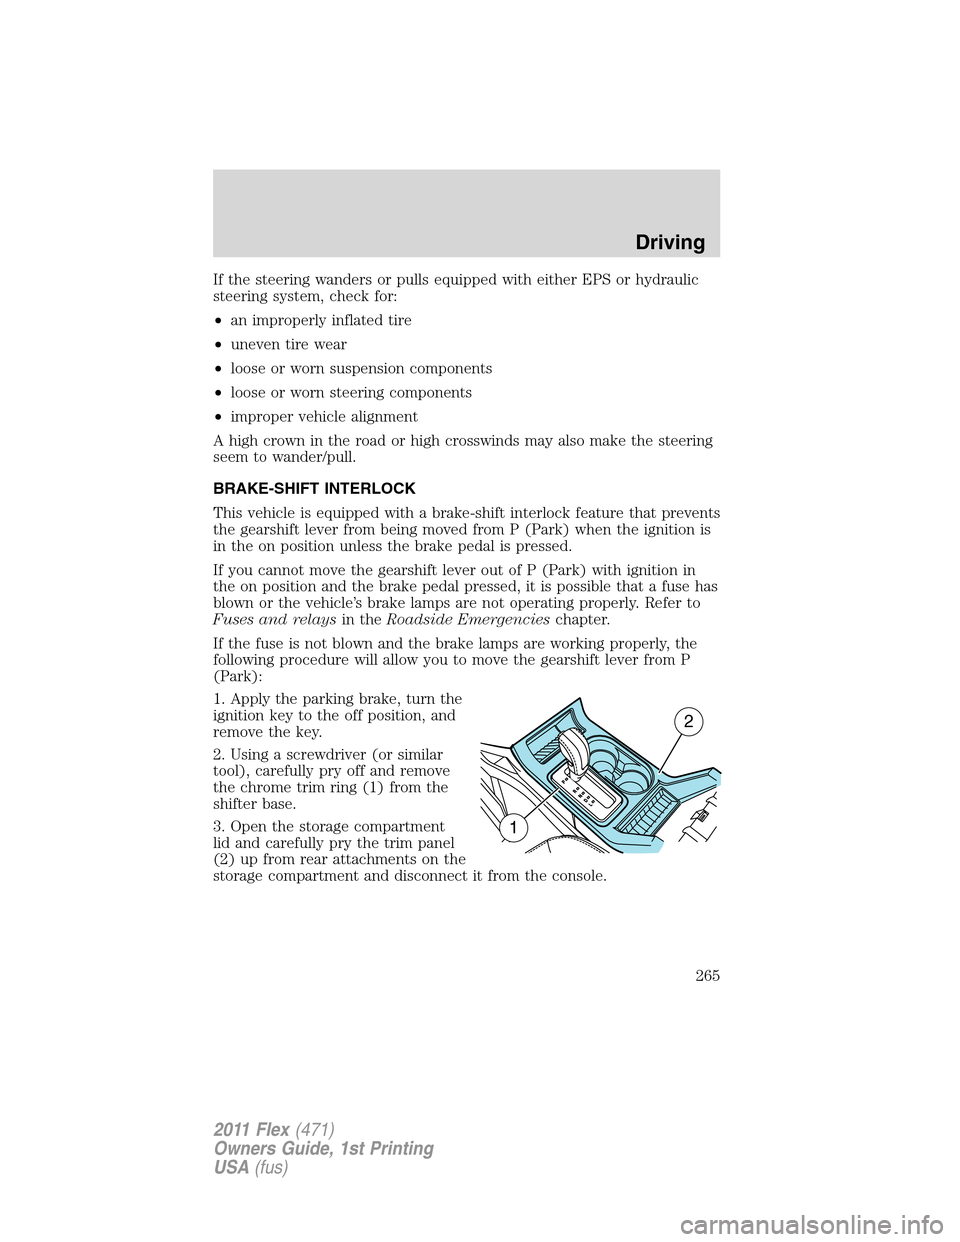
1. Apply the parking brake, turn the
ignition key to the off position, and
remove the key.
2. Using a screwdriver (or similar
tool), carefully pry off and remove
the chrome trim ring (1) from the
shifter base.
3. Open the storage compartment
lid and carefully pry the trim panel
(2) up from rear attachments on the
storage compartment and disconnect it from the console.
1
2
Driving
265
2011 Flex(471)
Owners Guide, 1st Printing
USA(fus)
Page 266 of 418
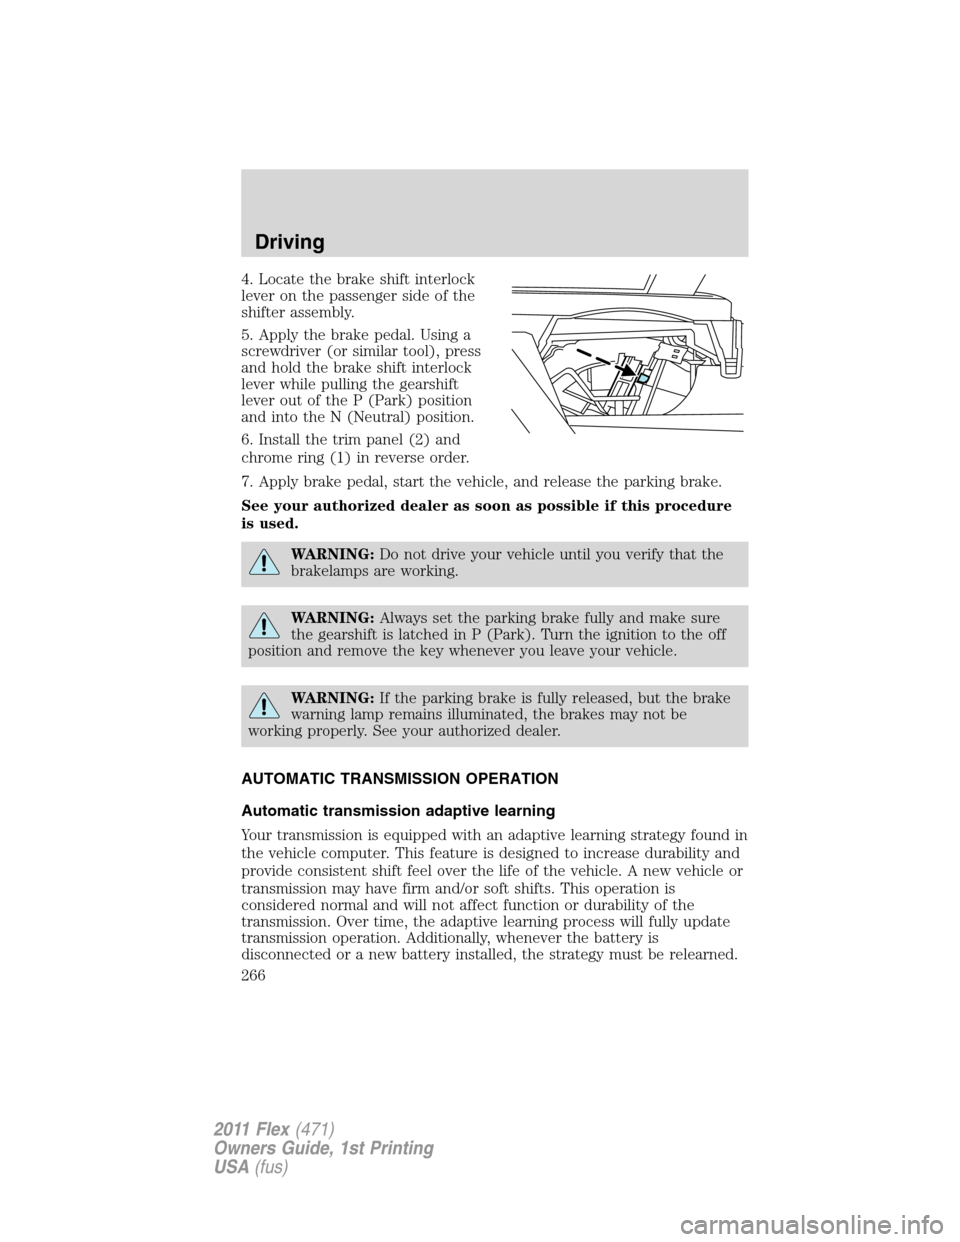
4. Locate the brake shift interlock
lever on the passenger side of the
shifter assembly.
5. Apply the brake pedal. Using a
screwdriver (or similar tool), press
and hold the brake shift interlock
lever while pulling the gearshift
lever out of the P (Park) position
and into the N (Neutral) position.
6. Install the trim panel (2) and
chrome ring (1) in reverse order.
7. Apply brake pedal, start the vehicle, and release the parking brake.
See your authorized dealer as soon as possible if this procedure
is used.
WARNING:Do not drive your vehicle until you verify that the
brakelamps are working.
WARNING:Always set the parking brake fully and make sure
the gearshift is latched in P (Park). Turn the ignition to the off
position and remove the key whenever you leave your vehicle.
WARNING:If the parking brake is fully released, but the brake
warning lamp remains illuminated, the brakes may not be
working properly. See your authorized dealer.
AUTOMATIC TRANSMISSION OPERATION
Automatic transmission adaptive learning
Your transmission is equipped with an adaptive learning strategy found in
the vehicle computer. This feature is designed to increase durability and
provide consistent shift feel over the life of the vehicle. A new vehicle or
transmission may have firm and/or soft shifts. This operation is
considered normal and will not affect function or durability of the
transmission. Over time, the adaptive learning process will fully update
transmission operation. Additionally, whenever the battery is
disconnected or a new battery installed, the strategy must be relearned.
Driving
266
2011 Flex(471)
Owners Guide, 1st Printing
USA(fus)
Page 267 of 418
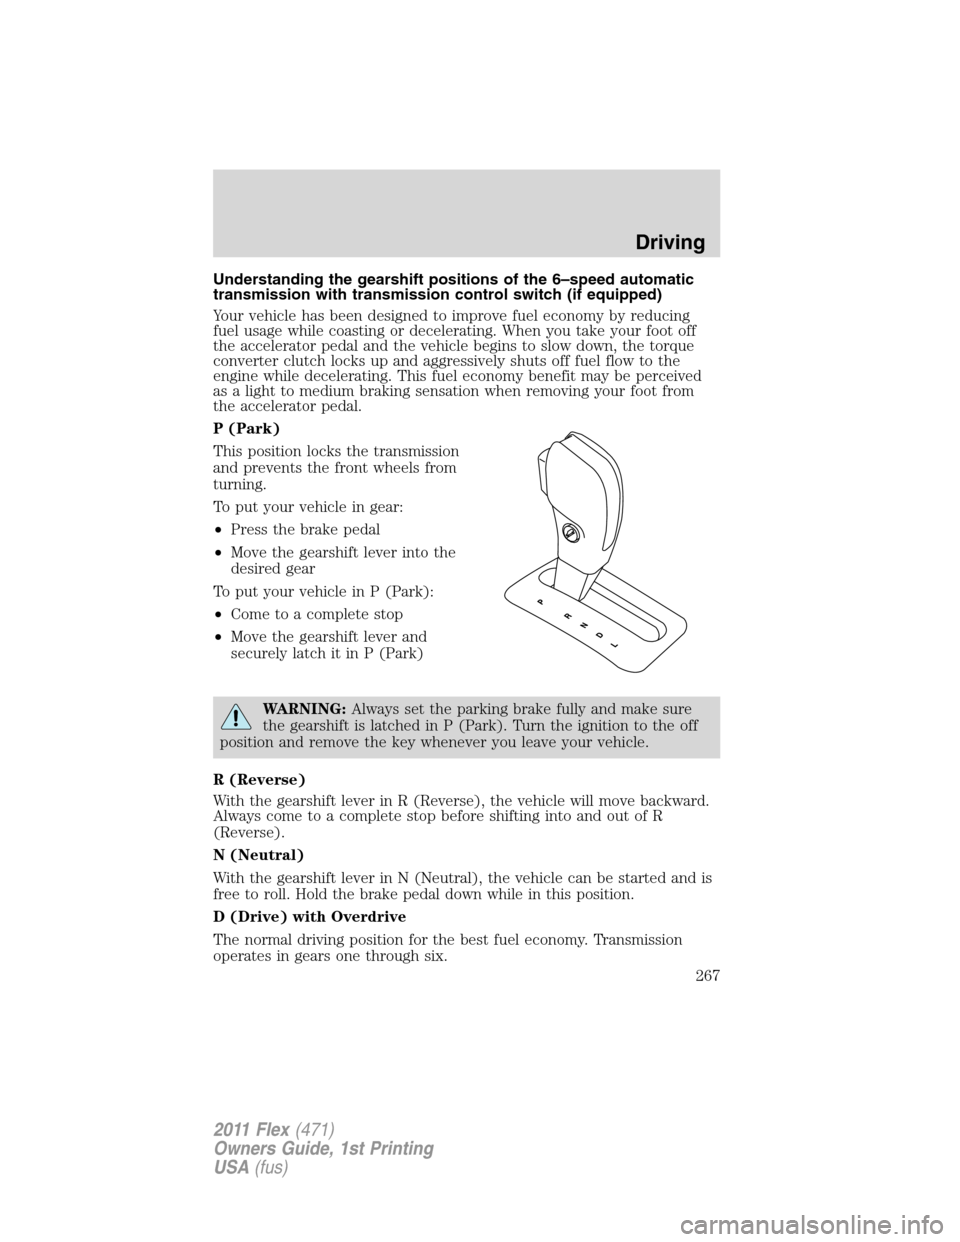
Understanding the gearshift positions of the 6–speed automatic
transmission with transmission control switch (if equipped)
Your vehicle has been designed to improve fuel economy by reducing
fuel usage while coasting or decelerating. When you take your foot off
the accelerator pedal and the vehicle begins to slow down, the torque
converter clutch locks up and aggressively shuts off fuel flow to the
engine while decelerating. This fuel economy benefit may be perceived
as a light to medium braking sensation when removing your foot from
the accelerator pedal.
P (Park)
This position locks the transmission
and prevents the front wheels from
turning.
To put your vehicle in gear:
•Press the brake pedal
•Move the gearshift lever into the
desired gear
To put your vehicle in P (Park):
•Come to a complete stop
•Move the gearshift lever and
securely latch it in P (Park)
WARNING:Always set the parking brake fully and make sure
the gearshift is latched in P (Park). Turn the ignition to the off
position and remove the key whenever you leave your vehicle.
R (Reverse)
With the gearshift lever in R (Reverse), the vehicle will move backward.
Always come to a complete stop before shifting into and out of R
(Reverse).
N (Neutral)
With the gearshift lever in N (Neutral), the vehicle can be started and is
free to roll. Hold the brake pedal down while in this position.
D (Drive) with Overdrive
The normal driving position for the best fuel economy. Transmission
operates in gears one through six.
Driving
267
2011 Flex(471)
Owners Guide, 1st Printing
USA(fus)
Page 269 of 418
•Will downshift to the lowest available gear for the current vehicle
speed; allows for first gear when vehicle reaches slower speeds.
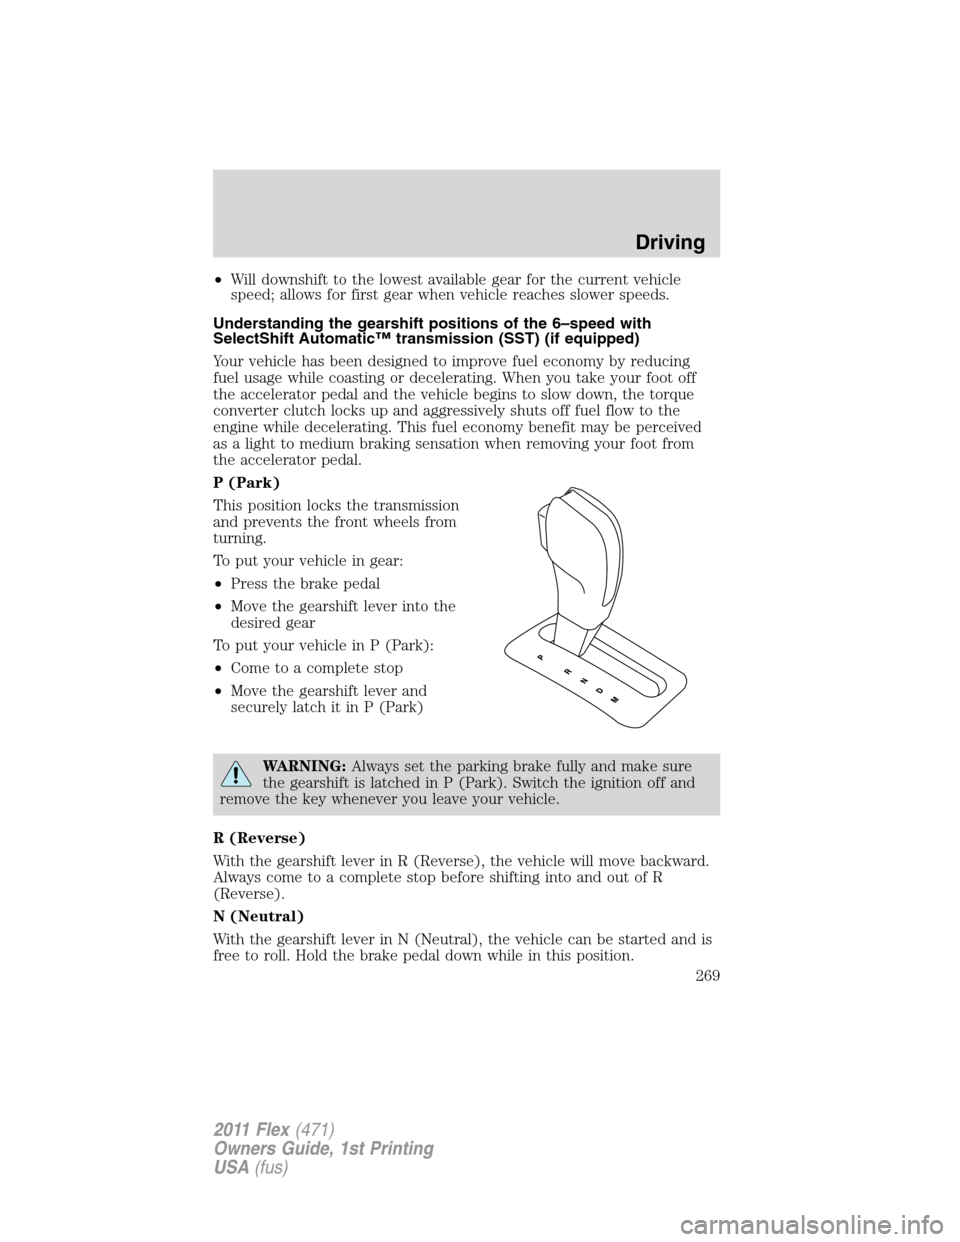
Understanding the gearshift positions of the 6–speed with
SelectShift Automatic™ transmission (SST) (if equipped)
Your vehicle has been designed to improve fuel economy by reducing
fuel usage while coasting or decelerating. When you take your foot off
the accelerator pedal and the vehicle begins to slow down, the torque
converter clutch locks up and aggressively shuts off fuel flow to the
engine while decelerating. This fuel economy benefit may be perceived
as a light to medium braking sensation when removing your foot from
the accelerator pedal.
P (Park)
This position locks the transmission
and prevents the front wheels from
turning.
To put your vehicle in gear:
•Press the brake pedal
•Move the gearshift lever into the
desired gear
To put your vehicle in P (Park):
•Come to a complete stop
•Move the gearshift lever and
securely latch it in P (Park)
WARNING:Always set the parking brake fully and make sure
the gearshift is latched in P (Park). Switch the ignition off and
remove the key whenever you leave your vehicle.
R (Reverse)
With the gearshift lever in R (Reverse), the vehicle will move backward.
Always come to a complete stop before shifting into and out of R
(Reverse).
N (Neutral)
With the gearshift lever in N (Neutral), the vehicle can be started and is
free to roll. Hold the brake pedal down while in this position.
Driving
269
2011 Flex(471)
Owners Guide, 1st Printing
USA(fus)
Page 273 of 418
WARNING:This system is not designed to prevent contact with
small or moving objects. The system is designed to provide a
warning to assist the driver in detecting large stationary objects to
avoid damaging the vehicle. The system may not detect smaller
objects, particularly those close to the ground.
WARNING:Certain add-on devices such as large trailer hitches,
bike or surfboard racks and any device that may block the
normal detection zone of the RSS system may create false beeps.
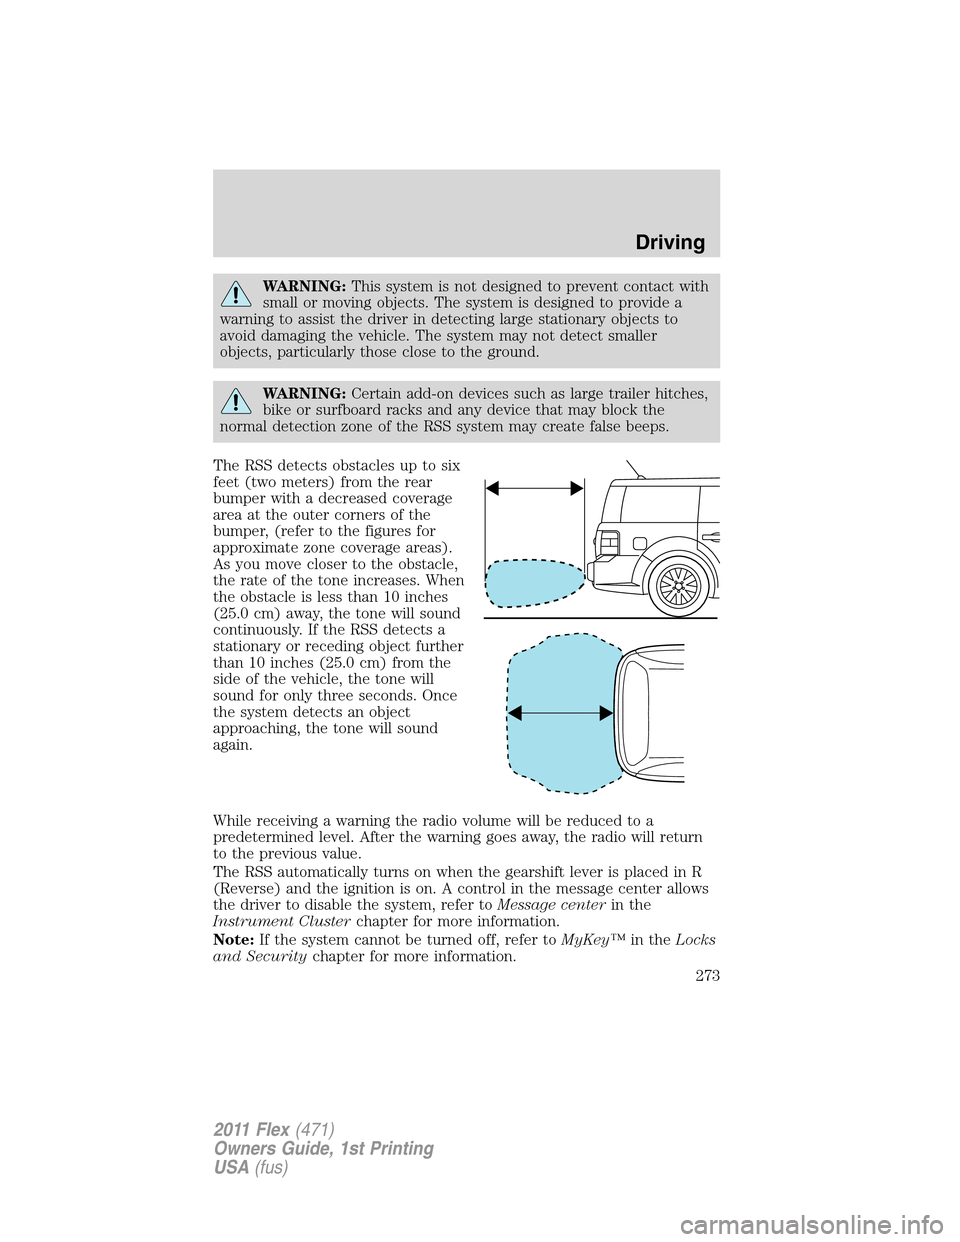
The RSS detects obstacles up to six
feet (two meters) from the rear
bumper with a decreased coverage
area at the outer corners of the
bumper, (refer to the figures for
approximate zone coverage areas).
As you move closer to the obstacle,
the rate of the tone increases. When
the obstacle is less than 10 inches
(25.0 cm) away, the tone will sound
continuously. If the RSS detects a
stationary or receding object further
than 10 inches (25.0 cm) from the
side of the vehicle, the tone will
sound for only three seconds. Once
the system detects an object
approaching, the tone will sound
again.
While receiving a warning the radio volume will be reduced to a
predetermined level. After the warning goes away, the radio will return
to the previous value.
The RSS automatically turns on when the gearshift lever is placed in R
(Reverse) and the ignition is on. A control in the message center allows
the driver to disable the system, refer toMessage centerin the
Instrument Clusterchapter for more information.
Note:If the system cannot be turned off, refer toMyKey™in theLocks
and Securitychapter for more information.
Driving
273
2011 Flex(471)
Owners Guide, 1st Printing
USA(fus)
Page 283 of 418
sudden return to the pavement which could cause the vehicle to slide
sideways out of control or rollover. Remember, your safety and the
safety of others should be your primary concern.
If your vehicle gets stuck
If your vehicle gets stuck in mud or snow it may be rocked out by
shifting between forward and reverse gears, stopping between shifts, in a
steady pattern. Press lightly on the accelerator in each gear.
Your vehicle is equipped with traction control. It may be beneficial to
disengage the traction control system while attempting to rock the
vehicle.
Do not rock the vehicle if the engine is not at normal operating
temperature or damage to the transmission may occur.
Do not rock the vehicle for more than a few minutes or damage
to the transmission and tires may occur or the engine may
overheat.
WARNING:Always set the parking brake fully and make sure
the gearshift is latched in P (Park). Switch the ignition off and
remove the key whenever you leave your vehicle.
WARNING:If the parking brake is fully released, but the brake
warning lamp remains illuminated, the brakes may not be
working properly. See your authorized dealer.
WARNING:Do not spin the wheels at over 35 mph (56 km/h).
The tires may fail and injure a passenger or bystander.
Emergency maneuvers
•In an unavoidable emergency situation where a sudden sharp turn
must be made, remember to avoid “over-driving” your vehicle (i.e.,
turn the steering wheel only as rapidly and as far as required to avoid
the emergency). Excessive steering will result in less vehicle control,
not more. Additionally, smooth variations of the accelerator and/or
brake pedal pressure should be utilized if changes in vehicle speed are
called for. Avoid abrupt steering, acceleration or braking which could
result in an increased risk of loss of vehicle control, vehicle rollover
and/or personal injury. Use all available road surface to return the
vehicle to a safe direction of travel.
Driving
283
2011 Flex(471)
Owners Guide, 1st Printing
USA(fus)
Page 288 of 418
ROADSIDE ASSISTANCE
Getting roadside assistance
To fully assist you should you have a vehicle concern, Ford Motor
Company offers a complimentary roadside assistance program. This
program is separate from the New Vehicle Limited Warranty. The service
is available:
•24-hours, seven days a week
•for the coverage period listed on the Roadside Assistance Card
included in your Owner Guide portfolio.
Roadside assistance will cover:
•a flat tire change with a good spare (except vehicles that have been
supplied with a tire inflation kit)
•battery jump start
•lock-out assistance (key replacement cost is the customer’s
responsibility)
•fuel delivery – Independent Service Contractors, if not prohibited by
state, local or municipal law shall deliver up to 2.0 gallons (7.5L) of
gasoline or 5.0 gallons (18.9L) of diesel fuel to a disabled vehicle. Fuel
delivery service is limited to two no-charge occurrences within a
12-month period.
•winch out – available within 100 feet (30.5 meters) of a paved or
county maintained road, no recoveries.
•towing – Ford/Mercury/Lincoln eligible vehicle towed to an authorized
dealer within 35 miles (56 km) of the disablement location or to the
nearest authorized dealer. If a member requests to be towed to an
authorized dealer more than 35 miles (56 km) from the disablement
location, the member shall be responsible for any mileage costs in
excess of 35 miles (56 km).
Trailers shall be covered up to $200 if the disabled eligible vehicle
requires service at the nearest authorized dealer. If the trailer is disabled,
but the towing vehicle is operational, the trailer does not qualify for any
roadside services.
Roadside Emergencies
288
2011 Flex(471)
Owners Guide, 1st Printing
USA(fus)
Page 289 of 418
Canadian customers refer to your Warranty Guide or visit our
website at www.ford.ca for information on:
Using roadside assistance
Complete the roadside assistance identification card and place it in your
wallet for quick reference. In the United States, this card is found in the
Owner Guide portfolio in the glove compartment. In Canada, the card is
found in theWarranty Guidein the glove compartment.
U.S. Ford, Mercury and Lincoln vehicle customers who require Roadside
Assistance, call 1-800-241-3673.
Canadian customers who require roadside assistance, call
1-800-665-2006.
If you need to arrange roadside assistance for yourself, Ford Motor
Company will reimburse a reasonable amount for towing to the nearest
dealership within 35 miles (56 km). To obtain reimbursement
information, U.S. Ford, Mercury and Lincoln vehicle customers call
1-800-241-3673. Customers will be asked to submit their original
receipts.
Canadian customers who need to obtain reimbursement information, call
1-800-665-2006 or visit our website at www.ford.ca.
HAZARD FLASHER CONTROL
The hazard flasher control is located
on the instrument panel by the
radio. The hazard flashers will
operate when the ignition is in any
position or if the key is not in the
ignition.
Press the flasher control and all front and rear direction signals will flash.
Press the flasher control again to turn them off. Use it when your vehicle
is disabled and is creating a safety hazard for other motorists.
Note:With extended use, the flasher may run down your battery.
FUEL PUMP SHUT-OFF
In the event of a moderate to severe collision, this vehicle is equipped
with a fuel pump shut-off feature that stops the flow of fuel to the
engine. Not every impact will cause a shut-off.
Roadside Emergencies
289
2011 Flex(471)
Owners Guide, 1st Printing
USA(fus)