tire pressure FORD FLEX 2017 1.G Owners Manual
[x] Cancel search | Manufacturer: FORD, Model Year: 2017, Model line: FLEX, Model: FORD FLEX 2017 1.GPages: 496, PDF Size: 5.92 MB
Page 7 of 496
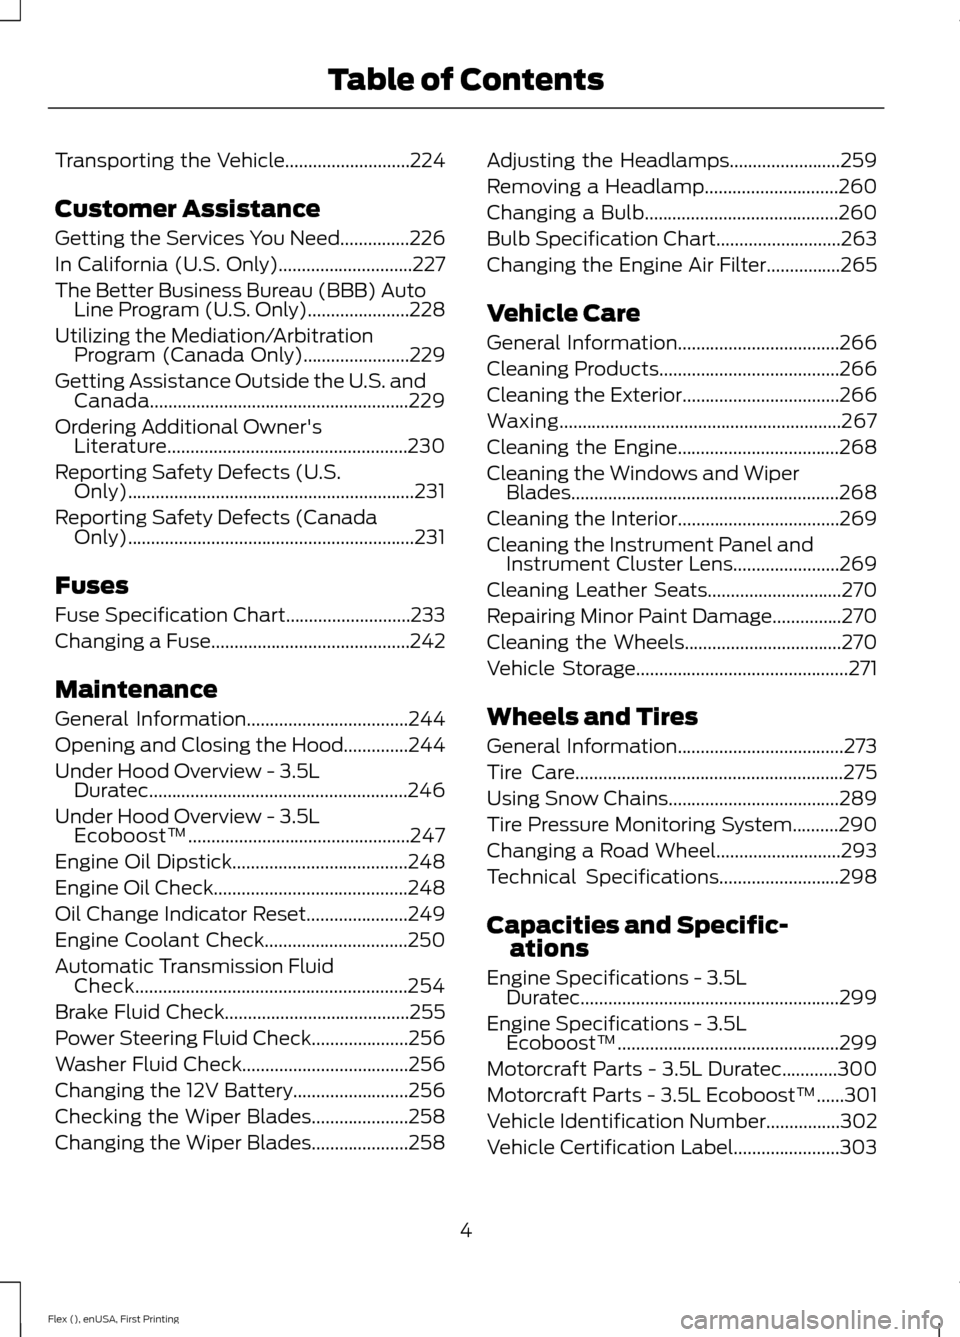
Transporting the Vehicle...........................224
Customer Assistance
Getting the Services You Need...............226
In California (U.S. Only).............................227
The Better Business Bureau (BBB) Auto Line Program (U.S. Only)
......................228
Utilizing the Mediation/Arbitration Program (Canada Only).......................229
Getting Assistance Outside the U.S. and Canada........................................................229
Ordering Additional Owner's Literature....................................................230
Reporting Safety Defects (U.S. Only)..............................................................231
Reporting Safety Defects (Canada Only)..............................................................231
Fuses
Fuse Specification Chart...........................233
Changing a Fuse...........................................242
Maintenance
General Information
...................................244
Opening and Closing the Hood..............244
Under Hood Overview - 3.5L Duratec........................................................246
Under Hood Overview - 3.5L Ecoboost™................................................247
Engine Oil Dipstick
......................................248
Engine Oil Check..........................................248
Oil Change Indicator Reset......................249
Engine Coolant Check...............................250
Automatic Transmission Fluid Check...........................................................254
Brake Fluid Check........................................255
Power Steering Fluid Check.....................256
Washer Fluid Check....................................256
Changing the 12V Battery.........................256
Checking the Wiper Blades
.....................258
Changing the Wiper Blades
.....................258 Adjusting the Headlamps........................259
Removing a Headlamp.............................260
Changing a Bulb..........................................260
Bulb Specification Chart...........................263
Changing the Engine Air Filter
................265
Vehicle Care
General Information...................................266
Cleaning Products.......................................266
Cleaning the Exterior..................................266
Waxing
.............................................................267
Cleaning the Engine
...................................268
Cleaning the Windows and Wiper Blades..........................................................268
Cleaning the Interior
...................................269
Cleaning the Instrument Panel and Instrument Cluster Lens.......................269
Cleaning Leather Seats.............................270
Repairing Minor Paint Damage
...............270
Cleaning the Wheels..................................270
Vehicle Storage
..............................................271
Wheels and Tires
General Information....................................273
Tire Care..........................................................275
Using Snow Chains
.....................................289
Tire Pressure Monitoring System..........290
Changing a Road Wheel...........................293
Technical Specifications
..........................298
Capacities and Specific- ations
Engine Specifications - 3.5L Duratec........................................................299
Engine Specifications - 3.5L Ecoboost™................................................299
Motorcraft Parts - 3.5L Duratec............300
Motorcraft Parts - 3.5L Ecoboost™......301
Vehicle Identification Number
................302
Vehicle Certification Label.......................303
4
Flex (), enUSA, First Printing Table of Contents
Page 11 of 496
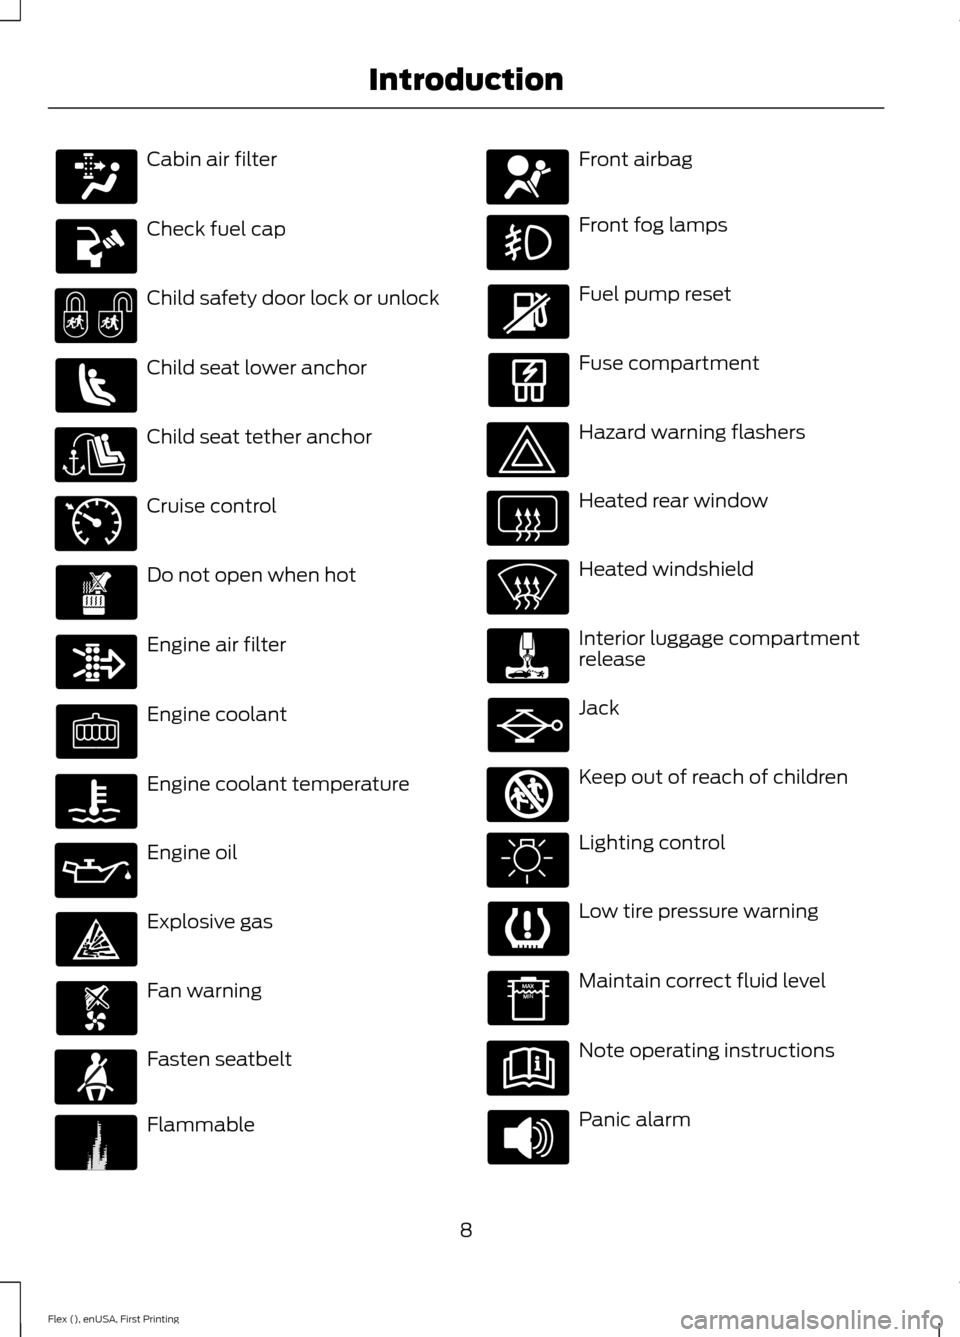
Cabin air filter
Check fuel cap
Child safety door lock or unlock
Child seat lower anchor
Child seat tether anchor
Cruise control
Do not open when hot
Engine air filter
Engine coolant
Engine coolant temperature
Engine oil
Explosive gas
Fan warning
Fasten seatbelt
Flammable Front airbag
Front fog lamps
Fuel pump reset
Fuse compartment
Hazard warning flashers
Heated rear window
Heated windshield
Interior luggage compartment
release
Jack
Keep out of reach of children
Lighting control
Low tire pressure warning
Maintain correct fluid level
Note operating instructions
Panic alarm
8
Flex (), enUSA, First Printing Introduction E71340 E71880 E231160 E67017 E161353
Page 40 of 496
2. Grasp the shoulder portion and pull
downward until you pull the entire belt
out. As the belt retracts, you will hear
a clicking sound. This indicates the
seatbelt is now in the automatic
locking mode.
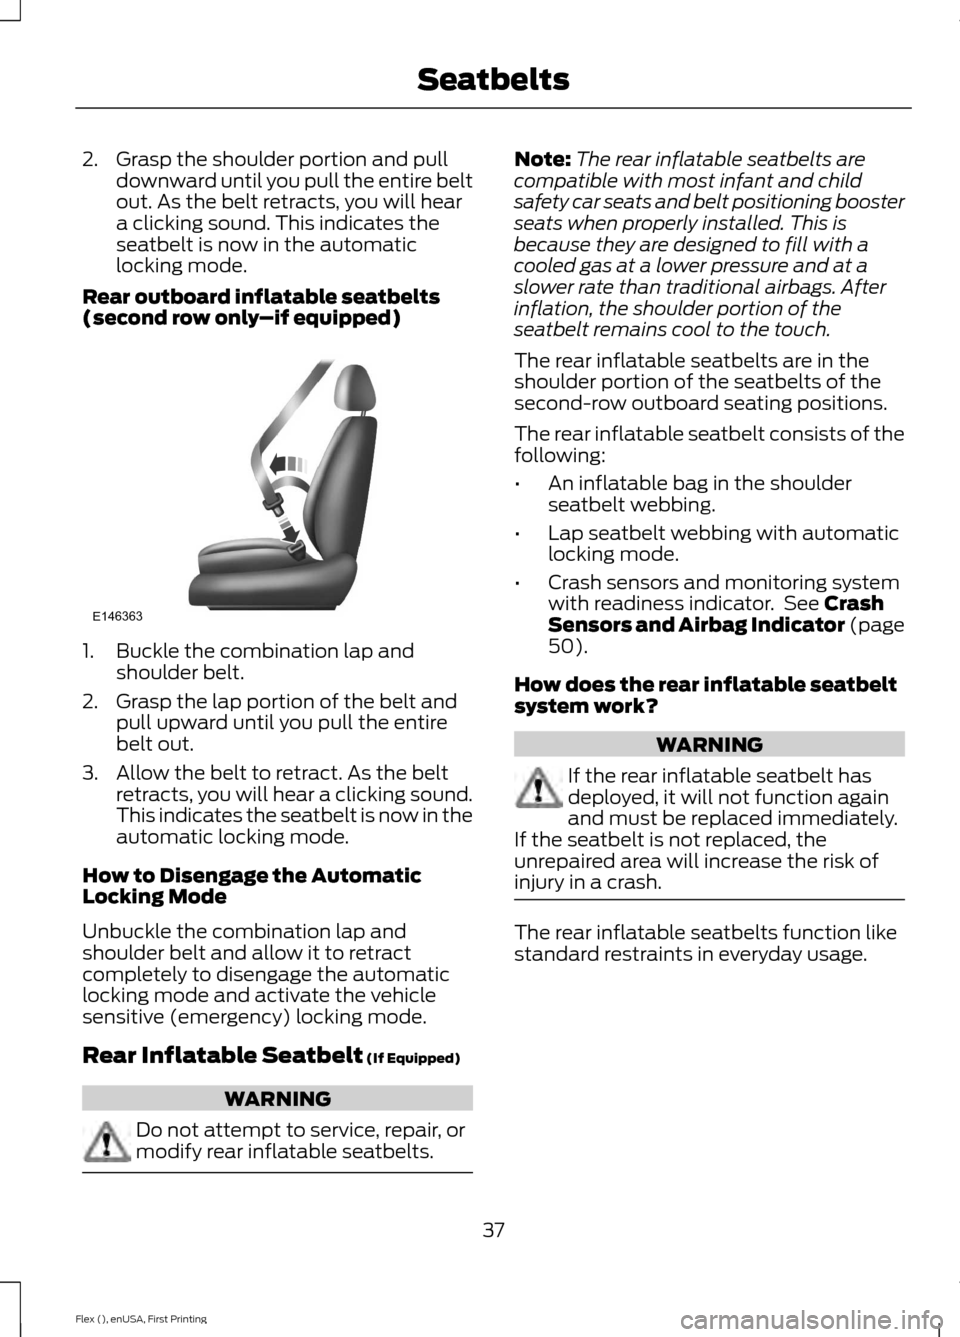
Rear outboard inflatable seatbelts
(second row only –if equipped)1. Buckle the combination lap and
shoulder belt.
2. Grasp the lap portion of the belt and pull upward until you pull the entire
belt out.
3. Allow the belt to retract. As the belt retracts, you will hear a clicking sound.
This indicates the seatbelt is now in the
automatic locking mode.
How to Disengage the Automatic
Locking Mode
Unbuckle the combination lap and
shoulder belt and allow it to retract
completely to disengage the automatic
locking mode and activate the vehicle
sensitive (emergency) locking mode.
Rear Inflatable Seatbelt (If Equipped) WARNING
Do not attempt to service, repair, or
modify rear inflatable seatbelts. Note:
The rear inflatable seatbelts are
compatible with most infant and child
safety car seats and belt positioning booster
seats when properly installed. This is
because they are designed to fill with a
cooled gas at a lower pressure and at a
slower rate than traditional airbags. After
inflation, the shoulder portion of the
seatbelt remains cool to the touch.
The rear inflatable seatbelts are in the
shoulder portion of the seatbelts of the
second-row outboard seating positions.
The rear inflatable seatbelt consists of the
following:
• An inflatable bag in the shoulder
seatbelt webbing.
• Lap seatbelt webbing with automatic
locking mode.
• Crash sensors and monitoring system
with readiness indicator. See
Crash
Sensors and Airbag Indicator (page
50
).
How does the rear inflatable seatbelt
system work? WARNING
If the rear inflatable seatbelt has
deployed, it will not function again
and must be replaced immediately.
If the seatbelt is not replaced, the
unrepaired area will increase the risk of
injury in a crash. The rear inflatable seatbelts function like
standard restraints in everyday usage.
37
Flex (), enUSA, First Printing SeatbeltsE146363
Page 99 of 496
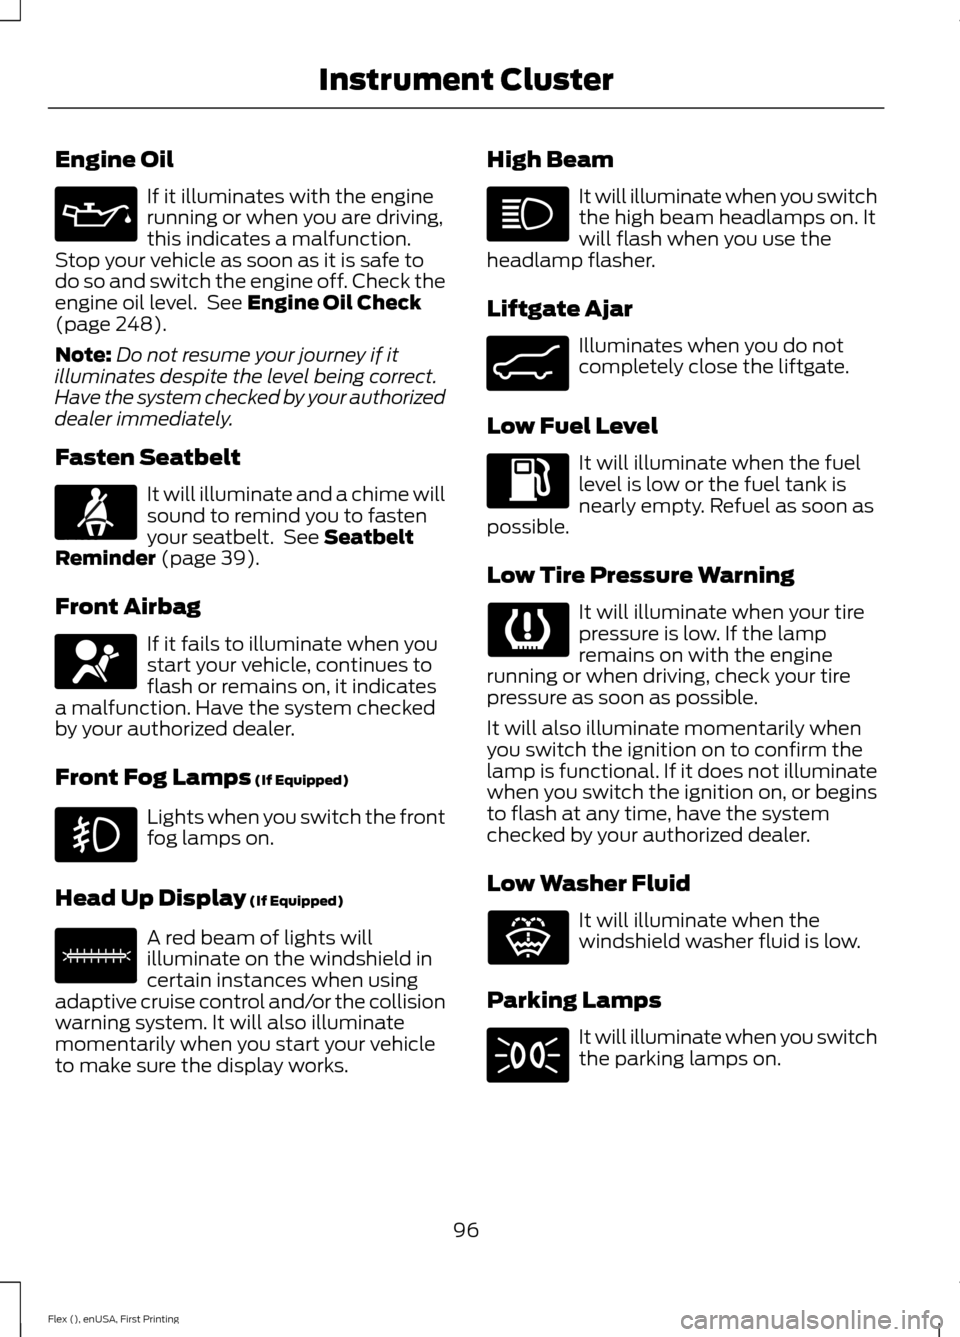
Engine Oil
If it illuminates with the engine
running or when you are driving,
this indicates a malfunction.
Stop your vehicle as soon as it is safe to
do so and switch the engine off. Check the
engine oil level. See Engine Oil Check
(page 248).
Note: Do not resume your journey if it
illuminates despite the level being correct.
Have the system checked by your authorized
dealer immediately.
Fasten Seatbelt It will illuminate and a chime will
sound to remind you to fasten
your seatbelt. See
Seatbelt
Reminder (page 39).
Front Airbag If it fails to illuminate when you
start your vehicle, continues to
flash or remains on, it indicates
a malfunction. Have the system checked
by your authorized dealer.
Front Fog Lamps
(If Equipped) Lights when you switch the front
fog lamps on.
Head Up Display
(If Equipped) A red beam of lights will
illuminate on the windshield in
certain instances when using
adaptive cruise control and/or the collision
warning system. It will also illuminate
momentarily when you start your vehicle
to make sure the display works. High Beam It will illuminate when you switch
the high beam headlamps on. It
will flash when you use the
headlamp flasher.
Liftgate Ajar Illuminates when you do not
completely close the liftgate.
Low Fuel Level It will illuminate when the fuel
level is low or the fuel tank is
nearly empty. Refuel as soon as
possible.
Low Tire Pressure Warning It will illuminate when your tire
pressure is low. If the lamp
remains on with the engine
running or when driving, check your tire
pressure as soon as possible.
It will also illuminate momentarily when
you switch the ignition on to confirm the
lamp is functional. If it does not illuminate
when you switch the ignition on, or begins
to flash at any time, have the system
checked by your authorized dealer.
Low Washer Fluid It will illuminate when the
windshield washer fluid is low.
Parking Lamps It will illuminate when you switch
the parking lamps on.
96
Flex (), enUSA, First Printing Instrument Cluster E71880 E67017 E156133 E162453 E132353
Page 118 of 496
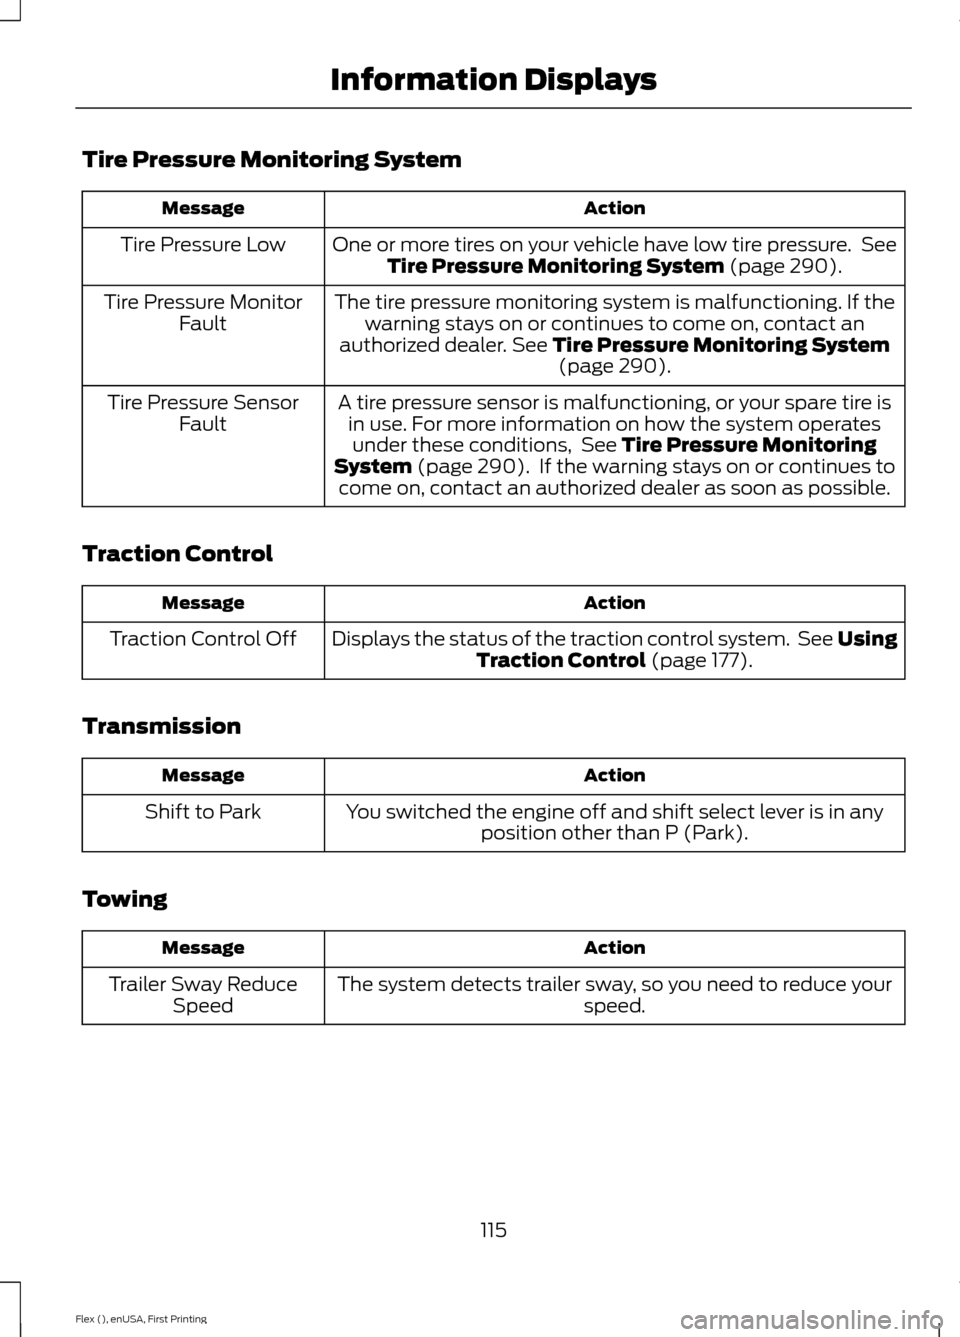
Tire Pressure Monitoring System
Action
Message
One or more tires on your vehicle have low tire pressure. SeeTire Pressure Monitoring System (page 290).
Tire Pressure Low
The tire pressure monitoring system is malfunctioning. If thewarning stays on or continues to come on, contact an
authorized dealer.
See Tire Pressure Monitoring System (page 290).
Tire Pressure Monitor
Fault
A tire pressure sensor is malfunctioning, or your spare tire isin use. For more information on how the system operatesunder these conditions, See
Tire Pressure Monitoring
System (page 290). If the warning stays on or continues to
come on, contact an authorized dealer as soon as possible.
Tire Pressure Sensor
Fault
Traction Control Action
Message
Displays the status of the traction control system. See UsingTraction Control
(page 177).
Traction Control Off
Transmission Action
Message
You switched the engine off and shift select lever is in anyposition other than P (Park).
Shift to Park
Towing Action
Message
The system detects trailer sway, so you need to reduce your speed.
Trailer Sway Reduce
Speed
115
Flex (), enUSA, First Printing Information Displays
Page 174 of 496
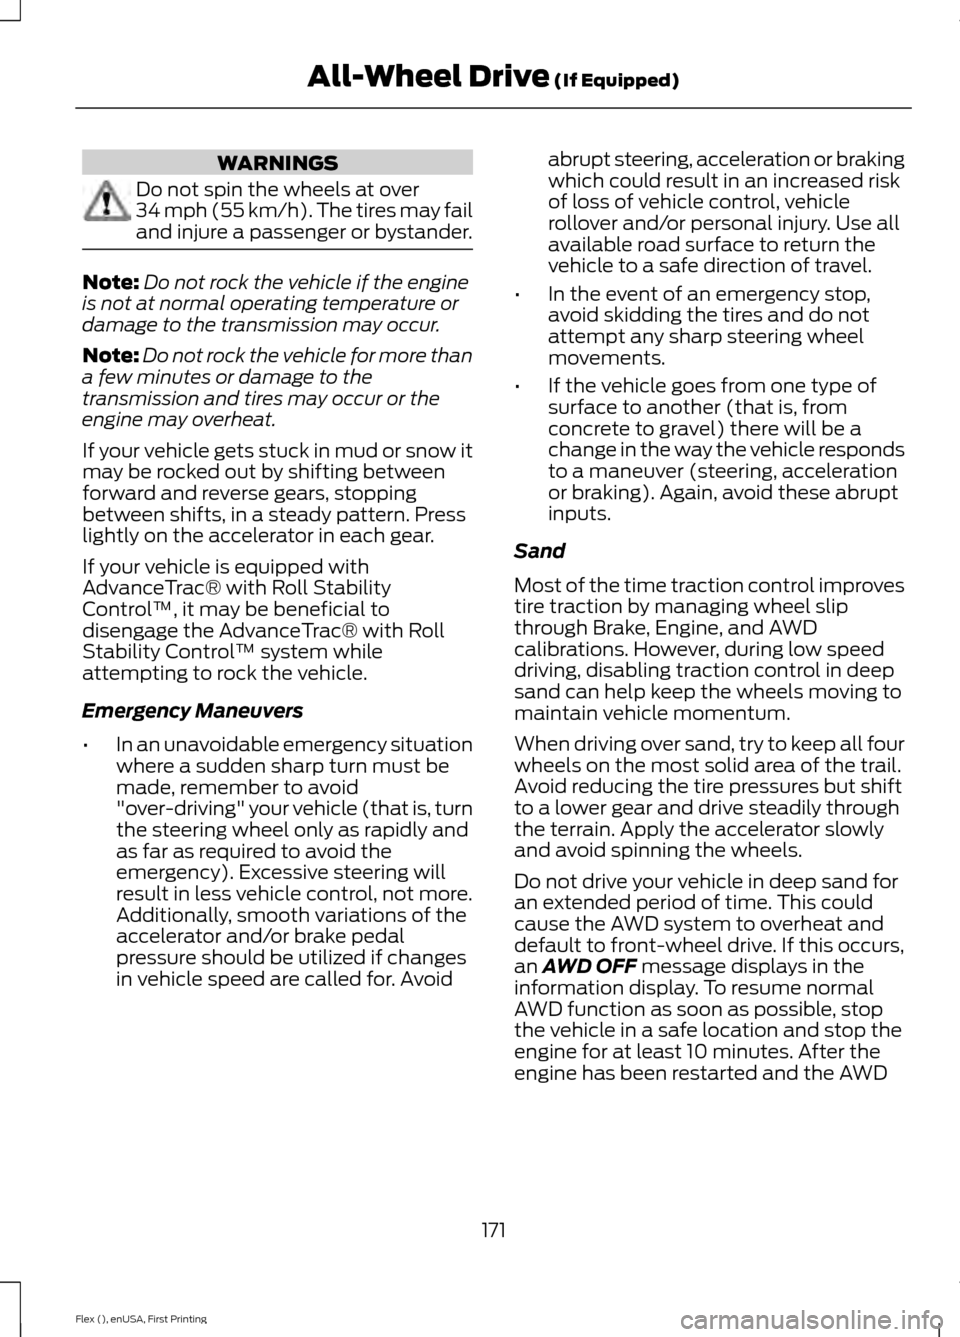
WARNINGS
Do not spin the wheels at over
34 mph (55 km/h). The tires may fail
and injure a passenger or bystander.
Note:
Do not rock the vehicle if the engine
is not at normal operating temperature or
damage to the transmission may occur.
Note: Do not rock the vehicle for more than
a few minutes or damage to the
transmission and tires may occur or the
engine may overheat.
If your vehicle gets stuck in mud or snow it
may be rocked out by shifting between
forward and reverse gears, stopping
between shifts, in a steady pattern. Press
lightly on the accelerator in each gear.
If your vehicle is equipped with
AdvanceTrac® with Roll Stability
Control ™, it may be beneficial to
disengage the AdvanceTrac® with Roll
Stability Control ™ system while
attempting to rock the vehicle.
Emergency Maneuvers
• In an unavoidable emergency situation
where a sudden sharp turn must be
made, remember to avoid
"over-driving" your vehicle (that is, turn
the steering wheel only as rapidly and
as far as required to avoid the
emergency). Excessive steering will
result in less vehicle control, not more.
Additionally, smooth variations of the
accelerator and/or brake pedal
pressure should be utilized if changes
in vehicle speed are called for. Avoid abrupt steering, acceleration or braking
which could result in an increased risk
of loss of vehicle control, vehicle
rollover and/or personal injury. Use all
available road surface to return the
vehicle to a safe direction of travel.
• In the event of an emergency stop,
avoid skidding the tires and do not
attempt any sharp steering wheel
movements.
• If the vehicle goes from one type of
surface to another (that is, from
concrete to gravel) there will be a
change in the way the vehicle responds
to a maneuver (steering, acceleration
or braking). Again, avoid these abrupt
inputs.
Sand
Most of the time traction control improves
tire traction by managing wheel slip
through Brake, Engine, and AWD
calibrations. However, during low speed
driving, disabling traction control in deep
sand can help keep the wheels moving to
maintain vehicle momentum.
When driving over sand, try to keep all four
wheels on the most solid area of the trail.
Avoid reducing the tire pressures but shift
to a lower gear and drive steadily through
the terrain. Apply the accelerator slowly
and avoid spinning the wheels.
Do not drive your vehicle in deep sand for
an extended period of time. This could
cause the AWD system to overheat and
default to front-wheel drive. If this occurs,
an AWD OFF message displays in the
information display. To resume normal
AWD function as soon as possible, stop
the vehicle in a safe location and stop the
engine for at least 10 minutes. After the
engine has been restarted and the AWD
171
Flex (), enUSA, First Printing All-Wheel Drive
(If Equipped)
Page 175 of 496
system has adequately cooled, the AWD
OFF message turns off and normal AWD
function returns. In the event the engine is
not stopped, the AWD OFF message turns
off when the system cools and normal
AWD function returns.
When driving at slow speeds in deep sand
under high outside temperatures, use L
(Low) gear when possible. L (Low) gear
operation will maximize the engine and
transmission cooling capability.
Under severe operating conditions, the A/C
may cycle on and off to protect
overheating of the engine.
Avoid excessive speed because vehicle
momentum can work against you and
cause the vehicle to become stuck to the
point that assistance may be required from
another vehicle. Remember, you may be
able to back out the way you came if you
proceed with caution.
Mud and Water
If you must drive through high water, drive
slowly. Traction or brake capability may
be limited.
When driving through water, determine the
depth; avoid water higher than the bottom
of the wheel rims (for cars) or the bottom
of the hubs (for trucks) (if possible) and
proceed slowly. If the ignition system gets
wet, the vehicle may stall.
Once through water, always try the brakes.
Wet brakes do not stop the vehicle as
effectively as dry brakes. Drying can be
improved by moving your vehicle slowly
while applying light pressure on the brake
pedal. Be cautious of sudden changes in vehicle
speed or direction when you are driving in
mud. Even AWD vehicles can lose traction
in slick mud. As when you are driving over
sand, apply the accelerator slowly and
avoid spinning your wheels. If the vehicle
does slide, steer in the direction of the slide
until you regain control of the vehicle.
After driving through mud, clean off residue
stuck to rotating driveshafts and tires.
Excess mud stuck on tires and rotating
driveshafts causes an imbalance that
could damage drive components.
Note:
Driving through deep water may
damage the transmission.
If the front or rear axle is submerged in
water, have the power transfer unit (PTU)
or rear axle serviced by an authorized
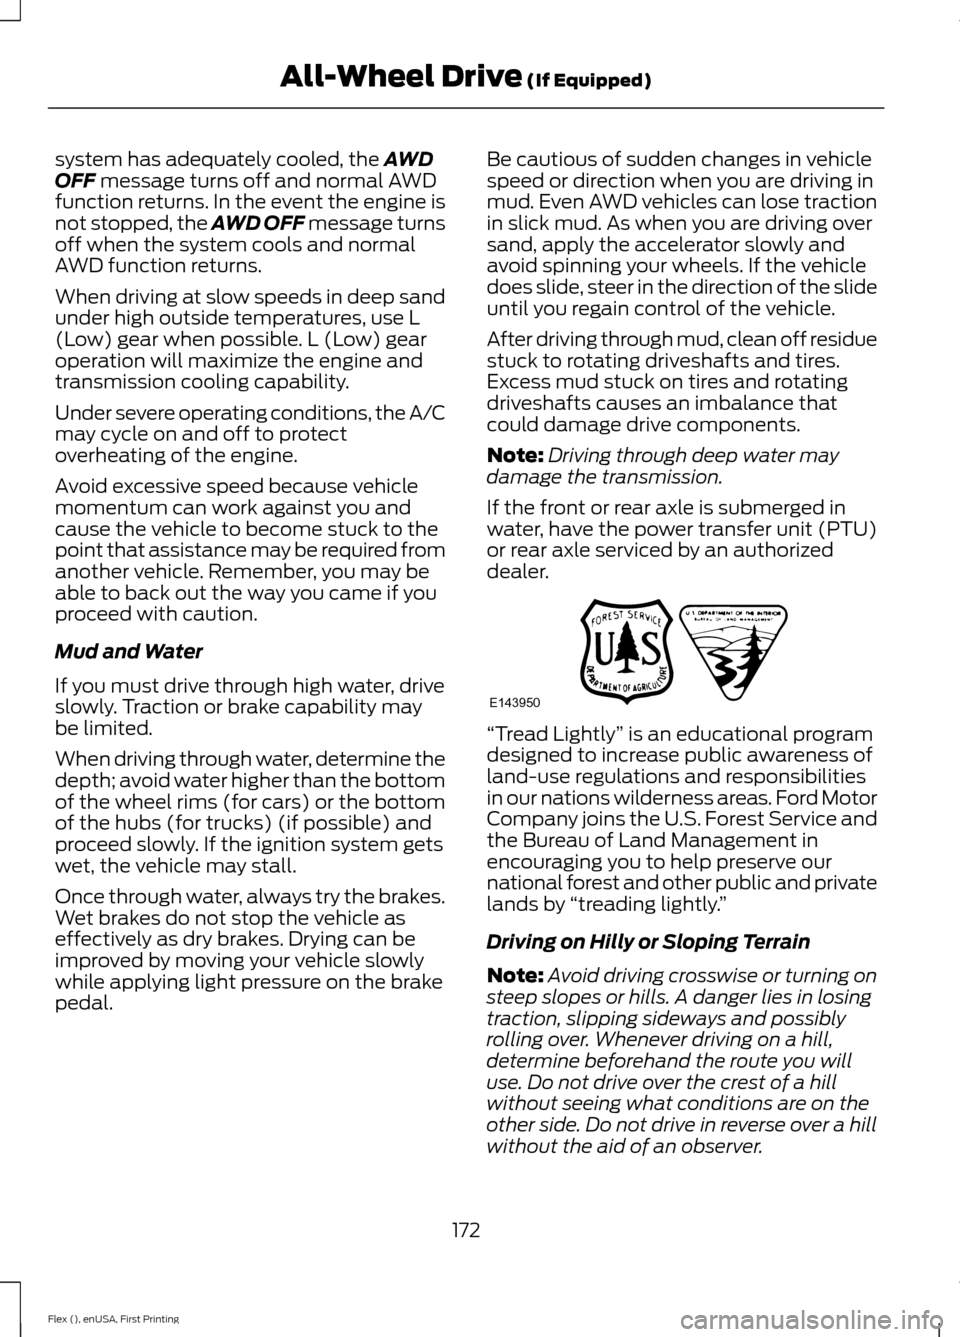
dealer. “Tread Lightly
” is an educational program
designed to increase public awareness of
land-use regulations and responsibilities
in our nations wilderness areas. Ford Motor
Company joins the U.S. Forest Service and
the Bureau of Land Management in
encouraging you to help preserve our
national forest and other public and private
lands by “treading lightly. ”
Driving on Hilly or Sloping Terrain
Note: Avoid driving crosswise or turning on
steep slopes or hills. A danger lies in losing
traction, slipping sideways and possibly
rolling over. Whenever driving on a hill,
determine beforehand the route you will
use. Do not drive over the crest of a hill
without seeing what conditions are on the
other side. Do not drive in reverse over a hill
without the aid of an observer.
172
Flex (), enUSA, First Printing All-Wheel Drive
(If Equipped)E143950
Page 203 of 496
STEERING
Electric Power Steering
WARNINGS
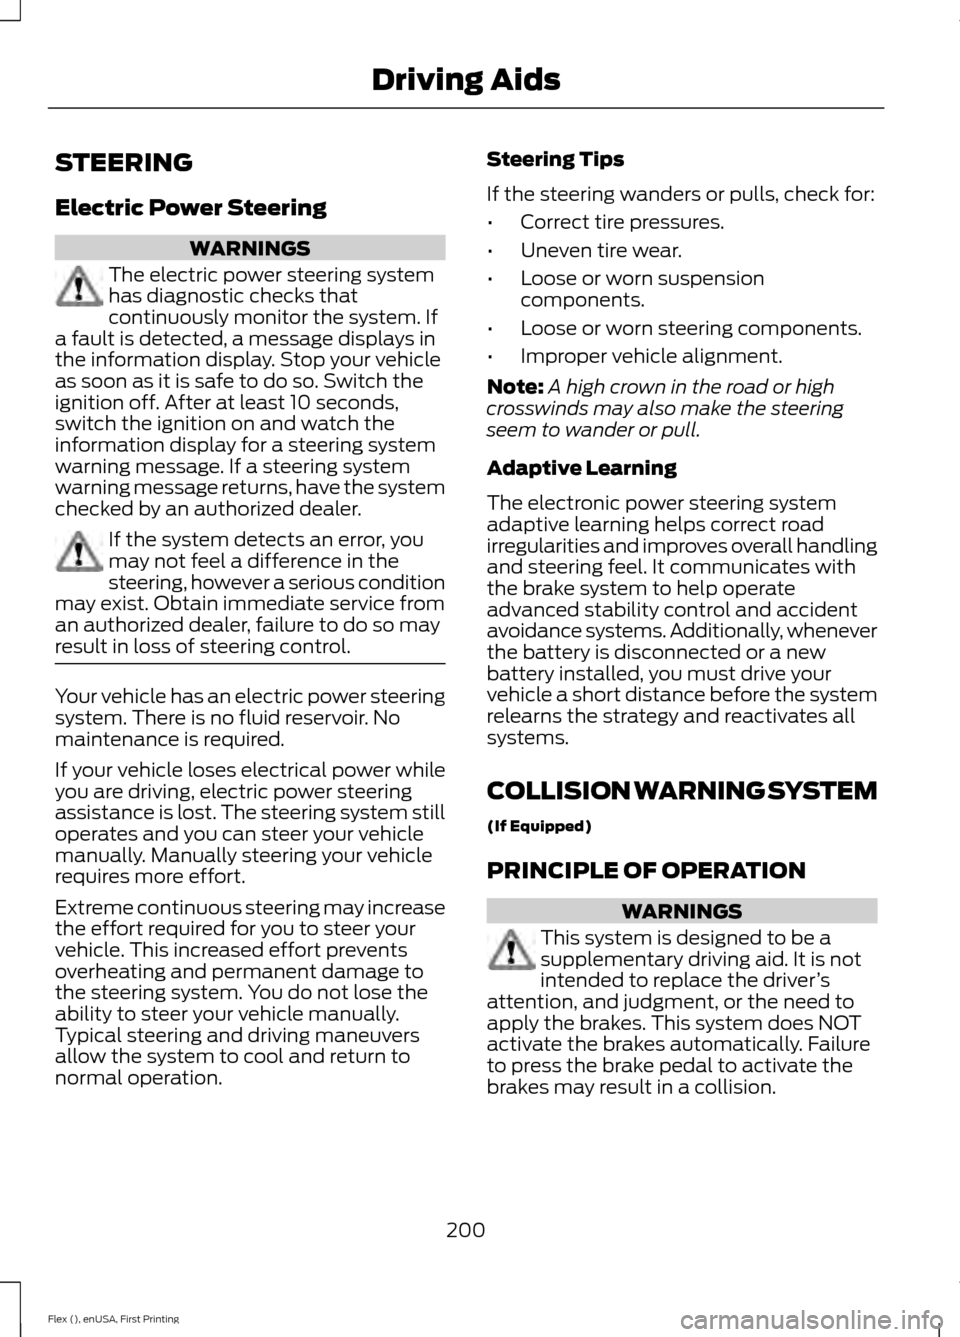
The electric power steering system
has diagnostic checks that
continuously monitor the system. If
a fault is detected, a message displays in
the information display. Stop your vehicle
as soon as it is safe to do so. Switch the
ignition off. After at least 10 seconds,
switch the ignition on and watch the
information display for a steering system
warning message. If a steering system
warning message returns, have the system
checked by an authorized dealer. If the system detects an error, you
may not feel a difference in the
steering, however a serious condition
may exist. Obtain immediate service from
an authorized dealer, failure to do so may
result in loss of steering control. Your vehicle has an electric power steering
system. There is no fluid reservoir. No
maintenance is required.
If your vehicle loses electrical power while
you are driving, electric power steering
assistance is lost. The steering system still
operates and you can steer your vehicle
manually. Manually steering your vehicle
requires more effort.
Extreme continuous steering may increase
the effort required for you to steer your
vehicle. This increased effort prevents
overheating and permanent damage to
the steering system. You do not lose the
ability to steer your vehicle manually.
Typical steering and driving maneuvers
allow the system to cool and return to
normal operation. Steering Tips
If the steering wanders or pulls, check for:
•
Correct tire pressures.
• Uneven tire wear.
• Loose or worn suspension
components.
• Loose or worn steering components.
• Improper vehicle alignment.
Note: A high crown in the road or high
crosswinds may also make the steering
seem to wander or pull.
Adaptive Learning
The electronic power steering system
adaptive learning helps correct road
irregularities and improves overall handling
and steering feel. It communicates with
the brake system to help operate
advanced stability control and accident
avoidance systems. Additionally, whenever
the battery is disconnected or a new
battery installed, you must drive your
vehicle a short distance before the system
relearns the strategy and reactivates all
systems.
COLLISION WARNING SYSTEM
(If Equipped)
PRINCIPLE OF OPERATION WARNINGS
This system is designed to be a
supplementary driving aid. It is not
intended to replace the driver
’s
attention, and judgment, or the need to
apply the brakes. This system does NOT
activate the brakes automatically. Failure
to press the brake pedal to activate the
brakes may result in a collision.
200
Flex (), enUSA, First Printing Driving Aids
Page 270 of 496
•
Dry your vehicle with a chamois or soft
terry cloth towel to eliminate water
spotting.
• Immediately remove fuel spillages, bird
droppings, insect deposits and road tar.
These may cause damage to your
vehicle ’s paintwork or trim over time.
We recommend Motorcraft Bug and
Tar Remover.
• Remove any exterior accessories, for
example antennas, before entering a
car wash.
Note: Suntan lotions and insect repellents
can damage painted surfaces. If these
substances come in contact with your
vehicle, wash the affected area as soon as
possible.
Exterior Chrome Parts
• Apply a high quality-cleaning product
to bumpers and other chrome parts.
Follow the manufacturer ’s instructions.
We recommend Motorcraft Custom
Bright Metal Cleaner.
• Do not apply the cleaning product to
hot surfaces. Do not leave the cleaning
product on chrome surfaces longer
than the time recommended.
• Using other non-recommended
cleaners can result in severe and
permanent cosmetic damage.
Note: Never use abrasive materials, for
example steel wool or plastic pads as they
can scratch the chrome surface.
Note: Do not use chrome cleaner, metal
cleaner or polish on wheels or wheel covers.
Exterior Plastic Parts
For routine cleaning we recommend
Motorcraft Detail Wash. If tar or grease
spots are present, we recommend
Motorcraft Bug and Tar Remover. Stripes or Graphics (If Equipped)
Hand washing your vehicle is preferred
however, pressure washing may be used
under the following conditions:
• Do not use water pressure higher than
2,000 psi (14,000 kPa)
.
• Do not use water hotter than
179°F
(82°C).
• Use a spray with a
40° wide spray
angle pattern.
• Keep the nozzle at a
12 in (305 mm)
distance and 90° angle to your
vehicle's surface.
Note: Holding the pressure washer nozzle
at an angle to the vehicle's surface may
damage graphics and cause the edges to
peel away from the vehicle's surface.
Underbody
Flush the complete underside of your
vehicle frequently. Keep body and door
drain holes free of debris or foreign
material.
Under Hood
For removing black rubber marks from
under the hood we recommend Motorcraft
Wheel and Tire Cleaner or Motorcraft Bug
and Tar Remover.
WAXING
Regular waxing is necessary to protect your
car's paint from the elements. We
recommend that you wash and wax the
painted surface once or twice a year.
When washing and waxing, park your
vehicle in a shaded area out of direct
sunlight. Always wash your vehicle before
applying wax.
267
Flex (), enUSA, First Printing Vehicle Care
Page 271 of 496
•
Use a quality wax that does not contain
abrasives.
• Follow the manufacturer ’s instructions
to apply and remove the wax.
• Apply a small amount of wax in a
back-and-forth motion, not in circles.
• Do not allow wax to come in contact
with any non-body (low-gloss black)
colored trim. The wax will discolor or
stain the parts over time.
•Roof racks.
• Bumpers.
• Grained door handles.
• Side moldings.
• Mirror housings.
• Windshield cowl area.
• Do not apply wax to glass areas.
• After waxing, your car's paint should
feel smooth, and be free of streaks and
smudges.
CLEANING THE ENGINE
Engines are more efficient when they are
clean because grease and dirt buildup keep
the engine warmer than normal.
When washing:
• Take care when using a power washer
to clean the engine. The high-pressure
fluid could penetrate the sealed parts
and cause damage.
• Do not spray a hot engine with cold
water to avoid cracking the engine
block or other engine components.
• Spray Motorcraft Engine Shampoo and
Degreaser on all parts that require
cleaning and pressure rinse clean. In
Canada, use Motorcraft Engine
Shampoo.
• Never wash or rinse the engine while it
is hot or running; water in the running
engine may cause internal damage. •
Never wash or rinse any ignition coil,
spark plug wire or spark plug well, or
the area in and around these locations.
• Cover the battery, power distribution
box, and air filter assembly to prevent
water damage when cleaning the
engine.
CLEANING THE WINDOWS AND
WIPER BLADES
Car wash chemicals and environmental
fallout can result in windshield and wiper
blade contamination. Dirty windshield and
wipers will result in poor windshield wiper
operation. Keep the windshield and wiper
blades clean to maintain windshield wiper
performance.
To clean the windshield and wiper blades:
• Clean the windshield with a
non-abrasive glass cleaner. When
cleaning the interior of the windshield,
avoid getting any glass cleaner on the
instrument panel or door panels. Wipe
any glass cleaner off these surfaces
immediately.
• For windshields contaminated with
tree sap, chemicals, wax or bugs, clean
the entire windshield using steel wool
(no greater than 0000 grade) in a
circular motion and rinse with water.
• Clean the wiper blades with isopropyl
rubbing alcohol or windshield washer
concentrate.
Note: Do not use razor blades or other
sharp objects to clean or remove decals
from the inside of the heated rear window.
The vehicle warranty does not cover
damage caused to the heated rear window
grid lines.
268
Flex (), enUSA, First Printing Vehicle Care