FORD FOCUS ELECTRIC 2015 3.G Owners Manual
Manufacturer: FORD, Model Year: 2015, Model line: FOCUS ELECTRIC, Model: FORD FOCUS ELECTRIC 2015 3.GPages: 369, PDF Size: 4.53 MB
Page 171 of 369
Circuit switched
Relay Type
Relay
Not used.
-
R4
Not used.
-
R5
Not used.
-
R6
CHANGING A FUSE
Fuses WARNING
Always replace a fuse with one that
has the specified amperage rating.
Using a fuse with a higher amperage
rating can cause severe wire damage and
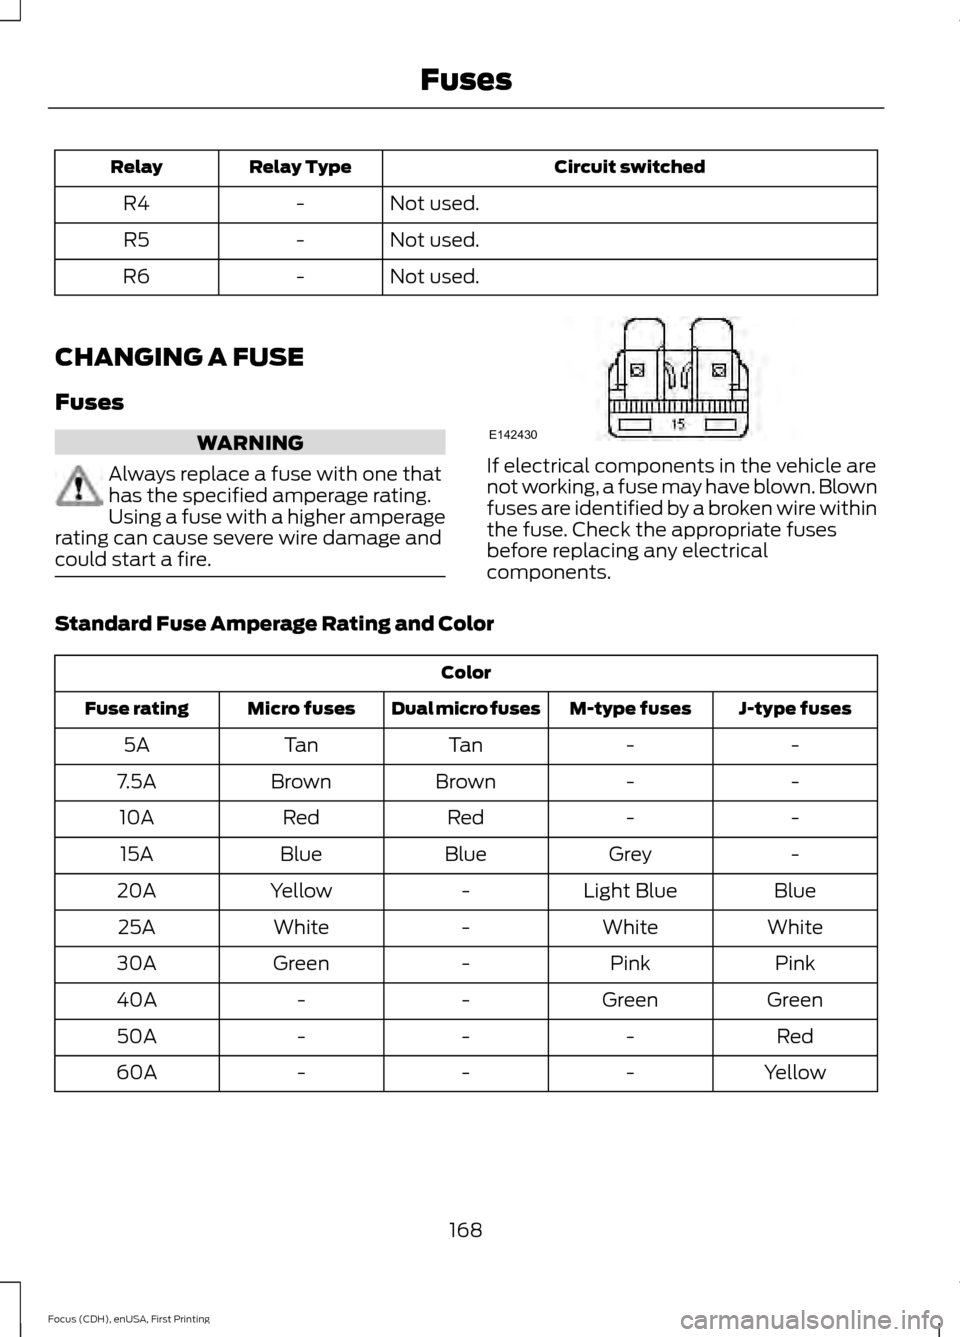
could start a fire. If electrical components in the vehicle are
not working, a fuse may have blown. Blown
fuses are identified by a broken wire within
the fuse. Check the appropriate fuses
before replacing any electrical
components.
Standard Fuse Amperage Rating and Color Color
J-type fuses
M-type fuses
Dual micro fuses
Micro fuses
Fuse rating
-
-
Tan
Tan
5A
-
-
Brown
Brown
7.5A
-
-
Red
Red
10A
-
Grey
Blue
Blue
15A
Blue
Light Blue
-
Yellow
20A
White
White
-
White
25A
Pink
Pink
-
Green
30A
Green
Green
-
-
40A
Red
-
-
-
50A
Yellow
-
-
-
60A
168
Focus (CDH), enUSA, First Printing FusesE142430
Page 172 of 369
GENERAL INFORMATION
Have your vehicle serviced regularly to help
maintain its roadworthiness and resale
value. There is a large network of Ford
authorized repairers that are there to help
you with their professional servicing
expertise. Authorized repairers are best
qualified to service your vehicle properly
and expertly, with a wide range of highly
specialized tools.
In addition to regular servicing, we
recommend that you carry out the
following checks.
WARNINGS
Switch the ignition off before
touching or attempting adjustment
of any kind.
Do not touch the electronic ignition
system parts after you have switched
the ignition on or when the electric
motor is running. The system operates at
high voltage. Keep your hands and clothing clear
of the electric motor cooling fan.
Under certain conditions, the fan
may continue to run for several minutes
after you have switched the electric motor
off. Make sure that you fit filler caps
securely after carrying out
maintenance checks.
High Voltage Information
WARNING
Exposure to high voltage could result
in severe personal injury or death.
High voltage components must be
serviced by a trained service technician. Your vehicle consists of various high
voltage components and wiring. All of the
high voltage power flows through specific
wiring assemblies which are labeled as
such or are covered with a solid orange
convolute or orange stripe tape. Do not
come in contact with these components.
Daily Checks
•
Exterior lamps.
• Interior lamps.
• Warning lamps and indicators.
Weekly Checks
• Brake fluid level.
• Washer fluid level.
• Tire pressures (when cold).
• Tire condition.
Monthly Checks
• Coolant level. See Coolant Check
(page 171).
• Pipes, hoses and reservoirs for leaks.
• Air conditioning operation.
• Parking brake operation.
• Horn operation.
• Tightness of lug nuts. See
Lug Nuts
(page 221).
OPENING AND CLOSING THE
HOOD
1. Inside the vehicle, pull the hood release
handle located under the left-hand
side of the instrument panel.
169
Focus (CDH), enUSA, First Printing Maintenance
Page 173 of 369
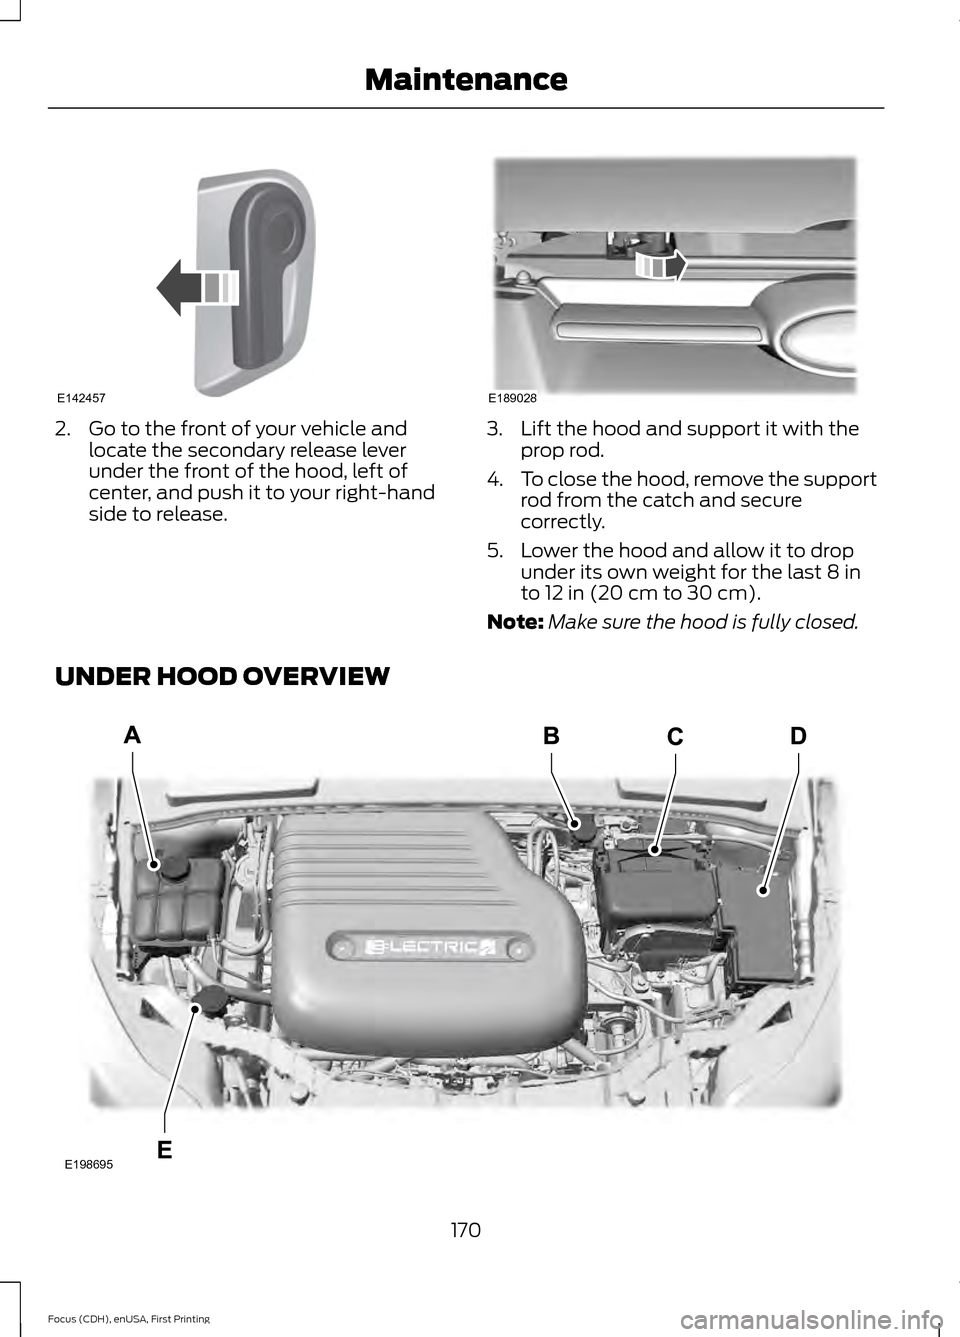
2. Go to the front of your vehicle and
locate the secondary release lever
under the front of the hood, left of
center, and push it to your right-hand
side to release. 3. Lift the hood and support it with the
prop rod.
4. To close the hood, remove the support
rod from the catch and secure
correctly.
5. Lower the hood and allow it to drop under its own weight for the last 8 in
to 12 in (20 cm to 30 cm).
Note: Make sure the hood is fully closed.
UNDER HOOD OVERVIEW 170
Focus (CDH), enUSA, First Printing MaintenanceE142457 E189028 E198695
Page 174 of 369
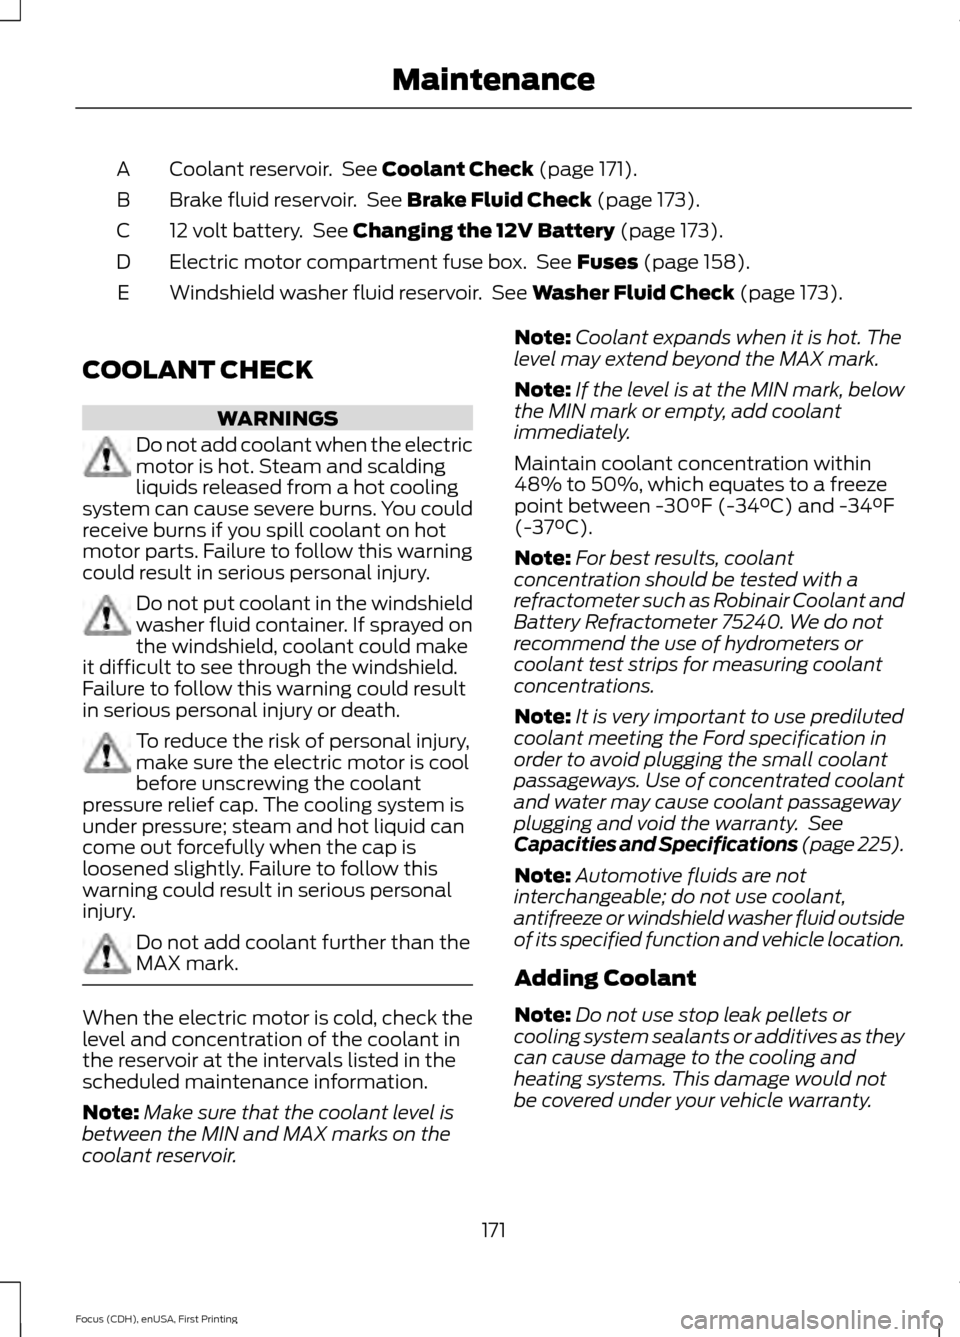
Coolant reservoir. See Coolant Check (page 171).
A
Brake fluid reservoir. See
Brake Fluid Check (page 173).
B
12 volt battery. See
Changing the 12V Battery (page 173).
C
Electric motor compartment fuse box. See
Fuses (page 158).
D
Windshield washer fluid reservoir. See
Washer Fluid Check (page 173).
E
COOLANT CHECK WARNINGS
Do not add coolant when the electric
motor is hot. Steam and scalding
liquids released from a hot cooling
system can cause severe burns. You could
receive burns if you spill coolant on hot
motor parts. Failure to follow this warning
could result in serious personal injury. Do not put coolant in the windshield
washer fluid container. If sprayed on
the windshield, coolant could make
it difficult to see through the windshield.
Failure to follow this warning could result
in serious personal injury or death. To reduce the risk of personal injury,
make sure the electric motor is cool
before unscrewing the coolant
pressure relief cap. The cooling system is
under pressure; steam and hot liquid can
come out forcefully when the cap is
loosened slightly. Failure to follow this
warning could result in serious personal
injury. Do not add coolant further than the
MAX mark.
When the electric motor is cold, check the
level and concentration of the coolant in
the reservoir at the intervals listed in the
scheduled maintenance information.
Note:
Make sure that the coolant level is
between the MIN and MAX marks on the
coolant reservoir. Note:
Coolant expands when it is hot. The
level may extend beyond the MAX mark.
Note: If the level is at the MIN mark, below
the MIN mark or empty, add coolant
immediately.
Maintain coolant concentration within
48% to 50%, which equates to a freeze
point between -30°F (-34°C) and -34°F
(-37°C).
Note: For best results, coolant
concentration should be tested with a
refractometer such as Robinair Coolant and
Battery Refractometer 75240. We do not
recommend the use of hydrometers or
coolant test strips for measuring coolant
concentrations.
Note: It is very important to use prediluted
coolant meeting the Ford specification in
order to avoid plugging the small coolant
passageways. Use of concentrated coolant
and water may cause coolant passageway
plugging and void the warranty. See
Capacities and Specifications (page 225).
Note: Automotive fluids are not
interchangeable; do not use coolant,
antifreeze or windshield washer fluid outside
of its specified function and vehicle location.
Adding Coolant
Note: Do not use stop leak pellets or
cooling system sealants or additives as they
can cause damage to the cooling and
heating systems. This damage would not
be covered under your vehicle warranty.
171
Focus (CDH), enUSA, First Printing Maintenance
Page 175 of 369
Note:
During normal vehicle operation, the
coolant may change color from orange to
pink or light red.
As long as the coolant is clear and
uncontaminated, this color change does
not indicate that the coolant has degraded,
nor does it require that qualified personnel
drain the coolant, flush the system or
replace the coolant.
Do not mix different colors or types of
coolant in your vehicle. Make sure the
correct coolant is used. Mixing of coolants
may harm your cooling system. The use of
an improper coolant may harm the electric
motor or cooling system components and
may invalidate the vehicle warranty.
In case of emergency, you can add a large
amount of water without coolant in order
to reach a vehicle service location. In this
instance, qualified personnel:
1. Must drain the cooling system.
2. Chemically clean the coolant system with Motorcraft Premium Cooling
System Flush.
3. Refill with coolant as soon as possible.
Water alone, without coolant, can cause
vehicle damage from corrosion,
overheating, freezing or plugging.
Do not use the following as a coolant
substitute:
• Alcohol.
• Methanol.
• Brine.
• Any coolant mixed with alcohol or
methanol antifreeze or coolant.
Alcohol and other liquids can cause vehicle
damage from overheating or freezing.
Do not add extra inhibitors or additives to
the coolant. These can be harmful and
compromise the corrosion protection of
the coolant. Whenever coolant has been added, the
coolant level in the coolant reservoir
should be checked the next few times you
drive the vehicle. If necessary, add enough
prediluted coolant to bring the coolant
level to the correct level.
When adding coolant:
1. Unscrew the cap slowly. Any pressure
will escape as you unscrew the cap.
2. Add prediluted coolant meeting the Ford specification. See Capacities
and Specifications (page 222).
3. Check the coolant level in the coolant reservoir the next few times you drive
your vehicle.
4. If necessary, add enough prediluted coolant to bring the coolant level to
the proper level.
Recycled Coolant
Ford Motor Company does not recommend
the use of recycled coolant since a
Ford-approved recycling process is not yet
available.
Used coolant should be disposed of in an
appropriate manner. Follow your
community ’s regulations and standards
for recycling and disposing of automotive
fluids.
Severe Climates
If you drive in extremely cold climates:
• It may be necessary to have a Ford
authorized dealer increase the coolant
concentration above 50%.
• A coolant concentration of 60%
provides improved freeze point
protection. Coolant concentrations
above 60% decrease the overheat
protection characteristics of the
coolant and may cause vehicle
damage.
172
Focus (CDH), enUSA, First Printing Maintenance
Page 176 of 369
If you drive in extremely hot climates:
•
It may be necessary to have a Ford
authorized dealer decrease the coolant
concentration to 40%.
• A coolant concentration of 40%
provides improved overheat protection.
Coolant concentrations below 40%
will decrease the freeze and corrosion
protection characteristics of the
coolant and may cause vehicle
damage.
Vehicles driven year-round in non-extreme
climates should use prediluted coolant for
optimum cooling system and vehicle
protection.
BRAKE FLUID CHECK WARNINGS
Do not use any fluid other than the
recommended brake fluid as this will
reduce brake efficiency. Use of
incorrect fluid could result in the loss of
vehicle control, serious personal injury or
death. Only use brake fluid from a sealed
container. Contamination with dirt,
water, petroleum products or other
materials may result in brake system
damage or failure. Failure to adhere to this
warning could result in the loss of vehicle
control, serious personal injury or death. Do not allow the fluid to touch your
skin or eyes. If this happens, rinse the
affected areas immediately with
plenty of water and contact your physician. A fluid level between the MAX and
MIN lines is within the normal
operating range and there is no need
to add fluid. A fluid level not in the normal
operating range could compromise the
performance of the system. Have your
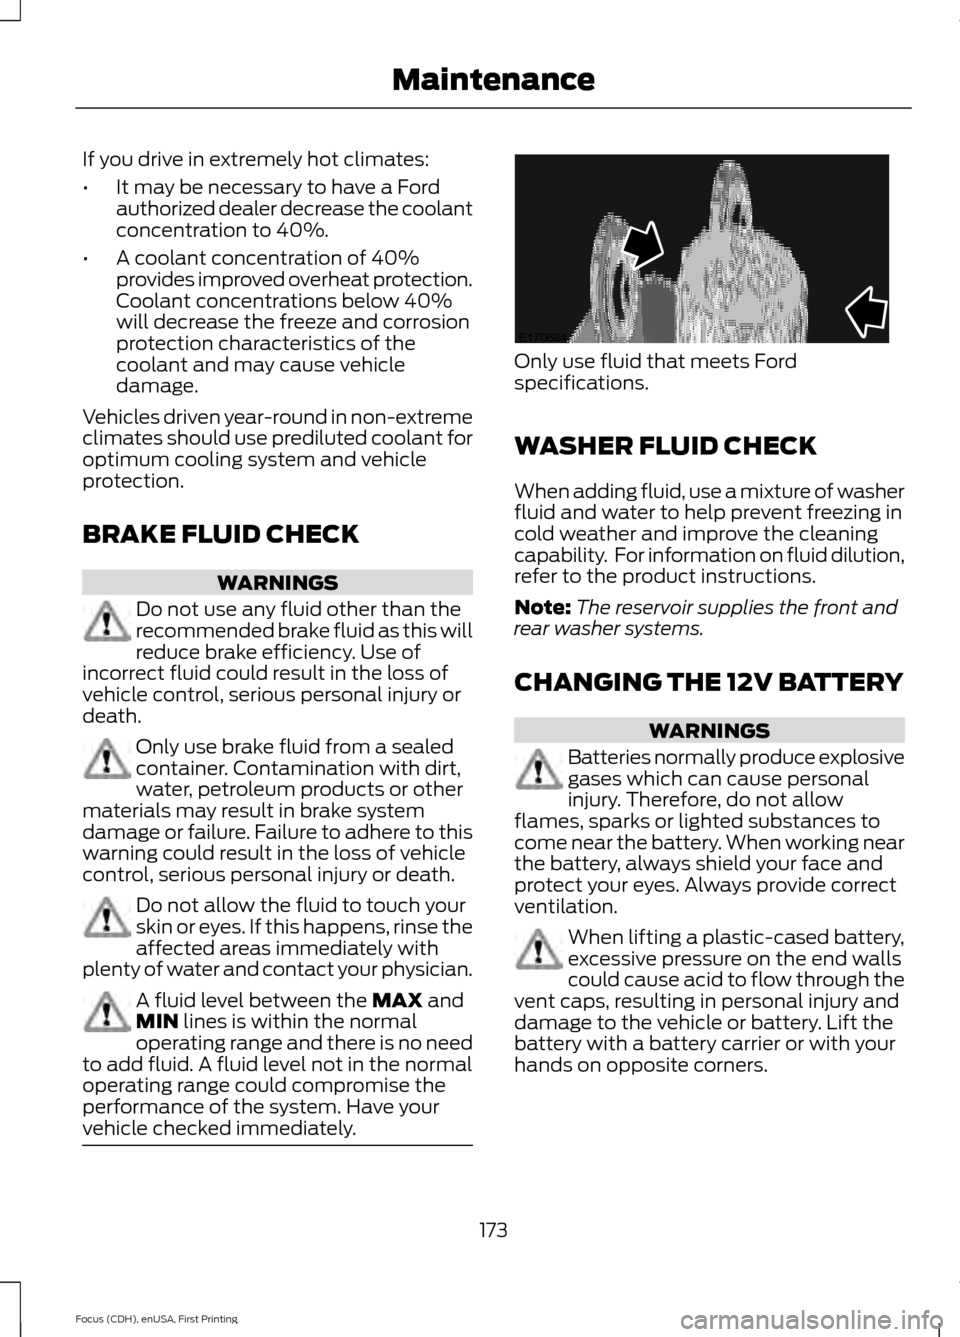
vehicle checked immediately. Only use fluid that meets Ford
specifications.
WASHER FLUID CHECK
When adding fluid, use a mixture of washer
fluid and water to help prevent freezing in
cold weather and improve the cleaning
capability. For information on fluid dilution,
refer to the product instructions.
Note:
The reservoir supplies the front and
rear washer systems.
CHANGING THE 12V BATTERY WARNINGS
Batteries normally produce explosive
gases which can cause personal
injury. Therefore, do not allow
flames, sparks or lighted substances to
come near the battery. When working near
the battery, always shield your face and
protect your eyes. Always provide correct
ventilation. When lifting a plastic-cased battery,
excessive pressure on the end walls
could cause acid to flow through the
vent caps, resulting in personal injury and
damage to the vehicle or battery. Lift the
battery with a battery carrier or with your
hands on opposite corners.
173
Focus (CDH), enUSA, First Printing MaintenanceE170684
Page 177 of 369
WARNINGS
Keep batteries out of reach of
children. Batteries contain sulfuric
acid. Avoid contact with skin, eyes or
clothing. Shield your eyes when working
near the battery to protect against possible
splashing of acid solution. In case of acid
contact with skin or eyes, flush
immediately with water for a minimum of
15 minutes and get prompt medical
attention. If acid is swallowed, call a
physician immediately. Battery posts, terminals and related
accessories contain lead and lead
compounds. Wash hands after
handling. Your vehicle is fitted with a Motorcraft
maintenance-free battery, which normally
does not require additional water.
Note:
After cleaning or replacing the
battery, make sure you reinstall the battery
cover or shield.
When a battery replacement is required,
you should replace the battery with a Ford
recommended replacement battery that
matches the electrical requirements of the
vehicle.
Note: Contact an authorized dealer for low
voltage battery access, testing or
replacement.
To make sure the battery management
system works correctly, do not connect an
electrical device ground connection
directly to the low voltage battery negative
post. This can cause inaccurate
measurements of the battery condition
and potential incorrect system operation.
Note: If you add electrical accessories or
components to the vehicle, it may adversely
affect the low voltage battery performance
and durability. This may also affect the
performance of other electrical systems in
the vehicle. For longer, trouble-free operation, keep the
top of the battery clean and dry.
If you see any corrosion on the battery or
terminals, remove the cables from the
terminals and clean with a wire brush. You
can neutralize the acid with a solution of
baking soda and water.
A computer electronically controls your
vehicle. The power of the low voltage
battery maintains the memory of some
settings, for example, clock setting or radio
presets. When the low voltage battery is
disconnected and then connected, these
settings erase.
To restore the settings, do the following:
1. Apply the parking brake.
2. Shift into park (P).
3. Switch off all accessories.
4. Press the brake pedal and start your
vehicle.
5. Reset the clock.
6. Reset the bounce-back feature. See Power Windows (page 77).
7. Reset the radio station presets. See Audio System
(page 227).
Make sure that you dispose of old batteries
in an environmentally friendly way. Seek
advice from your local authority about
recycling old batteries.
If storing your vehicle for more than 30
days without recharging the battery, we
recommend that you disconnect the
battery cables to maintain battery charge
for quick starting.
174
Focus (CDH), enUSA, First Printing Maintenance
Page 178 of 369
CHECKING THE WIPER
BLADES
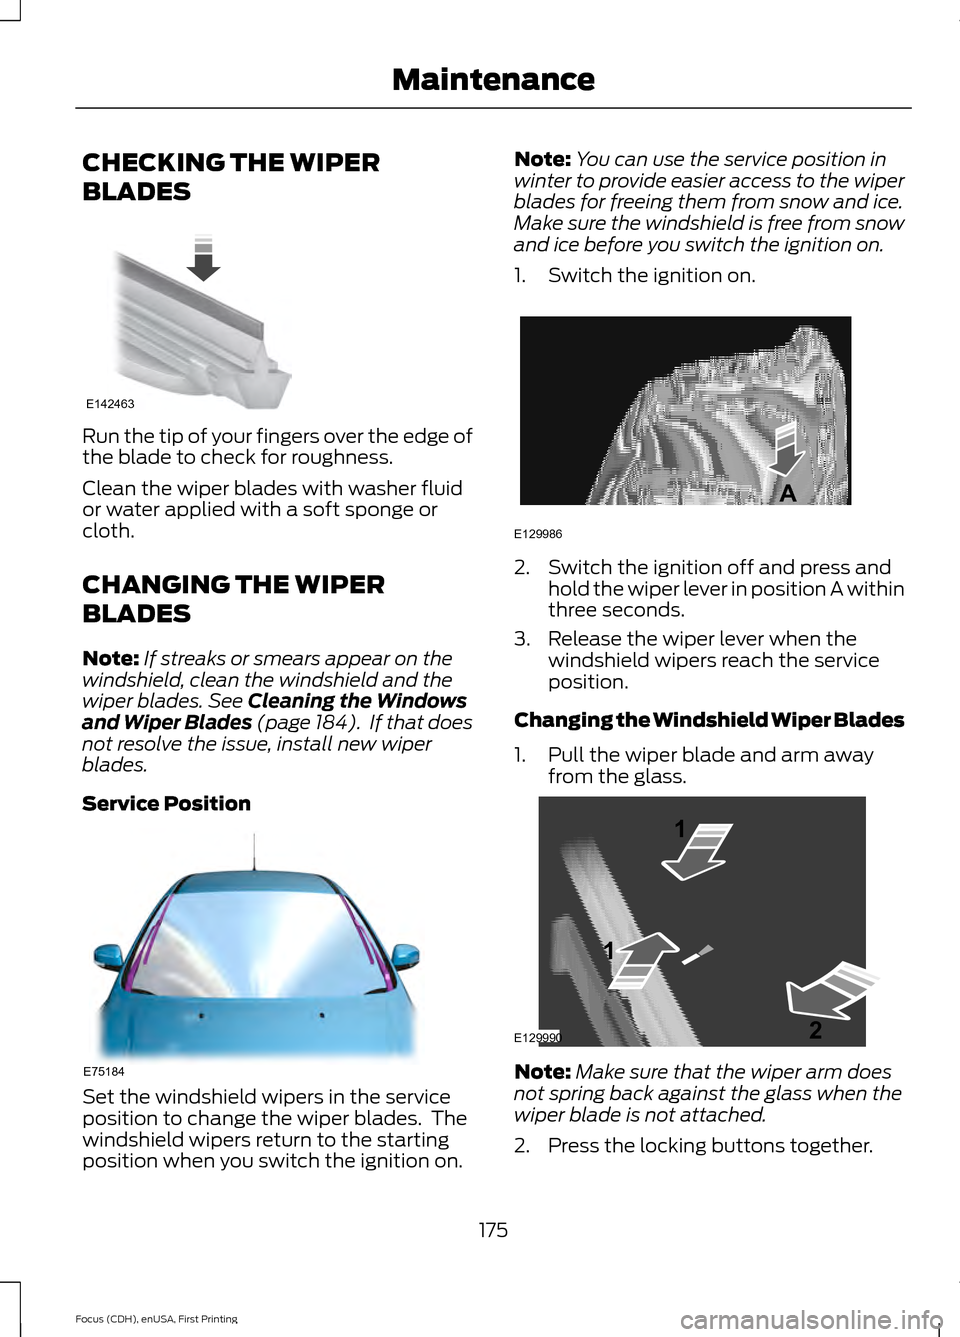
Run the tip of your fingers over the edge of
the blade to check for roughness.
Clean the wiper blades with washer fluid
or water applied with a soft sponge or
cloth.
CHANGING THE WIPER
BLADES
Note:
If streaks or smears appear on the
windshield, clean the windshield and the
wiper blades. See Cleaning the Windows
and Wiper Blades (page 184). If that does
not resolve the issue, install new wiper
blades.
Service Position Set the windshield wipers in the service
position to change the wiper blades. The
windshield wipers return to the starting
position when you switch the ignition on. Note:
You can use the service position in
winter to provide easier access to the wiper
blades for freeing them from snow and ice.
Make sure the windshield is free from snow
and ice before you switch the ignition on.
1. Switch the ignition on. 2. Switch the ignition off and press and
hold the wiper lever in position A within
three seconds.
3. Release the wiper lever when the windshield wipers reach the service
position.
Changing the Windshield Wiper Blades
1. Pull the wiper blade and arm away from the glass. Note:
Make sure that the wiper arm does
not spring back against the glass when the
wiper blade is not attached.
2. Press the locking buttons together.
175
Focus (CDH), enUSA, First Printing MaintenanceE142463 E75184 E129986
A E129990
1
1 2
Page 179 of 369
3. Rotate and remove the wiper blade.
4. Install in the reverse order.
Note:
Make sure that the wiper blade locks
into place.
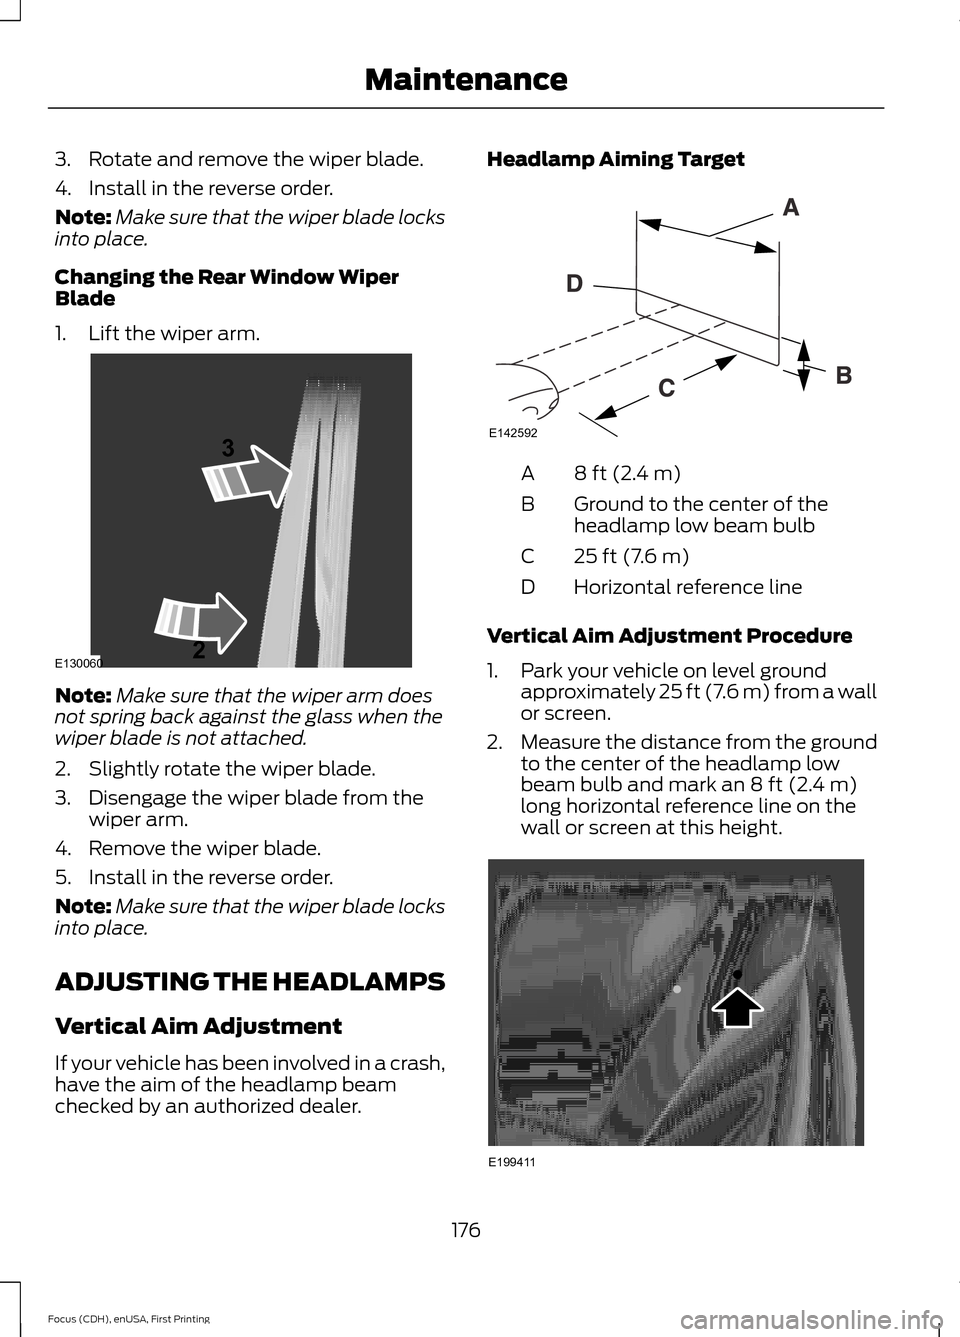
Changing the Rear Window Wiper
Blade
1. Lift the wiper arm. Note:
Make sure that the wiper arm does
not spring back against the glass when the
wiper blade is not attached.
2. Slightly rotate the wiper blade.
3. Disengage the wiper blade from the wiper arm.
4. Remove the wiper blade.
5. Install in the reverse order.
Note: Make sure that the wiper blade locks
into place.
ADJUSTING THE HEADLAMPS
Vertical Aim Adjustment
If your vehicle has been involved in a crash,
have the aim of the headlamp beam
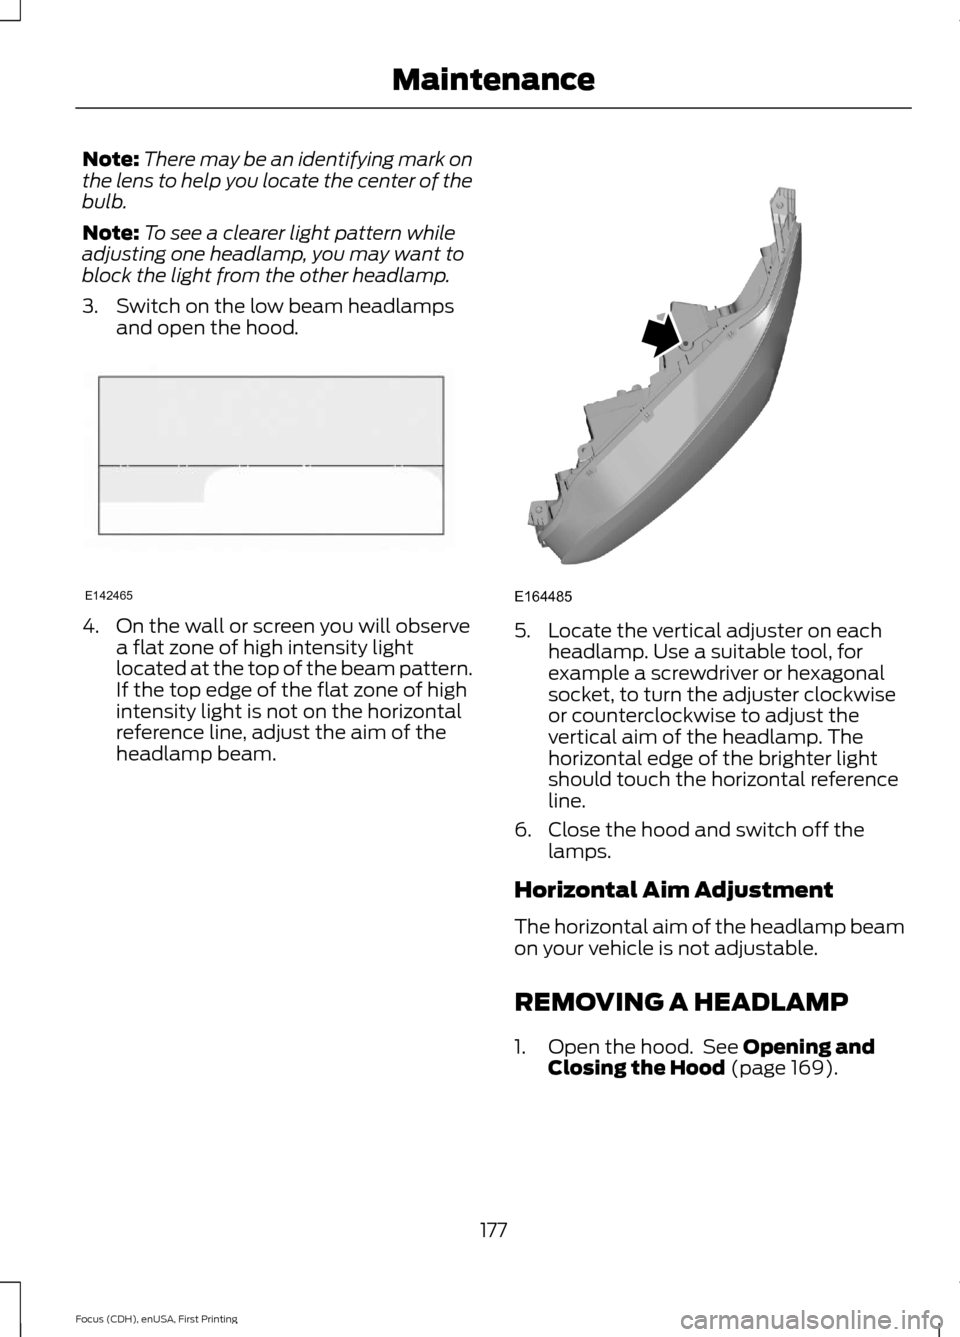
checked by an authorized dealer. Headlamp Aiming Target
8 ft (2.4 m)
A
Ground to the center of the
headlamp low beam bulb
B
25 ft (7.6 m)
C
Horizontal reference line
D
Vertical Aim Adjustment Procedure
1. Park your vehicle on level ground approximately 25 ft (7.6 m) from a wall
or screen.
2. Measure the distance from the ground
to the center of the headlamp low
beam bulb and mark an
8 ft (2.4 m)
long horizontal reference line on the
wall or screen at this height. 176
Focus (CDH), enUSA, First Printing MaintenanceE130060
3
2 E142592 E199411
Page 180 of 369
Note:
There may be an identifying mark on
the lens to help you locate the center of the
bulb.
Note: To see a clearer light pattern while
adjusting one headlamp, you may want to
block the light from the other headlamp.
3. Switch on the low beam headlamps and open the hood. 4. On the wall or screen you will observe
a flat zone of high intensity light
located at the top of the beam pattern.
If the top edge of the flat zone of high
intensity light is not on the horizontal
reference line, adjust the aim of the
headlamp beam. 5. Locate the vertical adjuster on each
headlamp. Use a suitable tool, for
example a screwdriver or hexagonal
socket, to turn the adjuster clockwise
or counterclockwise to adjust the
vertical aim of the headlamp. The
horizontal edge of the brighter light
should touch the horizontal reference
line.
6. Close the hood and switch off the lamps.
Horizontal Aim Adjustment
The horizontal aim of the headlamp beam
on your vehicle is not adjustable.
REMOVING A HEADLAMP
1. Open the hood. See Opening and
Closing the Hood (page 169).
177
Focus (CDH), enUSA, First Printing MaintenanceE142465 E164485