lock FORD FUSION ENERGI 2018 Manual Online
[x] Cancel search | Manufacturer: FORD, Model Year: 2018, Model line: FUSION ENERGI, Model: FORD FUSION ENERGI 2018Pages: 538, PDF Size: 7.52 MB
Page 261 of 538
GENERAL INFORMATION
Have your vehicle serviced regularly to helpmaintain its roadworthiness and resalevalue. There is a large network ofauthorized dealers that are there to helpyou with their professional servicingexpertise. We believe that their speciallytrained technicians are best qualified toservice your vehicle properly and expertly.They are supported by a wide range ofhighly specialized tools developedspecifically for servicing your vehicle.
If your vehicle requires professional service,an authorized dealer can provide thenecessary parts and service. Check yourwarranty information to find out whichparts and services are covered.
Use only recommended fuels, lubricants,fluids and service parts conforming tospecifications. Motorcraft® parts aredesigned and built to provide the bestperformance in your vehicle.
Precautions
•Do not work on a hot engine.
•Make sure that nothing gets caught inmoving parts.
•Do not work on a vehicle with theengine running in an enclosed space,unless you are sure you have enoughventilation.
•Keep all open flames and other burningmaterial (such as cigarettes) awayfrom the battery and all fuel relatedparts.
Working with the Engine Off
1.Set the parking brake and shift to park(P).
2. Switch off the engine.
3. Block the wheels.
Working with the Engine On
WARNING
To reduce the risk of vehicle damageand/or personal burn injuries, do notstart your engine with the air cleanerremoved and do not remove it while theengine is running.
1.Set the parking brake and shift to park(P).
2. Block the wheels.
OPENING AND CLOSING THE
HOOD
Opening the Hood
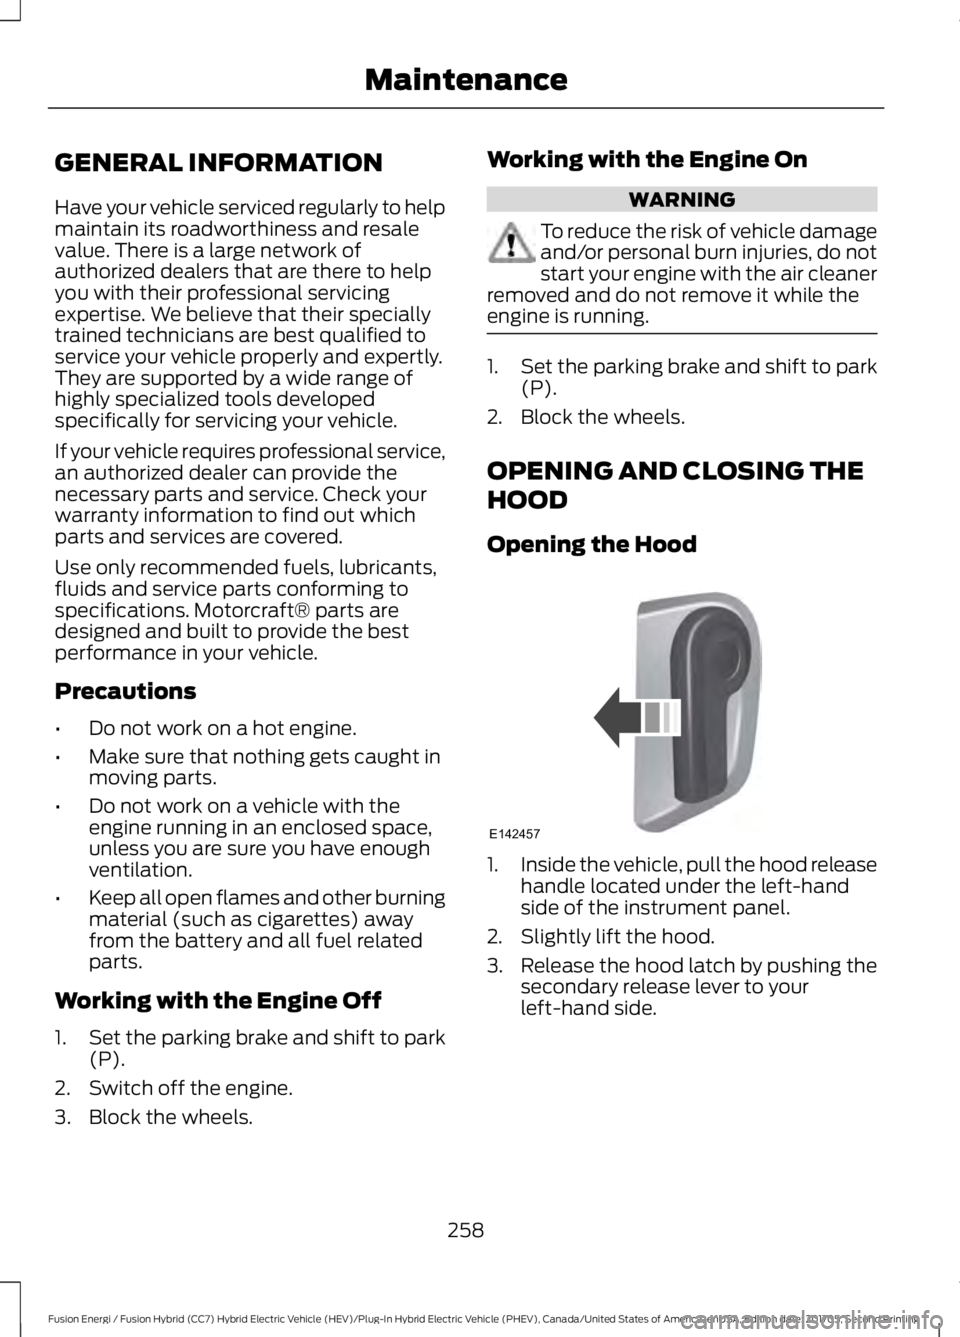
1.Inside the vehicle, pull the hood releasehandle located under the left-handside of the instrument panel.
2. Slightly lift the hood.
3. Release the hood latch by pushing thesecondary release lever to yourleft-hand side.
258
Fusion Energi / Fusion Hybrid (CC7) Hybrid Electric Vehicle (HEV)/Plug-In Hybrid Electric Vehicle (PHEV), Canada/United States of America, enUSA, Edition date: 201705, Second Printing
MaintenanceE142457
Page 265 of 538
Note:Make sure that the coolant level isbetween the MIN and the MAX marks onthe coolant reservoir.
Note: Coolant expands when it is hot. Thelevel may extend beyond the MAX mark.
Maintain coolant concentration within48% to 50%, which equates to a freezepoint between -30°F (-34°C) and -34°F(-37°C). Coolant concentration should bechecked using a refractometer. We do notrecommend the use of hydrometers orcoolant test strips for measuring coolantconcentration.
Adding Coolant
WARNINGS
Do not add engine coolant when theengine is hot. Failure to follow thisinstruction could result in personalinjury.
Never remove the coolant reservoircap when the engine is running orhot.
Note: Automotive fluids are notinterchangeable. Do not use coolant orwindshield washer fluid outside of itsspecified function and vehicle location.
Note: Do not use stop leak pellets, coolingsystem sealants, or non-specified additivesas they can cause damage to the enginecooling or heating systems. Resultingcomponent damage may not be covered bythe vehicle Warranty.
It is very important to use predilutedcoolant approved to the correctspecification in order to avoid plugging thesmall passageways in the engine coolingsystem. See Capacities andSpecifications (page 312). Do not mixdifferent colors or types of coolant in yourvehicle. Mixing of engine coolants or usingan incorrect coolant may harm the engineor cooling system components and maynot be covered by the vehicle Warranty.
Note:If prediluted coolant is not available,use the approved concentrated coolantdiluting it to 50/50 with distilled water. SeeCapacities and Specifications (page 308).Using water that has not been deionizedmay contribute to deposit formation,corrosion and plugging of the small coolingsystem passageways.
Note: Coolants marketed for all makes andmodels may not be approved to Fordspecifications and may cause damage tothe cooling system. Resulting componentdamage may not be covered by the vehicleWarranty.
If the coolant level is at or below theminimum mark, add prediluted coolantimmediately.
To top up the coolant level do thefollowing:
1. Unscrew the cap slowly. Any pressureescapes as you unscrew the cap.
2. Add prediluted coolant approved tothe correct specification. SeeCapacities and Specifications (page308).
3. Add enough prediluted coolant toreach the correct level.
4.Replace the coolant reservoir cap, turnit clockwise until you feel a strongresistance.
262
Fusion Energi / Fusion Hybrid (CC7) Hybrid Electric Vehicle (HEV)/Plug-In Hybrid Electric Vehicle (PHEV), Canada/United States of America, enUSA, Edition date: 201705, Second Printing
Maintenance
Page 271 of 538
Note:Contact an authorized dealer for lowvoltage battery access, testing orreplacement.
To make sure the battery managementsystem works correctly, do not connect anelectrical device ground connectiondirectly to the low voltage battery negativepost. This can cause inaccuratemeasurements of the battery conditionand potential incorrect system operation.
Note:If you add electrical accessories orcomponents to the vehicle, it may adverselyaffect the low voltage battery performanceand durability. This may also affect theperformance of other electrical systems inthe vehicle.
For longer, trouble-free operation, keep thetop of the battery clean and dry.
If you see any corrosion on the battery orterminals, remove the cables from theterminals and clean with a wire brush. Youcan neutralize the acid with a solution ofbaking soda and water.
Because your vehicle’s engine iselectronically-controlled by a computer,some engine control settings aremaintained by power from the low-voltagebattery. Some engine computer settings,like the idle trim and fuel trim strategy,optimize the driveability and performanceof the engine. The clock and radio stationpresets are also maintained in memory bypower from the low-voltage battery. Thesesettings are erased when a techniciandisconnects and connects the low-voltagebattery.
To restore the settings, do the following:
1. Apply the parking brake.
2. Shift into park (P) or neutral (N).
3. Switch off all accessories.
4. Press the brake pedal and start yourvehicle.
5. Run the engine until it reaches normaloperating temperature. While theengine is warming up, complete thefollowing: Reset the clock. See AudioSystem (page 317). Reset the powerwindows bounce-back feature. SeeWindows and Mirrors (page 83).Reset the radio station presets. SeeAudio System (page 317).
6.Allow the engine to idle for at least oneminute.
7.Drive the vehicle at least 10 mi (16 km)to completely relearn the idle trim andfuel trim strategy.
Note:If you do not allow the engine torelearn the idle and fuel trim strategy, theidle quality of your vehicle may be adverselyaffected until the engine computereventually relearns the idle trim and fueltrim strategy.
Make sure that you dispose of old batteriesin an environmentally friendly way. Seekadvice from your local authority aboutrecycling old batteries.
If storing your vehicle for more than 30days without recharging the battery, werecommend that you disconnect thebattery cables to maintain battery chargefor quick starting.
CHECKING THE WIPER
BLADES
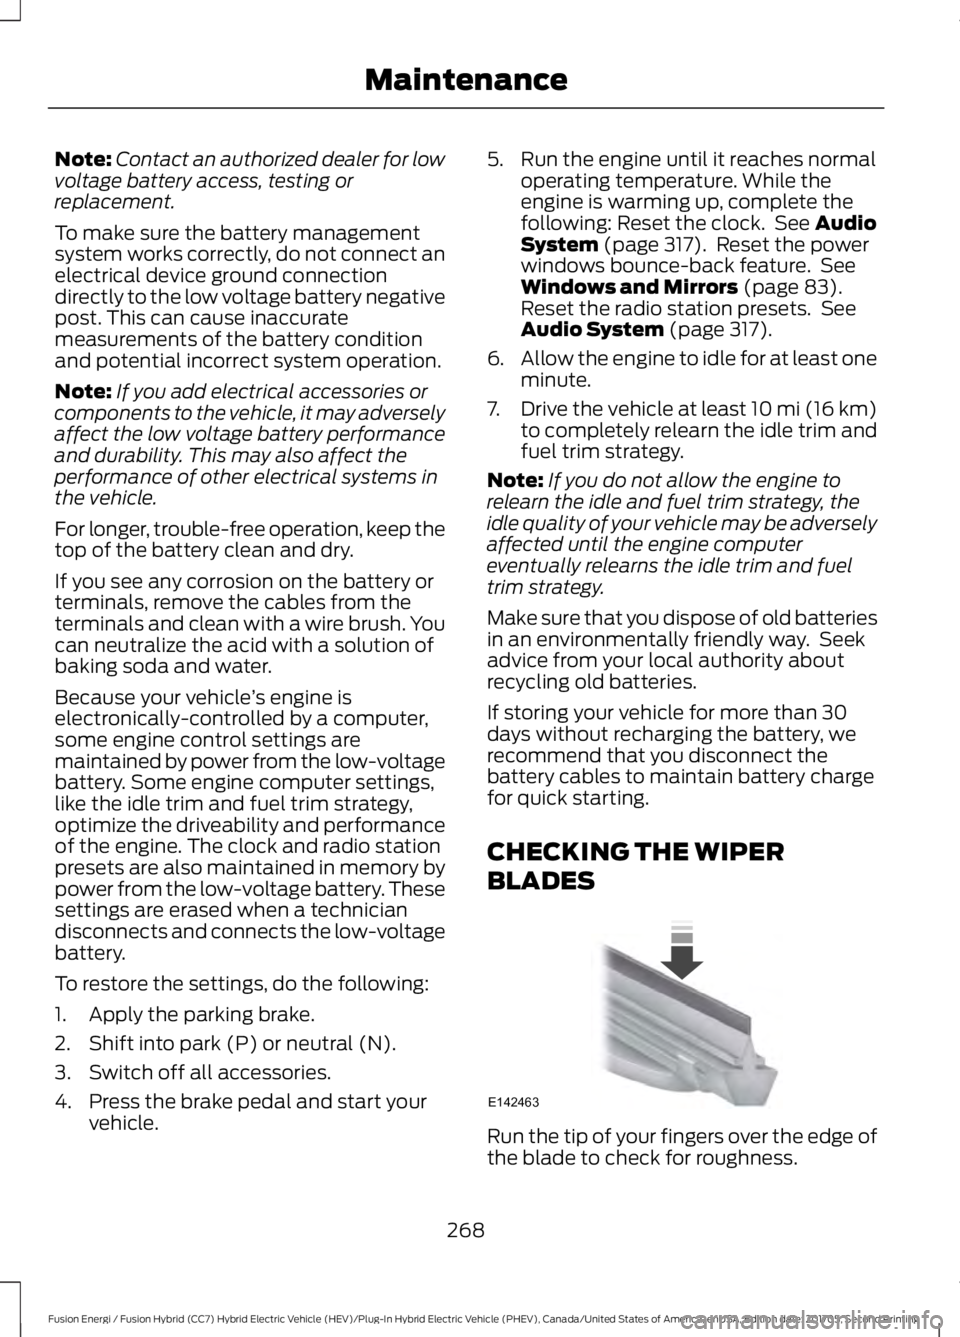
Run the tip of your fingers over the edge ofthe blade to check for roughness.
268
Fusion Energi / Fusion Hybrid (CC7) Hybrid Electric Vehicle (HEV)/Plug-In Hybrid Electric Vehicle (PHEV), Canada/United States of America, enUSA, Edition date: 201705, Second Printing
MaintenanceE142463
Page 272 of 538
Clean the wiper blades with washer fluidor water applied with a soft sponge orcloth.
CHANGING THE WIPER
BLADES
The wiper arms can be manually movedwhen the ignition is off. This allows for easeof blade replacement and cleaning underthe blades.
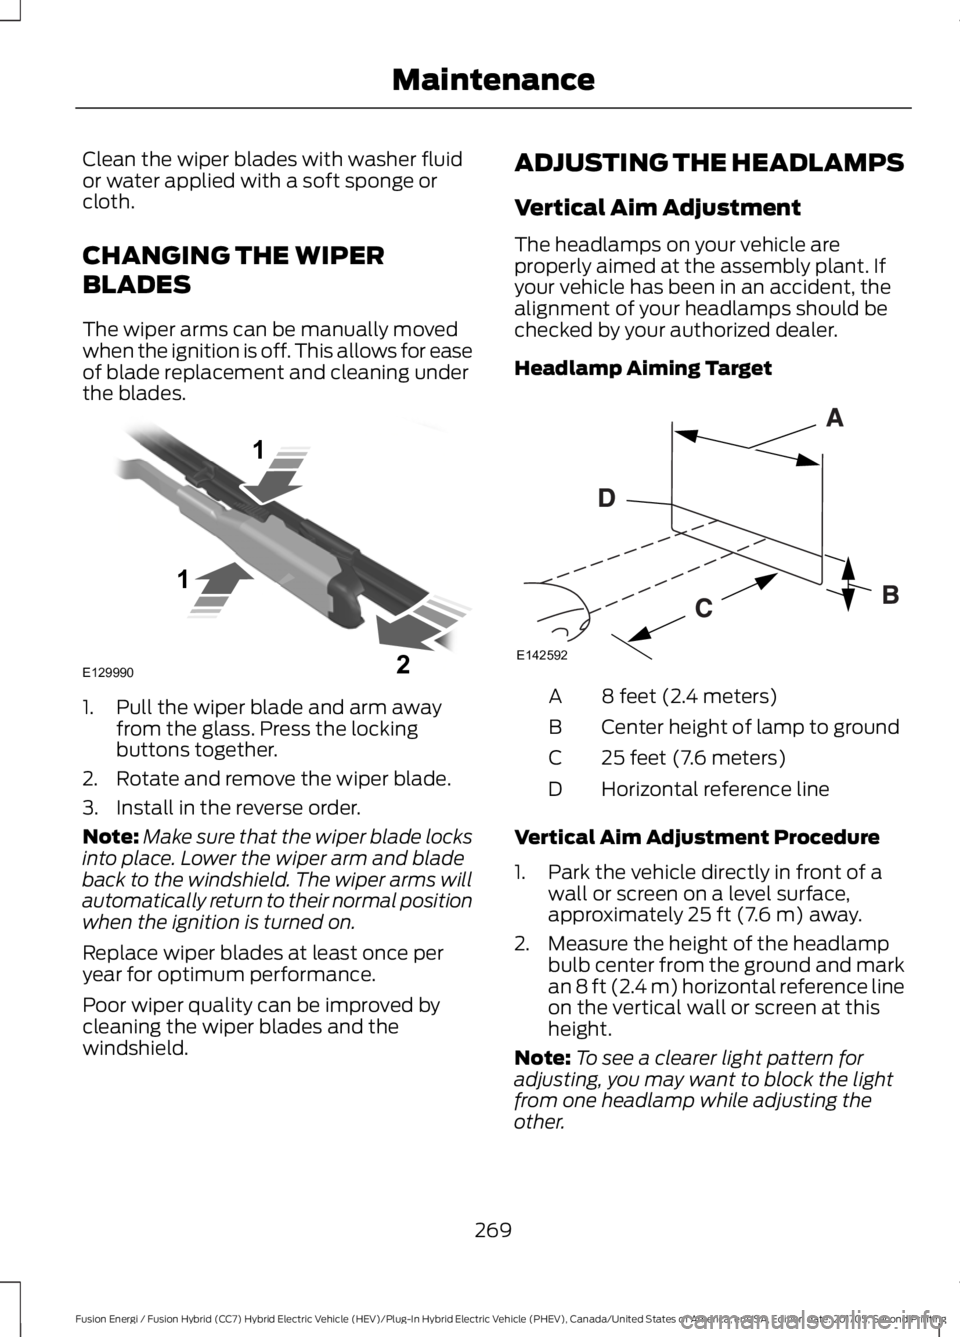
1. Pull the wiper blade and arm awayfrom the glass. Press the lockingbuttons together.
2. Rotate and remove the wiper blade.
3. Install in the reverse order.
Note:Make sure that the wiper blade locksinto place. Lower the wiper arm and bladeback to the windshield. The wiper arms willautomatically return to their normal positionwhen the ignition is turned on.
Replace wiper blades at least once peryear for optimum performance.
Poor wiper quality can be improved bycleaning the wiper blades and thewindshield.
ADJUSTING THE HEADLAMPS
Vertical Aim Adjustment
The headlamps on your vehicle areproperly aimed at the assembly plant. Ifyour vehicle has been in an accident, thealignment of your headlamps should bechecked by your authorized dealer.
Headlamp Aiming Target
8 feet (2.4 meters)A
Center height of lamp to groundB
25 feet (7.6 meters)C
Horizontal reference lineD
Vertical Aim Adjustment Procedure
1. Park the vehicle directly in front of awall or screen on a level surface,approximately 25 ft (7.6 m) away.
2. Measure the height of the headlampbulb center from the ground and markan 8 ft (2.4 m) horizontal reference lineon the vertical wall or screen at thisheight.
Note:To see a clearer light pattern foradjusting, you may want to block the lightfrom one headlamp while adjusting theother.
269
Fusion Energi / Fusion Hybrid (CC7) Hybrid Electric Vehicle (HEV)/Plug-In Hybrid Electric Vehicle (PHEV), Canada/United States of America, enUSA, Edition date: 201705, Second Printing
MaintenanceE129990
1
1 2 E142592
Page 273 of 538
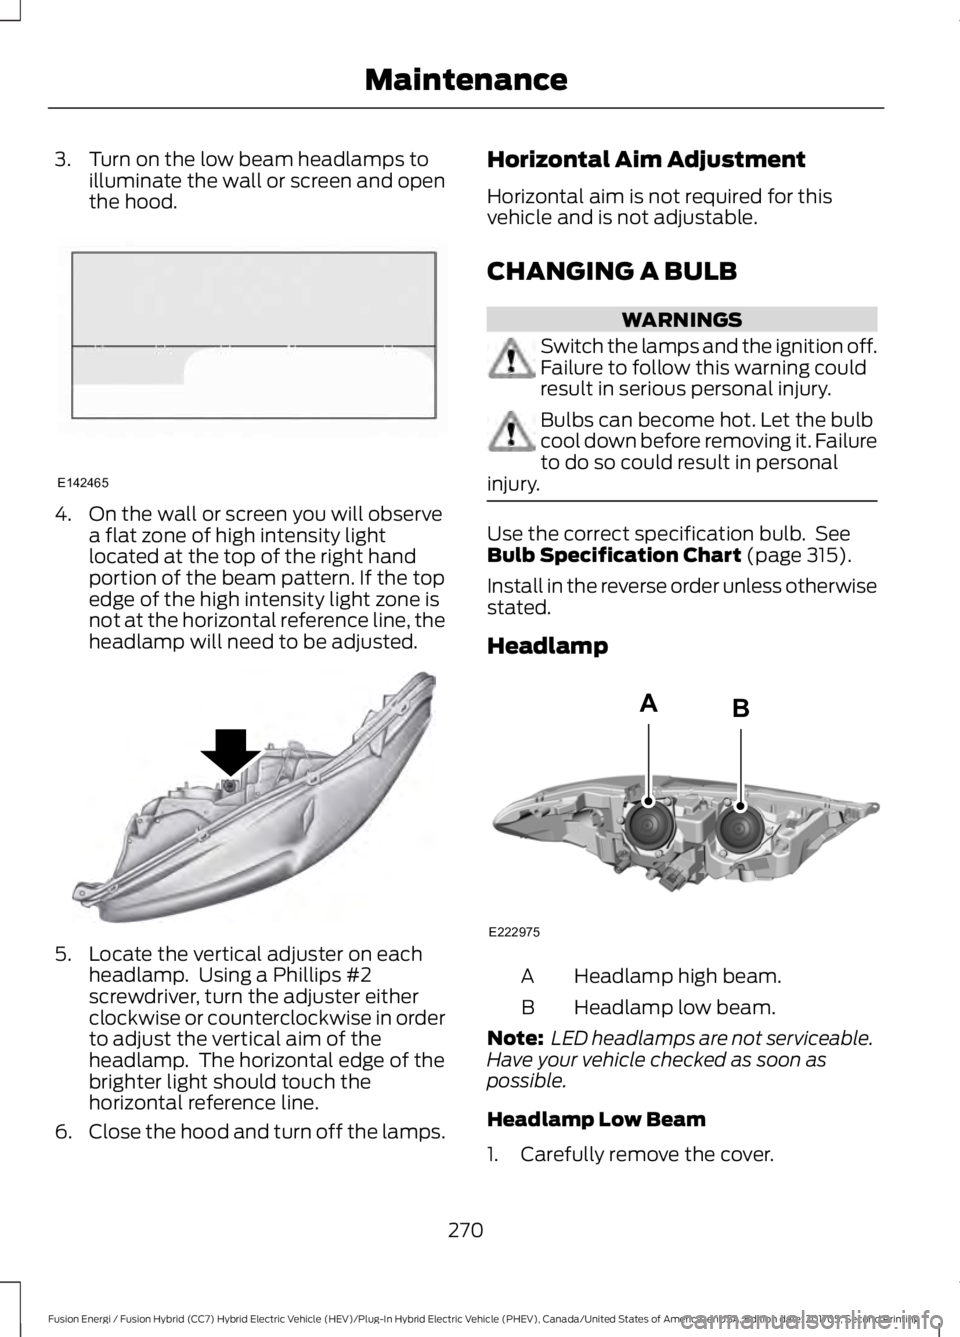
3. Turn on the low beam headlamps toilluminate the wall or screen and openthe hood.
4. On the wall or screen you will observea flat zone of high intensity lightlocated at the top of the right handportion of the beam pattern. If the topedge of the high intensity light zone isnot at the horizontal reference line, theheadlamp will need to be adjusted.
5. Locate the vertical adjuster on eachheadlamp. Using a Phillips #2screwdriver, turn the adjuster eitherclockwise or counterclockwise in orderto adjust the vertical aim of theheadlamp. The horizontal edge of thebrighter light should touch thehorizontal reference line.
6.Close the hood and turn off the lamps.
Horizontal Aim Adjustment
Horizontal aim is not required for thisvehicle and is not adjustable.
CHANGING A BULB
WARNINGS
Switch the lamps and the ignition off.Failure to follow this warning couldresult in serious personal injury.
Bulbs can become hot. Let the bulbcool down before removing it. Failureto do so could result in personalinjury.
Use the correct specification bulb. SeeBulb Specification Chart (page 315).
Install in the reverse order unless otherwisestated.
Headlamp
Headlamp high beam.A
Headlamp low beam.B
Note: LED headlamps are not serviceable.Have your vehicle checked as soon aspossible.
Headlamp Low Beam
1. Carefully remove the cover.
270
Fusion Energi / Fusion Hybrid (CC7) Hybrid Electric Vehicle (HEV)/Plug-In Hybrid Electric Vehicle (PHEV), Canada/United States of America, enUSA, Edition date: 201705, Second Printing
MaintenanceE142465 E145594 E222975
AB
Page 274 of 538
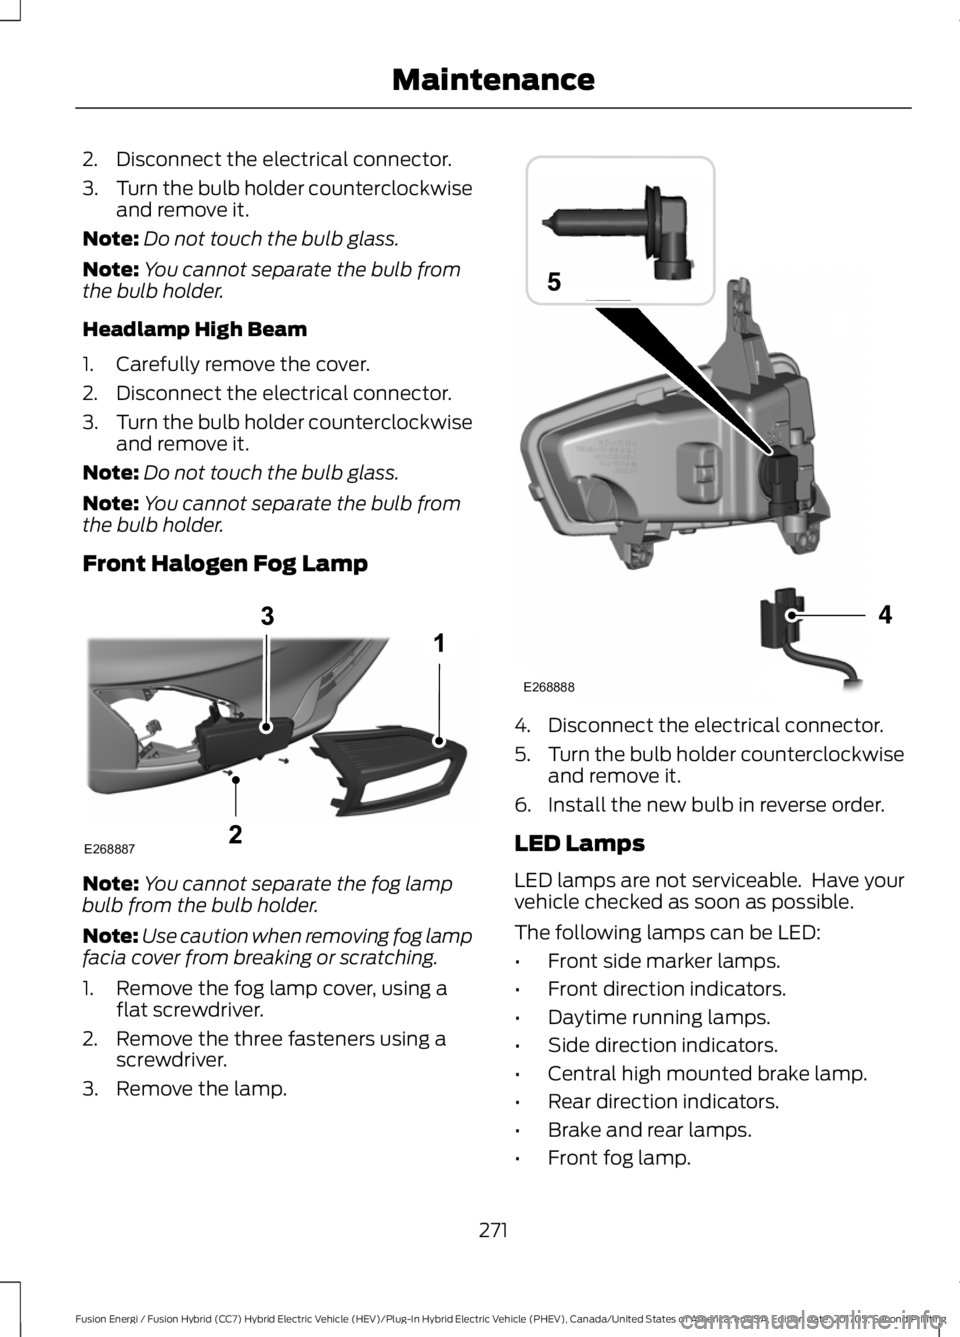
2. Disconnect the electrical connector.
3.Turn the bulb holder counterclockwiseand remove it.
Note:Do not touch the bulb glass.
Note:You cannot separate the bulb fromthe bulb holder.
Headlamp High Beam
1. Carefully remove the cover.
2. Disconnect the electrical connector.
3.Turn the bulb holder counterclockwiseand remove it.
Note:Do not touch the bulb glass.
Note:You cannot separate the bulb fromthe bulb holder.
Front Halogen Fog Lamp
Note:You cannot separate the fog lampbulb from the bulb holder.
Note:Use caution when removing fog lampfacia cover from breaking or scratching.
1. Remove the fog lamp cover, using aflat screwdriver.
2. Remove the three fasteners using ascrewdriver.
3. Remove the lamp.
4. Disconnect the electrical connector.
5.Turn the bulb holder counterclockwiseand remove it.
6. Install the new bulb in reverse order.
LED Lamps
LED lamps are not serviceable. Have yourvehicle checked as soon as possible.
The following lamps can be LED:
•Front side marker lamps.
•Front direction indicators.
•Daytime running lamps.
•Side direction indicators.
•Central high mounted brake lamp.
•Rear direction indicators.
•Brake and rear lamps.
•Front fog lamp.
271
Fusion Energi / Fusion Hybrid (CC7) Hybrid Electric Vehicle (HEV)/Plug-In Hybrid Electric Vehicle (PHEV), Canada/United States of America, enUSA, Edition date: 201705, Second Printing
MaintenanceE268887 E268888
Page 275 of 538
Reversing Lamp
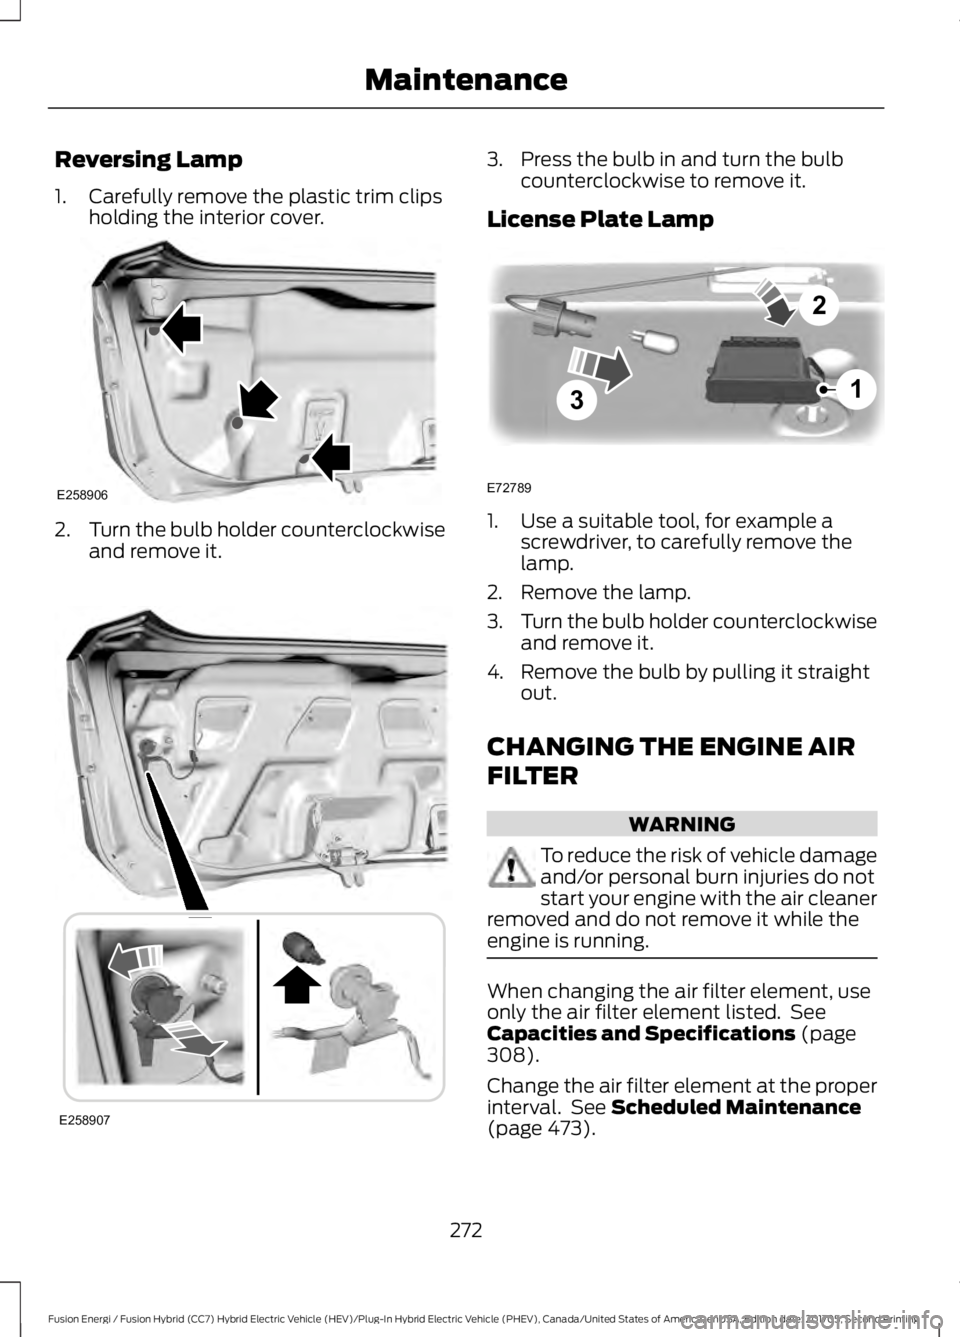
1. Carefully remove the plastic trim clipsholding the interior cover.
2.Turn the bulb holder counterclockwiseand remove it.
3. Press the bulb in and turn the bulbcounterclockwise to remove it.
License Plate Lamp
1. Use a suitable tool, for example ascrewdriver, to carefully remove thelamp.
2. Remove the lamp.
3.Turn the bulb holder counterclockwiseand remove it.
4. Remove the bulb by pulling it straightout.
CHANGING THE ENGINE AIR
FILTER
WARNING
To reduce the risk of vehicle damageand/or personal burn injuries do notstart your engine with the air cleanerremoved and do not remove it while theengine is running.
When changing the air filter element, useonly the air filter element listed. SeeCapacities and Specifications (page308).
Change the air filter element at the properinterval. See Scheduled Maintenance(page 473).
272
Fusion Energi / Fusion Hybrid (CC7) Hybrid Electric Vehicle (HEV)/Plug-In Hybrid Electric Vehicle (PHEV), Canada/United States of America, enUSA, Edition date: 201705, Second Printing
MaintenanceE258906 E258907 3
2
1
E72789
Page 279 of 538
When washing and waxing, park yourvehicle in a shaded area out of directsunlight. Always wash your vehicle beforeapplying wax.
•Use a quality wax that does not containabrasives.
•Follow the manufacturer’s instructionsto apply and remove the wax.
•Apply a small amount of wax in aback-and-forth motion, not in circles.
•Do not allow wax to come in contactwith any non-body (low-gloss black)colored trim. The wax will discolor orstain the parts over time.
•Roof racks.
•Bumpers.
•Grained door handles.
•Side moldings.
•Mirror housings.
•Windshield cowl area.
•Do not apply wax to glass areas.
•After waxing, your car's paint shouldfeel smooth, and be free of streaks andsmudges.
CLEANING THE ENGINE
Engines are more efficient when they areclean because grease and dirt buildup keepthe engine warmer than normal.
When washing:
•Take care when using a power washerto clean the engine. The high-pressurefluid could penetrate the sealed partsand cause damage.
•Do not spray a hot engine with coldwater to avoid cracking the engineblock or other engine components.
•Spray Motorcraft Engine Shampoo andDegreaser on all parts that requirecleaning and pressure rinse clean. InCanada, use Motorcraft EngineShampoo.
•Never wash or rinse the engine while itis hot or running; water in the runningengine may cause internal damage.
•Never wash or rinse any ignition coil,spark plug wire or spark plug well, orthe area in and around these locations.
•Cover the battery, power distributionbox, and air filter assembly to preventwater damage when cleaning theengine.
CLEANING THE WINDOWS AND
WIPER BLADES
Car wash chemicals and environmentalfallout can result in windshield and wiperblade contamination. Dirty windshield andwipers will result in poor windshield wiperoperation. Keep the windshield and wiperblades clean to maintain windshield wiperperformance.
To clean the windshield and wiper blades:
•Clean the windshield with anon-abrasive glass cleaner. Whencleaning the interior of the windshield,avoid getting any glass cleaner on theinstrument panel or door panels. Wipeany glass cleaner off these surfacesimmediately.
•For windshields contaminated withtree sap, chemicals, wax or bugs, cleanthe entire windshield using steel wool(no greater than 0000 grade) in acircular motion and rinse with water.
•Clean the wiper blades with isopropylrubbing alcohol or windshield washerconcentrate.
276
Fusion Energi / Fusion Hybrid (CC7) Hybrid Electric Vehicle (HEV)/Plug-In Hybrid Electric Vehicle (PHEV), Canada/United States of America, enUSA, Edition date: 201705, Second Printing
Vehicle Care
Page 283 of 538
Cooling System
•Protect against freezing temperatures.
•When removing your vehicle fromstorage, check coolant fluid level.Confirm that there are no coolingsystem leaks and that fluid is at therecommended level.
12V Battery
•Check and recharge as necessary. Keepconnections clean.
•If storing your vehicle for more than 30days without recharging the battery,we recommend that you disconnectthe battery cables to maintain batterycharge for quick starting.
Note:It is necessary to reset memoryfeatures if you disconnect the batterycables.
We recommend the following options foryour plug-in vehicle:
•Leave your vehicle plugged in. The 12Vbattery maintains power if left pluggedin. However, this periodically useselectricity from the household outlet.
•Connect a battery charger to your 12Vbattery and leave it on a continuous,slow charge.
•Disconnect the 12V battery. If your 12Vbattery is located in the luggagecompartment, do not fully shut theluggage compartment afterdisconnecting the 12V battery. Onlyleave the luggage compartment openif your vehicle is stored in a lockedlocation.
Brakes
•Make sure the brakes and parking brakerelease fully.
Tires
•Maintain recommended air pressure.
Miscellaneous
•Make sure you cover all linkages,cables, levers and pins under yourvehicle with grease to prevent rust.
•Move vehicles at least 25 ft (7.5 m)every 15 days to lubricate working partsand prevent corrosion.
Removing Vehicle From Storage
When your vehicle is ready to come out ofstorage, do the following:
•Wash your vehicle to remove any dirtor grease film build-up on windowsurfaces.
•Check windshield wipers for anydeterioration.
•Check under the hood for any foreignmaterial that may have collectedduring storage such as mice or squirrelnests.
•Check the exhaust for any foreignmaterial that may have collectedduring storage.
•Check tire pressures and set tireinflation per the Tire Label.
•Check brake pedal operation. Driveyour vehicle 15 ft (4.5 m) back andforth to remove rust build-up.
•Check fluid levels (including coolantand gas) to make sure there are noleaks, and fluids are at recommendedlevels.
•If you remove the 12-volt battery, cleanthe cable ends and inspect.
Contact an authorized dealer if you haveany concerns or issues.
BODY STYLING KITS
The distance between the underside ofyour vehicle and the ground is less thanthat of other models. Drive with extremecare to avoid damage to your vehicle.
280
Fusion Energi / Fusion Hybrid (CC7) Hybrid Electric Vehicle (HEV)/Plug-In Hybrid Electric Vehicle (PHEV), Canada/United States of America, enUSA, Edition date: 201705, Second Printing
Vehicle Care
Page 286 of 538
* When inflation only is requiredfor a tire or other objects, theselector must be in the Airposition.
What to do when a Tire IsPunctured
A tire puncture within the tire's tread areacan be repaired in two stages with the kit.
•In the first stage, the tire will bereinflated with a sealing compoundand air. After the tire has been inflated,you will need to drive the vehicle ashort distance 4 mi (6 km) to distributethe sealant in the tire.
•In the second stage, you will need tocheck the tire pressure and adjust, ifnecessary, to the vehicle's specifiedtire inflation pressure.
First Stage: Reinflating the Tirewith Sealing Compound and Air
WARNINGS
Do not stand directly over the kitwhile inflating the tire. If you noticeany unusual bulges or deformationsin the tire's sidewall during inflation, stopand call roadside assistance.
If the tire does not inflate to therecommended tire pressure within15 minutes, stop and call roadsideassistance.
Do not run the engine whenoperating the air compressor unlessthe vehicle is outdoors or in awell-ventilated area.
Preparation: Park the vehicle in a safe, leveland secure area, away from moving traffic.
Turn the hazard lights on. Apply the parkingbrake and turn the engine off. Inspect theflat tire for visible damage.
Sealant compound contains latex. Useappropriate precautions to avoid anyallergic reactions.
Do not remove any foreign object that haspierced the tire. If a puncture is located inthe tire sidewall, stop and call roadsideassistance.
1. Remove the valve cap from the tirevalve.
2. Unwrap the dual purpose hose (blacktube) from the back of the compressorhousing.
3. Fasten the hose to the tire valve byturning the connector clockwise.Tighten the connection securely.
4. Plug the power cable into the 12-voltpower point in the vehicle.
283
Fusion Energi / Fusion Hybrid (CC7) Hybrid Electric Vehicle (HEV)/Plug-In Hybrid Electric Vehicle (PHEV), Canada/United States of America, enUSA, Edition date: 201705, Second Printing
Wheels and TiresE175978 E175979