roof FORD FUSION HYBRID 2014 Owners Manual
[x] Cancel search | Manufacturer: FORD, Model Year: 2014, Model line: FUSION HYBRID, Model: FORD FUSION HYBRID 2014Pages: 473, PDF Size: 5.93 MB
Page 5 of 473
Wipers and Washers Windshield Wipers.........................................67
Autowiper s........................................................67
Windshield Washers.....................................68
Lighting Lighting Control..............................................69
Autolamps........................................................69
Instrument Lighting Dimmer.....................70
Headlamp Exit Delay....................................70
Daytime Running Lamps.............................70
Automatic High Beam Control...................71
Front Fog Lamps.............................................72
Direction Indicators........................................72
Interior Lamps..................................................72
Ambient Lighting............................................73
Windows and Mirrors Power Windows..............................................74
Global Opening and Closing......................75
Exterior Mirrors.................................................75
Interior Mirror....................................................76
Sun Visors..........................................................77
Moonroof............................................................77
Instrument Cluster Gauges................................................................79
Warning Lamps and Indicators..................81
Audible Warnings and Indicators.............85
Information Displays General Information.....................................86
Information Messages.................................98
Climate Control Automatic Climate Control........................113
Automatic Climate Control........................114
Automatic Climate Control.......................116 Hints on Controlling the Interior
Climate..........................................................118
Heated Windows and Mirrors...................119
Cabin Air Filter................................................119
Remote Start.................................................120
Seats Sitting in the Correct Position...................121
Head Restraints..............................................121
Manual Seats.................................................123
Power Seats....................................................123
Memory Function.........................................124
Rear Seats.......................................................126
Heated Seats..................................................127
Ventilated Seats............................................127
Rear Seat Armrest........................................127
Universal Ga rage Door
Opener Universal Garage Door Opener...............129
Auxiliary Power Points Auxiliary Power Points................................133
Storage C ompartmentsCenter Console..............................................135
Overhead Console........................................135
Starting and Stopping the
Engine General Information....................................136
Ignition Switch...............................................136
Keyless Starting............................................136
Starting a Gasoline Engine........................137
Engine Block Heater....................................140
Unique Driving Character-
istics
Hybrid Electric Vehicle................................142
2Table of Contents
Page 26 of 473
E142537
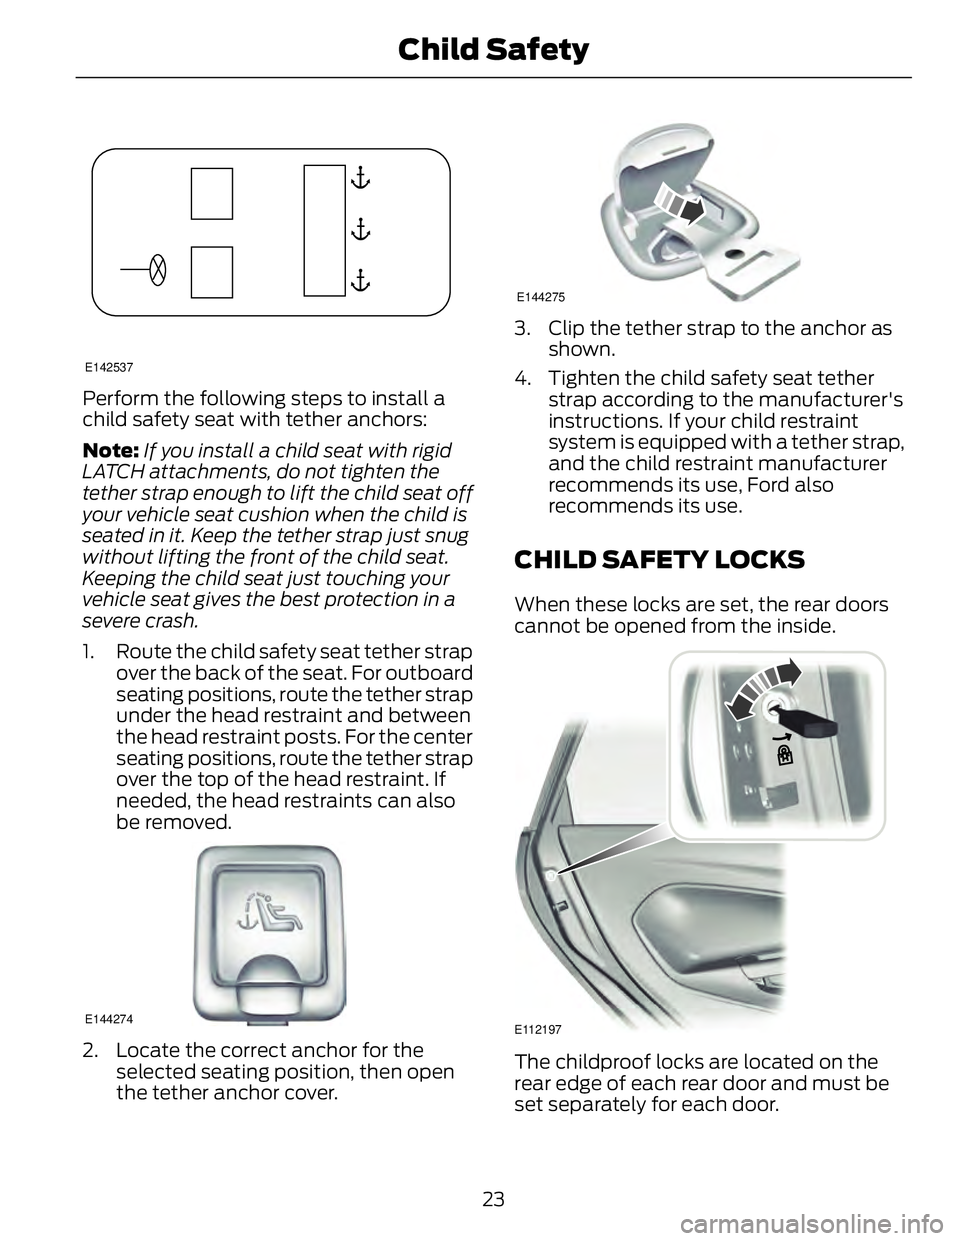
Perform the following steps to install a
child safety seat with tether anchors:
Note: If you install a child seat with rigid
LATCH attachments, do not tighten the
tether strap enough to lift the child seat off
your vehicle seat cushion when the child is
seated in it. Keep the tether strap just snug
without lifting the front of the child seat.
Keeping the child seat just touching your
vehicle seat gives the best protection in a
severe crash.
1. Route the child safety seat tether strap
over the back of the seat. For outboard
seating positions, route the tether strap
under the head restraint and between
the head restraint posts. For the center
seating positions, route the tether strap
over the top of the head restraint. If
needed, the head restraints can also
be removed.
E144274
2. Locate the correct anchor for the
selected seating position, then open
the tether anchor cover. E144275
3. Clip the tether strap to the anchor as
shown.
4. Tighten the child safety seat tether
strap according to the manufacturer's
instructions. If your child restraint
system is equipped with a tether strap,
and the child restraint manufacturer
recommends its use, Ford also
recommends its use.
CHILD SAFETY LOCKS When these locks are set, the rear doors
cannot be opened from the inside.
E112197
The childproof locks are located on the
rear edge of each rear door and must be
set separately for each door.
23Child Safety
Page 44 of 473
The design and development of the side
airbag system included recommended
testing procedures that were developed
by a group of automotive safety experts
known as the Side Airbag Technical
Working Group. These recommended
testing procedures help reduce the risk of
injuries related to the deployment of side
airbags.
SIDE CURTAIN AIRBAGS WARNINGS
Do not place objects or mount
equipment on or near the headliner
at the siderail that may come into
contact with a deploying side curtain
airbag. Failure to follow these instructions
may increase the risk of personal injury in
the event of a crash.
Do not lean your head on the door.
The side curtain airbag could injure
you as it deploys from the headliner.
Do not attempt to service, repair, or
modify the side curtain airbags, its
fuses, the A, B, or C pillar trim, or the
headliner on a vehicle containing side
curtain airbags. Contact your authorized
dealer as soon as possible.
All occupants of the vehicle including
the driver should always wear their
safety belts even when an airbag
supplemental restraint system and side
curtain airbag is provided.
To reduce risk of injury, do not
obstruct or place objects in the
deployment path of the side curtain
airbag. WARNINGS
If the side curtain airbags have
deployed, the side curtain airbags
will not function again. The side
curtain airbags (including the A, B and C
pillar trim and headliner) must be
inspected and serviced by an authorized
dealer. If the side curtain airbag is not
replaced, the unrepaired area will increase
the risk of injury in a crash.
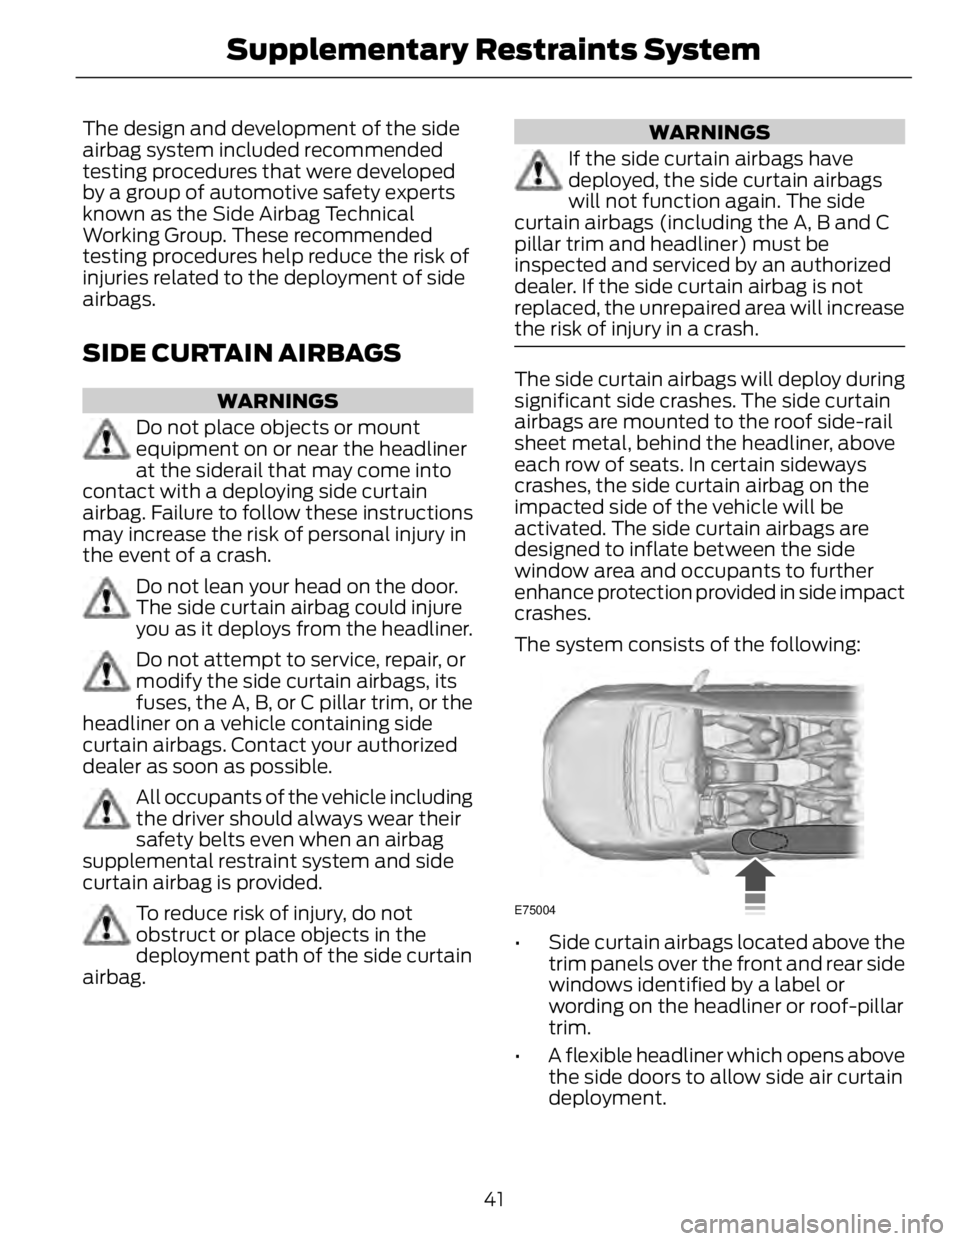
The side curtain airbags will deploy during
significant side crashes. The side curtain
airbags are mounted to the roof side-rail
sheet metal, behind the headliner, above
each row of seats. In certain sideways
crashes, the side curtain airbag on the
impacted side of the vehicle will be
activated. The side curtain airbags are
designed to inflate between the side
window area and occupants to further
enhance protection provided in side impact
crashes.
The system consists of the following:
E75004
• Side curtain airbags located above the
trim panels over the front and rear side
windows identified by a label or
wording on the headliner or roof-pillar
trim.
• A flexible headliner which opens above
the side doors to allow side air curtain
deployment.
41Supplementary Restraints System
Page 75 of 473
Switch the lighting control to the
autolamps position.
Manually Overriding the System E169254
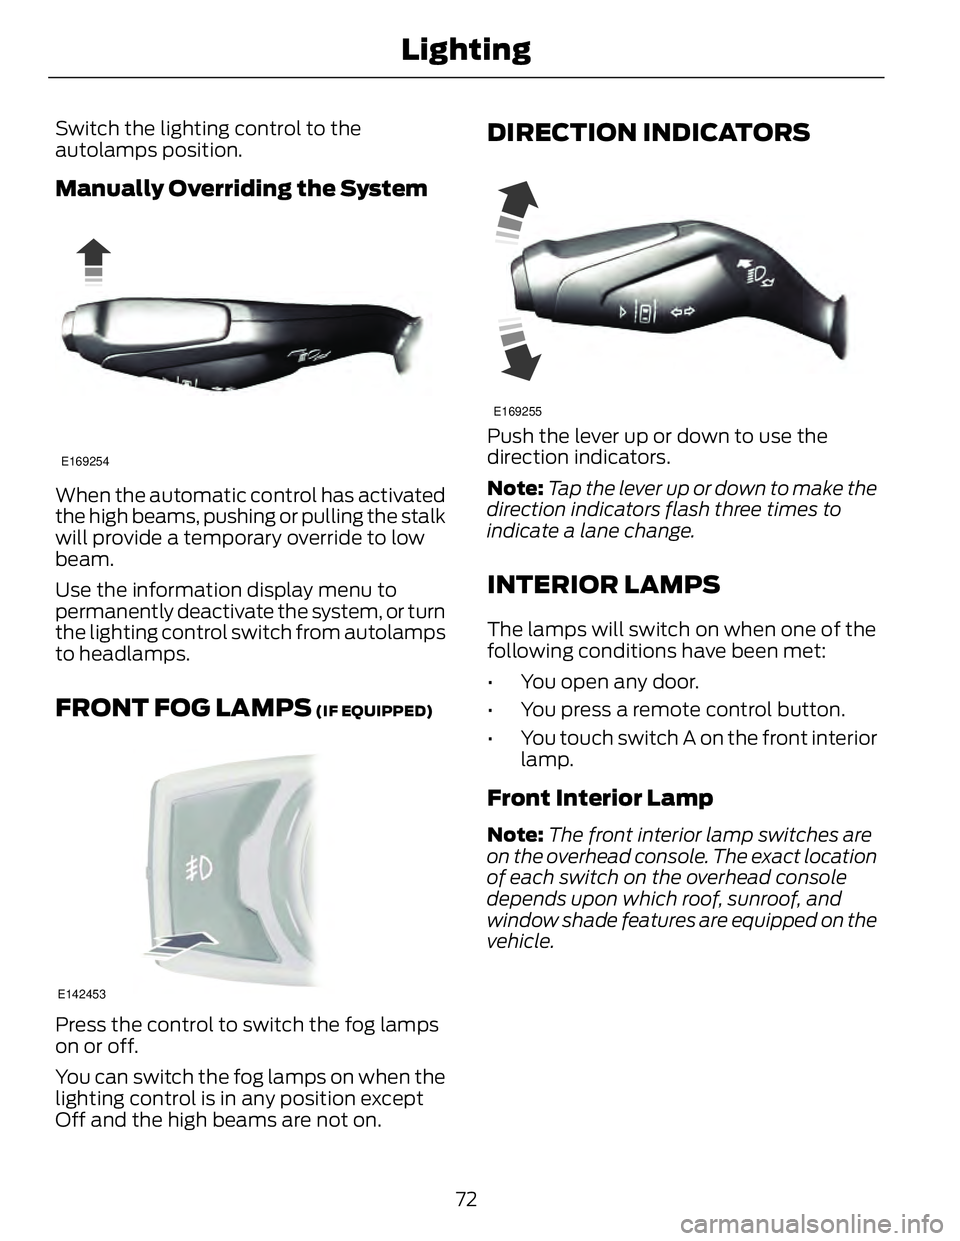
When the automatic control has activated
the high beams, pushing or pulling the stalk
will provide a temporary override to low
beam.
Use the information display menu to
permanently deactivate the system, or turn
the lighting control switch from autolamps
to headlamps.
FRONT FOG LAMPS (IF EQUIPPED)
E142453
Press the control to switch the fog lamps
on or off.
You can switch the fog lamps on when the
lighting control is in any position except
Off and the high beams are not on. DIRECTION INDICATORS E169255
Push the lever up or down to use the
direction indicators.
Note: Tap the lever up or down to make the
direction indicators flash three times to
indicate a lane change.
INTERIOR LAMPS The lamps will switch on when one of the
following conditions have been met:
• You open any door.
• You press a remote control button.
• You touch switch A on the front interior
lamp.
Front Interior Lamp Note: The front interior lamp switches are
on the overhead console. The exact location
of each switch on the overhead console
depends upon which roof, sunroof, and
window shade features are equipped on the
vehicle.
72Lighting
Page 78 of 473
GLOBAL OPENING AND
CLOSING You can use the remote control to operate
the windows with the ignition off.
Note: You can enable or disable this feature
in the information display or see an
authorized dealer. See General
Information (page 86).
Note: To operate this feature, accessory
delay must not be active.
Opening the Windows You can only open the windows for a short
time after you unlock your vehicle with the
remote control. After you unlock your
vehicle, press and hold the remote control
unlock button to open the windows and
vent the moonroof. Release the button
once movement starts. Press the lock or
unlock button to stop movement.
Closing the Windows WARNING
When closing the windows and
moonroof, you should verify they are
free of obstructions and make sure
that children and pets are not in the
proximity of the window openings.
To close the windows and moonroof, press
and hold the remote control lock button.
Release the button once movement starts.
Press the lock or unlock button to stop
movement.
EXTERIOR MIRRORS
Power Exterior Mirrors
WARNING
Do not adjust the mirrors when your
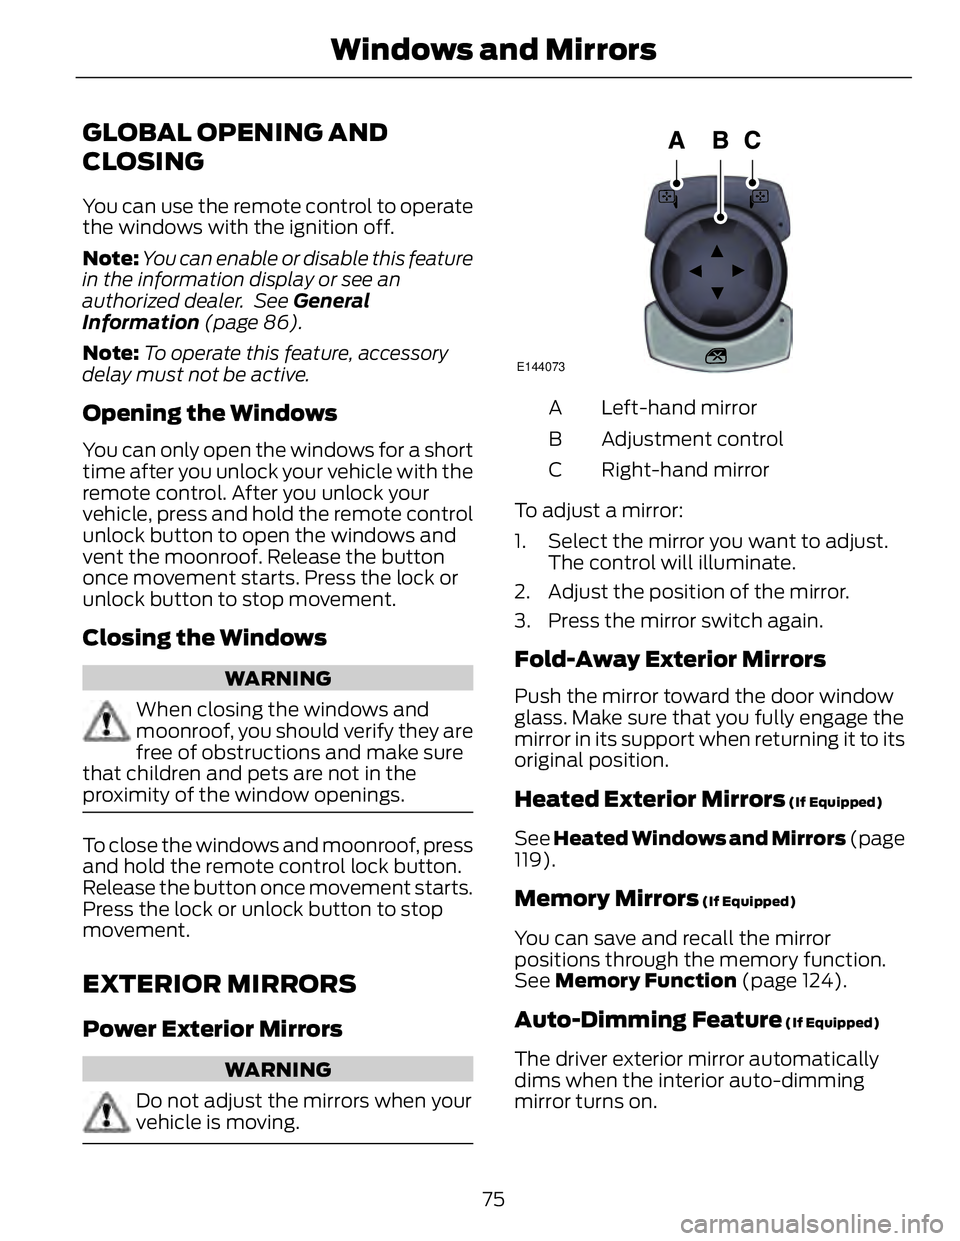
vehicle is moving. E144073
Left-hand mirrorA
Adjustment controlB
Right-hand mirrorC
To adjust a mirror:
1. Select the mirror you want to adjust.
The control will illuminate.
2. Adjust the position of the mirror.
3. Press the mirror switch again.
Fold-Away Exterior Mirrors Push the mirror toward the door window
glass. Make sure that you fully engage the
mirror in its support when returning it to its
original position.
Heated Exterior Mirrors (If Equipped)
See Heated Windows and Mirrors (page
119).
Memory Mirrors (If Equipped)
You can save and recall the mirror
positions through the memory function.
See Memory Function (page 124).
Auto-Dimming Feature (If Equipped)
The driver exterior mirror automatically
dims when the interior auto-dimming
mirror turns on.
75Windows and Mirrors
Page 80 of 473
Note: Do not clean the housing or glass of
any mirror with harsh abrasives, fuel or other
petroleum or ammonia-based cleaning
products.
You can adjust the interior mirror to your
preference. Some mirrors also have a
second pivot point. This lets you move the
mirror head up or down and from side to
side.
Pull the tab below the mirror toward you
to reduce glare at night.
Auto-Dimming Mirror (If Equipped)
Note: Do not block the sensors on the front
and back of the mirror. Mirror performance
may be affected. A rear center passenger or
raised rear center head restraint may also
block light from reaching the sensor.
The mirror will dim automatically to reduce
glare when bright lights are detected from
behind your vehicle. It will automatically
return to normal reflection when you select
reverse gear to make sure you have a clear
view when backing up.
SUN VISORS
E138666
Rotate the sun visor toward the side
window and extend it rearward for extra
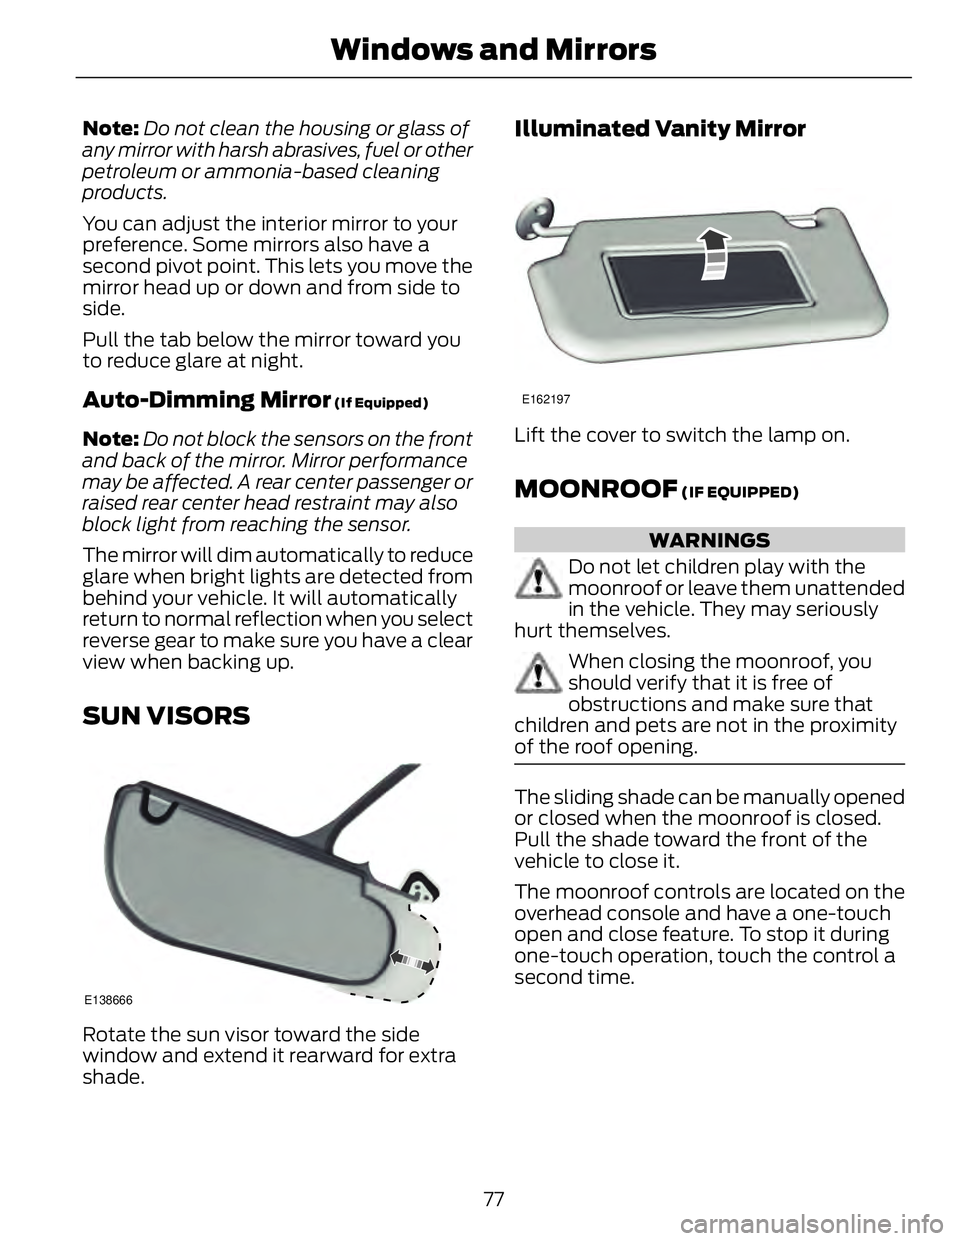
shade. Illuminated Vanity Mirror E162197
Lift the cover to switch the lamp on.
MOONROOF (IF EQUIPPED)
WARNINGS
Do not let children play with the
moonroof or leave them unattended
in the vehicle. They may seriously
hurt themselves.
When closing the moonroof, you
should verify that it is free of
obstructions and make sure that
children and pets are not in the proximity
of the roof opening.
The sliding shade can be manually opened
or closed when the moonroof is closed.
Pull the shade toward the front of the
vehicle to close it.
The moonroof controls are located on the
overhead console and have a one-touch
open and close feature. To stop it during
one-touch operation, touch the control a
second time.
77Windows and Mirrors
Page 81 of 473
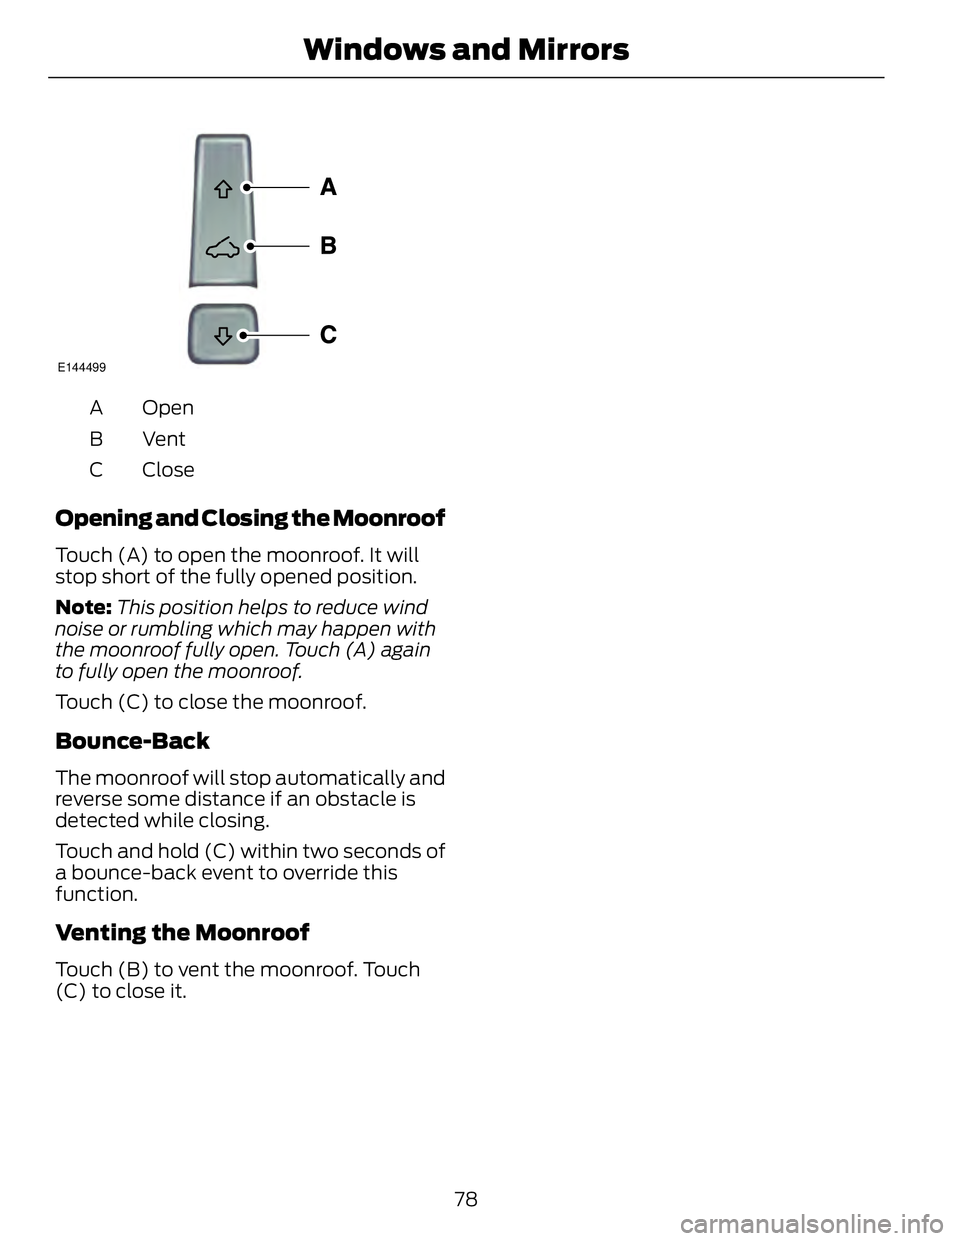
E144499
OpenA
VentB
CloseC
Opening and Closing the Moonroof Touch (A) to open the moonroof. It will
stop short of the fully opened position.
Note: This position helps to reduce wind
noise or rumbling which may happen with
the moonroof fully open. Touch (A) again
to fully open the moonroof.
Touch (C) to close the moonroof.
Bounce-Back The moonroof will stop automatically and
reverse some distance if an obstacle is
detected while closing.
Touch and hold (C) within two seconds of
a bounce-back event to override this
function.
Venting the Moonroof
Touch (B) to vent the moonroof. Touch
(C) to close it.
78Windows and Mirrors
Page 178 of 473
PRINCIPLE OF OPERATION WARNINGS
Vehicle modifications involving
braking system, aftermarket roof
racks, suspension, steering system,
tire construction and wheel and tire size
may change the handling characteristics
of the vehicle and may adversely affect
the performance of the AdvanceTrac
system. In addition, installing any stereo
loudspeakers may interfere with and
adversely affect the AdvanceTrac system.
Install any aftermarket stereo loudspeaker
as far as possible from the front center
console, the tunnel, and the front seats in
order to minimize the risk of interfering with
the AdvanceTrac sensors. Reducing the
effectiveness of the AdvanceTrac system
could lead to an increased risk of loss of
vehicle control, vehicle rollover, personal
injury and death.
Remember that even advanced
technology cannot defy the laws of
physics. It’s always possible to lose
control of a vehicle due to inappropriate
driver input for the conditions. Aggressive
driving on any road condition can cause
you to lose control of your vehicle
increasing the risk of personal injury or
property damage. Activation of the
AdvanceTrac system is an indication that
at least some of the tires have exceeded
their ability to grip the road; this could
reduce the operator’s ability to control the
vehicle potentially resulting in a loss of
vehicle control, vehicle rollover, personal
injury and death. If your AdvanceTrac
system activates, SLOW DOWN. The AdvanceTrac Control system helps
you keep control of your vehicle when on
a slippery surface. The electronic stability
control portion of the system helps avoid
skids and lateral slides. The traction
control system helps avoid drive wheel
spin and loss of traction. See Using
Traction Control (page 174).
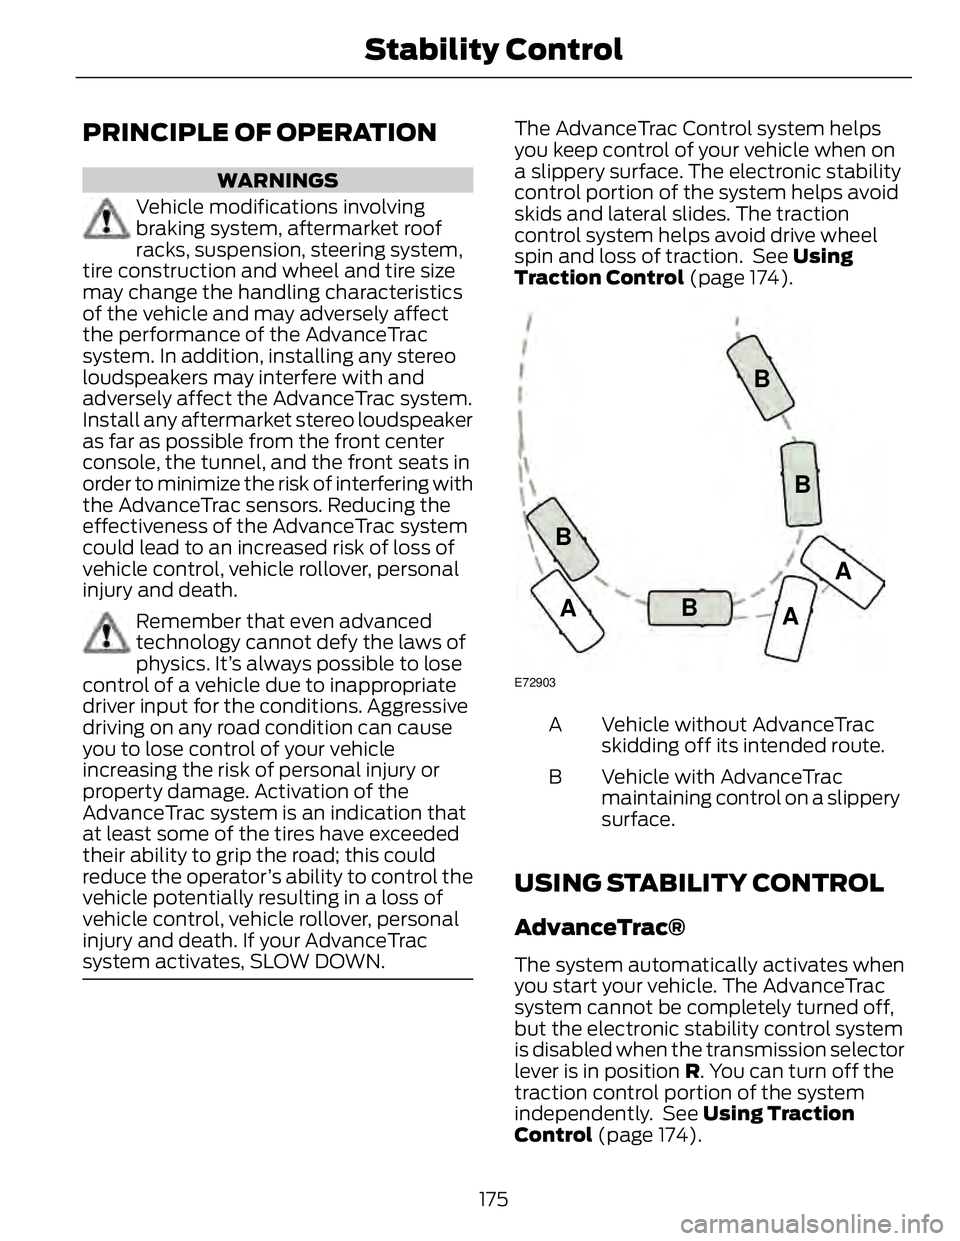
E72903
A
A AB
B BB
Vehicle without AdvanceTrac
skidding off its intended route.A
Vehicle with AdvanceTrac
maintaining control on a slippery
surface.B
USING STABILITY CONTROL
AdvanceTrac®
The system automatically activates when
you start your vehicle. The AdvanceTrac
system cannot be completely turned off,
but the electronic stability control system
is disabled when the transmission selector
lever is in position R . You can turn off the
traction control portion of the system
independently. See Using Traction
Control (page 174).
175Stability Control
Page 181 of 473
For specific information on the reverse
sensing portion of the system, refer to that
section.
ACTIVE PARK ASSIST (IF
EQUIPPED)
WARNING
This system is designed to be a
supplementary park aid. It may not
work in all conditions and is not
intended to replace the driver’s attention
and judgment. The driver is responsible for
avoiding hazards and maintaining a safe
distance and speed, even when the system
is in use.
Note: The driver is always responsible for
controlling the vehicle, supervising the
system and intervening if required.
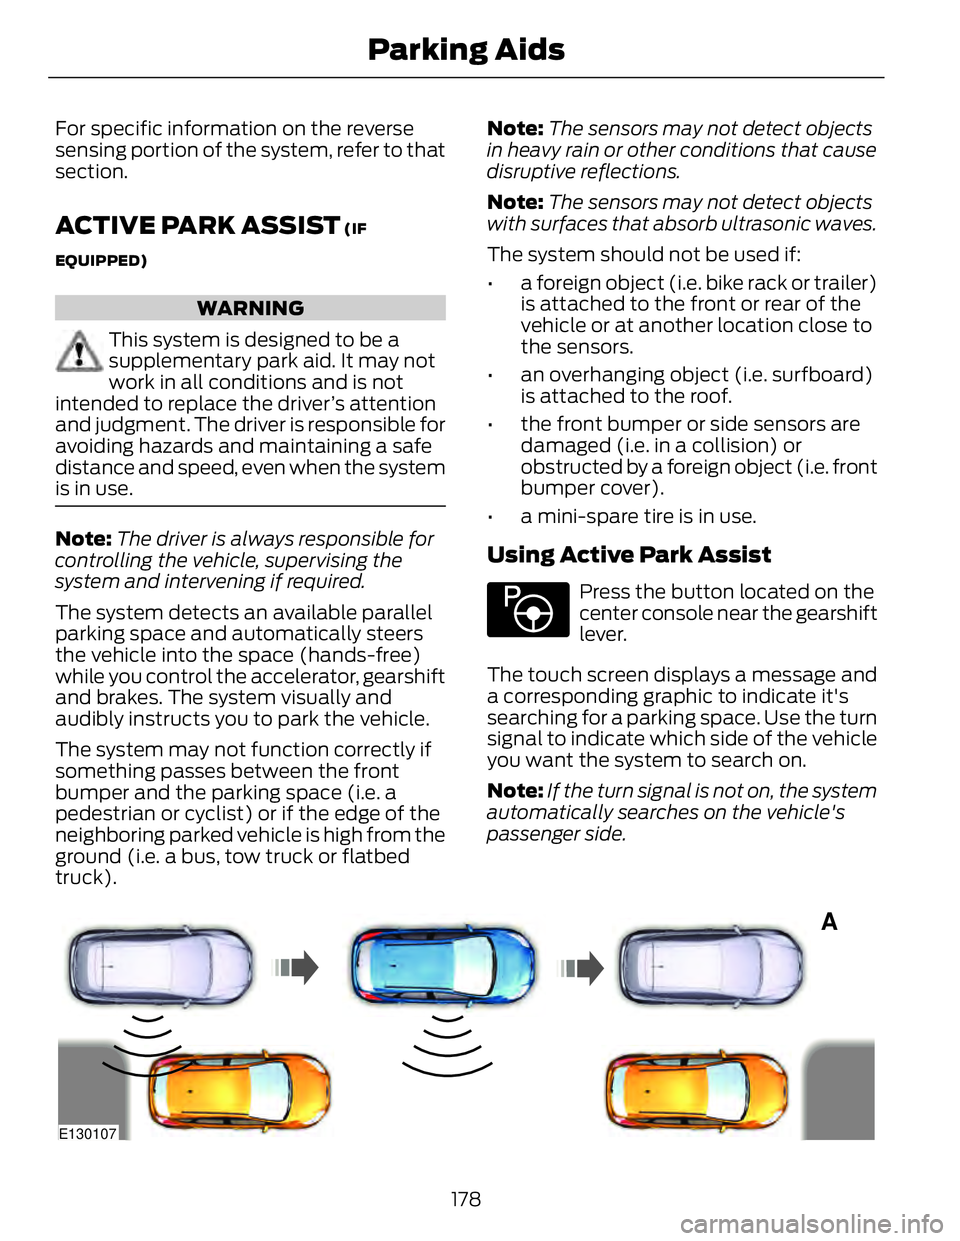
The system detects an available parallel
parking space and automatically steers
the vehicle into the space (hands-free)
while you control the accelerator, gearshift
and brakes. The system visually and
audibly instructs you to park the vehicle.
The system may not function correctly if
something passes between the front
bumper and the parking space (i.e. a
pedestrian or cyclist) or if the edge of the
neighboring parked vehicle is high from the
ground (i.e. a bus, tow truck or flatbed
truck). Note: The sensors may not detect objects
in heavy rain or other conditions that cause
disruptive reflections.
Note: The sensors may not detect objects
with surfaces that absorb ultrasonic waves.
The system should not be used if:
• a foreign object (i.e. bike rack or trailer)
is attached to the front or rear of the
vehicle or at another location close to
the sensors.
• an overhanging object (i.e. surfboard)
is attached to the roof.
• the front bumper or side sensors are
damaged (i.e. in a collision) or
obstructed by a foreign object (i.e. front
bumper cover).
• a mini-spare tire is in use.
Using Active Park Assist E146186
Press the button located on the
center console near the gearshift
lever.
The touch screen displays a message and
a corresponding graphic to indicate it's
searching for a parking space. Use the turn
signal to indicate which side of the vehicle
you want the system to search on.
Note: If the turn signal is not on, the system
automatically searches on the vehicle's
passenger side.
A
E130107
178Parking Aids
Page 223 of 473
THE BETTER BUSINESS
BUREAU (BBB) AUTO LINE
PROGRAM (U.S. ONLY) Your satisfaction is important to Ford
Motor Company and to your dealer. If a
warranty concern has not been resolved
using the three-step procedure outlined
earlier in this chapter in the Getting the
Services you need section, you may be
eligible to participate in the BBB AUTO
LINE program.
The BBB AUTO LINE program consists of
two parts – mediation and arbitration.
During mediation, a representative of the
BBB will contact both you and Ford Motor
Company to explore options for settlement
of the claim. If an agreement is not reached
during mediation or you do not want to
participate in mediation, and if your claim
is eligible, you may participate in the
arbitration process. An arbitration hearing
will be scheduled so that you can present
your case in an informal setting before an
impartial person. The arbitrator will
consider the testimony provided and make
a decision after the hearing.
Disputes submitted to the BBB AUTO LINE
program are usually decided within forty
days after you file your claim with the BBB.
You are not bound by the decision, and
may reject the decision and proceed to
court where all findings of the BBB Auto
Line dispute, and decision, are admissible
in the court action. Should you choose to
accept the BBB AUTO LINE decision, Ford
is then bound by the decision, and must
comply with the decision within 30 days
of receipt of your acceptance letter.
BBB AUTO LINE Application: Using the
information provided below, please call or
write to request a program application.
You will be asked for your name and
address, general information about your
new vehicle, information about your
warranty concerns, and any steps you have already taken to try to resolve them. A
Customer Claim Form will be mailed that
will need to be completed, signed and
returned to the BBB along with proof of
ownership. Upon receipt, the BBB will
review the claim for eligibility under the
Program Summary Guidelines.
You can get more information by
calling BBB AUTO LINE at
1-800-955-5100, or writing to:
BBB AUTO LINE
4200 Wilson Boulevard, Suite 800
Arlington, Virginia 22203-1833
BBB AUTO LINE applications can also be
requested by calling the Ford Motor
Company Customer Relationship Center
at 1-800-392-3673.
Note: Ford Motor Company reserves the
right to change eligibility limitations, modify
procedures, or to discontinue this process
at any time without notice and without
obligation.
UTILIZING THE
MEDIATION/ARBITRATION
PROGRAM (CANADA ONLY) For vehicles delivered to authorized
Canadian dealers. In those cases where
you continue to feel that the efforts by Ford
of Canada and the authorized dealer to
resolve a factory-related vehicle service
concern have been unsatisfactory, Ford of
Canada participates in an impartial third
party mediation/arbitration program
administered by the Canadian Motor
Vehicle Arbitration Plan (CAMVAP).
The CAMVAP program is a straight forward
and relatively speedy alternative to resolve
a disagreement when all other efforts to
produce a settlement have failed. This
procedure is without cost to you and is
designed to eliminate the need for lengthy
and expensive legal proceedings.
220Customer Assistance