battery FORD FUSION HYBRID 2014 Owners Manual
[x] Cancel search | Manufacturer: FORD, Model Year: 2014, Model line: FUSION HYBRID, Model: FORD FUSION HYBRID 2014Pages: 473, PDF Size: 5.93 MB
Page 6 of 473
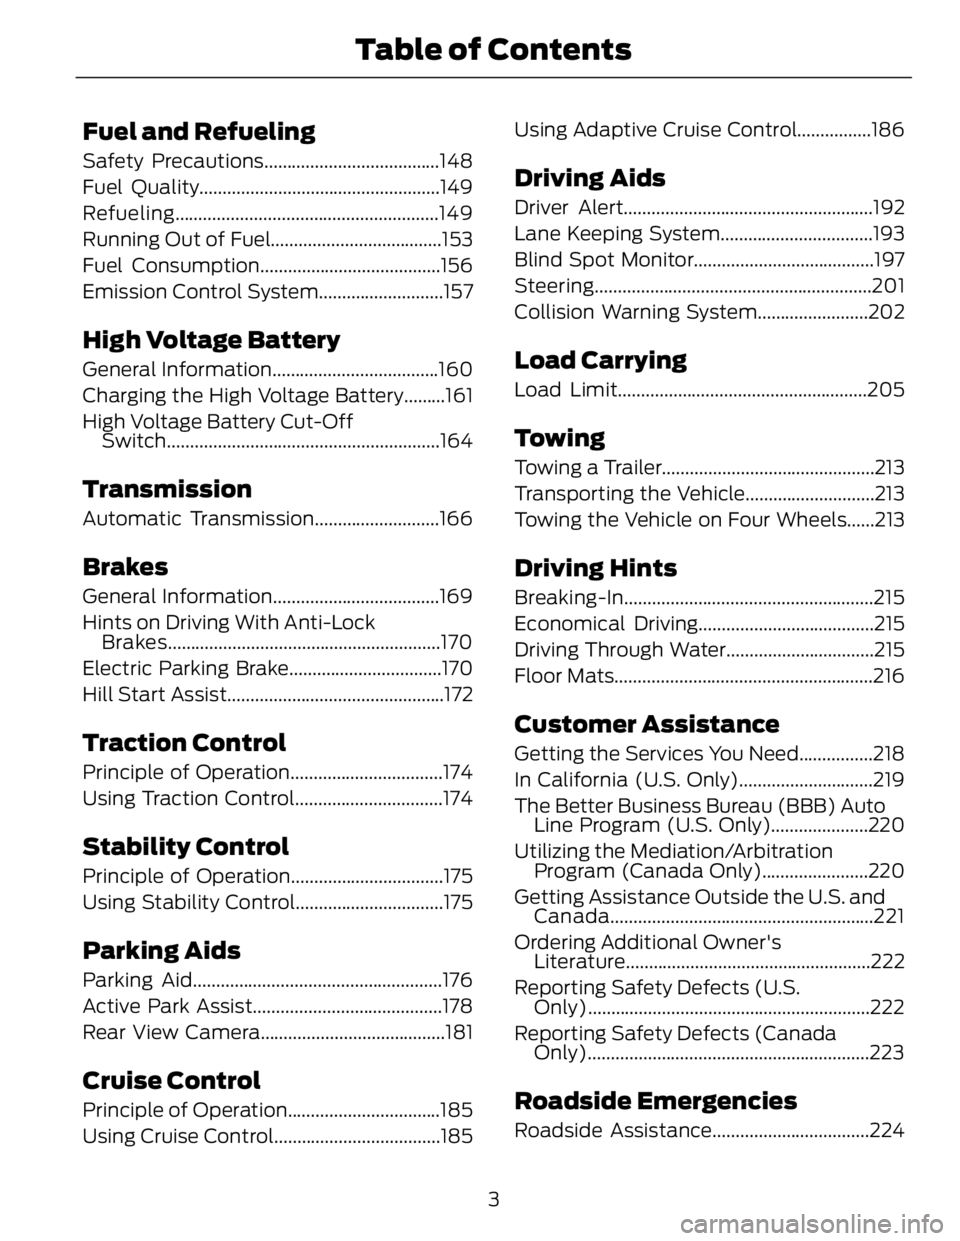
Fuel and Refueling Safety Precautions......................................148
Fuel Quality....................................................149
Refueling .........................................................149
Running Out of Fuel.....................................153
Fuel Consumption.......................................156
Emission Control System...........................157
High Voltage Battery General Information....................................160
Charging the High Voltage Battery.........161
High Voltage Battery Cut-Off
Switch...........................................................164
Transmission Automatic Transmission...........................166
Brakes General Information....................................169
Hints on Driving With Anti-Lock
Brakes...........................................................170
Electric Parking Brake.................................170
Hill Start Assist...............................................172
Traction Control Principle of Operation.................................174
Using Traction Control................................174
Stability Control Principle of Operation.................................175
Using Stability Control................................175
Parking Aids Parking Aid......................................................176
Active Park Assist.........................................178
Rear View Camera........................................181
Cruise Control
Principle of Operation.................................185
Using Cruise Control....................................185 Using Adaptive Cruise Control................186
Driving Aids Driver Alert......................................................192
Lane Keeping System.................................193
Blind Spot Monitor.......................................197
Steering ............................................................ 201
Collision Warning System........................202
Load Carrying Load Limit......................................................205
Towing Towing a Trailer..............................................213
Transporting the Vehicle............................213
Towing the Vehicle on Four Wheels......213
Driving Hints Breaking-In ...................................................... 215
Economical Driving......................................215
Driving Through Water................................215
Floor Mats........................................................216
Customer Assistance Getting the Services You Need................218
In California (U.S. Only).............................219
The Better Business Bureau (BBB) Auto
Line Program (U.S. Only).....................220
Utilizing the Mediation/Arbitration
Program (Canada Only).......................220
Getting Assistance Outside the U.S. and
Canada.........................................................221
Ordering Additional Owner's
Literature.....................................................222
Reporting Safety Defects (U.S.
Only).............................................................222
Reporting Safety Defects (Canada
Only).............................................................223
Roadside Emergencies
Roadside Assistance..................................224
3Table of Contents
Page 7 of 473
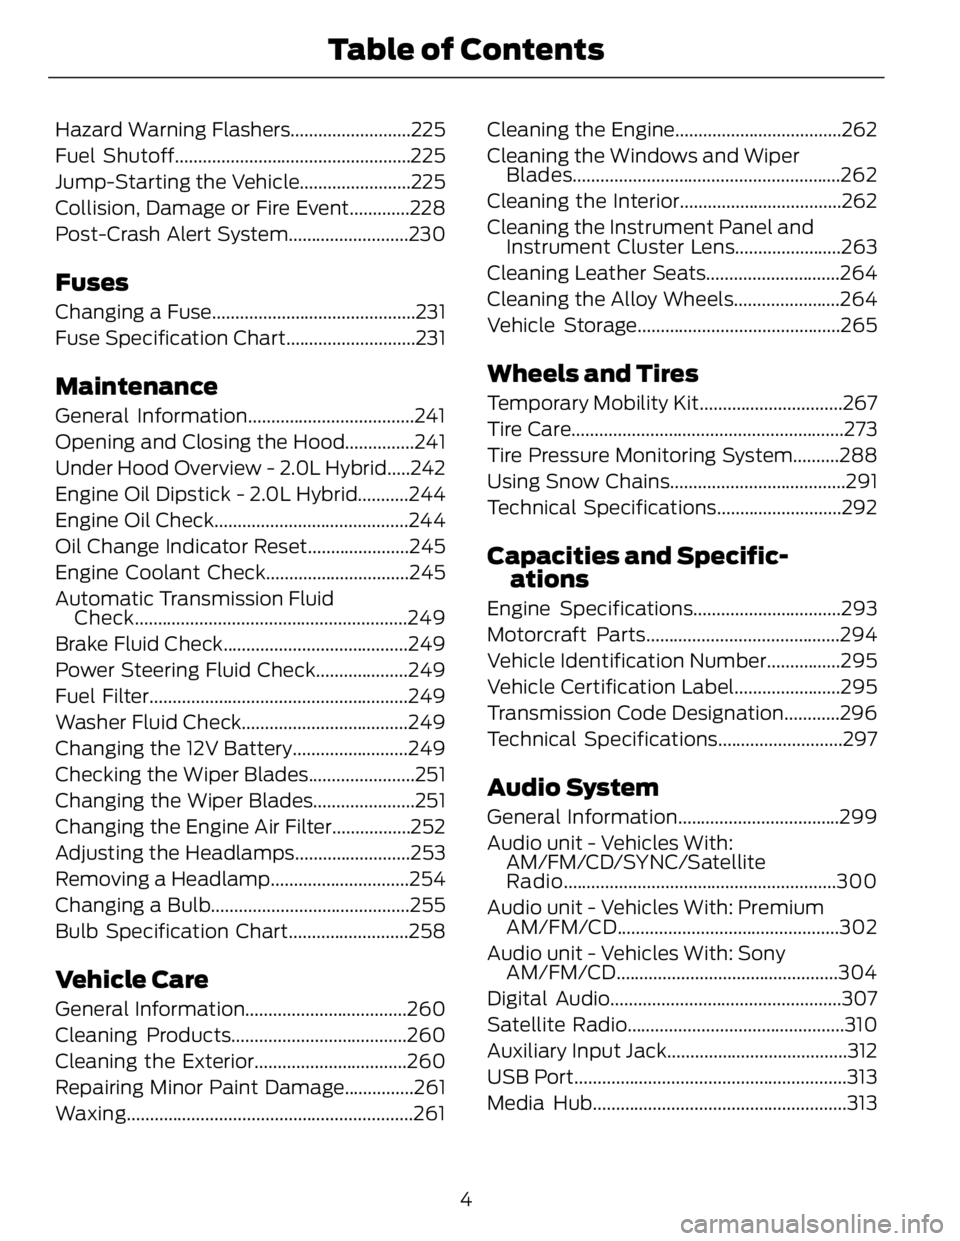
Hazard Warning Flashers..........................225
Fuel Shutoff...................................................225
Jump-Starting the Vehicle........................225
Collision, Damage or Fire Event.............228
Post-Crash Alert System..........................230
Fuses Changing a Fuse............................................231
Fuse Specification Chart............................231
Maintenance General Information....................................241
Opening and Closing the Hood...............241
Under Hood Overview - 2.0L Hybrid.....242
Engine Oil Dipstick - 2.0L Hybrid...........244
Engine Oil Check..........................................244
Oil Change Indicator Reset......................245
Engine Coolant Check...............................245
Automatic Transmission Fluid
Check...........................................................249
Brake Fluid Check........................................249
Power Steering Fluid Check....................249
Fuel Filter........................................................249
Washer Fluid Check....................................249
Changing the 12V Battery.........................249
Checking the Wiper Blades.......................251
Changing the Wiper Blades......................251
Changing the Engine Air Filter.................252
Adjusting the Headlamps.........................253
Removing a Headlamp..............................254
Changing a Bulb...........................................255
Bulb Specification Chart..........................258
Vehicle Care General Information...................................260
Cleaning Products......................................260
Cleaning the Exterior.................................260
Repairing Minor Paint Damage...............261
Waxing ..............................................................261 Cleaning the Engine....................................262
Cleaning the Windows and Wiper
Blades..........................................................262
Cleaning the Interior...................................262
Cleaning the Instrument Panel and
Instrument Cluster Lens.......................263
Cleaning Leather Seats.............................264
Cleaning the Alloy Wheels.......................264
Vehicle Storage............................................265
Wheels and Tires Temporary Mobility Kit...............................267
Tire Care...........................................................273
Tire Pressure Monitoring System..........288
Using Snow Chains......................................291
Technical Specifications...........................292
Capacities and Specific-
ations Engine Specifications................................293
Motorcraft Parts..........................................294
Vehicle Identification Number................295
Vehicle Certification Label.......................295
Transmission Code Designation............296
Technical Specifications...........................297
Audio System General Information...................................299
Audio unit - Vehicles With:
AM/FM/CD/SYNC/Satellite
Radio...........................................................300
Audio unit - Vehicles With: Premium
AM/FM/CD ................................................302
Audio unit - Vehicles With: Sony
AM/FM/CD ................................................304
Digital Audio..................................................307
Satellite Radio...............................................310
Auxiliary Input Jack.......................................312
USB Port...........................................................313
Media Hub.......................................................313
4Table of Contents
Page 11 of 473
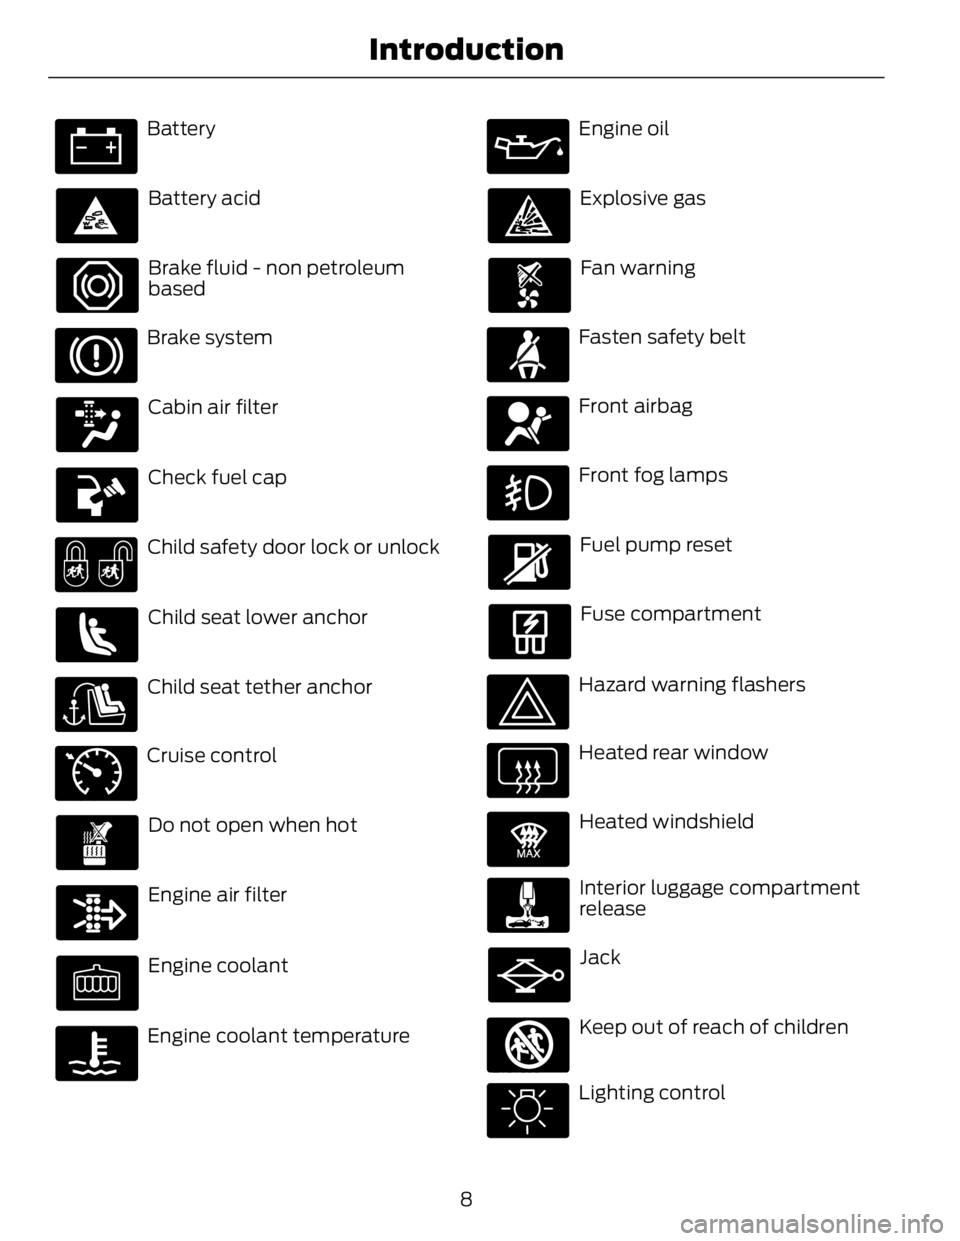
Battery
Battery acid
Brake fluid - non petroleum
based
Brake system
Cabin air filter
Check fuel cap
Child safety door lock or unlock
Child seat lower anchor
Child seat tether anchorE71340
Cruise control
Do not open when hot
Engine air filter
Engine coolant
Engine coolant temperature Engine oil
Explosive gas
Fan warning
Fasten safety belt
Front airbag
Front fog lamps
Fuel pump reset
Fuse compartment
Hazard warning flashers
Heated rear window E91392
Heated windshield
Interior luggage compartment
release
Jack
E161353
Keep out of reach of children
Lighting control
8Introduction
Page 47 of 473
GENERAL INFORMATION ON
RADIO FREQUENCIES This device complies with Part 15 of the
FCC Rules and with Industry Canada
license-exempt RSS standard(s).
Operation is subject to the following two
conditions: (1) This device may not cause
harmful interference, and (2) This device
must accept any interference received,
including interference that may cause
undesired operation.
Note: Changes or modifications not
expressively approved by the party
responsible for compliance could void the
user's authority to operate the equipment.
The term IC before the radio certification
number only signifies that Industry Canada
technical specifications were met.
The typical operating range for your
transmitter is approximately 33 feet (10
meters). Vehicles with the remote start
feature will have a greater range. One of
the following could cause a decrease in
operating range:
• weather conditions
• nearby radio towers
• structures around the vehicle
• other vehicles parked next to your
vehicle
The radio frequency used by your remote
control can also be used by other short
distance radio transmissions, for example
amateur radios, medical equipment,
wireless headphones, remote controls and
alarm systems. If the frequencies are
jammed, you will not be able to use your
remote control. You can lock and unlock
the doors with the key.
Note: Make sure to lock your vehicle before
leaving it unattended.
Note: If you are in range, the remote control
will operate if you press any button
unintentionally. Intelligent Access (If Equipped)
The system uses a radio frequency signal
to communicate with your vehicle and
authorize your vehicle to unlock when one
of the following conditions are met:
• You touch the inside of the front
exterior door handle.
• You press the luggage compartment
button.
• You press a button on the transmitter.
If excessive radio frequency interference
is present in the area or if the transmitter
battery is low, you may need to
mechanically unlock your door. You can
use the mechanical key blade in your
intelligent access key to open the driver
door in this situation. See Remote
Control (page 44).
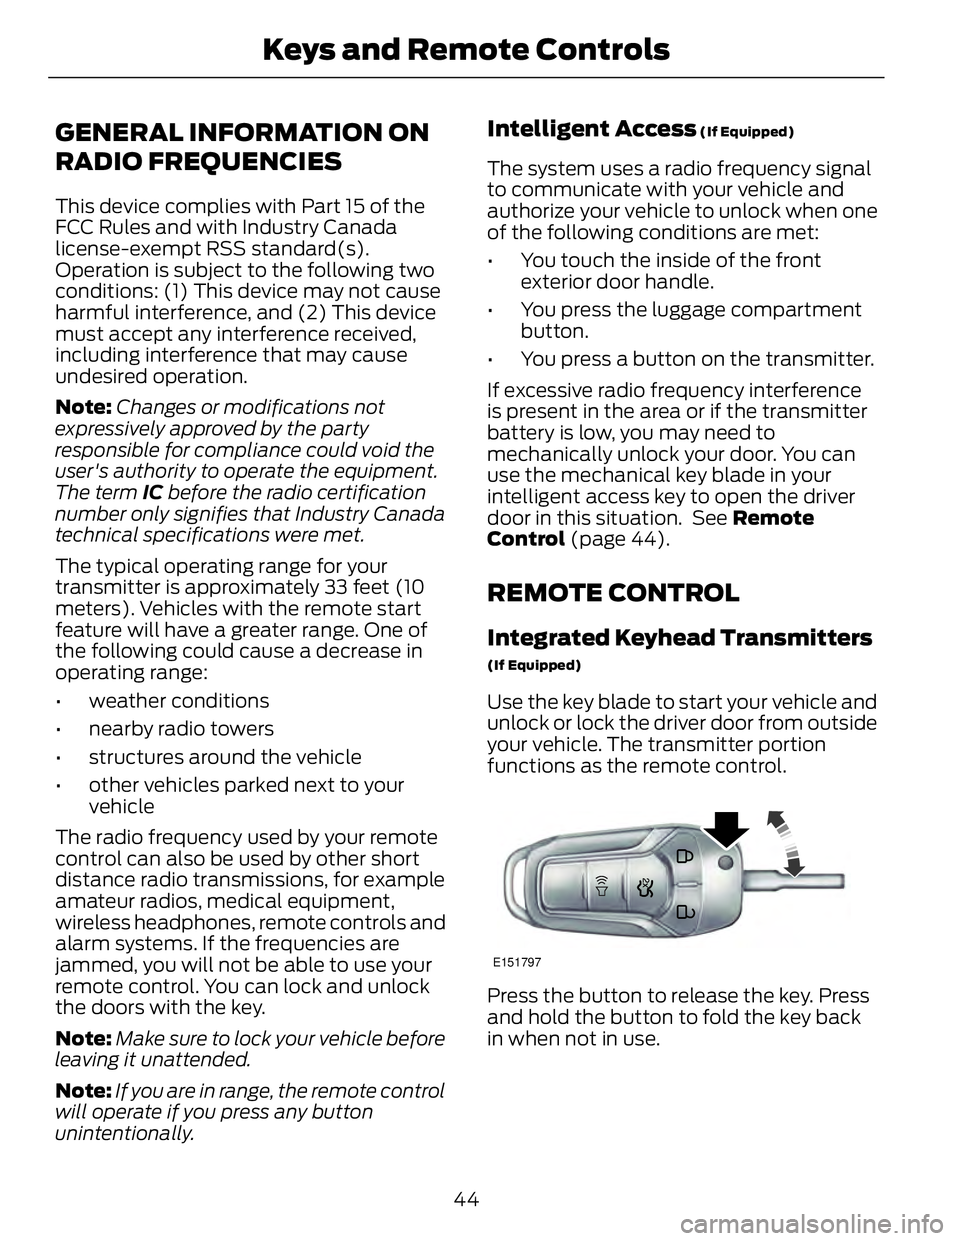
REMOTE CONTROL Integrated Keyhead Transmitters (If Equipped)
Use the key blade to start your vehicle and
unlock or lock the driver door from outside
your vehicle. The transmitter portion
functions as the remote control.
E151797
Press the button to release the key. Press
and hold the button to fold the key back
in when not in use.
44Keys and Remote Controls
Page 49 of 473
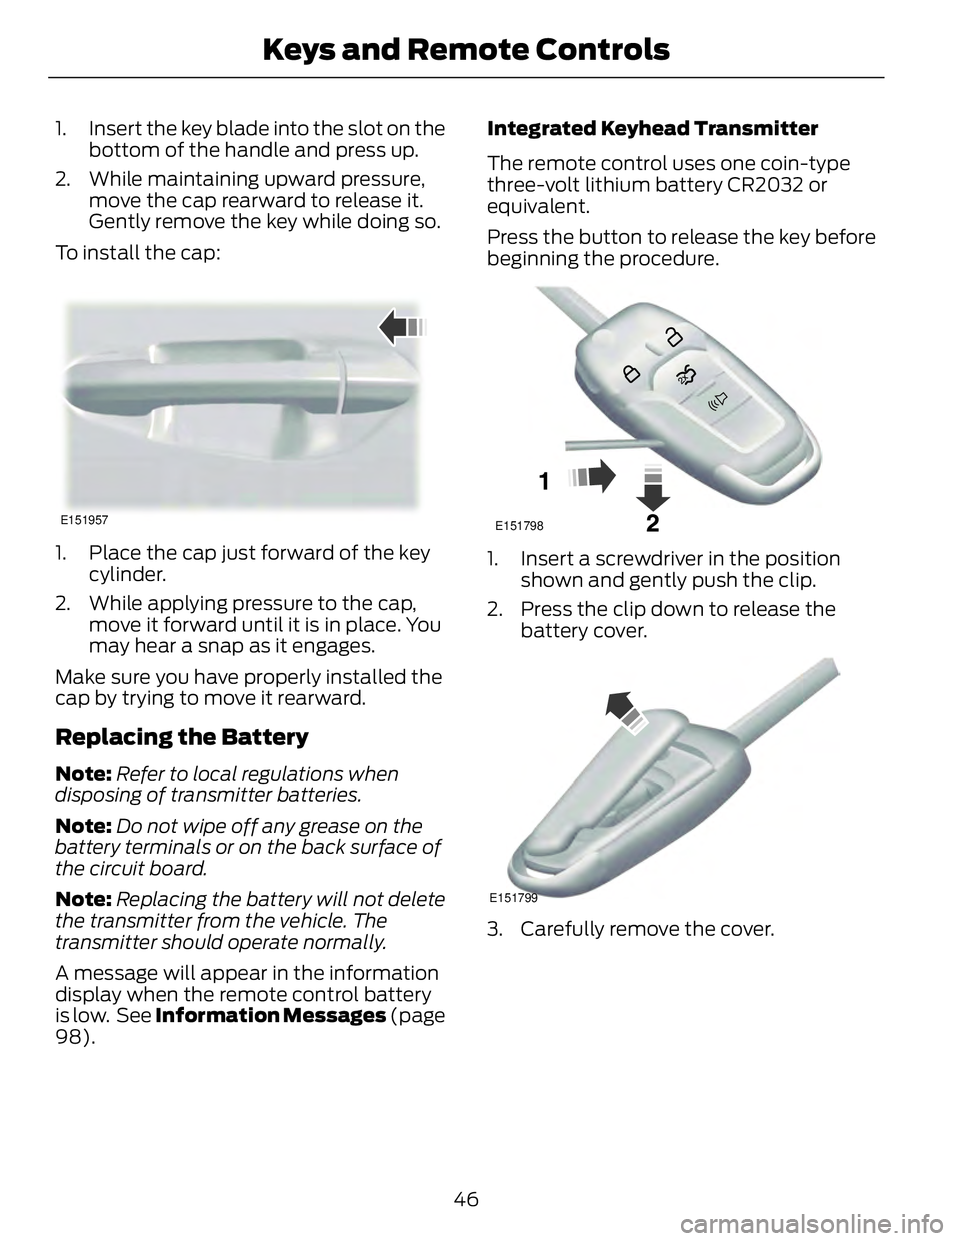
1. Insert the key blade into the slot on the
bottom of the handle and press up.
2. While maintaining upward pressure,
move the cap rearward to release it.
Gently remove the key while doing so.
To install the cap: E151957
1. Place the cap just forward of the key
cylinder.
2. While applying pressure to the cap,
move it forward until it is in place. You
may hear a snap as it engages.
Make sure you have properly installed the
cap by trying to move it rearward.
Replacing the Battery Note: Refer to local regulations when
disposing of transmitter batteries.
Note: Do not wipe off any grease on the
battery terminals or on the back surface of
the circuit board.
Note: Replacing the battery will not delete
the transmitter from the vehicle. The
transmitter should operate normally.
A message will appear in the information
display when the remote control battery
is low. See Information Messages (page
98). Integrated Keyhead Transmitter
The remote control uses one coin-type
three-volt lithium battery CR2032 or
equivalent.
Press the button to release the key before
beginning the procedure. E151798
1. Insert a screwdriver in the position
shown and gently push the clip.
2. Press the clip down to release the
battery cover.
E151799
3. Carefully remove the cover.
46Keys and Remote Controls
Page 50 of 473
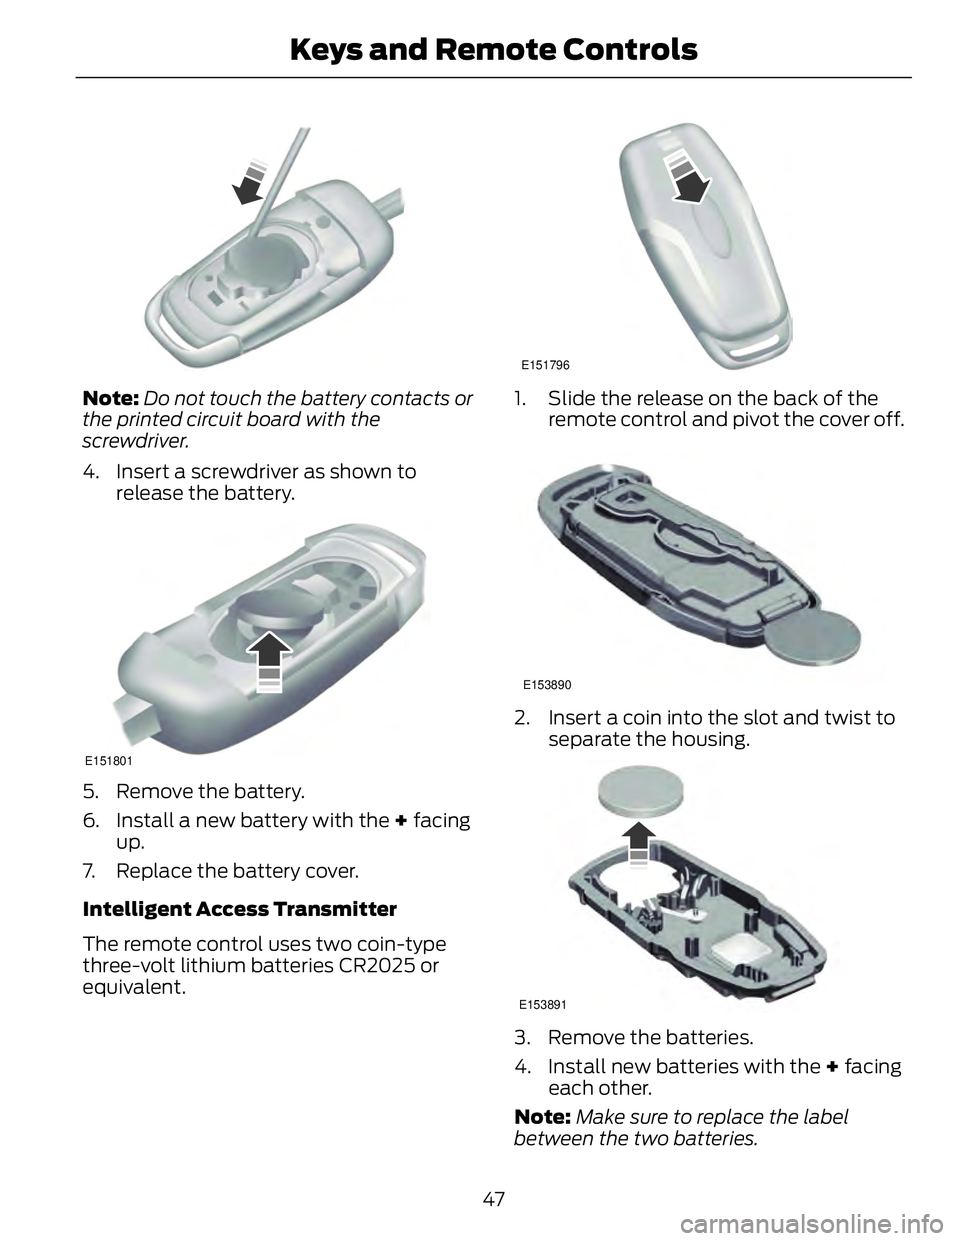
Note: Do not touch the battery contacts or
the printed circuit board with the
screwdriver.
4. Insert a screwdriver as shown to
release the battery. E151801
5. Remove the battery.
6. Install a new battery with the + facing
up.
7. Replace the battery cover.
Intelligent Access Transmitter
The remote control uses two coin-type
three-volt lithium batteries CR2025 or
equivalent. E151796
1. Slide the release on the back of the
remote control and pivot the cover off. E153890
2. Insert a coin into the slot and twist to
separate the housing.
E153891
3. Remove the batteries.
4. Install new batteries with the + facing
each other.
Note: Make sure to replace the label
between the two batteries.
47Keys and Remote Controls
Page 51 of 473
5. Reinstall the housing and cover.
Car Finder E138623
Press the button twice within
three seconds. The horn will
sound and the turn signals will
flash. We recommend you use this method
to locate your vehicle, rather than using
the panic alarm.
Sounding a Panic Alarm Note: The panic alarm will only operate
when the ignition is off. E138624
Press the button to activate the
alarm. Press the button again or
switch the ignition on to
deactivate.
Remote Start (If Equipped)
WARNING
To avoid exhaust fumes, do not use
remote start if your vehicle is parked
indoors or areas that are not well
ventilated.
Note: Do not use remote start if your vehicle
is low on fuel. E138625
The remote start button is on the
transmitter.
This feature allows you to start your
vehicle from outside the vehicle. The
transmitter has an extended operating
range.
Vehicles with automatic climate control
can be configured to operate when the
vehicle is remote started. See Climate
Control (page 113). A manual climate
control system will run at the setting it was
set to when you switched the vehicle off. Many states and provinces have
restrictions for the use of remote start.
Check your local and state or provincial
laws for specific requirements regarding
remote start systems.
The remote start system will not work if:
• the ignition is on
• the alarm system triggered
• you disable the feature
• the hood is open
• the transmission is not in P
• the vehicle battery voltage is too low
• the service engine soon light is on.
Remote Control Feedback
An LED on the remote control provides
status feedback of remote start or stop
commands. StatusLED
Remote start or
extension
successfulSolid green
Remote stop
successful; engine
offSolid red
Remote start or
stop failedBlinking red
Waiting for status
updateBlinking green
Remote Starting the Vehicle
Note: You must press each button within
three seconds of each other. Your vehicle
will not remote start if you do not follow this
sequence.
48Keys and Remote Controls
Page 60 of 473
The illuminated entry system will turn off
the lights if:
• the ignition is on,
• you press the remote control lock
button, or
• after 25 seconds of illumination.
The lights will not turn off if:
• you turn them on with the lamp control,
or
• any door is open.
Illuminated Exit The interior lamps and select exterior
lamps will illuminate when all doors are
closed, you switch the ignition off and you
remove the key from the ignition
(integrated keyhead transmitter only).
The lamps will turn off if all the doors
remain closed and:
• 25 seconds elapse
• you insert the key in the ignition
(integrated keyhead transmitter only)
• you press the START/STOP button
(intelligent access key only).
Battery Saver If you leave the courtesy lamps, dome
lamps or headlamps on, the battery saver
will shut them off 10 minutes after you
switch the ignition off.
Accessory Mode Battery Saver for
Intelligent Access Keys (If Equipped)
If you leave your vehicle in the run ignition
state, it will shut off once it detects a
certain amount of battery drain or after 45
minutes. Luggage Compartment With the Remote Control E138630
Press twice within three seconds
to unlatch the trunk.
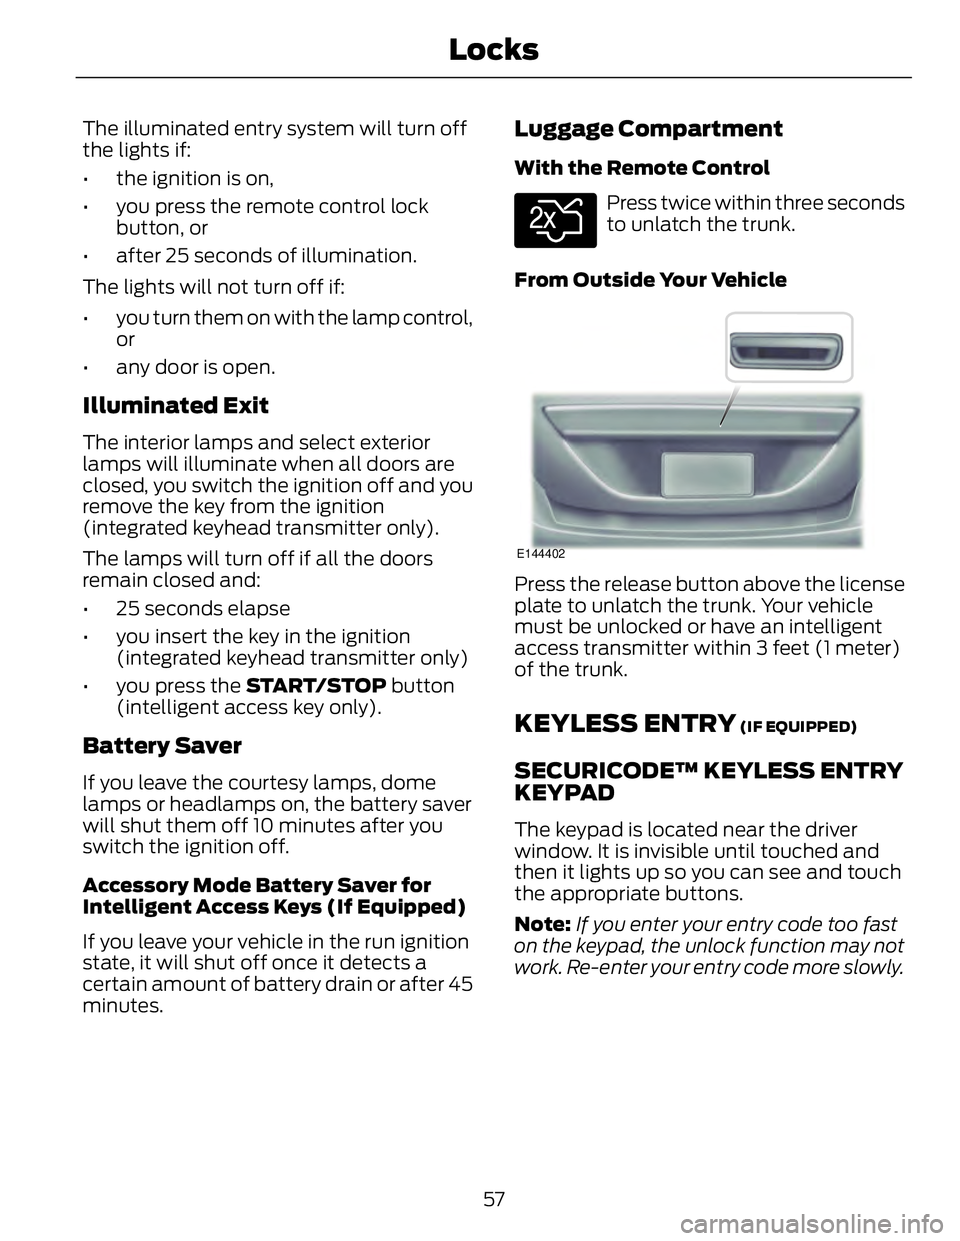
From Outside Your Vehicle E144402
Press the release button above the license
plate to unlatch the trunk. Your vehicle
must be unlocked or have an intelligent
access transmitter within 3 feet (1 meter)
of the trunk.
KEYLESS ENTRY (IF EQUIPPED)
SECURICODE™ KEYLESS ENTRY
KEYPAD The keypad is located near the driver
window. It is invisible until touched and
then it lights up so you can see and touch
the appropriate buttons.
Note: If you enter your entry code too fast
on the keypad, the unlock function may not
work. Re-enter your entry code more slowly.
57Locks
Page 73 of 473
Note: If you switch autolamps on in
conjunction with autowipers, low beam
headlamps will illuminate automatically
when the rain sensor activates the
windshield wipers continuously.
INSTRUMENT LIGHTING
DIMMER Note: If you disconnect the battery or it
becomes discharged, the illuminated
components will switch to the maximum
setting.
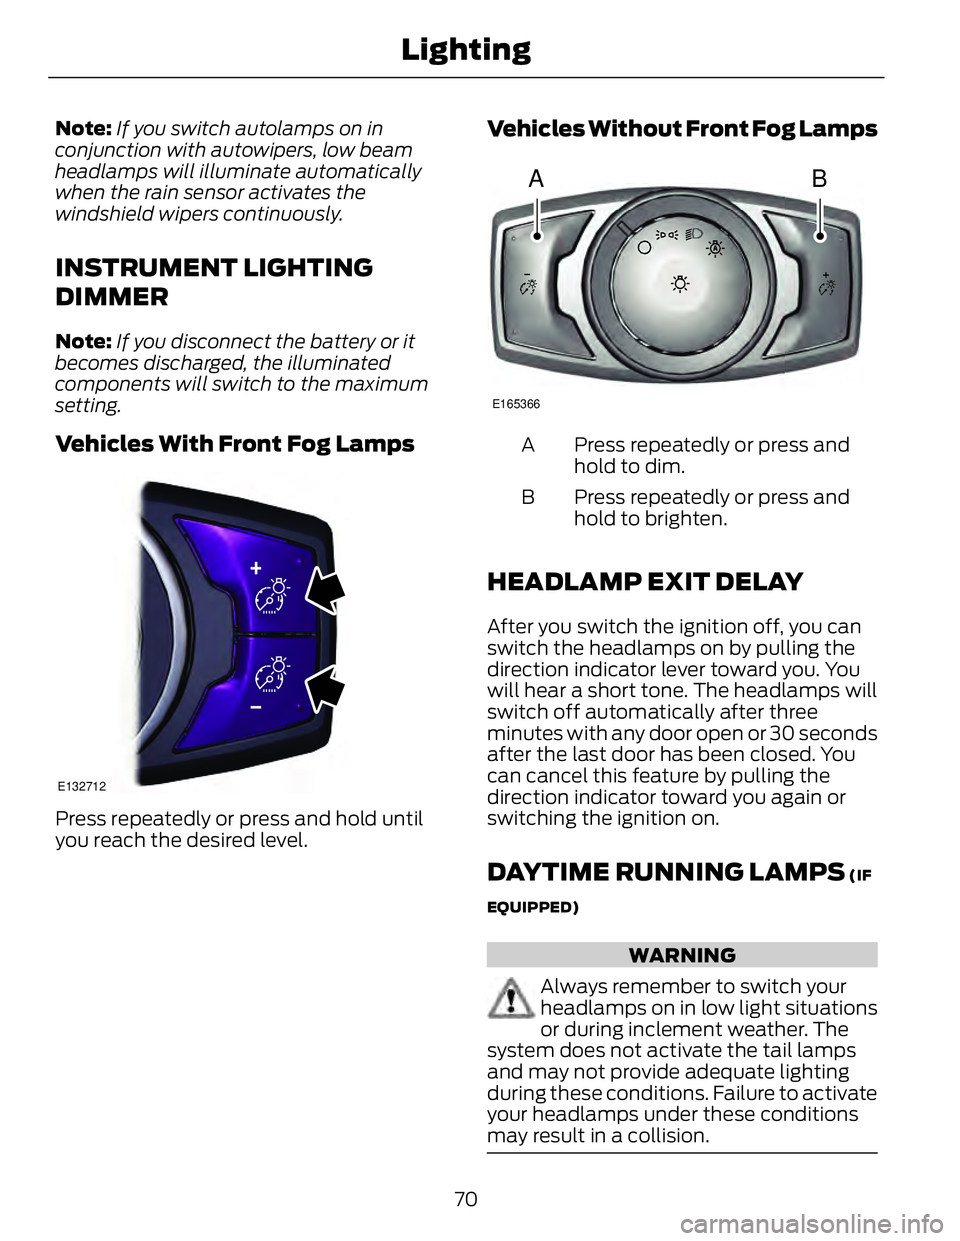
Vehicles With Front Fog Lamps E132712
Press repeatedly or press and hold until
you reach the desired level. Vehicles Without Front Fog Lamps
A B E165366
Press repeatedly or press and
hold to dim.A
Press repeatedly or press and
hold to brighten.B
HEADLAMP EXIT DELAY After you switch the ignition off, you can
switch the headlamps on by pulling the
direction indicator lever toward you. You
will hear a short tone. The headlamps will
switch off automatically after three
minutes with any door open or 30 seconds
after the last door has been closed. You
can cancel this feature by pulling the
direction indicator toward you again or
switching the ignition on.
DAYTIME RUNNING LAMPS (IF
EQUIPPED)
WARNING
Always remember to switch your
headlamps on in low light situations
or during inclement weather. The
system does not activate the tail lamps
and may not provide adequate lighting
during these conditions. Failure to activate
your headlamps under these conditions
may result in a collision.
70Lighting
Page 77 of 473
POWER WINDOWS WARNINGS
Do not leave children unattended in
your vehicle and do not let them play
with the power windows. They may
seriously injure themselves.
When closing the power windows,
you should verify they are free of
obstructions and make sure that
children and pets are not in the proximity
of the window openings.
Note: Window operation may stop or delay
during low battery conditions and engine
re-cranking. It will resume after the engine
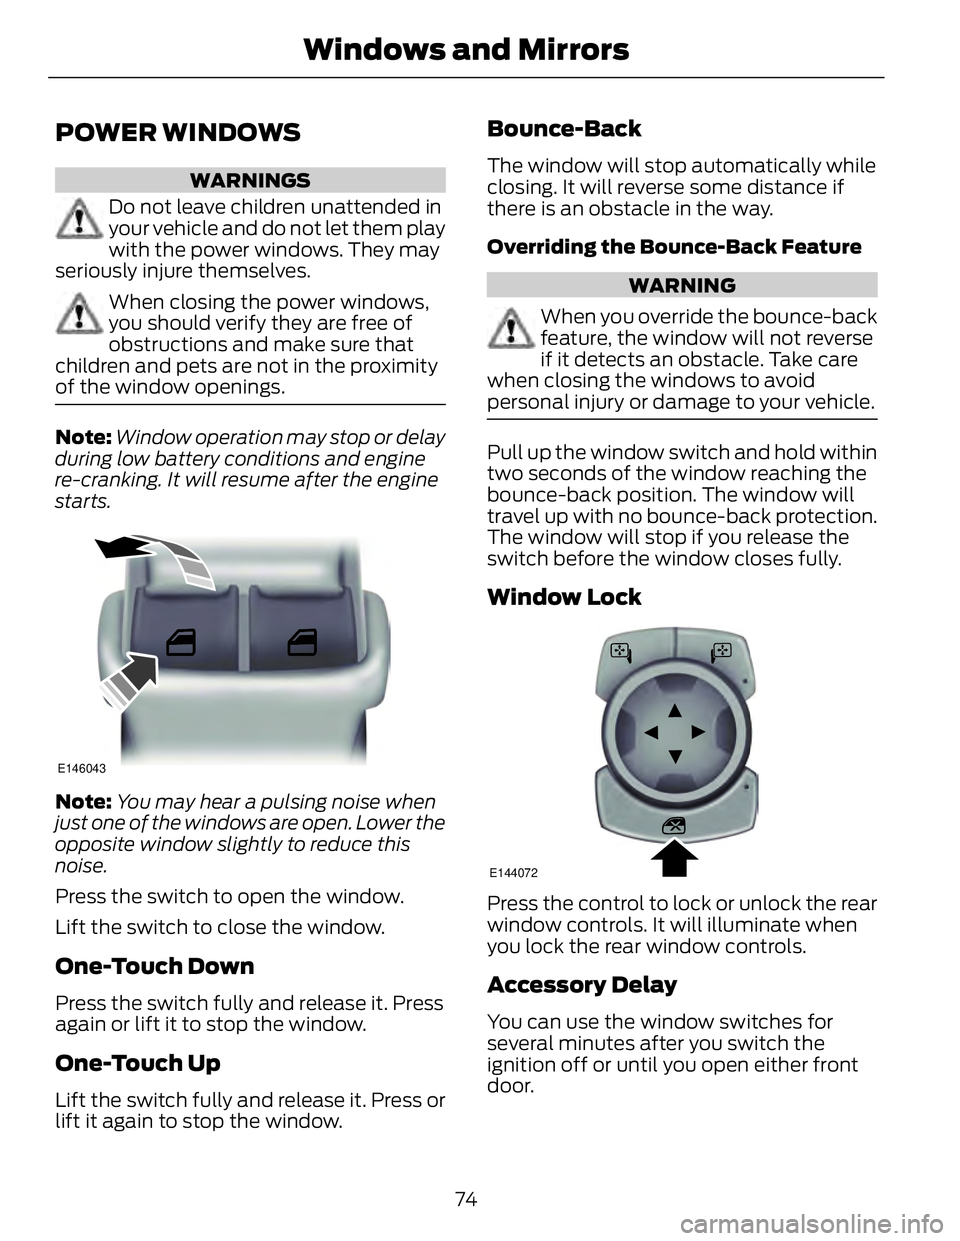
starts. E146043
Note: You may hear a pulsing noise when
just one of the windows are open. Lower the
opposite window slightly to reduce this
noise.
Press the switch to open the window.
Lift the switch to close the window.
One-Touch Down
Press the switch fully and release it. Press
again or lift it to stop the window.
One-Touch Up
Lift the switch fully and release it. Press or
lift it again to stop the window. Bounce-Back The window will stop automatically while
closing. It will reverse some distance if
there is an obstacle in the way.
Overriding the Bounce-Back Feature
WARNING
When you override the bounce-back
feature, the window will not reverse
if it detects an obstacle. Take care
when closing the windows to avoid
personal injury or damage to your vehicle.
Pull up the window switch and hold within
two seconds of the window reaching the
bounce-back position. The window will
travel up with no bounce-back protection.
The window will stop if you release the
switch before the window closes fully.
Window Lock E144072
Press the control to lock or unlock the rear
window controls. It will illuminate when
you lock the rear window controls.
Accessory Delay
You can use the window switches for
several minutes after you switch the
ignition off or until you open either front
door.
74Windows and Mirrors