transmission FORD FUSION HYBRID 2014 Owners Manual
[x] Cancel search | Manufacturer: FORD, Model Year: 2014, Model line: FUSION HYBRID, Model: FORD FUSION HYBRID 2014Pages: 473, PDF Size: 5.93 MB
Page 6 of 473
Fuel and Refueling Safety Precautions......................................148
Fuel Quality....................................................149
Refueling .........................................................149
Running Out of Fuel.....................................153
Fuel Consumption.......................................156
Emission Control System...........................157
High Voltage Battery General Information....................................160
Charging the High Voltage Battery.........161
High Voltage Battery Cut-Off
Switch...........................................................164
Transmission Automatic Transmission...........................166
Brakes General Information....................................169
Hints on Driving With Anti-Lock
Brakes...........................................................170
Electric Parking Brake.................................170
Hill Start Assist...............................................172
Traction Control Principle of Operation.................................174
Using Traction Control................................174
Stability Control Principle of Operation.................................175
Using Stability Control................................175
Parking Aids Parking Aid......................................................176
Active Park Assist.........................................178
Rear View Camera........................................181
Cruise Control
Principle of Operation.................................185
Using Cruise Control....................................185 Using Adaptive Cruise Control................186
Driving Aids Driver Alert......................................................192
Lane Keeping System.................................193
Blind Spot Monitor.......................................197
Steering ............................................................ 201
Collision Warning System........................202
Load Carrying Load Limit......................................................205
Towing Towing a Trailer..............................................213
Transporting the Vehicle............................213
Towing the Vehicle on Four Wheels......213
Driving Hints Breaking-In ...................................................... 215
Economical Driving......................................215
Driving Through Water................................215
Floor Mats........................................................216
Customer Assistance Getting the Services You Need................218
In California (U.S. Only).............................219
The Better Business Bureau (BBB) Auto
Line Program (U.S. Only).....................220
Utilizing the Mediation/Arbitration
Program (Canada Only).......................220
Getting Assistance Outside the U.S. and
Canada.........................................................221
Ordering Additional Owner's
Literature.....................................................222
Reporting Safety Defects (U.S.
Only).............................................................222
Reporting Safety Defects (Canada
Only).............................................................223
Roadside Emergencies
Roadside Assistance..................................224
3Table of Contents
Page 7 of 473
Hazard Warning Flashers..........................225
Fuel Shutoff...................................................225
Jump-Starting the Vehicle........................225
Collision, Damage or Fire Event.............228
Post-Crash Alert System..........................230
Fuses Changing a Fuse............................................231
Fuse Specification Chart............................231
Maintenance General Information....................................241
Opening and Closing the Hood...............241
Under Hood Overview - 2.0L Hybrid.....242
Engine Oil Dipstick - 2.0L Hybrid...........244
Engine Oil Check..........................................244
Oil Change Indicator Reset......................245
Engine Coolant Check...............................245
Automatic Transmission Fluid
Check...........................................................249
Brake Fluid Check........................................249
Power Steering Fluid Check....................249
Fuel Filter........................................................249
Washer Fluid Check....................................249
Changing the 12V Battery.........................249
Checking the Wiper Blades.......................251
Changing the Wiper Blades......................251
Changing the Engine Air Filter.................252
Adjusting the Headlamps.........................253
Removing a Headlamp..............................254
Changing a Bulb...........................................255
Bulb Specification Chart..........................258
Vehicle Care General Information...................................260
Cleaning Products......................................260
Cleaning the Exterior.................................260
Repairing Minor Paint Damage...............261
Waxing ..............................................................261 Cleaning the Engine....................................262
Cleaning the Windows and Wiper
Blades..........................................................262
Cleaning the Interior...................................262
Cleaning the Instrument Panel and
Instrument Cluster Lens.......................263
Cleaning Leather Seats.............................264
Cleaning the Alloy Wheels.......................264
Vehicle Storage............................................265
Wheels and Tires Temporary Mobility Kit...............................267
Tire Care...........................................................273
Tire Pressure Monitoring System..........288
Using Snow Chains......................................291
Technical Specifications...........................292
Capacities and Specific-
ations Engine Specifications................................293
Motorcraft Parts..........................................294
Vehicle Identification Number................295
Vehicle Certification Label.......................295
Transmission Code Designation............296
Technical Specifications...........................297
Audio System General Information...................................299
Audio unit - Vehicles With:
AM/FM/CD/SYNC/Satellite
Radio...........................................................300
Audio unit - Vehicles With: Premium
AM/FM/CD ................................................302
Audio unit - Vehicles With: Sony
AM/FM/CD ................................................304
Digital Audio..................................................307
Satellite Radio...............................................310
Auxiliary Input Jack.......................................312
USB Port...........................................................313
Media Hub.......................................................313
4Table of Contents
Page 35 of 473
Deactivating and Activating the
Belt-Minder Feature
WARNING
While the system allows you to
deactivate it, this system is designed
to improve your chances of being
safely belted and surviving an accident.
We recommend you leave the system
activated for yourself and others who may
use the vehicle. To reduce the risk of injury,
do not deactivate or activate the system
while driving the vehicle.
Note: The driver and front passenger
warning are deactivated and activated
independently. When deactivating or
activating one seating position, do not
buckle the other position as this will
terminate the process.
Read Steps 1 - 4 thoroughly before
proceeding with the programming
procedure.
The system can be deactivated or
activated by performing the following
procedure:
Before following the procedure, make sure
that:
• the parking brake is set
• the transmission selector lever is in
position P (automatic transmission)
or N (manual transmission)
• the ignition is off
• the driver and front passenger safety
belts are unbuckled.
1. Turn the ignition on. Do not start the
vehicle.
2. Wait until the safety belt warning light
turns off (about one minute). After
Step 2, wait an additional five seconds
before proceeding with Step 3. Once
Step 3 is started, the procedure must
be completed within 30 seconds. 3. For the seating position being disabled,
buckle then unbuckle the safety belt
three times at a moderate speed,
ending in the unbuckled state. After
Step 3, the safety belt warning light will
turn on.
4. While the safety belt warning light is
on, buckle and then unbuckle the
safety belt. After Step 4, the safety belt
warning light will flash for confirmation.
• This will disable the feature for that
seating position if it is currently
enabled.
• This will enable the feature for that
seating position if it is currently
disabled.
CHILD RESTRAINT AND
SAFETY BELT MAINTENANCE Inspect the vehicle safety belts and child
safety seat systems periodically to make
sure they work properly and are not
damaged. Inspect the vehicle and child
seat safety belts to make sure there are no
nicks, tears or cuts. Replace if necessary.
All vehicle safety belt assemblies, including
retractors, buckles, front safety belt buckle
assemblies, buckle support assemblies
(slide bar-if equipped), shoulder belt
height adjusters (if equipped), shoulder
belt guide on seat back (if equipped), child
safety seat LATCH and tether anchors, and
attaching hardware, should be inspected
after a crash. Read the child restraint
manufacturer's instructions for additional
inspection and maintenance information
specific to the child restraint.
32Safety Belts
Page 47 of 473
GENERAL INFORMATION ON
RADIO FREQUENCIES This device complies with Part 15 of the
FCC Rules and with Industry Canada
license-exempt RSS standard(s).
Operation is subject to the following two
conditions: (1) This device may not cause
harmful interference, and (2) This device
must accept any interference received,
including interference that may cause
undesired operation.
Note: Changes or modifications not
expressively approved by the party
responsible for compliance could void the
user's authority to operate the equipment.
The term IC before the radio certification
number only signifies that Industry Canada
technical specifications were met.
The typical operating range for your
transmitter is approximately 33 feet (10
meters). Vehicles with the remote start
feature will have a greater range. One of
the following could cause a decrease in
operating range:
• weather conditions
• nearby radio towers
• structures around the vehicle
• other vehicles parked next to your
vehicle
The radio frequency used by your remote
control can also be used by other short
distance radio transmissions, for example
amateur radios, medical equipment,
wireless headphones, remote controls and
alarm systems. If the frequencies are
jammed, you will not be able to use your
remote control. You can lock and unlock
the doors with the key.
Note: Make sure to lock your vehicle before
leaving it unattended.
Note: If you are in range, the remote control
will operate if you press any button
unintentionally. Intelligent Access (If Equipped)
The system uses a radio frequency signal
to communicate with your vehicle and
authorize your vehicle to unlock when one
of the following conditions are met:
• You touch the inside of the front
exterior door handle.
• You press the luggage compartment
button.
• You press a button on the transmitter.
If excessive radio frequency interference
is present in the area or if the transmitter
battery is low, you may need to
mechanically unlock your door. You can
use the mechanical key blade in your
intelligent access key to open the driver
door in this situation. See Remote
Control (page 44).
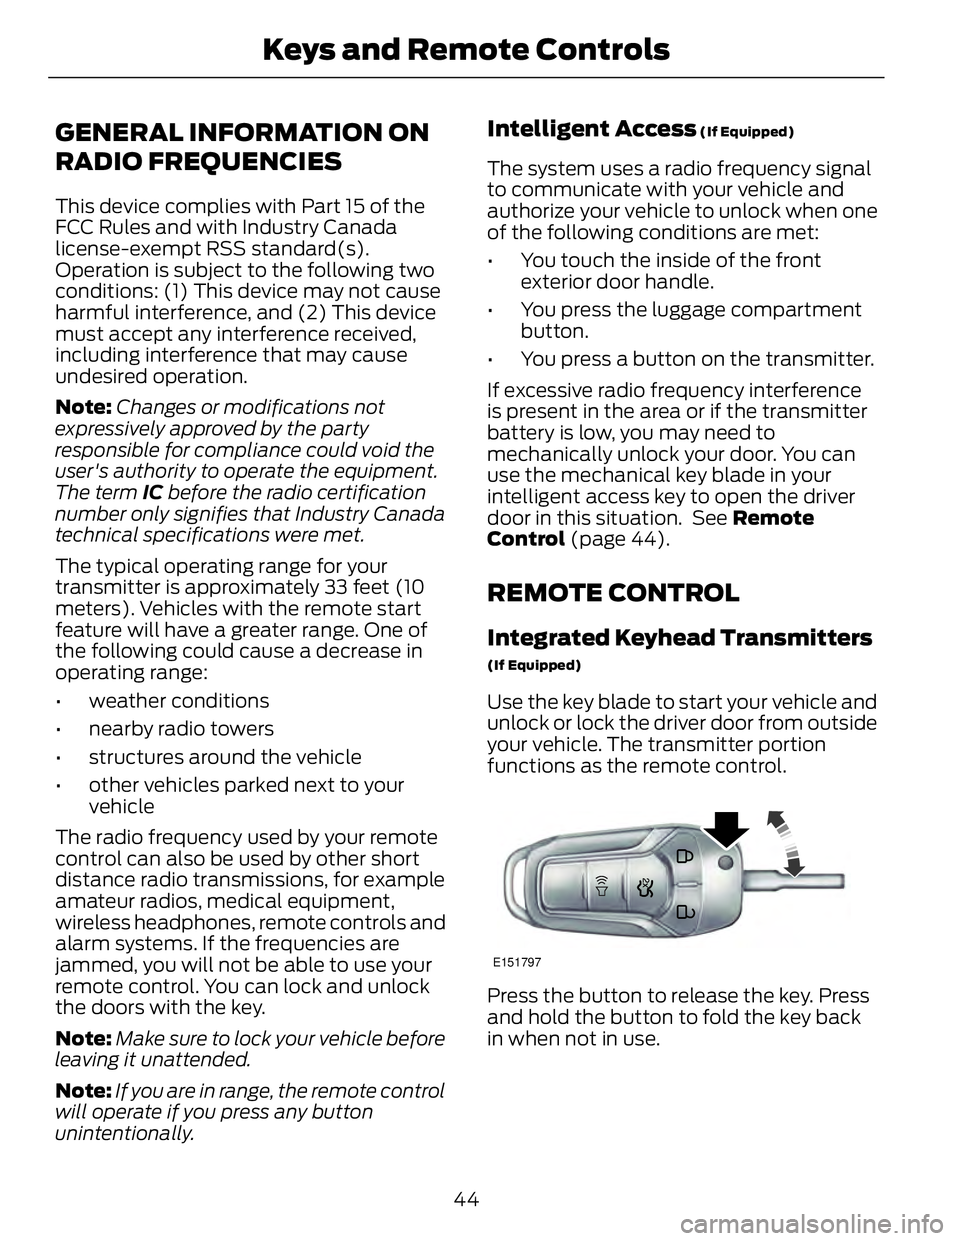
REMOTE CONTROL Integrated Keyhead Transmitters (If Equipped)
Use the key blade to start your vehicle and
unlock or lock the driver door from outside
your vehicle. The transmitter portion
functions as the remote control.
E151797
Press the button to release the key. Press
and hold the button to fold the key back
in when not in use.
44Keys and Remote Controls
Page 51 of 473
5. Reinstall the housing and cover.
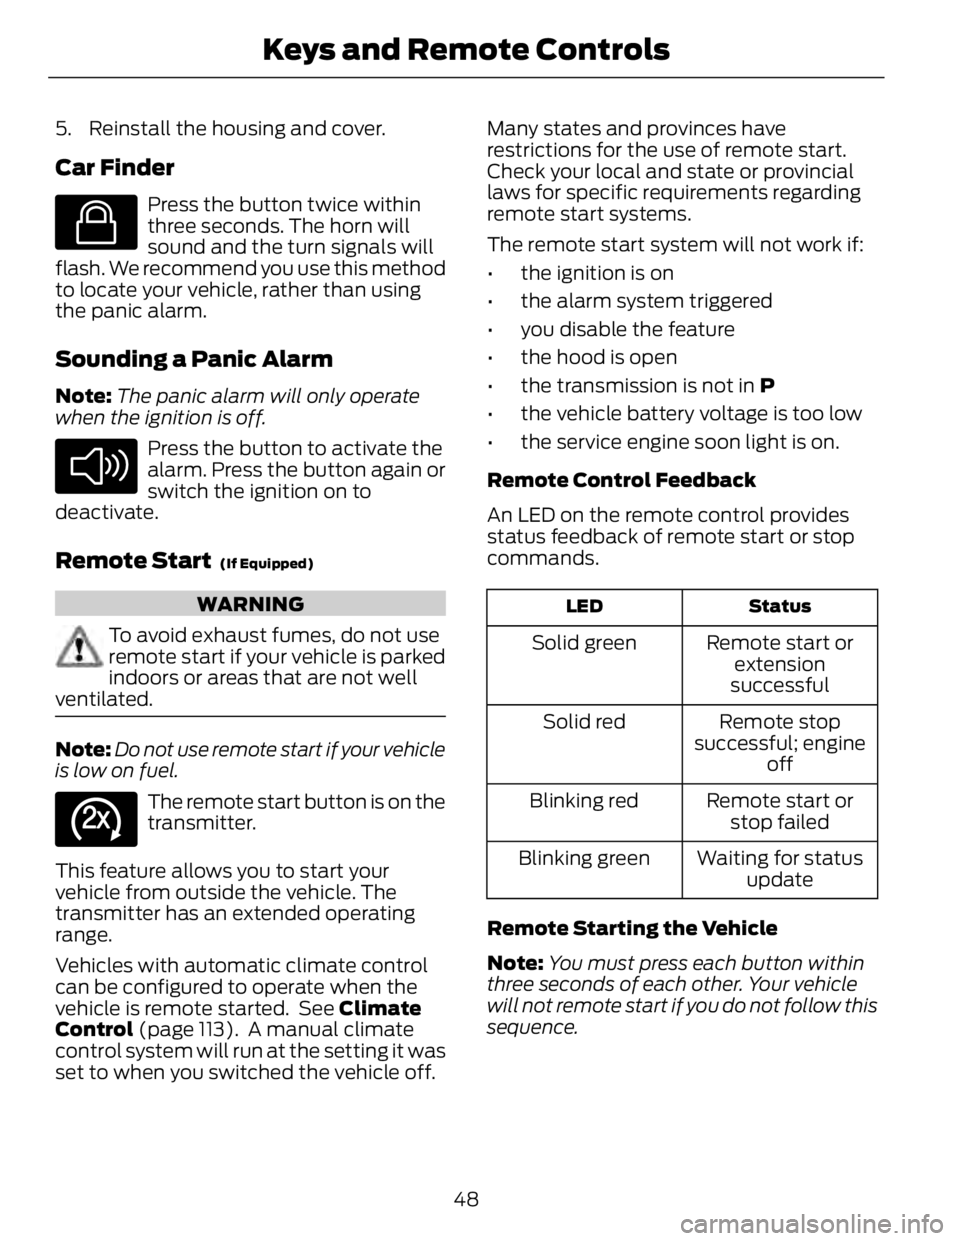
Car Finder E138623
Press the button twice within
three seconds. The horn will
sound and the turn signals will
flash. We recommend you use this method
to locate your vehicle, rather than using
the panic alarm.
Sounding a Panic Alarm Note: The panic alarm will only operate
when the ignition is off. E138624
Press the button to activate the
alarm. Press the button again or
switch the ignition on to
deactivate.
Remote Start (If Equipped)
WARNING
To avoid exhaust fumes, do not use
remote start if your vehicle is parked
indoors or areas that are not well
ventilated.
Note: Do not use remote start if your vehicle
is low on fuel. E138625
The remote start button is on the
transmitter.
This feature allows you to start your
vehicle from outside the vehicle. The
transmitter has an extended operating
range.
Vehicles with automatic climate control
can be configured to operate when the
vehicle is remote started. See Climate
Control (page 113). A manual climate
control system will run at the setting it was
set to when you switched the vehicle off. Many states and provinces have
restrictions for the use of remote start.
Check your local and state or provincial
laws for specific requirements regarding
remote start systems.
The remote start system will not work if:
• the ignition is on
• the alarm system triggered
• you disable the feature
• the hood is open
• the transmission is not in P
• the vehicle battery voltage is too low
• the service engine soon light is on.
Remote Control Feedback
An LED on the remote control provides
status feedback of remote start or stop
commands. StatusLED
Remote start or
extension
successfulSolid green
Remote stop
successful; engine
offSolid red
Remote start or
stop failedBlinking red
Waiting for status
updateBlinking green
Remote Starting the Vehicle
Note: You must press each button within
three seconds of each other. Your vehicle
will not remote start if you do not follow this
sequence.
48Keys and Remote Controls
Page 114 of 473
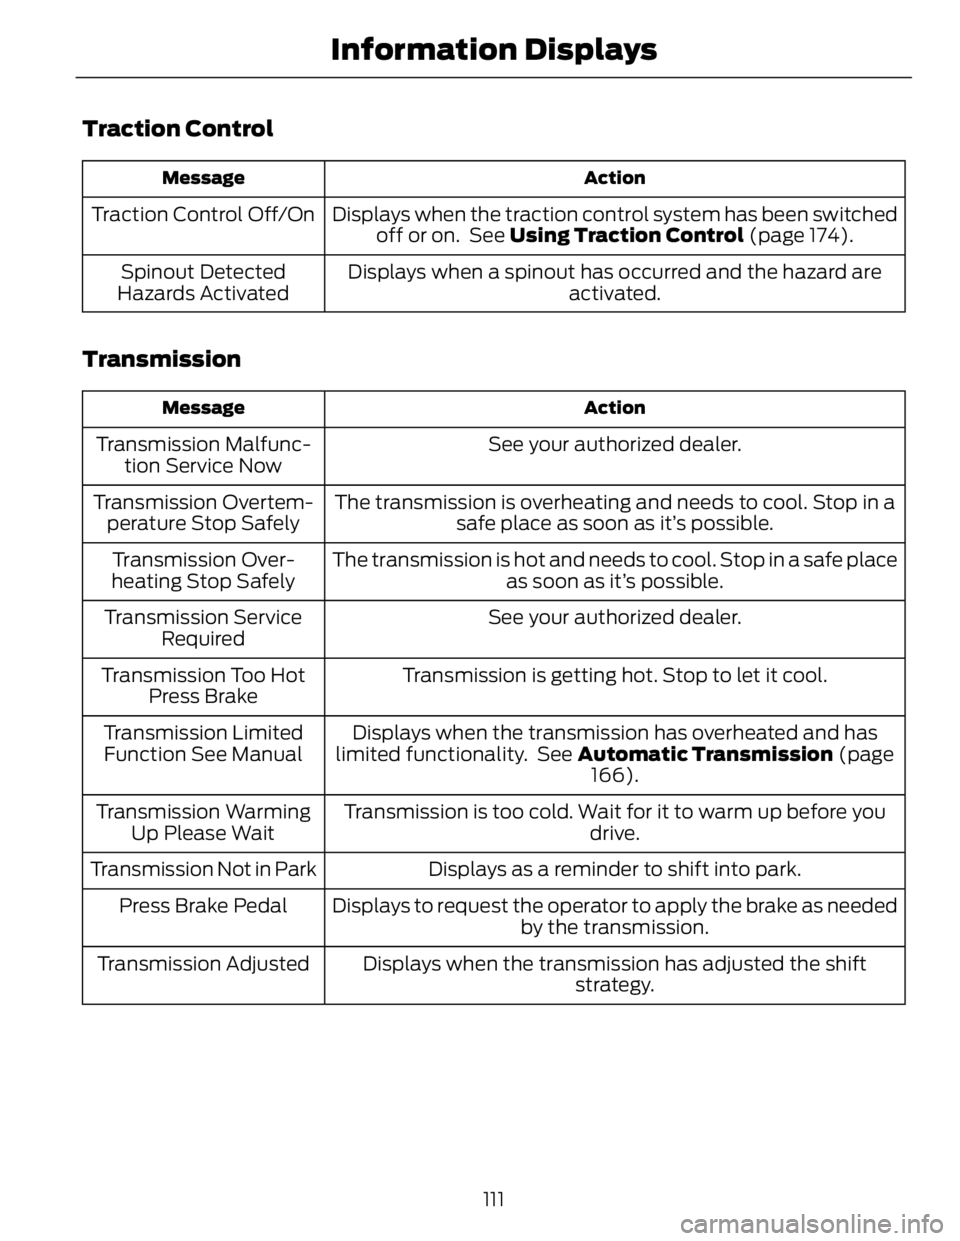
Traction Control ActionMessage
Displays when the traction control system has been switched
off or on. See Using Traction Control (page 174).Traction Control Off/On
Displays when a spinout has occurred and the hazard are
activated.Spinout Detected
Hazards Activated
Transmission ActionMessage
See your authorized dealer.Transmission Malfunc-
tion Service Now
The transmission is overheating and needs to cool. Stop in a
safe place as soon as it’s possible.Transmission Overtem-
perature Stop Safely
The transmission is hot and needs to cool. Stop in a safe place
as soon as it’s possible.Transmission Over-
heating Stop Safely
See your authorized dealer.Transmission Service
Required
Transmission is getting hot. Stop to let it cool.Transmission Too Hot
Press Brake
Displays when the transmission has overheated and has
limited functionality. See Automatic Transmission (page
166).Transmission Limited
Function See Manual
Transmission is too cold. Wait for it to warm up before you
drive.Transmission Warming
Up Please Wait
Displays as a reminder to shift into park.Transmission Not in Park
Displays to request the operator to apply the brake as needed
by the transmission.Press Brake Pedal
Displays when the transmission has adjusted the shift
strategy.Transmission Adjusted
111Information Displays
Page 115 of 473
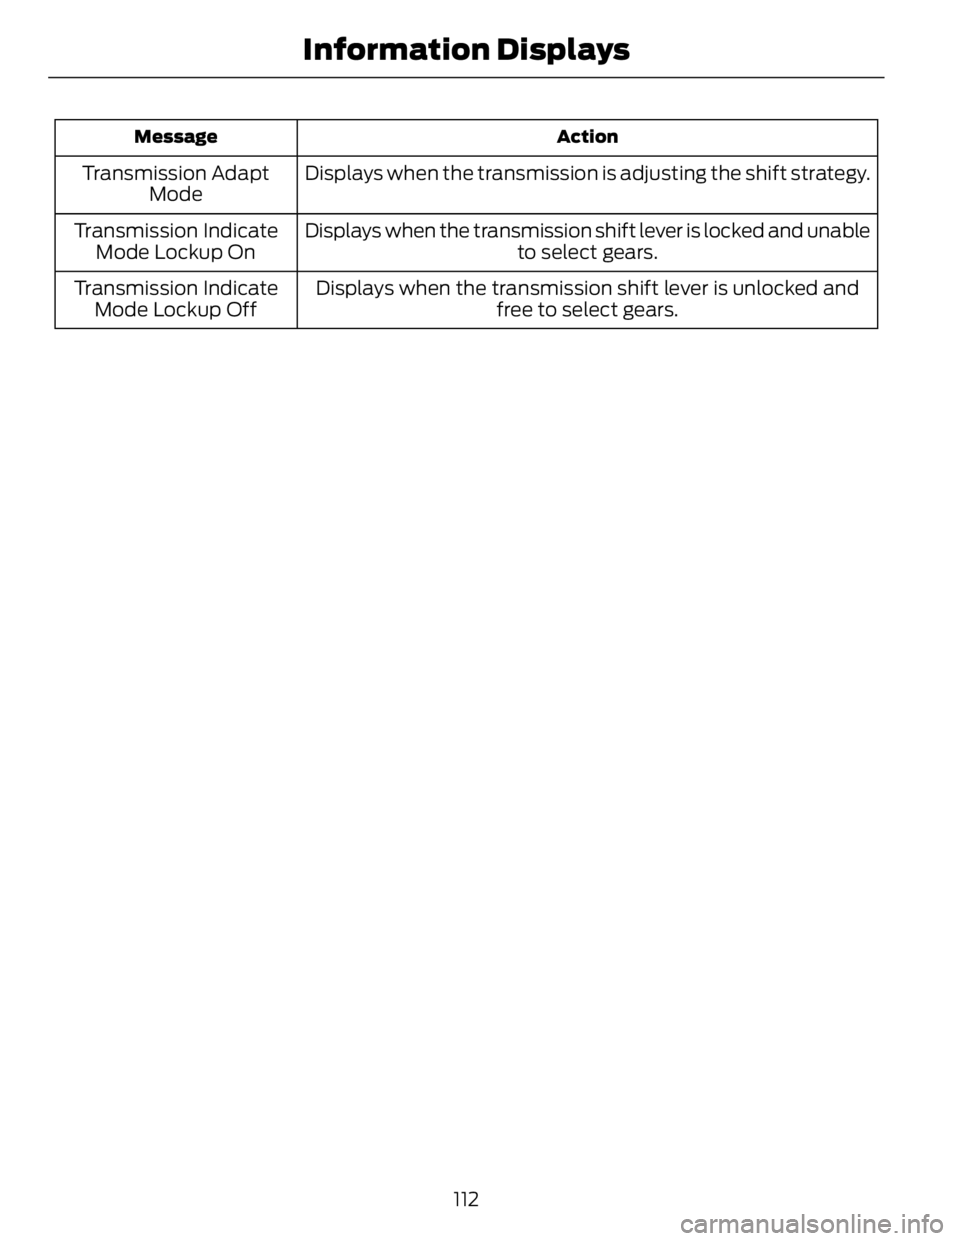
ActionMessage
Displays when the transmission is adjusting the shift strategy.Transmission Adapt
Mode
Displays when the transmission shift lever is locked and unable
to select gears.Transmission Indicate
Mode Lockup On
Displays when the transmission shift lever is unlocked and
free to select gears.Transmission Indicate
Mode Lockup Off
112Information Displays
Page 128 of 473
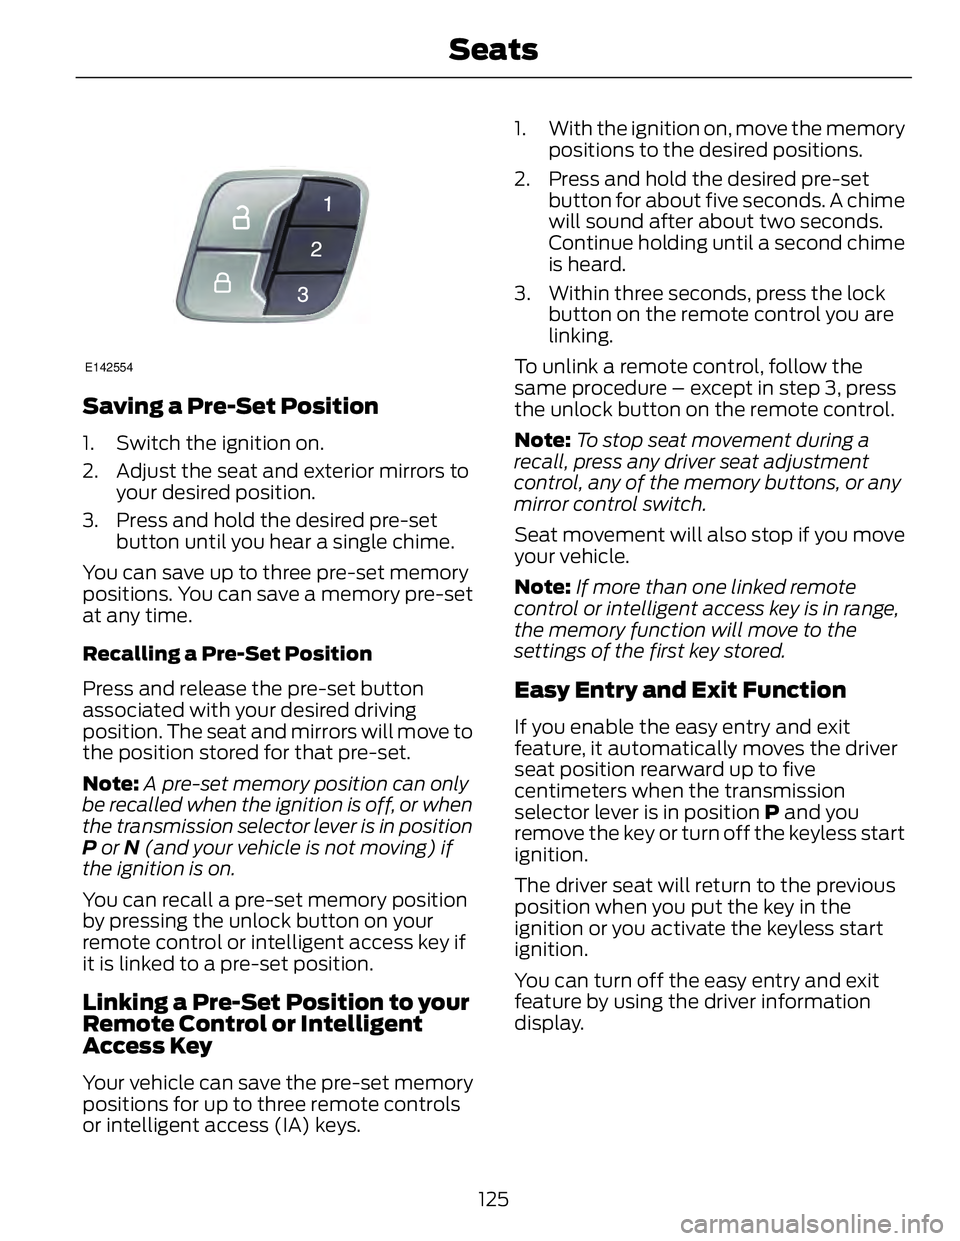
E142554
Saving a Pre-Set Position 1. Switch the ignition on.
2. Adjust the seat and exterior mirrors to
your desired position.
3. Press and hold the desired pre-set
button until you hear a single chime.
You can save up to three pre-set memory
positions. You can save a memory pre-set
at any time.
Recalling a Pre-Set Position
Press and release the pre-set button
associated with your desired driving
position. The seat and mirrors will move to
the position stored for that pre-set.
Note: A pre-set memory position can only
be recalled when the ignition is off, or when
the transmission selector lever is in position
P or N (and your vehicle is not moving) if
the ignition is on.
You can recall a pre-set memory position
by pressing the unlock button on your
remote control or intelligent access key if
it is linked to a pre-set position.
Linking a Pre-Set Position to your
Remote Control or Intelligent
Access Key
Your vehicle can save the pre-set memory
positions for up to three remote controls
or intelligent access (IA) keys. 1. With the ignition on, move the memory
positions to the desired positions.
2. Press and hold the desired pre-set
button for about five seconds. A chime
will sound after about two seconds.
Continue holding until a second chime
is heard.
3. Within three seconds, press the lock
button on the remote control you are
linking.
To unlink a remote control, follow the
same procedure – except in step 3, press
the unlock button on the remote control.
Note: To stop seat movement during a
recall, press any driver seat adjustment
control, any of the memory buttons, or any
mirror control switch.
Seat movement will also stop if you move
your vehicle.
Note: If more than one linked remote
control or intelligent access key is in range,
the memory function will move to the
settings of the first key stored.
Easy Entry and Exit Function If you enable the easy entry and exit
feature, it automatically moves the driver
seat position rearward up to five
centimeters when the transmission
selector lever is in position P and you
remove the key or turn off the keyless start
ignition.
The driver seat will return to the previous
position when you put the key in the
ignition or you activate the keyless start
ignition.
You can turn off the easy entry and exit
feature by using the driver information
display.
125Seats
Page 132 of 473
HomeLink Wireless Control
System (If Equipped)
WARNING
Do not use the system with any
garage door opener that does not
have the safety stop and reverse
feature as required by U.S. Federal Safety
Standards (this includes any garage door
opener manufactured before April 1, 1982).
A garage door opener which cannot detect
an object, signaling the door to stop and
reverse, does not meet current federal
safety standards. Using a garage door
opener without these features increases
the risk of serious injury or death.
Note: Make sure that the garage door and
security device are free from obstruction
when you are programming. Do not program
the system with the vehicle in the garage.
Note: Make sure you keep the original
remote control transmitter for use in other
vehicles as well as for future system
programming.
Note: We recommend that upon the sale
or lease termination of your vehicle, you
erase the programmed function buttons for
security reasons. See Erasing the function
button codes later in this section.
Note: You can program a maximum of
three devices. To change or replace any of
the three devices after it has been initially
programmed, you must first erase the
current settings. See Erasing the function
button codes later in this section.
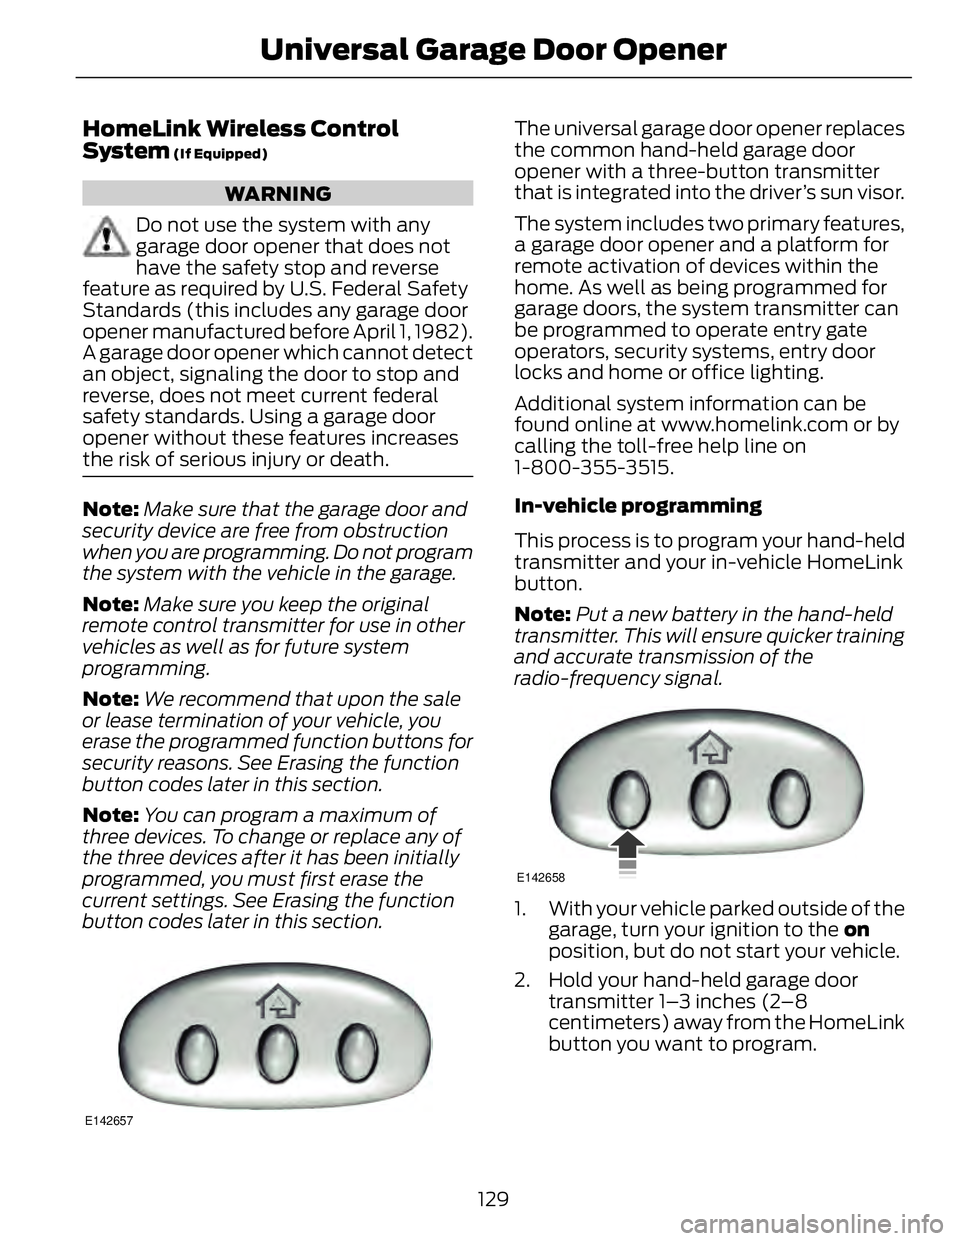
E142657 The universal garage door opener replaces
the common hand-held garage door
opener with a three-button transmitter
that is integrated into the driver’s sun visor.
The system includes two primary features,
a garage door opener and a platform for
remote activation of devices within the
home. As well as being programmed for
garage doors, the system transmitter can
be programmed to operate entry gate
operators, security systems, entry door
locks and home or office lighting.
Additional system information can be
found online at www.homelink.com or by
calling the toll-free help line on
1-800-355-3515.
In-vehicle programming
This process is to program your hand-held
transmitter and your in-vehicle HomeLink
button.
Note: Put a new battery in the hand-held
transmitter. This will ensure quicker training
and accurate transmission of the
radio-frequency signal. E142658
1. With your vehicle parked outside of the
garage, turn your ignition to the on
position, but do not start your vehicle.
2. Hold your hand-held garage door
transmitter 1–3 inches (2–8
centimeters) away from the HomeLink
button you want to program.
129Universal Ga rage Door Opener
Page 140 of 473
Ignition Modes E169299
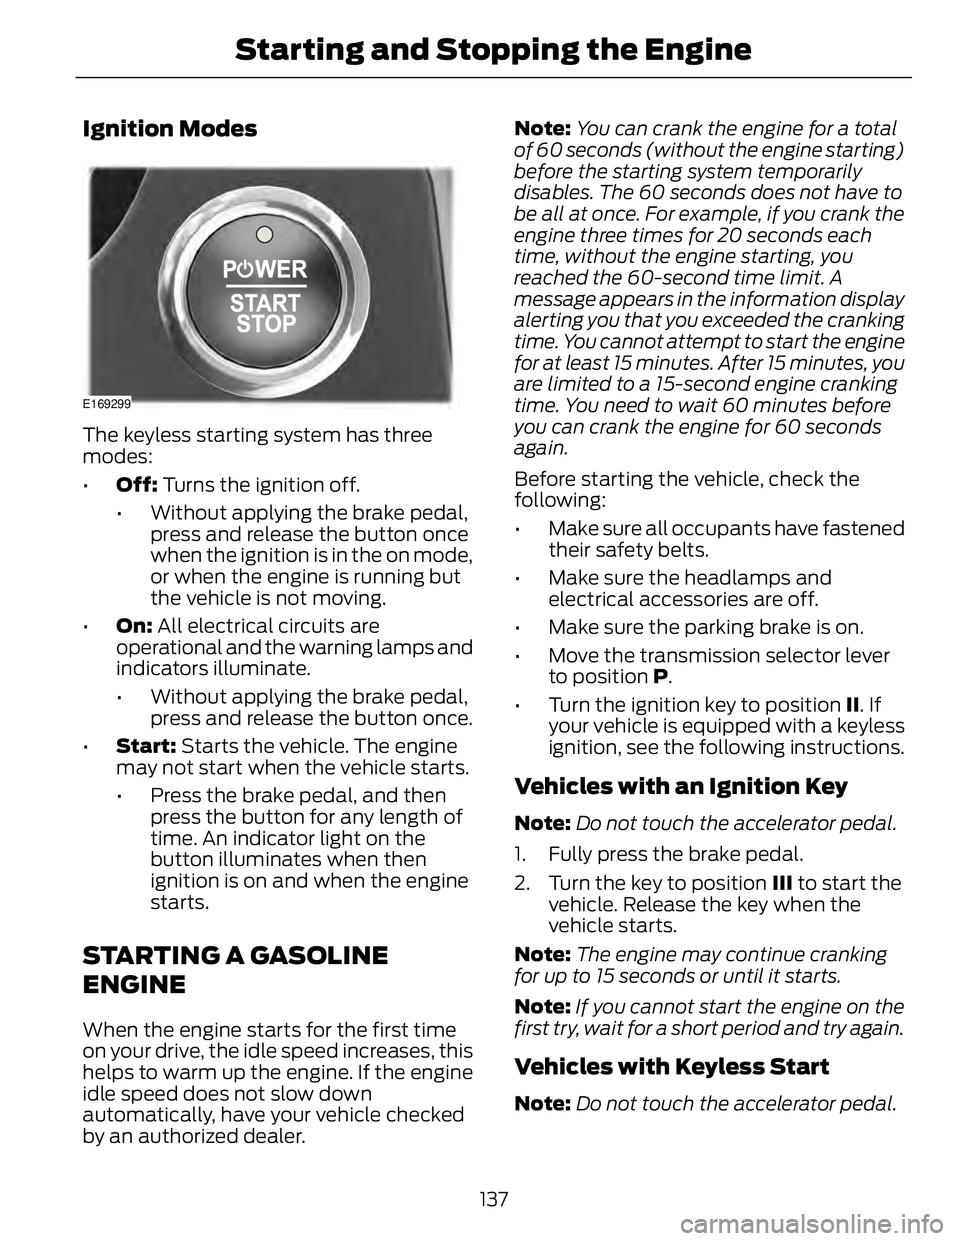
The keyless starting system has three
modes:
• Off: Turns the ignition off.
• Without applying the brake pedal,
press and release the button once
when the ignition is in the on mode,
or when the engine is running but
the vehicle is not moving.
• On: All electrical circuits are
operational and the warning lamps and
indicators illuminate.
• Without applying the brake pedal,
press and release the button once.
• Start: Starts the vehicle. The engine
may not start when the vehicle starts.
• Press the brake pedal, and then
press the button for any length of
time. An indicator light on the
button illuminates when then
ignition is on and when the engine
starts.
STARTING A GASOLINE
ENGINE When the engine starts for the first time
on your drive, the idle speed increases, this
helps to warm up the engine. If the engine
idle speed does not slow down
automatically, have your vehicle checked
by an authorized dealer. Note: You can crank the engine for a total
of 60 seconds (without the engine starting)
before the starting system temporarily
disables. The 60 seconds does not have to
be all at once. For example, if you crank the
engine three times for 20 seconds each
time, without the engine starting, you
reached the 60-second time limit. A
message appears in the information display
alerting you that you exceeded the cranking
time. You cannot attempt to start the engine
for at least 15 minutes. After 15 minutes, you
are limited to a 15-second engine cranking
time. You need to wait 60 minutes before
you can crank the engine for 60 seconds
again.
Before starting the vehicle, check the
following:
• Make sure all occupants have fastened
their safety belts.
• Make sure the headlamps and
electrical accessories are off.
• Make sure the parking brake is on.
• Move the transmission selector lever
to position P .
• Turn the ignition key to position II . If
your vehicle is equipped with a keyless
ignition, see the following instructions.
Vehicles with an Ignition Key Note: Do not touch the accelerator pedal.
1. Fully press the brake pedal.
2. Turn the key to position III to start the
vehicle. Release the key when the
vehicle starts.
Note: The engine may continue cranking
for up to 15 seconds or until it starts.
Note: If you cannot start the engine on the
first try, wait for a short period and try again.
Vehicles with Keyless Start
Note: Do not touch the accelerator pedal.
137Starting and Stopping the Engine