ECO mode FORD FUSION/HYBRID 2018 Service Manual
[x] Cancel search | Manufacturer: FORD, Model Year: 2018, Model line: FUSION/HYBRID, Model: FORD FUSION/HYBRID 2018Pages: 538, PDF Size: 6.06 MB
Page 124 of 538
AUTO
Press to switch on automatic operation,
then adjust the temperature control to
select the desired temperature. The
system adjusts fan speed, air distribution,
air conditioning operation, and outside or
recirculated air to heat or cool the vehicle
to maintain the desired temperature.
Note:
You can also switch off dual zone
mode by pressing and holding the button
for more than two seconds.
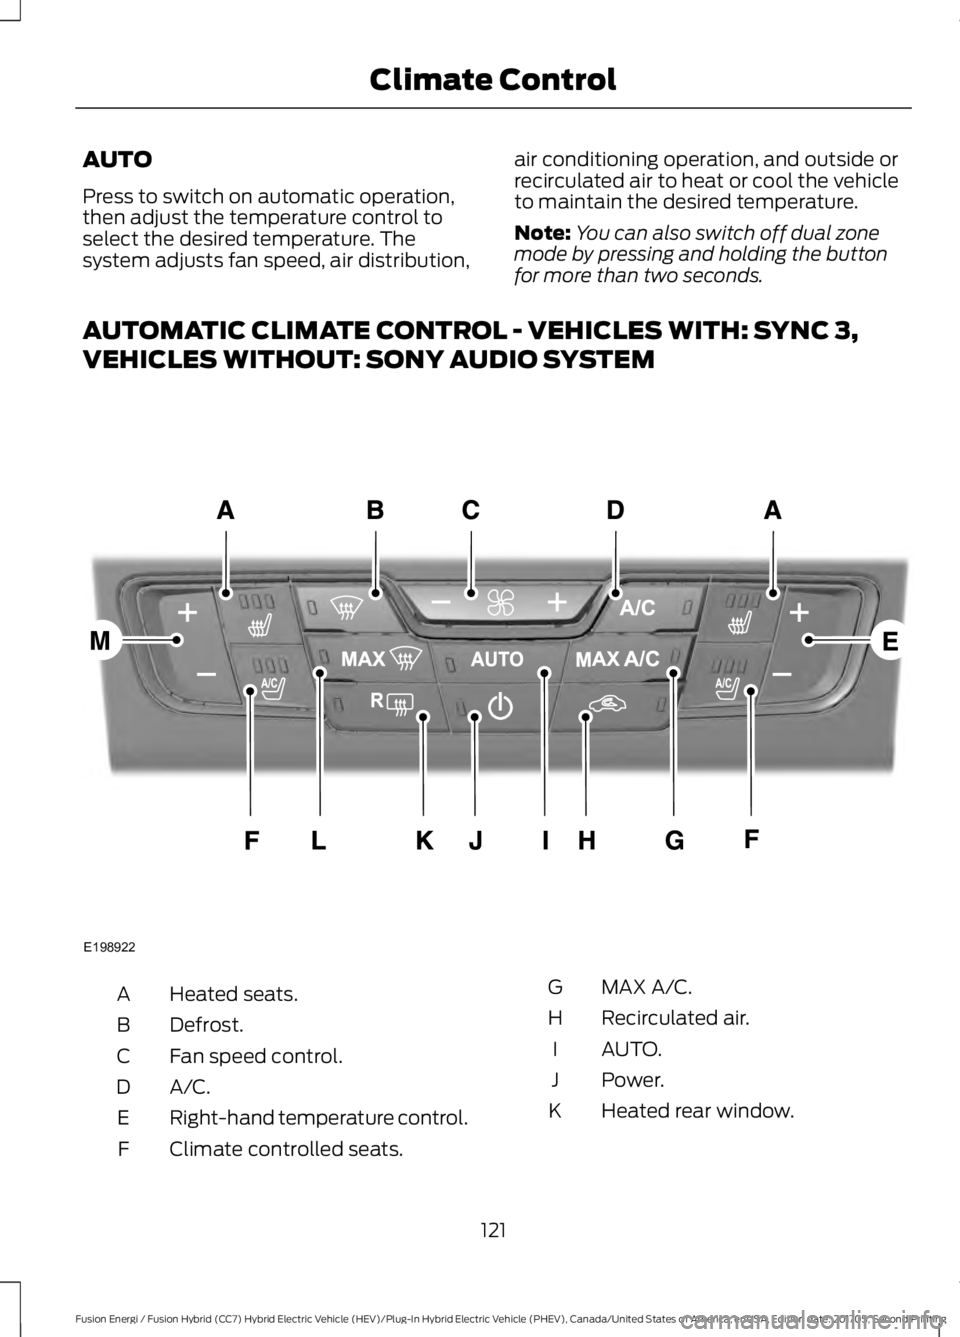
AUTOMATIC CLIMATE CONTROL - VEHICLES WITH: SYNC 3,
VEHICLES WITHOUT: SONY AUDIO SYSTEM Heated seats.
A
Defrost.
B
Fan speed control.
C
A/C.D
Right-hand temperature control.
E
Climate controlled seats.
F MAX A/C.
G
Recirculated air.
H
AUTO.
I
Power.
J
Heated rear window.
K
121
Fusion Energi / Fusion Hybrid (CC7) Hybrid Electric Vehicle (HEV)/Plug-In Hybrid Electric Vehicle (PHEV), Canada/United States of America, enUSA, Edition date: 201705, Second Printing Climate ControlE198922
Page 125 of 538
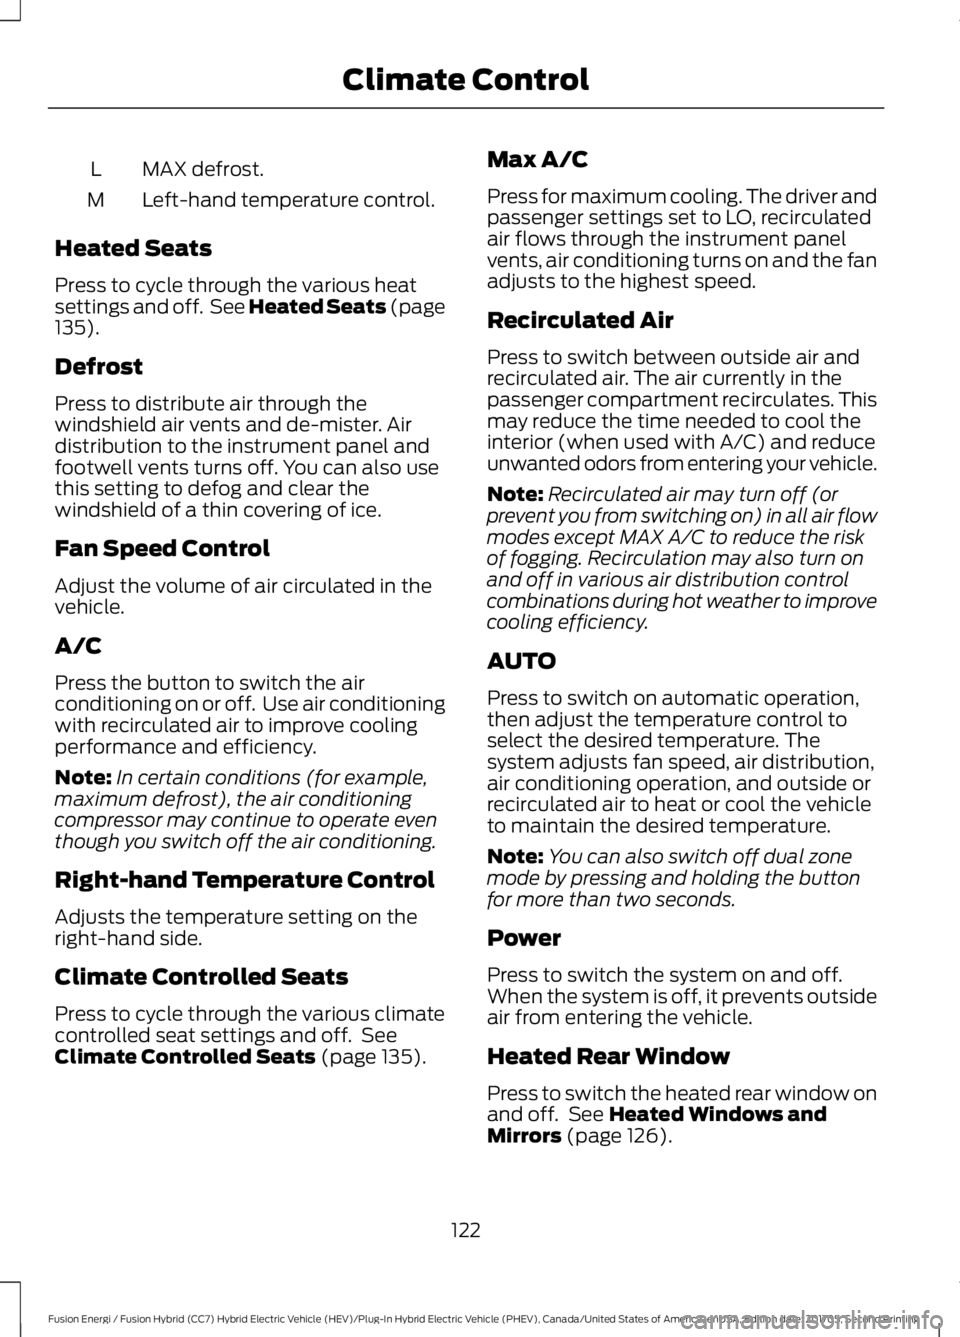
MAX defrost.
L
Left-hand temperature control.
M
Heated Seats
Press to cycle through the various heat
settings and off. See Heated Seats (page
135).
Defrost
Press to distribute air through the
windshield air vents and de-mister. Air
distribution to the instrument panel and
footwell vents turns off. You can also use
this setting to defog and clear the
windshield of a thin covering of ice.
Fan Speed Control
Adjust the volume of air circulated in the
vehicle.
A/C
Press the button to switch the air
conditioning on or off. Use air conditioning
with recirculated air to improve cooling
performance and efficiency.
Note: In certain conditions (for example,
maximum defrost), the air conditioning
compressor may continue to operate even
though you switch off the air conditioning.
Right-hand Temperature Control
Adjusts the temperature setting on the
right-hand side.
Climate Controlled Seats
Press to cycle through the various climate
controlled seat settings and off. See
Climate Controlled Seats
(page 135). Max A/C
Press for maximum cooling. The driver and
passenger settings set to LO, recirculated
air flows through the instrument panel
vents, air conditioning turns on and the fan
adjusts to the highest speed.
Recirculated Air
Press to switch between outside air and
recirculated air. The air currently in the
passenger compartment recirculates. This
may reduce the time needed to cool the
interior (when used with A/C) and reduce
unwanted odors from entering your vehicle.
Note:
Recirculated air may turn off (or
prevent you from switching on) in all air flow
modes except MAX A/C to reduce the risk
of fogging. Recirculation may also turn on
and off in various air distribution control
combinations during hot weather to improve
cooling efficiency.
AUTO
Press to switch on automatic operation,
then adjust the temperature control to
select the desired temperature. The
system adjusts fan speed, air distribution,
air conditioning operation, and outside or
recirculated air to heat or cool the vehicle
to maintain the desired temperature.
Note: You can also switch off dual zone
mode by pressing and holding the button
for more than two seconds.
Power
Press to switch the system on and off.
When the system is off, it prevents outside
air from entering the vehicle.
Heated Rear Window
Press to switch the heated rear window on
and off. See
Heated Windows and
Mirrors (page 126).
122
Fusion Energi / Fusion Hybrid (CC7) Hybrid Electric Vehicle (HEV)/Plug-In Hybrid Electric Vehicle (PHEV), Canada/United States of America, enUSA, Edition date: 201705, Second Printing Climate Control
Page 126 of 538
Max Defrost
Press to switch on defrost. The left-hand
and right-hand settings set to HI, air flows
through the windshield vents, and the fan
adjusts to the highest speed. You can also
use this setting to defog and clear the
windshield of a thin covering of ice. The
heated rear window also turns on when
you select maximum defrost.
Note:
To prevent window fogging, you
cannot select recirculated air when
maximum defrost is on.
Left-hand Temperature Control
Adjusts the temperature setting on the
left-hand side.
Note: This control also adjusts the
right-hand side temperature when you
switch off dual zone mode.
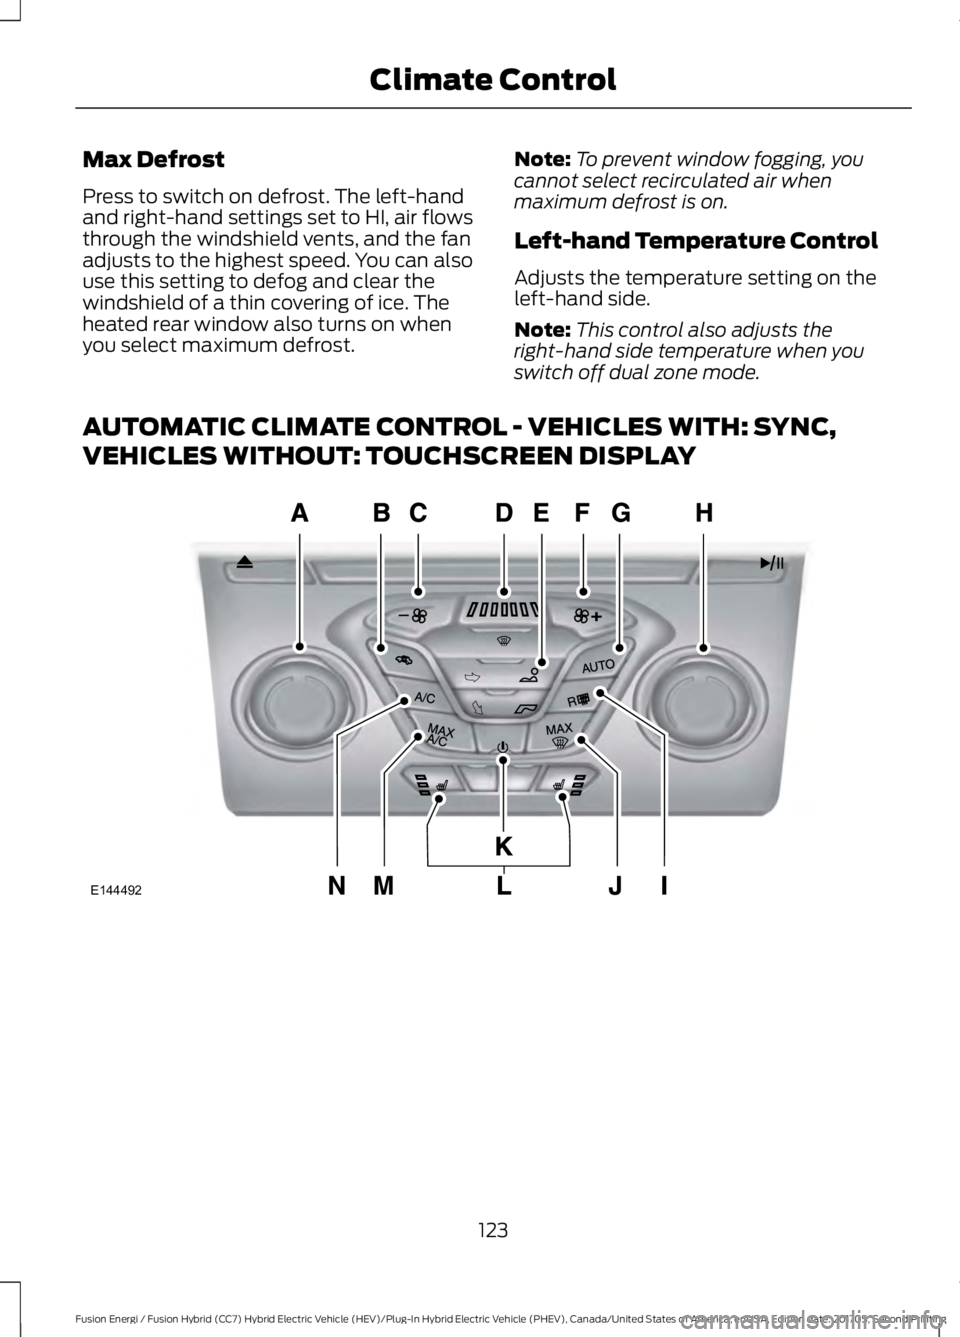
AUTOMATIC CLIMATE CONTROL - VEHICLES WITH: SYNC,
VEHICLES WITHOUT: TOUCHSCREEN DISPLAY 123
Fusion Energi / Fusion Hybrid (CC7) Hybrid Electric Vehicle (HEV)/Plug-In Hybrid Electric Vehicle (PHEV), Canada/United States of America, enUSA, Edition date: 201705, Second Printing Climate ControlE144492
Page 127 of 538
Driver temperature control:
Turn to increase or decrease the
air temperature for the driver
side of the vehicle. This control
also adjusts the passenger side
temperature when not in dual
zone mode.
A
Recirculated air: Press the
button to switch between
outside air and recirculated air.
When you select recirculated air,
the air currently in the passenger
compartment recirculates. This
may reduce the time needed to
cool the interior (when used with
A/C
) and may reduce unwanted
odors from entering your vehicle.
B
Note:
Recirculated air may turn
off automatically (or be
prevented from turning on) in all
airflow modes except MAX A/C
to reduce risk of fogging.
Recirculated air may also turn on
and off automatically in
Panel
or Panel and Floor airflow
modes during hot weather in
order to improve cooling
efficiency.
Fan speed control -:
Press to
decrease the volume of air
circulated in your vehicle.
C
Fan speed indicator:
Illuminates to indicate fan
speed. When the system is
controlling the fan
automatically, all of the fan
speed indicators turn off.
D
Note:
When the system is
controlling the fan speed
automatically, all of the fan
speed indicators turn off. Air distribution control: Press
these buttons to turn airflow
from the windshield, instrument
panel, or footwell vents on or off.
The system can distribute air
through any combination of
these vents.
E
Note:
At least one of these
buttons remains on while the
system is on.
Fan speed control +:
Press to
increase the volume of air
circulated in your vehicle.
F
AUTO:
Press the button to turn
on automatic operation. Select
the desired temperature using
the temperature control. The
system adjusts fan speed, air
distribution, air conditioning
G
operation, and selects outside
air or recirculated air to heat or
cool the vehicle in order to
maintain the desired
temperature. You can also use
the AUTO button to turn off dual
zone operation by pressing and
holding the button for more than
two seconds.
Passenger temperature
control:
Turn to increase or
decrease the air temperature on
the passenger side of the vehicle.
This turns on dual zone mode.
H
Heated rear window: Turns the
heated rear window on and off.
See
Heated Windows and
Mirrors (page 126).
I
124
Fusion Energi / Fusion Hybrid (CC7) Hybrid Electric Vehicle (HEV)/Plug-In Hybrid Electric Vehicle (PHEV), Canada/United States of America, enUSA, Edition date: 201705, Second Printing Climate Control
Page 130 of 538
Replace the filter at regular intervals. See
Scheduled Maintenance (page 473).
For additional cabin air filter information,
or to replace the filter, see an authorized
dealer.
REMOTE START
(If Equipped)
You can switch this feature on or off and
adjust the settings using the information
display.
The system adjusts the interior
temperature depending on your chosen
settings during remote start.
You cannot adjust the climate control
setting during remote start operation.
When you switch the ignition on, the
climate control system returns to the
previous settings. You can now make
adjustments.
You need to switch on certain
vehicle-dependent features, such as:
• Heated seats.
• Cooled seats.
• Heated steering wheel.
• Heated mirrors.
• Heated rear window.
Automatic Settings
In hot weather, the system sets to
72°F
(22°C). The cooled seats are set to high
(if available, and AUTO is on in the
information display).
In moderate weather, the system either
heats or cools (based on previous
settings). The rear defroster, heated
mirrors and heated or cooled seats do not
turn on. In cold weather, the system sets to
72°F
(22°C). The heated seats are set to high
(if available, and AUTO is on in the
information display). The heated rear
window and heated mirrors turn on.
127
Fusion Energi / Fusion Hybrid (CC7) Hybrid Electric Vehicle (HEV)/Plug-In Hybrid Electric Vehicle (PHEV), Canada/United States of America, enUSA, Edition date: 201705, Second Printing Climate Control
Page 142 of 538
Gate Operator / Canadian
Programming
Canadian radio-frequency laws require
transmitter signals to
“time-out” (or quit)
after several seconds of transmission –
which may not be long enough for
HomeLink to pick up the signal during
programming. Similar to this Canadian law,
some U.S. gate operators are designed to
“time-out” in the same manner.
Note: If programming a garage door opener
or gate operator, it is advised to unplug the
device during the “cycling” process to
prevent possible overheating.
1. Press and hold the HomeLink button while you press and release, every two
seconds, your hand-held transmitter
until the HomeLink indicator light
changes from a slow to a rapidly
blinking light.
2. Release both the HomeLink and hand-held transmitter buttons.
3. Continue programing HomeLink. See In-Vehicle Programming
.
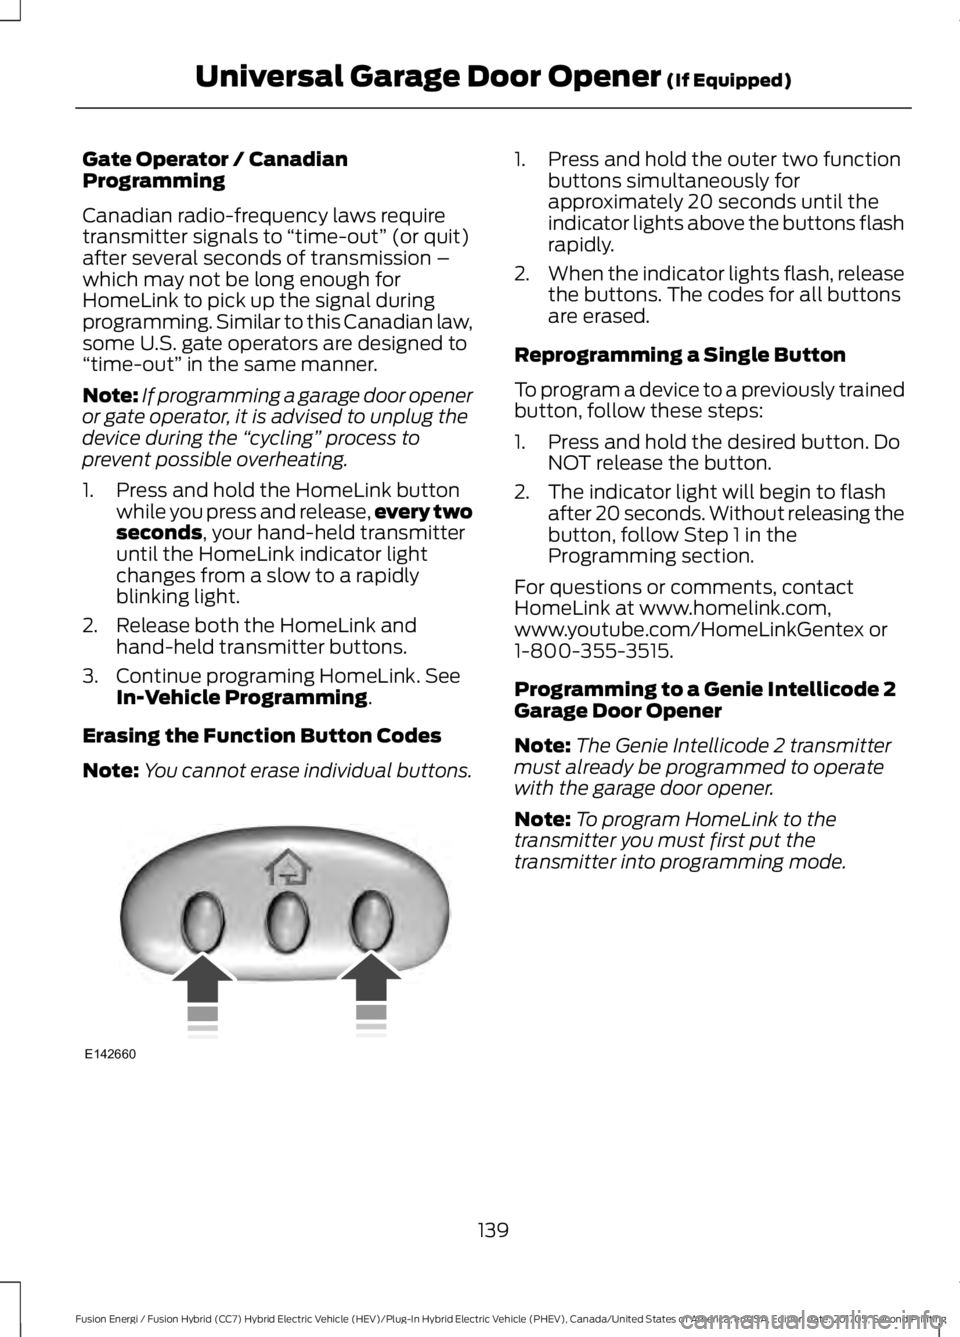
Erasing the Function Button Codes
Note: You cannot erase individual buttons. 1. Press and hold the outer two function
buttons simultaneously for
approximately 20 seconds until the
indicator lights above the buttons flash
rapidly.
2. When the indicator lights flash, release
the buttons. The codes for all buttons
are erased.
Reprogramming a Single Button
To program a device to a previously trained
button, follow these steps:
1. Press and hold the desired button. Do NOT release the button.
2. The indicator light will begin to flash after 20 seconds. Without releasing the
button, follow Step 1 in the
Programming section.
For questions or comments, contact
HomeLink at www.homelink.com,
www.youtube.com/HomeLinkGentex or
1-800-355-3515.
Programming to a Genie Intellicode 2
Garage Door Opener
Note: The Genie Intellicode 2 transmitter
must already be programmed to operate
with the garage door opener.
Note: To program HomeLink to the
transmitter you must first put the
transmitter into programming mode.
139
Fusion Energi / Fusion Hybrid (CC7) Hybrid Electric Vehicle (HEV)/Plug-In Hybrid Electric Vehicle (PHEV), Canada/United States of America, enUSA, Edition date: 201705, Second Printing Universal Garage Door Opener
(If Equipped)E142660
Page 143 of 538
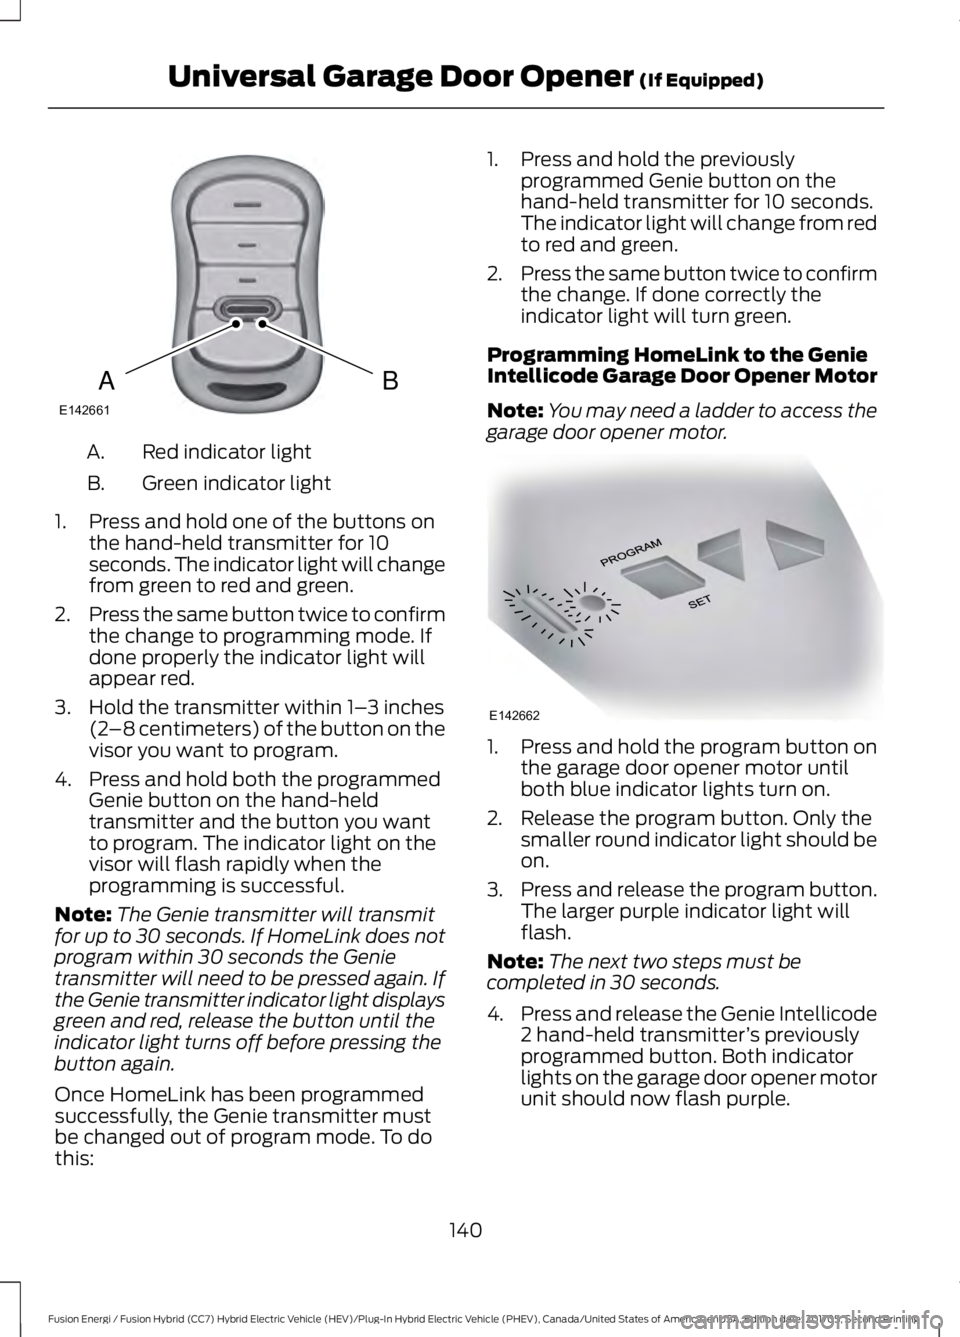
Red indicator light
A.
Green indicator light
B.
1. Press and hold one of the buttons on the hand-held transmitter for 10
seconds. The indicator light will change
from green to red and green.
2. Press the same button twice to confirm
the change to programming mode. If
done properly the indicator light will
appear red.
3. Hold the transmitter within 1– 3 inches
(2 –8 centimeters) of the button on the
visor you want to program.
4. Press and hold both the programmed Genie button on the hand-held
transmitter and the button you want
to program. The indicator light on the
visor will flash rapidly when the
programming is successful.
Note: The Genie transmitter will transmit
for up to 30 seconds. If HomeLink does not
program within 30 seconds the Genie
transmitter will need to be pressed again. If
the Genie transmitter indicator light displays
green and red, release the button until the
indicator light turns off before pressing the
button again.
Once HomeLink has been programmed
successfully, the Genie transmitter must
be changed out of program mode. To do
this: 1. Press and hold the previously
programmed Genie button on the
hand-held transmitter for 10 seconds.
The indicator light will change from red
to red and green.
2. Press the same button twice to confirm
the change. If done correctly the
indicator light will turn green.
Programming HomeLink to the Genie
Intellicode Garage Door Opener Motor
Note: You may need a ladder to access the
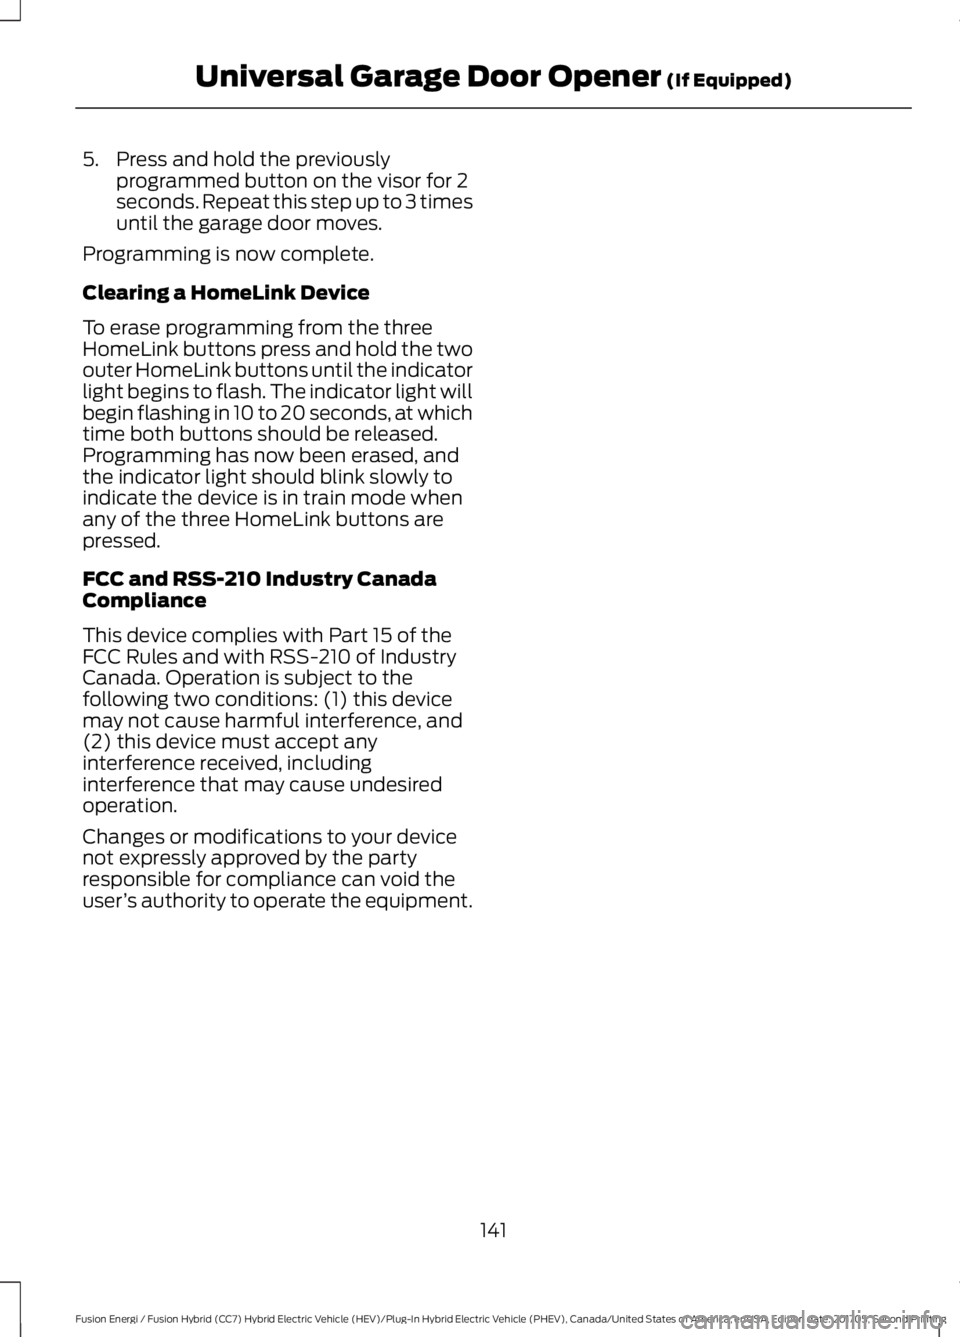
garage door opener motor. 1. Press and hold the program button on
the garage door opener motor until
both blue indicator lights turn on.
2. Release the program button. Only the smaller round indicator light should be
on.
3. Press and release the program button.
The larger purple indicator light will
flash.
Note: The next two steps must be
completed in 30 seconds.
4. Press and release the Genie Intellicode
2 hand-held transmitter ’s previously
programmed button. Both indicator
lights on the garage door opener motor
unit should now flash purple.
140
Fusion Energi / Fusion Hybrid (CC7) Hybrid Electric Vehicle (HEV)/Plug-In Hybrid Electric Vehicle (PHEV), Canada/United States of America, enUSA, Edition date: 201705, Second Printing Universal Garage Door Opener (If Equipped)BAE142661 E142662
Page 144 of 538
5. Press and hold the previously
programmed button on the visor for 2
seconds. Repeat this step up to 3 times
until the garage door moves.
Programming is now complete.
Clearing a HomeLink Device
To erase programming from the three
HomeLink buttons press and hold the two
outer HomeLink buttons until the indicator
light begins to flash. The indicator light will
begin flashing in 10 to 20 seconds, at which
time both buttons should be released.
Programming has now been erased, and
the indicator light should blink slowly to
indicate the device is in train mode when
any of the three HomeLink buttons are
pressed.
FCC and RSS-210 Industry Canada
Compliance
This device complies with Part 15 of the
FCC Rules and with RSS-210 of Industry
Canada. Operation is subject to the
following two conditions: (1) this device
may not cause harmful interference, and
(2) this device must accept any
interference received, including
interference that may cause undesired
operation.
Changes or modifications to your device
not expressly approved by the party
responsible for compliance can void the
user ’s authority to operate the equipment.
141
Fusion Energi / Fusion Hybrid (CC7) Hybrid Electric Vehicle (HEV)/Plug-In Hybrid Electric Vehicle (PHEV), Canada/United States of America, enUSA, Edition date: 201705, Second Printing Universal Garage Door Opener (If Equipped)
Page 146 of 538
When the indicator light on the power point
is:
•
On: The power point is working, the
ignition is on and a device is plugged
in.
• Off: The power point is off, the ignition
is off or no device is plugged in.
• Flashing: The power point is in fault
mode.
The power outlet temporarily turns off
power when in fault mode if the device
exceeds the 150 watt limit. Unplug your
device and switch the ignition off. Switch
the ignition back on, but do not plug your
device back in. Let the system cool off and
switch the ignition off to reset the fault
mode. Switch the ignition back on and
make sure the indicator light remains on.
Do not use the power point for certain
electric devices, including:
• Cathode-ray, tube-type televisions.
• Motor loads, such as vacuum cleaners,
electric saws and other electric power
tools or compressor-driven
refrigerators.
• Measuring devices, which process
precise data, such as medical
equipment or measuring equipment.
• Other appliances requiring an
extremely stable power supply such as
microcomputer-controlled electric
blankets or touch-sensor lamps.
143
Fusion Energi / Fusion Hybrid (CC7) Hybrid Electric Vehicle (HEV)/Plug-In Hybrid Electric Vehicle (PHEV), Canada/United States of America, enUSA, Edition date: 201705, Second Printing Auxiliary Power Points
Page 148 of 538
GENERAL INFORMATION
WARNINGS
Extended idling at high engine
speeds can produce very high
temperatures in the engine and
exhaust system, creating the risk of fire or
other damage. Do not park, idle or drive your vehicle
on dry grass or other dry ground
cover. The emission system heats up
the engine compartment and exhaust
system, creating the risk of fire. Do not start the vehicle in a closed
garage or in other enclosed areas.
Exhaust fumes can be toxic. Always
open the garage door before you start the
vehicle. If you smell exhaust fumes inside
your vehicle, have your vehicle
checked by an authorized dealer
immediately. Do not drive your vehicle if
you smell exhaust fumes. If you disconnect the battery, your vehicle
may exhibit some unusual driving
characteristics for approximately 5 mi
(8 km) after you reconnect it. This is
because the engine management system
must realign itself with the engine. You can
disregard any unusual driving
characteristics during this period.
The powertrain control system meets all
Canadian interference-causing equipment
standard requirements regulating the
impulse electrical field or radio noise.
When you start your vehicle, avoid pressing
the accelerator pedal until the ready to
drive indicator illuminates. Only use the
accelerator pedal when you have difficulty
starting your vehicle. KEYLESS STARTING
Note:
The system may not function if the
intelligent access key is close to metal
objects or electronic devices, for example
keys or a cell phone.
Note: A valid intelligent access key must
be located inside your vehicle to switch the
ignition on and start your vehicle.
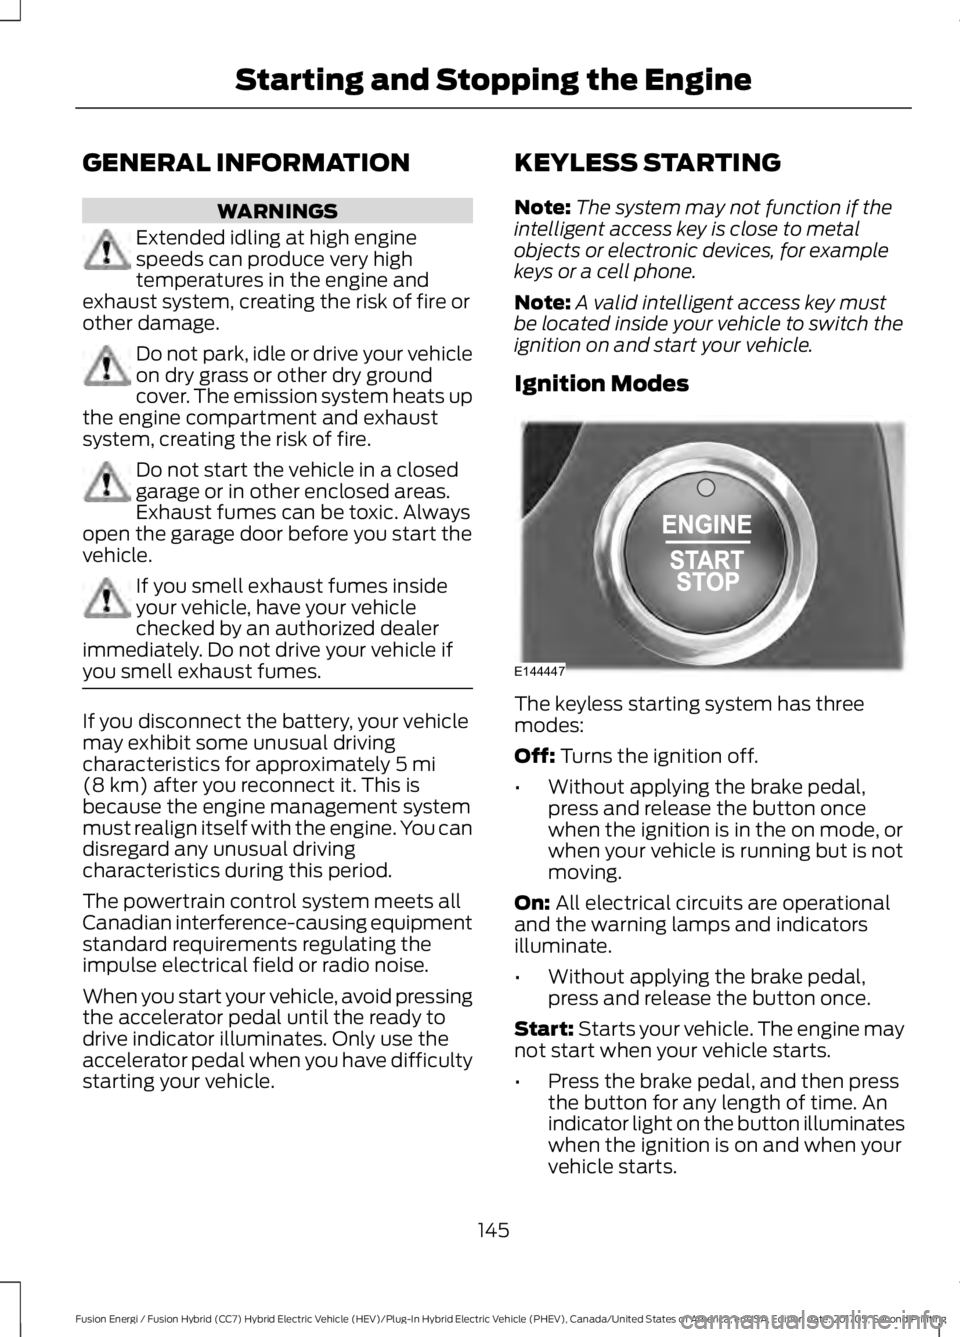
Ignition Modes The keyless starting system has three
modes:
Off:
Turns the ignition off.
• Without applying the brake pedal,
press and release the button once
when the ignition is in the on mode, or
when your vehicle is running but is not
moving.
On:
All electrical circuits are operational
and the warning lamps and indicators
illuminate.
• Without applying the brake pedal,
press and release the button once.
Start:
Starts your vehicle. The engine may
not start when your vehicle starts.
• Press the brake pedal, and then press
the button for any length of time. An
indicator light on the button illuminates
when the ignition is on and when your
vehicle starts.
145
Fusion Energi / Fusion Hybrid (CC7) Hybrid Electric Vehicle (HEV)/Plug-In Hybrid Electric Vehicle (PHEV), Canada/United States of America, enUSA, Edition date: 201705, Second Printing Starting and Stopping the EngineE144447