towing FORD MONDEO 2006 2.G Owners Manual
[x] Cancel search | Manufacturer: FORD, Model Year: 2006, Model line: MONDEO, Model: FORD MONDEO 2006 2.GPages: 198, PDF Size: 4.69 MB
Page 5 of 198
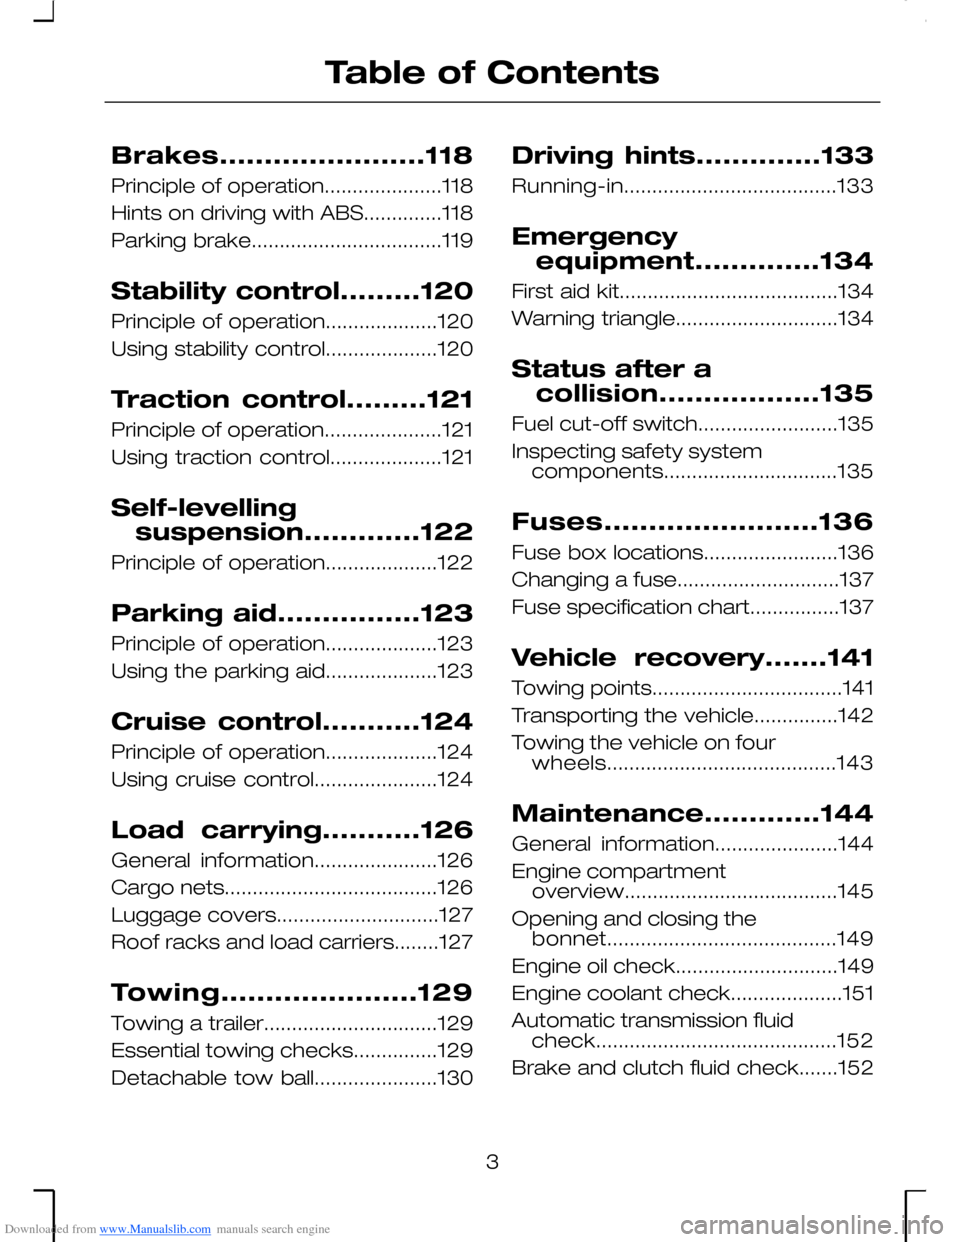
Downloaded from www.Manualslib.com manuals search engine Brakes.......................118
Principle of operation.....................118
Hints on driving with ABS..............118
Parking brake..................................119
Stability control.........120
Principle of operation....................120
Using stability control....................120
Traction control.........121
Principle of operation.....................121
Using traction control....................121
Self-levelling
suspension.............122
Principle of operation....................122
Parking aid................123
Principle of operation....................123
Using the parking aid....................123
Cruise control...........124
Principle of operation....................124
Using cruise control......................124
Load carrying...........126
General information......................126
Cargo nets......................................126
Luggage covers.............................127
Roof racks and load carriers........127
Towing......................129
Towing a trailer...............................129
Essential towing checks...............129
Detachable tow ball......................130
Driving hints..............133
Running-in......................................133
Emergency
equipment..............134
First aid kit.......................................134
Warning triangle.............................134
Status after a
collision..................135
Fuel cut-off switch.........................135
Inspecting safety systemcomponents...............................135
Fuses........................136
Fuse box locations........................136
Changing a fuse.............................137
Fuse specification chart................137
Vehicle recovery.......141
Towing points..................................141
Transporting the vehicle...............142
Towing the vehicle on fourwheels.........................................143
Maintenance.............144
General information......................144
Engine compartmentoverview......................................145
Opening and closing thebonnet.........................................149
Engine oil check.............................149
Engine coolant check....................151
Automatic transmission fluidcheck...........................................152
Brake and clutch fluid check.......152
3
Table of Contents
Page 58 of 198
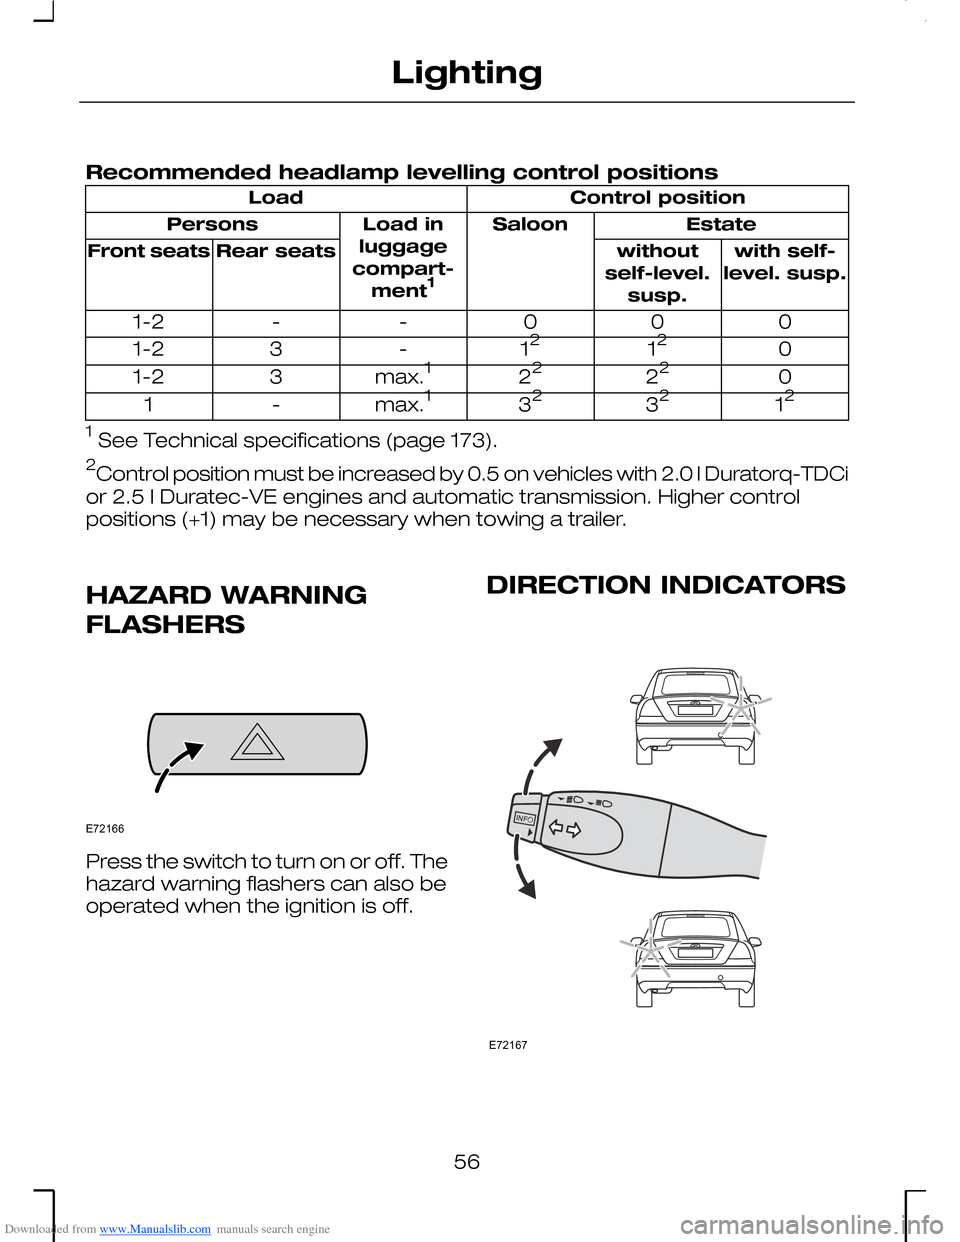
Downloaded from www.Manualslib.com manuals search engine Recommended headlamp levelling control positions
Control positionLoad
EstateSaloonLoad inluggagecompart-ment1
Persons
with self-level. susp.withoutself-level.susp.
Rear seatsFront seats
000--1-2
01212-31-2
02222max.131-2
123232max.1-1
1 See Technical specifications (page 173).
2Control position must be increased by 0.5 on vehicles with 2.0 l Duratorq-TDCi
or 2.5 l Duratec-VE engines and automatic transmission. Higher controlpositions (+1) may be necessary when towing a trailer.
HAZARD WARNING
FLASHERS
Press the switch to turn on or off. Thehazard warning flashers can also beoperated when the ignition is off.
DIRECTION INDICATORS
56
LightingE72166 E72167
Page 76 of 198
Downloaded from www.Manualslib.com manuals search engine •Engine
•Stability control (ESP)
•Ignition
•Low washer fluid
•Oil pressure
•Oil change
If a warning or indicator lamp doesnot illuminate when the ignition isswitched on, it indicates amalfunction. Have the systemchecked by an expert.
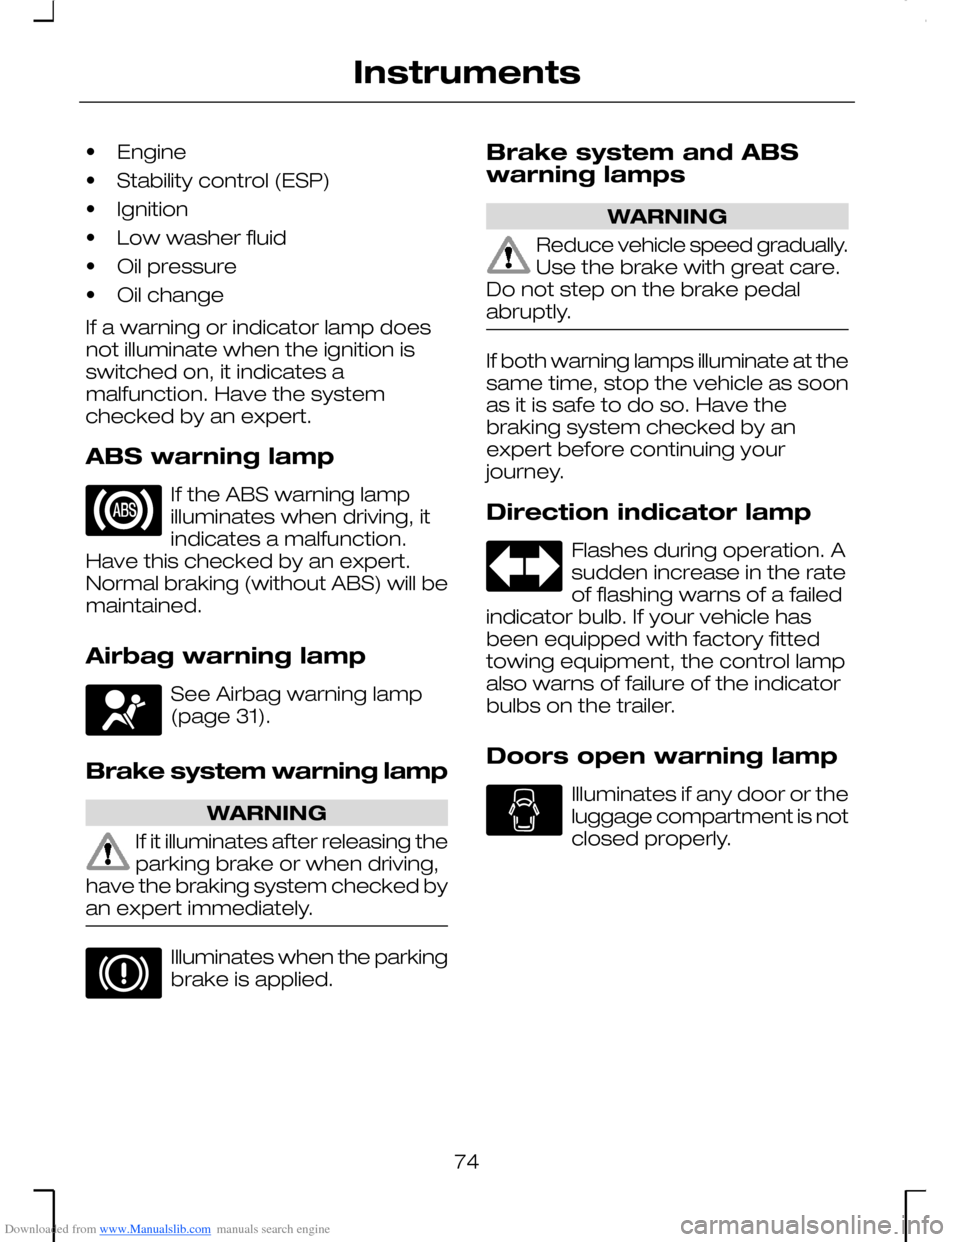
ABS warning lamp
If the ABS warning lampilluminates when driving, itindicates a malfunction.Have this checked by an expert.Normal braking (without ABS) will bemaintained.
Airbag warning lamp
See Airbag warning lamp(page 31).
Brake system warning lamp
WARNING
If it illuminates after releasing theparking brake or when driving,have the braking system checked byan expert immediately.
Illuminates when the parkingbrake is applied.
Brake system and ABSwarning lamps
WARNING
Reduce vehicle speed gradually.Use the brake with great care.Do not step on the brake pedalabruptly.
If both warning lamps illuminate at thesame time, stop the vehicle as soonas it is safe to do so. Have thebraking system checked by anexpert before continuing yourjourney.
Direction indicator lamp
Flashes during operation. Asudden increase in the rateof flashing warns of a failedindicator bulb. If your vehicle hasbeen equipped with factory fittedtowing equipment, the control lampalso warns of failure of the indicatorbulbs on the trailer.
Doors open warning lamp
Illuminates if any door or theluggage compartment is notclosed properly.
74
Instruments
Page 102 of 198
Downloaded from www.Manualslib.com manuals search engine GENERAL INFORMATION
General points on starting
If the battery has been disconnectedthe vehicle may exhibit some unusualdriving characteristics for approx. 8kilometres (5 miles) afterreconnecting the battery.
This is because the enginemanagement system must realignitself with the engine. Any unusualdriving characteristics during thisperiod may be disregarded.
Starting the engine bytowing or pushing
WARNING
To prevent damage you mustnot push or tow start yourvehicle. Use booster cables and abooster battery. See Using boostercables (page 158).
IGNITION SWITCH
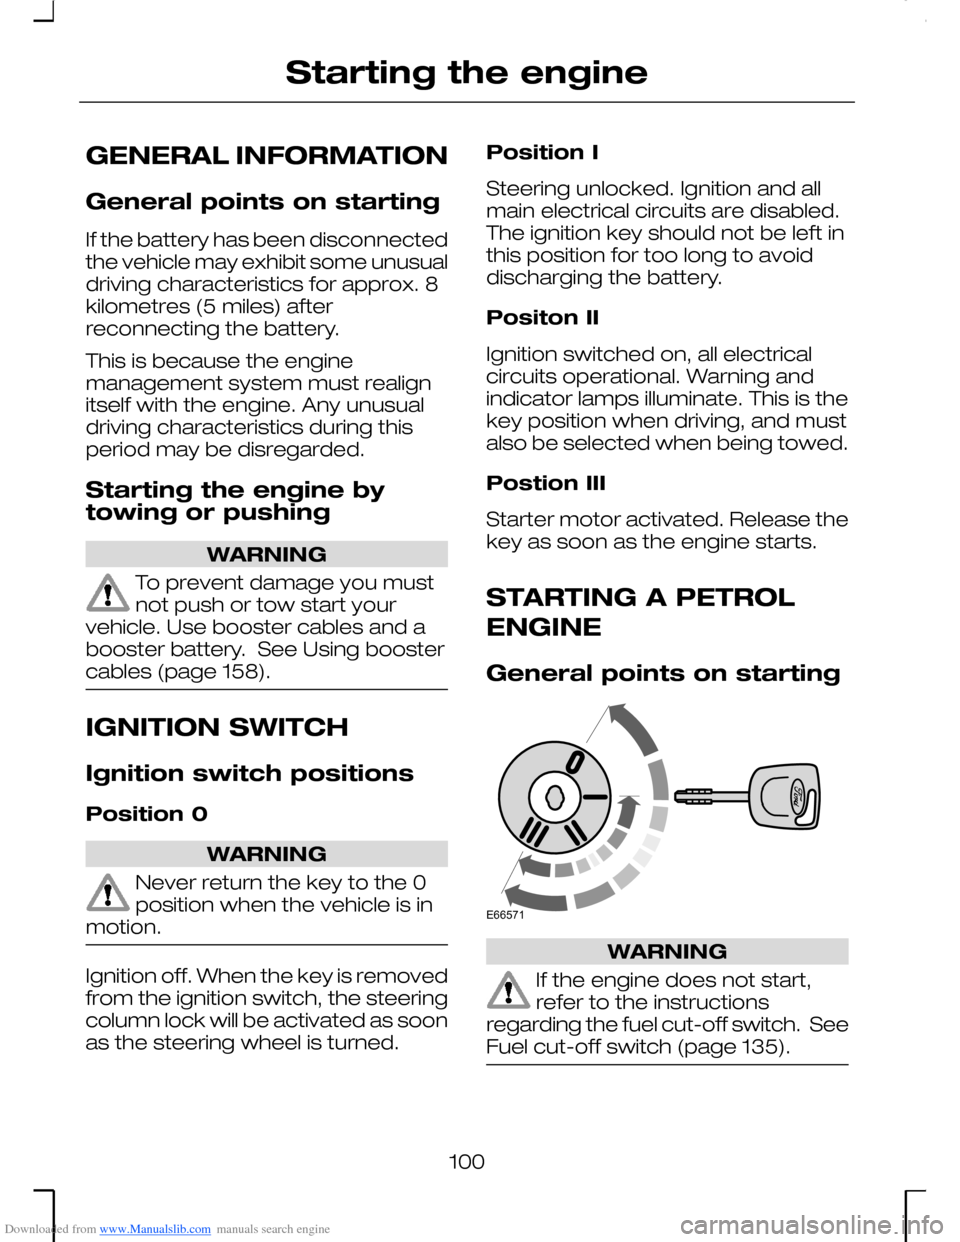
Ignition switch positions
Position 0
WARNING
Never return the key to the 0position when the vehicle is inmotion.
Ignition off. When the key is removedfrom the ignition switch, the steeringcolumn lock will be activated as soonas the steering wheel is turned.
Position I
Steering unlocked. Ignition and allmain electrical circuits are disabled.The ignition key should not be left inthis position for too long to avoiddischarging the battery.
Positon II
Ignition switched on, all electricalcircuits operational. Warning andindicator lamps illuminate. This is thekey position when driving, and mustalso be selected when being towed.
Postion III
Starter motor activated. Release thekey as soon as the engine starts.
STARTING A PETROL
ENGINE
General points on starting
WARNING
If the engine does not start,refer to the instructionsregarding the fuel cut-off switch. SeeFuel cut-off switch (page 135).
100
Starting the engineE66571
Page 119 of 198
Downloaded from www.Manualslib.com manuals search engine Downhill mode
The transmission recognizes downhilldriving conditions and supports yourbraking manoeuvre by downshiftingto increase engine braking.
Uphill mode
The transmission recognizes uphilldriving or trailer towing conditionsand will select a lower gear to providemore engine power.
Fast off mode
If you release the accelerator pedalquickly, e.g. when driving through acurve, the transmission stays in theselected gear to avoid a sequenceof upshifts and downshifts.
Auto sport mode
If you press down the acceleratorpedal quickly, for example, if youprefer sporty driving, the transmissionsupports your driving style byimmediately shifting down or byshifting up later, i.e at high enginespeeds.
Stop-and-go mode (2.5 lDuratec-VE)
The transmission recognizesstop-and-go traffic conditions andinhibits first gear for smoothacceleration and to avoid a sequenceof upshifts and downshifts.
Neutral idle control (2.0 lDuratorq-TDCi)
To increase your comfort, enginenoise and vibration characteristics willbe optimised if the vehicle stands stillwith the engine sunning, the selectorlever in D and the footbrake isapplied.
117
Transmission
Page 125 of 198
Downloaded from www.Manualslib.com manuals search engine PRINCIPLE OF
OPERATION
WARNING
The parking aid is an auxiliarysystem which is not intended torelieve the driver of his responsibilityfor exercising due care and attentionwhen reversing. In particular, someobjects close to the vehicle (approx.30 cm) and above or below thesensors may not be detected by thepark distance sensor and causedamage to the vehicle. Ultrasonicwaves, heavy rain and/or conditionscausing disruptive reflections maylead to objects not being detectedby the sensors. In addition, objectswhich absorb ultrasonic waves maynot always be detected due to theirunfavourable surface characteristics.
USING THE PARKING AID
WARNING
Be careful when a tow bar isinstalled.
Note: If the vehicle is fitted with anoriginal Ford fixed tow bar, particularcare must be taken when reversing.
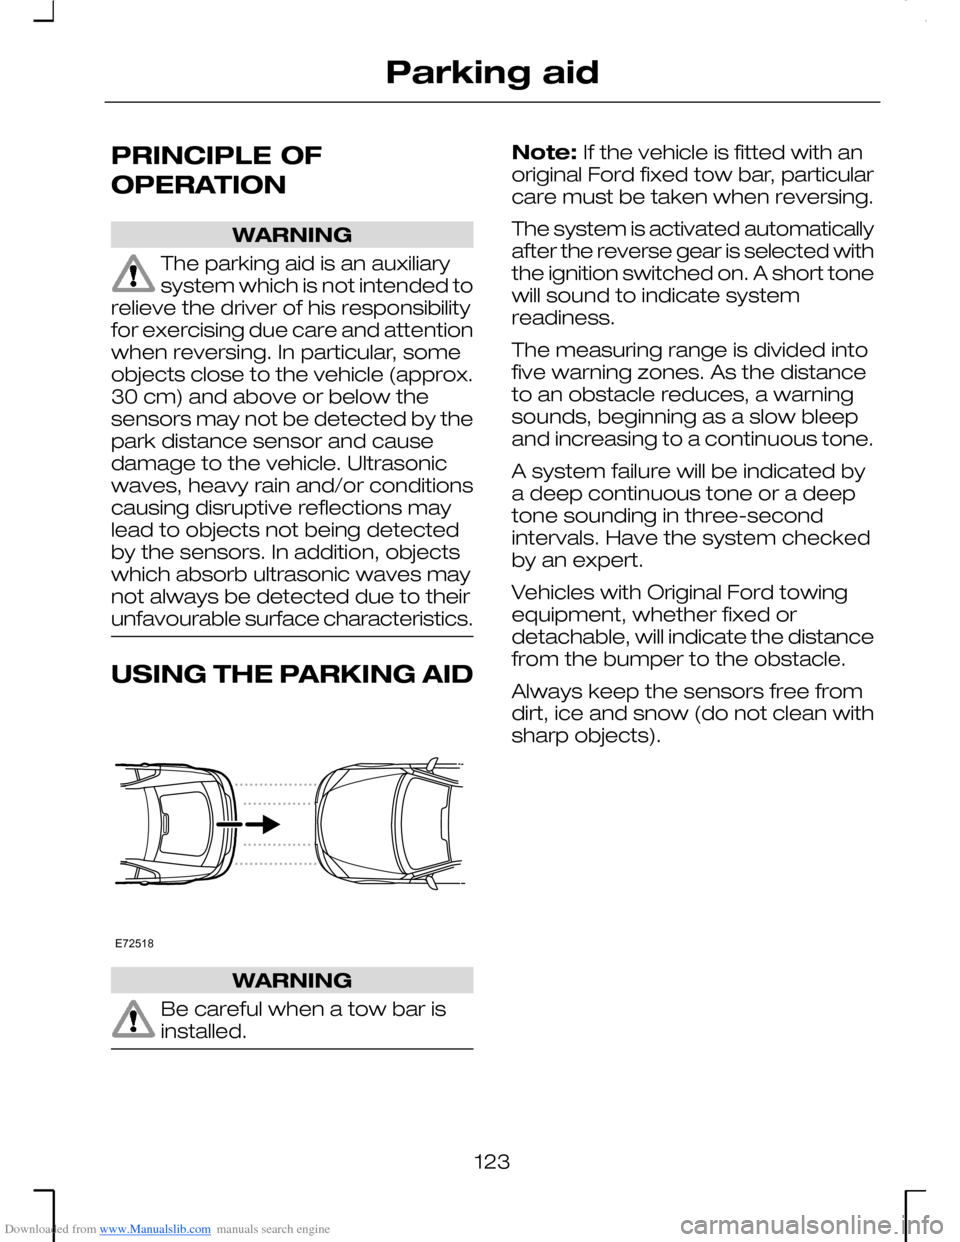
The system is activated automaticallyafter the reverse gear is selected withthe ignition switched on. A short tonewill sound to indicate systemreadiness.
The measuring range is divided intofive warning zones. As the distanceto an obstacle reduces, a warningsounds, beginning as a slow bleepand increasing to a continuous tone.
A system failure will be indicated bya deep continuous tone or a deeptone sounding in three-secondintervals. Have the system checkedby an expert.
Vehicles with Original Ford towingequipment, whether fixed ordetachable, will indicate the distancefrom the bumper to the obstacle.
Always keep the sensors free fromdirt, ice and snow (do not clean withsharp objects).
123
Parking aidE72518
Page 131 of 198
Downloaded from www.Manualslib.com manuals search engine TOWING A TRAILER
Note: Mondeo ST vehicles are notapproved for trailer towing.
The maximum vehicle and trailerpayloads represent technicallybinding values for gradients up to 12% and at an altitude of 1 000 metresabove sea level. In high altituderegions, thinner atmosphere canreduce engine performance so thefollowing restrictions will apply:
Above 1 000 metres, the stipulatedmaximum permitted gross trainweight must be reduced by 10 % forevery 1 000 metres in altitude.
Steep gradients
WARNING
The overrun brake on a trailer isnot controlled by the anti-lockbraking system.
Change down in plenty of timebefore downhill gradients.
For vehicles with an automatictransmission, if downhill modeprovides insufficient braking thenselect manual mode and second orfirst gear as necessary.
ESSENTIAL TOWING
CHECKS
WARNING
If any of the following conditionscannot be met, do not use thetow bar and have it inspected by anexpert.
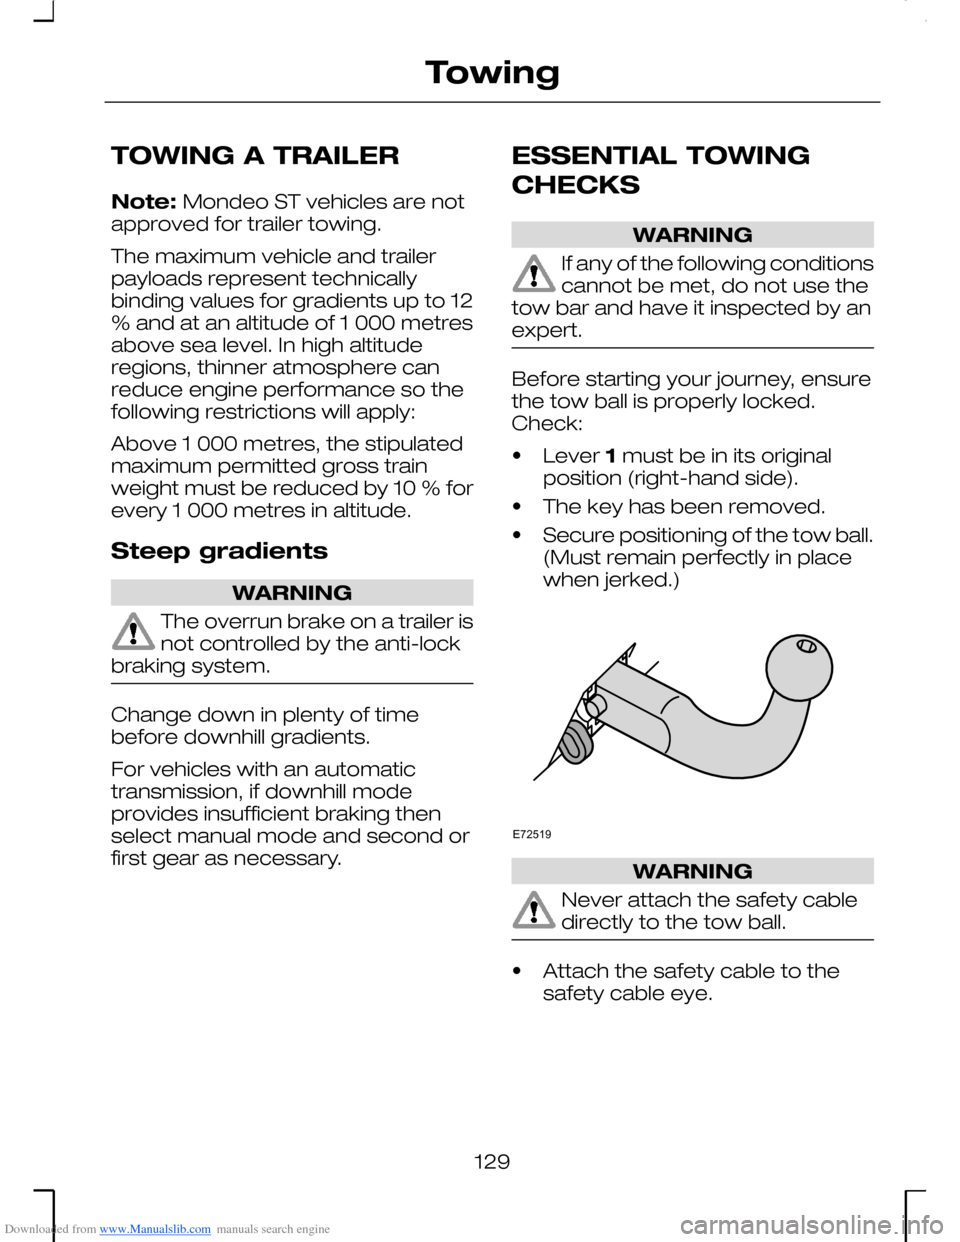
Before starting your journey, ensurethe tow ball is properly locked.Check:
•Lever 1 must be in its originalposition (right-hand side).
•The key has been removed.
•Secure positioning of the tow ball.(Must remain perfectly in placewhen jerked.)
WARNING
Never attach the safety cabledirectly to the tow ball.
•Attach the safety cable to thesafety cable eye.
129
TowingE72519
Page 132 of 198
Downloaded from www.Manualslib.com manuals search engine DETACHABLE TOW BALL
WARNINGS
Remove and reinstall the towball regularly to keep the lockingmechanism working smoothly.
Do not use any tools formounting/dismounting the towball. Do not modify the trailercoupling. Do not disassemble/repairthe tow ball.
To avoid risk of injury, neverunlock the tow ball with thetrailer attached.
To avoid risk of injury, neverleave the detached tow ballunsecured inside the vehicle.
Note: When the tow ball is not inuse, always remove it and secure itwith the strap to the eye on theright-hand side in the rear of theluggage compartment.
Removing the tow ball
•Unhitch the trailer.
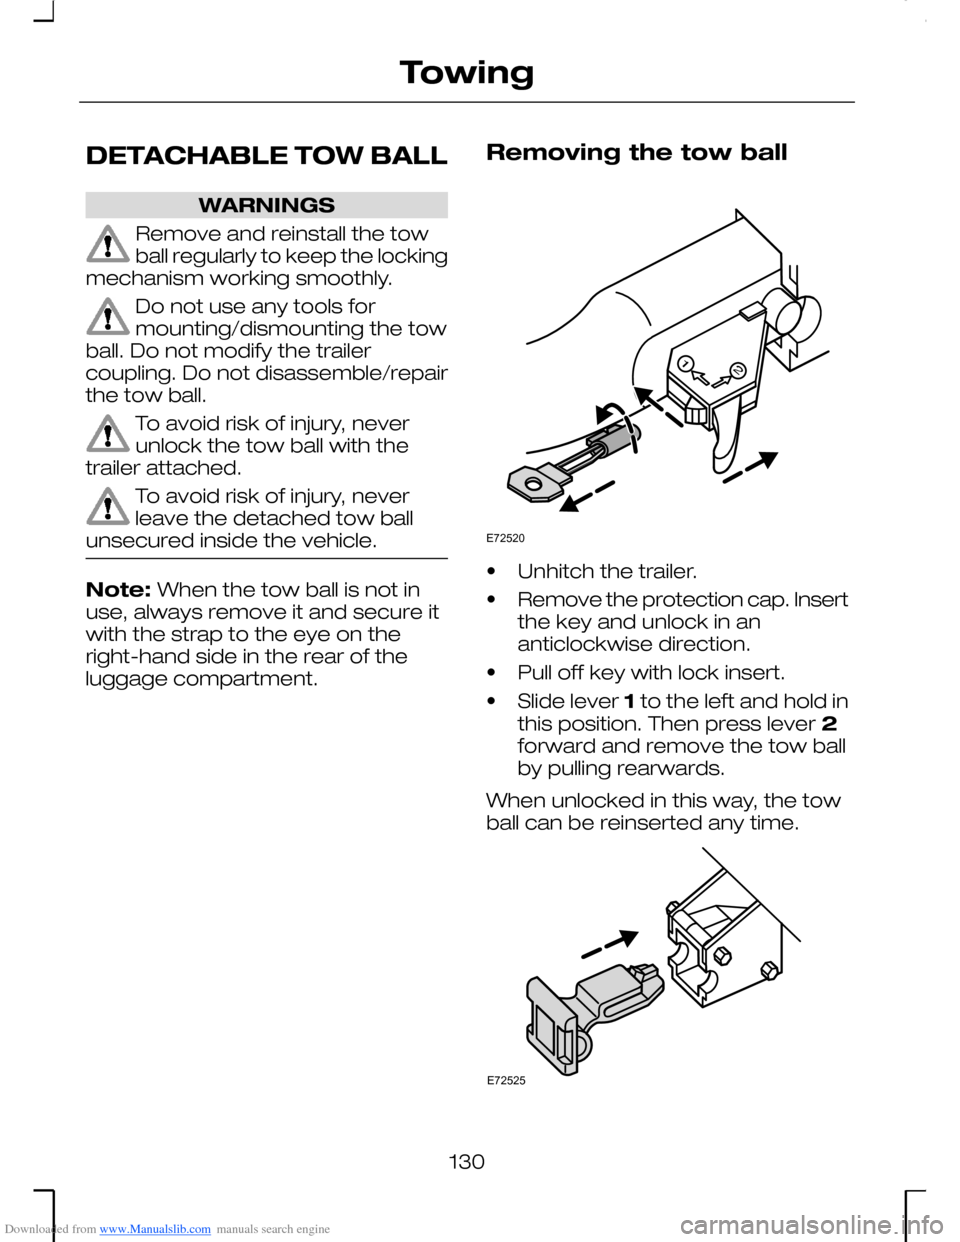
•Remove the protection cap. Insertthe key and unlock in ananticlockwise direction.
•Pull off key with lock insert.
•Slide lever 1 to the left and hold inthis position. Then press lever 2forward and remove the tow ballby pulling rearwards.
When unlocked in this way, the towball can be reinserted any time.
130
TowingE72520 E72525
Page 133 of 198
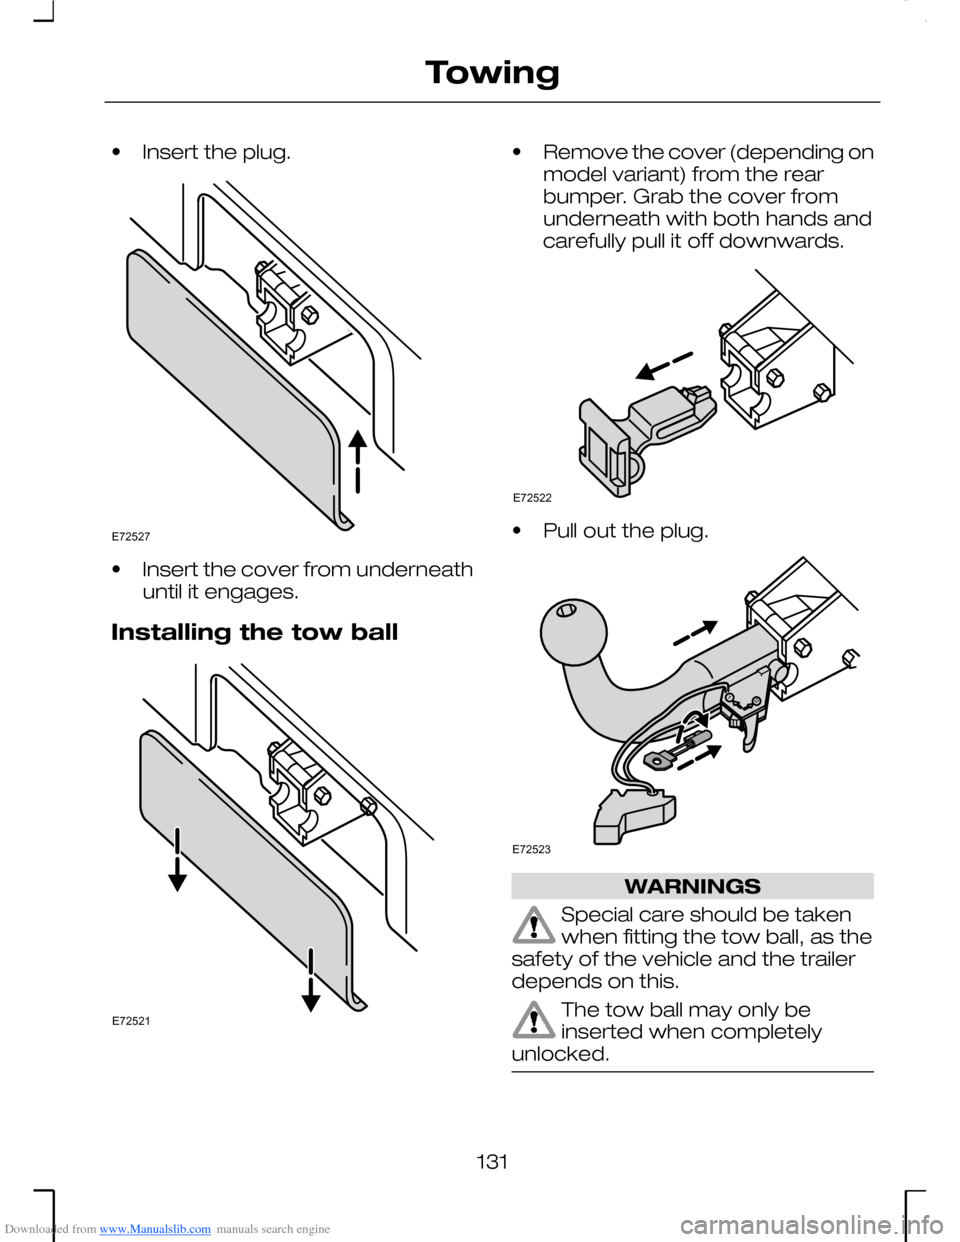
Downloaded from www.Manualslib.com manuals search engine •Insert the plug.
•Insert the cover from underneathuntil it engages.
Installing the tow ball
•Remove the cover (depending onmodel variant) from the rearbumper. Grab the cover fromunderneath with both hands andcarefully pull it off downwards.
•Pull out the plug.
WARNINGS
Special care should be takenwhen fitting the tow ball, as thesafety of the vehicle and the trailerdepends on this.
The tow ball may only beinserted when completelyunlocked.
131
TowingE72527 E72521 E72522 E72523
Page 134 of 198
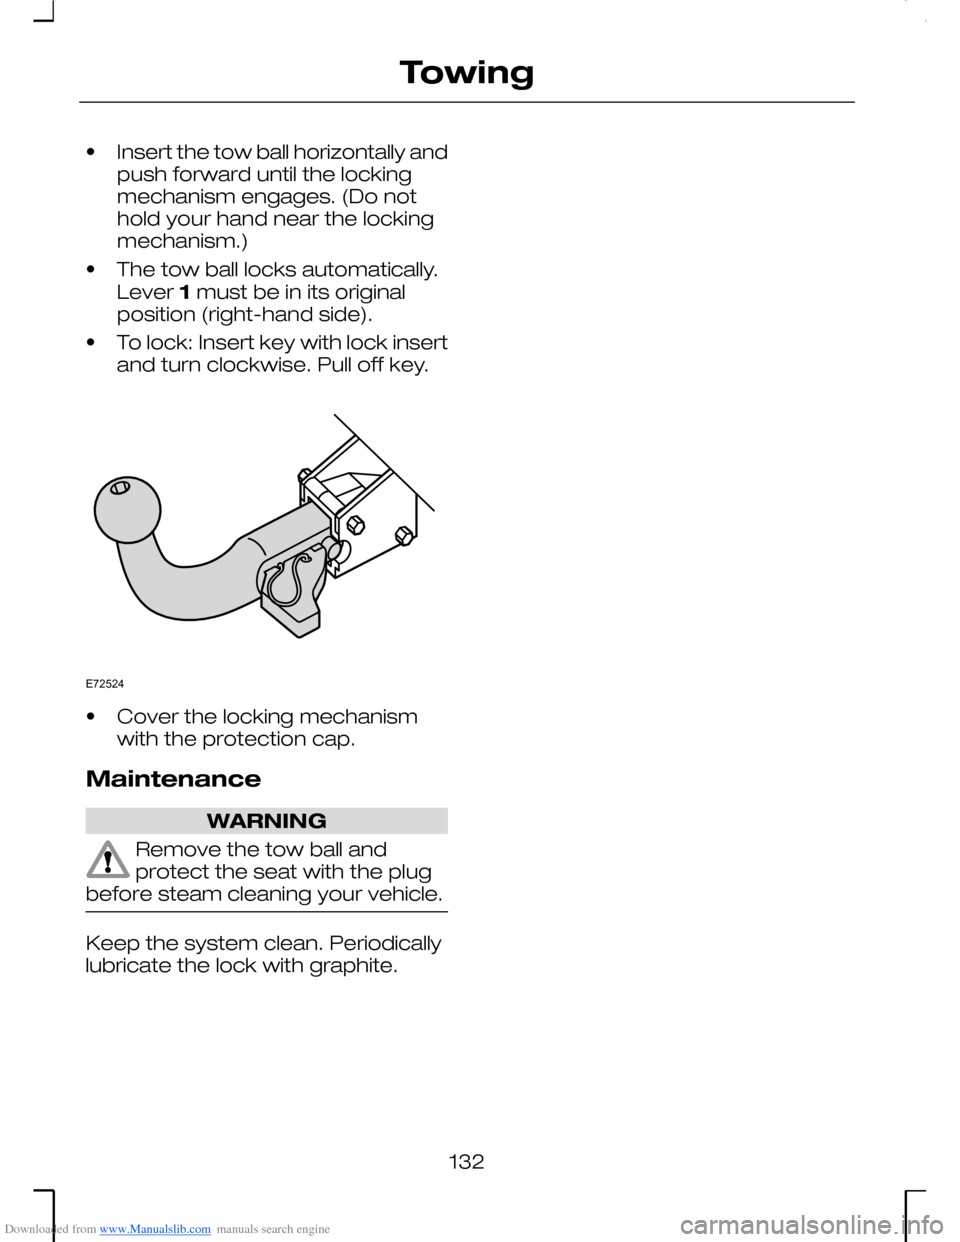
Downloaded from www.Manualslib.com manuals search engine •Insert the tow ball horizontally andpush forward until the lockingmechanism engages. (Do nothold your hand near the lockingmechanism.)
•The tow ball locks automatically.Lever 1 must be in its originalposition (right-hand side).
•To lock: Insert key with lock insertand turn clockwise. Pull off key.
•Cover the locking mechanismwith the protection cap.
Maintenance
WARNING
Remove the tow ball andprotect the seat with the plugbefore steam cleaning your vehicle.
Keep the system clean. Periodicallylubricate the lock with graphite.
132
TowingE72524