high beam FORD MUSTANG 1998 4.G Owners Manual
[x] Cancel search | Manufacturer: FORD, Model Year: 1998, Model line: MUSTANG, Model: FORD MUSTANG 1998 4.GPages: 192, PDF Size: 1.67 MB
Page 7 of 192
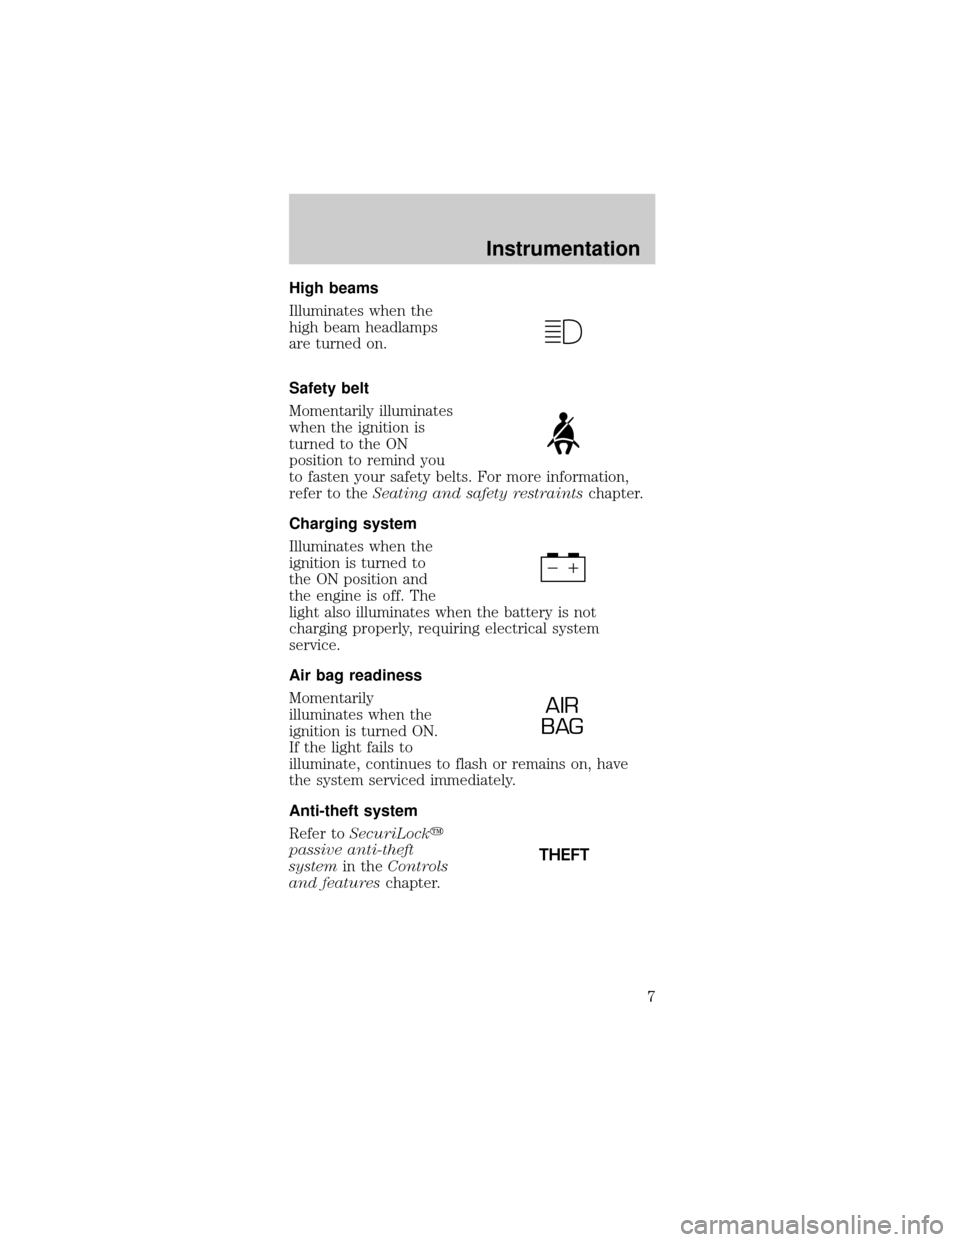
High beams
Illuminates when the
high beam headlamps
are turned on.
Safety belt
Momentarily illuminates
when the ignition is
turned to the ON
position to remind you
to fasten your safety belts. For more information,
refer to theSeating and safety restraintschapter.
Charging system
Illuminates when the
ignition is turned to
the ON position and
the engine is off. The
light also illuminates when the battery is not
charging properly, requiring electrical system
service.
Air bag readiness
Momentarily
illuminates when the
ignition is turned ON.
If the light fails to
illuminate, continues to flash or remains on, have
the system serviced immediately.
Anti-theft system
Refer toSecuriLocky
passive anti-theft
systemin theControls
and featureschapter.
AIR
BAG
THEFT
Instrumentation
7
Page 16 of 192
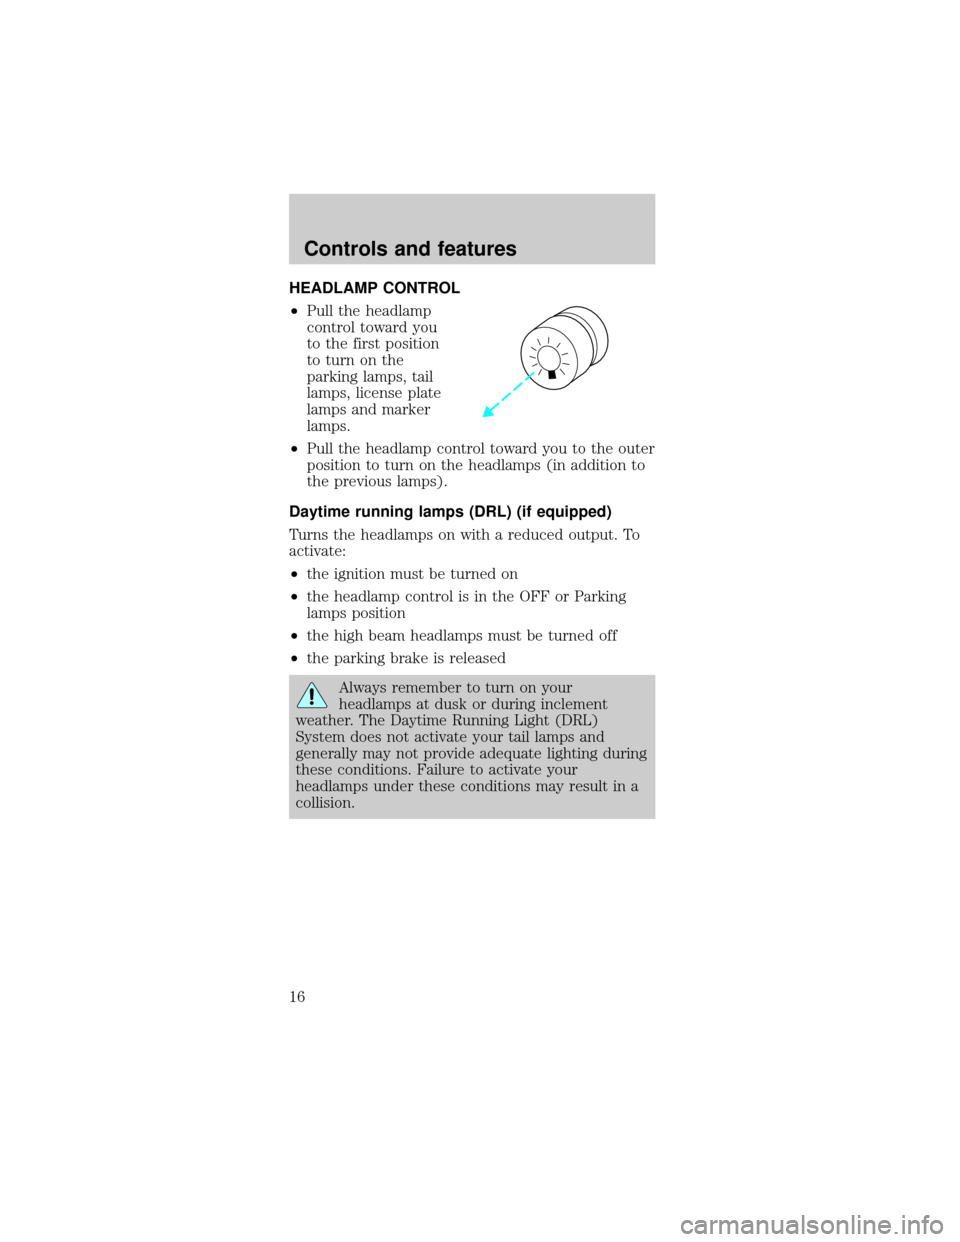
HEADLAMP CONTROL
²Pull the headlamp
control toward you
to the first position
to turn on the
parking lamps, tail
lamps, license plate
lamps and marker
lamps.
²Pull the headlamp control toward you to the outer
position to turn on the headlamps (in addition to
the previous lamps).
Daytime running lamps (DRL) (if equipped)
Turns the headlamps on with a reduced output. To
activate:
²the ignition must be turned on
²the headlamp control is in the OFF or Parking
lamps position
²the high beam headlamps must be turned off
²the parking brake is released
Always remember to turn on your
headlamps at dusk or during inclement
weather. The Daytime Running Light (DRL)
System does not activate your tail lamps and
generally may not provide adequate lighting during
these conditions. Failure to activate your
headlamps under these conditions may result in a
collision.
Controls and features
16
Page 44 of 192
The bars of varying length are for intermittent
wipers. When in this position rotate the control
upward for fast intervals and downward for slow
intervals.
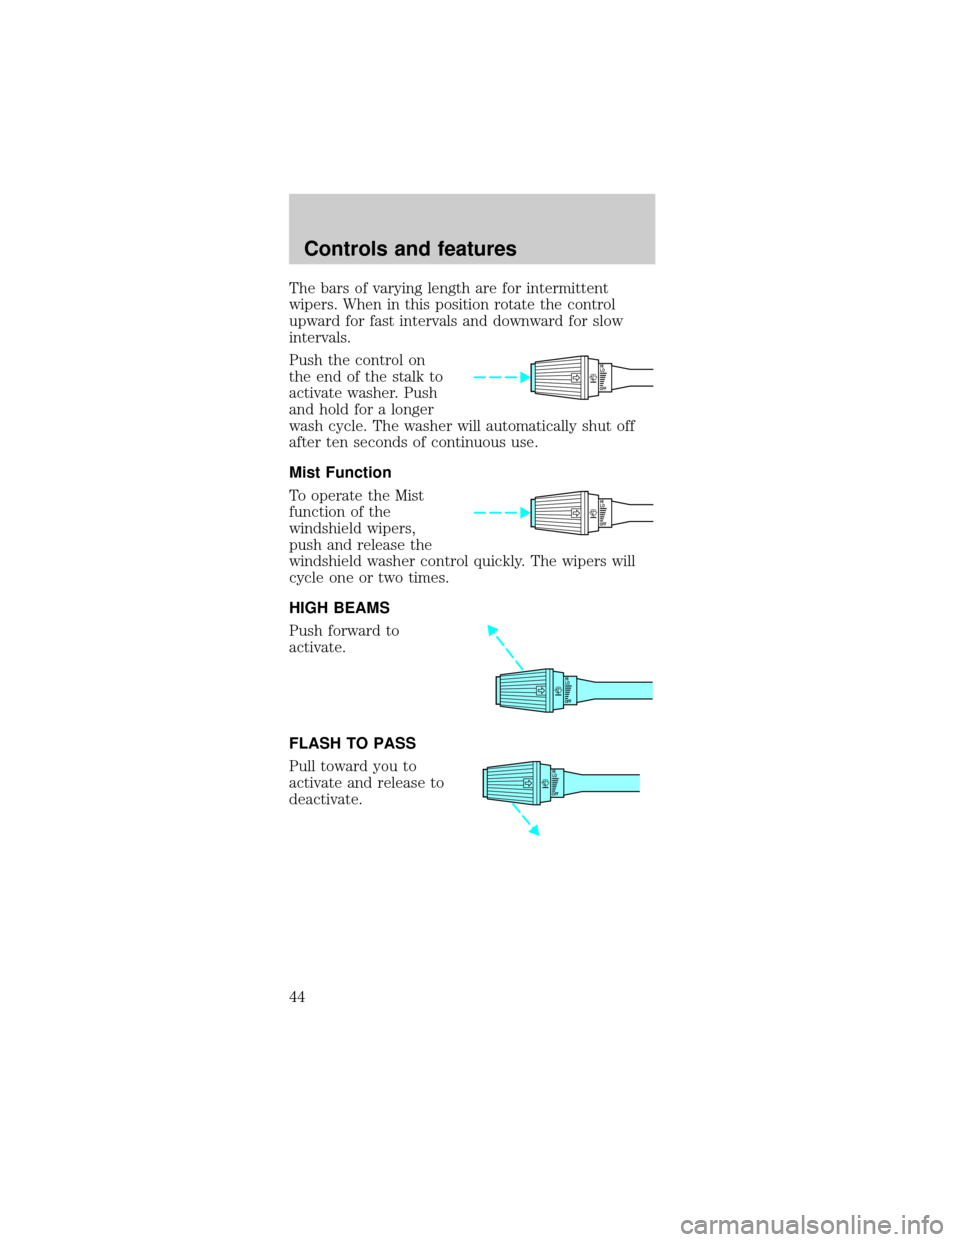
Push the control on
the end of the stalk to
activate washer. Push
and hold for a longer
wash cycle. The washer will automatically shut off
after ten seconds of continuous use.
Mist Function
To operate the Mist
function of the
windshield wipers,
push and release the
windshield washer control quickly. The wipers will
cycle one or two times.
HIGH BEAMS
Push forward to
activate.
FLASH TO PASS
Pull toward you to
activate and release to
deactivate.
OFFHI
LO
OFFHI
LO
OFFHI
LO
OFFHI
LO
Controls and features
44
Page 113 of 192
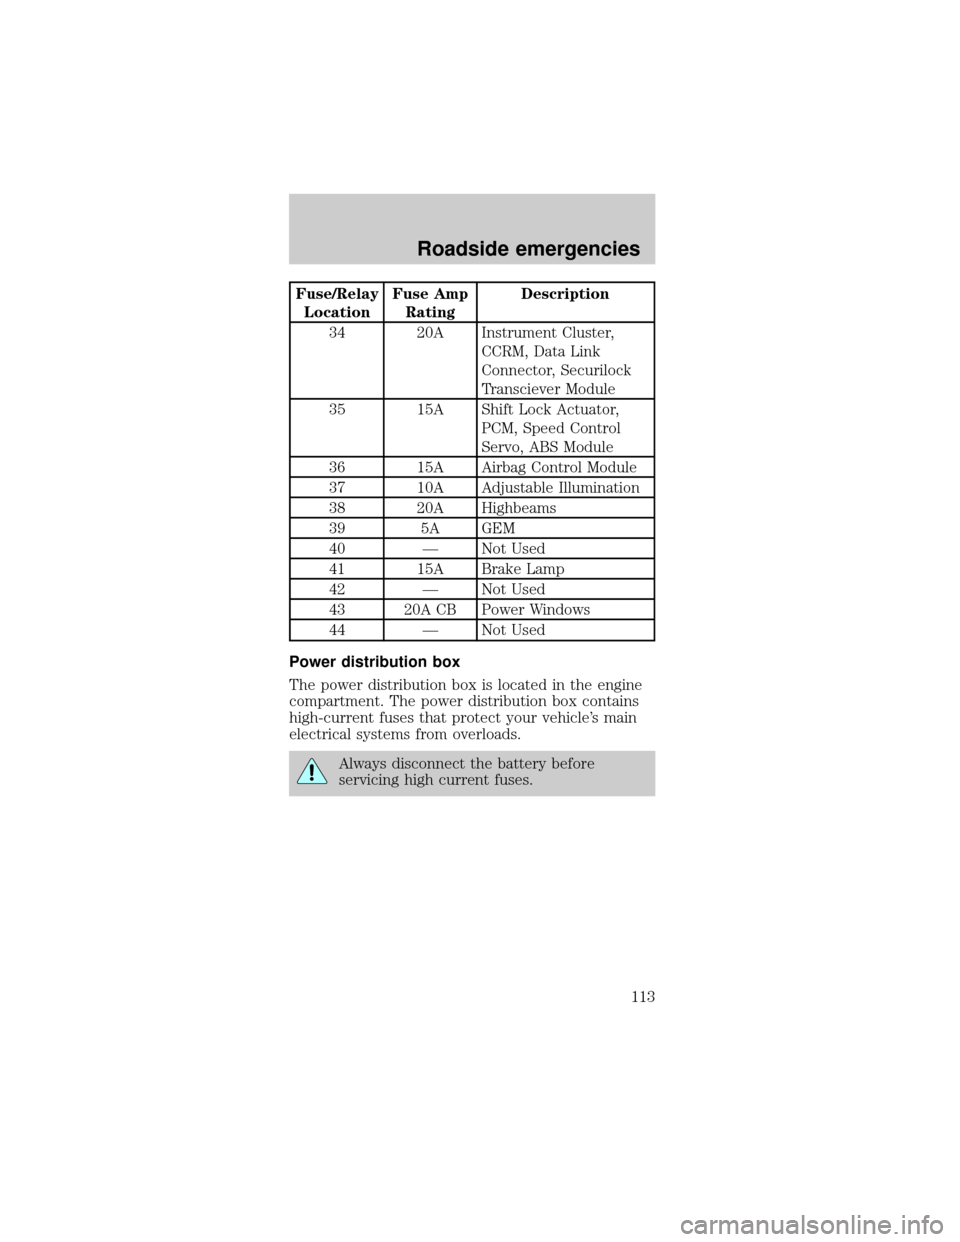
Fuse/Relay
LocationFuse Amp
RatingDescription
34 20A Instrument Cluster,
CCRM, Data Link
Connector, Securilock
Transciever Module
35 15A Shift Lock Actuator,
PCM, Speed Control
Servo, ABS Module
36 15A Airbag Control Module
37 10A Adjustable Illumination
38 20A Highbeams
39 5A GEM
40 Ð Not Used
41 15A Brake Lamp
42 Ð Not Used
43 20A CB Power Windows
44 Ð Not Used
Power distribution box
The power distribution box is located in the engine
compartment. The power distribution box contains
high-current fuses that protect your vehicle's main
electrical systems from overloads.
Always disconnect the battery before
servicing high current fuses.
Roadside emergencies
113
Page 170 of 192
Map lamps
For bulb replacement, see a qualified service
technician or your dealer.
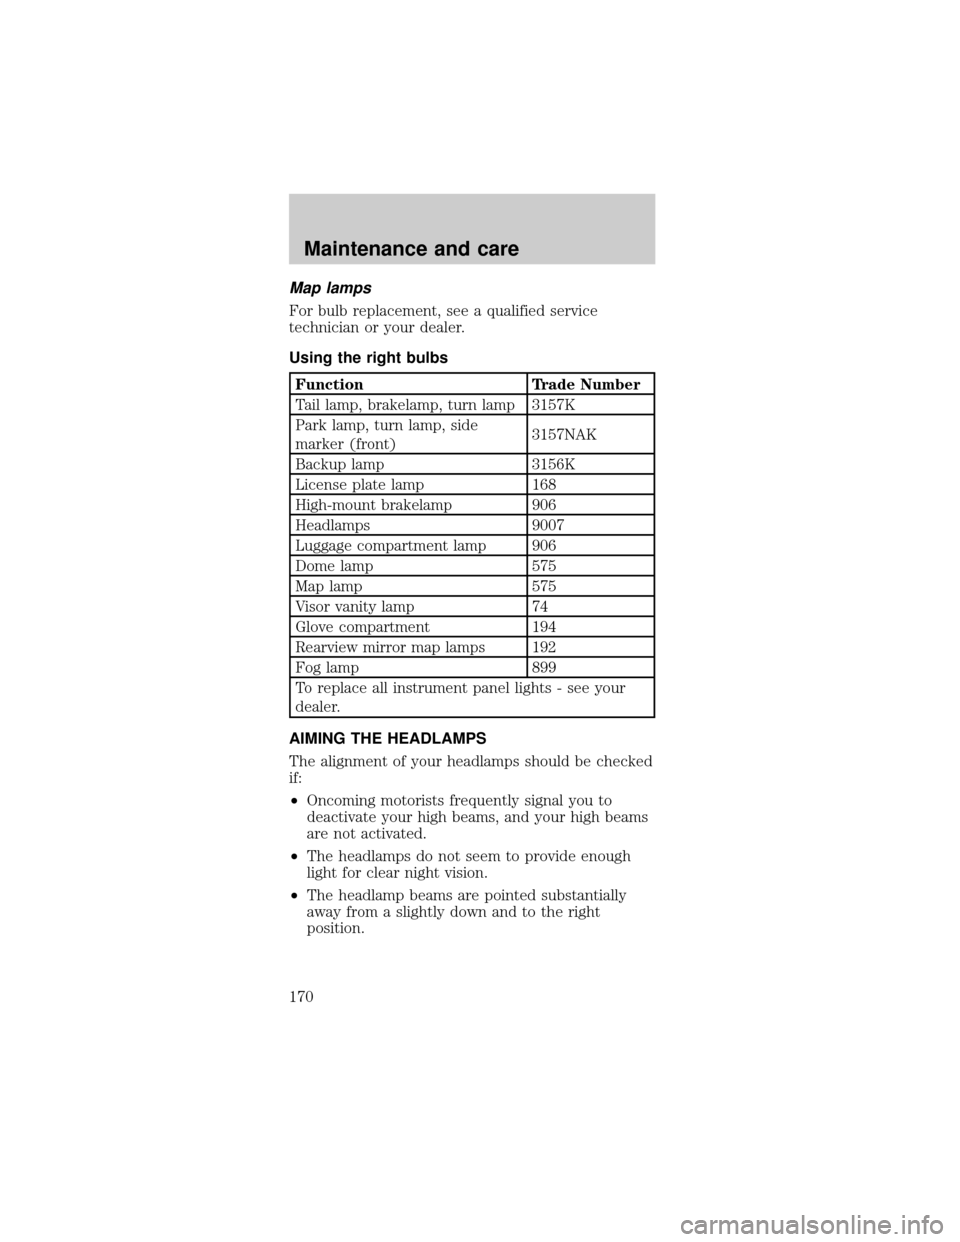
Using the right bulbs
Function Trade Number
Tail lamp, brakelamp, turn lamp 3157K
Park lamp, turn lamp, side
marker (front)3157NAK
Backup lamp 3156K
License plate lamp 168
High-mount brakelamp 906
Headlamps 9007
Luggage compartment lamp 906
Dome lamp 575
Map lamp 575
Visor vanity lamp 74
Glove compartment 194
Rearview mirror map lamps 192
Fog lamp 899
To replace all instrument panel lights - see your
dealer.
AIMING THE HEADLAMPS
The alignment of your headlamps should be checked
if:
²Oncoming motorists frequently signal you to
deactivate your high beams, and your high beams
are not activated.
²The headlamps do not seem to provide enough
light for clear night vision.
²The headlamp beams are pointed substantially
away from a slightly down and to the right
position.
Maintenance and care
170
Page 171 of 192
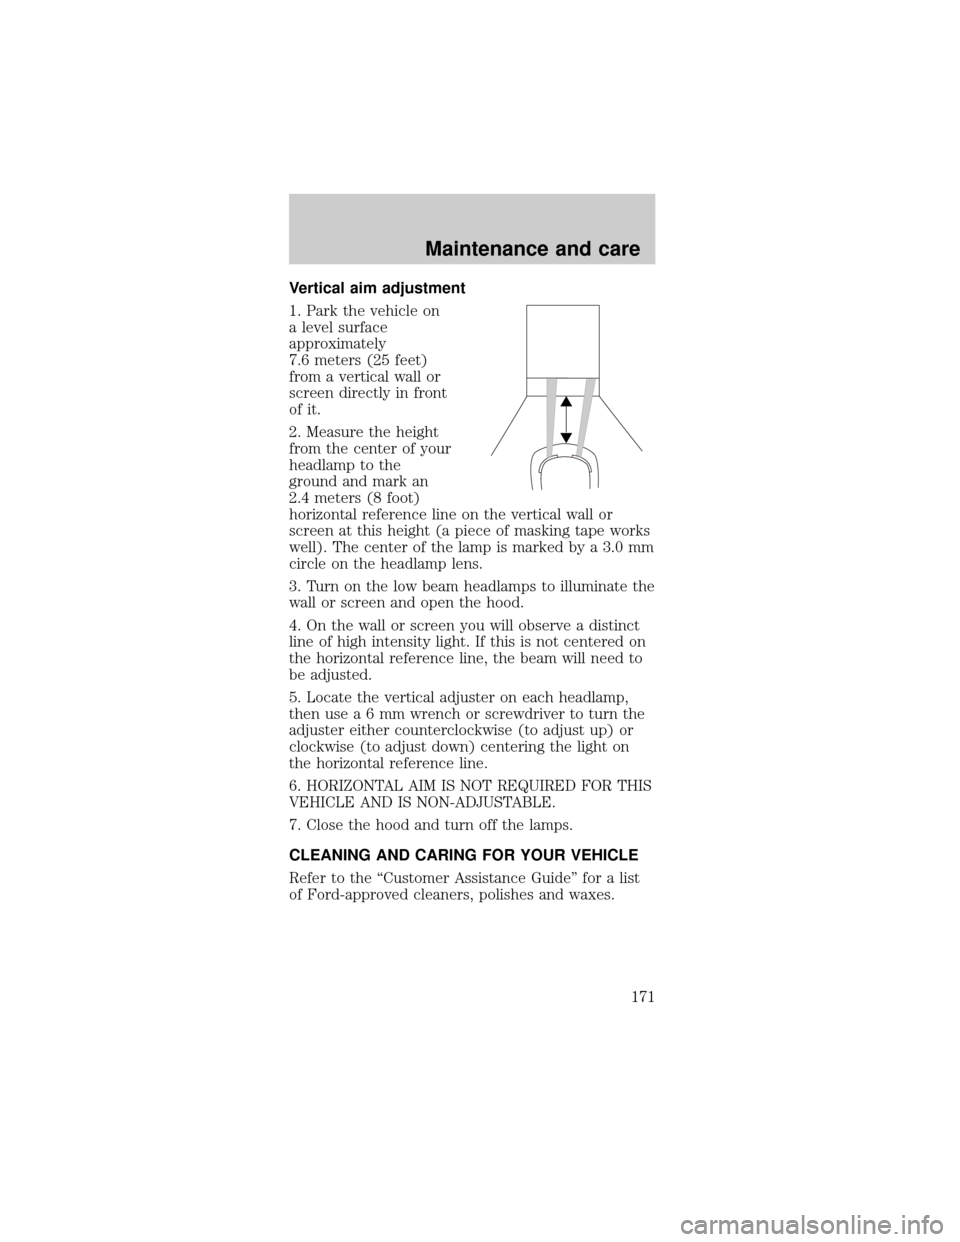
Vertical aim adjustment
1. Park the vehicle on
a level surface
approximately
7.6 meters (25 feet)
from a vertical wall or
screen directly in front
of it.
2. Measure the height
from the center of your
headlamp to the
ground and mark an
2.4 meters (8 foot)
horizontal reference line on the vertical wall or
screen at this height (a piece of masking tape works
well). The center of the lamp is marked by a 3.0 mm
circle on the headlamp lens.
3. Turn on the low beam headlamps to illuminate the
wall or screen and open the hood.
4. On the wall or screen you will observe a distinct
line of high intensity light. If this is not centered on
the horizontal reference line, the beam will need to
be adjusted.
5. Locate the vertical adjuster on each headlamp,
then usea6mmwrench or screwdriver to turn the
adjuster either counterclockwise (to adjust up) or
clockwise (to adjust down) centering the light on
the horizontal reference line.
6. HORIZONTAL AIM IS NOT REQUIRED FOR THIS
VEHICLE AND IS NON-ADJUSTABLE.
7. Close the hood and turn off the lamps.
CLEANING AND CARING FOR YOUR VEHICLE
Refer to the ªCustomer Assistance Guideº for a list
of Ford-approved cleaners, polishes and waxes.
Maintenance and care
171
Page 187 of 192

Fuel
choosing
the right fuel ......... 156
comparisons with EPA
fuel economy
estimates ............... 163
detergent in fuel ... 158
filling your vehicle
with fuel ......... 154,155
gauge ....................... 12
quality .................... 157
running
out of fuel ............. 158
safety information
relating to automotive
fuels ....................... 154
Fuses ................. 109,110
Gas mileage (see
Fuel economy) ........ 159
160,161,162
Gauges ....................... 12
engine coolant
temperature gauge . 13
engine oil pressure
gauge ....................... 15
Hazard flashers ....... 108
Head restraints ......... 63
Headlamps
aiming ............. 170,171
bulb
specifications ........ 170
high beam ............ 7,44
warning chime ........ 11
Heating ...................... 18
heating and air
conditioning
system ................ 18,20
Hood ........................ 128
Ignition ..................... 182
Inspection/maintenance
(I/M) testing ............ 164
Instrument panel ........ 6cleaning ................. 175
Keys
key in ignition
chime ....................... 11
positions of the
ignition .................... 45
removing from the
ignition .................. 101
Lamps
daytime
running light ........... 16
fog lamps ................. 52
headlamps ............... 16
headlamps, flash to
pass .......................... 44
instrument panel,
dimming ................... 17
interior
lamps ......... 49,169,170
replacing bulbs ..... 165
166,167,168,169
Lane change indicator
(see Turn signal) ...... 43
Lights, warning and
indicator
air bag ........................ 7
anti-lock brakes
(ABS) ...................... 10
anti-theft ................... 7
brake ........................ 10
charging system ........ 7
check coolant .......... 11
low fuel ...................... 9
overdrive off .............. 9
safety belt ................. 7
service engine soon .. 8
turn signal indicator . 6
Lumbar support,
seats ...................... 65,66
Manual transmission
reverse ................... 100
Index
187