hood open FORD MUSTANG 1998 4.G Owners Manual
[x] Cancel search | Manufacturer: FORD, Model Year: 1998, Model line: MUSTANG, Model: FORD MUSTANG 1998 4.GPages: 192, PDF Size: 1.67 MB
Page 128 of 192
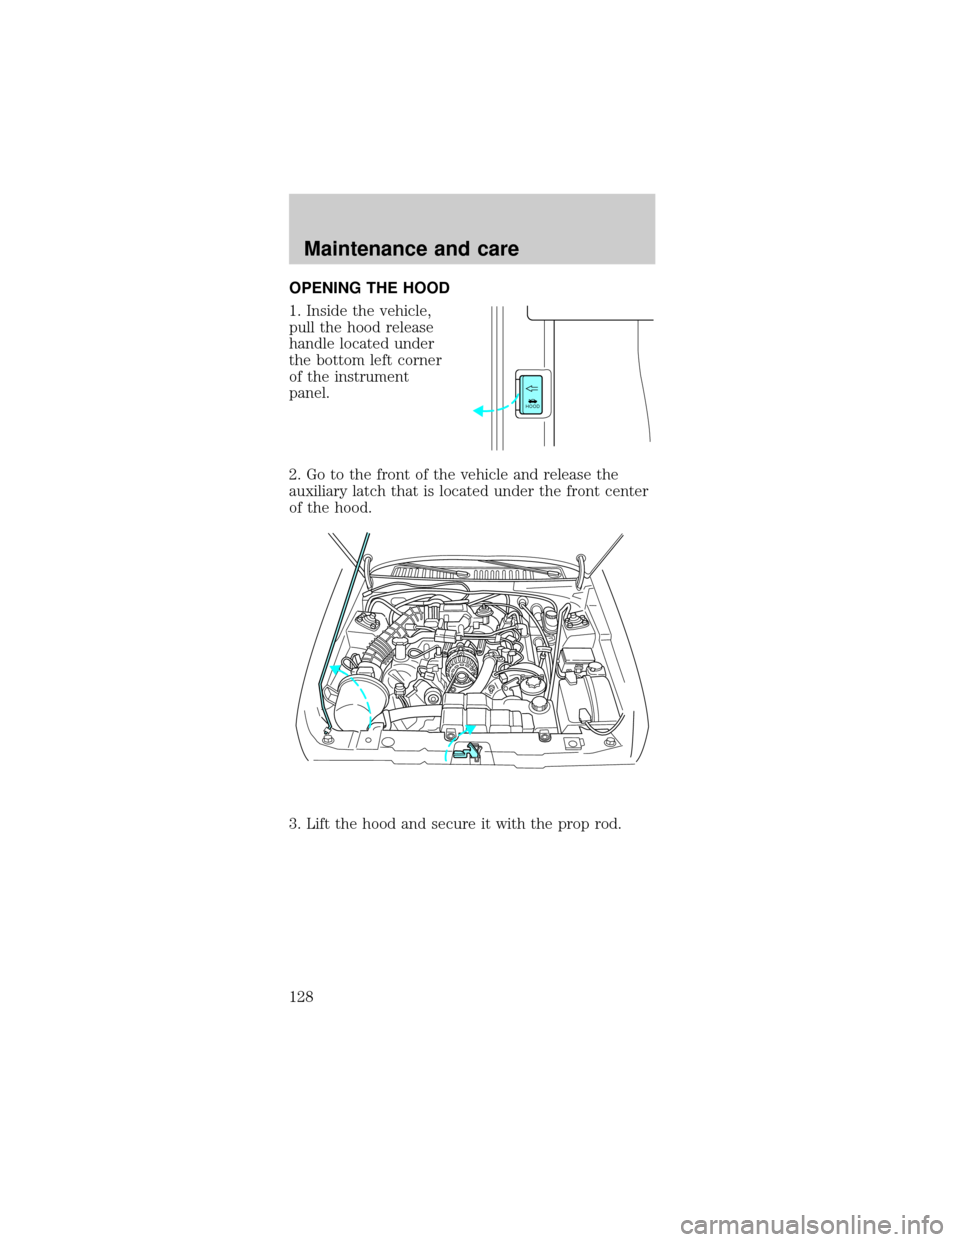
OPENING THE HOOD
1. Inside the vehicle,
pull the hood release
handle located under
the bottom left corner
of the instrument
panel.
2. Go to the front of the vehicle and release the
auxiliary latch that is located under the front center
of the hood.
3. Lift the hood and secure it with the prop rod.
HOOD
Maintenance and care
128
Page 131 of 192
2. Turn the engine off and wait a few minutes for
the oil to drain into the oil pan.
3. Set the parking brake and ensure the gearshift is
securely latched in P (Park) (automatic
transmissions) or 1 (First) (manual transmissions).
4. Open the hood. Protect yourself from engine heat.
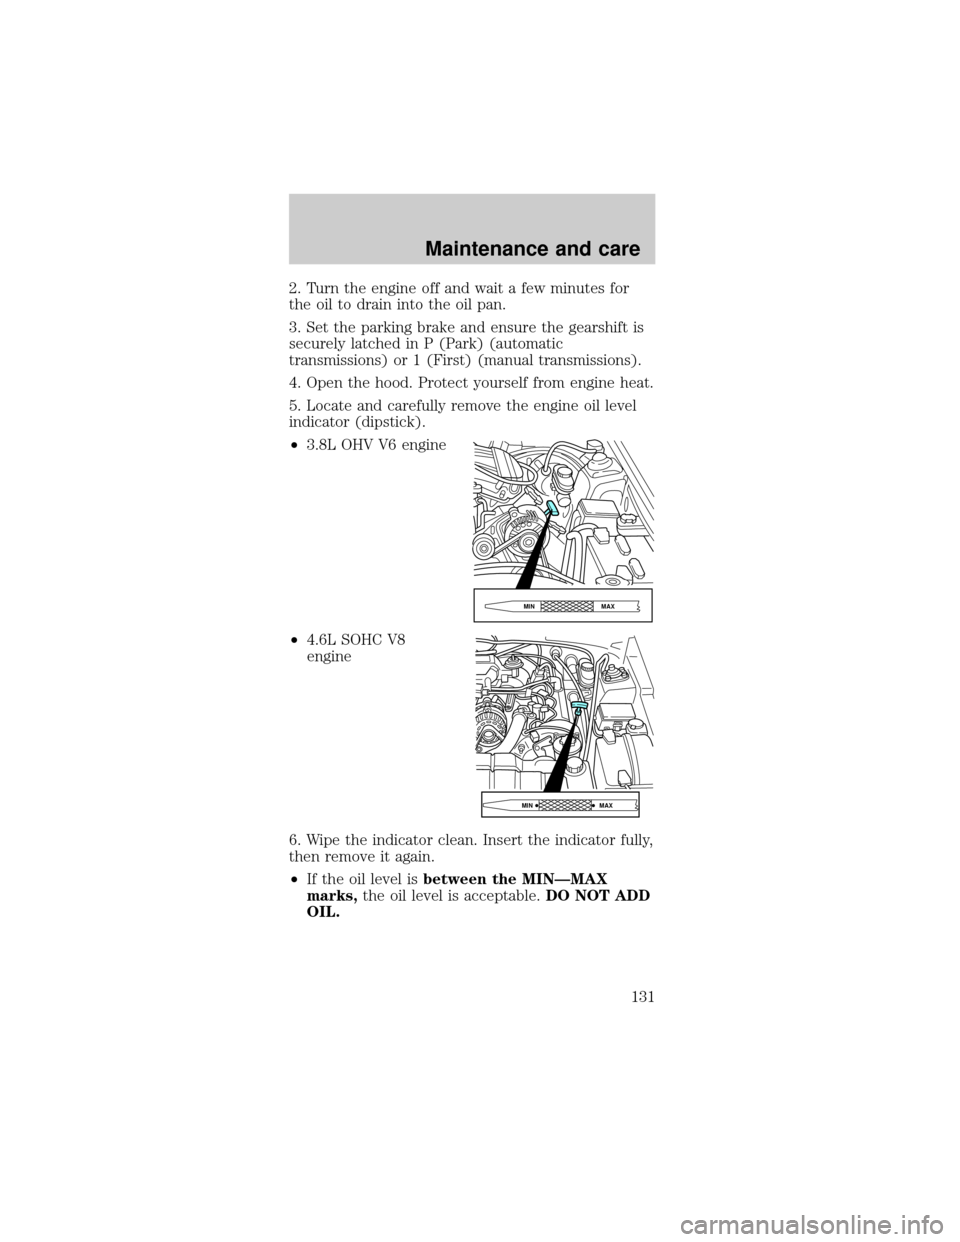
5. Locate and carefully remove the engine oil level
indicator (dipstick).
²3.8L OHV V6 engine
²4.6L SOHC V8
engine
6. Wipe the indicator clean. Insert the indicator fully,
then remove it again.
²If the oil level isbetween the MINÐMAX
marks,the oil level is acceptable.DO NOT ADD
OIL.
MAX MIN
MAX MIN
Maintenance and care
131
Page 166 of 192
Replacing headlamp bulbs
Handle a halogen headlamp bulb carefully
and keep out of children's reach. Grasp the
bulb only by its plastic base and do not touch the
glass. The oil from your hand could cause the bulb
to break the next time the headlamps are
operated.
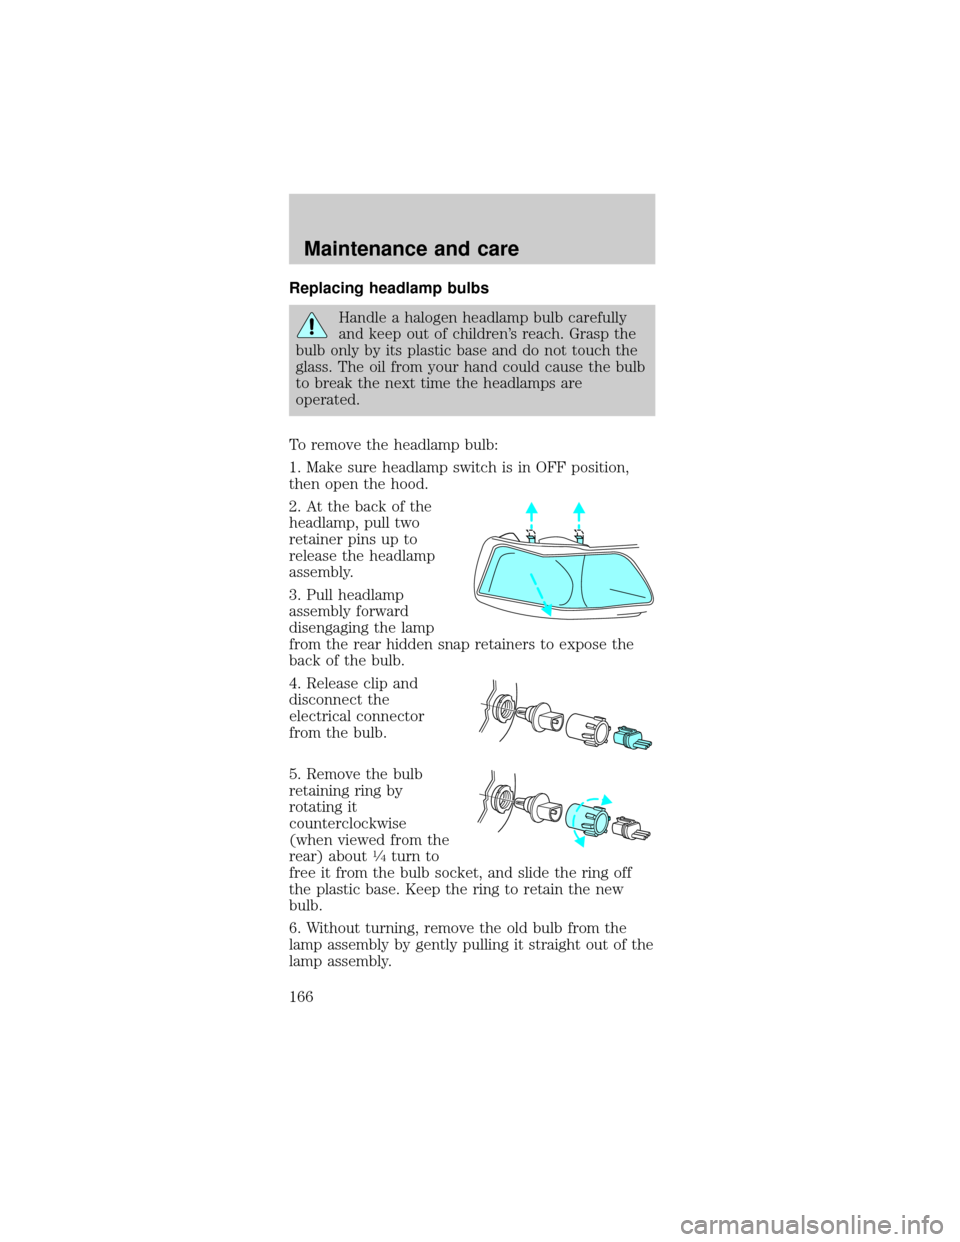
To remove the headlamp bulb:
1. Make sure headlamp switch is in OFF position,
then open the hood.
2. At the back of the
headlamp, pull two
retainer pins up to
release the headlamp
assembly.
3. Pull headlamp
assembly forward
disengaging the lamp
from the rear hidden snap retainers to expose the
back of the bulb.
4. Release clip and
disconnect the
electrical connector
from the bulb.
5. Remove the bulb
retaining ring by
rotating it
counterclockwise
(when viewed from the
rear) about
1¤4turn to
free it from the bulb socket, and slide the ring off
the plastic base. Keep the ring to retain the new
bulb.
6. Without turning, remove the old bulb from the
lamp assembly by gently pulling it straight out of the
lamp assembly.
Maintenance and care
166
Page 167 of 192
To install the new bulb:
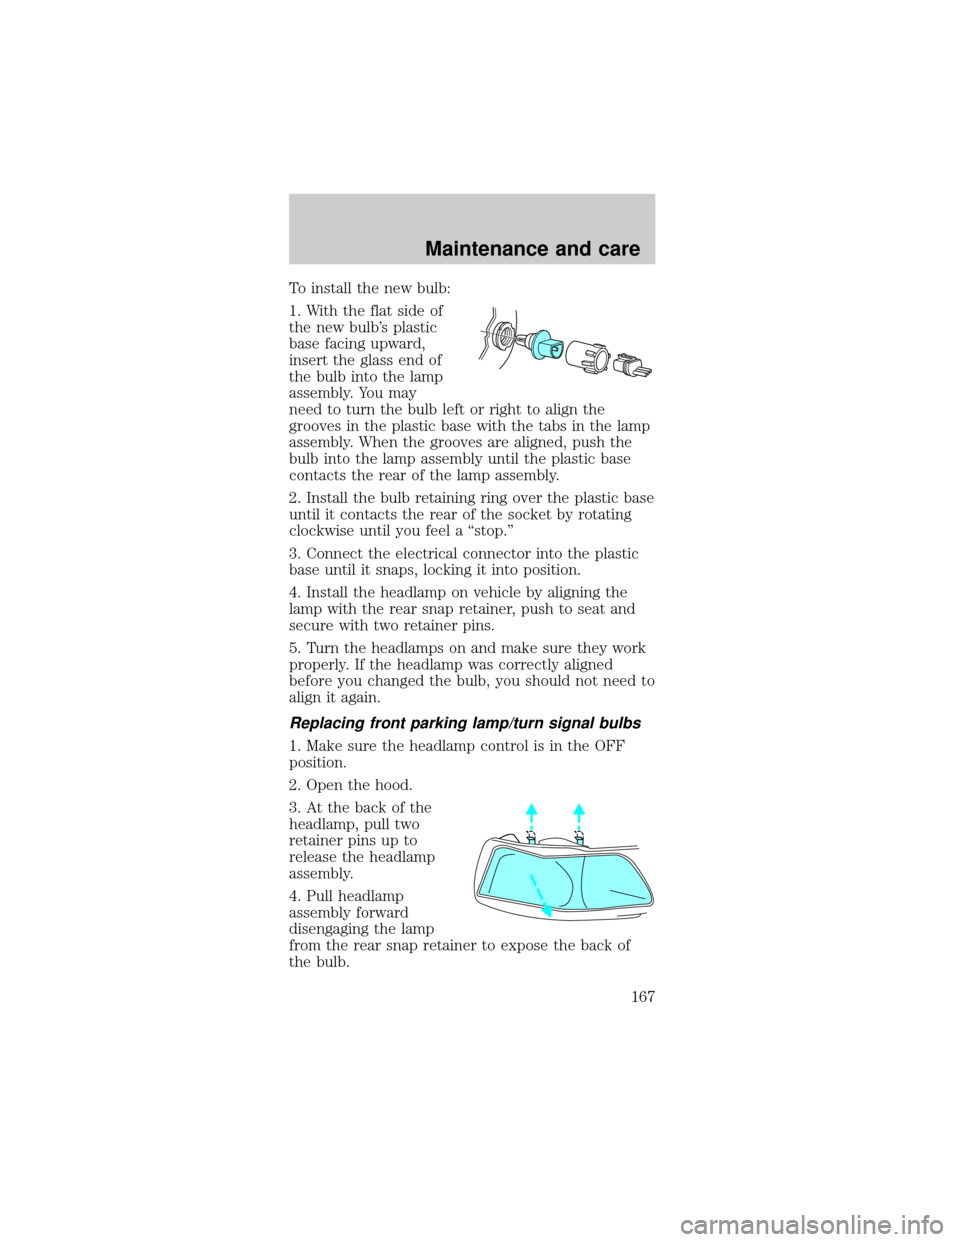
1. With the flat side of
the new bulb's plastic
base facing upward,
insert the glass end of
the bulb into the lamp
assembly. You may
need to turn the bulb left or right to align the
grooves in the plastic base with the tabs in the lamp
assembly. When the grooves are aligned, push the
bulb into the lamp assembly until the plastic base
contacts the rear of the lamp assembly.
2. Install the bulb retaining ring over the plastic base
until it contacts the rear of the socket by rotating
clockwise until you feel a ªstop.º
3. Connect the electrical connector into the plastic
base until it snaps, locking it into position.
4. Install the headlamp on vehicle by aligning the
lamp with the rear snap retainer, push to seat and
secure with two retainer pins.
5. Turn the headlamps on and make sure they work
properly. If the headlamp was correctly aligned
before you changed the bulb, you should not need to
align it again.
Replacing front parking lamp/turn signal bulbs
1. Make sure the headlamp control is in the OFF
position.
2. Open the hood.
3. At the back of the
headlamp, pull two
retainer pins up to
release the headlamp
assembly.
4. Pull headlamp
assembly forward
disengaging the lamp
from the rear snap retainer to expose the back of
the bulb.
Maintenance and care
167
Page 171 of 192
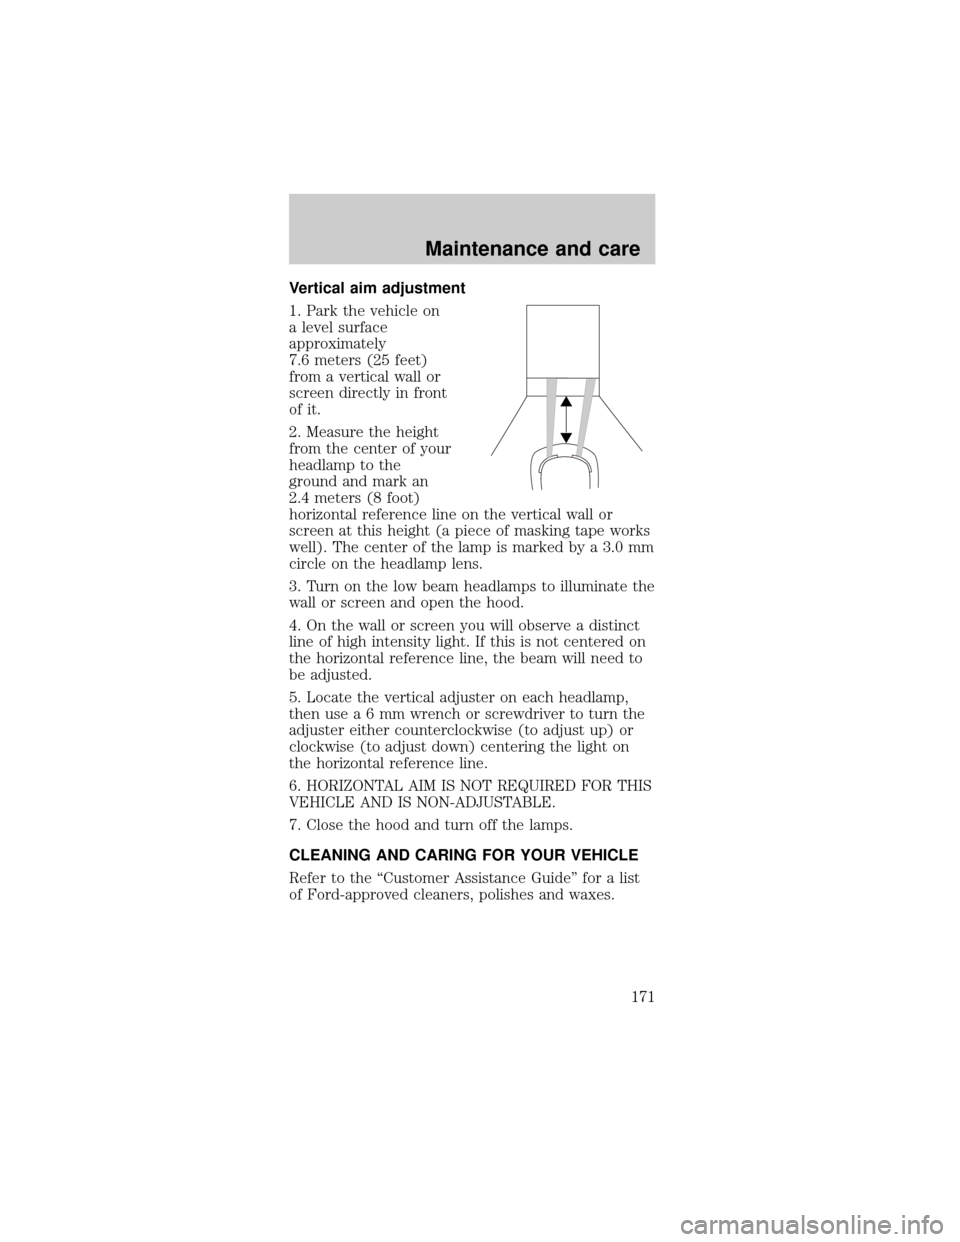
Vertical aim adjustment
1. Park the vehicle on
a level surface
approximately
7.6 meters (25 feet)
from a vertical wall or
screen directly in front
of it.
2. Measure the height
from the center of your
headlamp to the
ground and mark an
2.4 meters (8 foot)
horizontal reference line on the vertical wall or
screen at this height (a piece of masking tape works
well). The center of the lamp is marked by a 3.0 mm
circle on the headlamp lens.
3. Turn on the low beam headlamps to illuminate the
wall or screen and open the hood.
4. On the wall or screen you will observe a distinct
line of high intensity light. If this is not centered on
the horizontal reference line, the beam will need to
be adjusted.
5. Locate the vertical adjuster on each headlamp,
then usea6mmwrench or screwdriver to turn the
adjuster either counterclockwise (to adjust up) or
clockwise (to adjust down) centering the light on
the horizontal reference line.
6. HORIZONTAL AIM IS NOT REQUIRED FOR THIS
VEHICLE AND IS NON-ADJUSTABLE.
7. Close the hood and turn off the lamps.
CLEANING AND CARING FOR YOUR VEHICLE
Refer to the ªCustomer Assistance Guideº for a list
of Ford-approved cleaners, polishes and waxes.
Maintenance and care
171