window FORD MUSTANG 1998 4.G Owners Manual
[x] Cancel search | Manufacturer: FORD, Model Year: 1998, Model line: MUSTANG, Model: FORD MUSTANG 1998 4.GPages: 192, PDF Size: 1.67 MB
Page 17 of 192
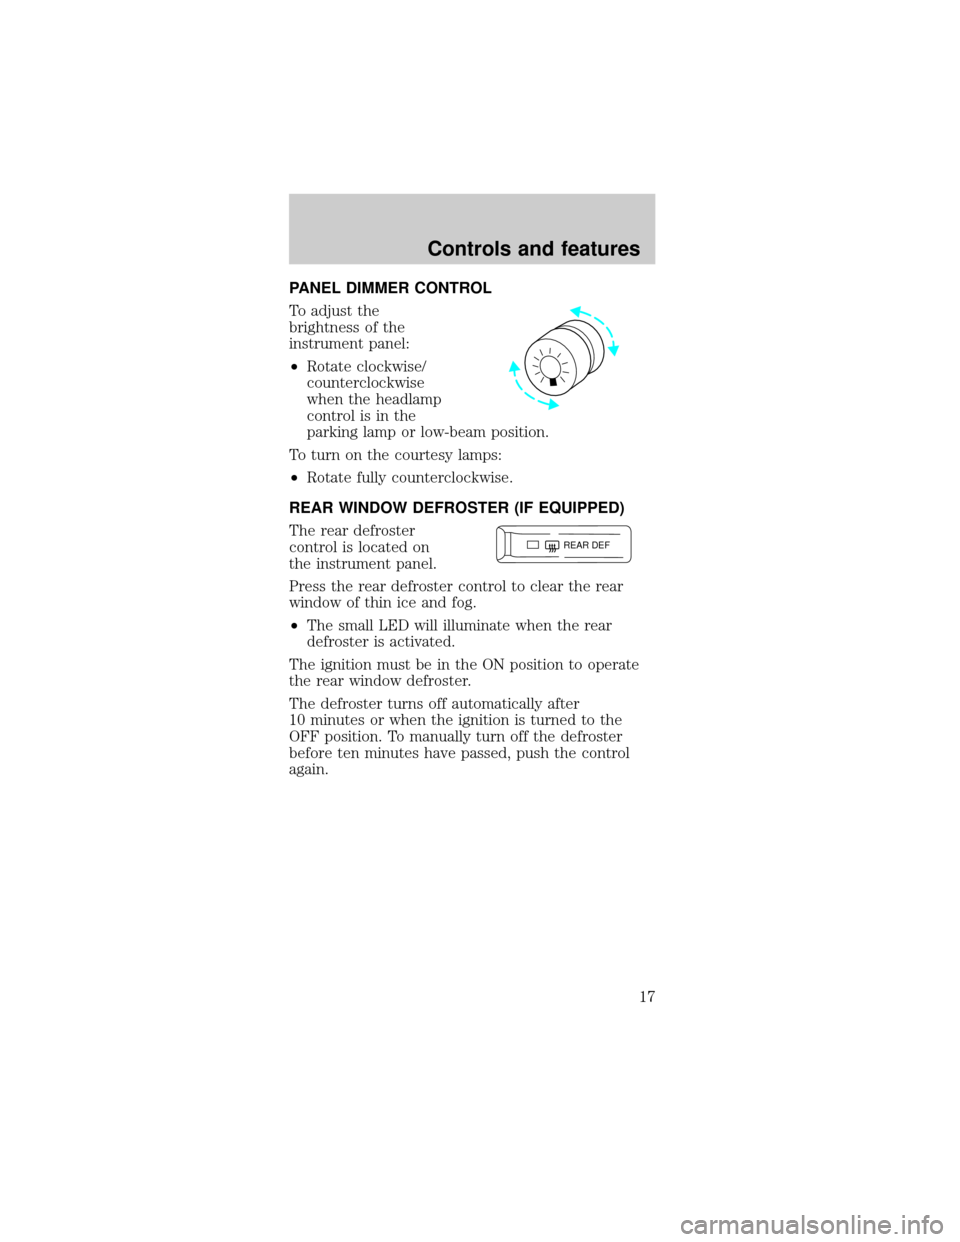
PANEL DIMMER CONTROL
To adjust the
brightness of the
instrument panel:
²Rotate clockwise/
counterclockwise
when the headlamp
control is in the
parking lamp or low-beam position.
To turn on the courtesy lamps:
²Rotate fully counterclockwise.
REAR WINDOW DEFROSTER (IF EQUIPPED)
The rear defroster
control is located on
the instrument panel.
Press the rear defroster control to clear the rear
window of thin ice and fog.
²The small LED will illuminate when the rear
defroster is activated.
The ignition must be in the ON position to operate
the rear window defroster.
The defroster turns off automatically after
10 minutes or when the ignition is turned to the
OFF position. To manually turn off the defroster
before ten minutes have passed, push the control
again.
REAR DEF
Controls and features
17
Page 20 of 192

is about 10ÉC (50ÉF) or higher, the air conditioner
will automatically dehumidify the air to reduce
fogging.
²
-Distributes outside air through the
windshield defroster ducts. It can be used to clear
ice or fog from the windshield. If the temperature is
about 10ÉC (50ÉF) or higher, the air conditioner will
automatically dehumidify the air to reduce fogging.
Operating tips
²In humid weather, selectbefore driving. This
will prevent your windshield from fogging. After a
few minutes, select any desired position.
²To reduce humidity buildup inside the vehicle,
don't drive with the climate control system in the
OFF position.
²Don't put objects under the front seat that will
interfere with the airflow to the back seats.
²Remove any snow,
ice or leaves from
the air intake area
(at the bottom of
the windshield).
²
If your vehicle has been parked with the windows
closed during hot weather, the air conditioner will do
a much faster job of cooling if you drive for two or
three minutes with the windows open. This will force
most of the hot, stale air out of the vehicle. Then
operate your air conditioner as you would normally.
²When placing objects on top of your instrument
panel, be careful to not place them over the
defroster outlets. These objects can block airflow
and reduce your ability to see through your
windshield. Also, avoid placing small objects on top
of your instrument panel. These objects can fall
down into the defroster outlets and block airflow
and possibly damage your climate control system.
Controls and features
20
Page 50 of 192

POWER WINDOWS (IF EQUIPPED)
Press and hold the rocker switches to open and
close windows.
²Press the top portion
of the rocker switch
to close.
²Press the bottom
portion of the rocker
switch to open.
Express down
To make the driver
window open fully
without holding the
window control, press
the driver window
control completely down
and release quickly.
Depress again to stop
window operation.
Window lock
The window lock
feature allows only the
driver to operate the
power windows.
To lock out all the
window controls except
for the driver's press the control. Press the control
again to restore the window controls.
LOCK
Controls and features
50
Page 53 of 192
Convertible (If equipped)
Do not store articles behind rear seat. Articles
stored in the convertible top stowage compartment
may break the rear glass window when the top is
lowered.
Lowering the convertible top
The convertible top can be lowered with the side
windows either up or down.
The convertible top will not operate unless the
parking brake is engaged. Do not lower the top while
the vehicle is moving because the top may be
severely damaged. Also, do not lower the top when
the top material is wet.
To lower the convertible top:
1. Bring vehicle to a complete stop. Engage the
parking brake. Key must be in the ON position.
2. Check the convertible top stowage compartment
behind the rear seat to be sure it is empty and ready
to receive the top.
3. Unclamp the top from the windshield header at
both the right and left sides by pulling each clamp
rearward until the hook in the windshield header is
free. The clamps are flush with the header when in
the closed position.
4. Close the windshield header clamps immediately
after disengagement, to avoid cutting the top
material and to permit installation of the vinyl boot.
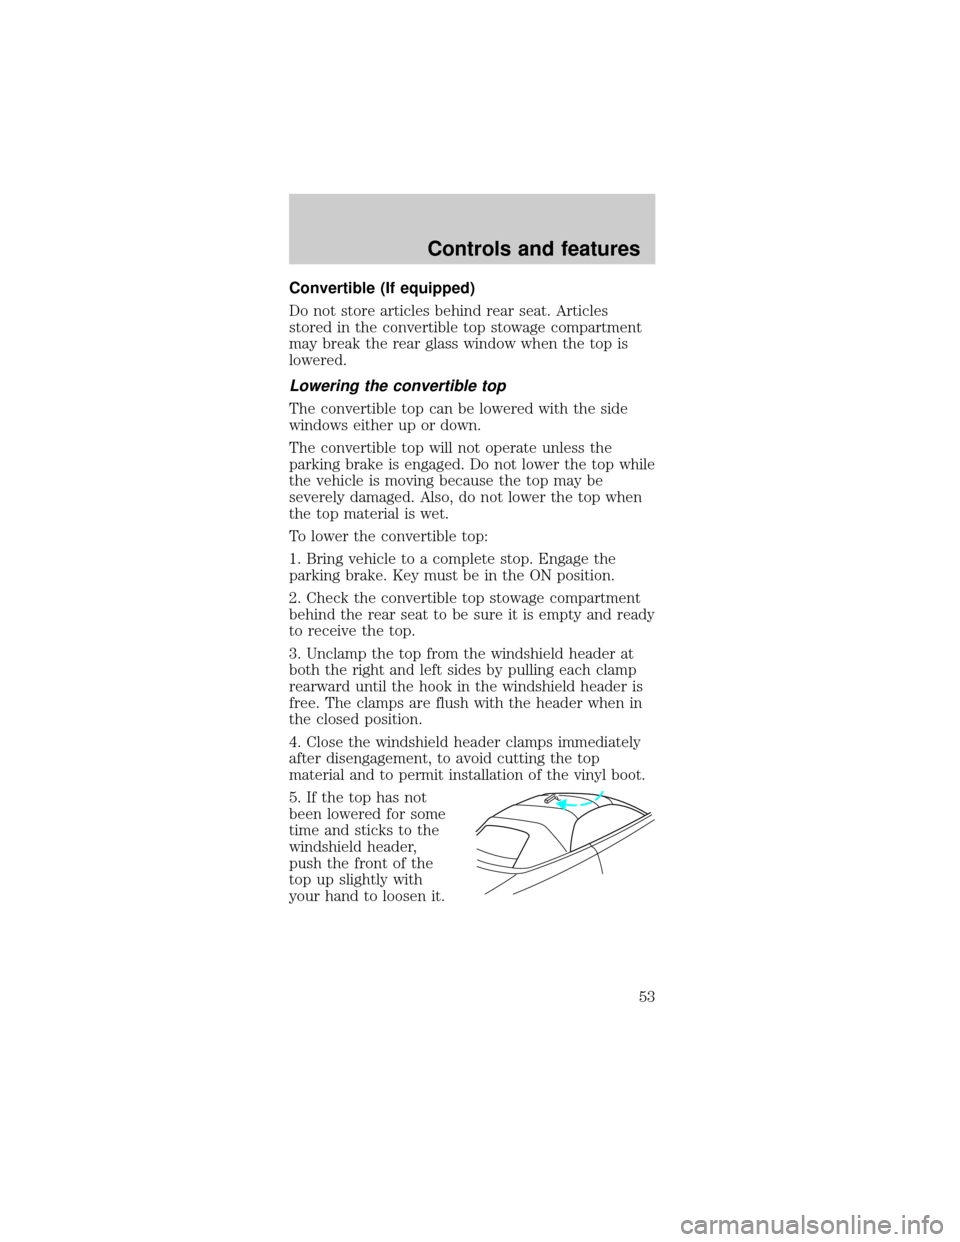
5. If the top has not
been lowered for some
time and sticks to the
windshield header,
push the front of the
top up slightly with
your hand to loosen it.
Controls and features
53
Page 55 of 192
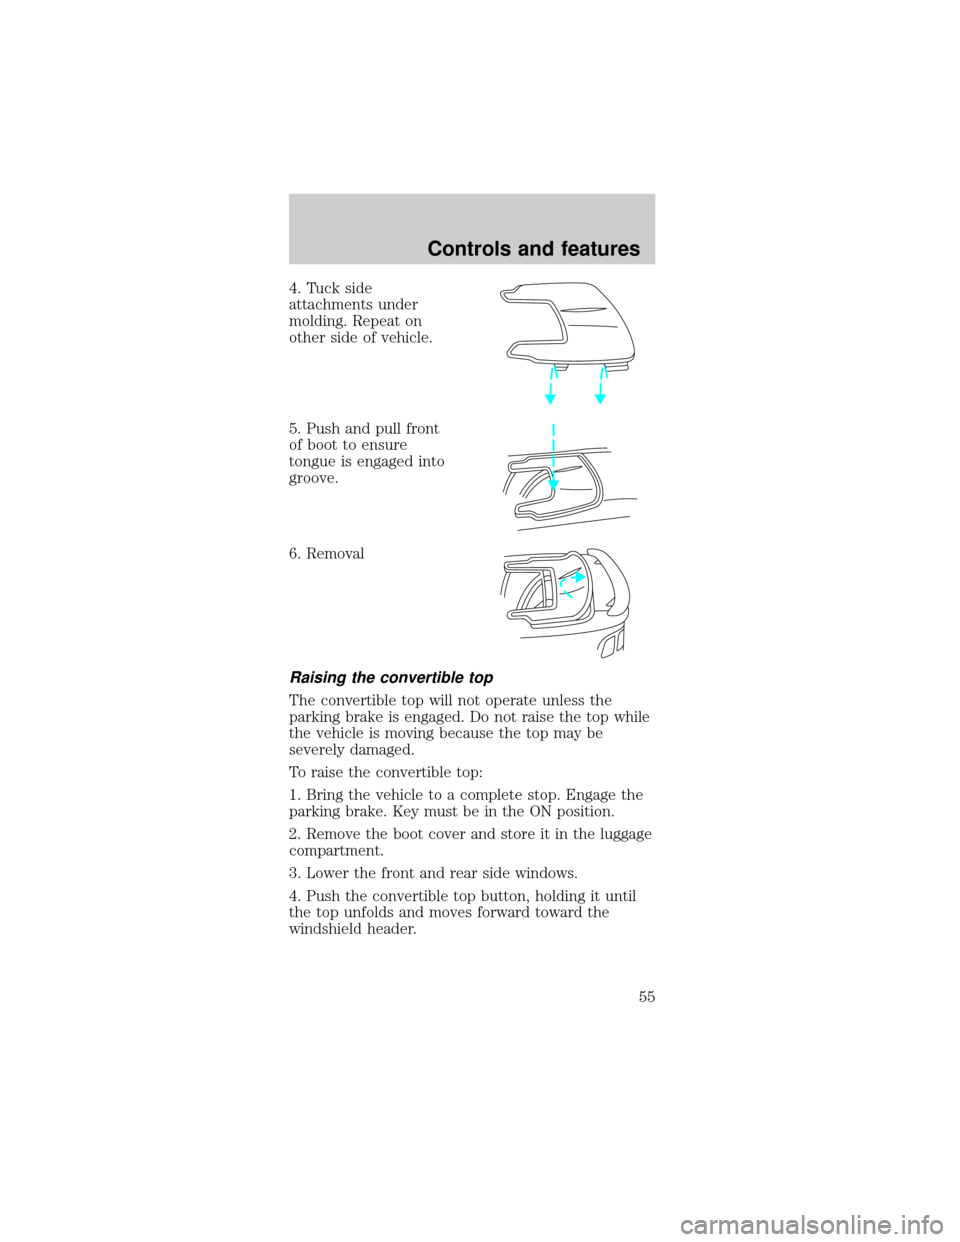
4. Tuck side
attachments under
molding. Repeat on
other side of vehicle.
5. Push and pull front
of boot to ensure
tongue is engaged into
groove.
6. Removal
Raising the convertible top
The convertible top will not operate unless the
parking brake is engaged. Do not raise the top while
the vehicle is moving because the top may be
severely damaged.
To raise the convertible top:
1. Bring the vehicle to a complete stop. Engage the
parking brake. Key must be in the ON position.
2. Remove the boot cover and store it in the luggage
compartment.
3. Lower the front and rear side windows.
4. Push the convertible top button, holding it until
the top unfolds and moves forward toward the
windshield header.
Controls and features
55
Page 56 of 192
5. Open both top clamps before the top meets the
windshield header
6. Continue to use the top motor to raise the top
until it has reached the fully closed position flush to
the header.
7. The two pins under the forward edge of the top
should seat themselves in the matching holes in the
header.
8. To fasten both clamps securely, push the clamp
handles into the header on the top until they are
flush with the header. Pulling down on the header at
the center grip while closing the latches may assist
in fastening the clamps.
9. Raise the front and rear side windows.
10. Disengage the parking brake.
REMOTE ENTRY SYSTEM
The remote entry system allows you to:
²lock or unlock all vehicle doors without a key.
²open the trunk.
²activate the panic alarm.
²confirms that the vehicle is locked with a short
ªbeepº from the horn.
The remote entry features only operate with the
ignition in the OFF position.
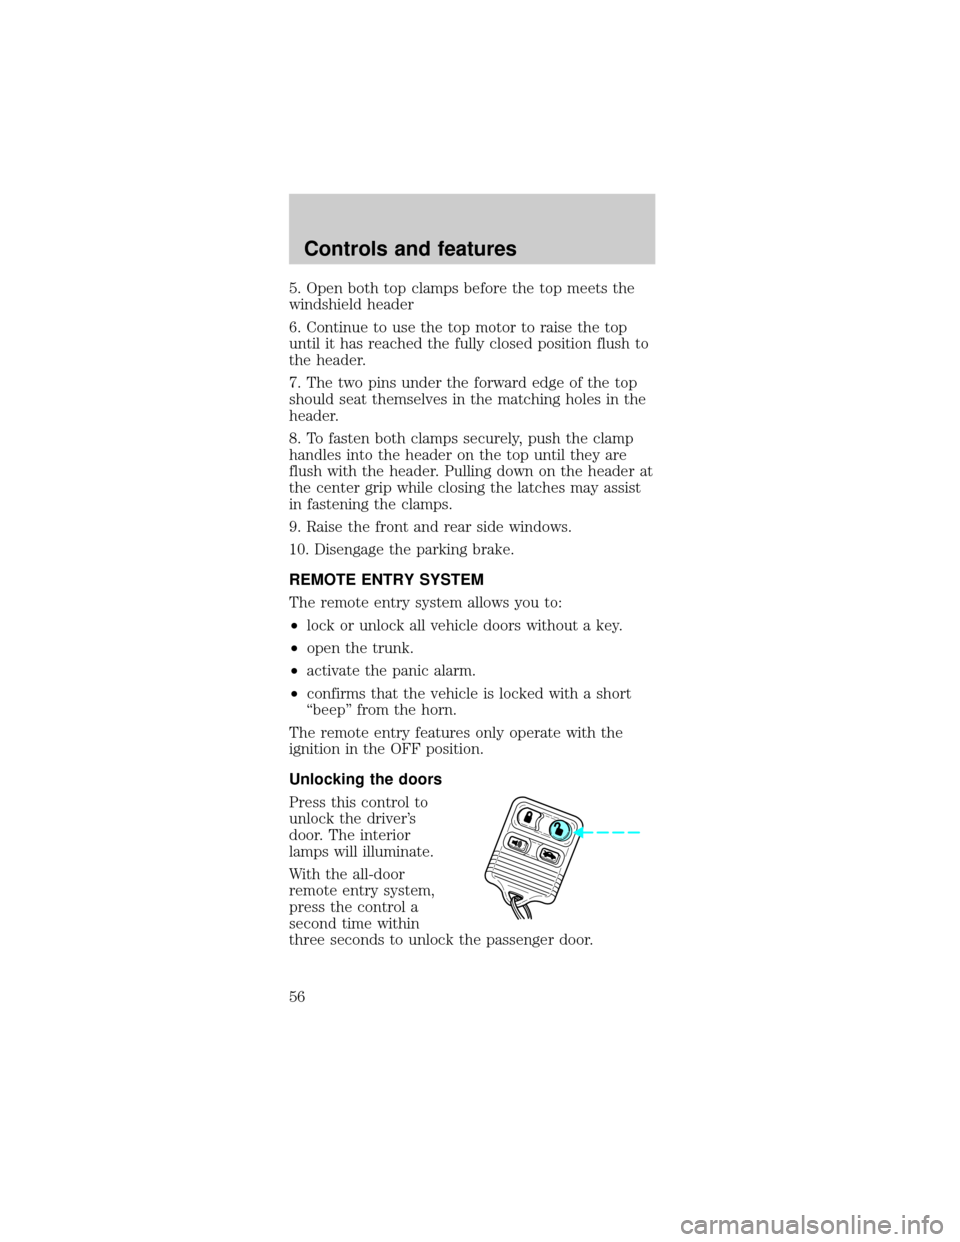
Unlocking the doors
Press this control to
unlock the driver's
door. The interior
lamps will illuminate.
With the all-door
remote entry system,
press the control a
second time within
three seconds to unlock the passenger door.
Controls and features
56
Page 87 of 192
Guarding against exhaust fumes
Although odorless and colorless, carbon monoxide is
present in exhaust fumes. Take precautions to avoid
its dangerous effects.
If you ever smell exhaust fumes of any kind
inside your vehicle, have your dealer inspect
and fix your vehicle immediately. Do not drive if
you smell exhaust fumes. These fumes are harmful
and could kill you.
Have the exhaust and body ventilation systems
checked whenever:
²the vehicle is raised for service.
²the sound of the exhaust system changes.
²the vehicle has been damaged in a collision.
Engine exhaust, some of its constituents,
and certain vehicle components contain or
emit chemicals known to the State of California to
cause cancer, and birth defects or other
reproductive harm.
Important ventilating information
If the engine is idling while the vehicle is stopped in
an open area for long periods of time, open the
windows at least 2.5 cm (one inch).
Adjust the heating or air conditioning (if equipped)
to bring in fresh air.
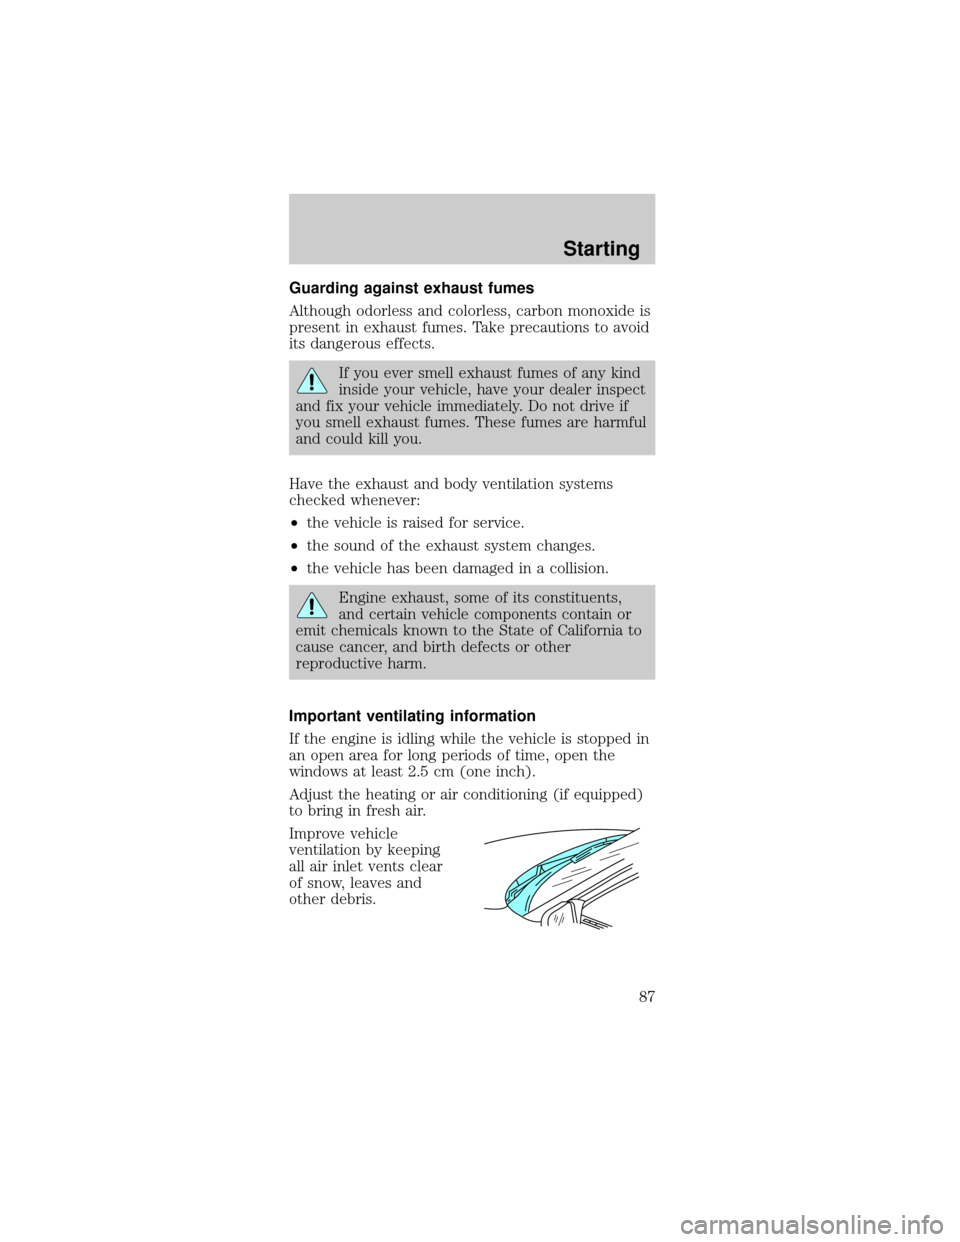
Improve vehicle
ventilation by keeping
all air inlet vents clear
of snow, leaves and
other debris.
Starting
87
Page 113 of 192
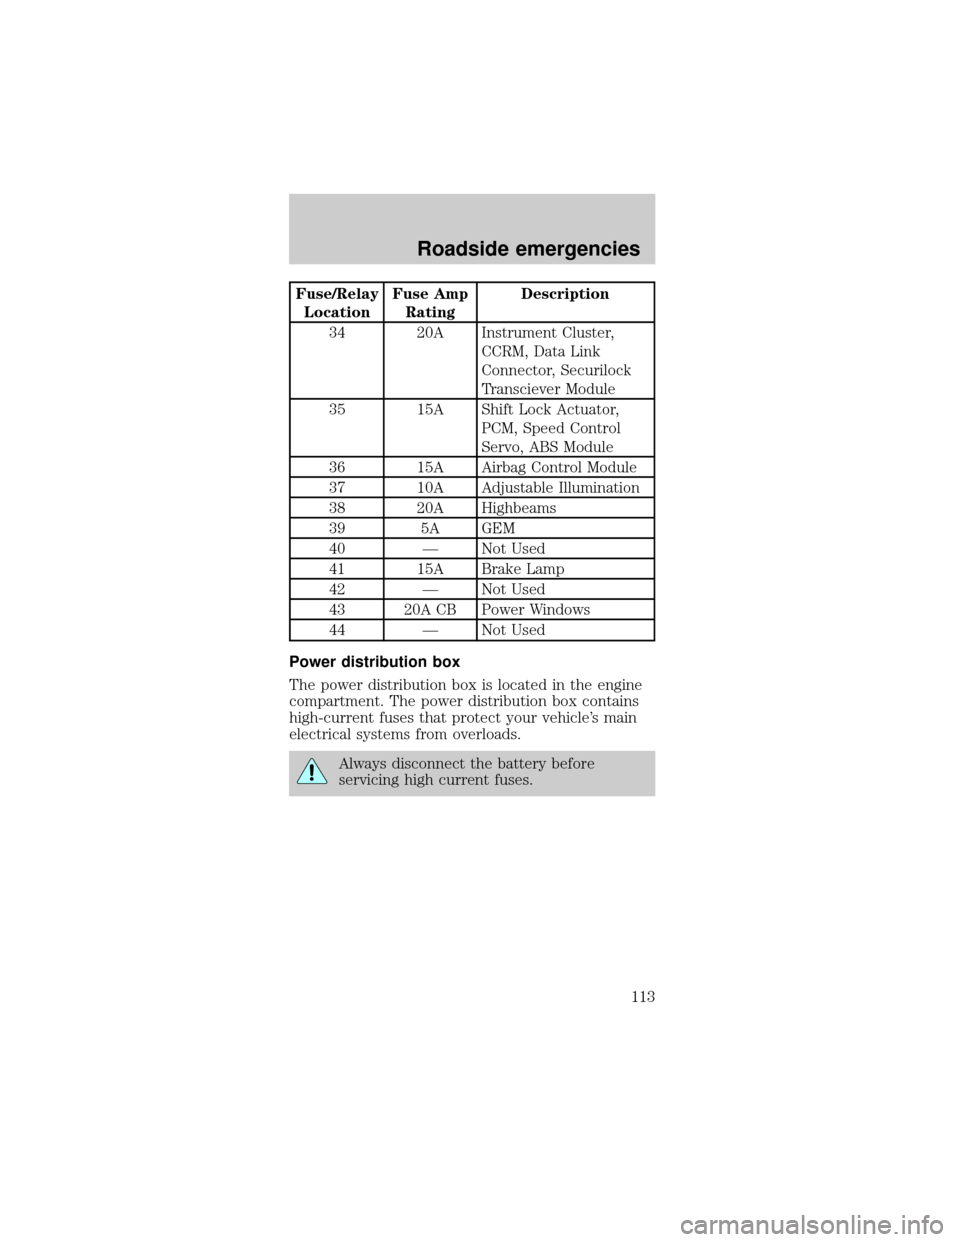
Fuse/Relay
LocationFuse Amp
RatingDescription
34 20A Instrument Cluster,
CCRM, Data Link
Connector, Securilock
Transciever Module
35 15A Shift Lock Actuator,
PCM, Speed Control
Servo, ABS Module
36 15A Airbag Control Module
37 10A Adjustable Illumination
38 20A Highbeams
39 5A GEM
40 Ð Not Used
41 15A Brake Lamp
42 Ð Not Used
43 20A CB Power Windows
44 Ð Not Used
Power distribution box
The power distribution box is located in the engine
compartment. The power distribution box contains
high-current fuses that protect your vehicle's main
electrical systems from overloads.
Always disconnect the battery before
servicing high current fuses.
Roadside emergencies
113
Page 115 of 192
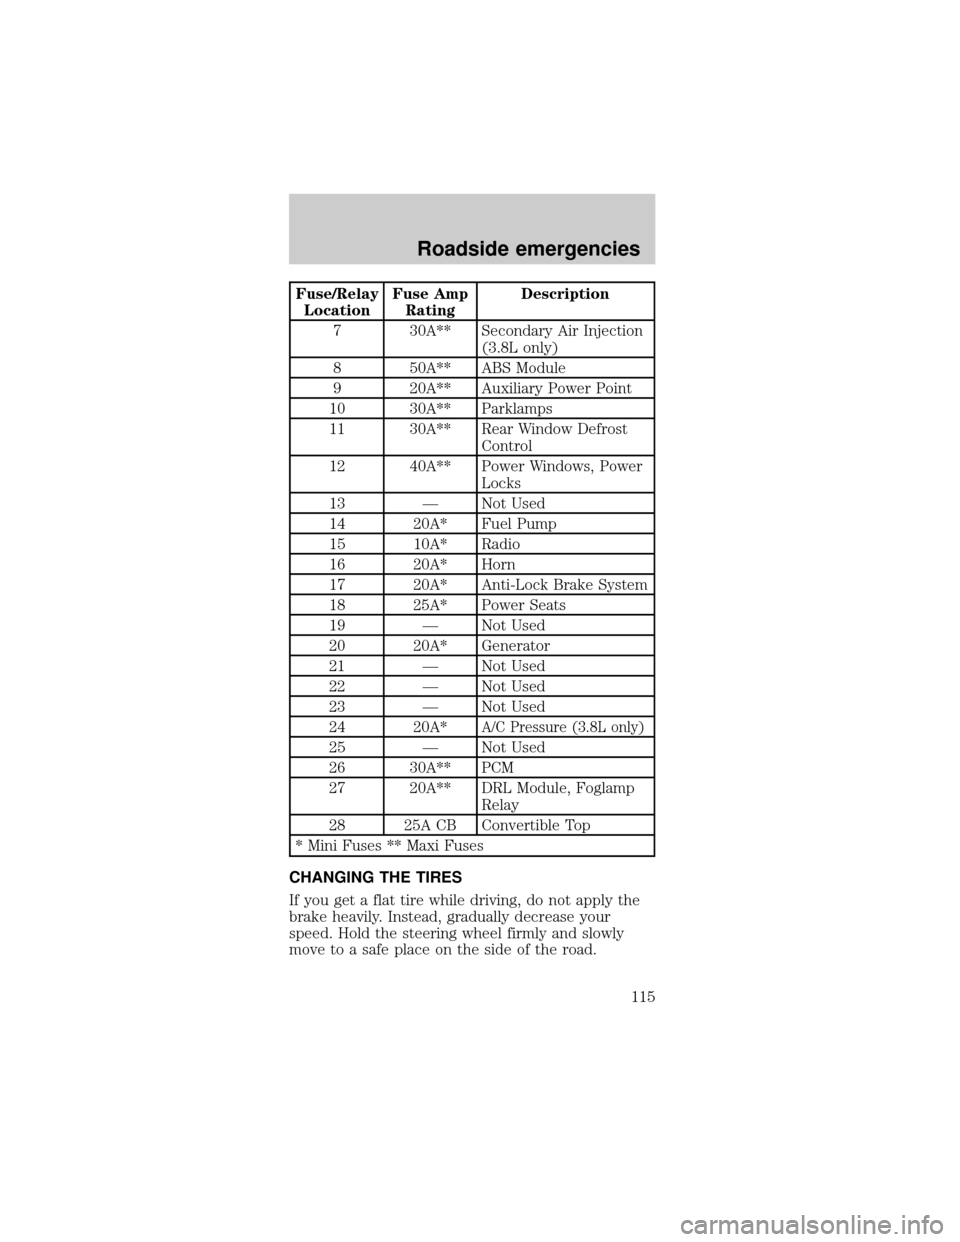
Fuse/Relay
LocationFuse Amp
RatingDescription
7 30A** Secondary Air Injection
(3.8L only)
8 50A** ABS Module
9 20A** Auxiliary Power Point
10 30A** Parklamps
11 30A** Rear Window Defrost
Control
12 40A** Power Windows, Power
Locks
13 Ð Not Used
14 20A* Fuel Pump
15 10A* Radio
16 20A* Horn
17 20A* Anti-Lock Brake System
18 25A* Power Seats
19 Ð Not Used
20 20A* Generator
21 Ð Not Used
22 Ð Not Used
23 Ð Not Used
24 20A*
A/C Pressure (3.8L only)
25 Ð Not Used
26 30A** PCM
27 20A** DRL Module, Foglamp
Relay
28 25A CB Convertible Top
* Mini Fuses ** Maxi Fuses
CHANGING THE TIRES
If you get a flat tire while driving, do not apply the
brake heavily. Instead, gradually decrease your
speed. Hold the steering wheel firmly and slowly
move to a safe place on the side of the road.
Roadside emergencies
115
Page 162 of 192
²Combine errands and minimize stop-and-go
driving.
Maintenance
²Keep tires properly inflated and use only
recommended size.
²Operating a vehicle with the wheels out of
alignment will reduce fuel economy.
²Use recommended engine oil. Refer toLubricant
Specifications.
²Perform all regularly scheduled maintenance
items. Follow the recommended maintenance
schedule and owner maintenance checks found in
your vehicle Scheduled Maintenance Guide.
Conditions
²Heavily loading a vehicle or towing a trailer may
reduce fuel economy at any speed.
²Carrying unnecessary weight may reduce fuel
economy (approximately 2 km/h [1 mpg] is lost
for every 180 kg [400 lb] of weight carried).
²Adding certain accessories to your vehicle (for
example bug deflectors, rollover/light bars,
running boards, ski/luggage racks) may reduce
fuel economy.
²Use of fuel blended with alcohol may lower fuel
economy.
²Fuel economy may decrease with lower
temperatures during the first 12±16 km
(8±10 miles) of driving.
²Flat terrain driving improves fuel economy over
hilly roads.
²Transmissions give their best fuel economy when
operated in the top cruise gear and with steady
pressure on the gas pedal.
²Close windows for high speed driving.
Maintenance and care
162