engine FORD MUSTANG 1999 4.G Service Manual
[x] Cancel search | Manufacturer: FORD, Model Year: 1999, Model line: MUSTANG, Model: FORD MUSTANG 1999 4.GPages: 216, PDF Size: 1.72 MB
Page 124 of 216
Do not push start your vehicle. You could
damage the catalytic converter.
Batteries contain sulfuric acid which can
burn skin, eyes, and clothing, if contacted.
Do not attempt to push start your vehicle.
Automatic transmissions do not have
push-start capability.
Preparing your vehicle
1.Use only a 12±volt supply to start your
vehicle.
2. Do not disconnect the battery of the disabled
vehicle as this could damage the vehicle's electrical
system.
3. Park the booster vehicle close to the hood of the
disabled vehicle making sure the two vehiclesdo
nottouch. Set the parking brake on both vehicles
and stay clear of the engine cooling fan and other
moving parts.
4. Check all battery terminals and remove any
excessive corrosion before you attach the battery
cables. Ensure that vent caps are tight and level.
5. Turn the heater fan on in both vehicles to protect
any electrical surges. Turn all other accessories off.
Roadside emergencies
124
Page 126 of 216
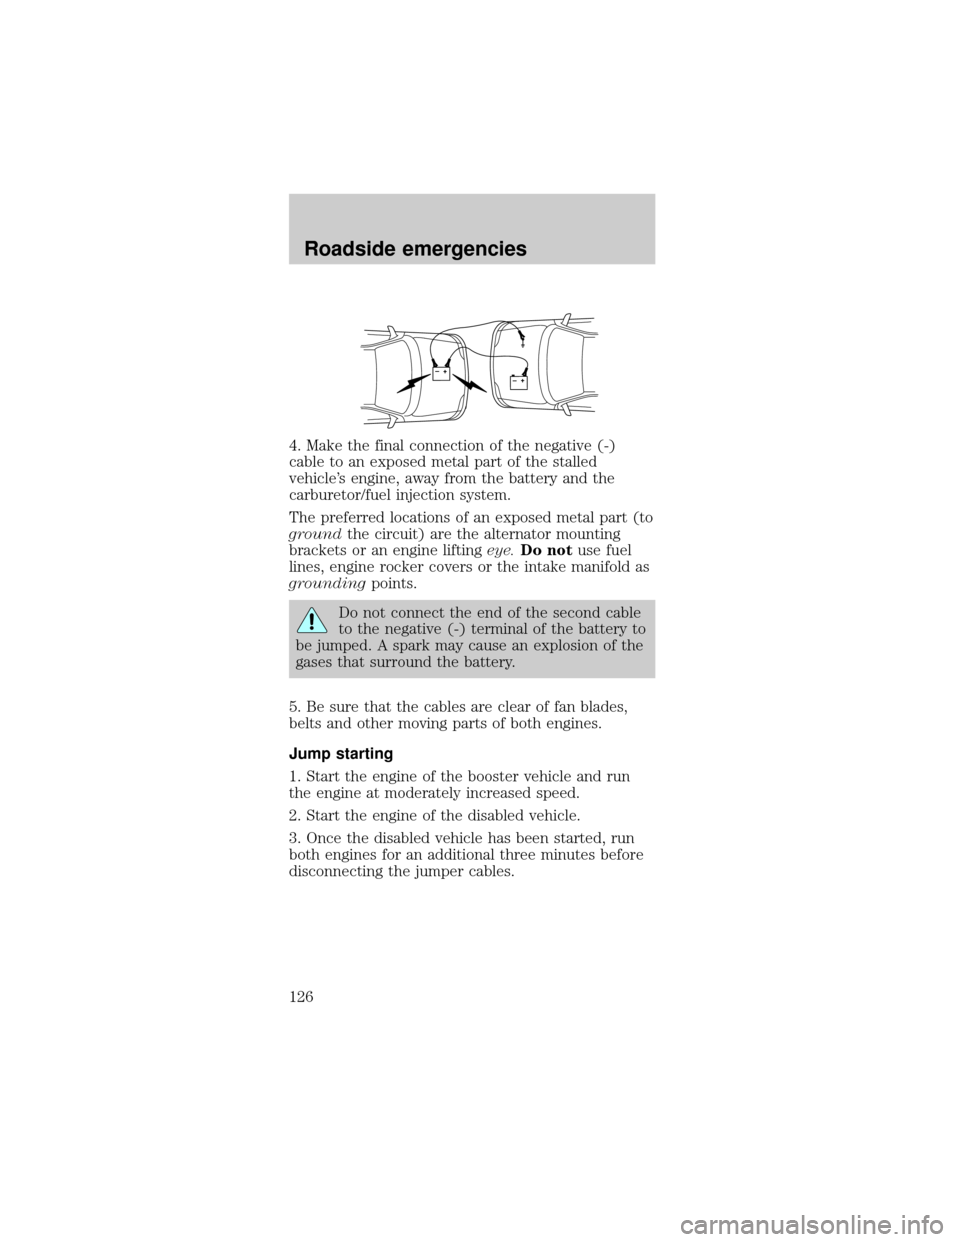
4. Make the final connection of the negative (-)
cable to an exposed metal part of the stalled
vehicle's engine, away from the battery and the
carburetor/fuel injection system.
The preferred locations of an exposed metal part (to
groundthe circuit) are the alternator mounting
brackets or an engine liftingeye.Do notuse fuel
lines, engine rocker covers or the intake manifold as
groundingpoints.
Do not connect the end of the second cable
to the negative (-) terminal of the battery to
be jumped. A spark may cause an explosion of the
gases that surround the battery.
5. Be sure that the cables are clear of fan blades,
belts and other moving parts of both engines.
Jump starting
1. Start the engine of the booster vehicle and run
the engine at moderately increased speed.
2. Start the engine of the disabled vehicle.
3. Once the disabled vehicle has been started, run
both engines for an additional three minutes before
disconnecting the jumper cables.
+–+–
Roadside emergencies
126
Page 128 of 216
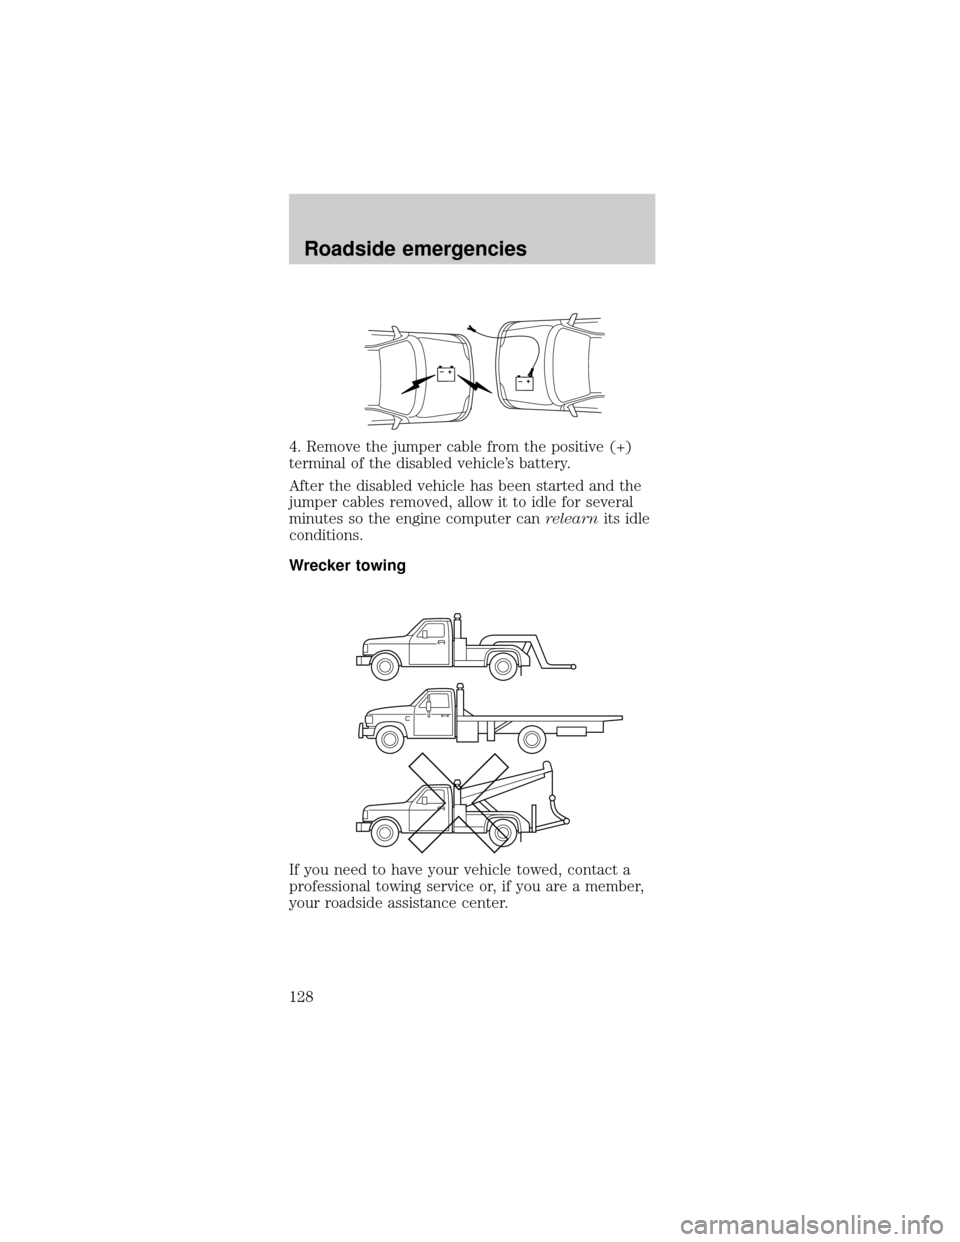
4. Remove the jumper cable from the positive (+)
terminal of the disabled vehicle's battery.
After the disabled vehicle has been started and the
jumper cables removed, allow it to idle for several
minutes so the engine computer canrelearnits idle
conditions.
Wrecker towing
If you need to have your vehicle towed, contact a
professional towing service or, if you are a member,
your roadside assistance center.
+–+–
Roadside emergencies
128
Page 130 of 216

SERVICE RECOMMENDATIONS
To help you service your vehicle:
²We highlight do-it-yourself items in the engine
compartment for easy location.
²We provide a Scheduled Maintenance Guide which
makes tracking routine service easy.
If your vehicle requires professional service, your
dealership can provide necessary parts and service.
Check your ªWarranty Guideº to find out which parts
and services are covered.
Use only recommended fuels, lubricants, fluids and
service parts conforming to specifications. Motorcraft
parts are designed and built to provide the best
performance in your vehicle.
PRECAUTIONS WHEN SERVICING YOUR
VEHICLE
Be especially careful when inspecting or servicing
your vehicle.
²Do not work on a hot engine.
²When the engine is running, keep loose clothing,
jewelry or long hair away from moving parts.
²Do not work on a vehicle with the engine running
in an enclosed space, unless you are sure you
have enough ventilation.
²Keep all lit cigarettes, open flames and other lit
material away from the battery and all fuel related
parts.
If you disconnect the battery, the engine must
ªrelearnº its idle conditions before your vehicle will
drive properly, as explained in theBatterysection in
this chapter.
Working with the engine off
²Automatic transmission:
1. Set the parking brake and ensure the gearshift is
securely latched in P (Park).
Maintenance and care
130
Page 131 of 216
2. Turn off the engine and remove the key.
3. Block the wheels to prevent the vehicle from
moving unexpectedly.
²Manual transmission:
1. Set the parking brake.
2. Depress the clutch and place the gearshift in 1
(First).
3. Turn off the engine and remove the key.
4. Block the wheels to prevent the vehicle from
moving unexpectedly.
Working with the engine on
²Automatic transmission:
1. Set the parking brake and ensure the gearshift is
securely latched in P (Park).
2. Block the wheels to prevent the vehicle from
moving unexpectedly.
Do not start your engine with the air cleaner
removed and do not remove it while the
engine is running.
²Manual transmission:
1. Set the parking brake, depress the clutch and
place the gearshift in N (Neutral).
2. Block the wheels to prevent the vehicle from
moving unexpectedly.
Do not start your engine with the air cleaner
removed and do not remove it while the
engine is running.
Maintenance and care
131
Page 133 of 216
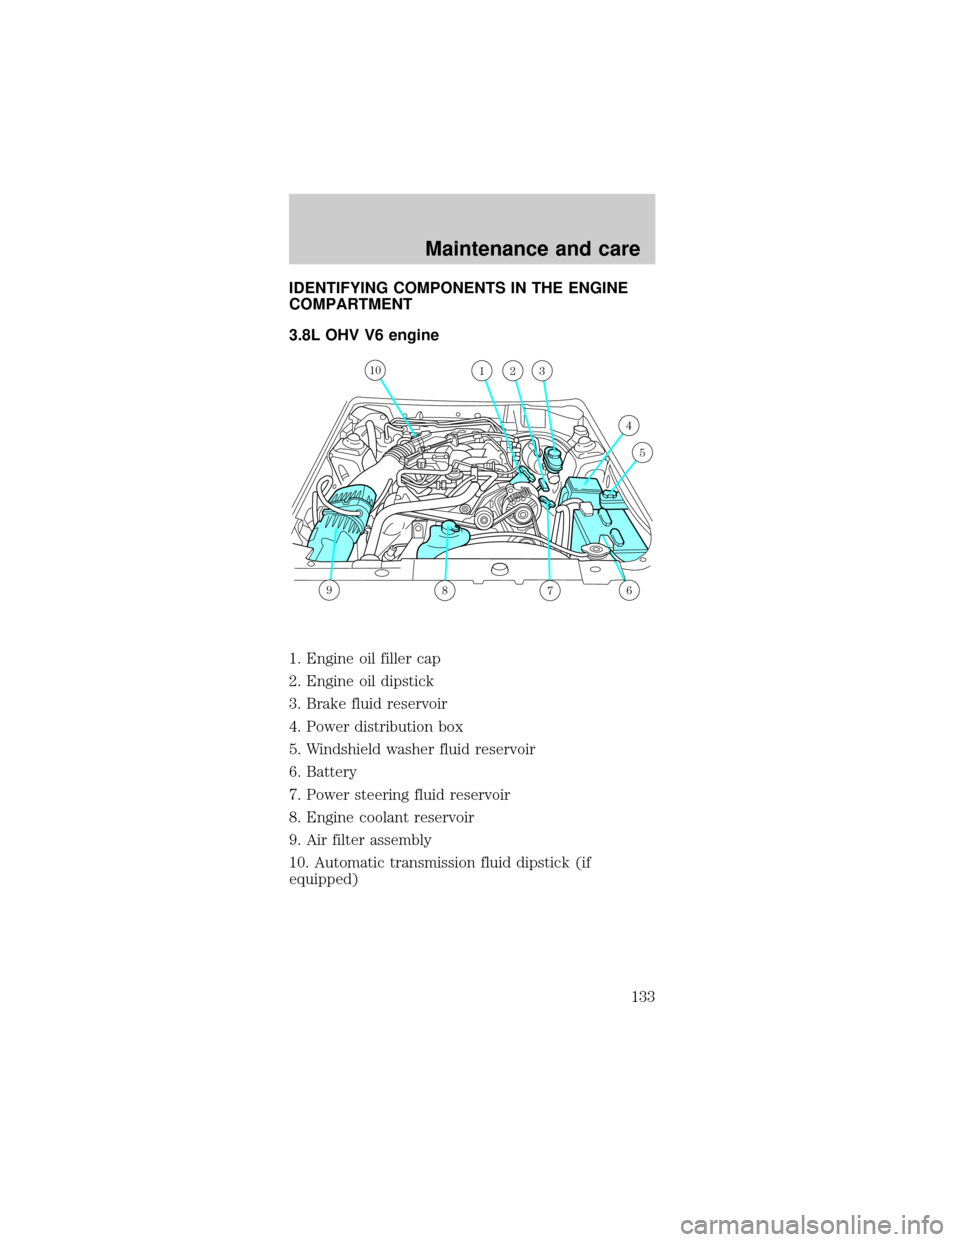
IDENTIFYING COMPONENTS IN THE ENGINE
COMPARTMENT
3.8L OHV V6 engine
1. Engine oil filler cap
2. Engine oil dipstick
3. Brake fluid reservoir
4. Power distribution box
5. Windshield washer fluid reservoir
6. Battery
7. Power steering fluid reservoir
8. Engine coolant reservoir
9. Air filter assembly
10. Automatic transmission fluid dipstick (if
equipped)
6
1023
4
5
789
1
Maintenance and care
133
Page 134 of 216
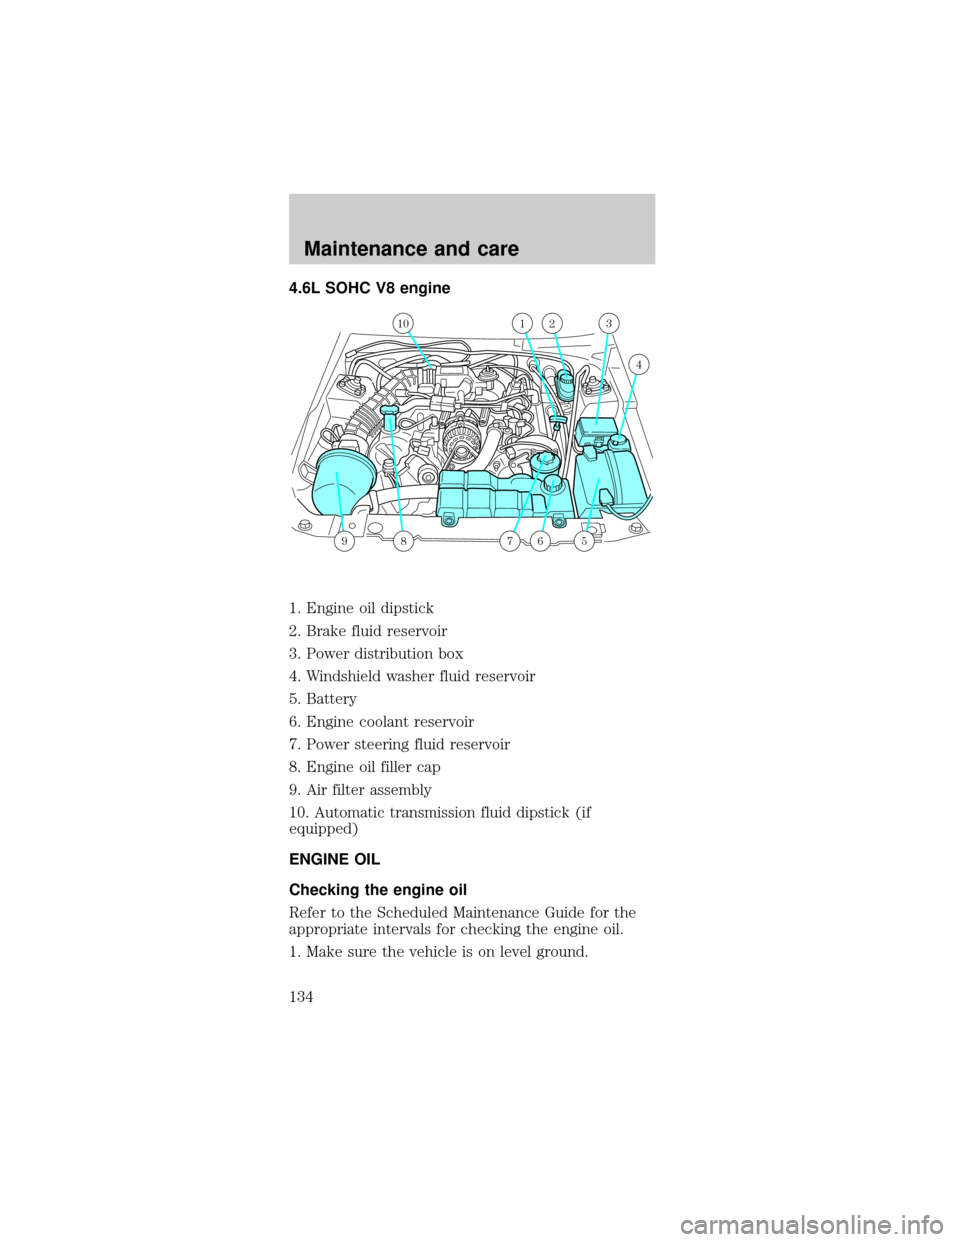
4.6L SOHC V8 engine
1. Engine oil dipstick
2. Brake fluid reservoir
3. Power distribution box
4. Windshield washer fluid reservoir
5. Battery
6. Engine coolant reservoir
7. Power steering fluid reservoir
8. Engine oil filler cap
9. Air filter assembly
10. Automatic transmission fluid dipstick (if
equipped)
ENGINE OIL
Checking the engine oil
Refer to the Scheduled Maintenance Guide for the
appropriate intervals for checking the engine oil.
1. Make sure the vehicle is on level ground.
56798
23
4
110
Maintenance and care
134
Page 135 of 216
2. Turn the engine off and wait a few minutes for
the oil to drain into the oil pan.
3. Set the parking brake and ensure the gearshift is
securely latched in P (Park) (automatic
transmissions) or 1 (First) (manual transmissions).
4. Open the hood. Protect yourself from engine heat.
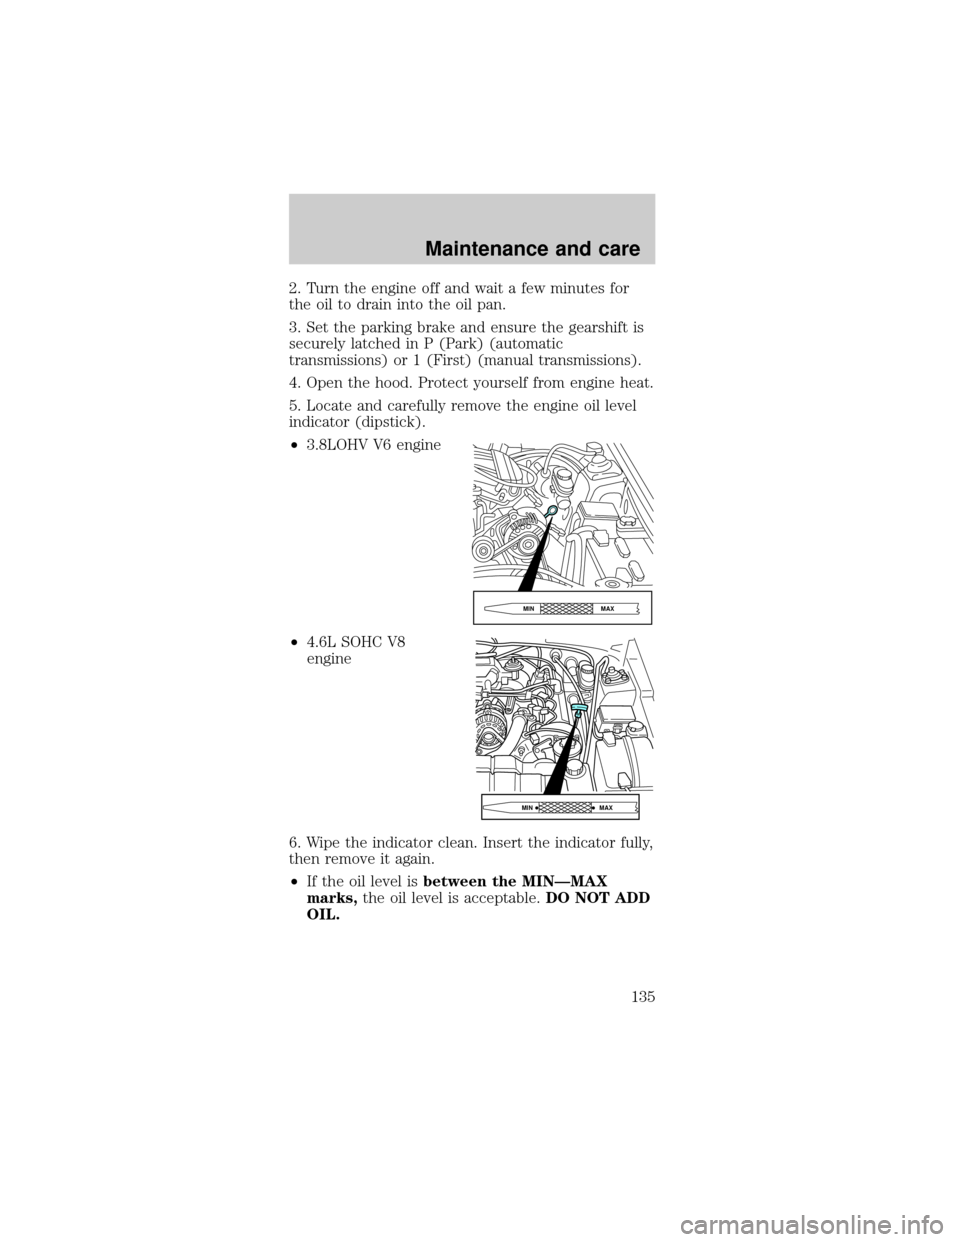
5. Locate and carefully remove the engine oil level
indicator (dipstick).
²3.8LOHV V6 engine
²4.6L SOHC V8
engine
6. Wipe the indicator clean. Insert the indicator fully,
then remove it again.
²If the oil level isbetween the MINÐMAX
marks,the oil level is acceptable.DO NOT ADD
OIL.
MAX MIN
MAX MIN
Maintenance and care
135
Page 136 of 216
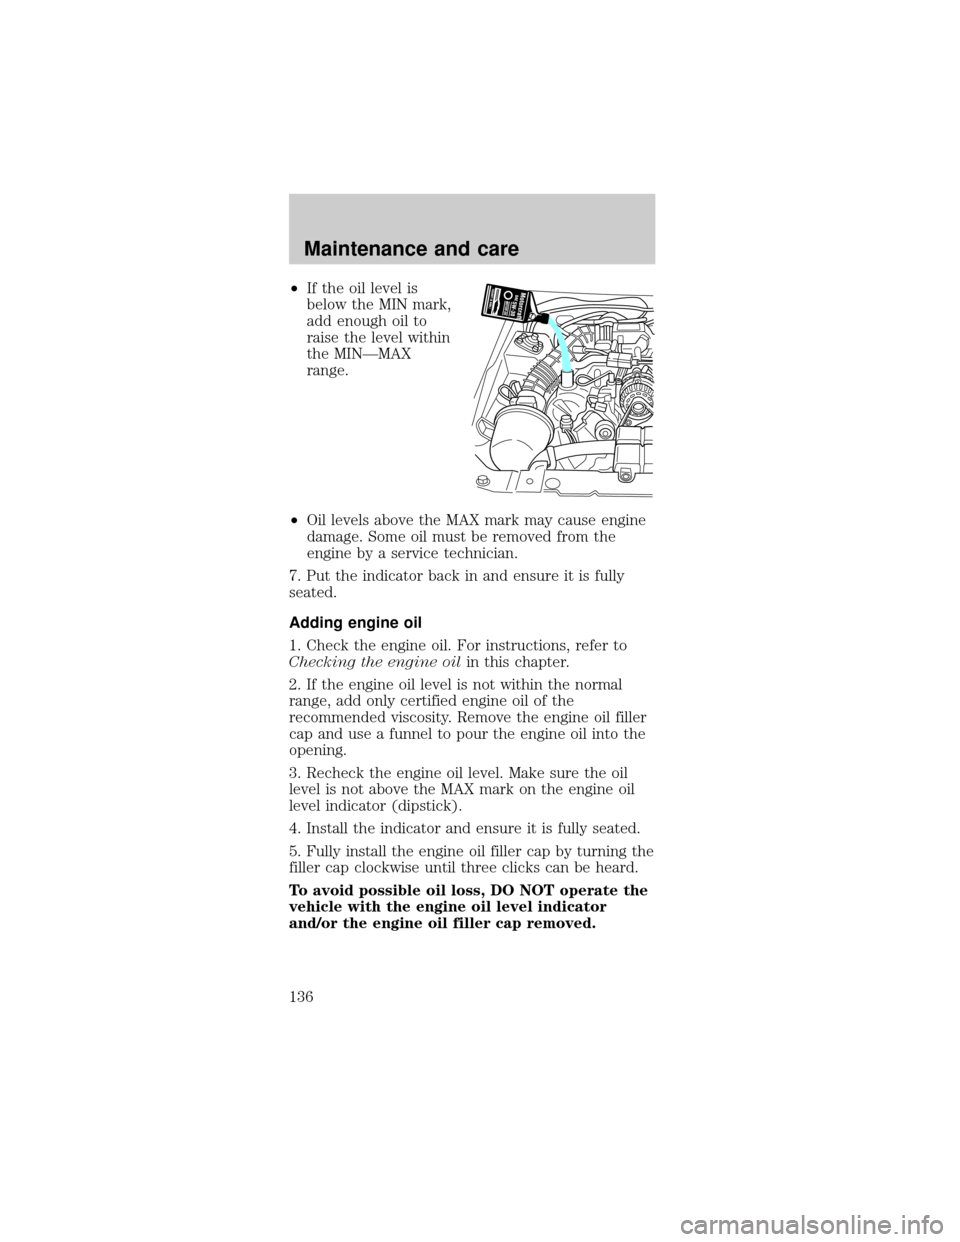
²If the oil level is
below the MIN mark,
add enough oil to
raise the level within
the MINÐMAX
range.
²Oil levels above the MAX mark may cause engine
damage. Some oil must be removed from the
engine by a service technician.
7. Put the indicator back in and ensure it is fully
seated.
Adding engine oil
1. Check the engine oil. For instructions, refer to
Checking the engine oilin this chapter.
2. If the engine oil level is not within the normal
range, add only certified engine oil of the
recommended viscosity. Remove the engine oil filler
cap and use a funnel to pour the engine oil into the
opening.
3. Recheck the engine oil level. Make sure the oil
level is not above the MAX mark on the engine oil
level indicator (dipstick).
4. Install the indicator and ensure it is fully seated.
5. Fully install the engine oil filler cap by turning the
filler cap clockwise until three clicks can be heard.
To avoid possible oil loss, DO NOT operate the
vehicle with the engine oil level indicator
and/or the engine oil filler cap removed.
Maintenance and care
136
Page 137 of 216
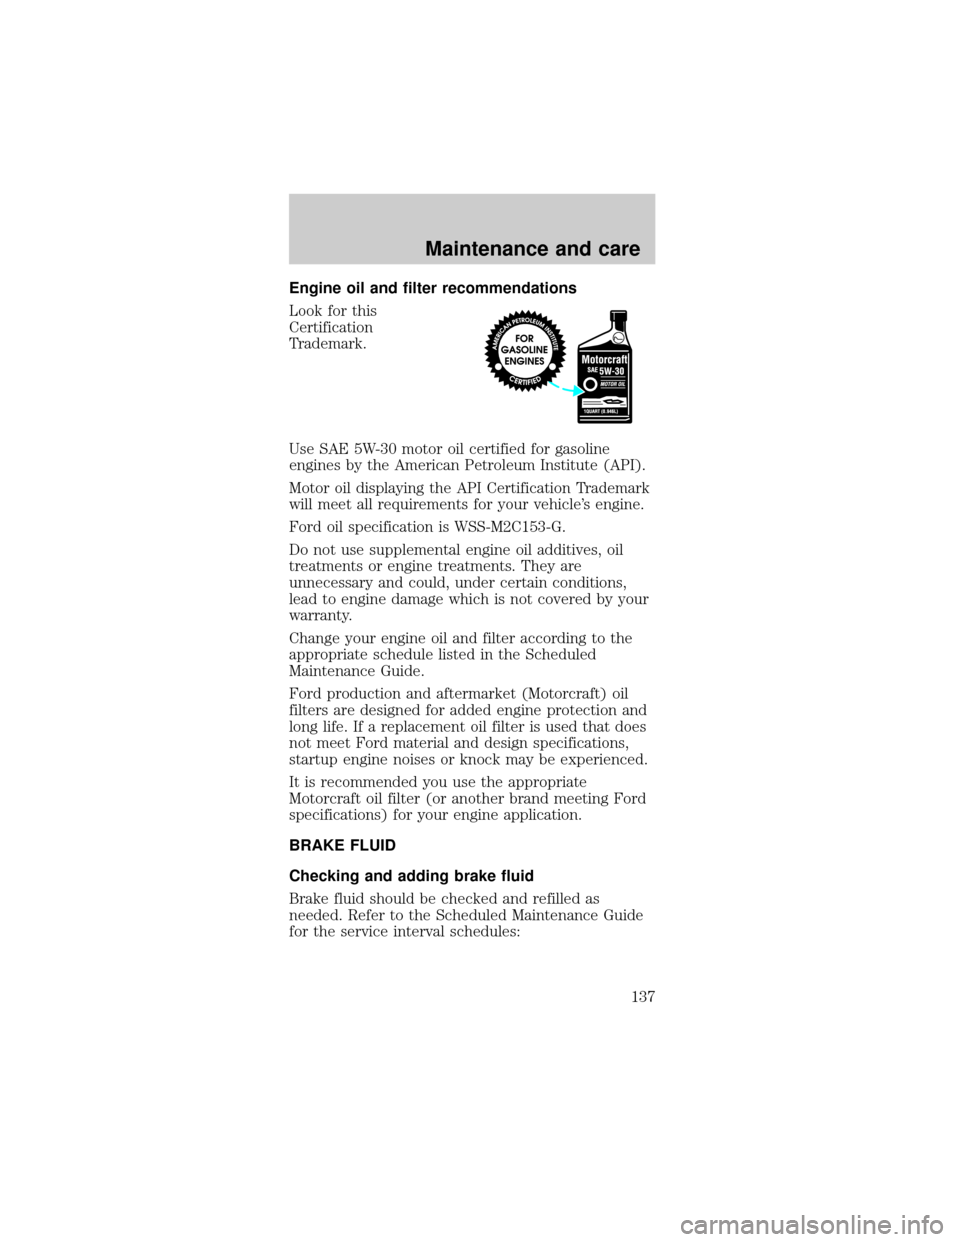
Engine oil and filter recommendations
Look for this
Certification
Trademark.
Use SAE 5W-30 motor oil certified for gasoline
engines by the American Petroleum Institute (API).
Motor oil displaying the API Certification Trademark
will meet all requirements for your vehicle's engine.
Ford oil specification is WSS-M2C153-G.
Do not use supplemental engine oil additives, oil
treatments or engine treatments. They are
unnecessary and could, under certain conditions,
lead to engine damage which is not covered by your
warranty.
Change your engine oil and filter according to the
appropriate schedule listed in the Scheduled
Maintenance Guide.
Ford production and aftermarket (Motorcraft) oil
filters are designed for added engine protection and
long life. If a replacement oil filter is used that does
not meet Ford material and design specifications,
startup engine noises or knock may be experienced.
It is recommended you use the appropriate
Motorcraft oil filter (or another brand meeting Ford
specifications) for your engine application.
BRAKE FLUID
Checking and adding brake fluid
Brake fluid should be checked and refilled as
needed. Refer to the Scheduled Maintenance Guide
for the service interval schedules:
Maintenance and care
137