clutch FORD MUSTANG 2000 4.G Owners Manual
[x] Cancel search | Manufacturer: FORD, Model Year: 2000, Model line: MUSTANG, Model: FORD MUSTANG 2000 4.GPages: 224, PDF Size: 1.86 MB
Page 45 of 224
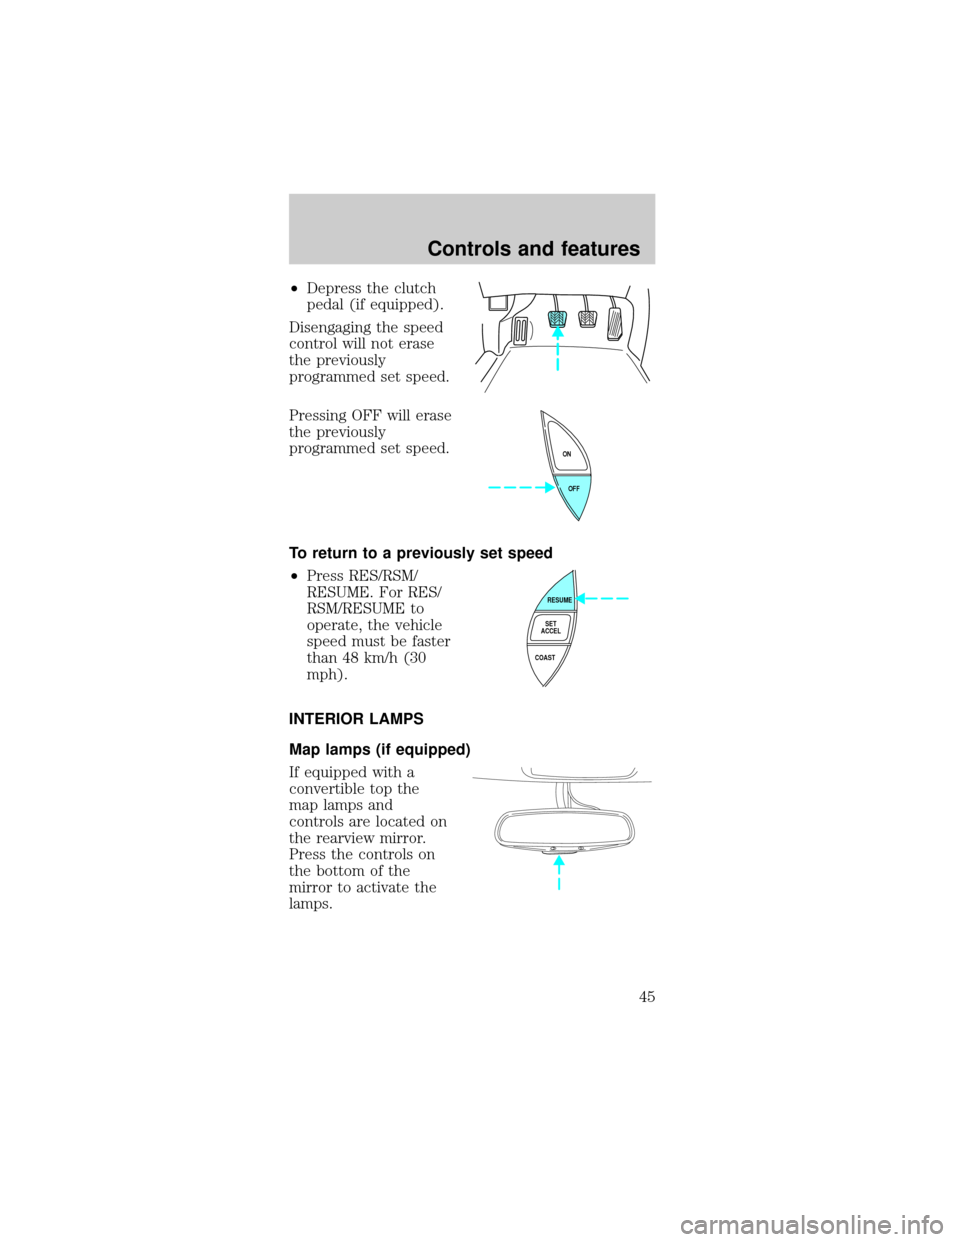
²Depress the clutch
pedal (if equipped).
Disengaging the speed
control will not erase
the previously
programmed set speed.
Pressing OFF will erase
the previously
programmed set speed.
To return to a previously set speed
²Press RES/RSM/
RESUME. For RES/
RSM/RESUME to
operate, the vehicle
speed must be faster
than 48 km/h (30
mph).
INTERIOR LAMPS
Map lamps (if equipped)
If equipped with a
convertible top the
map lamps and
controls are located on
the rearview mirror.
Press the controls on
the bottom of the
mirror to activate the
lamps.
OFF ON
RESUME
SET
ACCEL
COAST
Controls and features
45
Page 91 of 224
Important safety precautions
A computer system controls the engine's idle
revolutions per minute (RPM). When the engine
starts, the idle RPM runs faster to warm the engine.
If the engine idle speed does not slow down
automatically, have the vehicle checked. Do not
allow the vehicle to idle for more than 10 minutes at
high engine RPM.
Before starting the vehicle:
1. Make sure all vehicle occupants have buckled
their safety belts. For more information on safety
belts and their proper usage, refer to theSeating
and safety restraintschapter.
2. Make sure the headlamps and vehicle accessories
are off.
If starting a vehicle with an automatic transmission:
²Make sure the
parking brake is set.
²Make sure the gearshift is in P (Park).
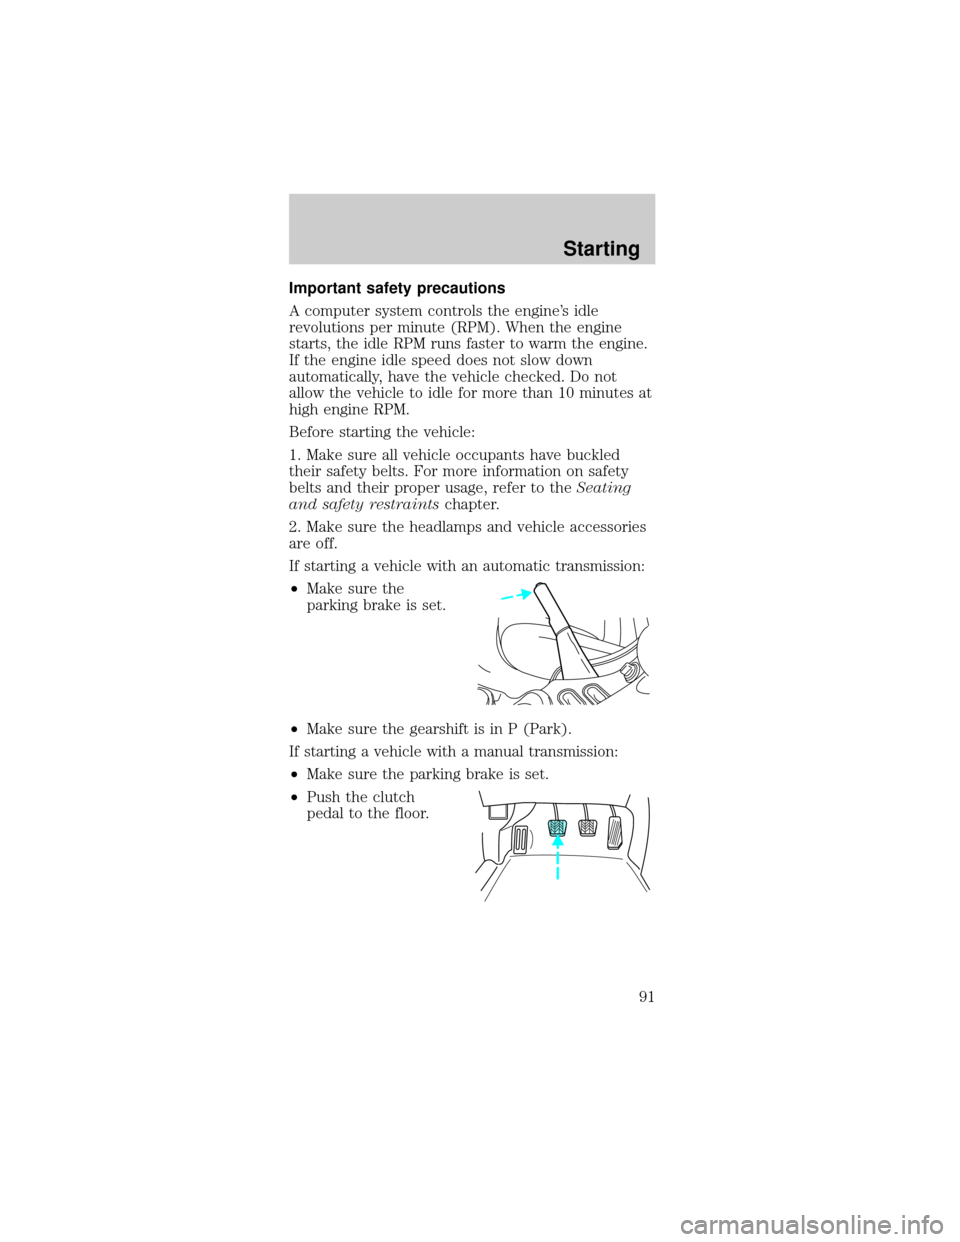
If starting a vehicle with a manual transmission:
²Make sure the parking brake is set.
²Push the clutch
pedal to the floor.
Starting
91
Page 106 of 224
MANUAL TRANSMISSION OPERATION
(IF EQUIPPED)
Using the clutch
Vehicles equipped with a manual transmission have a
starter interlock that prevents cranking the engine
unless the clutch pedal is fully depressed.
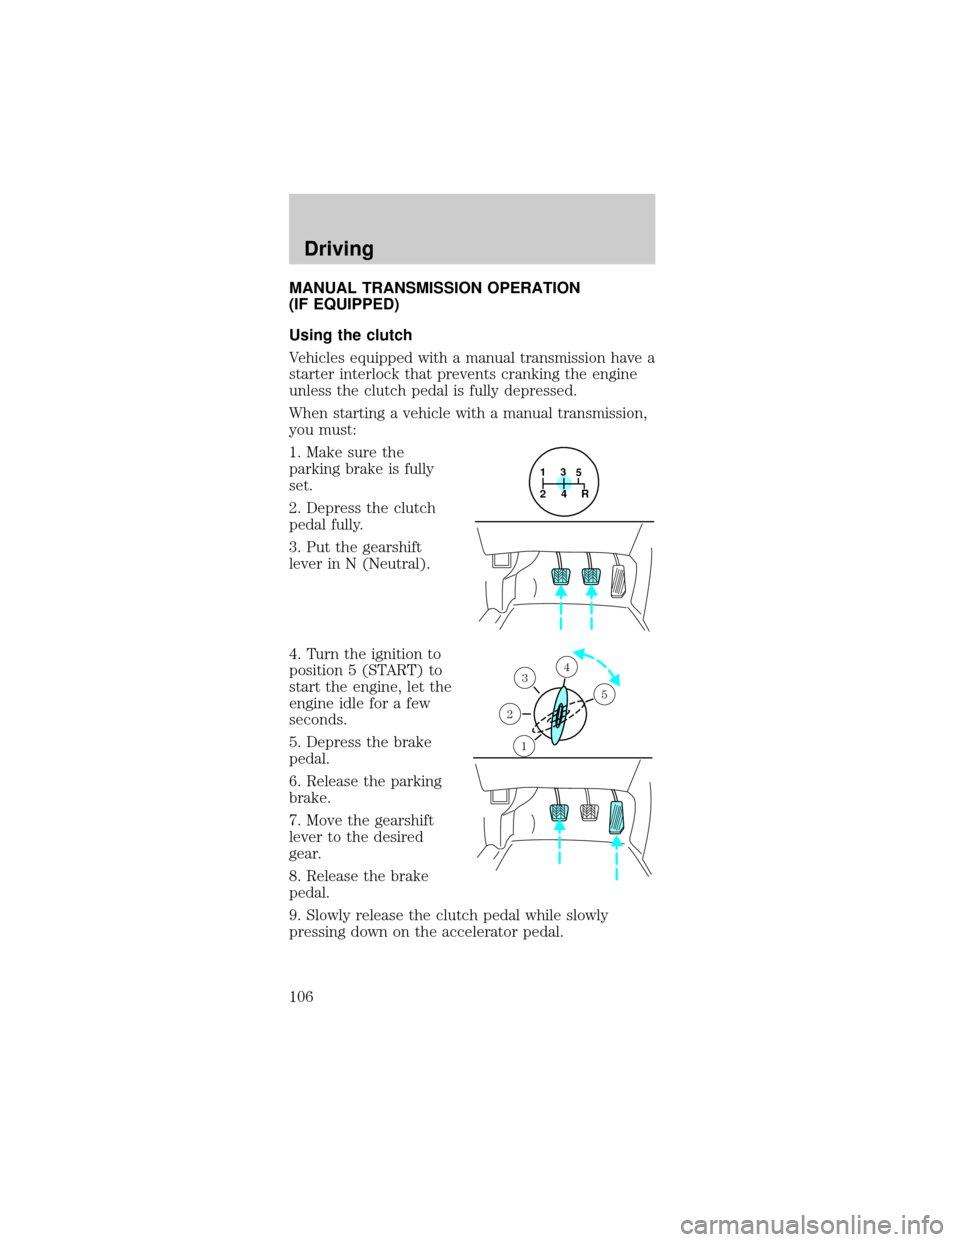
When starting a vehicle with a manual transmission,
you must:
1. Make sure the
parking brake is fully
set.
2. Depress the clutch
pedal fully.
3. Put the gearshift
lever in N (Neutral).
4. Turn the ignition to
position 5 (START) to
start the engine, let the
engine idle for a few
seconds.
5. Depress the brake
pedal.
6. Release the parking
brake.
7. Move the gearshift
lever to the desired
gear.
8. Release the brake
pedal.
9. Slowly release the clutch pedal while slowly
pressing down on the accelerator pedal.
1
24R3
5
1
2
34
5
Driving
106
Page 107 of 224
²Do not drive with your foot resting on the clutch
pedal and do not use the clutch to hold your
vehicle at a standstill while waiting on a hill.
These actions will greatly reduce clutch life.
Recommended shift speeds
Do not downshift into 1 (first) when your
vehicle is moving faster then 24 km/h (15 mph).
This will damage the clutch.
Upshift according to the following chart:
Upshifts when accelerating
(recommended for best fuel economy)
Shift from:
1 - 2 18 km/h (11 mph)
2 - 3 31 km/h (19 mph)
3 - 4 48 km/h (30 mph)
4 - 5 64 km/h (40 mph)
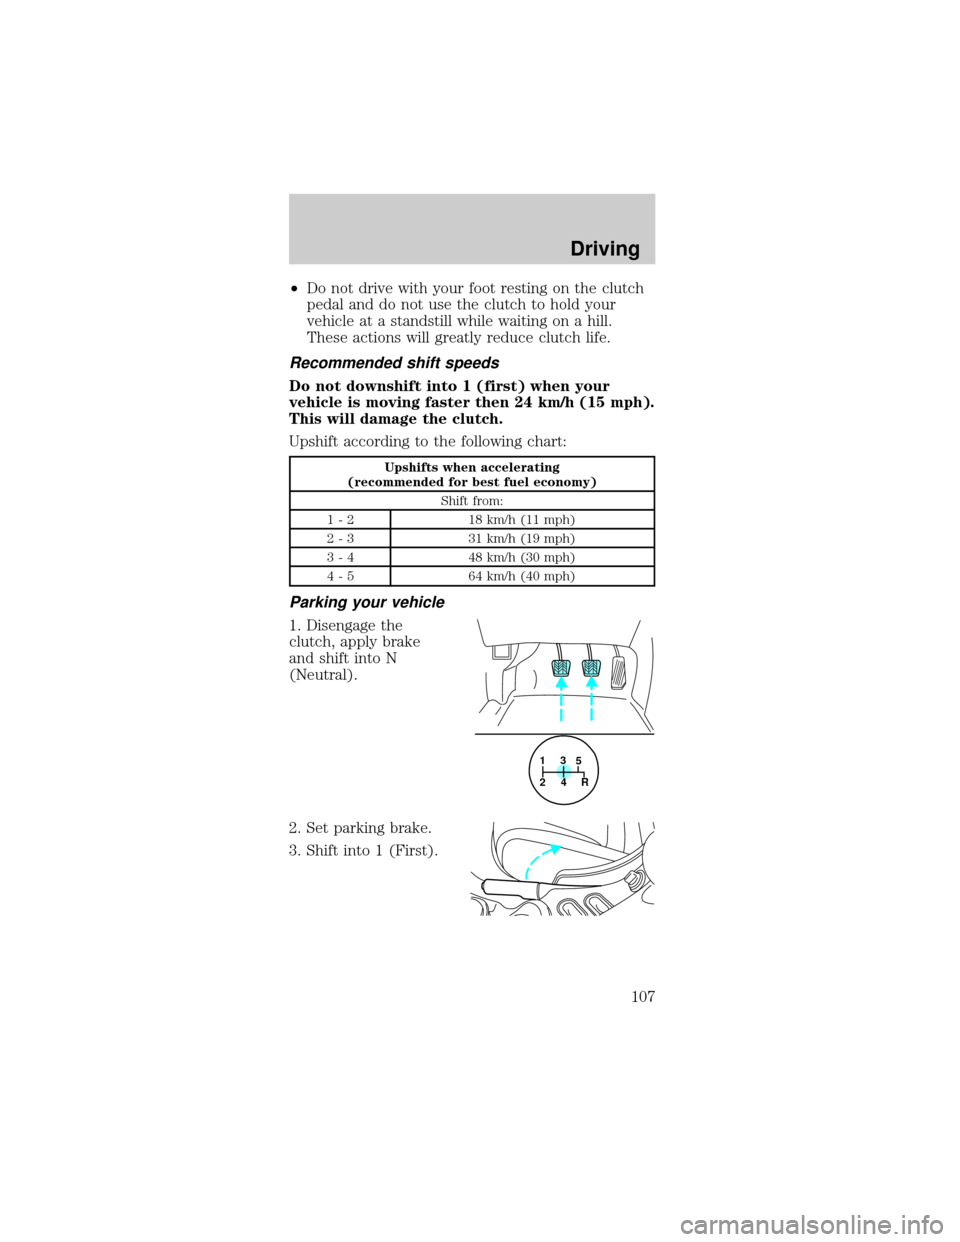
Parking your vehicle
1. Disengage the
clutch, apply brake
and shift into N
(Neutral).
2. Set parking brake.
3. Shift into 1 (First).
1
24R3
5
Driving
107
Page 108 of 224
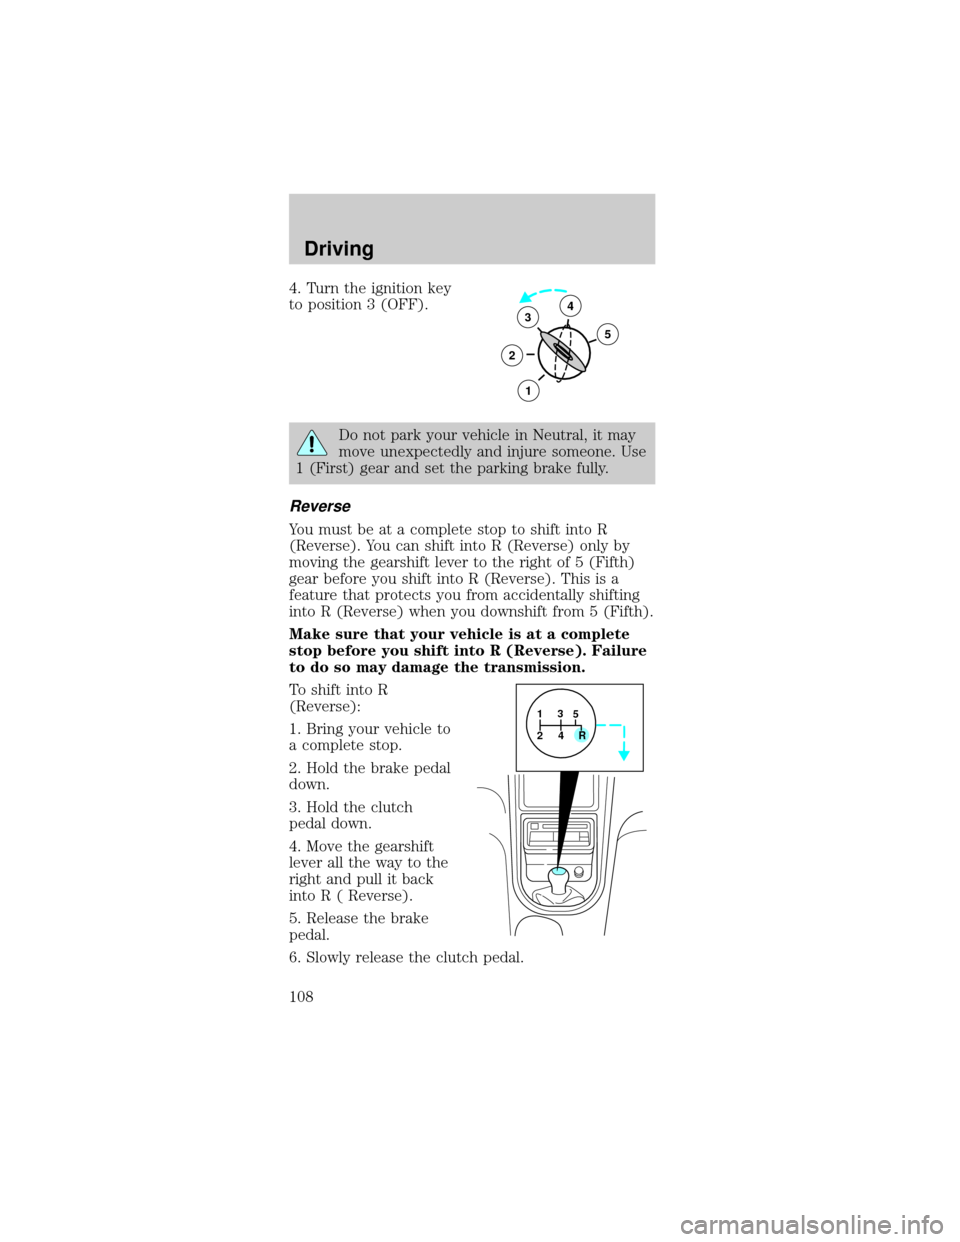
4. Turn the ignition key
to position 3 (OFF).
Do not park your vehicle in Neutral, it may
move unexpectedly and injure someone. Use
1 (First) gear and set the parking brake fully.
Reverse
You must be at a complete stop to shift into R
(Reverse). You can shift into R (Reverse) only by
moving the gearshift lever to the right of 5 (Fifth)
gear before you shift into R (Reverse). This is a
feature that protects you from accidentally shifting
into R (Reverse) when you downshift from 5 (Fifth).
Make sure that your vehicle is at a complete
stop before you shift into R (Reverse). Failure
to do so may damage the transmission.
To shift into R
(Reverse):
1. Bring your vehicle to
a complete stop.
2. Hold the brake pedal
down.
3. Hold the clutch
pedal down.
4. Move the gearshift
lever all the way to the
right and pull it back
into R ( Reverse).
5. Release the brake
pedal.
6. Slowly release the clutch pedal.
3
2
1
5
4
1
24R3
5
Driving
108
Page 109 of 224
If R (Reverse) is not engaged, push the clutch
pedal down and put the gearshift back into
Neutral. Then, release the clutch pedal for a
moment and repeat steps 3 through 6.
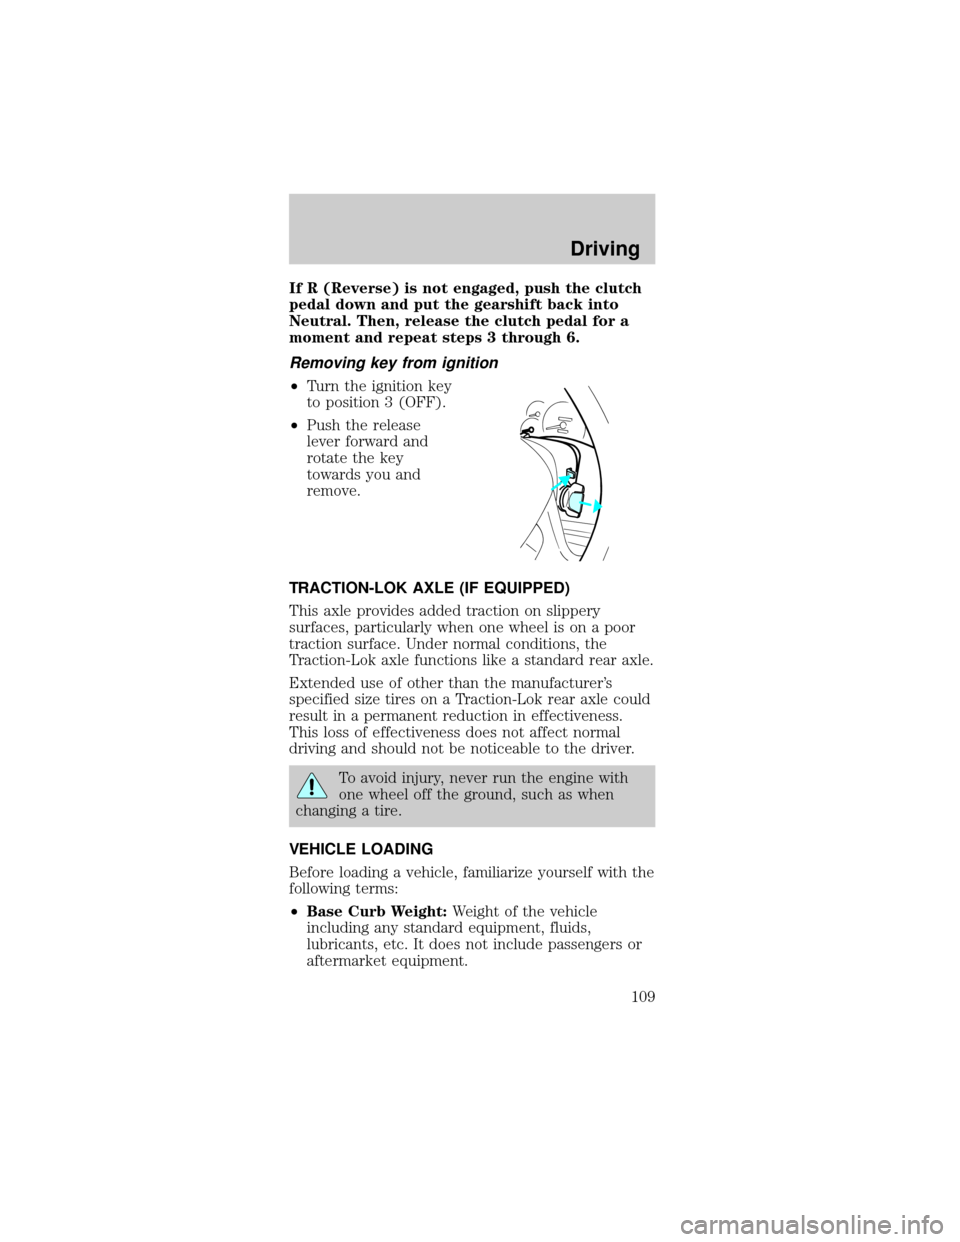
Removing key from ignition
²Turn the ignition key
to position 3 (OFF).
²Push the release
lever forward and
rotate the key
towards you and
remove.
TRACTION-LOK AXLE (IF EQUIPPED)
This axle provides added traction on slippery
surfaces, particularly when one wheel is on a poor
traction surface. Under normal conditions, the
Traction-Lok axle functions like a standard rear axle.
Extended use of other than the manufacturer's
specified size tires on a Traction-Lok rear axle could
result in a permanent reduction in effectiveness.
This loss of effectiveness does not affect normal
driving and should not be noticeable to the driver.
To avoid injury, never run the engine with
one wheel off the ground, such as when
changing a tire.
VEHICLE LOADING
Before loading a vehicle, familiarize yourself with the
following terms:
²Base Curb Weight:Weight of the vehicle
including any standard equipment, fluids,
lubricants, etc. It does not include passengers or
aftermarket equipment.
Driving
109
Page 121 of 224
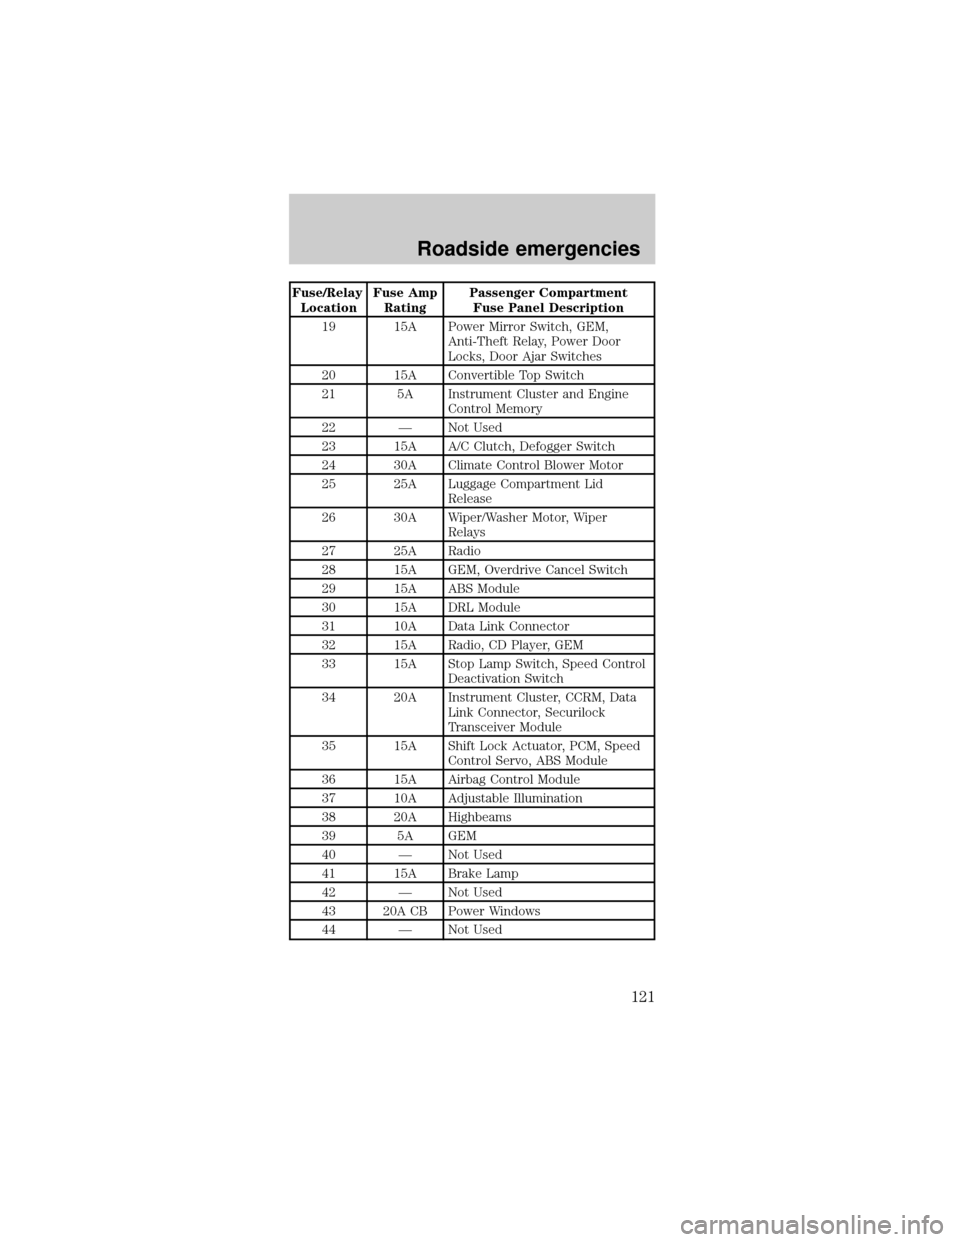
Fuse/Relay
LocationFuse Amp
RatingPassenger Compartment
Fuse Panel Description
19 15A Power Mirror Switch, GEM,
Anti-Theft Relay, Power Door
Locks, Door Ajar Switches
20 15A Convertible Top Switch
21 5A Instrument Cluster and Engine
Control Memory
22 Ð Not Used
23 15A A/C Clutch, Defogger Switch
24 30A Climate Control Blower Motor
25 25A Luggage Compartment Lid
Release
26 30A Wiper/Washer Motor, Wiper
Relays
27 25A Radio
28 15A GEM, Overdrive Cancel Switch
29 15A ABS Module
30 15A DRL Module
31 10A Data Link Connector
32 15A Radio, CD Player, GEM
33 15A Stop Lamp Switch, Speed Control
Deactivation Switch
34 20A Instrument Cluster, CCRM, Data
Link Connector, Securilock
Transceiver Module
35 15A Shift Lock Actuator, PCM, Speed
Control Servo, ABS Module
36 15A Airbag Control Module
37 10A Adjustable Illumination
38 20A Highbeams
39 5A GEM
40 Ð Not Used
41 15A Brake Lamp
42 Ð Not Used
43 20A CB Power Windows
44 Ð Not Used
Roadside emergencies
121
Page 134 of 224
2. Turn off the engine and remove the key.
3. Block the wheels to prevent the vehicle from
moving unexpectedly.
²Manual transmission:
1. Set the parking brake.
2. Depress the clutch and place the gearshift in 1
(First).
3. Turn off the engine and remove the key.
4. Block the wheels to prevent the vehicle from
moving unexpectedly.
Working with the engine on
²Automatic transmission:
1. Set the parking brake and ensure the gearshift is
securely latched in P (Park).
2. Block the wheels to prevent the vehicle from
moving unexpectedly.
Do not start your engine with the air cleaner
removed and do not remove it while the
engine is running.
²Manual transmission:
1. Set the parking brake, depress the clutch and
place the gearshift in N (Neutral).
2. Block the wheels to prevent the vehicle from
moving unexpectedly.
Do not start your engine with the air cleaner
removed and do not remove it while the
engine is running.
Maintenance and care
134
Page 142 of 224
4. Use only a DOT 3 brake fluid certified to meet
Ford specifications. Refer toLubricant
specificationsin theCapacities and specifications
chapter.
Brake fluid is toxic. If brake fluid contacts
the eyes, flush eyes with running water for
15 minutes. Seek medical attention if irritation
persists. If taken internally, drink water and induce
vomiting. Seek medical attention immediately.
If you use a brake fluid that is not DOT 3,
you will cause permanent damage to your
brakes.
Do not let the reservoir for the master
cylinder run dry. This may cause the brakes
to fail.
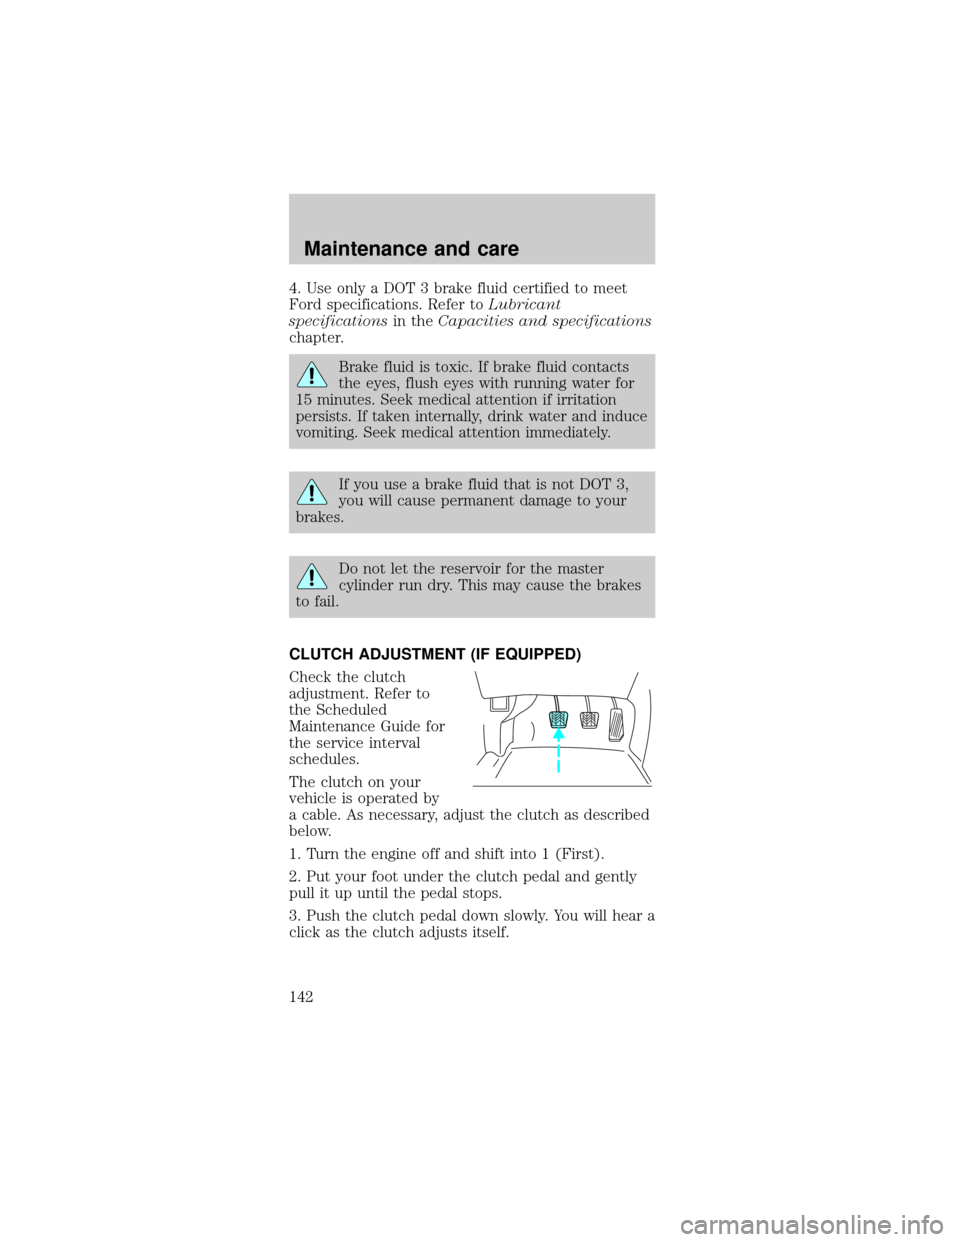
CLUTCH ADJUSTMENT (IF EQUIPPED)
Check the clutch
adjustment. Refer to
the Scheduled
Maintenance Guide for
the service interval
schedules.
The clutch on your
vehicle is operated by
a cable. As necessary, adjust the clutch as described
below.
1. Turn the engine off and shift into 1 (First).
2. Put your foot under the clutch pedal and gently
pull it up until the pedal stops.
3. Push the clutch pedal down slowly. You will hear a
click as the clutch adjusts itself.
Maintenance and care
142
Page 213 of 224

Cleaning
your vehicle ............. 184
engine
compartment ......... 187
exterior ........... 185,186
exterior lamps ....... 186
instrument panel .. 188
instrument
panel lens .............. 188
interior ............ 189,190
mirrors ................... 186
plastic parts .......... 186
safety belts ............ 189
washing .................. 184
waxing ................... 185
wheels .................... 186
windows ................ 189
wiper blades .......... 187
woodtone trim ...... 189
Climate control
(see Air conditioning
or Heating) ................ 20
Clock .......................... 34
Clutch
adjusting ................ 142
operation
while driving ......... 106
recommended
shift speeds ........... 107
Console ...................... 47
Controls
power seat ............... 63
Convertible ................ 48
cleaning ................. 187
installation
of the boot .............. 49
lowering the
convertible top ........ 48
raising the
convertible top ........ 51Coolant
checking
and adding ............ 143
low coolant light ..... 12
refill
capacities ........ 150,191
specifications.. 193,194
Cruise control (see
Speed control) .......... 42
Customer
Assistance ................ 116
Ford accessories for
your vehicle .......... 206
Ford Extended
Service Plan .......... 197
Getting assistance
outside the U.S.
and Canada ........... 205
Getting roadside
assistance .............. 116
Getting the service
you need ............... 198
Ordering
additional owner's
literature ............... 210
The Dispute
Settlement
Board ..................... 200
Utilizing the
Mediation/
Arbitration
Program ................. 204
Daytime running
lamps (see Lamps) ... 18
Defrost
rear window ............ 19
Dipstick
automatic
transmission fluid... 153
engine oil ............... 137
Index
213