headlamp FORD MUSTANG 2009 5.G User Guide
[x] Cancel search | Manufacturer: FORD, Model Year: 2009, Model line: MUSTANG, Model: FORD MUSTANG 2009 5.GPages: 292, PDF Size: 2.66 MB
Page 55 of 292
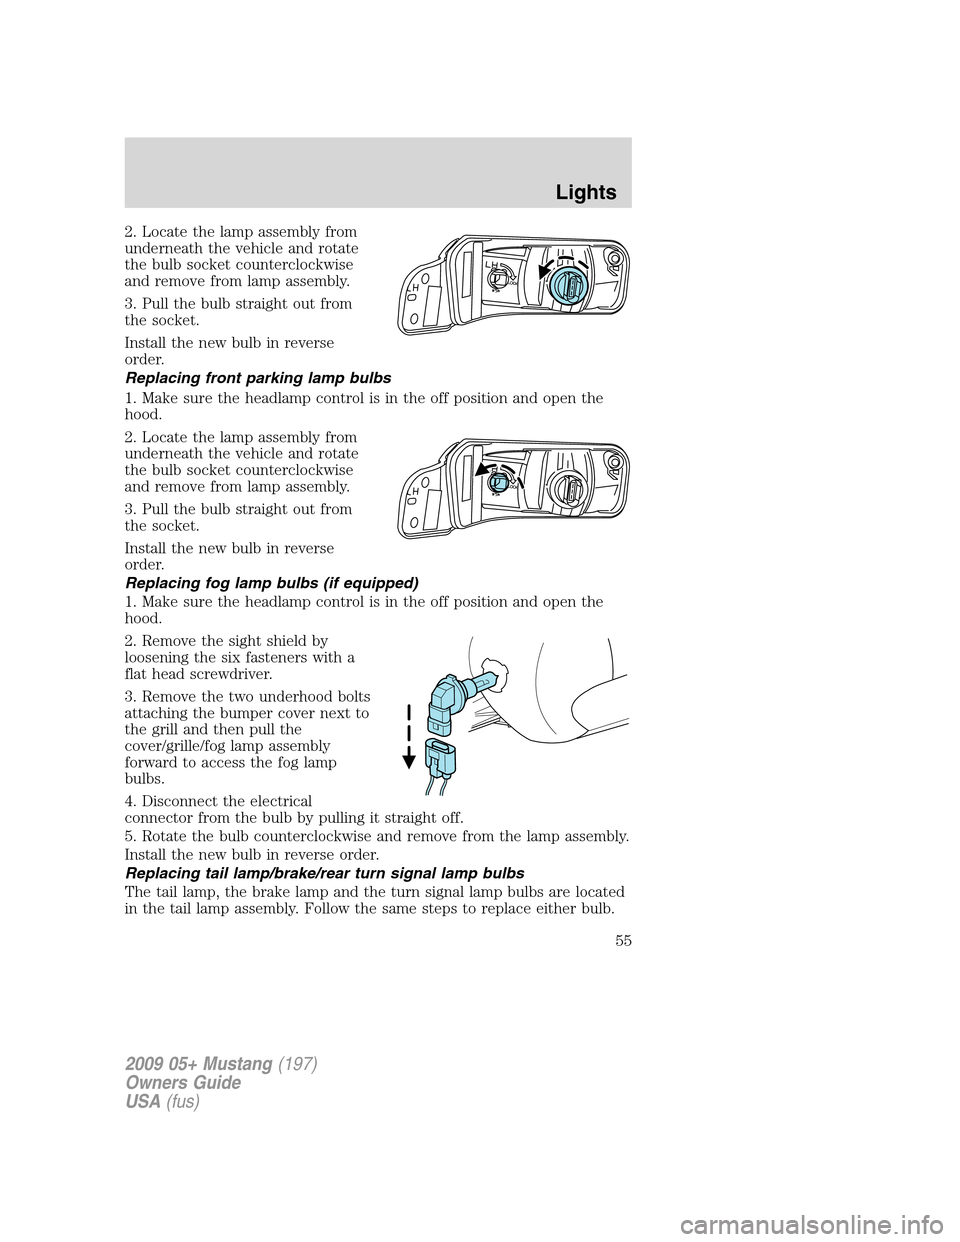
2. Locate the lamp assembly from
underneath the vehicle and rotate
the bulb socket counterclockwise
and remove from lamp assembly.
3. Pull the bulb straight out from
the socket.
Install the new bulb in reverse
order.
Replacing front parking lamp bulbs
1. Make sure the headlamp control is in the off position and open the
hood.
2. Locate the lamp assembly from
underneath the vehicle and rotate
the bulb socket counterclockwise
and remove from lamp assembly.
3. Pull the bulb straight out from
the socket.
Install the new bulb in reverse
order.
Replacing fog lamp bulbs (if equipped)
1. Make sure the headlamp control is in the off position and open the
hood.
2. Remove the sight shield by
loosening the six fasteners with a
flat head screwdriver.
3. Remove the two underhood bolts
attaching the bumper cover next to
the grill and then pull the
cover/grille/fog lamp assembly
forward to access the fog lamp
bulbs.
4. Disconnect the electrical
connector from the bulb by pulling it straight off.
5. Rotate the bulb counterclockwise and remove from the lamp assembly.
Install the new bulb in reverse order.
Replacing tail lamp/brake/rear turn signal lamp bulbs
The tail lamp, the brake lamp and the turn signal lamp bulbs are located
in the tail lamp assembly. Follow the same steps to replace either bulb.
2009 05+ Mustang(197)
Owners Guide
USA(fus)
Lights
55
Page 56 of 292
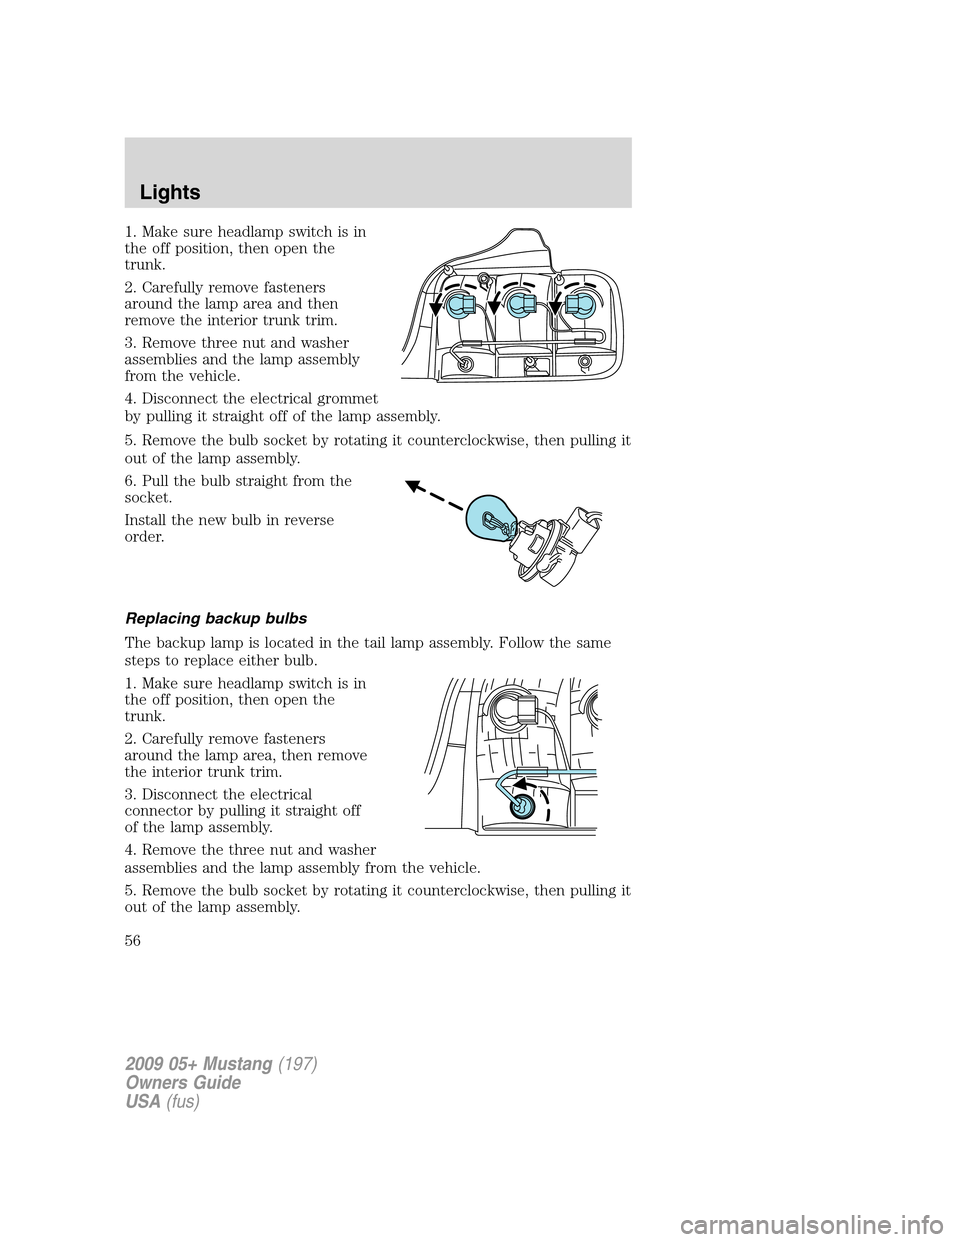
1. Make sure headlamp switch is in
the off position, then open the
trunk.
2. Carefully remove fasteners
around the lamp area and then
remove the interior trunk trim.
3. Remove three nut and washer
assemblies and the lamp assembly
from the vehicle.
4. Disconnect the electrical grommet
by pulling it straight off of the lamp assembly.
5. Remove the bulb socket by rotating it counterclockwise, then pulling it
out of the lamp assembly.
6. Pull the bulb straight from the
socket.
Install the new bulb in reverse
order.
Replacing backup bulbs
The backup lamp is located in the tail lamp assembly. Follow the same
steps to replace either bulb.
1. Make sure headlamp switch is in
the off position, then open the
trunk.
2. Carefully remove fasteners
around the lamp area, then remove
the interior trunk trim.
3. Disconnect the electrical
connector by pulling it straight off
of the lamp assembly.
4. Remove the three nut and washer
assemblies and the lamp assembly from the vehicle.
5. Remove the bulb socket by rotating it counterclockwise, then pulling it
out of the lamp assembly.
2009 05+ Mustang(197)
Owners Guide
USA(fus)
Lights
56
Page 57 of 292
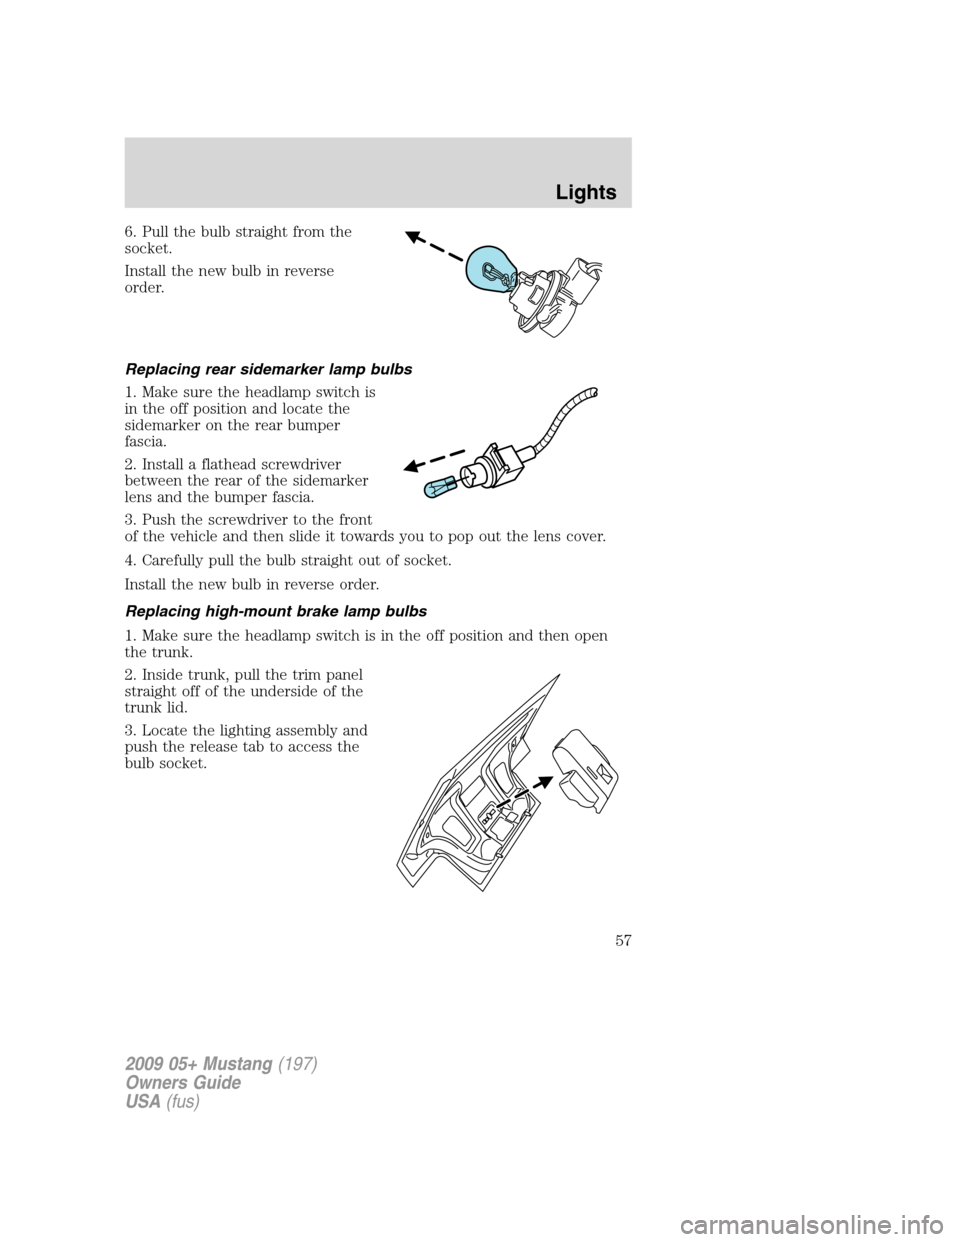
6. Pull the bulb straight from the
socket.
Install the new bulb in reverse
order.
Replacing rear sidemarker lamp bulbs
1. Make sure the headlamp switch is
in the off position and locate the
sidemarker on the rear bumper
fascia.
2. Install a flathead screwdriver
between the rear of the sidemarker
lens and the bumper fascia.
3. Push the screwdriver to the front
of the vehicle and then slide it towards you to pop out the lens cover.
4. Carefully pull the bulb straight out of socket.
Install the new bulb in reverse order.
Replacing high-mount brake lamp bulbs
1. Make sure the headlamp switch is in the off position and then open
the trunk.
2. Inside trunk, pull the trim panel
straight off of the underside of the
trunk lid.
3. Locate the lighting assembly and
push the release tab to access the
bulb socket.
2009 05+ Mustang(197)
Owners Guide
USA(fus)
Lights
57
Page 58 of 292
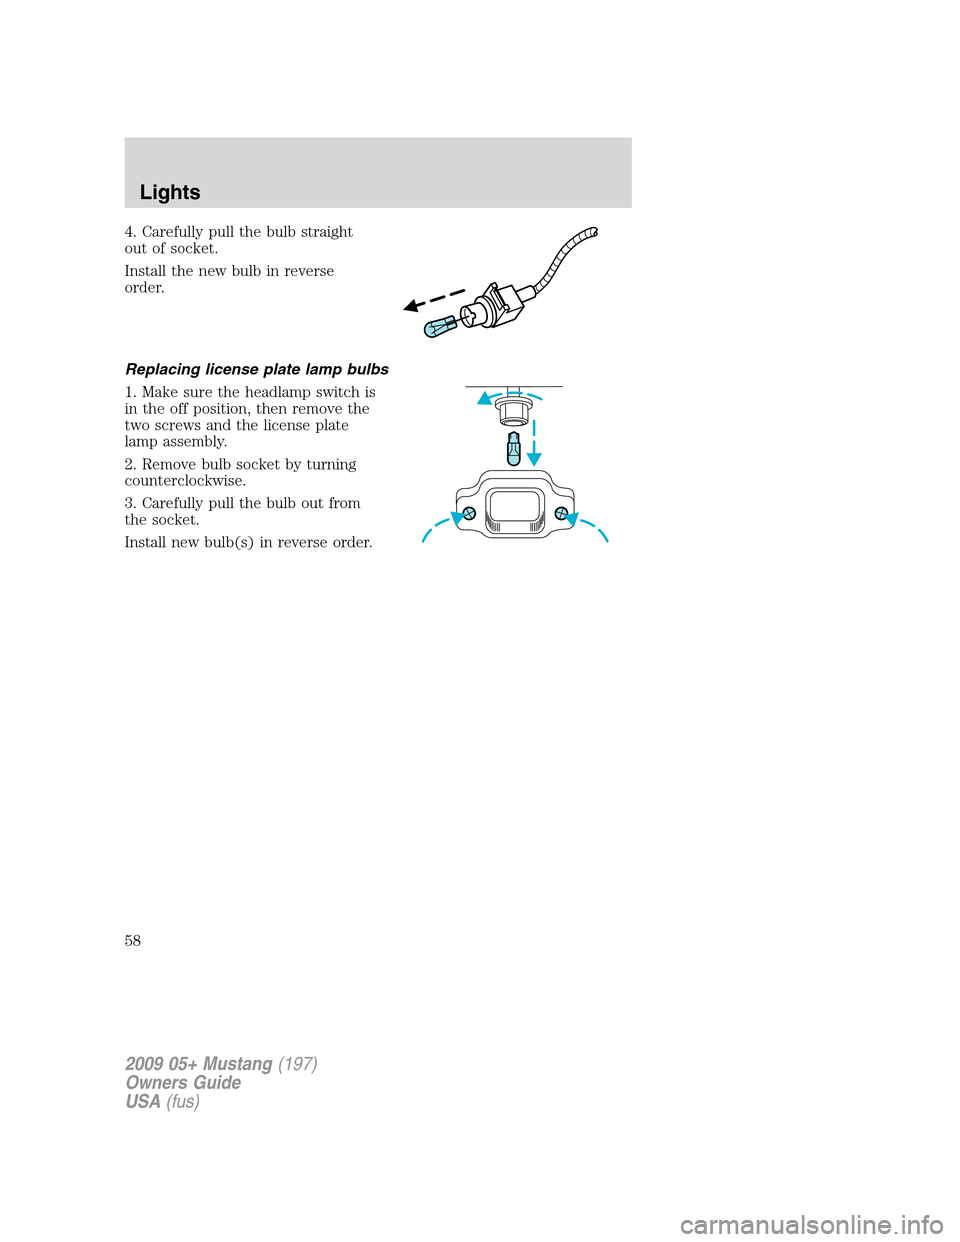
4. Carefully pull the bulb straight
out of socket.
Install the new bulb in reverse
order.
Replacing license plate lamp bulbs
1. Make sure the headlamp switch is
in the off position, then remove the
two screws and the license plate
lamp assembly.
2. Remove bulb socket by turning
counterclockwise.
3. Carefully pull the bulb out from
the socket.
Install new bulb(s) in reverse order.
2009 05+ Mustang(197)
Owners Guide
USA(fus)
Lights
58
Page 75 of 292
8. TRAC CONTROL (if equipped)
9. FUEL CAP
10. FUEL LEVEL
11. MILES TO EMPTY
Display color
The instrument cluster gauges are backlit with white backlighting when
the headlamps are off. When the headlamps are on, the user can select
one of six preset colors or one user definable color (MyColor™) for the
nighttime gauge backlighting. Headlamps must be on to set up the
nighttime display color.
Note:A gauge in a warning condition will be lit red when the headlamps
are on.
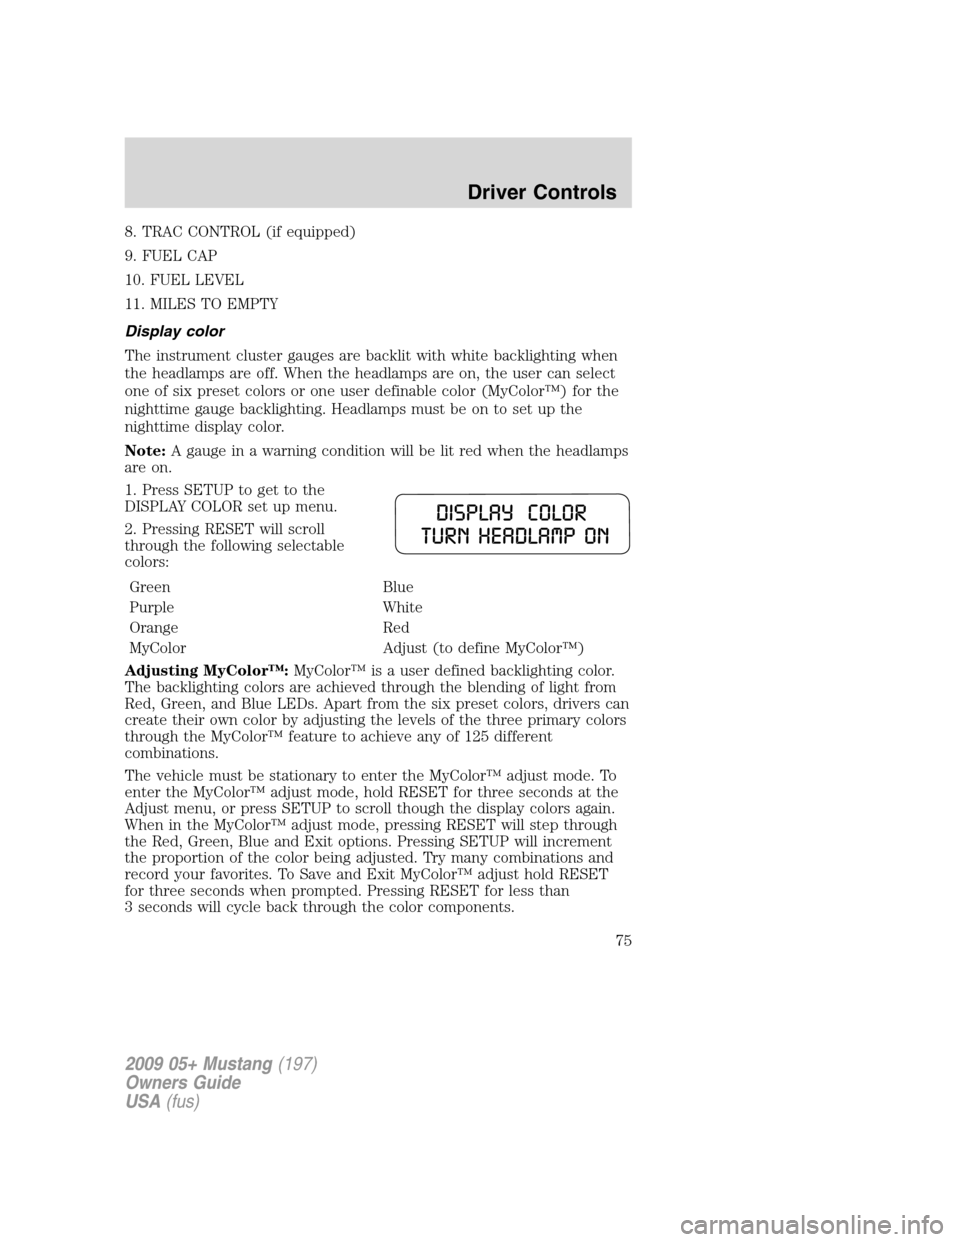
1. Press SETUP to get to the
DISPLAY COLOR set up menu.
2. Pressing RESET will scroll
through the following selectable
colors:
Green Blue
Purple White
Orange Red
MyColor Adjust (to define MyColor™)
Adjusting MyColor™:MyColor™ is a user defined backlighting color.
The backlighting colors are achieved through the blending of light from
Red, Green, and Blue LEDs. Apart from the six preset colors, drivers can
create their own color by adjusting the levels of the three primary colors
through the MyColor™ feature to achieve any of 125 different
combinations.
The vehicle must be stationary to enter the MyColor™ adjust mode. To
enter the MyColor™ adjust mode, hold RESET for three seconds at the
Adjust menu, or press SETUP to scroll though the display colors again.
When in the MyColor™ adjust mode, pressing RESET will step through
the Red, Green, Blue and Exit options. Pressing SETUP will increment
the proportion of the color being adjusted. Try many combinations and
record your favorites. To Save and Exit MyColor™ adjust hold RESET
for three seconds when prompted. Pressing RESET for less than
3 seconds will cycle back through the color components.
2009 05+ Mustang(197)
Owners Guide
USA(fus)
Driver Controls
75
Page 179 of 292
WARNING:Do not start your vehicle in a closed garage or in
other enclosed areas. Exhaust fumes can be toxic. Always open
the garage door before you start the engine. SeeGuarding against
exhaust fumesin this chapter for more instructions.
WARNING:If you smell exhaust fumes inside your vehicle, have
your dealer inspect your vehicle immediately. Do not drive if you
smell exhaust fumes.
Important safety precautions
A computer system controls the engine’s idle revolutions per minute
(RPM). When the engine starts, the idle RPM runs higher than normal in
order to warm the engine. If the engine idle speed does not slow down
automatically, have the vehicle checked. Do not allow the vehicle to idle
for more than 10 minutes at the higher engine RPM.
Before starting the vehicle:
1. Make sure all vehicle occupants have buckled their safety belts. For
more information on safety belts and their proper usage, refer to the
Seating and Safety Restraintschapter.
2. Make sure the headlamps and vehicle accessories are off.
If starting a vehicle with an automatic transmission:
2009 05+ Mustang(197)
Owners Guide
USA(fus)
Driving
179
Page 203 of 292
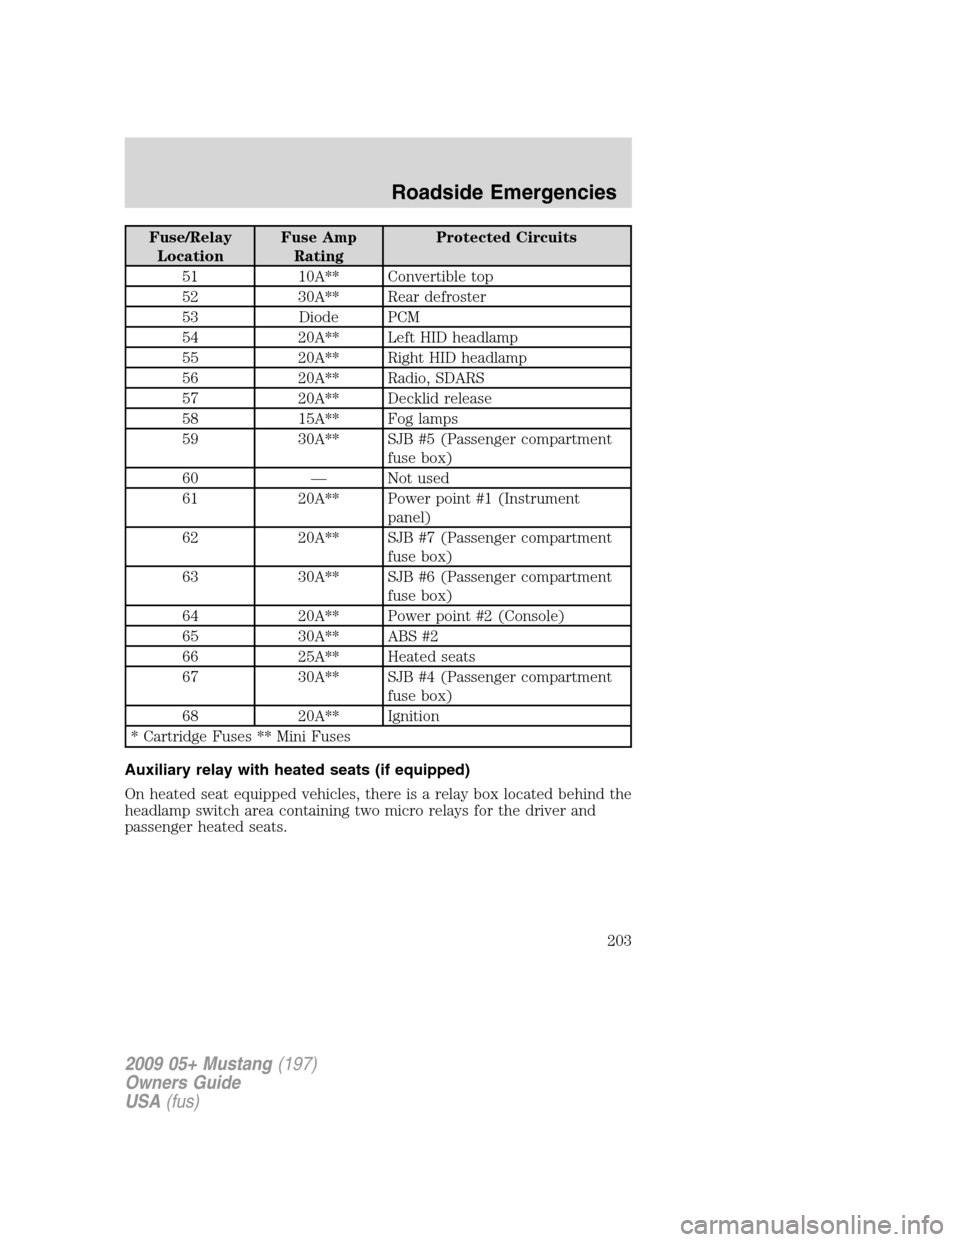
Fuse/Relay
LocationFuse Amp
RatingProtected Circuits
51 10A** Convertible top
52 30A** Rear defroster
53 Diode PCM
54 20A** Left HID headlamp
55 20A** Right HID headlamp
56 20A** Radio, SDARS
57 20A** Decklid release
58 15A** Fog lamps
59 30A** SJB #5 (Passenger compartment
fuse box)
60 — Not used
61 20A** Power point #1 (Instrument
panel)
62 20A** SJB #7 (Passenger compartment
fuse box)
63 30A** SJB #6 (Passenger compartment
fuse box)
64 20A** Power point #2 (Console)
65 30A** ABS #2
66 25A** Heated seats
67 30A** SJB #4 (Passenger compartment
fuse box)
68 20A** Ignition
* Cartridge Fuses ** Mini Fuses
Auxiliary relay with heated seats (if equipped)
On heated seat equipped vehicles, there is a relay box located behind the
headlamp switch area containing two micro relays for the driver and
passenger heated seats.
2009 05+ Mustang(197)
Owners Guide
USA(fus)
Roadside Emergencies
203
Page 204 of 292
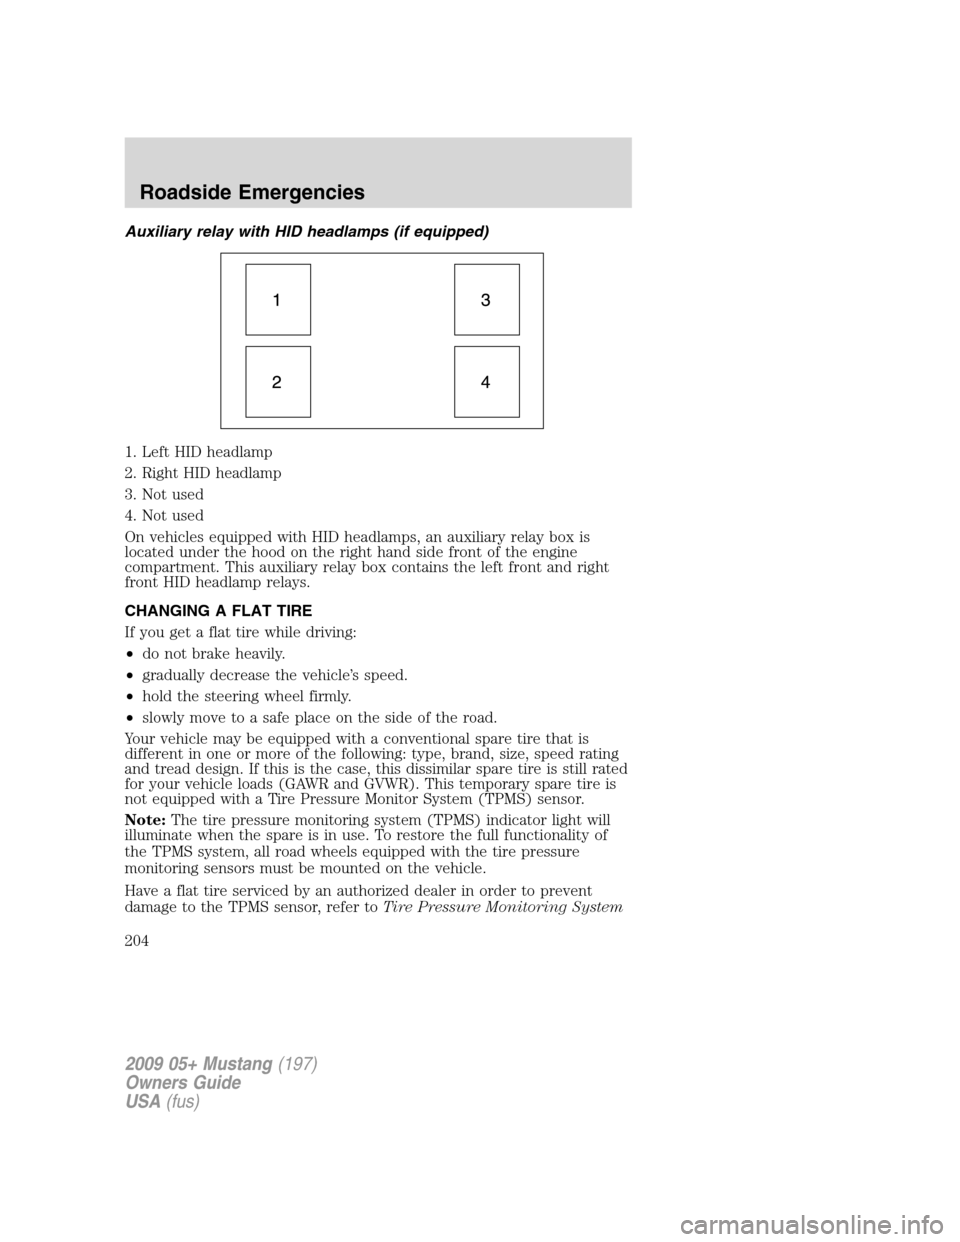
Auxiliary relay with HID headlamps (if equipped)
1. Left HID headlamp
2. Right HID headlamp
3. Not used
4. Not used
On vehicles equipped with HID headlamps, an auxiliary relay box is
located under the hood on the right hand side front of the engine
compartment. This auxiliary relay box contains the left front and right
front HID headlamp relays.
CHANGING A FLAT TIRE
If you get a flat tire while driving:
•do not brake heavily.
•gradually decrease the vehicle’s speed.
•hold the steering wheel firmly.
•slowly move to a safe place on the side of the road.
Your vehicle may be equipped with a conventional spare tire that is
different in one or more of the following: type, brand, size, speed rating
and tread design. If this is the case, this dissimilar spare tire is still rated
for your vehicle loads (GAWR and GVWR). This temporary spare tire is
not equipped with a Tire Pressure Monitor System (TPMS) sensor.
Note:The tire pressure monitoring system (TPMS) indicator light will
illuminate when the spare is in use. To restore the full functionality of
the TPMS system, all road wheels equipped with the tire pressure
monitoring sensors must be mounted on the vehicle.
Have a flat tire serviced by an authorized dealer in order to prevent
damage to the TPMS sensor, refer toTire Pressure Monitoring System
2009 05+ Mustang(197)
Owners Guide
USA(fus)
Roadside Emergencies
204
Page 239 of 292
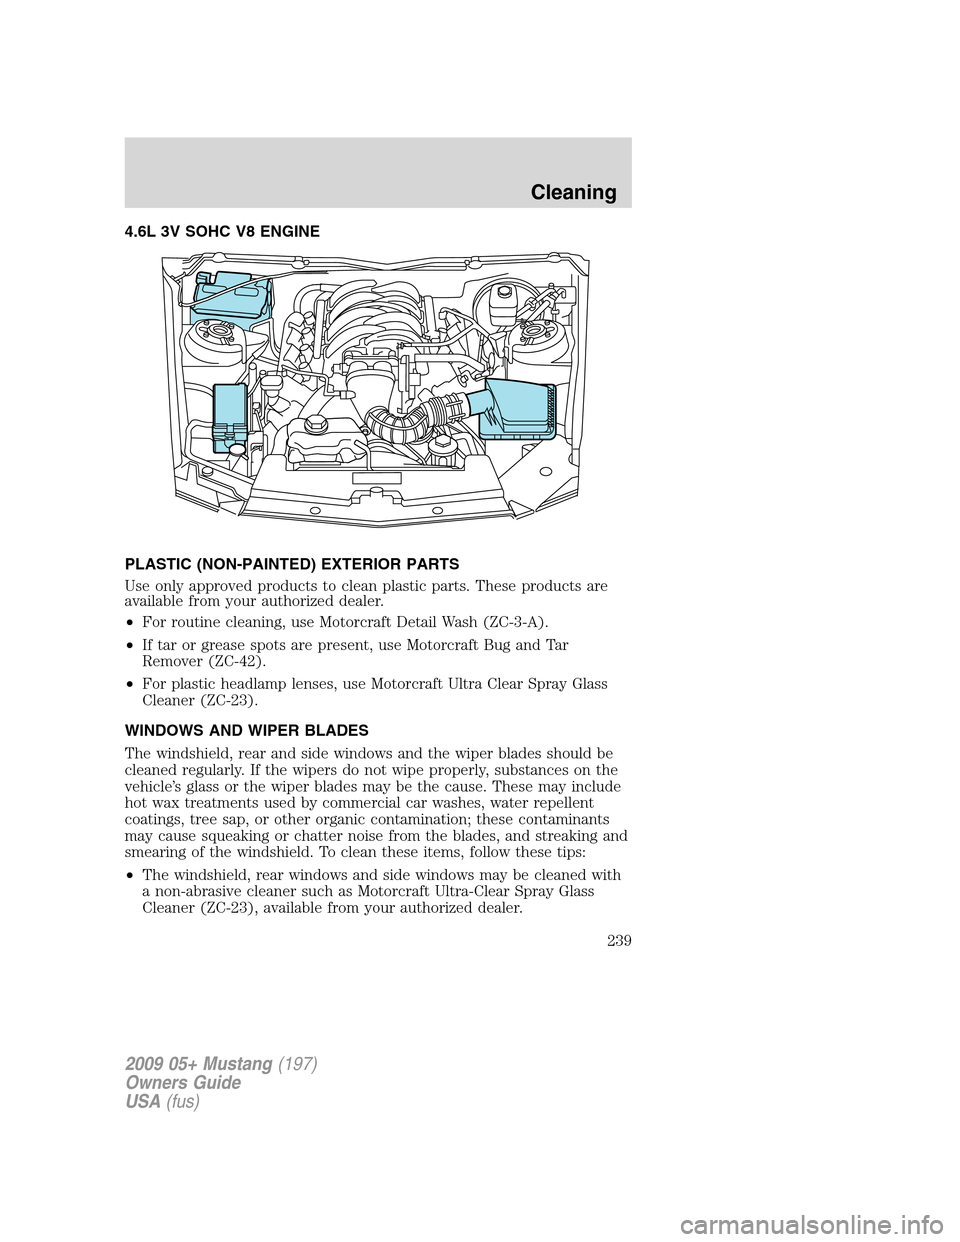
4.6L 3V SOHC V8 ENGINE
PLASTIC (NON-PAINTED) EXTERIOR PARTS
Use only approved products to clean plastic parts. These products are
available from your authorized dealer.
•For routine cleaning, use Motorcraft Detail Wash (ZC-3-A).
•If tar or grease spots are present, use Motorcraft Bug and Tar
Remover (ZC-42).
•For plastic headlamp lenses, use Motorcraft Ultra Clear Spray Glass
Cleaner (ZC-23).
WINDOWS AND WIPER BLADES
The windshield, rear and side windows and the wiper blades should be
cleaned regularly. If the wipers do not wipe properly, substances on the
vehicle’s glass or the wiper blades may be the cause. These may include
hot wax treatments used by commercial car washes, water repellent
coatings, tree sap, or other organic contamination; these contaminants
may cause squeaking or chatter noise from the blades, and streaking and
smearing of the windshield. To clean these items, follow these tips:
•The windshield, rear windows and side windows may be cleaned with
a non-abrasive cleaner such as Motorcraft Ultra-Clear Spray Glass
Cleaner (ZC-23), available from your authorized dealer.
2009 05+ Mustang(197)
Owners Guide
USA(fus)
Cleaning
239
Page 289 of 292
F
Fail safe cooling ........................261
Floor mats ...................................82
Fluid capacities .........................279
Foglamps .....................................48
Fuel ............................................262
calculating fuel
economy ............................78, 267
cap ...........................................264
capacity ...................................279
choosing the right fuel ...........265
comparisons with EPA fuel
economy estimates .................270
detergent in fuel .....................267
filling your vehicle with
fuel ...........................262, 264, 267
filter, specifications ........262, 278
fuel pump shut-off switch .....197
improving fuel economy ........267
octane rating ...................266, 282
quality ......................................266
running out of fuel .................267
safety information relating to
automotive fuels .....................262
Fuel pump shut-off switch .......197
Fuses ..................................197–198
G
Gas cap (see Fuel cap) ............264
Gas mileage
(see Fuel economy) .................267
Gauges .........................................15
H
Hazard flashers .........................196
Head restraints ...........................97Headlamps ...................................48
aiming ........................................50
bulb specifications ....................53
daytime running lights .............49
flash to pass ..............................49
high beam .................................48
replacing bulbs .........................53
turning on and off ....................48
Heating
heating and air conditioning
system .......................................44
Hood ..........................................245
How to get going ........................19
I
Ignition ...............................178, 282
Infant seats
(see Safety seats) .....................134
Inspection/maintenance (I/M)
testing ........................................272
Instrument panel
cleaning ...................................240
cluster ........................................10
lighting up panel and
interior .......................................49
J
Jump-starting your vehicle ......220
K
Keyless entry system
autolock .....................................85
Keys .............................................93
positions of the ignition .........178
2009 05+ Mustang(197)
Owners Guide
USA(fus)
Index
289