reset FORD POLICE INTERCEPTOR 2018 Warranty Guide
[x] Cancel search | Manufacturer: FORD, Model Year: 2018, Model line: POLICE INTERCEPTOR, Model: FORD POLICE INTERCEPTOR 2018Pages: 364, PDF Size: 8.07 MB
Page 7 of 364
Engine Oil Check
..........................................179
Oil Change Indicator Reset ......................
180
Engine Coolant Check ................................
181
Automatic Transmission Fluid Check - 2.0L EcoBoost™ ......................................
185
Automatic Transmission Fluid Check - 3.5L Duratec/3.5L Ecoboost™/3.7L
........................................................................\
.
185
Brake Fluid Check .......................................
188
Power Steering Fluid Check ....................
189
Washer Fluid Check ....................................
189
Fuel Filter ........................................................
189
Changing the 12V Battery .........................
189
Checking the Wiper Blades ......................
191
Changing the Wiper Blades .....................
192
Adjusting the Headlamps .........................
192
Changing a Bulb ...........................................
193
Bulb Specification Chart ..........................
194
Changing the Engine Air Filter ................
196
Vehicle Care
General Information ...................................
197
Cleaning Products .......................................
197
Cleaning the Exterior ..................................
197
Waxing .............................................................
199
Cleaning the Engine ...................................
199
Cleaning the Windows and Wiper Blades ........................................................................\
199
Cleaning the Interior .................................
200
Cleaning the Instrument Panel and Instrument Cluster Lens ......................
200
Cleaning Leather Seats .............................
201
Repairing Minor Paint Damage .............
202
Cleaning the Wheels .................................
202
Vehicle Storage ...........................................
202
Wheels and Tires
General Information ..................................
205
Tire Care .........................................................
205
Using Snow Chains .....................................
219Tire Pressure Monitoring System
..........
220
Changing a Road Wheel ...........................
223
Technical Specifications ...........................
227
Capacities and Specifications
Engine Specifications - 2.0L EcoBoost™ ........................................................................\
229
Engine Specifications - 3.5L Duratec ........................................................................\
229
Engine Specifications - 3.5L Ecoboost™ ........................................................................\
230
Engine Specifications - 3.7L .....................
231
Motorcraft Parts - 2.0L EcoBoost™ ......
231
Motorcraft Parts - 3.5L Duratec ............
233
Motorcraft Parts - 3.5L Ecoboost™ .....
234
Motorcraft Parts - 3.7L ..............................
235
Vehicle Identification Number ...............
236
Vehicle Certification Label .......................
237
Transmission Code Designation ............
237
Capacities and Specifications - 2.0L EcoBoost™ ...............................................
238
Capacities and Specifications - 3.5L Duratec .......................................................
242
Capacities and Specifications - 3.5L Ecoboost™ ...............................................
246
Capacities and Specifications - 3.7L ........................................................................\
250
Audio System
General Information ..................................
256
Audio Unit ......................................................
257
Audio Input Jack ..........................................
262
USB Port ........................................................
263
Media Hub .....................................................
263
SYNC™
General Information ..................................
264
Using Voice Recognition ..........................
266
Using SYNC™ With Your Phone ...........
269
SYNC™ Applications and Services ......
282
4
Taurus (CPH) Police, Canada/United States of America, enUSA, Edition date: 201708, Second Printing Table of Contents
Page 11 of 364
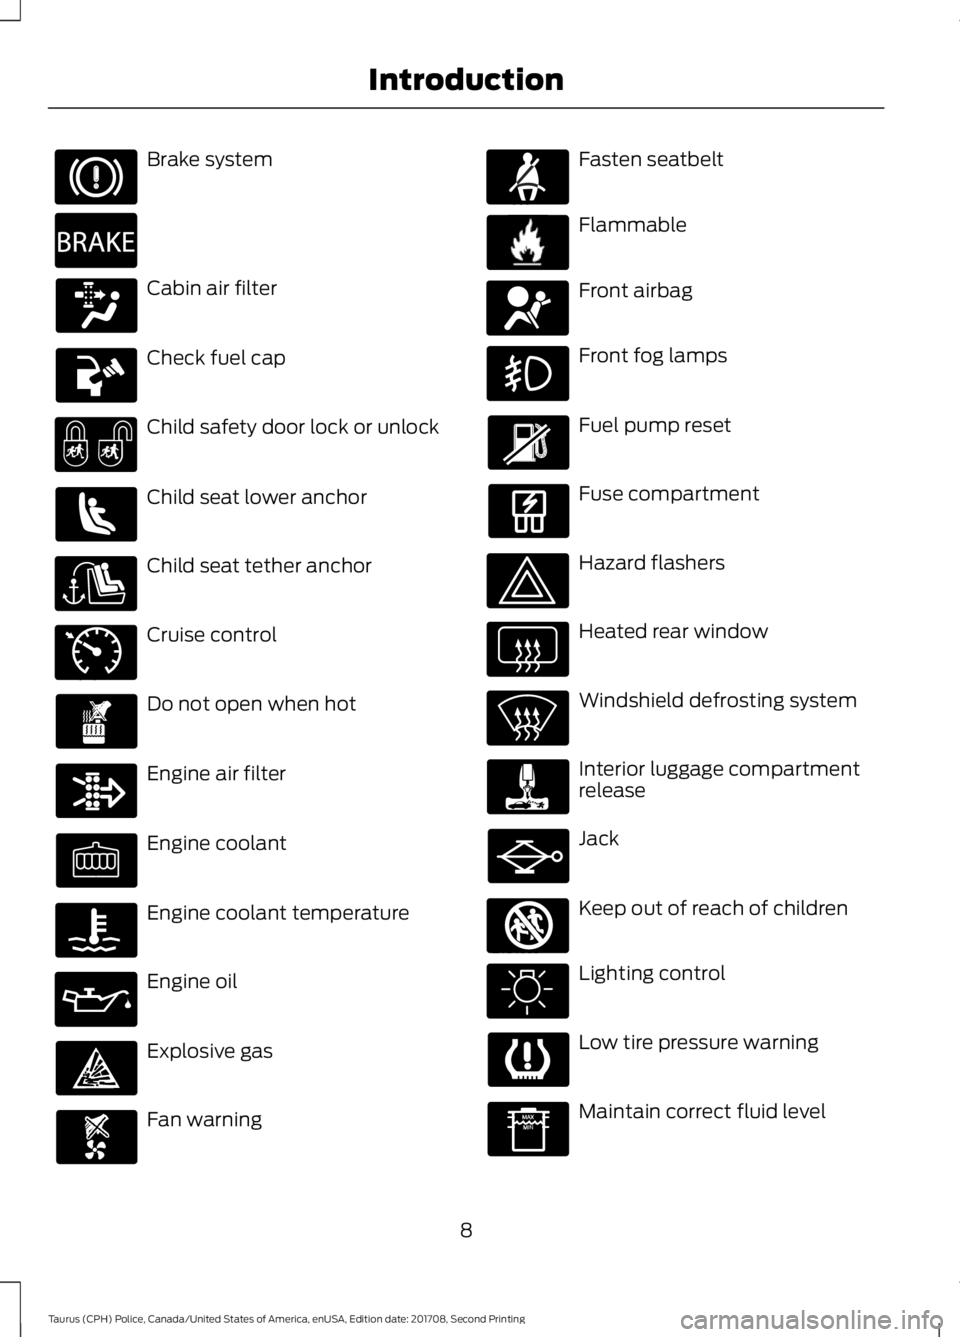
Brake system
Cabin air filter
Check fuel cap
Child safety door lock or unlock
Child seat lower anchor
Child seat tether anchor
Cruise control
Do not open when hot
Engine air filter
Engine coolant
Engine coolant temperature
Engine oil
Explosive gas
Fan warning Fasten seatbelt
Flammable
Front airbag
Front fog lamps
Fuel pump reset
Fuse compartment
Hazard flashers
Heated rear window
Windshield defrosting system
Interior luggage compartment
release
Jack
Keep out of reach of children
Lighting control
Low tire pressure warning
Maintain correct fluid level
8
Taurus (CPH) Police, Canada/United States of America, enUSA, Edition date: 201708, Second Printing Introduction E270480 E71340 E71880 E231160 E67017 E161353
Page 78 of 364
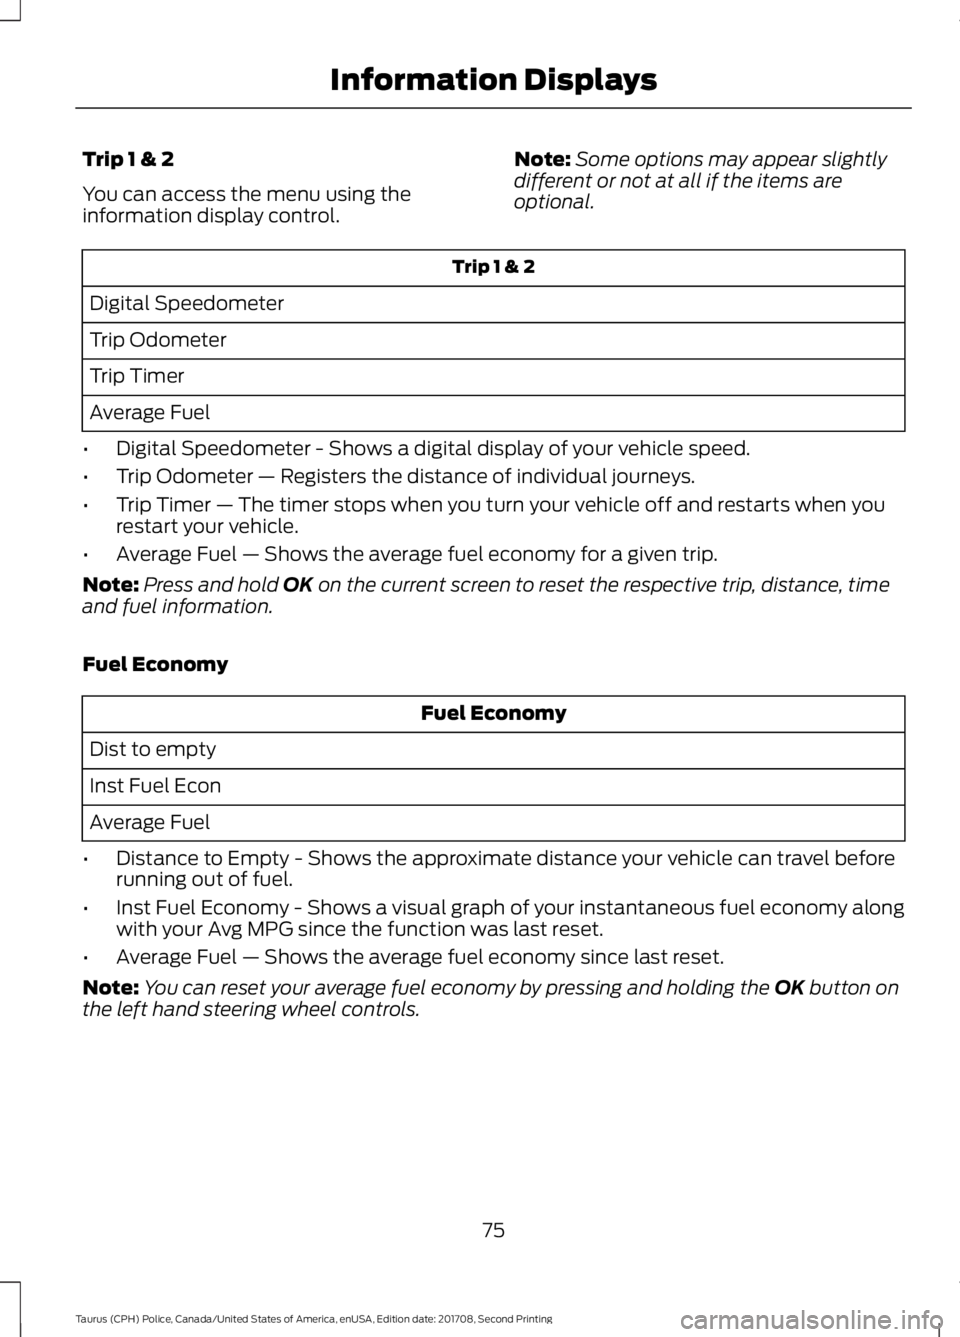
Trip 1 & 2
You can access the menu using the
information display control.
Note:
Some options may appear slightly
different or not at all if the items are
optional. Trip 1 & 2
Digital Speedometer
Trip Odometer
Trip Timer
Average Fuel
• Digital Speedometer - Shows a digital display of your vehicle speed.
• Trip Odometer — Registers the distance of individual journeys.
• Trip Timer — The timer stops when you turn your vehicle off and restarts when you
restart your vehicle.
• Average Fuel — Shows the average fuel economy for a given trip.
Note: Press and hold OK on the current screen to reset the respective trip, distance, time
and fuel information.
Fuel Economy Fuel Economy
Dist to empty
Inst Fuel Econ
Average Fuel
• Distance to Empty - Shows the approximate distance your vehicle can travel before
running out of fuel.
• Inst Fuel Economy - Shows a visual graph of your instantaneous fuel economy along
with your Avg MPG since the function was last reset.
• Average Fuel — Shows the average fuel economy since last reset.
Note: You can reset your average fuel economy by pressing and holding the
OK button on
the left hand steering wheel controls.
75
Taurus (CPH) Police, Canada/United States of America, enUSA, Edition date: 201708, Second Printing Information Displays
Page 79 of 364
Information
Information
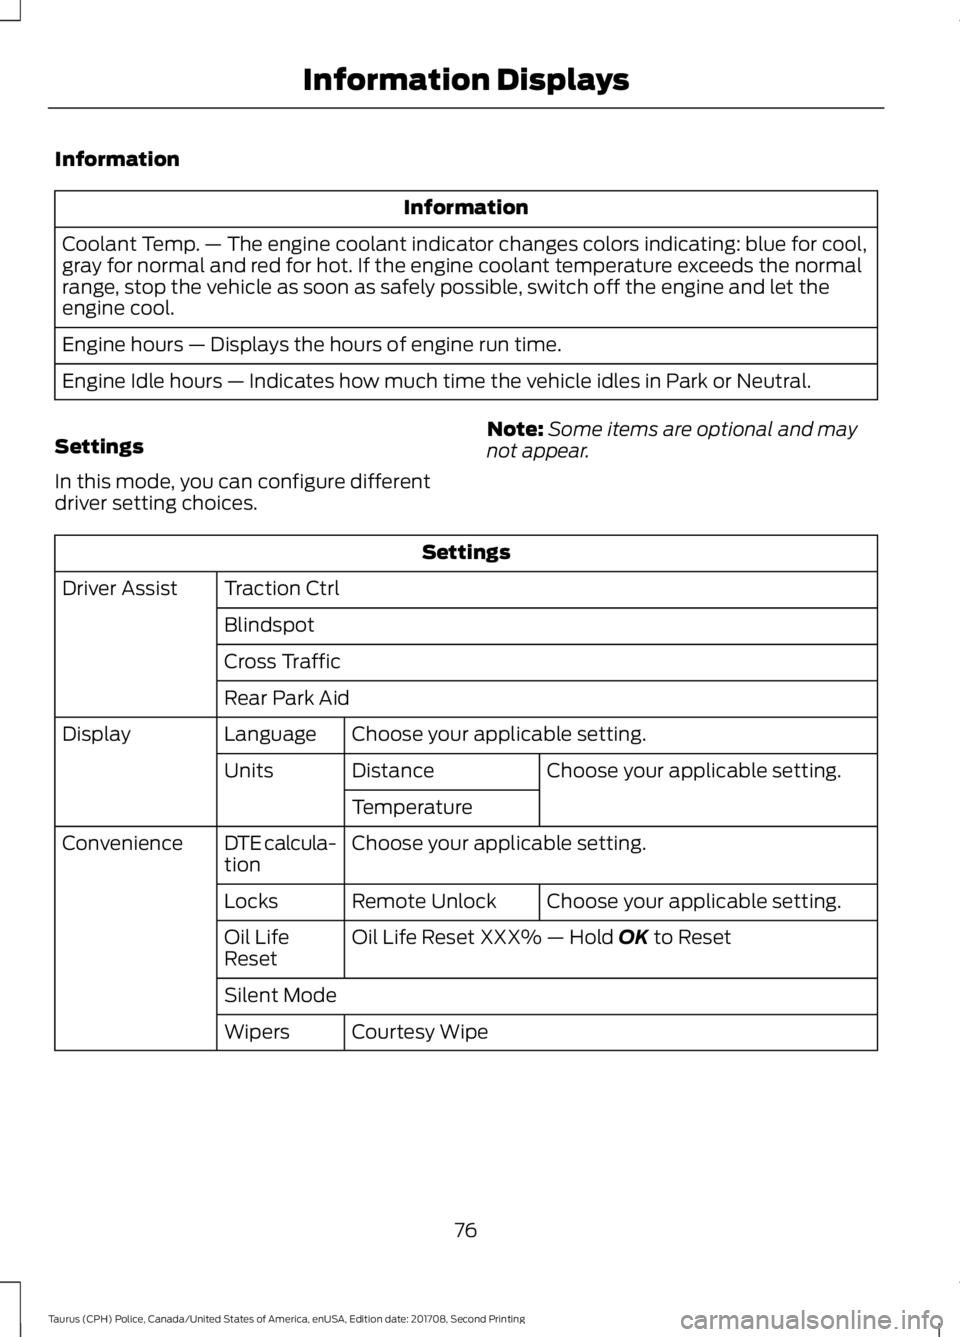
Coolant Temp. — The engine coolant indicator changes colors indicating: blue for cool,
gray for normal and red for hot. If the engine coolant temperature exceeds the normal
range, stop the vehicle as soon as safely possible, switch off the engine and let the
engine cool.
Engine hours — Displays the hours of engine run time.
Engine Idle hours — Indicates how much time the vehicle idles in Park or Neutral.
Settings
In this mode, you can configure different
driver setting choices. Note:
Some items are optional and may
not appear. Settings
Traction Ctrl
Driver Assist
Blindspot
Cross Traffic
Rear Park AidChoose your applicable setting.
Language
Display
Choose your applicable setting.
Distance
Units
Temperature
Choose your applicable setting.
DTE calcula-
tion
Convenience
Choose your applicable setting.
Remote Unlock
Locks
Oil Life Reset XXX% — Hold OK to Reset
Oil Life
Reset
Silent Mode
Courtesy Wipe
Wipers
76
Taurus (CPH) Police, Canada/United States of America, enUSA, Edition date: 201708, Second Printing Information Displays
Page 106 of 364
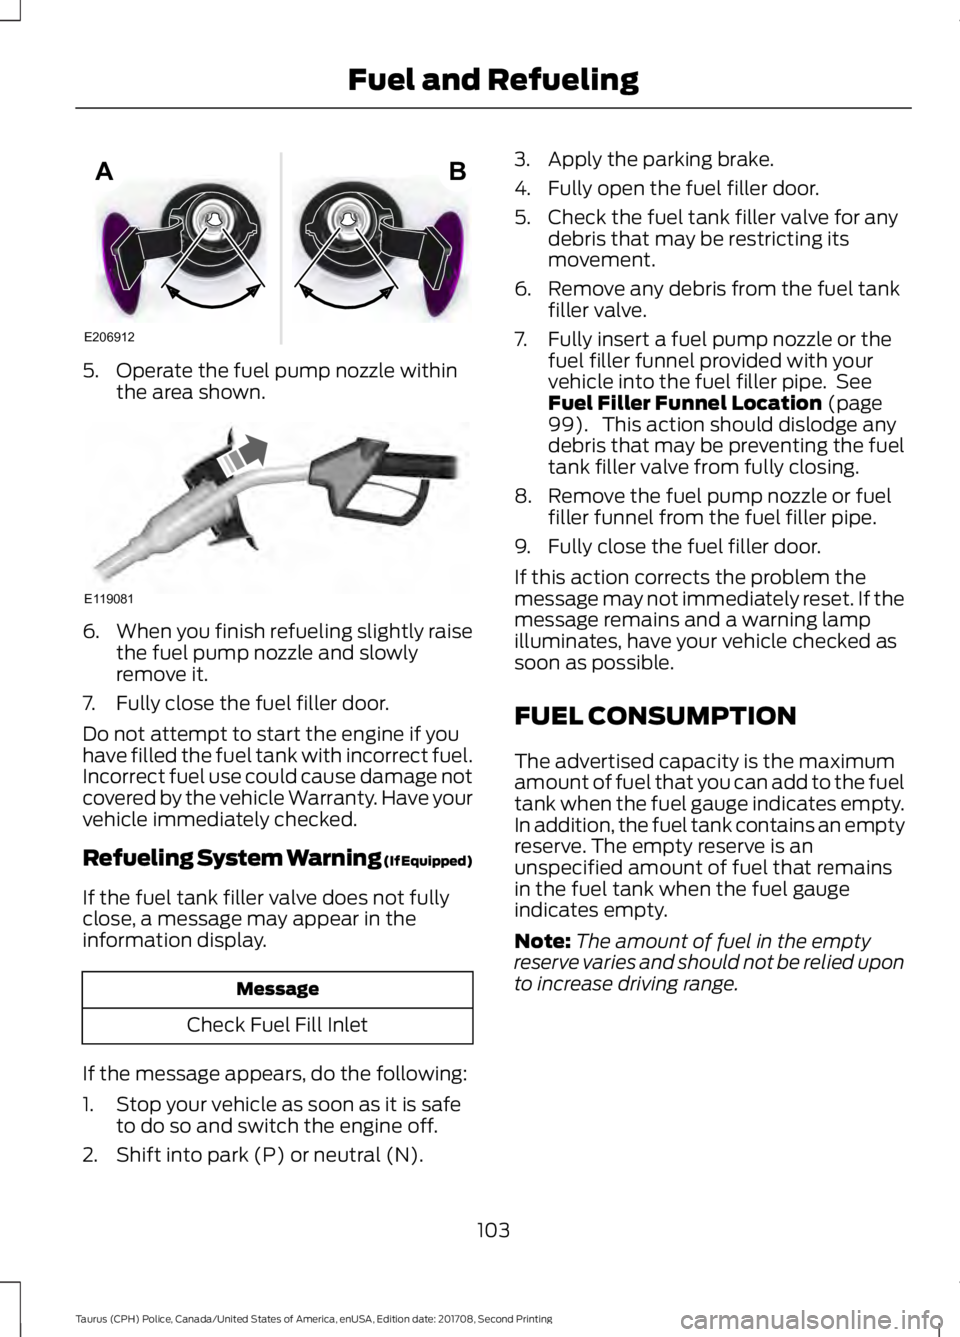
5. Operate the fuel pump nozzle within
the area shown. 6.
When you finish refueling slightly raise
the fuel pump nozzle and slowly
remove it.
7. Fully close the fuel filler door.
Do not attempt to start the engine if you
have filled the fuel tank with incorrect fuel.
Incorrect fuel use could cause damage not
covered by the vehicle Warranty. Have your
vehicle immediately checked.
Refueling System Warning (If Equipped)
If the fuel tank filler valve does not fully
close, a message may appear in the
information display. Message
Check Fuel Fill Inlet
If the message appears, do the following:
1. Stop your vehicle as soon as it is safe to do so and switch the engine off.
2. Shift into park (P) or neutral (N). 3. Apply the parking brake.
4. Fully open the fuel filler door.
5. Check the fuel tank filler valve for any
debris that may be restricting its
movement.
6. Remove any debris from the fuel tank filler valve.
7. Fully insert a fuel pump nozzle or the fuel filler funnel provided with your
vehicle into the fuel filler pipe. See
Fuel Filler Funnel Location (page
99). This action should dislodge any
debris that may be preventing the fuel
tank filler valve from fully closing.
8. Remove the fuel pump nozzle or fuel filler funnel from the fuel filler pipe.
9. Fully close the fuel filler door.
If this action corrects the problem the
message may not immediately reset. If the
message remains and a warning lamp
illuminates, have your vehicle checked as
soon as possible.
FUEL CONSUMPTION
The advertised capacity is the maximum
amount of fuel that you can add to the fuel
tank when the fuel gauge indicates empty.
In addition, the fuel tank contains an empty
reserve. The empty reserve is an
unspecified amount of fuel that remains
in the fuel tank when the fuel gauge
indicates empty.
Note: The amount of fuel in the empty
reserve varies and should not be relied upon
to increase driving range.
103
Taurus (CPH) Police, Canada/United States of America, enUSA, Edition date: 201708, Second Printing Fuel and RefuelingE206912
AB E119081
Page 115 of 364
USING ALL-WHEEL DRIVE (If
Equipped)
All-wheel drive uses all four wheels to
power the vehicle. This increases traction,
enabling you to drive over terrain and road
conditions that a conventional two-wheel
drive vehicle cannot. The AWD system is
active all the time and requires no input
from the operator.
Note: Your AWD vehicle is not intended for
off-road use. The AWD feature gives your
vehicle some limited off-road capabilities
in which driving surfaces are relatively level,
obstruction-free and otherwise similar to
normal on-road driving conditions.
Operating your vehicle under other than
those conditions could subject the vehicle
to excessive stress which might result in
damage which is not covered under your
warranty.
Note: The Power Transfer Unit (PTU) does
not require any normal scheduled
maintenance. The system is electronically
monitored and notifies the driver of required
service by displaying the message
Change
AWD Power Transfer Unit Lube in the
information display. The PTU lubricant will
be more likely to require a fluid change if the
vehicle has experienced extended periods
of extreme or severe duty cycle driving. Do
not check or change the PTU lubricant
unless the unit shows signs of leakage or a
message indicating required service is
displayed. Contact an authorized dealer for
service if the PTU was submerged in water
and to reset the PTU lube life monitor. Note:
When an AWD system fault is
present, the warning
Check AWD displays
in the information display. The AWD system
is not functioning correctly and defaulted
to front-wheel drive. When this warning
displays, have your vehicle serviced at an
authorized dealer.
Note: The
AWD OFF message may also
appear in the information display if the AWD
system overheats and defaults to
front-wheel drive. This may occur if the
vehicle is operated in extreme conditions
with excessive wheel slip, such as deep
sand. To resume normal AWD function as
soon as possible, stop the vehicle in a safe
location and stop the engine for at least 10
minutes. After the engine has been
restarted and the AWD system has
adequately cooled, the AWD OFF message
will turn off and normal AWD function
returns. If the engine is not stopped, the
AWD OFF
message turns off when the
system cools and normal AWD function
returns.
112
Taurus (CPH) Police, Canada/United States of America, enUSA, Edition date: 201708, Second Printing All-Wheel Drive
(If Equipped)
Page 166 of 364
FUSE SPECIFICATION CHART
Power Distribution Box
WARNINGS
Always disconnect the battery before
servicing high current fuses.
To reduce risk of electrical shock,
always replace the cover to the
power distribution box before
reconnecting the battery or refilling fluid
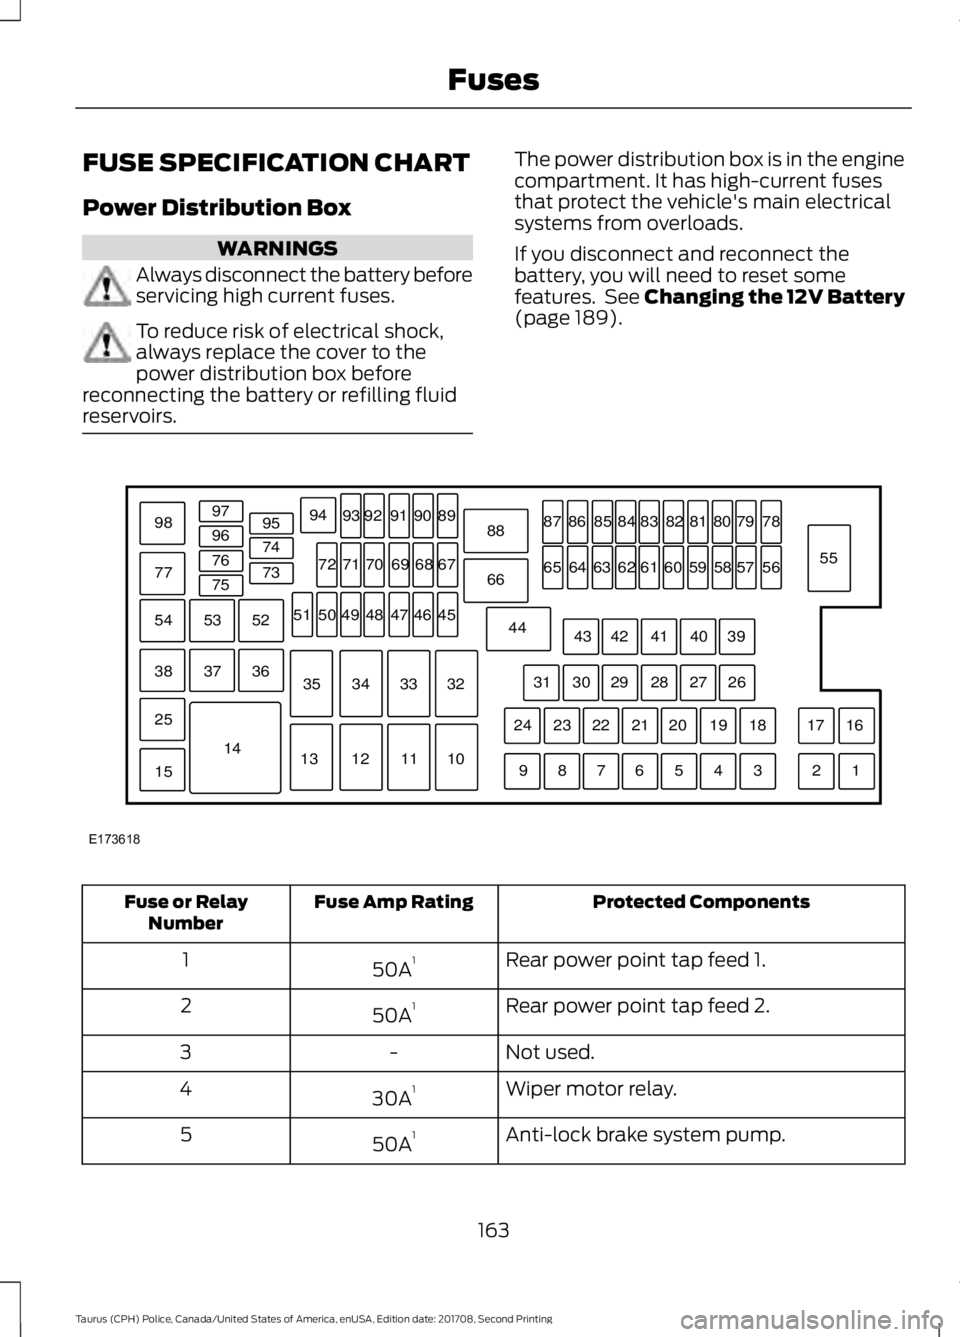
reservoirs. The power distribution box is in the engine
compartment. It has high-current fuses
that protect the vehicle's main electrical
systems from overloads.
If you disconnect and reconnect the
battery, you will need to reset some
features. See Changing the 12V Battery
(page 189).
Protected Components
Fuse Amp Rating
Fuse or Relay
Number
Rear power point tap feed 1.
50A 1
1
Rear power point tap feed 2.
50A 1
2
Not used.
-
3
Wiper motor relay.
30A 1
4
Anti-lock brake system pump.
50A 1
5
163
Taurus (CPH) Police, Canada/United States of America, enUSA, Edition date: 201708, Second Printing FusesE173618
97
98
77 96
95
94
9392 919089
88
66
44 78
56
39 26 18 16
17
3 1
2
4
5
6
7
8
9 19
20
21
22
23
24 27
28
29
30
31 40
41
42
43 55
57
58
59
60
61
62
63
64
65 79
80
81
82
83
84
85
86
87
67
45
32
10
11
12
13 33
34
35 46
47
48
49
50
51 68
69
70
71
72
74
73
76
75
53
37 36
54
38
25
15
1452
Page 183 of 364
Adding Engine Oil
WARNING
Do not remove the filler cap when
the engine is running.
Do not use supplemental engine oil
additives because they are unnecessary
and could lead to engine damage that may
not be covered by the vehicle Warranty.
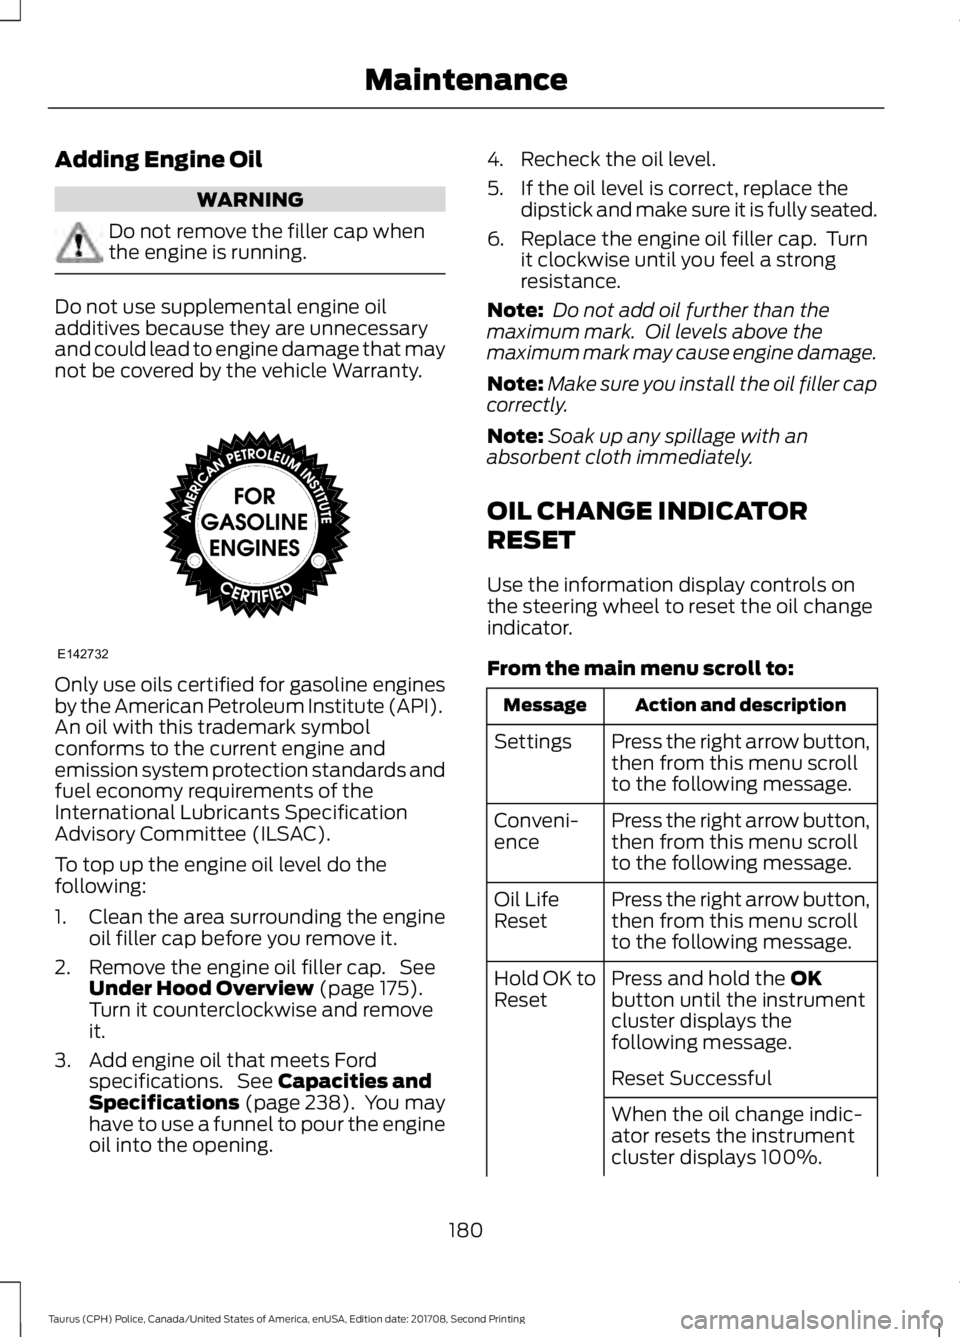
Only use oils certified for gasoline engines
by the American Petroleum Institute (API).
An oil with this trademark symbol
conforms to the current engine and
emission system protection standards and
fuel economy requirements of the
International Lubricants Specification
Advisory Committee (ILSAC).
To top up the engine oil level do the
following:
1. Clean the area surrounding the engine
oil filler cap before you remove it.
2. Remove the engine oil filler cap. See Under Hood Overview (page 175).
Turn it counterclockwise and remove
it.
3. Add engine oil that meets Ford specifications. See
Capacities and
Specifications (page 238). You may
have to use a funnel to pour the engine
oil into the opening. 4. Recheck the oil level.
5. If the oil level is correct, replace the
dipstick and make sure it is fully seated.
6. Replace the engine oil filler cap. Turn it clockwise until you feel a strong
resistance.
Note: Do not add oil further than the
maximum mark. Oil levels above the
maximum mark may cause engine damage.
Note: Make sure you install the oil filler cap
correctly.
Note: Soak up any spillage with an
absorbent cloth immediately.
OIL CHANGE INDICATOR
RESET
Use the information display controls on
the steering wheel to reset the oil change
indicator.
From the main menu scroll to: Action and description
Message
Press the right arrow button,
then from this menu scroll
to the following message.
Settings
Press the right arrow button,
then from this menu scroll
to the following message.
Conveni-
ence
Press the right arrow button,
then from this menu scroll
to the following message.
Oil Life
Reset
Press and hold the
OK
button until the instrument
cluster displays the
following message.
Hold OK to
Reset
Reset Successful
When the oil change indic-
ator resets the instrument
cluster displays 100%.
180
Taurus (CPH) Police, Canada/United States of America, enUSA, Edition date: 201708, Second Printing MaintenanceE142732
Page 184 of 364
Action and description
Message
Remaining Life
{00}%
If the instrument cluster
displays one of the following
messages, repeat the
process.
Not Reset
Reset Cancelled
ENGINE COOLANT CHECK WARNINGS
Never remove the coolant reservoir
cap when the engine is running or
hot.
Do not put coolant in the windshield
washer reservoir. If sprayed on the
windshield, coolant could make it
difficult to see through the windshield. To reduce the risk of personal injury,
make sure the engine is cool before
unscrewing the coolant pressure
relief cap. The cooling system is under
pressure. Steam and hot liquid can come
out forcefully when you loosen the cap
slightly. Do not add coolant further than the
MAX mark.
When the engine is cold, check the
concentration and level of the coolant at
the intervals listed in the scheduled
maintenance information. See Scheduled
Maintenance
(page 306).
Note: Make sure that the coolant level is
between the
MIN and MAX marks on the
coolant reservoir.
Note: Coolant expands when it is hot. The
level may extend beyond the
MAX mark. Maintain coolant concentration within
48% to 50%, which equates to a freeze
point between
-29°F (-34°C) and -35°F
(-37°C). Coolant concentration should be
checked using a refractometer. We do not
recommend the use of hydrometers or
coolant test strips for measuring coolant
concentration.
Adding Coolant WARNINGS
Do not add engine coolant when the
engine is hot. Failure to follow this
instruction could result in personal
injury. Never remove the coolant reservoir
cap when the engine is running or
hot.
Note:
Automotive fluids are not
interchangeable. Take care not to put
engine coolant in the windshield washer
fluid reservoir or windshield washer fluid in
the engine coolant reservoir.
Note: Do not use stop leak pellets, cooling
system sealants, or non-specified additives
as they can cause damage to the engine
cooling or heating systems. Resulting
component damage may not be covered by
the vehicle Warranty.
It is very important to use prediluted
coolant approved to the correct
specification in order to avoid plugging the
small passageways in the engine cooling
system. See
Capacities and
Specifications (page 229). Do not mix
different colors or types of coolant in your
vehicle. Mixing of engine coolants or using
an incorrect coolant may harm the engine
or cooling system components and may
not be covered by the vehicle Warranty.
181
Taurus (CPH) Police, Canada/United States of America, enUSA, Edition date: 201708, Second Printing Maintenance
Page 186 of 364
Severe Climates
If you drive in extremely cold climates:
•
It may be necessary to increase the
coolant concentration above 50%.
• A coolant concentration of 60%
provides improved freeze point
protection. Coolant concentrations
above 60% decrease the overheat
protection characteristics of the
coolant and may cause engine
damage.
If you drive in extremely hot climates:
• You can decrease the coolant
concentration to 40%.
• Coolant concentrations below 40%
decrease the freeze and corrosion
protection characteristics of the
coolant and may cause engine
damage.
Vehicles driven year-round in non-extreme
climates should use prediluted coolant for
optimum cooling system and engine
protection.
Coolant Change
At specific mileage intervals, as listed in
the scheduled maintenance information,
the coolant should be changed. Add
prediluted coolant approved to the correct
specification. See Capacities and
Specifications (page 229).
Fail-Safe Cooling
Fail-safe cooling allows you to temporarily
drive your vehicle before any incremental
component damage occurs. The fail-safe
distance depends on ambient
temperature, vehicle load and terrain.
How Fail-Safe Cooling Works If the engine begins to overheat,
the coolant temperature gauge
moves toward the red zone: A warning lamp illuminates and
a message may appear in the
information display.
If the engine reaches a preset
over-temperature condition, the engine
automatically switches to alternating
cylinder operation. Each disabled cylinder
acts as an air pump and cools the engine.
When this occurs, your vehicle still
operates, however:
• Engine power is limited.
• The air conditioning system turns off.
Continued operation increases the engine
temperature, causing the engine to
completely shut down. Your steering and
braking effort increases in this situation.
When the engine temperature cools, you
can re-start the engine. Have your vehicle
checked as soon as possible to minimize
engine damage.
When Fail-Safe Mode Is Activated WARNINGS
Fail-safe mode is for use during
emergencies only. Operate your
vehicle in fail-safe mode only as long
as necessary to bring your vehicle to rest
in a safe location and seek immediate
repairs. When in fail-safe mode, your
vehicle will have limited power, will not be
able to maintain high-speed operation, and
may completely shut down without
warning, potentially losing engine power,
power steering assist, and power brake
assist, which may increase the possibility
of a crash resulting in serious injury. Never remove the coolant reservoir
cap when the engine is running or
hot.
183
Taurus (CPH) Police, Canada/United States of America, enUSA, Edition date: 201708, Second Printing Maintenance