ignition FORD RANGER 1998 2.G User Guide
[x] Cancel search | Manufacturer: FORD, Model Year: 1998, Model line: RANGER, Model: FORD RANGER 1998 2.GPages: 160, PDF Size: 1.38 MB
Page 33 of 160

Sounding a panic alarm
Press this control to activate the alarm.
To deactivate the alarm, press the
control again or turn the ignition to
ACC or ON.
This device complies with part 15 of
the FCC rules and with RS-210 of
Industry Canada. Operation is
subject to the following two
conditions: (1) This device may not
cause harmful interference, and (2)
This device must accept any interference received, including interference
that may cause undesired operation.
Changes or modifications not expressly approved by the party
responsible for compliance could void the user's authority to
operate the equipment.
Replacing the battery
The transmitter is powered by one coin type three-volt lithium battery
CR2032 or equivalent. Typical operating range will allow you to be up to
10 meters (33 feet) away from your vehicle. A decrease in operating
range can be caused by:
²battery weakness due to time and use
²weather conditions
²nearby radio towers
²structures around the vehicle
²other vehicles parked next to the vehicle
To replace the battery:
1. Twist a thin coin between the two halves of the transmitter near the
key ring. DO NOT TAKE THE FRONT PART OF THE TRANSMITTER
APART.
2. Place the positive (+) side of new battery in the same orientation.
Refer to the diagram inside the transmitter unit.
3. Snap the two halves back together.
Controls and features
33
Page 34 of 160

Replacing lost transmitters
Take all your vehicle's transmitters
to your dealer for reprogramming if:
²a transmitter is lost or
²you want to purchase additional
transmitters (up to four may be
programmed).
Reprogramming transmitters
To reprogram all transmitters, place the key in the ignition and switch
from OFF to ON eight times in a row (within 10 seconds). After doors
lock/unlock, press any button on all transmitters (up to four). When
completed, switch the ignition to OFF.
All transmitters must be reprogrammed at the same time.
Illuminated entry
The interior lamps illuminate when the remote entry system is used to
unlock the door(s) or sound the personal alarm.
The system automatically turns off after 25 seconds or when the ignition
is turned to the START or ACC position. The dome lamp switch
(if equipped) mustnotbe set to the OFF position for the illuminated
entry system to operate.
The inside lights will not turn off if:
²they have been turned on with the dimmer control or
²any door is open.
The battery saver will shut off the interior lamps 40 minutes after the
ignition has been turned to the OFF position.
Controls and features
34
Page 35 of 160

PERIMETER ALARM SYSTEM
Arming the system
When armed, this system will help protect your vehicle from
unauthorized entry. When unauthorized entry occurs, the system will
flash the parking lamps and the theft indicator lamp, and chirp the horn.
The system is ready to arm whenever the ignition is turned OFF. Any of
the following actions will prearm the alarm system:
²Press the remote entry lock
control
²Open a door and press the power
door lock control to lock the
doors
If a door is open, the system is prearmed and is waiting for the door to
close. The theft indicator in the instrument panel will be lit continuously
when the system is prearmed.
Once the doors are closed, the system will arm in 30 seconds.
When you press the lock control
twice within 5 seconds, the horn will
chirp once to let you know that the
system is armed.
If the doors are not closed and you press the remote entry transmitter
twice to confirm the doors are locked, the horn will chirp twice to warn
you that the system is not arming.
Controls and features
35
Page 36 of 160
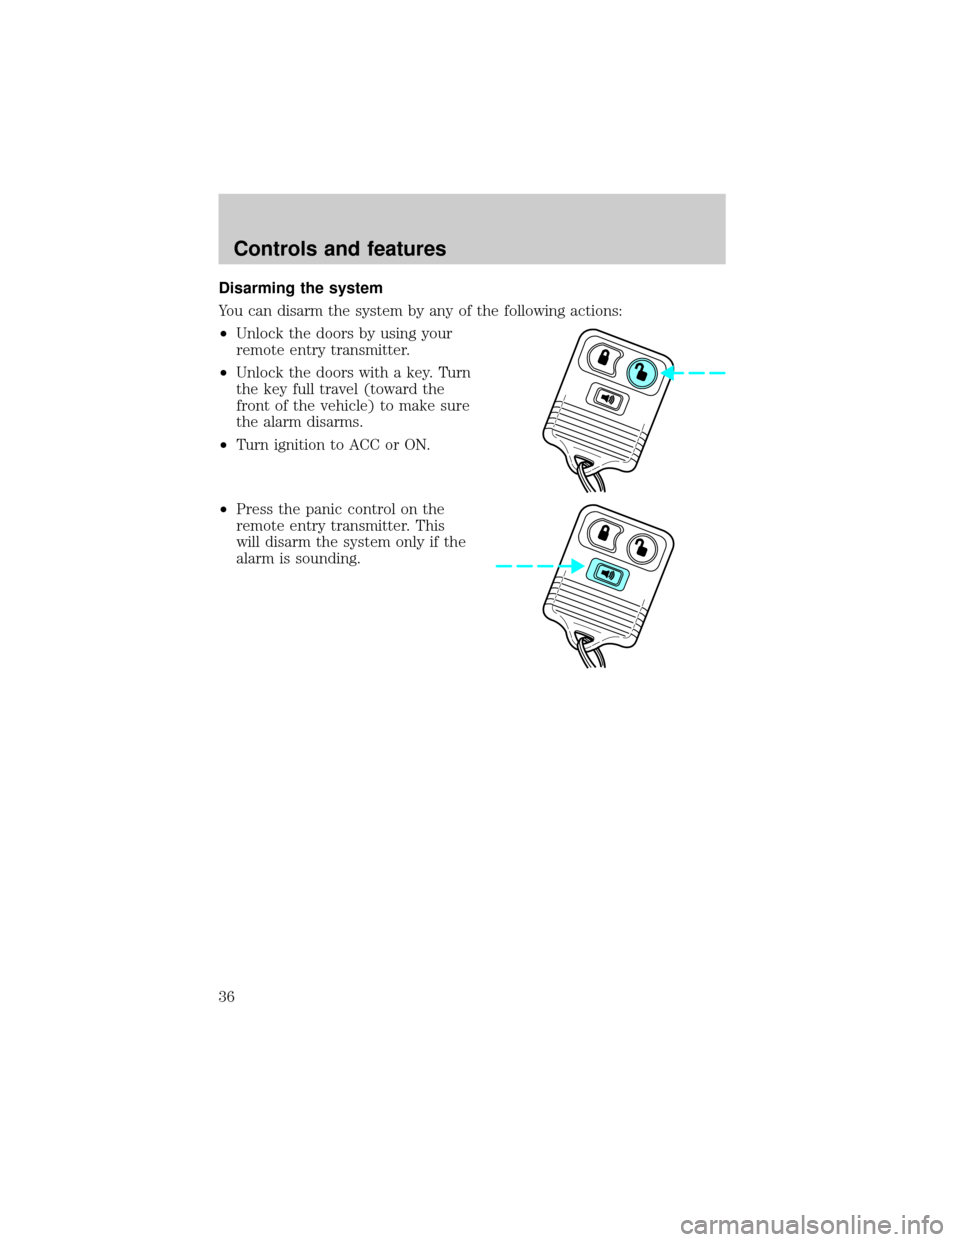
Disarming the system
You can disarm the system by any of the following actions:
²Unlock the doors by using your
remote entry transmitter.
²Unlock the doors with a key. Turn
the key full travel (toward the
front of the vehicle) to make sure
the alarm disarms.
²Turn ignition to ACC or ON.
²Press the panic control on the
remote entry transmitter. This
will disarm the system only if the
alarm is sounding.
Controls and features
36
Page 46 of 160
Conditions of operation
If... Then...
The driver's safety belt is not
buckled before the ignition switch
is turned to the ON position...The safety belt warning light
illuminates for one to two minutes
and the warning chime sounds for
four to eight seconds.
The driver's safety belt is buckled
while the indicator light is
illuminated and the warning chime
is sounding...The safety belt warning light and
warning chime turn off.
The driver's safety belt is buckled
before the ignition switch is turned
to the ON position...The safety belt warning light and
indicator chime remain off.
Safety belt maintenance
Check the safety belt systems periodically to make sure they work
properly and are not damaged. Check the safety belts to make sure there
are no nicks, wears or cuts. All safety belt assemblies, including
retractors, buckles, front seat belt buckle assemblies (slide bar)
(if equipped), shoulder belt height adjusters (if equipped), child safety
seat tether bracket assemblies (if equipped), and attaching hardware,
should be inspected after a collision. Ford recommends that all safety
belt assemblies used in vehicles involved in a collision be replaced.
However, if the collision was minor and a qualified technician finds that
the belts do not show damage and continue to operate properly, they do
not need to be replaced. Safety belt assemblies not in use during a
collision should also be inspected and replaced if either damage or
improper operation is noted.
Failure to replace the safety belt assembly under the above
conditions could result in severe personal injuries in the event of
a collision.
Refer toCleaning and maintaining the safety beltsin the
Maintenance and caresection.
Seating and safety restraints
46
Page 50 of 160

The SRS consists of:
²driver and passenger air bag modules
(which include the inflators and air bags)
²one or more impact and safing sensors, passenger air bag deactivation
switch and diagnostic monitor (RCM)
²a readiness light and tone
²and the electrical wiring which connects the components.
The RCM (restraints control module) monitors its own internal circuits
and the supplemental air bag electrical system warning (including the
passenger air bag deactivation switch, the impact sensors, the system
wiring, the air bag system readiness light, the air bag back up power and
the air bag ignitors).
Determining if the system is operational
The SRS uses readiness lights in the instrument cluster and the
passenger air bag deactivate switch or a tone to indicate the condition of
the system. Refer to theAir bag readinesssection in the
Instrumentationchapter orPassenger air bag deactivate switch
section in this chapter. Routine maintenance of the air bag is not
required.
A difficulty with the system is indicated by one or more of the following:
²The readiness lights will either
flash or stay lit.
²The readiness lights will not
illuminate immediately after
ignition is turned on.
²A series of five beeps will be heard. The tone pattern will repeat
periodically until the problem and light are repaired.
If any of these things happen, even intermittently, have the SRS serviced
at your dealership or by a qualified technician immediately. Unless
serviced, the system may not function properly in the event of a
collision.
Disposal of air bags and air bag equipped vehicles
For disposal of air bags or air bag equipped vehicles, see your local
dealership or qualified technician. Air bags MUST BE disposed of by
qualified personnel.
Seating and safety restraints
50
Page 51 of 160
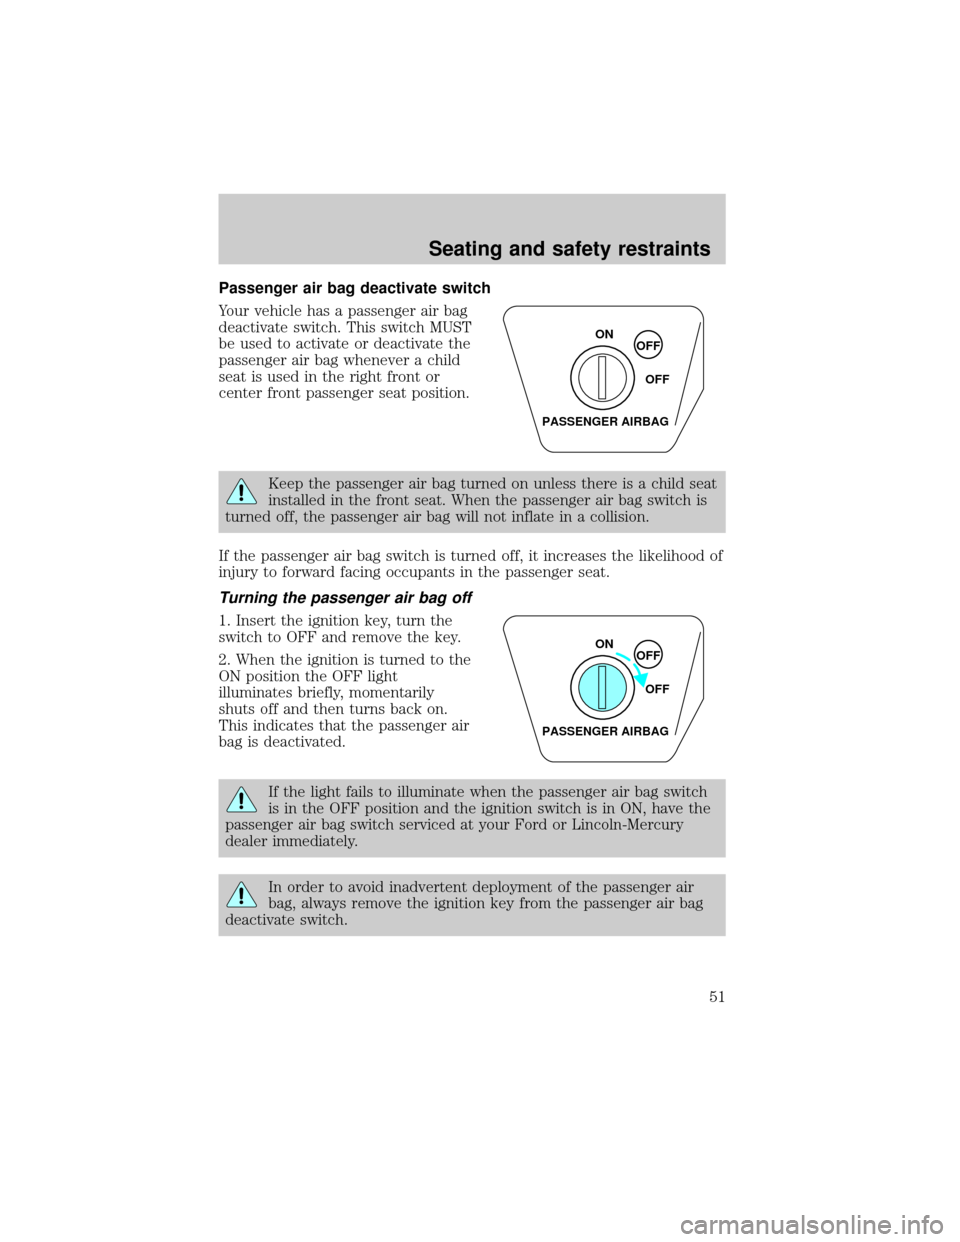
Passenger air bag deactivate switch
Your vehicle has a passenger air bag
deactivate switch. This switch MUST
be used to activate or deactivate the
passenger air bag whenever a child
seat is used in the right front or
center front passenger seat position.
Keep the passenger air bag turned on unless there is a child seat
installed in the front seat. When the passenger air bag switch is
turned off, the passenger air bag will not inflate in a collision.
If the passenger air bag switch is turned off, it increases the likelihood of
injury to forward facing occupants in the passenger seat.
Turning the passenger air bag off
1. Insert the ignition key, turn the
switch to OFF and remove the key.
2. When the ignition is turned to the
ON position the OFF light
illuminates briefly, momentarily
shuts off and then turns back on.
This indicates that the passenger air
bag is deactivated.
If the light fails to illuminate when the passenger air bag switch
is in the OFF position and the ignition switch is in ON, have the
passenger air bag switch serviced at your Ford or Lincoln-Mercury
dealer immediately.
In order to avoid inadvertent deployment of the passenger air
bag, always remove the ignition key from the passenger air bag
deactivate switch.
ON
OFF
OFF
PASSENGER AIRBAG
ON
OFF
OFF
PASSENGER AIRBAG
Seating and safety restraints
51
Page 52 of 160
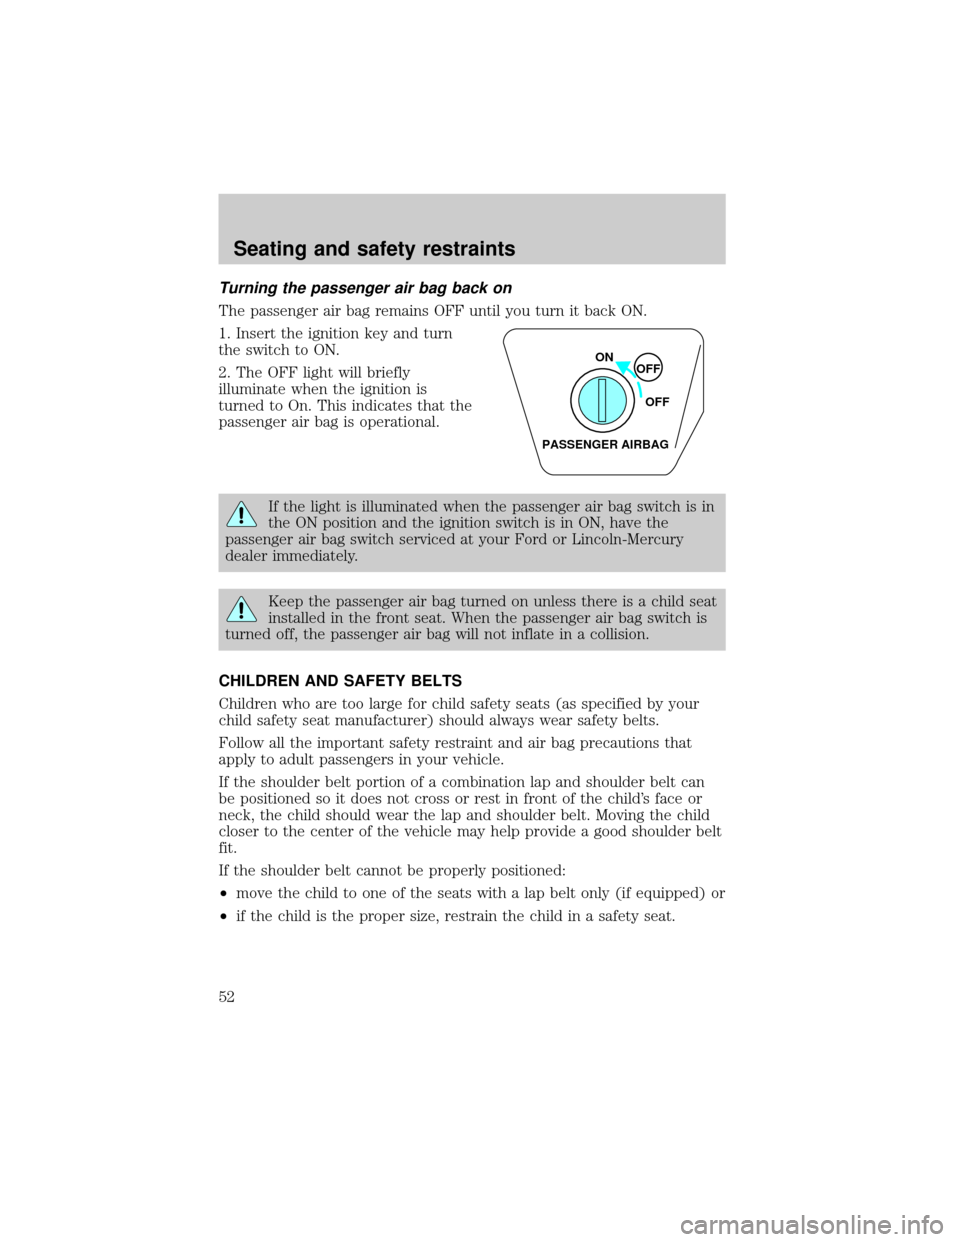
Turning the passenger air bag back on
The passenger air bag remains OFF until you turn it back ON.
1. Insert the ignition key and turn
the switch to ON.
2. The OFF light will briefly
illuminate when the ignition is
turned to On. This indicates that the
passenger air bag is operational.
If the light is illuminated when the passenger air bag switch is in
the ON position and the ignition switch is in ON, have the
passenger air bag switch serviced at your Ford or Lincoln-Mercury
dealer immediately.
Keep the passenger air bag turned on unless there is a child seat
installed in the front seat. When the passenger air bag switch is
turned off, the passenger air bag will not inflate in a collision.
CHILDREN AND SAFETY BELTS
Children who are too large for child safety seats (as specified by your
child safety seat manufacturer) should always wear safety belts.
Follow all the important safety restraint and air bag precautions that
apply to adult passengers in your vehicle.
If the shoulder belt portion of a combination lap and shoulder belt can
be positioned so it does not cross or rest in front of the child's face or
neck, the child should wear the lap and shoulder belt. Moving the child
closer to the center of the vehicle may help provide a good shoulder belt
fit.
If the shoulder belt cannot be properly positioned:
²move the child to one of the seats with a lap belt only (if equipped) or
²if the child is the proper size, restrain the child in a safety seat.
ON
OFF
OFF
PASSENGER AIRBAG
Seating and safety restraints
52
Page 59 of 160
PREPARING TO START YOUR VEHICLE
Engine starting is controlled by the ignition system. This system meets
all Canadian Interference-Causing Equipment standard requirements
regulating the impulse electrical field strength of radio noise.
When starting a fuel-injected engine, avoid pressing the accelerator
before or during starting. Only use the accelerator when you have
difficulty starting the engine. For more information on starting the
vehicle, refer toStarting the enginein this chapter.
Extended idling at high engine speeds can produce very high
temperatures in the engine and exhaust system, creating the risk
of fire or other damage.
Do not park, idle, or drive your vehicle in dry grass or other dry
ground cover. The emission system heats up the engine
compartment and exhaust system, which can start a fire.
Do not start your vehicle in a closed garage or in other enclosed
areas. Exhaust fumes can be toxic. Always open the garage door
before you start the engine. SeeGuarding against exhaust fumesin
this chapter for more instructions.
If you smell exhaust fumes inside your vehicle, have your dealer
inspect your vehicle immediately. Do not drive if you smell
exhaust fumes.
Important safety precautions
A computer system controls the engine's idle revolutions per minute
(RPM). When the engine starts, the idle RPM runs faster to warm the
engine. If the engine idle speed does not slow down automatically, have
the vehicle checked. Do not allow the vehicle to idle for more than ten
minutes.
Before starting the vehicle:
1. Make sure all vehicle occupants have buckled their safety belts. For
more information on safety belts and their proper usage, refer to the
Seating and safety restraintschapter.
Starting
59
Page 66 of 160

ABS warning lamp
The
ABSwarning lamp in the instrument cluster illuminates for about
five seconds when starting the vehicle. If an ABS fault is detected, the
light will remain on and your vehicle should be serviced as soon as
possible.
Normal braking is still effective
unless the BRAKE warning lamp is
also illuminated.
Using ABS
²In an emergency or when maximum efficiency from the ABS is
required, apply continuous full force on the brake. The ABS will be
activated immediately, thus allowing you to retain full steering control
of your vehicle and, providing there is sufficient space, will enable you
to avoid obstacles and bring the vehicle to a controlled stop.
²We recommend that you familiarize yourself with this braking
technique. However, avoid taking any unnecessary risks.
Parking brake
Apply the parking brake whenever
the vehicle is parked. To set the
parking brake, press the parking
brake pedal down until the pedal
stops.
The BRAKE warning lamp in the
instrument cluster illuminates and
remains illuminated (when the
ignition is turned ON) until the
parking brake is released.
!
BRAKE
!
BRAKE
Driving
66