FORD RANGER 2001 2.G Manual PDF
RANGER 2001 2.G
FORD
FORD
https://www.carmanualsonline.info/img/11/5338/w960_5338-0.png
FORD RANGER 2001 2.G Manual PDF
Trending: keyless entry, oil level, key, audio, airbag off, change wheel, lane assist
Page 71 of 272
HAZARD FLASHER
For information on the hazard flasher control, refer toHazard flasherin
theRoadside emergencieschapter.
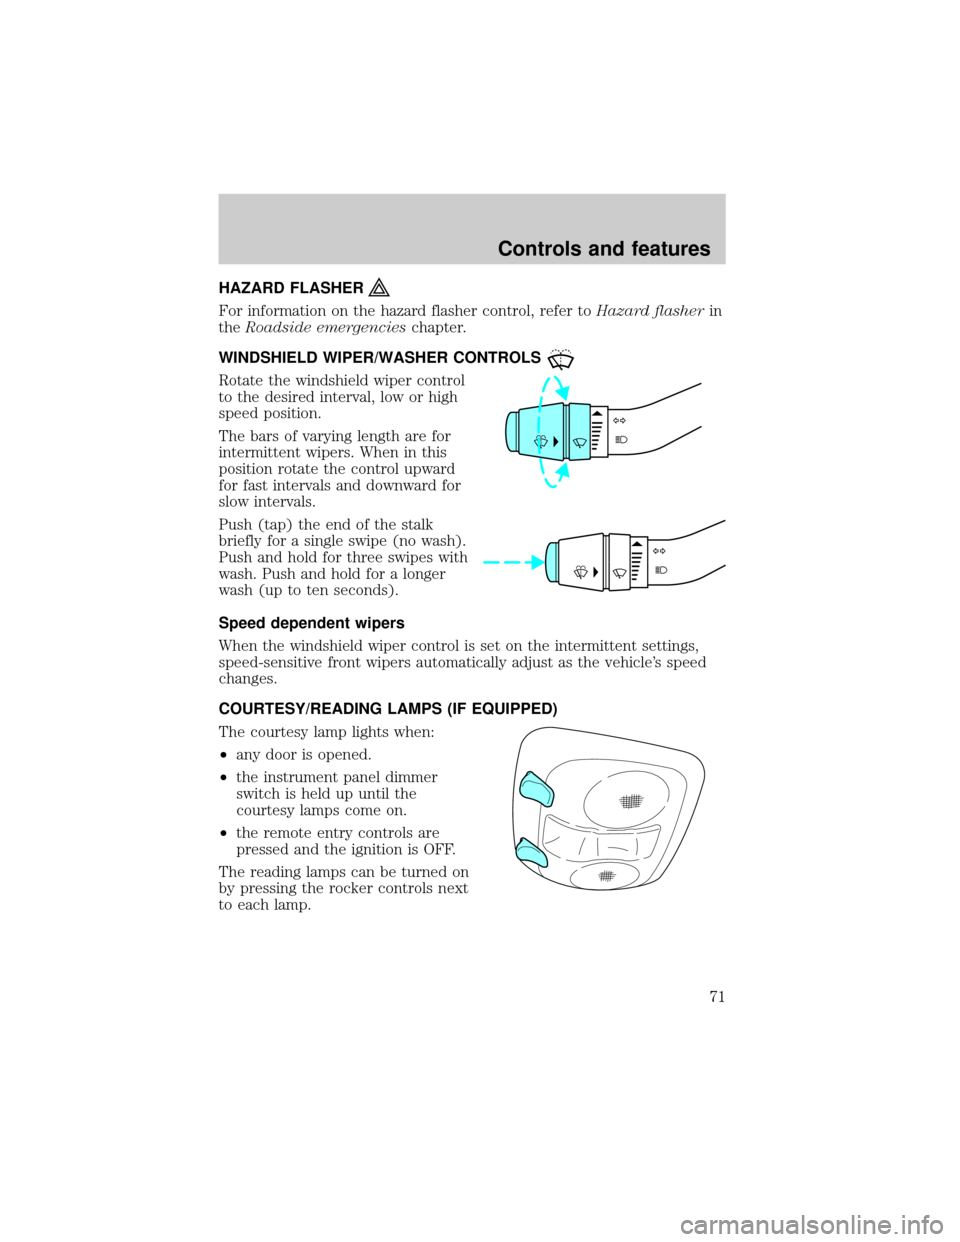
WINDSHIELD WIPER/WASHER CONTROLS
Rotate the windshield wiper control
to the desired interval, low or high
speed position.
The bars of varying length are for
intermittent wipers. When in this
position rotate the control upward
for fast intervals and downward for
slow intervals.
Push (tap) the end of the stalk
briefly for a single swipe (no wash).
Push and hold for three swipes with
wash. Push and hold for a longer
wash (up to ten seconds).
Speed dependent wipers
When the windshield wiper control is set on the intermittent settings,
speed-sensitive front wipers automatically adjust as the vehicle's speed
changes.
COURTESY/READING LAMPS (IF EQUIPPED)
The courtesy lamp lights when:
²any door is opened.
²the instrument panel dimmer
switch is held up until the
courtesy lamps come on.
²the remote entry controls are
pressed and the ignition is OFF.
The reading lamps can be turned on
by pressing the rocker controls next
to each lamp.
Controls and features
71
Page 72 of 272
POWER WINDOWS (IF EQUIPPED)
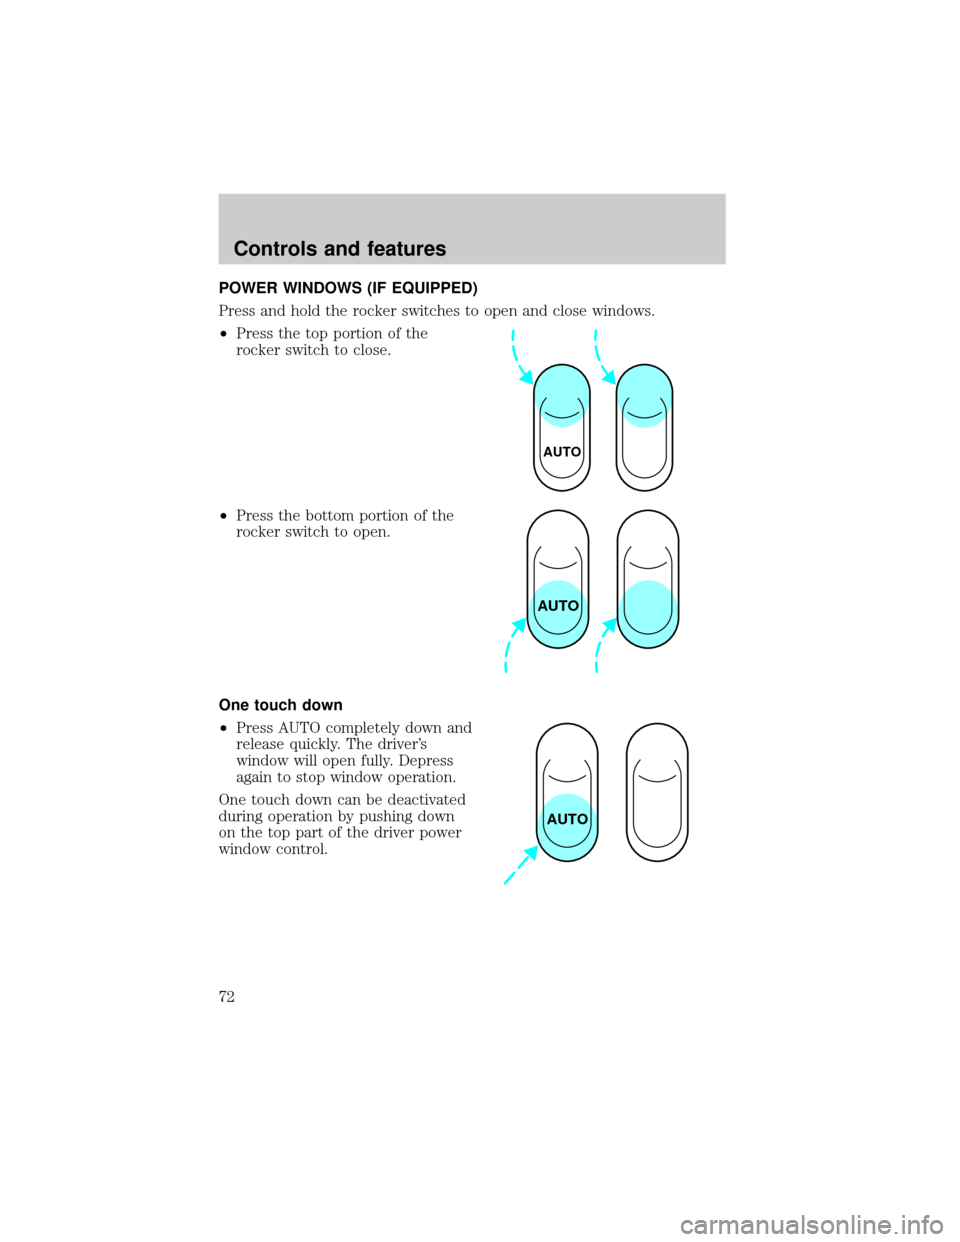
Press and hold the rocker switches to open and close windows.
²Press the top portion of the
rocker switch to close.
²Press the bottom portion of the
rocker switch to open.
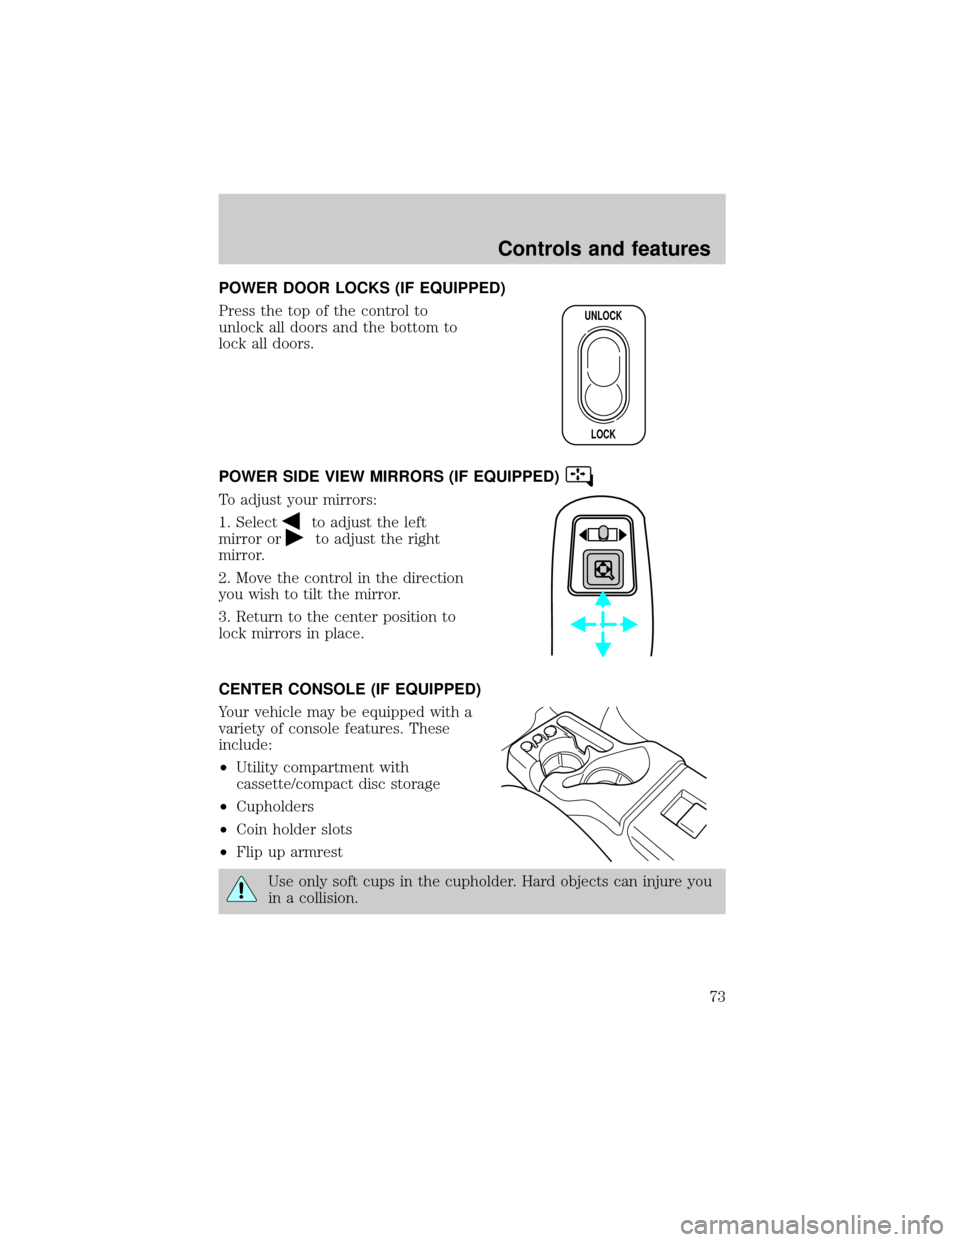
One touch down
²Press AUTO completely down and
release quickly. The driver's
window will open fully. Depress
again to stop window operation.
One touch down can be deactivated
during operation by pushing down
on the top part of the driver power
window control.
AUTO
AUTO
AUTO
Controls and features
72
Page 73 of 272
POWER DOOR LOCKS (IF EQUIPPED)
Press the top of the control to
unlock all doors and the bottom to
lock all doors.
POWER SIDE VIEW MIRRORS (IF EQUIPPED)
To adjust your mirrors:
1. Select
to adjust the left
mirror or
to adjust the right
mirror.
2. Move the control in the direction
you wish to tilt the mirror.
3. Return to the center position to
lock mirrors in place.
CENTER CONSOLE (IF EQUIPPED)
Your vehicle may be equipped with a
variety of console features. These
include:
²Utility compartment with
cassette/compact disc storage
²Cupholders
²Coin holder slots
²Flip up armrest
Use only soft cups in the cupholder. Hard objects can injure you
in a collision.
UNLOCK
LOCK
Controls and features
73
Page 74 of 272
CARGO AREA FEATURES
Cargo area shade (if equipped)
Your vehicle may be equipped with notches in the side trim panels that
are used for a cargo area shade. See your dealer for more information.
BED EXTENDER (IF EQUIPPED)
Your vehicle may be equipped with a bed extender designed to extend
the pickup box for longer loads.
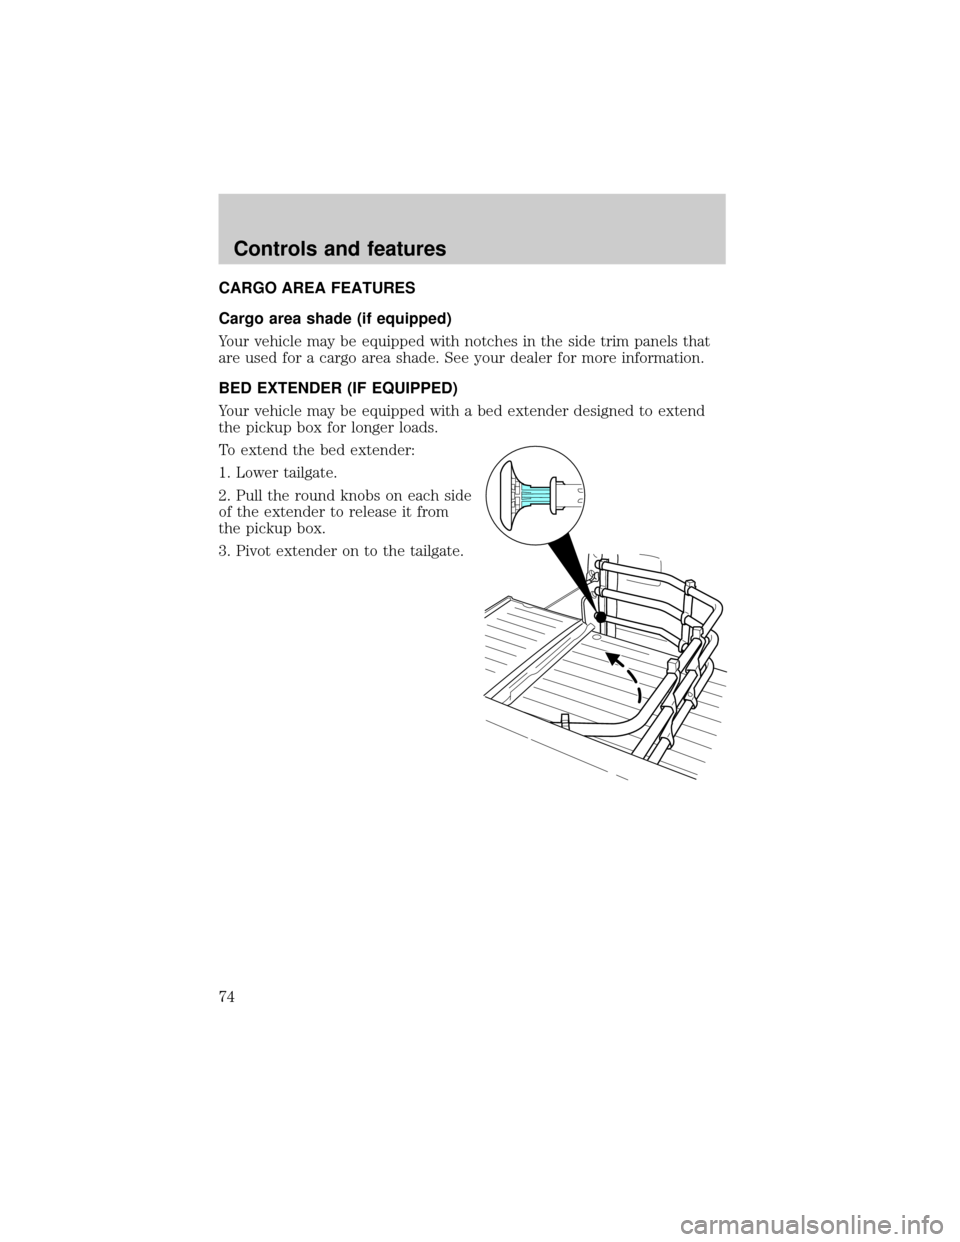
To extend the bed extender:
1. Lower tailgate.
2. Pull the round knobs on each side
of the extender to release it from
the pickup box.
3. Pivot extender on to the tailgate.
Controls and features
74
Page 75 of 272
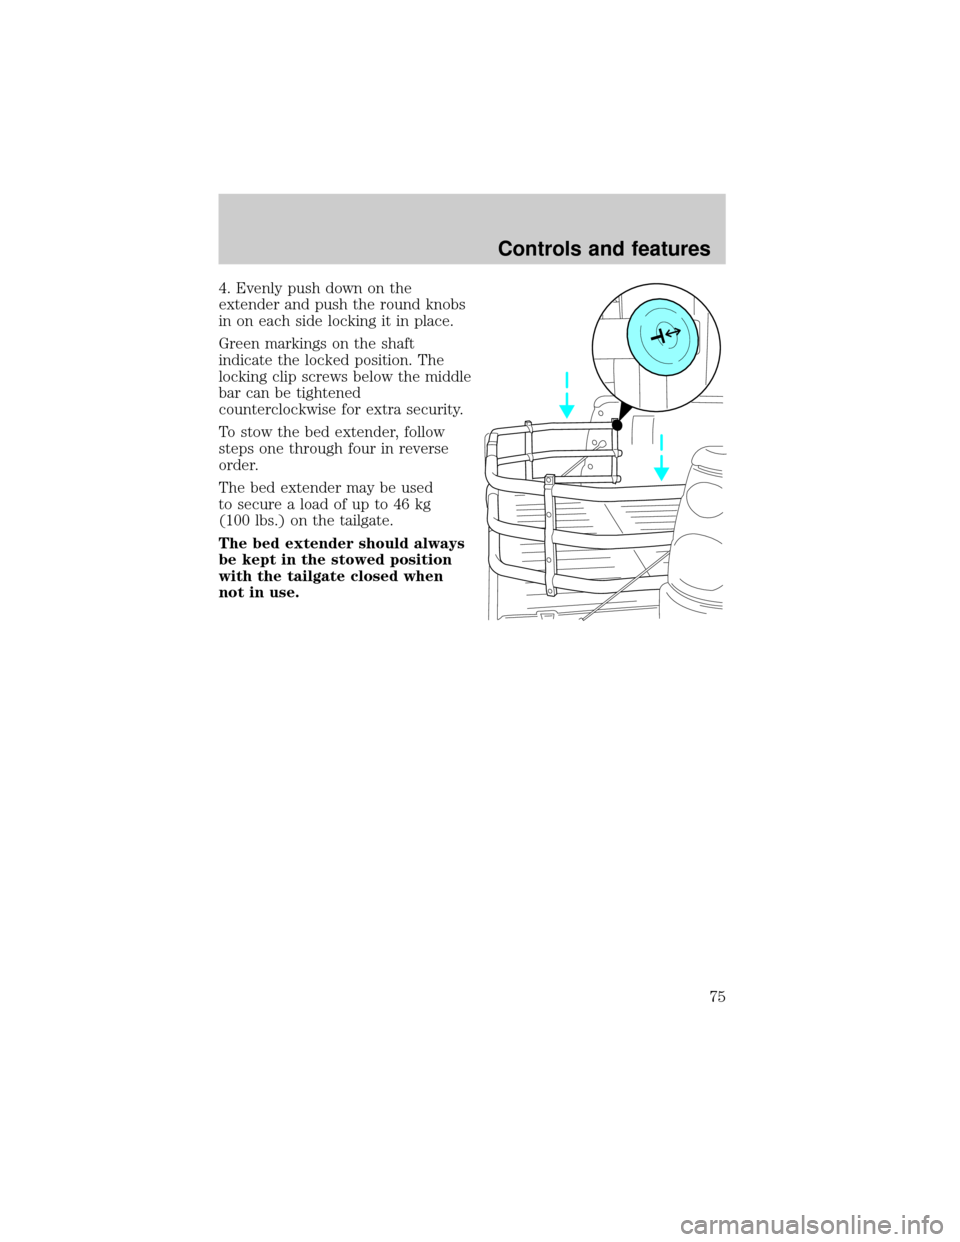
4. Evenly push down on the
extender and push the round knobs
in on each side locking it in place.
Green markings on the shaft
indicate the locked position. The
locking clip screws below the middle
bar can be tightened
counterclockwise for extra security.
To stow the bed extender, follow
steps one through four in reverse
order.
The bed extender may be used
to secure a load of up to 46 kg
(100 lbs.) on the tailgate.
The bed extender should always
be kept in the stowed position
with the tailgate closed when
not in use.
Controls and features
75
Page 76 of 272
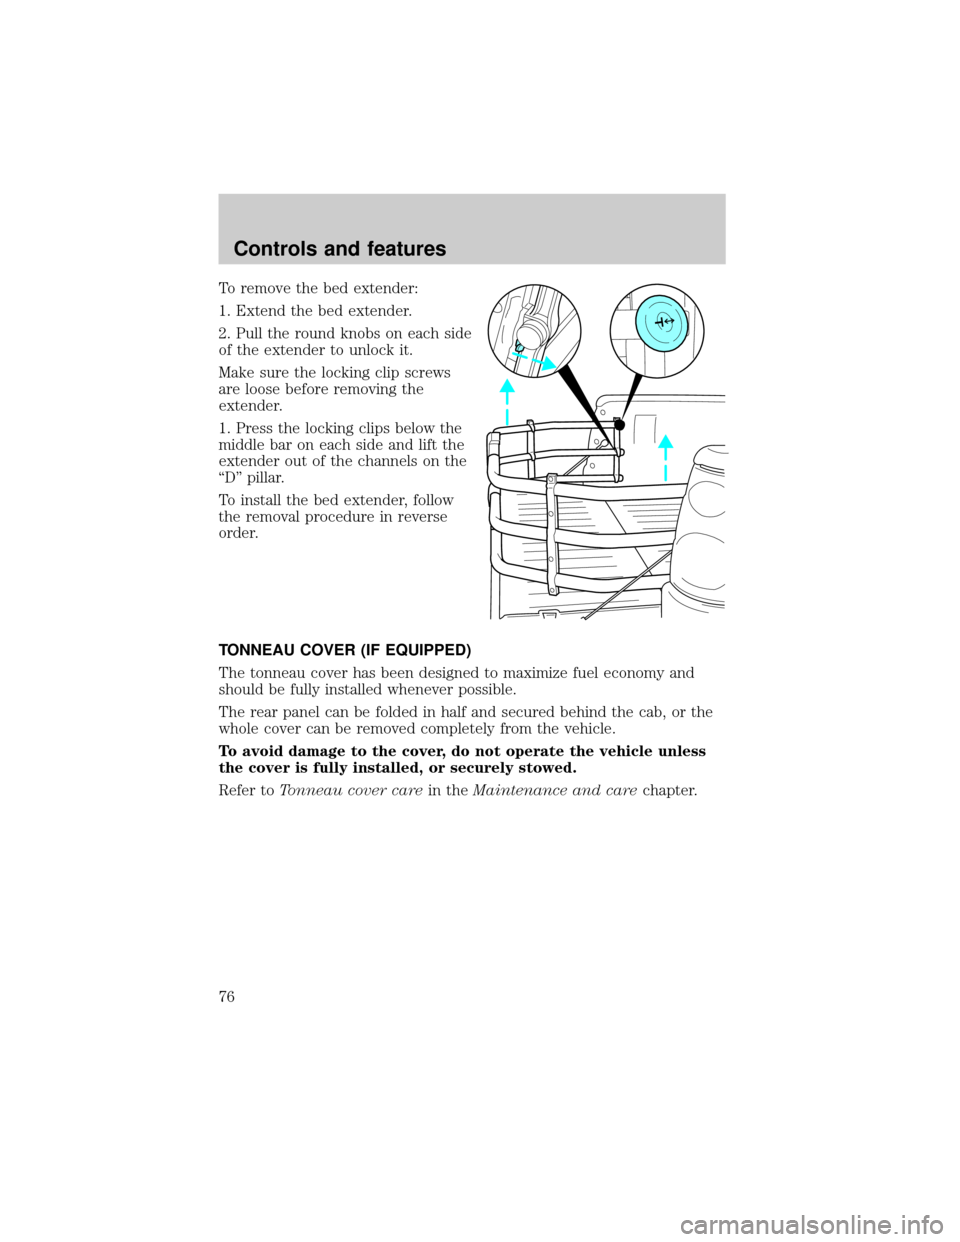
To remove the bed extender:
1. Extend the bed extender.
2. Pull the round knobs on each side
of the extender to unlock it.
Make sure the locking clip screws
are loose before removing the
extender.
1. Press the locking clips below the
middle bar on each side and lift the
extender out of the channels on the
ªDº pillar.
To install the bed extender, follow
the removal procedure in reverse
order.
TONNEAU COVER (IF EQUIPPED)
The tonneau cover has been designed to maximize fuel economy and
should be fully installed whenever possible.
The rear panel can be folded in half and secured behind the cab, or the
whole cover can be removed completely from the vehicle.
To avoid damage to the cover, do not operate the vehicle unless
the cover is fully installed, or securely stowed.
Refer toTonneau cover carein theMaintenance and carechapter.
Controls and features
76
Page 77 of 272
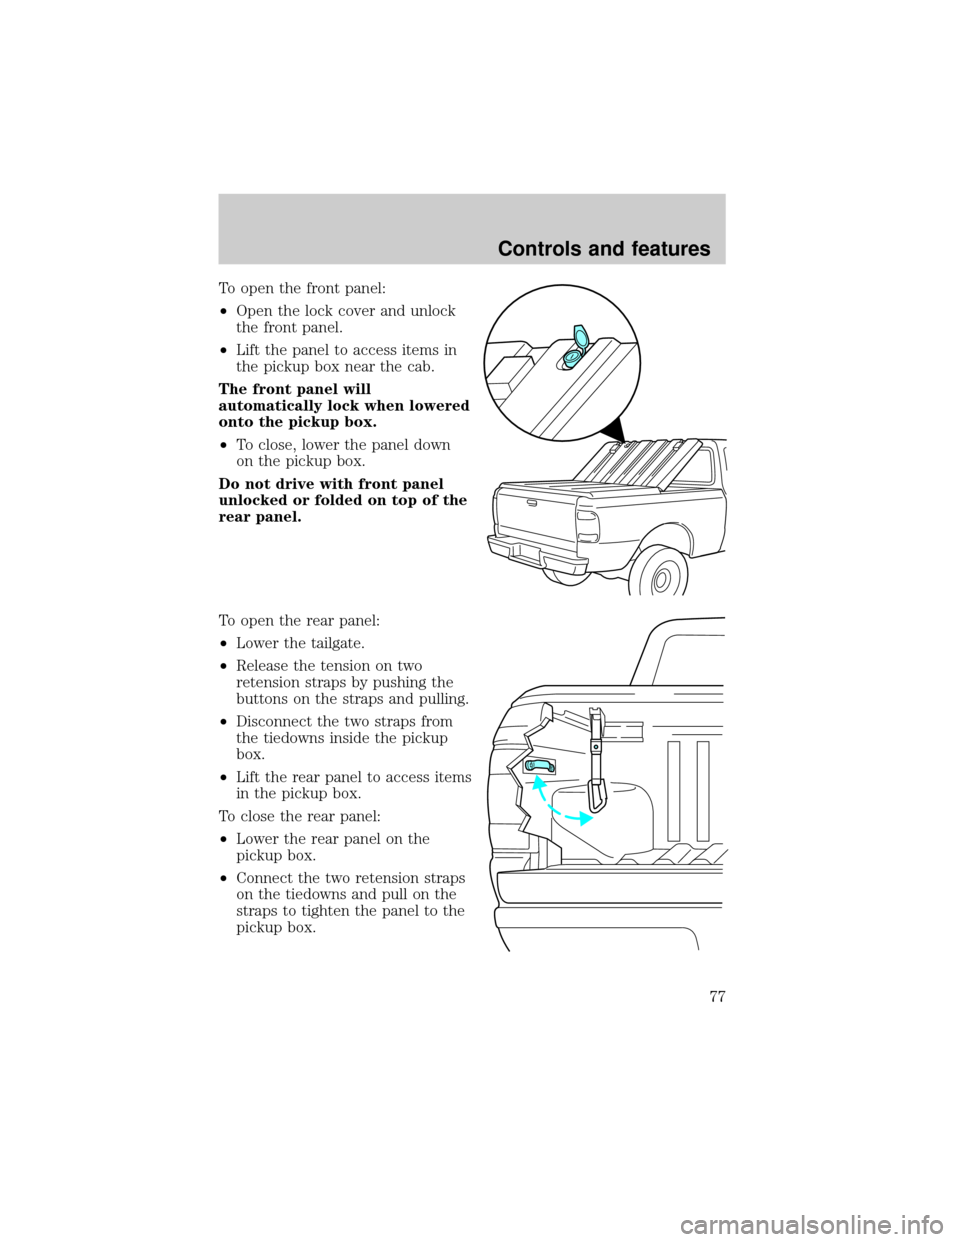
To open the front panel:
²Open the lock cover and unlock
the front panel.
²Lift the panel to access items in
the pickup box near the cab.
The front panel will
automatically lock when lowered
onto the pickup box.
²To close, lower the panel down
on the pickup box.
Do not drive with front panel
unlocked or folded on top of the
rear panel.
To open the rear panel:
²Lower the tailgate.
²Release the tension on two
retension straps by pushing the
buttons on the straps and pulling.
²Disconnect the two straps from
the tiedowns inside the pickup
box.
²Lift the rear panel to access items
in the pickup box.
To close the rear panel:
²Lower the rear panel on the
pickup box.
²Connect the two retension straps
on the tiedowns and pull on the
straps to tighten the panel to the
pickup box.
Controls and features
77
Page 78 of 272
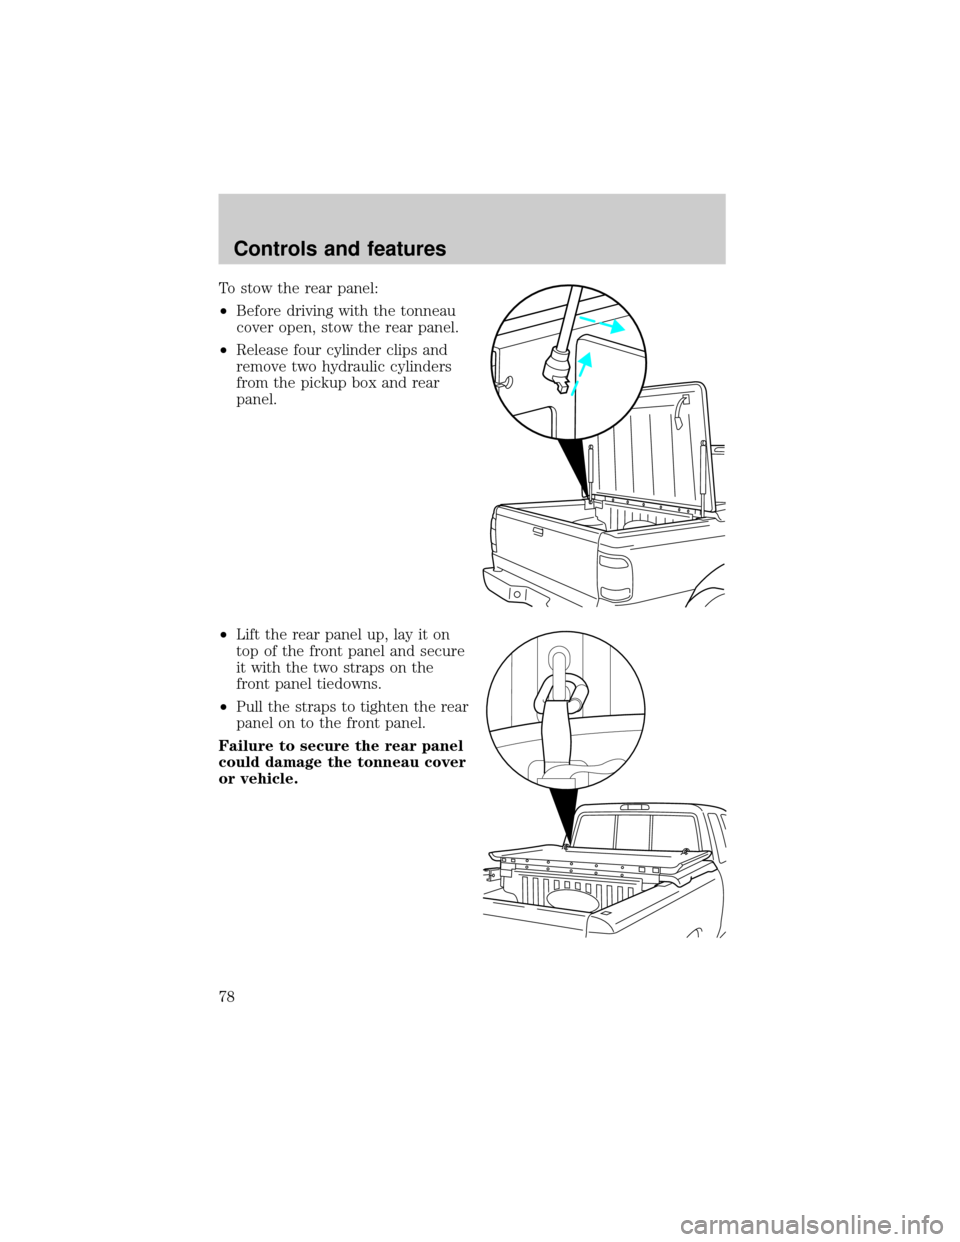
To stow the rear panel:
²Before driving with the tonneau
cover open, stow the rear panel.
²Release four cylinder clips and
remove two hydraulic cylinders
from the pickup box and rear
panel.
²Lift the rear panel up, lay it on
top of the front panel and secure
it with the two straps on the
front panel tiedowns.
²Pull the straps to tighten the rear
panel on to the front panel.
Failure to secure the rear panel
could damage the tonneau cover
or vehicle.
Controls and features
78
Page 79 of 272
The cargo divider is designed to
divide your pickup box in half or
rotate 90É to allow you full use of
the pickup box.
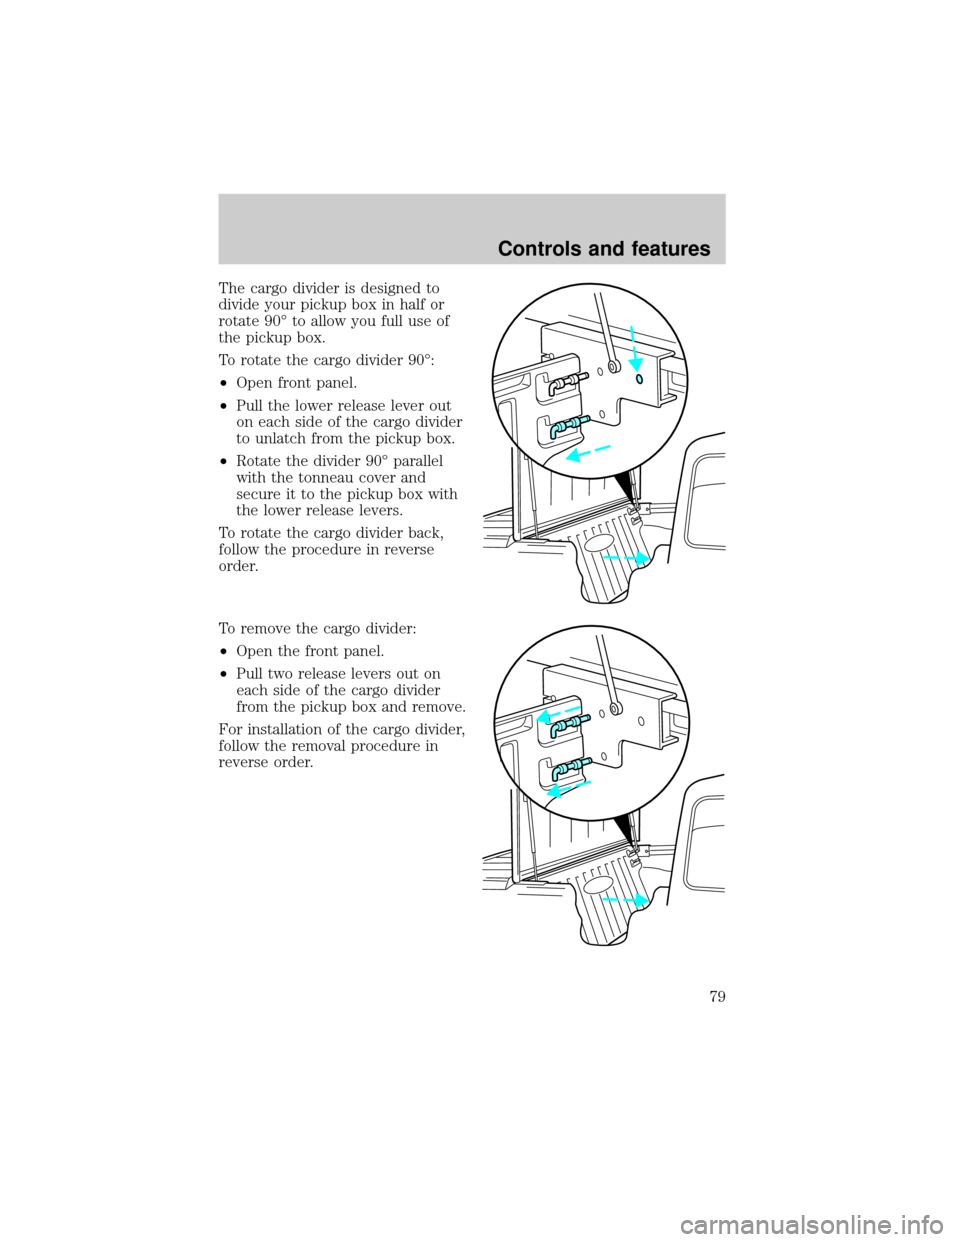
To rotate the cargo divider 90É:
²Open front panel.
²Pull the lower release lever out
on each side of the cargo divider
to unlatch from the pickup box.
²Rotate the divider 90É parallel
with the tonneau cover and
secure it to the pickup box with
the lower release levers.
To rotate the cargo divider back,
follow the procedure in reverse
order.
To remove the cargo divider:
²Open the front panel.
²Pull two release levers out on
each side of the cargo divider
from the pickup box and remove.
For installation of the cargo divider,
follow the removal procedure in
reverse order.
Controls and features
79
Page 80 of 272
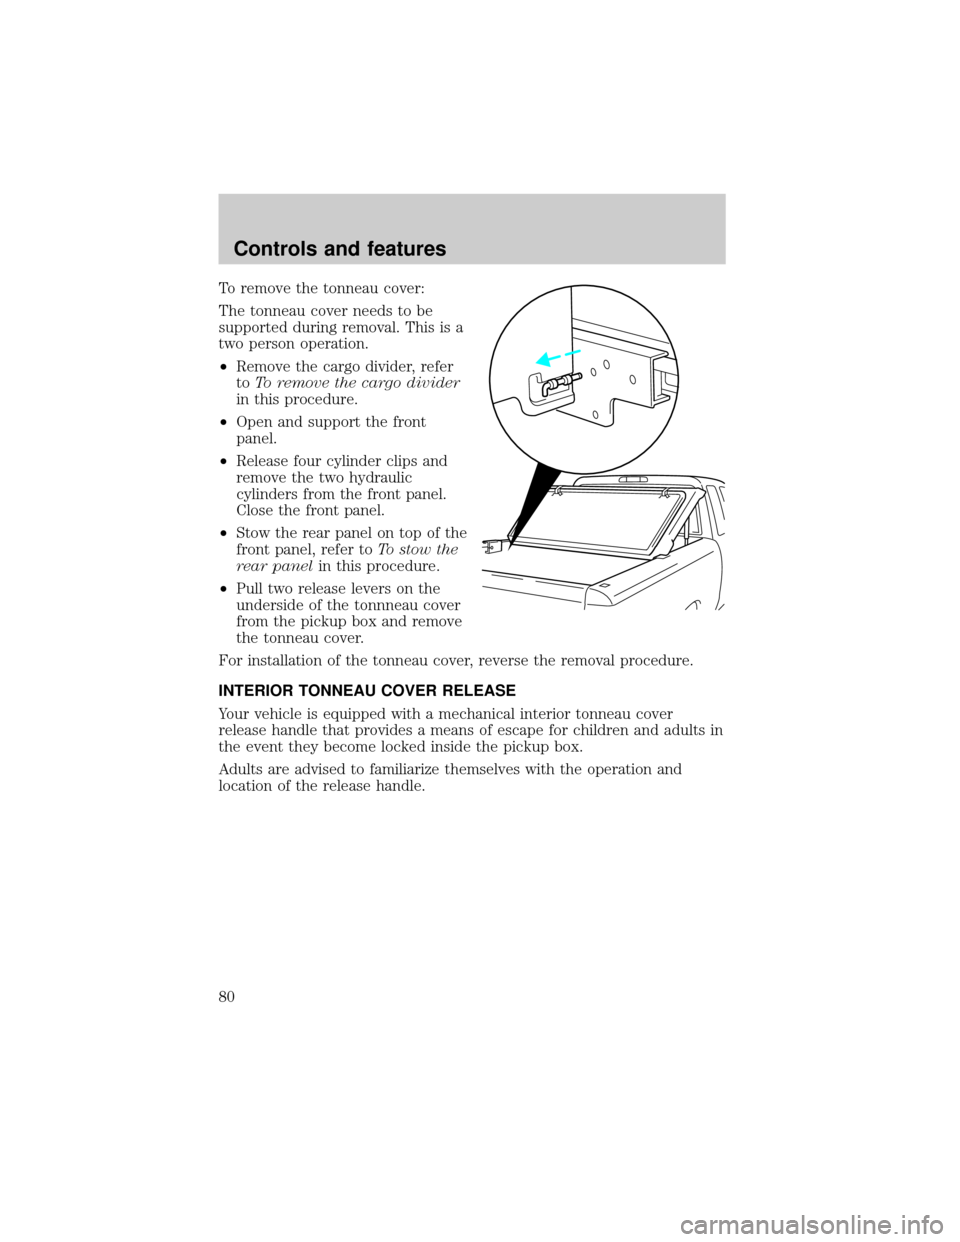
To remove the tonneau cover:
The tonneau cover needs to be
supported during removal. This is a
two person operation.
²Remove the cargo divider, refer
toTo remove the cargo divider
in this procedure.
²Open and support the front
panel.
²Release four cylinder clips and
remove the two hydraulic
cylinders from the front panel.
Close the front panel.
²Stow the rear panel on top of the
front panel, refer toTo stow the
rear panelin this procedure.
²Pull two release levers on the
underside of the tonnneau cover
from the pickup box and remove
the tonneau cover.
For installation of the tonneau cover, reverse the removal procedure.
INTERIOR TONNEAU COVER RELEASE
Your vehicle is equipped with a mechanical interior tonneau cover
release handle that provides a means of escape for children and adults in
the event they become locked inside the pickup box.
Adults are advised to familiarize themselves with the operation and
location of the release handle.
Controls and features
80
Trending: power steering fluid, oil capacities, 4WD, low oil pressure, manual radio set, fuel pressure, clock setting

