turn off FORD RANGER 2019 Owners Manual
[x] Cancel search | Manufacturer: FORD, Model Year: 2019, Model line: RANGER, Model: FORD RANGER 2019Pages: 512, PDF Size: 7.63 MB
Page 40 of 512
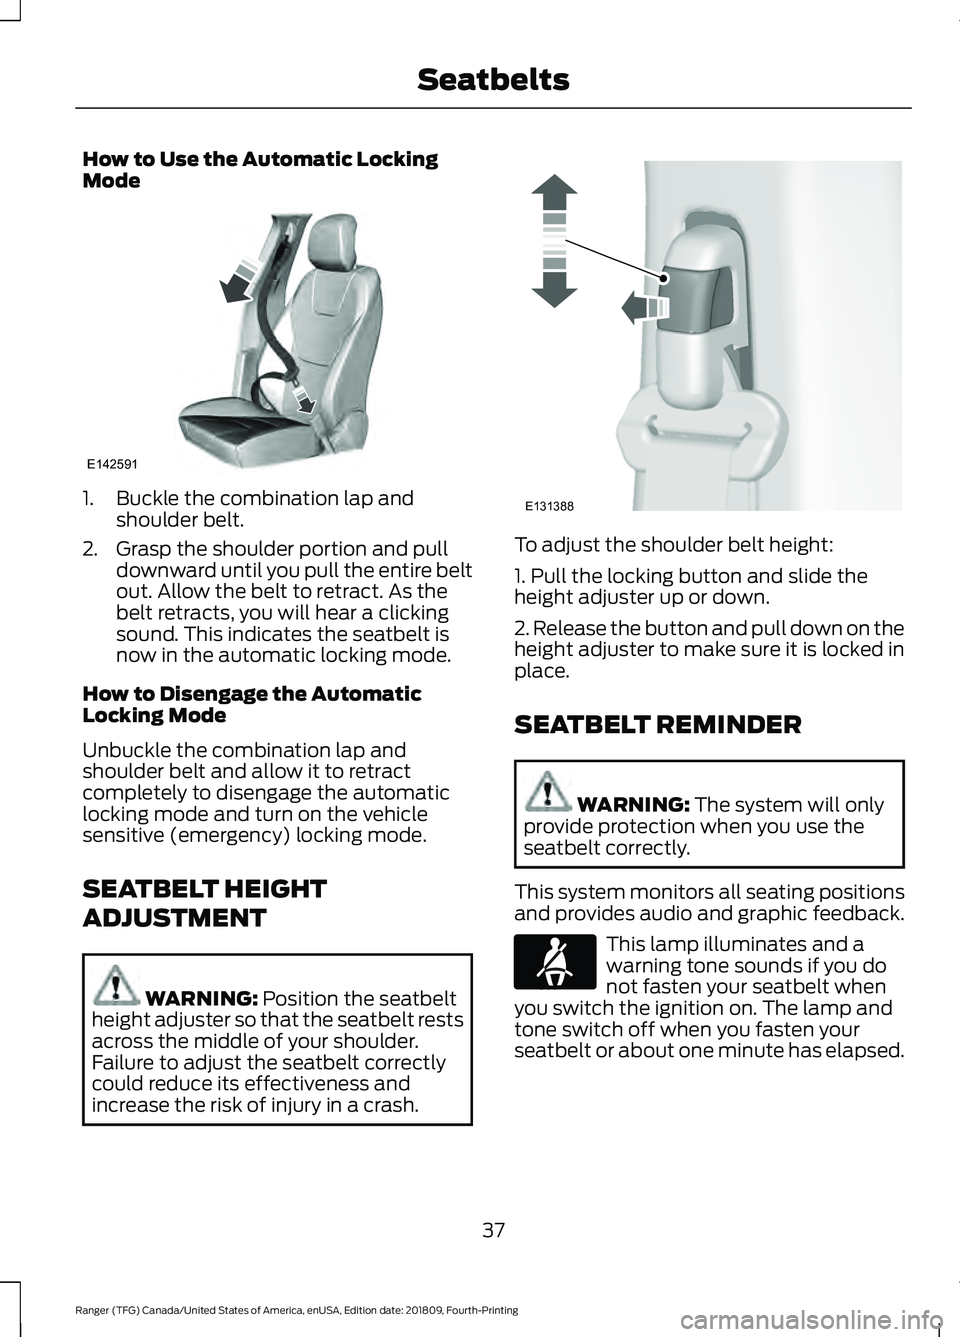
How to Use the Automatic Locking
Mode
1. Buckle the combination lap and
shoulder belt.
2. Grasp the shoulder portion and pull downward until you pull the entire belt
out. Allow the belt to retract. As the
belt retracts, you will hear a clicking
sound. This indicates the seatbelt is
now in the automatic locking mode.
How to Disengage the Automatic
Locking Mode
Unbuckle the combination lap and
shoulder belt and allow it to retract
completely to disengage the automatic
locking mode and turn on the vehicle
sensitive (emergency) locking mode.
SEATBELT HEIGHT
ADJUSTMENT WARNING: Position the seatbelt
height adjuster so that the seatbelt rests
across the middle of your shoulder.
Failure to adjust the seatbelt correctly
could reduce its effectiveness and
increase the risk of injury in a crash. To adjust the shoulder belt height:
1. Pull the locking button and slide the
height adjuster up or down.
2. Release the button and pull down on the
height adjuster to make sure it is locked in
place.
SEATBELT REMINDER
WARNING:
The system will only
provide protection when you use the
seatbelt correctly.
This system monitors all seating positions
and provides audio and graphic feedback. This lamp illuminates and a
warning tone sounds if you do
not fasten your seatbelt when
you switch the ignition on. The lamp and
tone switch off when you fasten your
seatbelt or about one minute has elapsed.
37
Ranger (TFG) Canada/United States of America, enUSA, Edition date: 201809, Fourth-Printing SeatbeltsE142591 E131388 E71880
Page 42 of 512
Note:
The driver and front passenger
warnings switch on and off independently.
When you perform this procedure for one
seating position, do not buckle the other
position as this terminates the process.
Read Steps 1 - 4 before starting the
procedure.
Make sure that:
• You set the parking brake.
• The transmission is in park (P).
• The ignition is off.
• You close all vehicle doors.
• You unbuckle the driver and front
passenger seatbelts.
1. Switch the ignition on. Do not start the
engine.
2. Wait until the seatbelt warning lamp turns off (about one minute). After
Step 2, wait an additional five seconds
before proceeding with Step 3. Once
you start Step 3, you must complete
the procedure within 60 seconds.
3. For the seating position you are switching off, buckle then unbuckle the
seatbelt three times at a moderate
speed, ending in the unbuckled state.
After Step 3, the seatbelt warning lamp
turns on.
4. When the seatbelt warning lamp is on,
buckle then unbuckle the seatbelt.
After Step 4, the seatbelt warning lamp
flashes for confirmation.
• This switches the feature off if it is
currently on.
• This switches the feature on if it is
currently off. CHILD RESTRAINT AND
SEATBELT MAINTENANCE
Inspect the vehicle seatbelts and child
safety seat systems periodically to make
sure they work properly and are not
damaged. Inspect the vehicle and child
restraint seatbelts to make sure there are
no nicks, tears or cuts. Replace if
necessary. All vehicle seatbelt assemblies,
including retractors, buckles, front seatbelt
buckle assemblies, buckle support
assemblies (slide bar-if equipped),
shoulder belt height adjusters (if
equipped), shoulder belt guide on seat
backrest (if equipped), child safety seat
LATCH and tether anchors, and attaching
hardware, should be inspected after a
crash. Read the child restraint
manufacturer's instructions for additional
inspection and maintenance information
specific to the child restraint.
We recommend that all seatbelt
assemblies in use in vehicles involved in a
crash be replaced. However, if the crash
was minor and an authorized dealer finds
that the belts do not show damage and
continue to operate properly, they do not
need to be replaced. Seatbelt assemblies
not in use during a crash should also be
inspected and replaced if either damage
or improper operation is noted.
Properly care for seatbelts. See Vehicle
Care (page 273).
SEATBELT EXTENSIONS WARNING:
Persons who fit into
the vehicle's seatbelt should not use an
extension. Unnecessary use could result
in serious personal injury in the event of
a crash.
39
Ranger (TFG) Canada/United States of America, enUSA, Edition date: 201809, Fourth-Printing Seatbelts
Page 47 of 512
After all occupants have adjusted their
seats and put on seatbelts, it is very
important that they continue to sit
properly. Properly seated occupants sit
upright, lean against the seat back, and
center themselves on the seat cushion,
with their feet comfortably extended on
the floor. Sitting improperly can increase
the chance of injury in a crash event. For
example, if an occupant slouches, lies
down, turns sideways, sits forward, leans
forward or sideways, or puts one or both
feet up, the chance of injury during a crash
greatly increases.
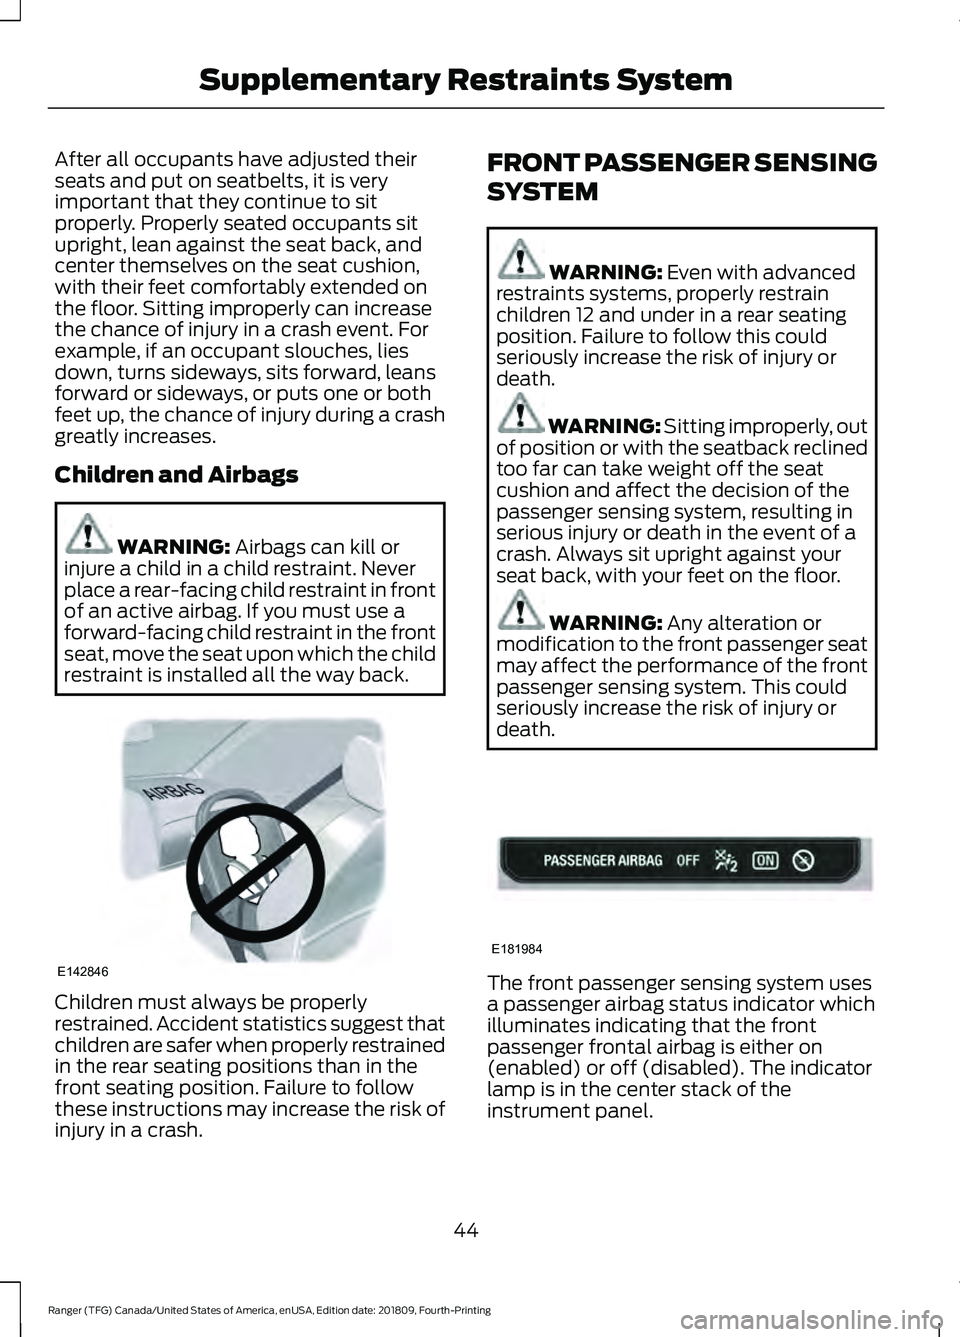
Children and Airbags
WARNING: Airbags can kill or
injure a child in a child restraint. Never
place a rear-facing child restraint in front
of an active airbag. If you must use a
forward-facing child restraint in the front
seat, move the seat upon which the child
restraint is installed all the way back. Children must always be properly
restrained. Accident statistics suggest that
children are safer when properly restrained
in the rear seating positions than in the
front seating position. Failure to follow
these instructions may increase the risk of
injury in a crash. FRONT PASSENGER SENSING
SYSTEM WARNING:
Even with advanced
restraints systems, properly restrain
children 12 and under in a rear seating
position. Failure to follow this could
seriously increase the risk of injury or
death. WARNING:
Sitting improperly, out
of position or with the seatback reclined
too far can take weight off the seat
cushion and affect the decision of the
passenger sensing system, resulting in
serious injury or death in the event of a
crash. Always sit upright against your
seat back, with your feet on the floor. WARNING:
Any alteration or
modification to the front passenger seat
may affect the performance of the front
passenger sensing system. This could
seriously increase the risk of injury or
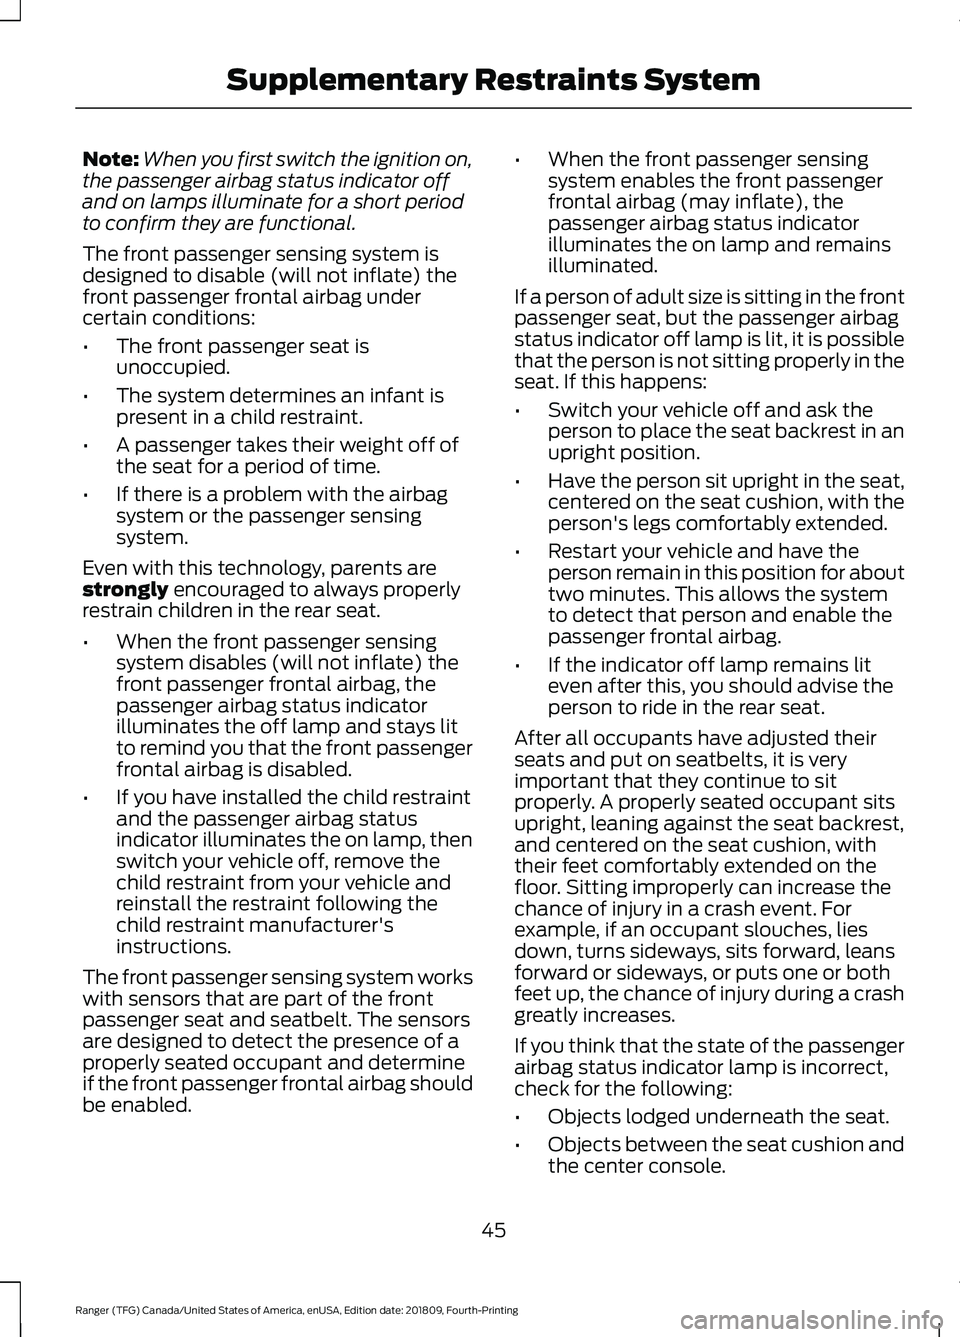
death. The front passenger sensing system uses
a passenger airbag status indicator which
illuminates indicating that the front
passenger frontal airbag is either on
(enabled) or off (disabled). The indicator
lamp is in the center stack of the
instrument panel.
44
Ranger (TFG) Canada/United States of America, enUSA, Edition date: 201809, Fourth-Printing Supplementary Restraints SystemE142846 E181984
Page 48 of 512
Note:
When you first switch the ignition on,
the passenger airbag status indicator off
and on lamps illuminate for a short period
to confirm they are functional.
The front passenger sensing system is
designed to disable (will not inflate) the
front passenger frontal airbag under
certain conditions:
• The front passenger seat is
unoccupied.
• The system determines an infant is
present in a child restraint.
• A passenger takes their weight off of
the seat for a period of time.
• If there is a problem with the airbag
system or the passenger sensing
system.
Even with this technology, parents are
strongly encouraged to always properly
restrain children in the rear seat.
• When the front passenger sensing
system disables (will not inflate) the
front passenger frontal airbag, the
passenger airbag status indicator
illuminates the off lamp and stays lit
to remind you that the front passenger
frontal airbag is disabled.
• If you have installed the child restraint
and the passenger airbag status
indicator illuminates the on lamp, then
switch your vehicle off, remove the
child restraint from your vehicle and
reinstall the restraint following the
child restraint manufacturer's
instructions.
The front passenger sensing system works
with sensors that are part of the front
passenger seat and seatbelt. The sensors
are designed to detect the presence of a
properly seated occupant and determine
if the front passenger frontal airbag should
be enabled. •
When the front passenger sensing
system enables the front passenger
frontal airbag (may inflate), the
passenger airbag status indicator
illuminates the on lamp and remains
illuminated.
If a person of adult size is sitting in the front
passenger seat, but the passenger airbag
status indicator off lamp is lit, it is possible
that the person is not sitting properly in the
seat. If this happens:
• Switch your vehicle off and ask the
person to place the seat backrest in an
upright position.
• Have the person sit upright in the seat,
centered on the seat cushion, with the
person's legs comfortably extended.
• Restart your vehicle and have the
person remain in this position for about
two minutes. This allows the system
to detect that person and enable the
passenger frontal airbag.
• If the indicator off lamp remains lit
even after this, you should advise the
person to ride in the rear seat.
After all occupants have adjusted their
seats and put on seatbelts, it is very
important that they continue to sit
properly. A properly seated occupant sits
upright, leaning against the seat backrest,
and centered on the seat cushion, with
their feet comfortably extended on the
floor. Sitting improperly can increase the
chance of injury in a crash event. For
example, if an occupant slouches, lies
down, turns sideways, sits forward, leans
forward or sideways, or puts one or both
feet up, the chance of injury during a crash
greatly increases.
If you think that the state of the passenger
airbag status indicator lamp is incorrect,
check for the following:
• Objects lodged underneath the seat.
• Objects between the seat cushion and
the center console.
45
Ranger (TFG) Canada/United States of America, enUSA, Edition date: 201809, Fourth-Printing Supplementary Restraints System
Page 58 of 512
Remote Start (If Equipped)
WARNING:
To avoid exhaust
fumes, do not use remote start if your
vehicle is parked indoors or in areas that
are not well ventilated.
Note: Do not use remote start if your fuel
level is low. The remote start button is on the
remote control.
This feature allows you to start your
vehicle from the outside. The remote
control has an extended operating range.
If your vehicle has automatic climate
control, you can configure it to operate
when you remote start your vehicle.
See
Climate Control (page 111). A manual
climate control system will run at the
setting it was set to when you switched
your vehicle off.
Many states and provinces have
restrictions for the use of remote start.
Check your local and state or provincial
laws for specific requirements regarding
remote start systems.
The remote start system does not work if:
• The ignition is on.
• The alarm system triggers.
• You disable the feature.
• The hood is open.
• The transmission is not in park (P).
• The vehicle battery voltage is too low.
• The service engine soon light is on.
Remote Control Feedback (If
Equipped)
An LED on the remote control provides
status feedback of remote start or stop
commands. Status
LED
Remote startsuccessful
Solid green
Remote stopsuccessful
Solid red
Request failed or
status not received
Blinking red
Status incomplete
Blinking green
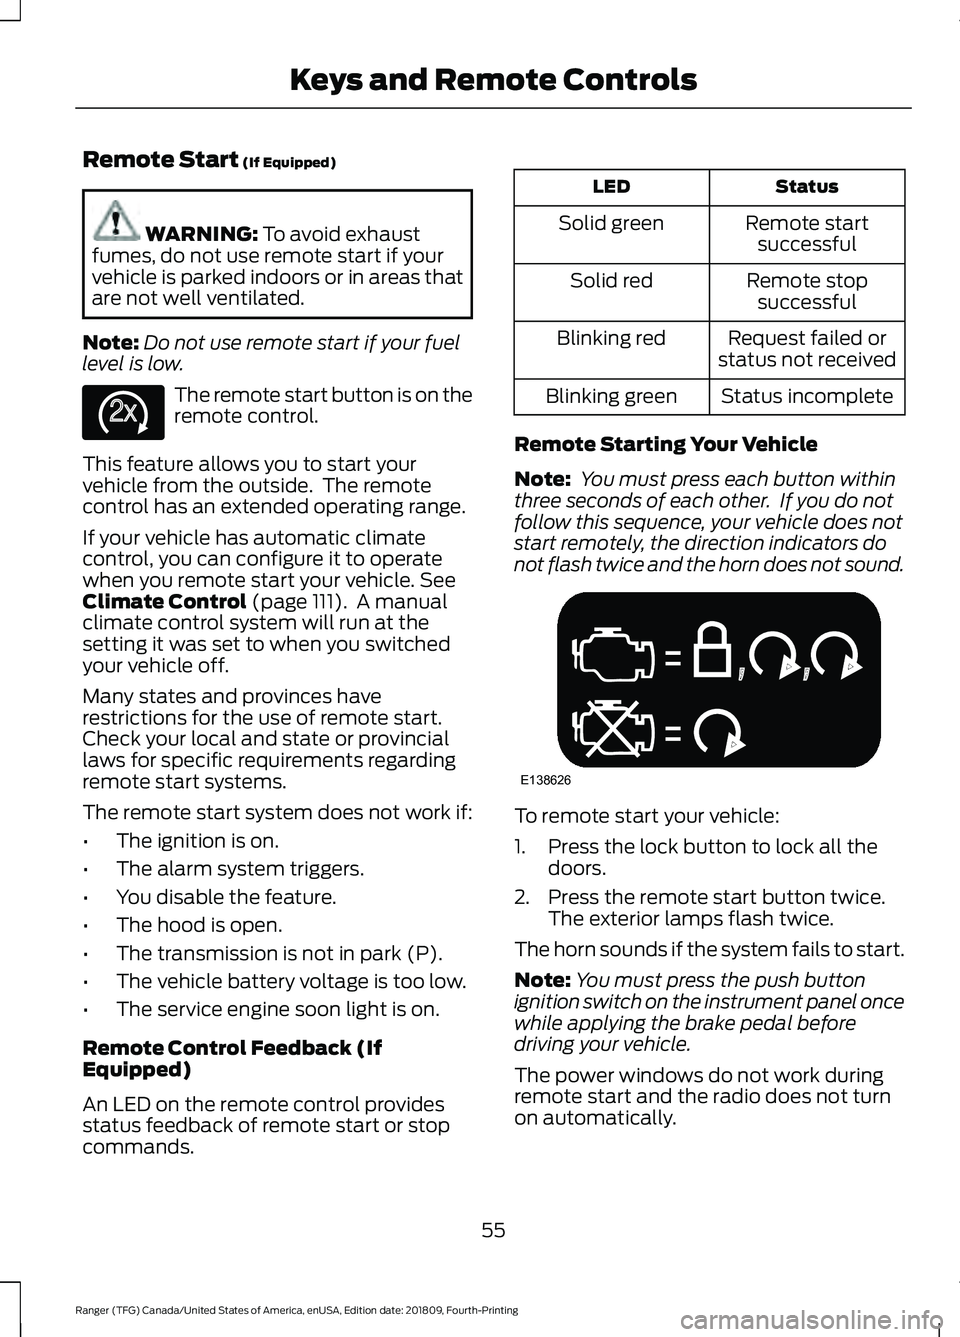
Remote Starting Your Vehicle
Note: You must press each button within
three seconds of each other. If you do not
follow this sequence, your vehicle does not
start remotely, the direction indicators do
not flash twice and the horn does not sound. To remote start your vehicle:
1. Press the lock button to lock all the
doors.
2. Press the remote start button twice. The exterior lamps flash twice.
The horn sounds if the system fails to start.
Note: You must press the push button
ignition switch on the instrument panel once
while applying the brake pedal before
driving your vehicle.
The power windows do not work during
remote start and the radio does not turn
on automatically.
55
Ranger (TFG) Canada/United States of America, enUSA, Edition date: 201809, Fourth-Printing Keys and Remote ControlsE138625 E138626
Page 59 of 512
The parking lamps remain on and your
vehicle will run for 5, 10 or 15 minutes,
depending on the setting.
Extending the Engine Running Time
To extend the engine running time duration
of your vehicle during remote start, repeat
steps 1 and 2 while the engine is running.
If the duration is set to 15 minutes, the
duration extends by another 15 minutes.
For example, if your vehicle had been
running from the first remote start for 10
minutes, your vehicle continues to run now
for a total of 30 minutes. You can extend
the engine running time duration to a
maximum of 30 minutes.
Wait at least five seconds before remote
starting after the engine stops running.
Turning Your Vehicle Off After Remote
Starting
Press the button once. Your
vehicle and the parking lamps
turn off.
You may have to be closer to your vehicle
than when starting due to ground reflection
and the added noise of your running
vehicle.
You can switch this feature on or off in the
information display.
REPLACING A LOST KEY OR
REMOTE CONTROL
Replacement keys or remote controls can
be purchased from an authorized dealer.
Authorized dealers can program remote
controls for your vehicle. See Passive
Anti-Theft System (page 65). PASSIVE KEY BACKUP
POSITION
Place the passive key in the position
shown, with the buttons facing upward.
Make sure that you place the key fob in the
center of the cup holder.
The top or bottom end of the key must be
pointing towards the front or rear of the
vehicle.
With the key in this position, press the
brake or clutch pedal, then press the start
button to switch on your vehicle.
56
Ranger (TFG) Canada/United States of America, enUSA, Edition date: 201809, Fourth-Printing Keys and Remote ControlsE138625 E272540
Page 60 of 512
PRINCIPLE OF OPERATION
MyKey allows you to program keys with
restricted driving modes to promote good
driving habits. You can program the
restrictions to all keys except one. Any keys
that you did not program are administrator
keys or admin keys.
You can use admin keys to:
•
Create a MyKey with certain vehicle
restrictions.
• Program certain MyKey settings.
• Clear all MyKey restrictions.
After you program a MyKey, you can view
the following information through the
information display:
• The total number of admin keys and
MyKeys for your vehicle.
• The total distance a MyKey driver
traveled with your vehicle.
Note: Every MyKey receives the same
restrictions and settings. You cannot
program them individually.
Note: For vehicles equipped with a
push-button start switch: When both a
MyKey and an admin key are present when
you start your vehicle, the system recognizes
the admin key only. Standard Settings
Not every vehicle includes the features
listed below. If your vehicle has this
equipment, then you cannot change the
following settings when using a MyKey:
•
Seatbelt reminder or Belt-Minder™.
MyKey mutes the audio system until
drivers, and in some instances,
passengers, fasten their seatbelts.
Note: If your vehicle includes an
AM/FM radio or a very basic audio
system, then the radio may not mute.
• Earlier low-fuel warning. The low-fuel
warning activates earlier for MyKey
drivers, giving them more time to refuel.
• Certain driver alerts, stability systems
or parking aids turn on automatically
when you use the MyKey system. For
example, Blind Spot Information
System (BLIS), cross traffic alert, lane
departure warning or forward collision
warning. Note:
MyKey drivers may be
able to turn the lane departure warning
feature off, but this feature turns back
on automatically with every new key
cycle.
• Restricted touchscreen operation in
some markets. For example, MyKey
may prevent manual navigation
destination input while the vehicle is in
any gear other than park (P) or when
the vehicle reaches a certain rate of
speed.
• Satellite radio adult content
restrictions, if this feature is available
in your market.
Optional Settings
You can configure certain vehicle feature
settings when you first create a MyKey. You
can also change the settings afterward
with an admin key.
57
Ranger (TFG) Canada/United States of America, enUSA, Edition date: 201809, Fourth-Printing MyKey
™
Page 61 of 512
Note:
Not every feature applies to every
vehicle in every market. When they are
available for your vehicle, then they appear
in your information display, providing
choices to switch them on or off, or to select
a more specific setting.
• Various vehicle speed limits so the
MyKey driver cannot exceed certain
speeds. The information display shows
warnings followed by an audible tone
when the MyKey driver reaches the set
speed. You cannot override the set
speed by fully depressing the
accelerator pedal. WARNING: Do not set MyKey
maximum speed limit to a limit that will
prevent the driver from maintaining a
safe speed considering posted speed
limits and prevailing road conditions. The
driver is always responsible to drive in
accordance with local laws and
prevailing conditions. Failure to do so
could result in accident or injury. •
Various vehicle speed reminders so
MyKey drivers know when their vehicle
speed approaches the limits. Warnings
appear in your information display and
a tone sounds when the MyKey drivers
exceed the set vehicle speed.
• The audio system's maximum volume
limits to 45% so MyKey drivers can
concentrate on the road. A message
appears in the information display
when MyKey drivers attempt to exceed
the limited volume. MyKey also
disables the automatic volume control.
Note:
If your vehicle includes an
AM/FM radio or a very basic audio
system, then the radio may not limit.
• Always on setting. This setting forces
certain features to remain on and
active for MyKey drivers. For example,
E911 or emergency assistance and the
do not disturb features stay on even if
a MyKey driver uses the feature's
control to switch it off. When selected,
you will not be able to turn off Advance
Trac or traction control (if your vehicle
has this feature).
CREATING A MYKEY
Use the information display to create a
MyKey:
1. Insert the key you want to program into
the ignition. If your vehicle is equipped
with a push-button start, place the
remote control into the backup slot.
See
Passive Key Backup Position
(page 56).
2. Switch the ignition on.
3. Access the main menu in the information display and then scroll
through the menus to change the
settings of your MyKey. From the
MyKey menu select the option Create
MyKey. See
Information Displays
(page 90).
58
Ranger (TFG) Canada/United States of America, enUSA, Edition date: 201809, Fourth-Printing MyKey
™
Page 62 of 512
4. When prompted, hold the OK button
until you see a message informing you
to label this key as a MyKey. The
programmed restrictions apply when
you key off, open and close the driver
door and restart your vehicle with the
programmed key or transmitter.
MyKey is successfully created. Make sure
you label it so you can distinguish it from
the admin keys.
You can also program configurable
settings for the key(s). See
Programming
and Changing Configurable Settings.
Programming and Changing
Configurable Settings
Use the information display to access your
configurable MyKey settings.
1. Switch the ignition on using an admin key or transmitter you want to program.
2. Access the main menu in the information display and then scroll
through the menus to change the
settings of your MyKey. See
Information Displays
(page 90).
3. Follow the instructions in the display. The programmed restrictions apply
when you switch the vehicle off, open
and close the driver door and restart
your vehicle with the programmed key
or transmitter.
Note: You can clear or change your MyKey
settings at any time during the same key
cycle as you created the MyKey. Once you
have switched the vehicle off, however, you
will need an admin key to change or clear
your MyKey settings. When you make any
changes to your MyKey settings, you change
the settings for every MyKey. You cannot
make individual changes to apply to certain
MyKeys. CLEARING ALL MYKEYS
When you clear your MyKeys, you remove
all restrictions and return all MyKeys to
their original admin key status at once. To
clear all MyKeys of all MyKey settings, use
the information display.
1. Switch the ignition on using an admin
key.
2. Access the main menu in the information display and then scroll
through the menus to begin clearing
your MyKey programming. See
Information Displays
(page 90).
3. Follow the instructions in the display.
4. A confirmation message appears in the
display after you finish clearing your
MyKeys.
Note: When you clear your MyKeys, you
remove all restrictions and return all MyKeys
to their original admin key status. You
cannot remove the MyKey restrictions
individually.
CHECKING MYKEY SYSTEM
STATUS
You can find information about your
programmed MyKeys by using the
information display. See
Information
Displays (page 90).
MyKey Distance
Tracks the distance when drivers use a
MyKey. The only way to delete the
accumulated distance is by using an admin
key to clear all MyKeys. If the distance does
not accumulate as expected, then the
intended user is not using the MyKey, or an
admin key user recently cleared and then
recreated a MyKey.
59
Ranger (TFG) Canada/United States of America, enUSA, Edition date: 201809, Fourth-Printing MyKey
™
Page 65 of 512
LOCKING AND UNLOCKING
You can use the power door lock control
or the remote control to lock and unlock
your doors and tailgate. See Tailgate Lock
(page 213).
Note: Always take your keys and lock all
doors when leaving your vehicle.
Power Door Locks
The power door lock control is on the driver
and front passenger door panels. Unlock.
A
Lock.
B
Door Lock Indicator
An LED on the power door lock control
illuminates when you lock the door.
Remote Control
Unlocking the Doors (Two-Stage
Unlock) Press the button to unlock the
driver door.
Press the button again within
three seconds to unlock all doors. The
direction indicators will flash. With the ignition off, press and hold both
the lock and unlock buttons on the remote
control for three seconds to change
between driver door or all door unlock
mode. The direction indicators will flash
twice to indicate a change to the unlocking
mode. Driver door mode only unlocks the
driver door when you press the unlock
button once. All door mode unlocks all
doors when you press the unlock button
once. The unlocking mode applies to the
remote control and Intelligent Access Key.
Locking the Doors
Press the button to lock all
doors. The direction indicators
will flash.
Press the button again within three
seconds to confirm that all the doors are
closed. The doors will lock again, the horn
will sound and the direction indicators will
flash if all the doors are closed.
Locking and Unlocking the Doors
with the Key Blade
Turn the top of the key toward the front of
your vehicle once to lock all doors. Turn
the top of the key toward the rear of your
vehicle once to unlock the driver door only.
If the central locking function does not
operate, lock the doors individually using
the key in the position shown.
62
Ranger (TFG) Canada/United States of America, enUSA, Edition date: 201809, Fourth-Printing Doors and LocksE196954 E138629 E138623