key FORD RANGER 2020 Service Manual
[x] Cancel search | Manufacturer: FORD, Model Year: 2020, Model line: RANGER, Model: FORD RANGER 2020Pages: 478, PDF Size: 7.44 MB
Page 175 of 478
•
You take corners too fast.
• The road surface is poor.
Note: If the system activates, the brake
pedal may pulse and may travel further.
Maintain pressure on the brake pedal. You
may also hear a noise from the system. This
is normal.
PARKING BRAKE WARNING: Always fully apply the
parking brake and make sure you shift
into park (P). Switch the ignition off and
remove the key whenever you leave your
vehicle.
To apply the parking brake:
1. Firmly press the brake pedal.
2. Pull the parking brake lever upward to its fullest extent.
Note: Do not press the release button when
pulling the parking brake lever upward.
Note: If you park your vehicle on a hill and
facing uphill, shift into park (P) and turn the
steering wheel away from the curb.
Note: If you park your vehicle on a hill and
facing downhill, shift into park (P) and turn
the steering wheel toward the curb.
To release the parking brake:
1. Firmly press the brake pedal.
2. Slightly pull the parking brake lever upward.
3. Press the release button and push the parking brake lever downward. HILL START ASSIST WARNING:
The system does not
replace the parking brake. When you
leave your vehicle, always apply the
parking brake. WARNING:
You must remain in
your vehicle when the system turns on.
At all times, you are responsible for
controlling your vehicle, supervising the
system and intervening, if required.
Failure to take care may result in the loss
of control of your vehicle, serious
personal injury or death. WARNING:
The system will turn
off if a malfunction is apparent or if you
rev the engine excessively. Failure to take
care may result in the loss of control of
your vehicle, serious personal injury or
death.
The system makes it easier to pull away
when your vehicle is on a slope without the
need to use the parking brake.
When the system is active, your vehicle
remains stationary on the slope for two to
three seconds after you release the brake
pedal. This allows time to move your foot
from the brake to the accelerator pedal.
The system releases the brakes
automatically once the engine has
developed sufficient torque to prevent your
vehicle from rolling down the slope. This
is an advantage when pulling away on a
slope, for example from a car park ramp,
traffic lights or when reversing uphill into
a parking space.
The system activates on any slope that
causes your vehicle to roll.
Note: There is no warning light to indicate
the system is either on or off.
172
Ranger (TFG) Canada/United States of America, Vehicles Built From: 18-11-2019, LB3J 19A321 AB enUSA, Edition date: 202002, Second-Printing Brakes
Page 177 of 478
PRINCIPLE OF OPERATION
The traction control system helps avoid
drive wheel spin and loss of traction.
If your vehicle begins to slide, the system
applies the brakes to individual wheels
and, when needed, reduces engine power
at the same time. If the wheels spin when
accelerating on slippery or loose surfaces,
the system reduces engine power in order
to increase traction.
USING TRACTION CONTROL
WARNING: The stability and
traction control light illuminates steadily
if the system detects a failure. Make sure
you did not manually disable the traction
control system using the information
display controls or the switch. If the
stability control and traction control light
is still illuminating steadily, have the
system serviced by an authorized dealer
immediately. Operating your vehicle with
the traction control disabled could lead
to an increased risk of loss of vehicle
control, vehicle rollover, personal injury
and death.
The system automatically turns on each
time you switch the ignition on.
If your vehicle is stuck in mud or snow,
switching traction control off may be
beneficial as this allows the wheels to spin.
Note: When you switch traction control off,
stability control remains fully active. Switching the System Off The switch for the stability and traction
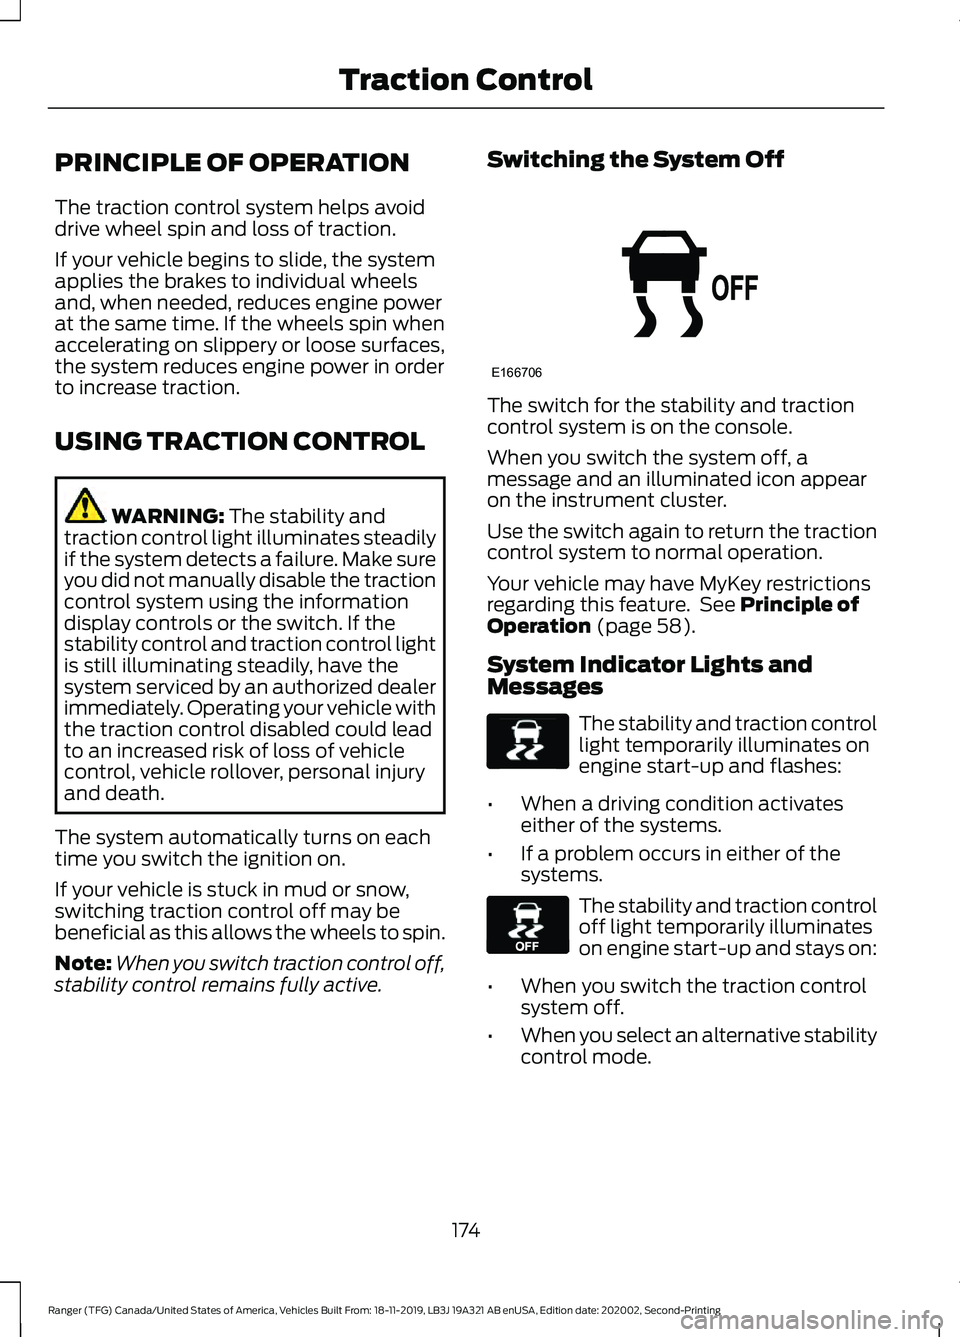
control system is on the console.
When you switch the system off, a
message and an illuminated icon appear
on the instrument cluster.
Use the switch again to return the traction
control system to normal operation.
Your vehicle may have MyKey restrictions
regarding this feature. See
Principle of
Operation (page 58).
System Indicator Lights and
Messages The stability and traction control
light temporarily illuminates on
engine start-up and flashes:
• When a driving condition activates
either of the systems.
• If a problem occurs in either of the
systems. The stability and traction control
off light temporarily illuminates
on engine start-up and stays on:
• When you switch the traction control
system off.
• When you select an alternative stability
control mode.
174
Ranger (TFG) Canada/United States of America, Vehicles Built From: 18-11-2019, LB3J 19A321 AB enUSA, Edition date: 202002, Second-Printing Traction ControlE166706 E138639 E130458
Page 185 of 478
PRINCIPLE OF OPERATION
WARNING: To help avoid personal
injury, always use caution when in
reverse (R) and when using the sensing
system. WARNING:
The system may not
detect objects with surfaces that absorb
reflection. Always drive with due care
and attention. Failure to take care may
result in a crash. WARNING: Traffic control systems,
inclement weather, air brakes, external
motors and fans may affect the correct
operation of the sensing system.This
may cause reduced performance or false
alerts. WARNING:
The system may not
detect small or moving objects,
particularly those close to the ground.
Note: If your vehicle has MyKey ™, the
sensing system cannot be switched off
when a MyKey ™ is present.
See Principle
of Operation (page 58).
Note: Keep the sensors on the bumper or
fascia free from snow, ice and large
accumulations of dirt. If the sensors are
covered, the system ’s accuracy can be
affected. Do not clean the sensors with
sharp objects.
Note: If your vehicle sustains damage to
the bumper or fascia, leaving it misaligned
or bent, the sensing zone may be altered
causing inaccurate measurement of
obstacles or false alerts. Note:
Certain add-on devices installed
around the bumper or fascia may create
false alerts. For example, large trailer
hitches, bike or surfboard racks, license plate
brackets, bumper covers or any other device
that may block the normal detection zone
of the system. Remove the add-on device
to prevent false alerts.
Note: When you connect a trailer to your
vehicle, the rear parking aid may detect the
trailer and therefore provide an alert. Disable
the rear parking aid when you connect a
trailer to prevent the alert.
The sensing system warns the driver of
obstacles within a certain range of your
vehicle. The system turns on automatically
whenever you switch the ignition on.
You can switch the system off through the
information display menu or from the
pop-up message that appears once you
shift the transmission into reverse (R). See
General Information
(page 96). If your
vehicle has a parking aid button, you can
switch the system off by pressing the
button.
If a fault is present in the system, a warning
message appears in the information
display. See
Information Messages
(page 104).
REAR PARKING AID
The rear sensors are only active when the
transmission is in reverse (R). As your
vehicle moves closer to the obstacle, the
rate of the audible warning increases.
When the obstacle is less than
12 in
(30 cm) away, the warning sounds
continuously. If the system detects a
stationary or receding object farther than
12 in (30 cm)
from the corners of the
bumper, the tone sounds for only three
seconds. Once the system detects an
object approaching, the warning sounds
again.
182
Ranger (TFG) Canada/United States of America, Vehicles Built From: 18-11-2019, LB3J 19A321 AB enUSA, Edition date: 202002, Second-Printing Parking Aids
(If Equipped)
Page 201 of 478
WARNING: In cold and severe
weather conditions the system may not
function. Rain, snow and spray can all
limit sensor performance. WARNING:
The system will not
operate if the sensor cannot track the
road lane markings. WARNING:
The sensor may
incorrectly track lane markings as other
structures or objects. This can result in
a false or missed warning. WARNING:
The system may not
operate properly if the sensor is blocked.
Keep the windshield free from
obstruction. WARNING:
If damage occurs in the
immediate area surrounding the sensor,
have your vehicle checked as soon as
possible. WARNING:
The system may not
correctly operate if your vehicle is fitted
with a suspension kit not approved by
us.
Note: The system works above
40 mph
(64 km/h).
Note: The system works as long as the
camera can detect one lane marking.
Note: When you select aid or alert and aid
mode and the system detects no steering
activity for a short period, the system alerts
you to put your hands on the steering wheel.
The system may detect a light grip or
touch on the steering wheel as hands off
driving.
Note: The system may not function with a
blocked camera, or if the windshield is
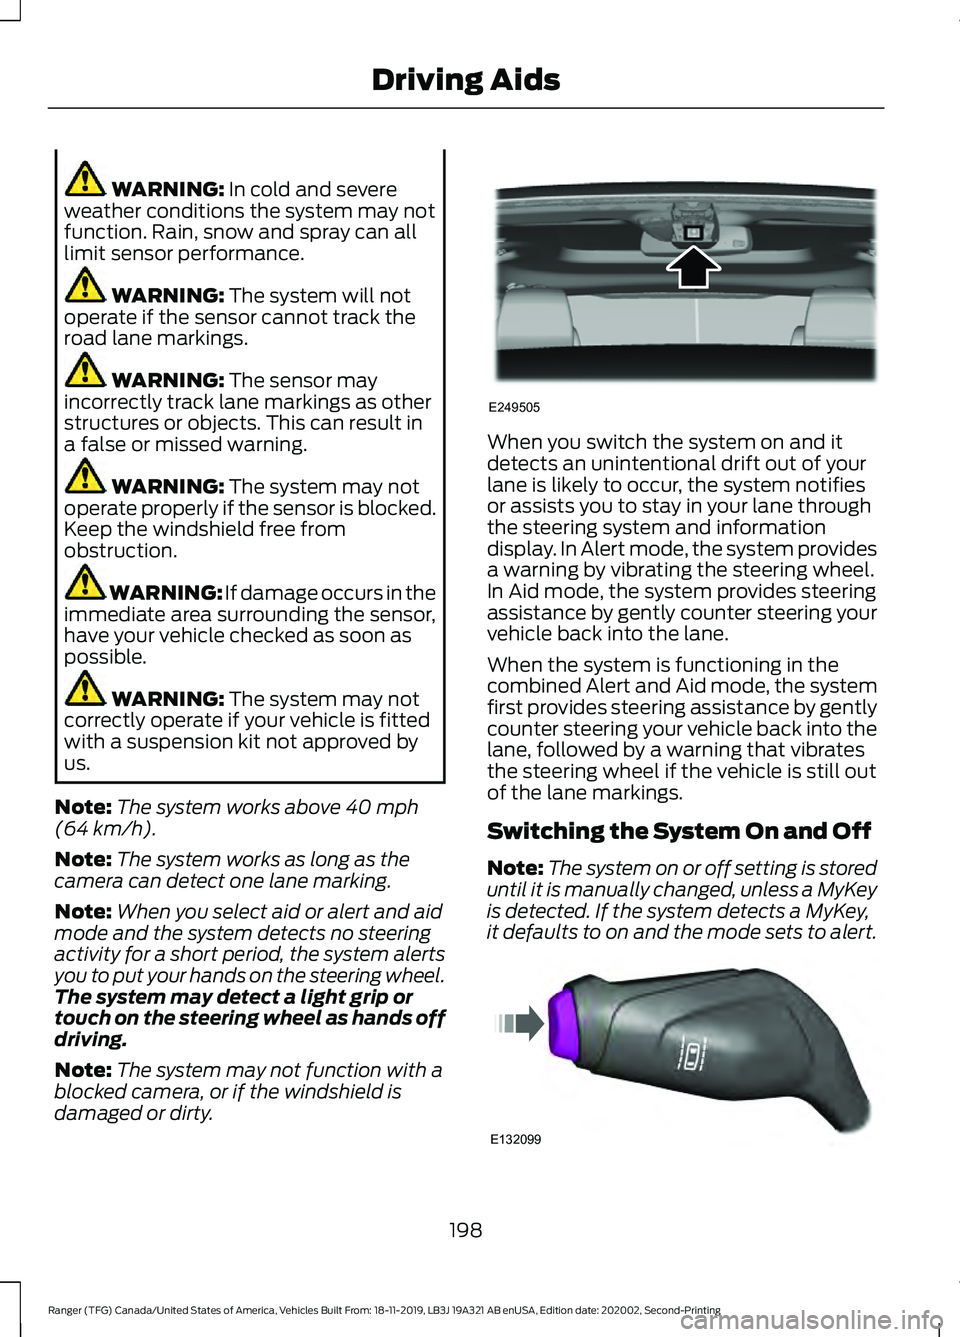
damaged or dirty. When you switch the system on and it
detects an unintentional drift out of your
lane is likely to occur, the system notifies
or assists you to stay in your lane through
the steering system and information
display. In Alert mode, the system provides
a warning by vibrating the steering wheel.
In Aid mode, the system provides steering
assistance by gently counter steering your
vehicle back into the lane.
When the system is functioning in the
combined Alert and Aid mode, the system
first provides steering assistance by gently
counter steering your vehicle back into the
lane, followed by a warning that vibrates
the steering wheel if the vehicle is still out
of the lane markings.
Switching the System On and Off
Note:
The system on or off setting is stored
until it is manually changed, unless a MyKey
is detected. If the system detects a MyKey,
it defaults to on and the mode sets to alert. 198
Ranger (TFG) Canada/United States of America, Vehicles Built From: 18-11-2019, LB3J 19A321 AB enUSA, Edition date: 202002, Second-Printing Driving AidsE249505 E132099
Page 230 of 478
Emergency Towing
If your vehicle becomes inoperable without
access to wheel dollies, a car-hauling
trailer or a flatbed transport vehicle, you
can flat-tow with all wheels on the ground,
regardless of the powertrain and
transmission configuration, under the
following conditions:
•
Your vehicle is facing forward for
towing in a forward direction.
• Place the transmission in neutral (N).
If you cannot move the transmission
into neutral (N), you may need to
override the gear shifter. See
Automatic Transmission (page 158).
• Maximum speed is 35 mph (56 km/h).
• Maximum distance is
50 mi (80 km).
Recreational Towing
Note: Put your climate control system in
recirculated air mode to prevent exhaust
fumes from entering your vehicle.
See
Climate Control (page 117).
Follow these guidelines if you have a need
for recreational towing, such as towing
your vehicle behind a motorhome. These
guidelines are designed to prevent damage
to your transmission.
You can put your vehicle in neutral tow for
recreational towing by placing the transfer
case in its neutral position and engaging
the four-wheel-down towing feature.
Perform the steps in the following section
after positioning your vehicle behind the
tow vehicle and properly securing them
together.
Note: Make sure you properly secure your
vehicle to the tow vehicle. 1. Put the ignition in the on position, but
do not start the engine. If your vehicle
has an ignition key, turn the key to the
on position. If your vehicle has
intelligent access, press the engine
START/STOP
button once without
pressing the brake pedal.
2. Press and hold the brake pedal.
3. Rotate the four-wheel drive switch to 2H
.
4. Shift the transmission to neutral (N).
5. Enable
Neutral Tow by selecting
Settings in the information display
menu.
6. Then select
Vehicle.
7. Then select
Neutral Tow and follow
the instructions on screen.
Note: If successfully completed, the
information display shows NEUTRAL TOW
LEAVE IN N
or Neutral Tow Enabled
Leave Transmission in Neutral. This
indicates that your vehicle is safe to tow
with all wheels on the ground.
Note: If you do not see the message in the
display, you must switch the ignition off and
perform the procedure again from the
beginning.
Note: You may hear an audible noise as the
transfer case shifts into its neutral position.
This is normal.
8. Leave the transmission in neutral (N) and turn the ignition key as far as it can
go towards the off position. It does not
turn fully off when the transmission is
in neutral (N). If your vehicle has an
ignition key, you must leave the key in
the ignition when towing. To lock and
unlock your vehicle, use the keyless
entry keypad or an extra set of keys. If
227
Ranger (TFG) Canada/United States of America, Vehicles Built From: 18-11-2019, LB3J 19A321 AB enUSA, Edition date: 202002, Second-Printing Towing
Page 231 of 478
your vehicle has intelligent access,
press the engine START/STOP button
once without pressing the brake pedal.
You do not need to leave your keys in
the vehicle. You can lock and unlock
your vehicle as you normally do.
9. Release the brake pedal. WARNING: Do not disconnect the
battery during recreational towing. It
prevents the transfer case from shifting
properly and may cause the vehicle to
roll, even if the transmission is in park
(P). WARNING:
Shifting the transfer
case to its neutral position for
recreational towing may cause the
vehicle to roll, even if the transmission is
in park (P). It may injure the driver and
others. Make sure you press the foot
brake and the vehicle is in a secure, safe
position when you shift to neutral (N).
Note: Failing to put the transfer case in its
neutral position may damage vehicle
components.
Note: You can check the four-wheel-down
towing status at any time by opening the
driver door or by switching the ignition to the
accessory or on position and verifying the
confirmation message appears in the
cluster.
To exit four-wheel-down towing and return
the transfer case to the
2H position:
1. With your vehicle still properly secured
to the tow vehicle, switch the ignition
to the on position but do not start the
engine. If your vehicle has an ignition
key, turn the key to the on position. If
your vehicle has intelligent access,
press the engine START/STOP button
once without pressing the brake pedal.
2. Press and hold the brake pedal. 3. Shift the transmission out of neutral
(N) and into park (P).
4. Observe the messages on the information display screen.
Note: If completed successfully, the
instrument cluster displays
4X2, and
Neutral Tow Disabled.
Note: If the indicator light and message do
not display, you must perform the procedure
again from the beginning.
Note: You may hear an audible noise as the
transfer case shifts out of its neutral
position. This is normal.
228
Ranger (TFG) Canada/United States of America, Vehicles Built From: 18-11-2019, LB3J 19A321 AB enUSA, Edition date: 202002, Second-Printing Towing
Page 236 of 478
ROADSIDE ASSISTANCE
Vehicles Sold in the United States:
Getting Roadside Assistance
To fully assist you should you have a
vehicle concern, Ford Motor Company
offers a complimentary roadside
assistance program. This program is
separate from the New Vehicle Limited
Warranty.
The service is available:
•
24 hours a day, seven days a week.
• For the coverage period supplied with
your vehicle.
Roadside Assistance covers:
• A flat tire change with a good spare
(except vehicles supplied with a tire
inflation kit).
• Battery jump start.
• Lock-out assistance (key replacement
cost is the customer's responsibility).
• Fuel delivery — independent service
contractors, if not prohibited by state,
local or municipal law, shall deliver up
to 2 gal (8 L) of gasoline or 5 gal (20 L)
of diesel fuel to a disabled vehicle.
Roadside Assistance limits fuel delivery
service to two no-charge occurrences
within a 12-month period.
• Winch out — available within 100 ft
(30 m) of a paved or county
maintained road, no recoveries. •
Towing — independent service
contractors, if not prohibited by state,
local or municipal law, shall tow Ford
eligible vehicles to an authorized dealer
within
35 mi (56 km) of the
disablement location or to the nearest
authorized dealer. If a member
requests a tow to an authorized dealer
that is more than
35 mi (56 km) from
the disablement location, the member
shall be responsible for any mileage
costs in excess of
35 mi (56 km).
• Roadside Assistance includes up to
$200 for a towed trailer if the disabled
eligible vehicle requires service at the
nearest authorized dealer. If the towing
vehicle is operational but the trailer is
not, then the trailer does not qualify for
any roadside services.
Vehicles Sold in the United States:
Using Roadside Assistance
Complete the roadside assistance
identification card and place it in your
wallet for quick reference. This card is in
the Owner's Manual kit.
United States vehicle customers who
require Roadside Assistance, call
1-800-241-3673.
If you need to arrange roadside assistance
for yourself, Ford Motor Company
reimburses a reasonable amount for
towing to the nearest dealership within
35 mi (56 km)
. To obtain reimbursement
information, United States vehicle
customers call 1-800-241-3673.
Customers need to submit their original
receipts.
233
Ranger (TFG) Canada/United States of America, Vehicles Built From: 18-11-2019, LB3J 19A321 AB enUSA, Edition date: 202002, Second-Printing Roadside Emergencies
Page 237 of 478
Vehicles Sold in Canada: Getting
Roadside Assistance
To fully assist you should you have a
vehicle concern, Ford Motor Company of
Canada, Limited offers a complimentary
roadside assistance program. This program
is eligible within Canada or the continental
United States.
The service is available 24 hours a day,
seven days a week.
This program is separate from the New
Vehicle Limited Warranty, but the coverage
is concurrent with the powertrain coverage
period of your vehicle. Canadian roadside
coverage and benefits may differ from the
U.S. coverage.
If you require more information, please call
us in Canada at 1-800-665-2006, or visit
our website at www.ford.ca.
HAZARD FLASHERS
Note:
The hazard flashers operate when
the ignition is in any position, or if the key is
not in the ignition. If used when the vehicle
is not running, the battery loses charge. As
a result, there may be insufficient power to
restart your vehicle. The flasher control is on the
instrument panel. Use your
hazard flashers when your
vehicle is creating a safety hazard for other
motorists.
• Press the flasher control and all front
and rear direction indicators flash.
• Press the button again to switch them
off. FUEL SHUTOFF WARNING: If your vehicle has been
involved in a crash, have the fuel system
checked. Failure to follow this instruction
could result in fire, personal injury or
death.
Note: When you try to restart your vehicle
after a fuel shutoff, the vehicle makes sure
that various systems are safe to restart.
Once the vehicle determines the systems
are safe, then the vehicle allows you to
restart.
Note: In the event that your vehicle does
not restart after your third attempt, contact
a qualified technician.
The fuel pump shutoff stops the flow of
fuel to the engine in the event of a
moderate to severe crash. Not every
impact causes a shutoff.
Should your vehicle shut off after a crash,
you may restart your vehicle.
If your vehicle has a key system:
1. Switch off the ignition.
2. Switch to start position.
3. Switch off the ignition.
4. Switch on the ignition to re-enable the
fuel pump.
5. If the vehicle does not start, repeat steps 1 through 4.
If your vehicle has a push button start
system:
1. Press START/STOP to switch off your
vehicle.
2. Press the brake pedal and START/STOP
to switch on your
vehicle.
3. Remove your foot from the brake pedal
and press
START/STOP to switch off
your vehicle.
234
Ranger (TFG) Canada/United States of America, Vehicles Built From: 18-11-2019, LB3J 19A321 AB enUSA, Edition date: 202002, Second-Printing Roadside Emergencies
Page 275 of 478
CHARGING THE 12V BATTERY
Battery Management System (If
Equipped)
The battery management system monitors
battery conditions and takes actions to
extend battery life. If excessive battery
drain is detected, the system may
temporarily disable certain electrical
features to protect the battery. Those
electrical accessories affected include the
rear defrost, heated/cooled seats, climate
control fan, heated steering wheel, audio
and navigation system. A message may be
shown in the information displays to alert
the driver that battery protection actions
are active. These messages are only for
notification that an action is taking place,
and not intended to indicate an electrical
problem or that the battery requires
replacement.
Electrical accessory installation
Note: Charging and replacing the battery
requires the driver power window to be
re-initialized.
See Windows and Mirrors
(page 83).
To ensure proper operation of the Battery
Management System, any electrical
devices that are added to your vehicle
should not have their ground connection
made directly at the negative battery post.
A connection at the negative battery
terminal can cause inaccurate
measurements of the battery condition
and potential incorrect system operation.
When a battery replacement is required,
you must use a recommended
replacement battery that matches the
electrical requirements of the vehicle. After battery replacement, or in some
cases after charging the battery with the
external charger, the Battery Management
System requires eight hours of vehicle
sleep time (key off with doors closed) to
relearn the new battery state of charge.
Prior to relearning the state of charge, the
Battery Management System may disable
electrical features (to protect the battery)
earlier than normal.
CHANGING THE 12V BATTERY
WARNING:
Batteries normally
produce explosive gases which can
cause personal injury. Therefore, do not
allow flames, sparks or lighted
substances to come near the battery.
When working near the battery, always
shield your face and protect your eyes.
Always provide correct ventilation. WARNING:
When lifting a
plastic-cased battery, excessive pressure
on the end walls could cause acid to flow
through the vent caps, resulting in
personal injury and damage to the
vehicle or battery. Lift the battery with a
battery carrier or with your hands on
opposite corners. WARNING:
Keep batteries out of
reach of children. Batteries contain
sulfuric acid. Avoid contact with skin,
eyes or clothing. Shield your eyes when
working near the battery to protect
against possible splashing of acid
solution. In case of acid contact with skin
or eyes, flush immediately with water for
a minimum of 15 minutes and get prompt
medical attention. If acid is swallowed,
call a physician immediately.
272
Ranger (TFG) Canada/United States of America, Vehicles Built From: 18-11-2019, LB3J 19A321 AB enUSA, Edition date: 202002, Second-Printing Maintenance
Page 322 of 478
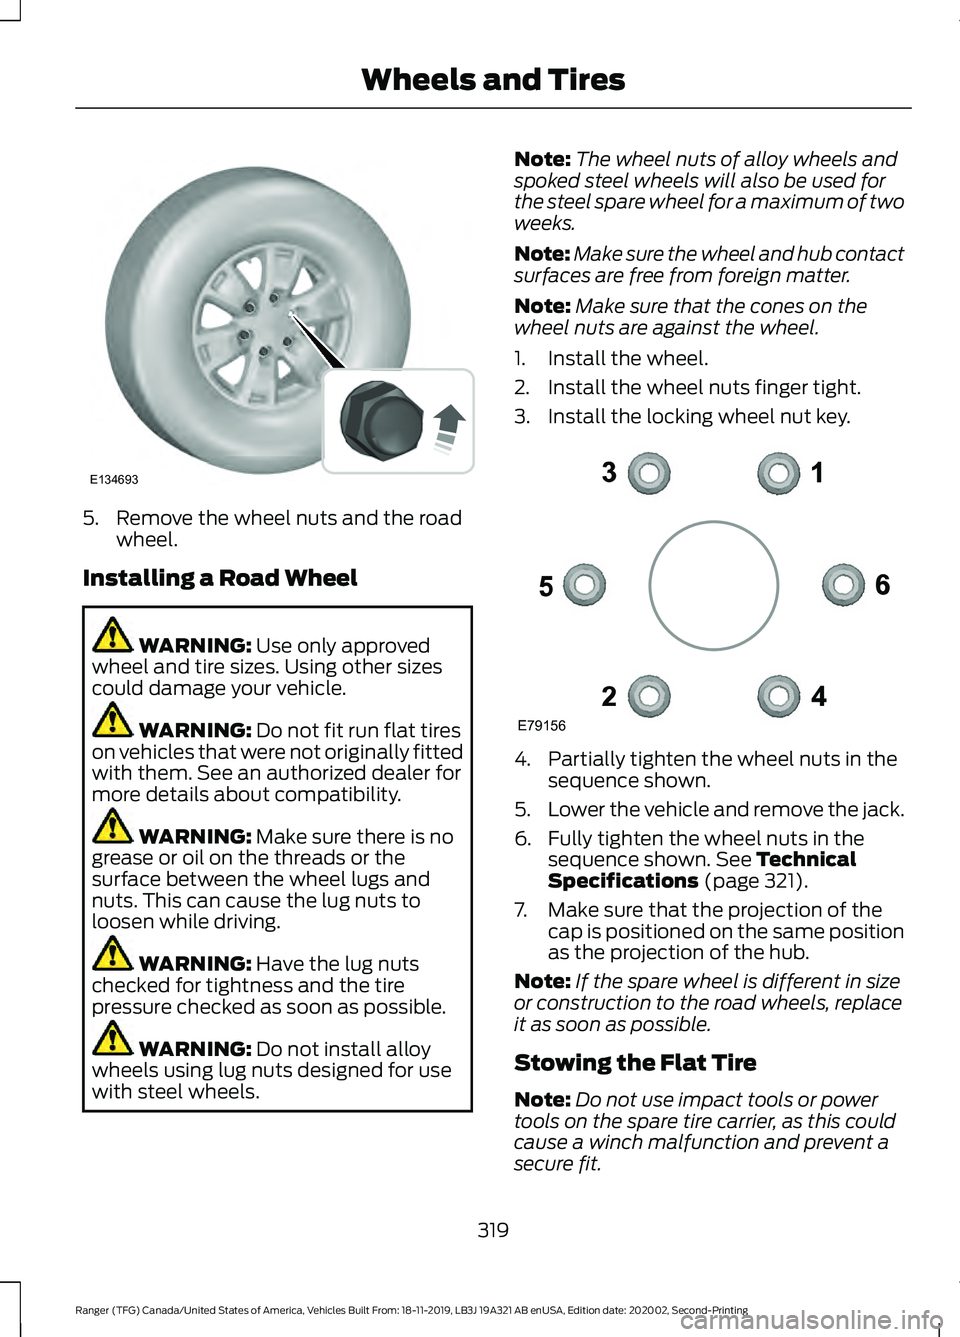
5. Remove the wheel nuts and the road
wheel.
Installing a Road Wheel WARNING: Use only approved
wheel and tire sizes. Using other sizes
could damage your vehicle. WARNING:
Do not fit run flat tires
on vehicles that were not originally fitted
with them. See an authorized dealer for
more details about compatibility. WARNING:
Make sure there is no
grease or oil on the threads or the
surface between the wheel lugs and
nuts. This can cause the lug nuts to
loosen while driving. WARNING:
Have the lug nuts
checked for tightness and the tire
pressure checked as soon as possible. WARNING:
Do not install alloy
wheels using lug nuts designed for use
with steel wheels. Note:
The wheel nuts of alloy wheels and
spoked steel wheels will also be used for
the steel spare wheel for a maximum of two
weeks.
Note: Make sure the wheel and hub contact
surfaces are free from foreign matter.
Note: Make sure that the cones on the
wheel nuts are against the wheel.
1. Install the wheel.
2. Install the wheel nuts finger tight.
3. Install the locking wheel nut key. 4. Partially tighten the wheel nuts in the
sequence shown.
5. Lower the vehicle and remove the jack.
6. Fully tighten the wheel nuts in the sequence shown.
See Technical
Specifications (page 321).
7. Make sure that the projection of the cap is positioned on the same position
as the projection of the hub.
Note: If the spare wheel is different in size
or construction to the road wheels, replace
it as soon as possible.
Stowing the Flat Tire
Note: Do not use impact tools or power
tools on the spare tire carrier, as this could
cause a winch malfunction and prevent a
secure fit.
319
Ranger (TFG) Canada/United States of America, Vehicles Built From: 18-11-2019, LB3J 19A321 AB enUSA, Edition date: 202002, Second-Printing Wheels and TiresE134693 E79156