steering FORD SIERRA 1983 1.G Routine Manintenance And Servicing User Guide
[x] Cancel search | Manufacturer: FORD, Model Year: 1983, Model line: SIERRA, Model: FORD SIERRA 1983 1.GPages: 22, PDF Size: 1.26 MB
Page 17 of 22

system immediately if the charge is low and
do not use it again until it has been recharged.
4Inspect the refrigerant pipes, hoses and
unions for security and good condition. Refit
the radiator grille.
5The air conditioning system will lose a
proportion of its charge through normal
seepage typically up to 100 g (4 oz) per year -
so it is as well to regard periodic recharging
as a maintenance operation.
1Check the final drive oil level as follows.
2Position the vehicle over a pit, or raise it at
front and rear on ramps or axle stands. The
vehicle must be level.
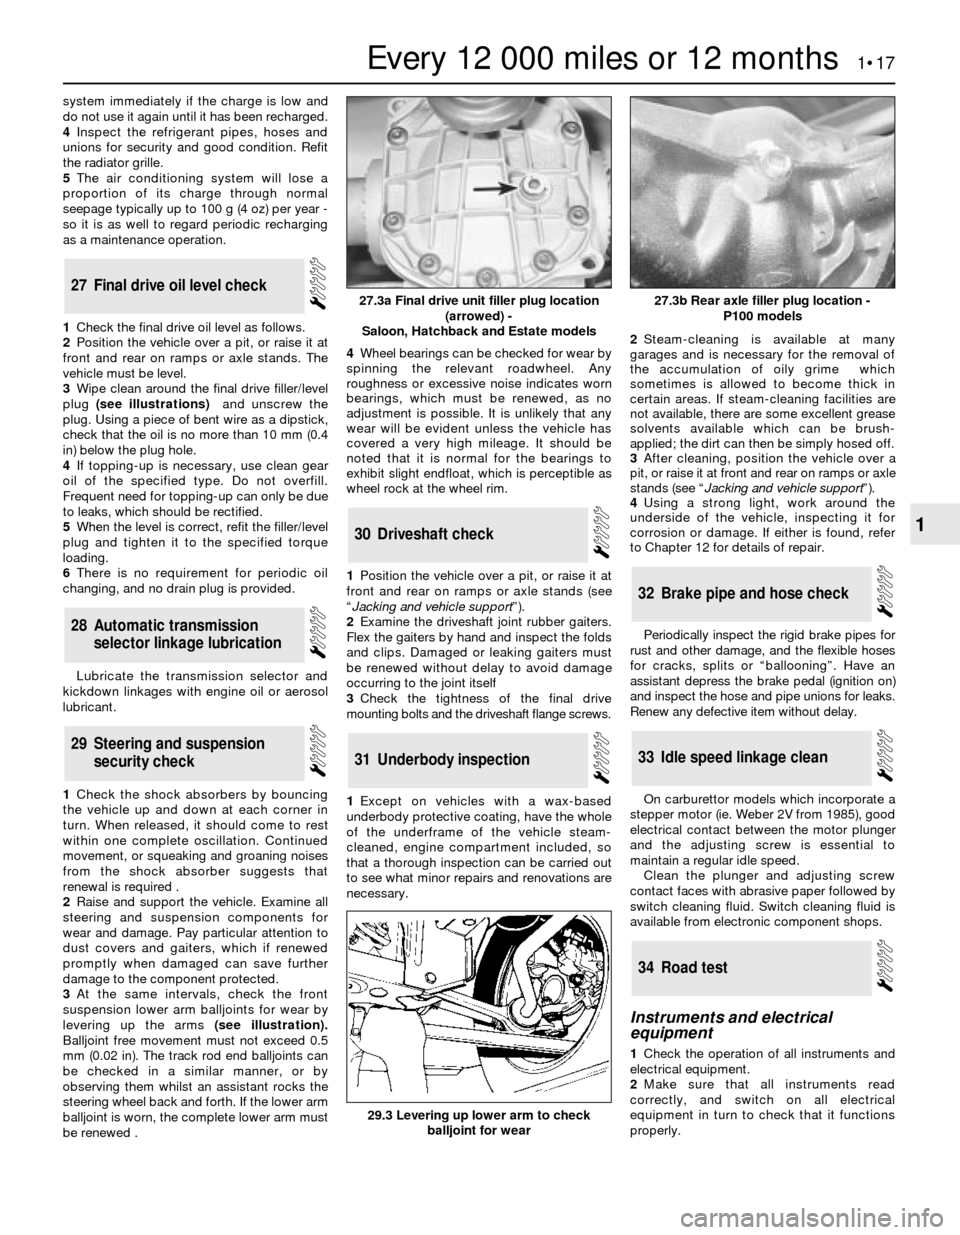
3Wipe clean around the final drive filler/level
plug (see illustrations) and unscrew the
plug. Using a piece of bent wire as a dipstick,
check that the oil is no more than 10 mm (0.4
in) below the plug hole.
4If topping-up is necessary, use clean gear
oil of the specified type. Do not overfill.
Frequent need for topping-up can only be due
to leaks, which should be rectified.
5When the level is correct, refit the filler/level
plug and tighten it to the specified torque
loading.
6There is no requirement for periodic oil
changing, and no drain plug is provided.
Lubricate the transmission selector and
kickdown linkages with engine oil or aerosol
lubricant.
1Check the shock absorbers by bouncing
the vehicle up and down at each corner in
turn. When released, it should come to rest
within one complete oscillation. Continued
movement, or squeaking and groaning noises
from the shock absorber suggests that
renewal is required .
2Raise and support the vehicle. Examine all
steering and suspension components for
wear and damage. Pay particular attention to
dust covers and gaiters, which if renewed
promptly when damaged can save further
damage to the component protected.
3At the same intervals, check the front
suspension lower arm balljoints for wear by
levering up the arms(see illustration).
Balljoint free movement must not exceed 0.5
mm (0.02 in). The track rod end balljoints can
be checked in a similar manner, or by
observing them whilst an assistant rocks the
steering wheel back and forth. If the lower arm
balljoint is worn, the complete lower arm must
be renewed .4Wheel bearings can be checked for wear by
spinning the relevant roadwheel. Any
roughness or excessive noise indicates worn
bearings, which must be renewed, as no
adjustment is possible. It is unlikely that any
wear will be evident unless the vehicle has
covered a very high mileage. It should be
noted that it is normal for the bearings to
exhibit slight endfloat, which is perceptible as
wheel rock at the wheel rim.
1Position the vehicle over a pit, or raise it at
front and rear on ramps or axle stands (see
“Jacking and vehicle support”).
2Examine the driveshaft joint rubber gaiters.
Flex the gaiters by hand and inspect the folds
and clips. Damaged or leaking gaiters must
be renewed without delay to avoid damage
occurring to the joint itself
3Check the tightness of the final drive
mounting bolts and the driveshaft flange screws.
1Except on vehicles with a wax-based
underbody protective coating, have the whole
of the underframe of the vehicle steam-
cleaned, engine compartment included, so
that a thorough inspection can be carried out
to see what minor repairs and renovations are
necessary. 2Steam-cleaning is available at many
garages and is necessary for the removal of
the accumulation of oily grime which
sometimes is allowed to become thick in
certain areas. If steam-cleaning facilities are
not available, there are some excellent grease
solvents available which can be brush-
applied; the dirt can then be simply hosed off.
3After cleaning, position the vehicle over a
pit, or raise it at front and rear on ramps or axle
stands (see “Jacking and vehicle support”).
4Using a strong light, work around the
underside of the vehicle, inspecting it for
corrosion or damage. If either is found, refer
to Chapter 12 for details of repair.
Periodically inspect the rigid brake pipes for
rust and other damage, and the flexible hoses
for cracks, splits or “ballooning”. Have an
assistant depress the brake pedal (ignition on)
and inspect the hose and pipe unions for leaks.
Renew any defective item without delay.
On carburettor models which incorporate a
stepper motor (ie. Weber 2V from 1985), good
electrical contact between the motor plunger
and the adjusting screw is essential to
maintain a regular idle speed.
Clean the plunger and adjusting screw
contact faces with abrasive paper followed by
switch cleaning fluid. Switch cleaning fluid is
available from electronic component shops.
Instruments and electrical
equipment
1Check the operation of all instruments and
electrical equipment.
2Make sure that all instruments read
correctly, and switch on all electrical
equipment in turn to check that it functions
properly.
34Road test
33Idle speed linkage clean
32Brake pipe and hose check
31Underbody inspection
30Driveshaft check
29Steering and suspension
security check
28Automatic transmission
selector linkage lubrication
27Final drive oil level check
Every 12 000 miles or 12 months 1•17
1
29.3 Levering up lower arm to check
balljoint for wear
27.3b Rear axle filler plug location -
P100 models27.3a Final drive unit filler plug location
(arrowed) -
Saloon, Hatchback and Estate models
Page 18 of 22

Steering and suspension
3Check for any abnormalities in the steering,
suspension, handling or road “feel”.
4Drive the vehicle, and check that there are
no unusual vibrations or noises.
5Check that the steering feels positive, with
no excessive “sloppiness”, or roughness, and
check for any suspension noises when
cornering, or when driving over bumps.
Drivetrain
6Check the performance of the engine,
clutch, transmission and driveshafts.
7Listen for any unusual noises from the
engine, clutch and transmission.
8Make sure that the engine runs smoothly
when idling, and that there is no hesitation
when accelerating.9Where applicable, check that the clutch
action is smooth and progressive, that the
drive is taken up smoothly, and that the pedal
travel is not excessive. Also listen for any
noises when the clutch pedal is depressed.
10Check that all gears can be engaged
smoothly, without noise, and that the gear lever
action is not abnormally vague or “notchy”.
Check the operation and
performance of the braking
system
11Make sure that the vehicle does not pull to
one side when braking, and that the wheels
do not lock prematurely when braking hard.
12Check that there is no vibration through
the steering when braking.
13Check that the handbrake operates
correctly, without excessive movement of thelever, and that it holds the vehicle stationary
on a slope.
14Test the operation of the brake servo unit
as follows. With the engine off, depress the
footbrake four or five times to exhaust the
vacuum. Start the engine, holding the brake
pedal depressed. As the engine starts, there
should be a noticeable “give” in the brake
pedal as vacuum builds up. Allow the engine
to run for at least two minutes, and then
switch it off. If the brake pedal is depressed
now, it should be possible to detect a hiss
from the servo as the pedal is depressed.
After about four or five applications, no further
hissing should be heard, and the pedal should
feel considerably firmer.
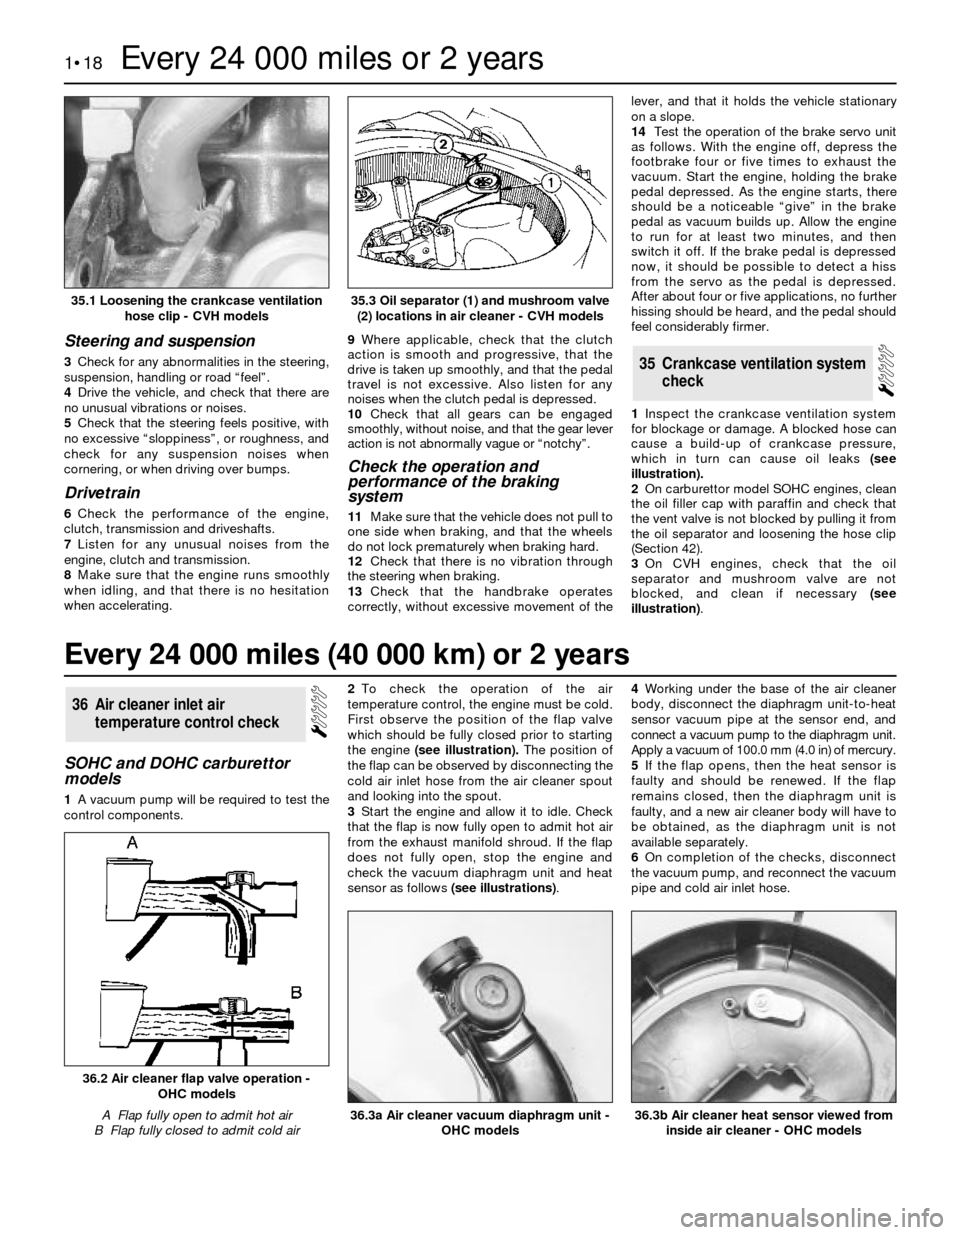
1Inspect the crankcase ventilation system
for blockage or damage. A blocked hose can
cause a build-up of crankcase pressure,
which in turn can cause oil leaks (see
illustration).
2On carburettor model SOHC engines, clean
the oil filler cap with paraffin and check that
the vent valve is not blocked by pulling it from
the oil separator and loosening the hose clip
(Section 42).
3On CVH engines, check that the oil
separator and mushroom valve are not
blocked, and clean if necessary (see
illustration).
35Crankcase ventilation system
check
SOHC and DOHC carburettor
models
1A vacuum pump will be required to test the
control components.2To check the operation of the air
temperature control, the engine must be cold.
First observe the position of the flap valve
which should be fully closed prior to starting
the engine(see illustration).The position of
the flap can be observed by disconnecting the
cold air inlet hose from the air cleaner spout
and looking into the spout.
3Start the engine and allow it to idle. Check
that the flap is now fully open to admit hot air
from the exhaust manifold shroud. If the flap
does not fully open, stop the engine and
check the vacuum diaphragm unit and heat
sensor as follows (see illustrations).4Working under the base of the air cleaner
body, disconnect the diaphragm unit-to-heat
sensor vacuum pipe at the sensor end, and
connect a vacuum pump to the diaphragm unit.
Apply a vacuum of 100.0 mm (4.0 in) of mercury.
5If the flap opens, then the heat sensor is
faulty and should be renewed. If the flap
remains closed, then the diaphragm unit is
faulty, and a new air cleaner body will have to
be obtained, as the diaphragm unit is not
available separately.
6On completion of the checks, disconnect
the vacuum pump, and reconnect the vacuum
pipe and cold air inlet hose.
36Air cleaner inlet air
temperature control check
1•18Every 24 000 miles or 2 years
35.1 Loosening the crankcase ventilation
hose clip - CVH models
36.3b Air cleaner heat sensor viewed from
inside air cleaner - OHC models36.3a Air cleaner vacuum diaphragm unit -
OHC models
36.2 Air cleaner flap valve operation -
OHC models
A Flap fully open to admit hot air
B Flap fully closed to admit cold air
35.3 Oil separator (1) and mushroom valve
(2) locations in air cleaner - CVH models
Every 24 000 miles (40 000 km) or 2 years