overheating FORD SIERRA 1986 1.G Body Electrical System Workshop Manual
[x] Cancel search | Manufacturer: FORD, Model Year: 1986, Model line: SIERRA, Model: FORD SIERRA 1986 1.GPages: 25, PDF Size: 1.7 MB
Page 18 of 25

P100 models
43Pull the lamp cover from the rubber
housing to expose the bulb. The bulb is a
bayonet fitting in the bulbholder.
44Refitting is a reversal of removal.
1Disconnect the battery negative lead.
Switches
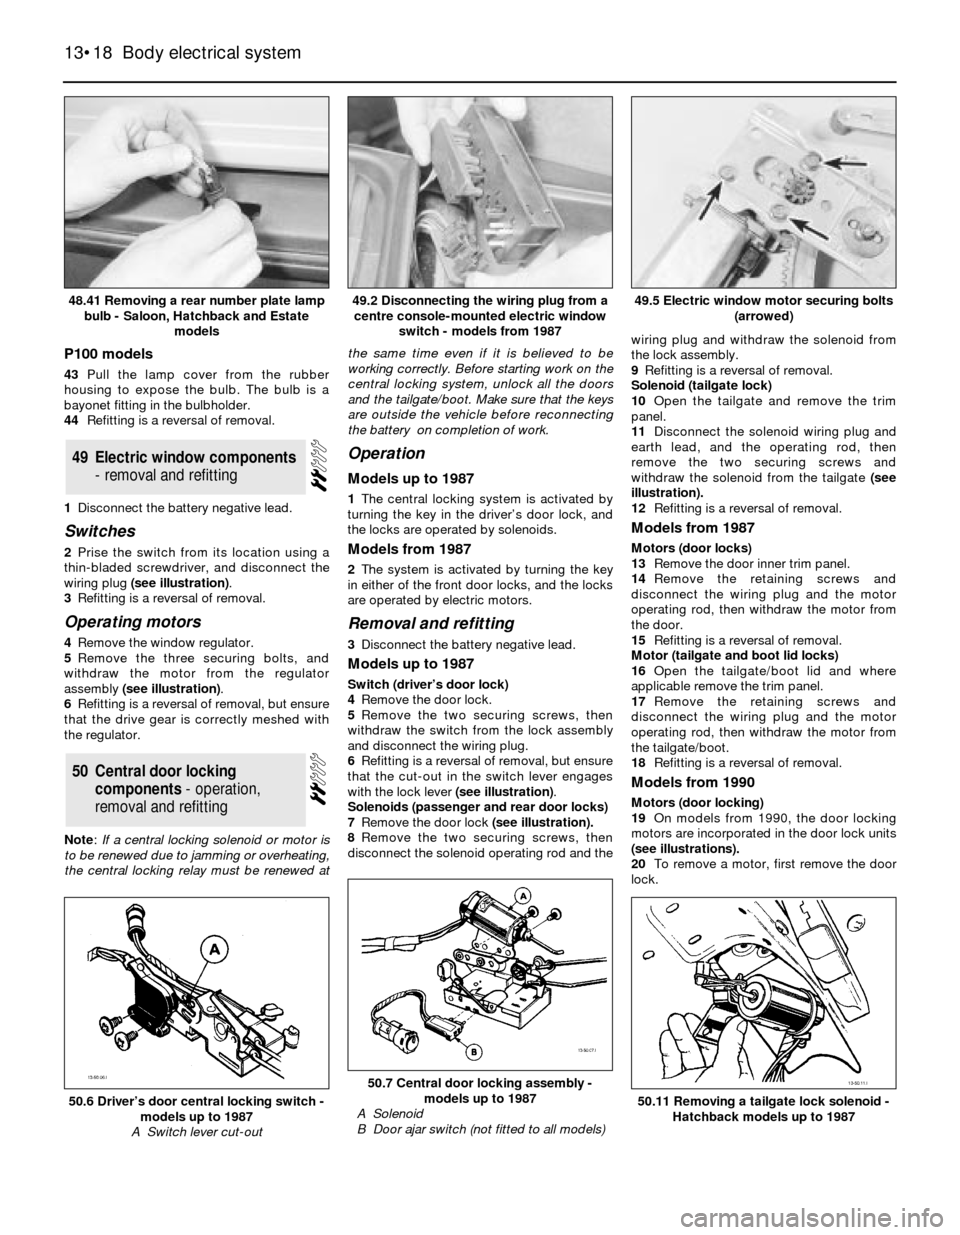
2Prise the switch from its location using a
thin-bladed screwdriver, and disconnect the
wiring plug (see illustration).
3Refitting is a reversal of removal.
Operating motors
4Remove the window regulator.
5Remove the three securing bolts, and
withdraw the motor from the regulator
assembly (see illustration).
6Refitting is a reversal of removal, but ensure
that the drive gear is correctly meshed with
the regulator.
Note:If a central locking solenoid or motor is
to be renewed due to jamming or overheating,
the central locking relay must be renewed atthe same time even if it is believed to be
working correctly. Before starting work on the
central locking system, unlock all the doors
and the tailgate/boot. Make sure that the keys
are outside the vehicle before reconnecting
the battery on completion of work.
Operation
Models up to 1987
1The central locking system is activated by
turning the key in the driver’s door lock, and
the locks are operated by solenoids.
Models from 1987
2The system is activated by turning the key
in either of the front door locks, and the locks
are operated by electric motors.
Removal and refitting
3Disconnect the battery negative lead.
Models up to 1987
Switch (driver’s door lock)
4Remove the door lock.
5Remove the two securing screws, then
withdraw the switch from the lock assembly
and disconnect the wiring plug.
6Refitting is a reversal of removal, but ensure
that the cut-out in the switch lever engages
with the lock lever (see illustration).
Solenoids (passenger and rear door locks)
7Remove the door lock (see illustration).
8Remove the two securing screws, then
disconnect the solenoid operating rod and thewiring plug and withdraw the solenoid from
the lock assembly.
9Refitting is a reversal of removal.
Solenoid (tailgate lock)
10Open the tailgate and remove the trim
panel.
11Disconnect the solenoid wiring plug and
earth lead, and the operating rod, then
remove the two securing screws and
withdraw the solenoid from the tailgate(see
illustration).
12Refitting is a reversal of removal.
Models from 1987
Motors (door locks)
13Remove the door inner trim panel.
14Remove the retaining screws and
disconnect the wiring plug and the motor
operating rod, then withdraw the motor from
the door.
15Refitting is a reversal of removal.
Motor (tailgate and boot lid locks)
16Open the tailgate/boot lid and where
applicable remove the trim panel.
17Remove the retaining screws and
disconnect the wiring plug and the motor
operating rod, then withdraw the motor from
the tailgate/boot.
18Refitting is a reversal of removal.
Models from 1990
Motors (door locking)
19On models from 1990, the door locking
motors are incorporated in the door lock units
(see illustrations).
20To remove a motor, first remove the door
lock.
50Central door locking
components - operation,
removal and refitting
49Electric window components
- removal and refitting
13•18Body electrical system
48.41 Removing a rear number plate lamp
bulb - Saloon, Hatchback and Estate
models49.5 Electric window motor securing bolts
(arrowed)
50.7 Central door locking assembly -
models up to 1987
A Solenoid
B Door ajar switch (not fitted to all models)
50.6 Driver’s door central locking switch -
models up to 1987
A Switch lever cut-out
49.2 Disconnecting the wiring plug from a
centre console-mounted electric window
switch - models from 1987
50.11 Removing a tailgate lock solenoid -
Hatchback models up to 1987