brake rotor FORD SIERRA 1987 2.G CVH Engines Workshop Manual
[x] Cancel search | Manufacturer: FORD, Model Year: 1987, Model line: SIERRA, Model: FORD SIERRA 1987 2.GPages: 24, PDF Size: 1.09 MB
Page 6 of 24

a)Removal of the cylinder head
b)Removal of the camshaft
c)Removal of the timing belt and sprockets
d)Removal of the engine mountings
e)Removal of the clutch and flywheel
f)Removal of the crankshaft oil seals
a)Removal of the sump
b)Removal of the oil pump
c)Removal of the pistons/connecting rods
d)Removal of the big-end bearings
e)Removal of the crankshaft main bearings
f)Removal of the crankshaft
Refer to Section 8, Chapter 2, Part A.
Note: A suitable hoist and lifting tackle will be
required for this operation.
1.8 litre (R2A type)
1Disconnect the battery negative lead.
2Remove the bonnet.
3Remove the air cleaner.
4Disconnect the cooling fan wiring plug, then
unscrew the retaining nuts and washers and
withdraw the fan shroud and cooling fan
assembly.
5Drain the cooling system.
6Disconnect the coolant hoses from the
coolant pump elbow, and detach the heater
hose from the clip on the front of the timing
cover.
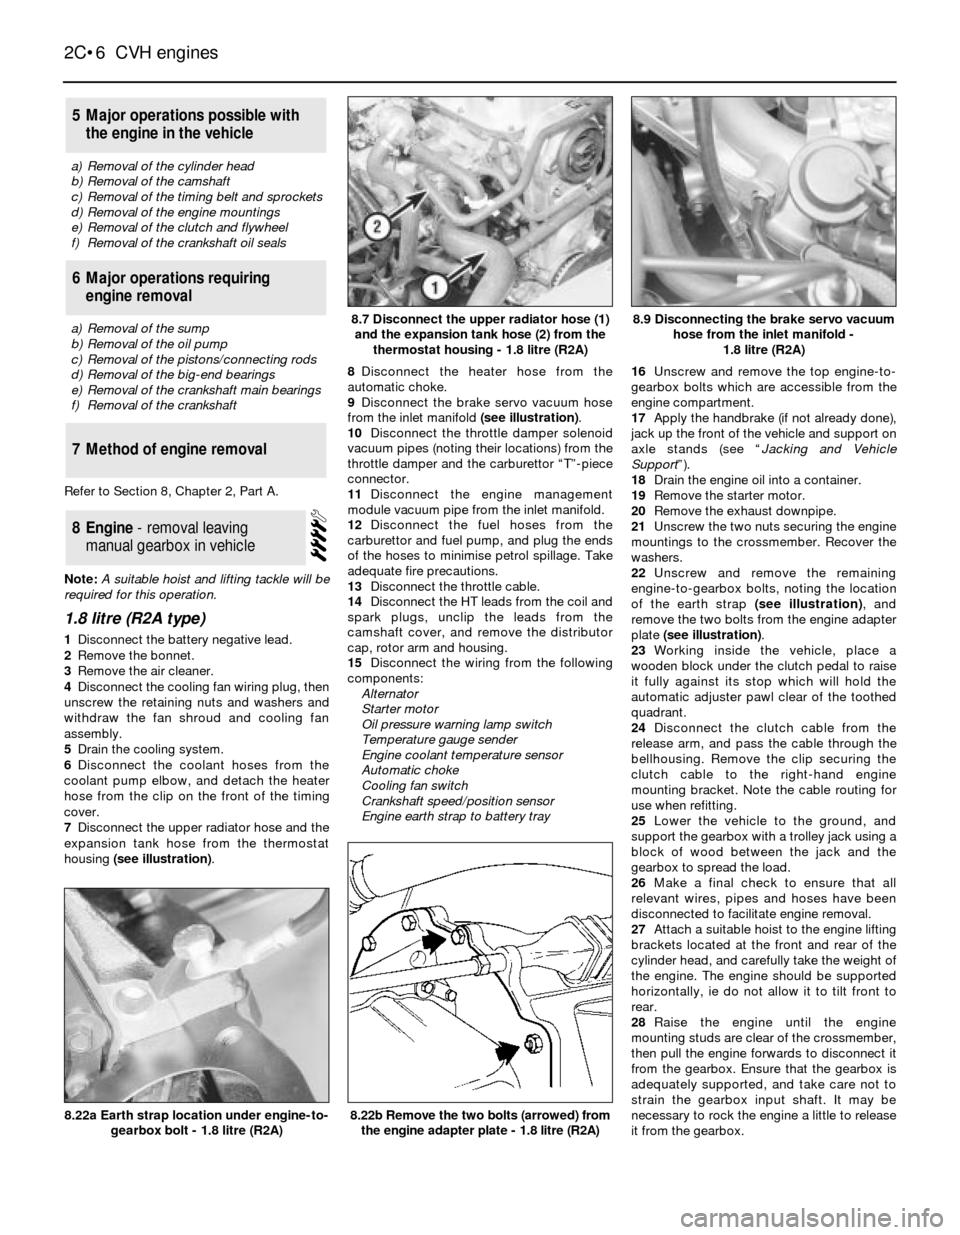
7Disconnect the upper radiator hose and the
expansion tank hose from the thermostat
housing (see illustration).8Disconnect the heater hose from the
automatic choke.
9Disconnect the brake servo vacuum hose
from the inlet manifold (see illustration).
10Disconnect the throttle damper solenoid
vacuum pipes (noting their locations) from the
throttle damper and the carburettor “T”-piece
connector.
11Disconnect the engine management
module vacuum pipe from the inlet manifold.
12Disconnect the fuel hoses from the
carburettor and fuel pump, and plug the ends
of the hoses to minimise petrol spillage. Take
adequate fire precautions.
13Disconnect the throttle cable.
14Disconnect the HT leads from the coil and
spark plugs, unclip the leads from the
camshaft cover, and remove the distributor
cap, rotor arm and housing.
15Disconnect the wiring from the following
components:
Alternator
Starter motor
Oil pressure warning lamp switch
Temperature gauge sender
Engine coolant temperature sensor
Automatic choke
Cooling fan switch
Crankshaft speed/position sensor
Engine earth strap to battery tray16Unscrew and remove the top engine-to-
gearbox bolts which are accessible from the
engine compartment.
17Apply the handbrake (if not already done),
jack up the front of the vehicle and support on
axle stands (see “Jacking and Vehicle
Support”).
18Drain the engine oil into a container.
19Remove the starter motor.
20Remove the exhaust downpipe.
21Unscrew the two nuts securing the engine
mountings to the crossmember. Recover the
washers.
22Unscrew and remove the remaining
engine-to-gearbox bolts, noting the location
of the earth strap (see illustration), and
remove the two bolts from the engine adapter
plate (see illustration).
23Working inside the vehicle, place a
wooden block under the clutch pedal to raise
it fully against its stop which will hold the
automatic adjuster pawl clear of the toothed
quadrant.
24Disconnect the clutch cable from the
release arm, and pass the cable through the
bellhousing. Remove the clip securing the
clutch cable to the right-hand engine
mounting bracket. Note the cable routing for
use when refitting.
25Lower the vehicle to the ground, and
support the gearbox with a trolley jack using a
block of wood between the jack and the
gearbox to spread the load.
26Make a final check to ensure that all
relevant wires, pipes and hoses have been
disconnected to facilitate engine removal.
27Attach a suitable hoist to the engine lifting
brackets located at the front and rear of the
cylinder head, and carefully take the weight of
the engine. The engine should be supported
horizontally, ie do not allow it to tilt front to
rear.
28Raise the engine until the engine
mounting studs are clear of the crossmember,
then pull the engine forwards to disconnect it
from the gearbox. Ensure that the gearbox is
adequately supported, and take care not to
strain the gearbox input shaft. It may be
necessary to rock the engine a little to release
it from the gearbox.
8Engine - removal leaving
manual gearbox in vehicle
7Method of engine removal
6Major operations requiring
engine removal
5Major operations possible with
the engine in the vehicle
2C•6CVH engines
8.9 Disconnecting the brake servo vacuum
hose from the inlet manifold -
1.8 litre (R2A)
8.22b Remove the two bolts (arrowed) from
the engine adapter plate - 1.8 litre (R2A)8.22a Earth strap location under engine-to-
gearbox bolt - 1.8 litre (R2A)
8.7 Disconnect the upper radiator hose (1)
and the expansion tank hose (2) from the
thermostat housing - 1.8 litre (R2A)
Page 10 of 24

1.8 litre (R2A type)
Dismantling
1It is best to mount the engine on a
dismantling stand, but if this is not available,
stand the engine on a strong bench at a
comfortable working height. Failing this, it will
have to stripped down on the floor.
2Cleanliness is most important, and if the
engine is dirty, it should be cleaned with
paraffin while keeping it in an upright position.
3Avoid working with the engine directly on a
concrete floor, as grit presents a real source
of trouble.
4As parts are removed, clean them in a
paraffin bath. However, do not immerse parts
with internal oilways in paraffin as it is difficult
to remove, usually requiring a high pressure
hose. Clean oilways with nylon pipe cleaners.
5It is advisable to have suitable containers
available to hold small items according to
their use, as this will help when reassembling
the engine and also prevent possible losses.
6Always obtain a complete set of new
gaskets for use during engine reassembly, but
retain the old gaskets with a view to using
them as a pattern to make a replacement if a
new one is not available.
7Where possible, refit securing nuts, bolts
and washers to their locations after removing
the relevant components. This will help to
protect the threads and will also prevent
possible losses.
8Retain unserviceable components in order
to compare them with the new components
supplied.
9A suitable Torx socket will be required to
remove the oil pump cover securing screws.
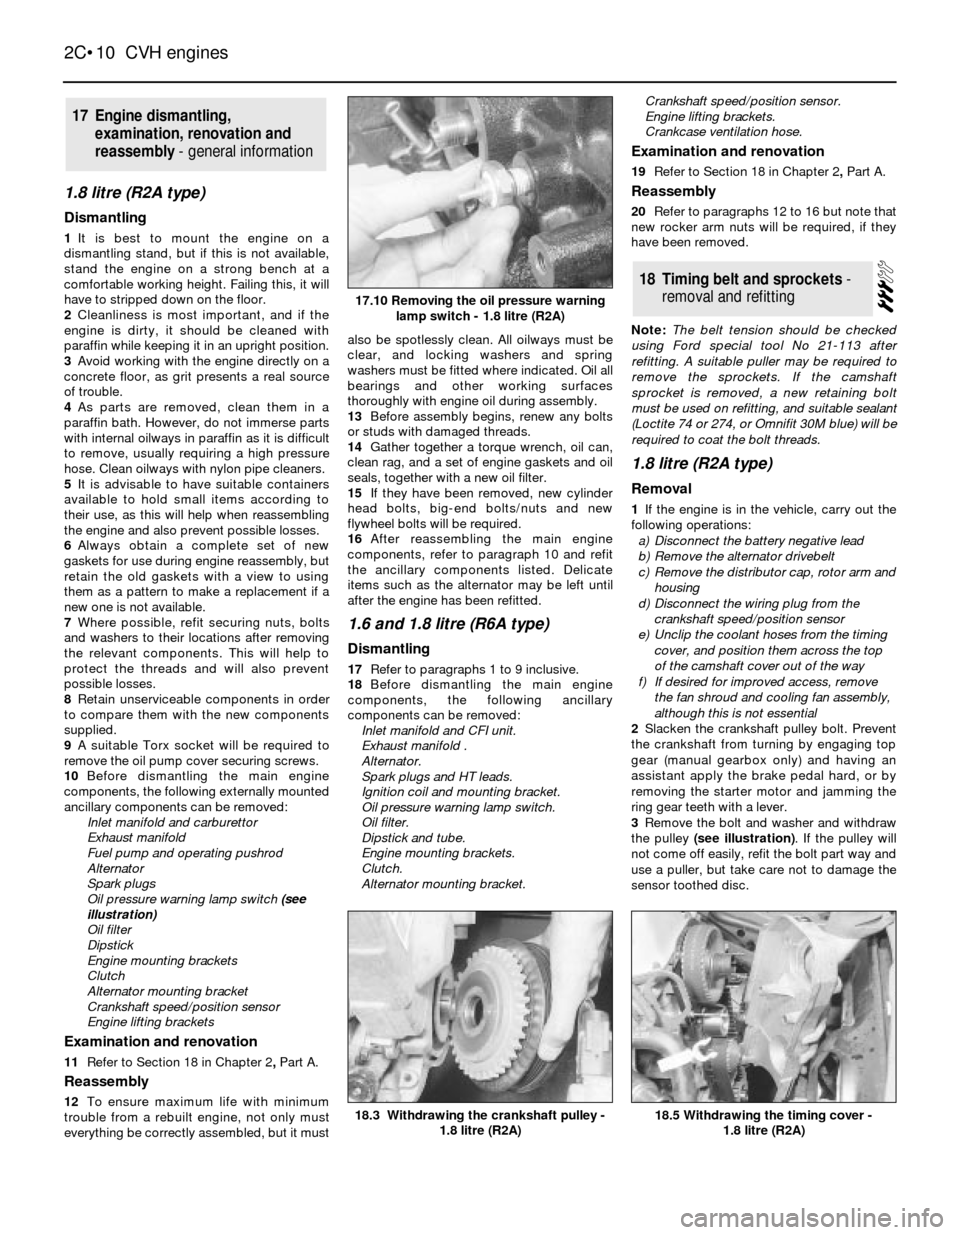
10Before dismantling the main engine
components, the following externally mounted
ancillary components can be removed:
Inlet manifold and carburettor
Exhaust manifold
Fuel pump and operating pushrod
Alternator
Spark plugs
Oil pressure warning lamp switch (see
illustration)
Oil filter
Dipstick
Engine mounting brackets
Clutch
Alternator mounting bracket
Crankshaft speed/position sensor
Engine lifting brackets
Examination and renovation
11Refer to Section 18 in Chapter 2, PartA.
Reassembly
12To ensure maximum life with minimum
trouble from a rebuilt engine, not only must
everything be correctly assembled, but it mustalso be spotlessly clean. All oilways must be
clear, and locking washers and spring
washers must be fitted where indicated. Oil all
bearings and other working surfaces
thoroughly with engine oil during assembly.
13Before assembly begins, renew any bolts
or studs with damaged threads.
14Gather together a torque wrench, oil can,
clean rag, and a set of engine gaskets and oil
seals, together with a new oil filter.
15If they have been removed, new cylinder
head bolts, big-end bolts/nuts and new
flywheel bolts will be required.
16After reassembling the main engine
components, refer to paragraph 10 and refit
the ancillary components listed. Delicate
items such as the alternator may be left until
after the engine has been refitted.
1.6 and 1.8 litre (R6A type)
Dismantling
17Refer to paragraphs 1 to 9 inclusive.
18Before dismantling the main engine
components, the following ancillary
components can be removed:
Inlet manifold and CFI unit.
Exhaust manifold .
Alternator.
Spark plugs and HT leads.
Ignition coil and mounting bracket.
Oil pressure warning lamp switch.
Oil filter.
Dipstick and tube.
Engine mounting brackets.
Clutch.
Alternator mounting bracket.Crankshaft speed/position sensor.
Engine lifting brackets.
Crankcase ventilation hose.
Examination and renovation
19Refer to Section 18 in Chapter 2, PartA.
Reassembly
20Refer to paragraphs 12 to 16 but note that
new rocker arm nuts will be required, if they
have been removed.
Note: The belt tension should be checked
using Ford special tool No 21-113 after
refitting. A suitable puller may be required to
remove the sprockets. If the camshaft
sprocket is removed, a new retaining bolt
must be used on refitting, and suitable sealant
(Loctite 74 or 274, or Omnifit 30M blue) will be
required to coat the bolt threads.
1.8 litre (R2A type)
Removal
1If the engine is in the vehicle, carry out the
following operations:
a)Disconnect the battery negative lead
b)Remove the alternator drivebelt
c)Remove the distributor cap, rotor arm and
housing
d)Disconnect the wiring plug from the
crankshaft speed/position sensor
e)Unclip the coolant hoses from the timing
cover, and position them across the top
of the camshaft cover out of the way
f)If desired for improved access, remove
the fan shroud and cooling fan assembly,
although this is not essential
2Slacken the crankshaft pulley bolt. Prevent
the crankshaft from turning by engaging top
gear (manual gearbox only) and having an
assistant apply the brake pedal hard, or by
removing the starter motor and jamming the
ring gear teeth with a lever.
3Remove the bolt and washer and withdraw
the pulley (see illustration). If the pulley will
not come off easily, refit the bolt part way and
use a puller, but take care not to damage the
sensor toothed disc.
18Timing belt and sprockets -
removal and refitting
17Engine dismantling,
examination, renovation and
reassembly - general information
2C•10CVH engines
17.10 Removing the oil pressure warning
lamp switch - 1.8 litre (R2A)
18.5 Withdrawing the timing cover -
1.8 litre (R2A)18.3 Withdrawing the crankshaft pulley -
1.8 litre (R2A)