key FORD SIERRA 1987 2.G DOHC Engine Workshop Manual
[x] Cancel search | Manufacturer: FORD, Model Year: 1987, Model line: SIERRA, Model: FORD SIERRA 1987 2.GPages: 18, PDF Size: 0.9 MB
Page 9 of 18

6Loosen the alternator lower mounting
through-bolt, then remove the alternator
upper mounting bolt, and swing the alternator
away from the engine.
7Unscrew the central securing bolt, and
withdraw the drivebelt tensioner assembly.
8Unscrew the eleven securing bolts, and
remove the lower timing chain cover. Recover
the rubber gasket.
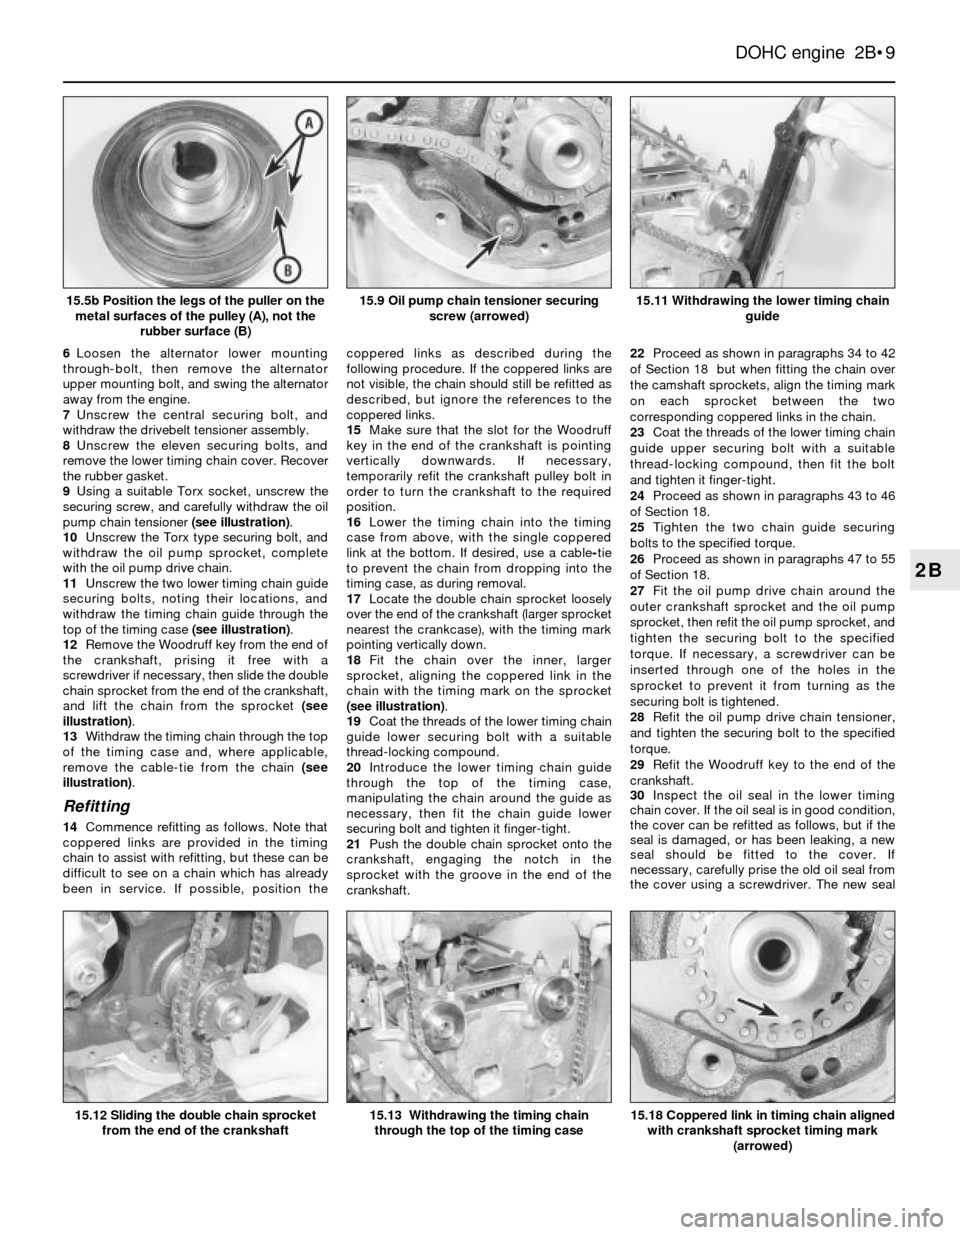
9Using a suitable Torx socket, unscrew the
securing screw, and carefully withdraw the oil
pump chain tensioner (see illustration).
10Unscrew the Torx type securing bolt, and
withdraw the oil pump sprocket, complete
with the oil pump drive chain.
11Unscrew the two lower timing chain guide
securing bolts, noting their locations, and
withdraw the timing chain guide through the
top of the timing case (see illustration).
12Remove the Woodruff key from the end of
the crankshaft, prising it free with a
screwdriver if necessary, then slide the double
chain sprocket from the end of the crankshaft,
and lift the chain from the sprocket (see
illustration).
13Withdraw the timing chain through the top
of the timing case and, where applicable,
remove the cable-tie from the chain (see
illustration).
Refitting
14Commence refitting as follows. Note that
coppered links are provided in the timing
chain to assist with refitting, but these can be
difficult to see on a chain which has already
been in service. If possible, position thecoppered links as described during the
following procedure. If the coppered links are
not visible, the chain should still be refitted as
described, but ignore the references to the
coppered links.
15Make sure that the slot for the Woodruff
key in the end of the crankshaft is pointing
vertically downwards. If necessary,
temporarily refit the crankshaft pulley bolt in
order to turn the crankshaft to the required
position.
16Lower the timing chain into the timing
case from above, with the single coppered
link at the bottom. If desired, use a cable-tie
to prevent the chain from dropping into the
timing case, as during removal.
17Locate the double chain sprocket loosely
over the end of the crankshaft (larger sprocket
nearest the crankcase), with the timing mark
pointing vertically down.
18Fit the chain over the inner, larger
sprocket, aligning the coppered link in the
chain with the timing mark on the sprocket
(see illustration).
19Coat the threads of the lower timing chain
guide lower securing bolt with a suitable
thread-locking compound.
20Introduce the lower timing chain guide
through the top of the timing case,
manipulating the chain around the guide as
necessary, then fit the chain guide lower
securing bolt and tighten it finger-tight.
21Push the double chain sprocket onto the
crankshaft, engaging the notch in the
sprocket with the groove in the end of the
crankshaft.22Proceed as shown in paragraphs 34 to 42
of Section 18 but when fitting the chain over
the camshaft sprockets, align the timing mark
on each sprocket between the two
corresponding coppered links in the chain.
23Coat the threads of the lower timing chain
guide upper securing bolt with a suitable
thread-locking compound, then fit the bolt
and tighten it finger-tight.
24Proceed as shown in paragraphs 43 to 46
of Section 18.
25Tighten the two chain guide securing
bolts to the specified torque.
26Proceed as shown in paragraphs 47 to 55
of Section 18.
27Fit the oil pump drive chain around the
outer crankshaft sprocket and the oil pump
sprocket, then refit the oil pump sprocket, and
tighten the securing bolt to the specified
torque. If necessary, a screwdriver can be
inserted through one of the holes in the
sprocket to prevent it from turning as the
securing bolt is tightened.
28Refit the oil pump drive chain tensioner,
and tighten the securing bolt to the specified
torque.
29Refit the Woodruff key to the end of the
crankshaft.
30Inspect the oil seal in the lower timing
chain cover. If the oil seal is in good condition,
the cover can be refitted as follows, but if the
seal is damaged, or has been leaking, a new
seal should be fitted to the cover. If
necessary, carefully prise the old oil seal from
the cover using a screwdriver. The new seal
DOHC engine 2B•9
2B
15.11 Withdrawing the lower timing chain
guide
15.18 Coppered link in timing chain aligned
with crankshaft sprocket timing mark
(arrowed)15.13 Withdrawing the timing chain
through the top of the timing case
15.9 Oil pump chain tensioner securing
screw (arrowed)15.5b Position the legs of the puller on the
metal surfaces of the pulley (A), not the
rubber surface (B)
15.12 Sliding the double chain sprocket
from the end of the crankshaft