coolant reservoir FORD SIERRA 1989 2.G Introduction Workshop Manual
[x] Cancel search | Manufacturer: FORD, Model Year: 1989, Model line: SIERRA, Model: FORD SIERRA 1989 2.GPages: 18, PDF Size: 0.5 MB
Page 10 of 18

0•10
There are some very simple checks which
need only take a few minutes to carry out, but
which could save you a lot of inconvenience
and expense.
These "Weekly checks" require no great skill
or special tools, and the small amount of time
they take to perform could prove to be very
well spent, for example;MKeeping an eye on tyre condition and
pressures, will not only help to stop them
wearing out prematurely, but could also save
your life.
MMany breakdowns are caused by electrical
problems. Battery-related faults are
particularly common, and a quick check on a
regular basis will often prevent the majority of
these.MIf your car develops a brake fluid leak, the
first time you might know about it is when your
brakes don't work properly. Checking the level
regularly will give advance warning of this kind
of problem.
MIf the oil or coolant levels run low, the cost
of repairing any engine damage will be far
greater than fixing the leak, for example.
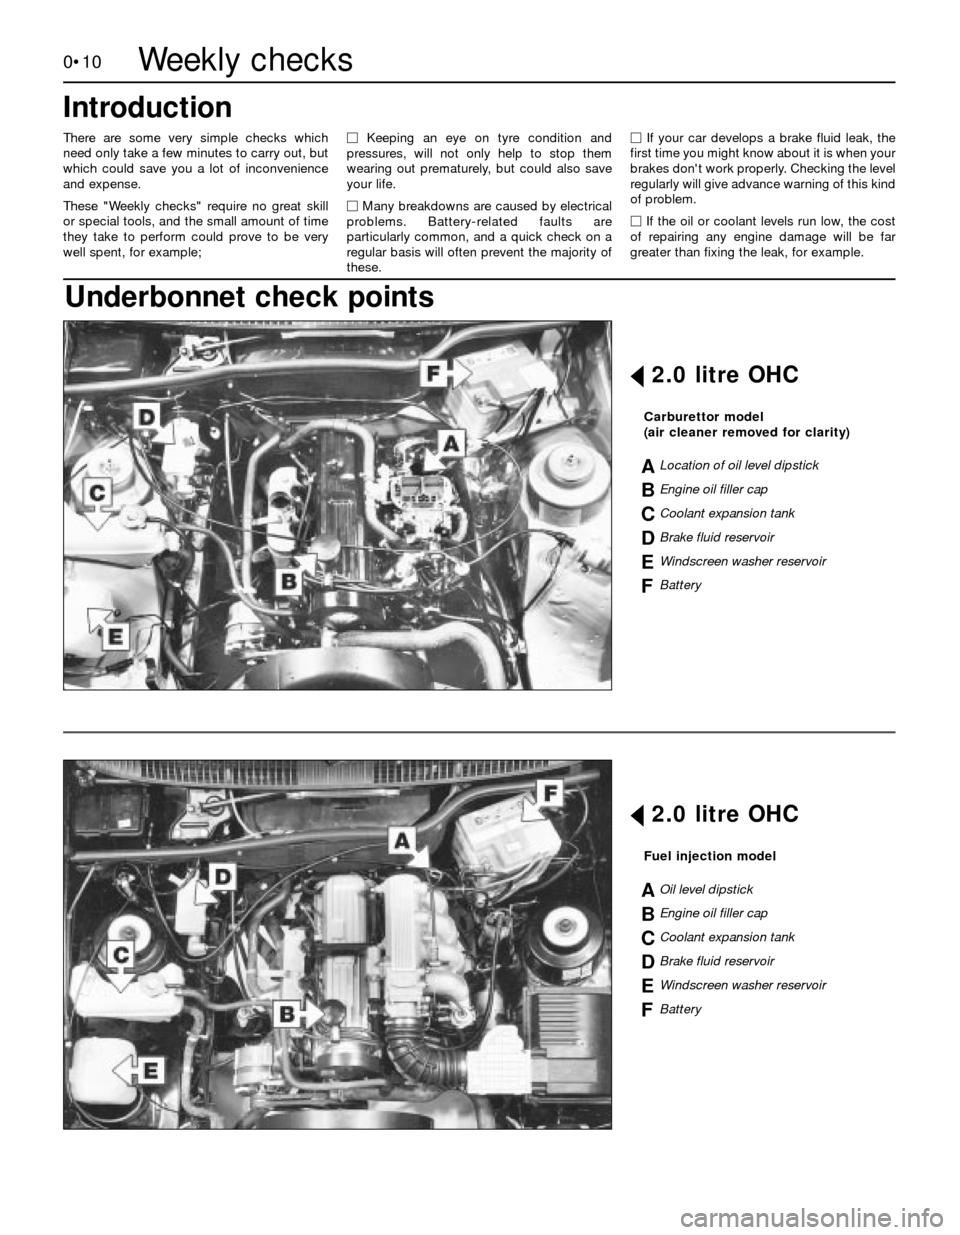
Underbonnet check points
§2.0 litre OHC
Carburettor model
(air cleaner removed for clarity)
ALocation of oil level dipstick
BEngine oil filler cap
CCoolant expansion tank
DBrake fluid reservoir
EWindscreen washer reservoir
FBattery
§2.0 litre OHC
Fuel injection model
AOil level dipstick
BEngine oil filler cap
CCoolant expansion tank
DBrake fluid reservoir
EWindscreen washer reservoir
FBattery
Introduction
Weekly checks
Page 11 of 18

0•11
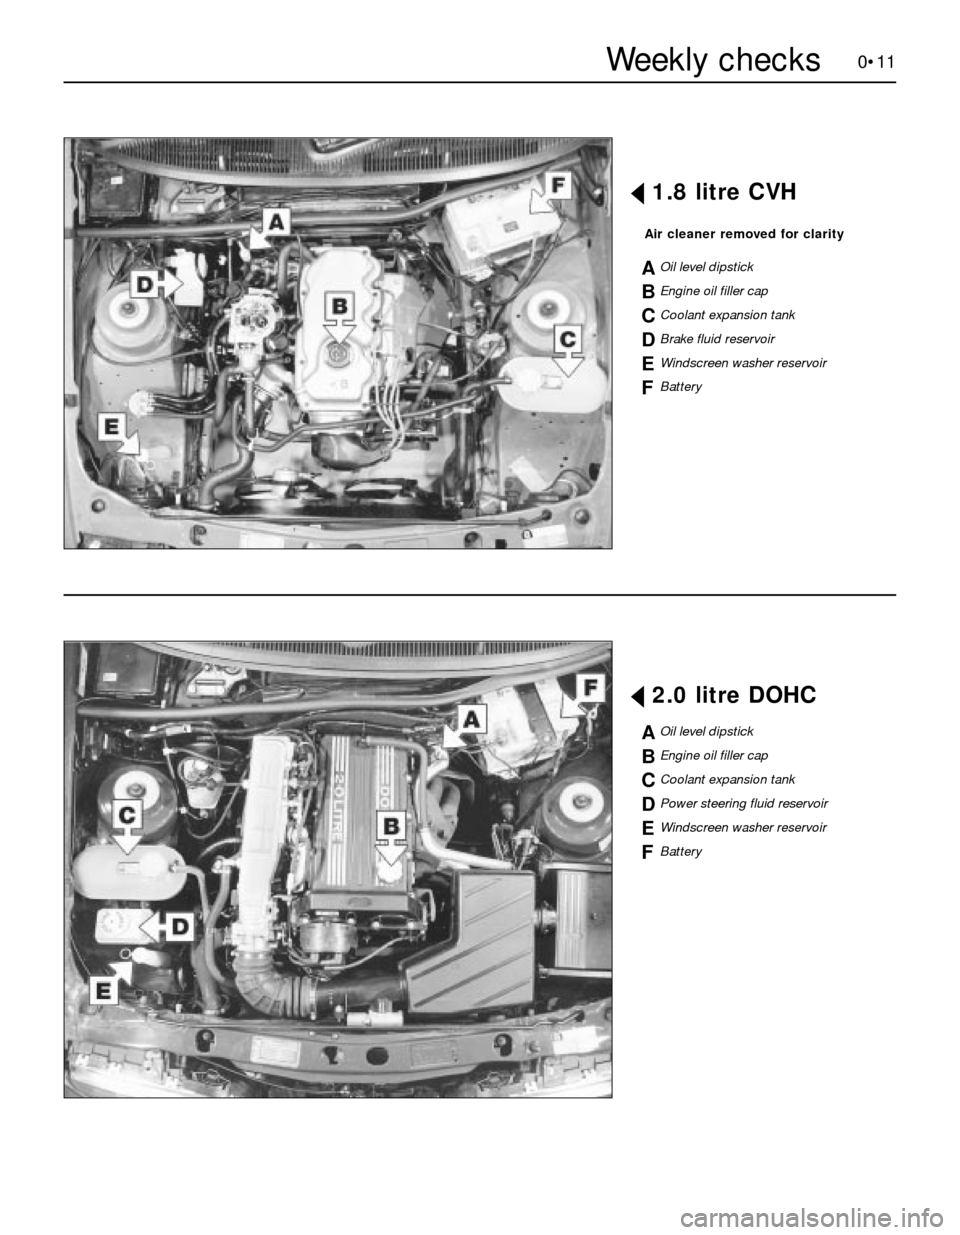
§1.8 litre CVH
Air cleaner removed for clarity
AOil level dipstick
BEngine oil filler cap
CCoolant expansion tank
DBrake fluid reservoir
EWindscreen washer reservoir
FBattery
§2.0 litre DOHC
AOil level dipstick
BEngine oil filler cap
CCoolant expansion tank
DPower steering fluid reservoir
EWindscreen washer reservoir
FBattery
Weekly checks
Page 14 of 18

0•14
Before you start:
4Park the vehicle on level ground.
4Set the steering wheel pointing straight-
ahead.
4The system should be at operating
temperature and the engine should be
turned off.
Safety First:
lThe need for frequent topping-up indicates
a leak, which should be investigated
immediately.
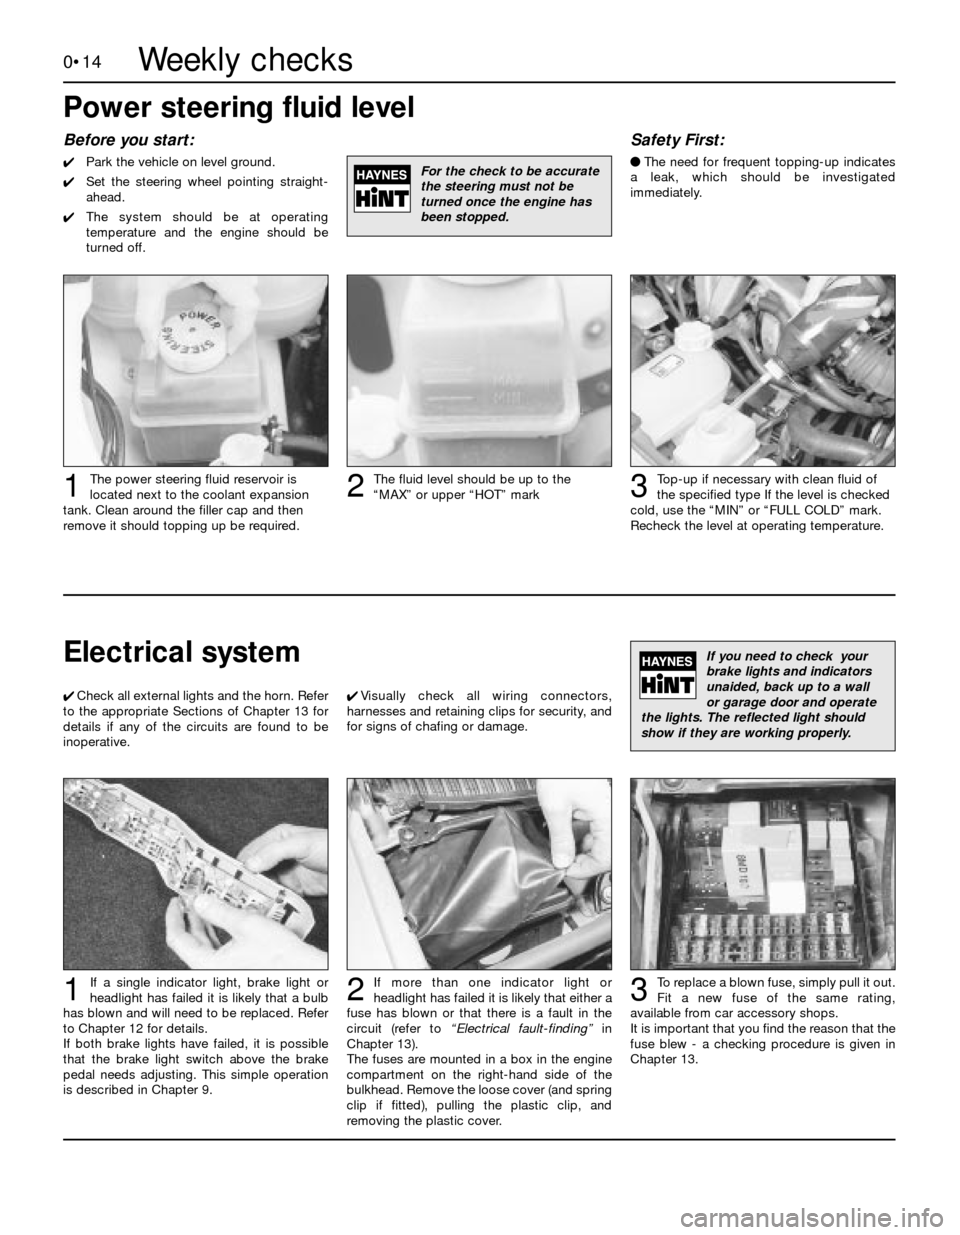
Top-up if necessary with clean fluid of
the specified typeIf the level is checked
cold, use the “MIN” or “FULL COLD” mark.
Recheck the level at operating temperature.
The fluid level should be up to the
“MAX” or upper “HOT” markThe power steering fluid reservoir is
located next to the coolant expansion
tank. Clean around the filler cap and then
remove it should topping up be required.123
For the check to be accurate
the steering must not be
turned once the engine has
been stopped.
Power steering fluid level
Weekly checks
Electrical system
To replace a blown fuse, simply pull it out.
Fit a new fuse of the same rating,
available from car accessory shops.
It is important that you find the reason that the
fuse blew - a checking procedure is given in
Chapter 13.If more than one indicator light or
headlight has failed it is likely that either a
fuse has blown or that there is a fault in the
circuit (refer to“Electrical fault-finding”in
Chapter 13).
The fuses are mounted in a box in the engine
compartment on the right-hand side of the
bulkhead. Remove the loose cover (and spring
clip if fitted), pulling the plastic clip, and
removing the plastic cover.If a single indicator light, brake light or
headlight has failed it is likely that a bulb
has blown and will need to be replaced. Refer
to Chapter 12 for details.
If both brake lights have failed, it is possible
that the brake light switch above the brake
pedal needs adjusting. This simple operation
is described in Chapter 9.1
If you need to check your
brake lights and indicators
unaided, back up to a wall
or garage door and operate
the lights. The reflected light should
show if they are working properly.
4Check all external lights and the horn. Refer
to the appropriate Sections of Chapter 13 for
details if any of the circuits are found to be
inoperative.4Visually check all wiring connectors,
harnesses and retaining clips for security, and
for signs of chafing or damage.
23