key FORD SIERRA 1992 2.G Engine Electrical Systems Workshop Manual
[x] Cancel search | Manufacturer: FORD, Model Year: 1992, Model line: SIERRA, Model: FORD SIERRA 1992 2.GPages: 24, PDF Size: 0.93 MB
Page 8 of 24

Mitsubishi type
21Unscrew the pulley nut. To prevent the
shaft rotating, insert an Allen key in the end of
the shaft.
22Remove the spring washer, pulley, fan,
spacer and dust shield.
23Scribe an alignment mark along the length
of the alternator to facilitate reassembly of the
drive end housing, stator and rear housing.
24Unscrew the through-bolts and withdraw
the drive end housing from the rotor shaft.
25Remove the seal and spacer from the
rotor shaft.
26Remove the rotor from the rear housing
and the stator. This may require the
application of local heat to the rear housing
using a large soldering iron. Do not use a heat
gun, as this may result in damage to the
diodes.
27Unscrew the four securing bolts and
withdraw the diode pack stator assembly
from the rear housing.
28Unsolder the stator leads from the diode
pack terminals. Use a pair of pliers when
unsoldering to act as a heat sink, otherwise
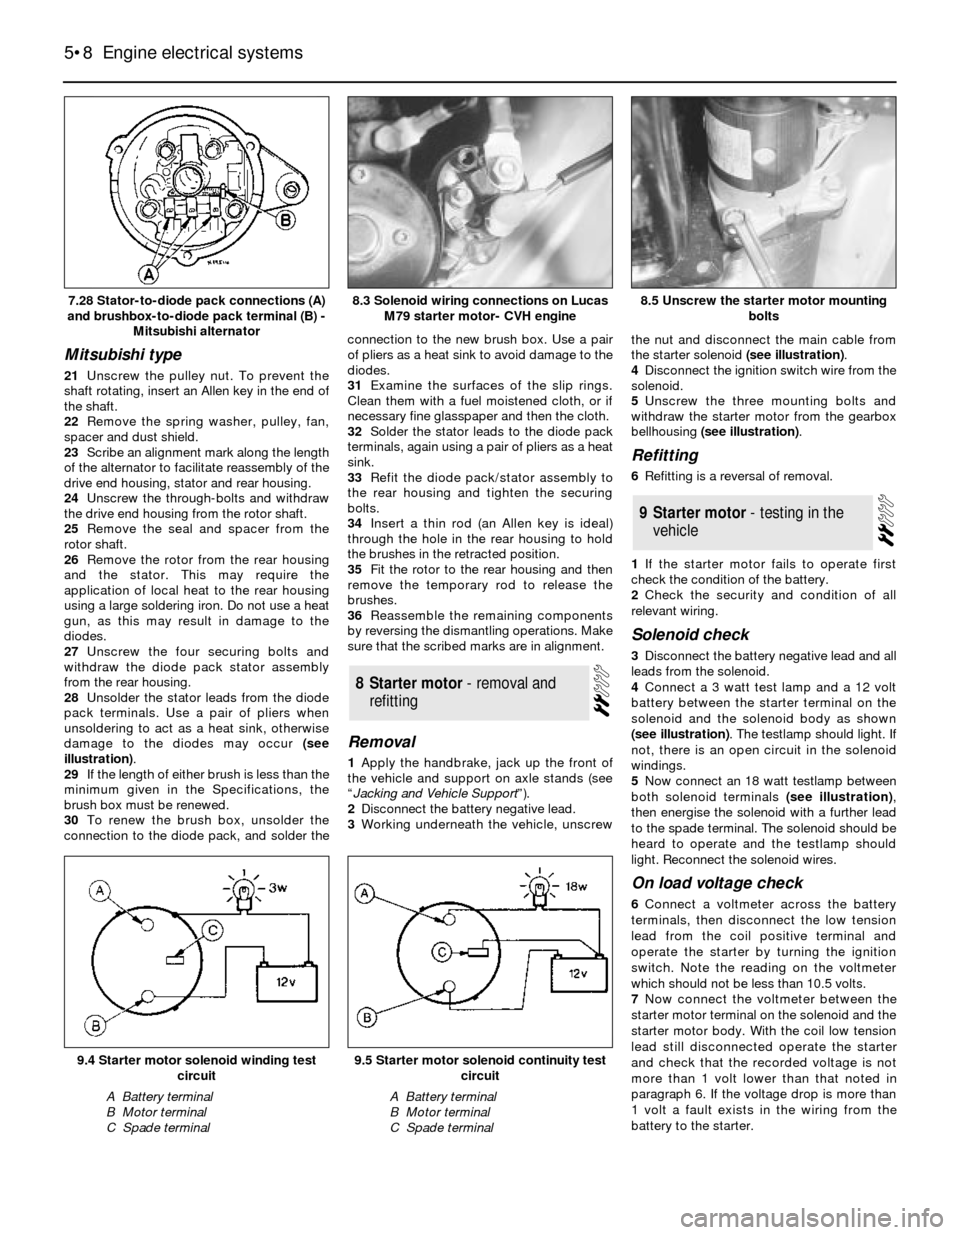
damage to the diodes may occur (see
illustration).
29If the length of either brush is less than the
minimum given in the Specifications, the
brush box must be renewed.
30To renew the brush box, unsolder the
connection to the diode pack, and solder theconnection to the new brush box. Use a pair
of pliers as a heat sink to avoid damage to the
diodes.
31Examine the surfaces of the slip rings.
Clean them with a fuel moistened cloth, or if
necessary fine glasspaper and then the cloth.
32Solder the stator leads to the diode pack
terminals, again using a pair of pliers as a heat
sink.
33Refit the diode pack/stator assembly to
the rear housing and tighten the securing
bolts.
34Insert a thin rod (an Allen key is ideal)
through the hole in the rear housing to hold
the brushes in the retracted position.
35Fit the rotor to the rear housing and then
remove the temporary rod to release the
brushes.
36Reassemble the remaining components
by reversing the dismantling operations. Make
sure that the scribed marks are in alignment.
Removal
1Apply the handbrake, jack up the front of
the vehicle and support on axle stands (see
“Jacking and Vehicle Support”).
2Disconnect the battery negative lead.
3Working underneath the vehicle, unscrewthe nut and disconnect the main cable from
the starter solenoid (see illustration).
4Disconnect the ignition switch wire from the
solenoid.
5Unscrew the three mounting bolts and
withdraw the starter motor from the gearbox
bellhousing (see illustration).
Refitting
6Refitting is a reversal of removal.
1If the starter motor fails to operate first
check the condition of the battery.
2Check the security and condition of all
relevant wiring.
Solenoid check
3Disconnect the battery negative lead and all
leads from the solenoid.
4Connect a 3 watt test lamp and a 12 volt
battery between the starter terminal on the
solenoid and the solenoid body as shown
(see illustration). The testlamp should light. If
not, there is an open circuit in the solenoid
windings.
5Now connect an 18 watt testlamp between
both solenoid terminals (see illustration),
then energise the solenoid with a further lead
to the spade terminal. The solenoid should be
heard to operate and the testlamp should
light. Reconnect the solenoid wires.
On load voltage check
6Connect a voltmeter across the battery
terminals, then disconnect the low tension
lead from the coil positive terminal and
operate the starter by turning the ignition
switch. Note the reading on the voltmeter
which should not be less than 10.5 volts.
7Now connect the voltmeter between the
starter motor terminal on the solenoid and the
starter motor body. With the coil low tension
lead still disconnected operate the starter
and check that the recorded voltage is not
more than 1 volt lower than that noted in
paragraph 6. If the voltage drop is more than
1 volt a fault exists in the wiring from the
battery to the starter.
9Starter motor - testing in the
vehicle
8Starter motor - removal and
refitting
5•8Engine electrical systems
7.28 Stator-to-diode pack connections (A)
and brushbox-to-diode pack terminal (B) -
Mitsubishi alternator8.5 Unscrew the starter motor mounting
bolts
9.5 Starter motor solenoid continuity test
circuit
A Battery terminal
B Motor terminal
C Spade terminal
9.4 Starter motor solenoid winding test
circuit
A Battery terminal
B Motor terminal
C Spade terminal
8.3 Solenoid wiring connections on Lucas
M79 starter motor- CVH engine
Page 15 of 24

problems are experienced, consult a Ford
dealer or an in-car entertainment specialist.
12Proceed as described in paragraph 6, but
additionally ensure that the air inlet hose clips
are correctly aligned (refer to illustration,
Section 15, Chapter 4, PartB).
DOHC models
13Disconnect the battery negative lead.
14Unclip the lower section of the distributor
shield from the upper section, then unscrew
the two securing nuts, and withdraw the
upper section of the shield from the studs on
the upper timing chain cover (see
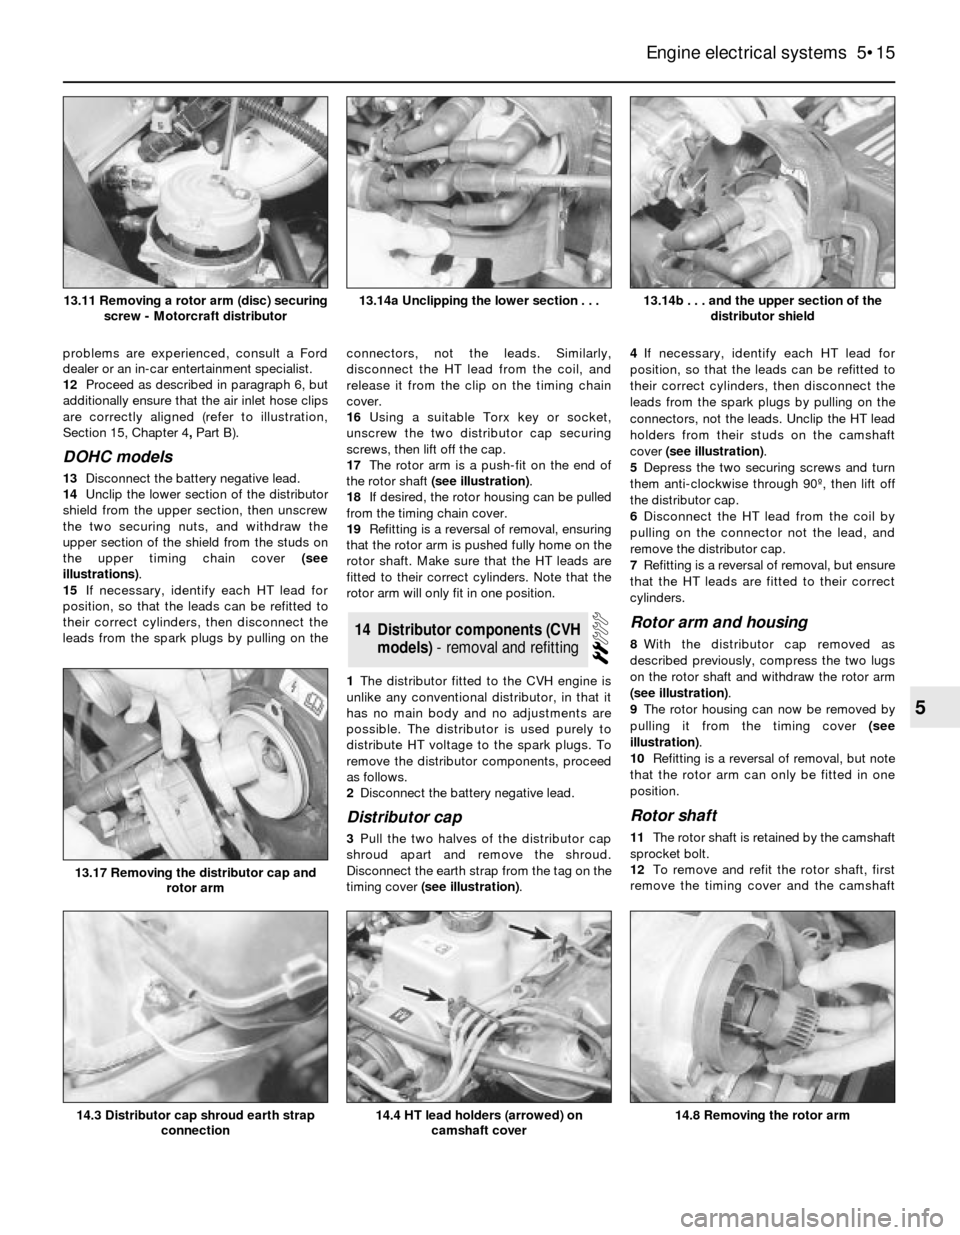
illustrations).
15If necessary, identify each HT lead for
position, so that the leads can be refitted to
their correct cylinders, then disconnect the
leads from the spark plugs by pulling on theconnectors, not the leads. Similarly,
disconnect the HT lead from the coil, and
release it from the clip on the timing chain
cover.
16Using a suitable Torx key or socket,
unscrew the two distributor cap securing
screws, then lift off the cap.
17The rotor arm is a push-fit on the end of
the rotor shaft (see illustration).
18If desired, the rotor housing can be pulled
from the timing chain cover.
19Refitting is a reversal of removal, ensuring
that the rotor arm is pushed fully home on the
rotor shaft. Make sure that the HT leads are
fitted to their correct cylinders. Note that the
rotor arm will only fit in one position.
1The distributor fitted to the CVH engine is
unlike any conventional distributor, in that it
has no main body and no adjustments are
possible. The distributor is used purely to
distribute HT voltage to the spark plugs. To
remove the distributor components, proceed
as follows.
2Disconnect the battery negative lead.
Distributor cap
3Pull the two halves of the distributor cap
shroud apart and remove the shroud.
Disconnect the earth strap from the tag on the
timing cover (see illustration).4If necessary, identify each HT lead for
position, so that the leads can be refitted to
their correct cylinders, then disconnect the
leads from the spark plugs by pulling on the
connectors, not the leads. Unclip the HT lead
holders from their studs on the camshaft
cover (see illustration).
5Depress the two securing screws and turn
them anti-clockwise through 90º, then lift off
the distributor cap.
6Disconnect the HT lead from the coil by
pulling on the connector not the lead, and
remove the distributor cap.
7Refitting is a reversal of removal, but ensure
that the HT leads are fitted to their correct
cylinders.
Rotor arm and housing
8With the distributor cap removed as
described previously, compress the two lugs
on the rotor shaft and withdraw the rotor arm
(see illustration).
9The rotor housing can now be removed by
pulling it from the timing cover (see
illustration).
10Refitting is a reversal of removal, but note
that the rotor arm can only be fitted in one
position.
Rotor shaft
11The rotor shaft is retained by the camshaft
sprocket bolt.
12To remove and refit the rotor shaft, first
remove the timing cover and the camshaft
14Distributor components (CVH
models) - removal and refitting
Engine electrical systems 5•15
5
13.14b . . . and the upper section of the
distributor shield
14.8 Removing the rotor arm14.4 HT lead holders (arrowed) on
camshaft cover14.3 Distributor cap shroud earth strap
connection
13.17 Removing the distributor cap and
rotor arm
13.14a Unclipping the lower section . . .13.11 Removing a rotor arm (disc) securing
screw - Motorcraft distributor