light FORD SUPER DUTY 2006 1.G Owner's Guide
[x] Cancel search | Manufacturer: FORD, Model Year: 2006, Model line: SUPER DUTY, Model: FORD SUPER DUTY 2006 1.GPages: 312, PDF Size: 3.25 MB
Page 51 of 312
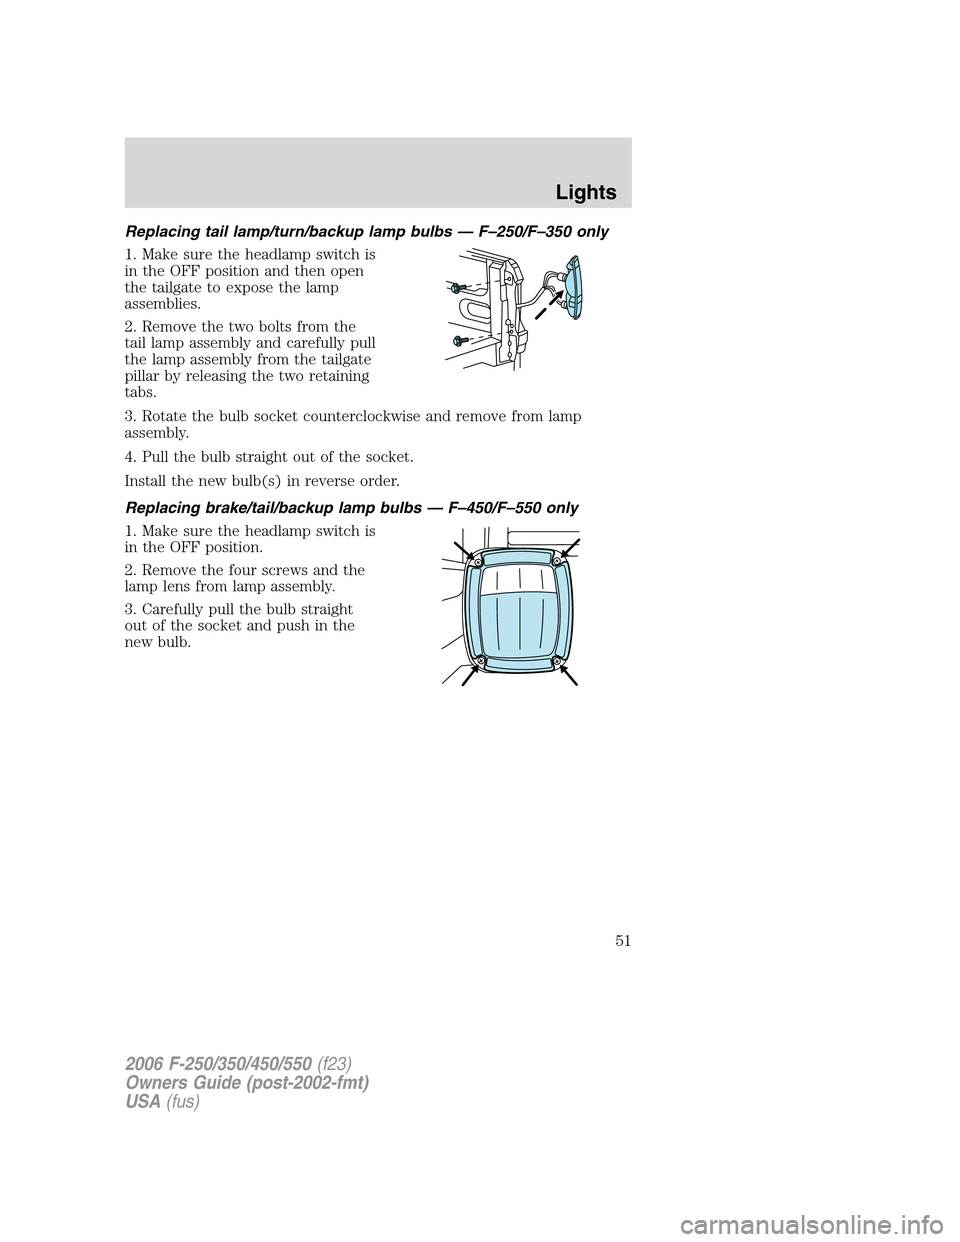
Replacing tail lamp/turn/backup lamp bulbs — F–250/F–350 only
1. Make sure the headlamp switch is
in the OFF position and then open
the tailgate to expose the lamp
assemblies.
2. Remove the two bolts from the
tail lamp assembly and carefully pull
the lamp assembly from the tailgate
pillar by releasing the two retaining
tabs.
3. Rotate the bulb socket counterclockwise and remove from lamp
assembly.
4. Pull the bulb straight out of the socket.
Install the new bulb(s) in reverse order.
Replacing brake/tail/backup lamp bulbs — F–450/F–550 only
1. Make sure the headlamp switch is
in the OFF position.
2. Remove the four screws and the
lamp lens from lamp assembly.
3. Carefully pull the bulb straight
out of the socket and push in the
new bulb.
2006 F-250/350/450/550(f23)
Owners Guide (post-2002-fmt)
USA(fus)
Lights
51
Page 52 of 312
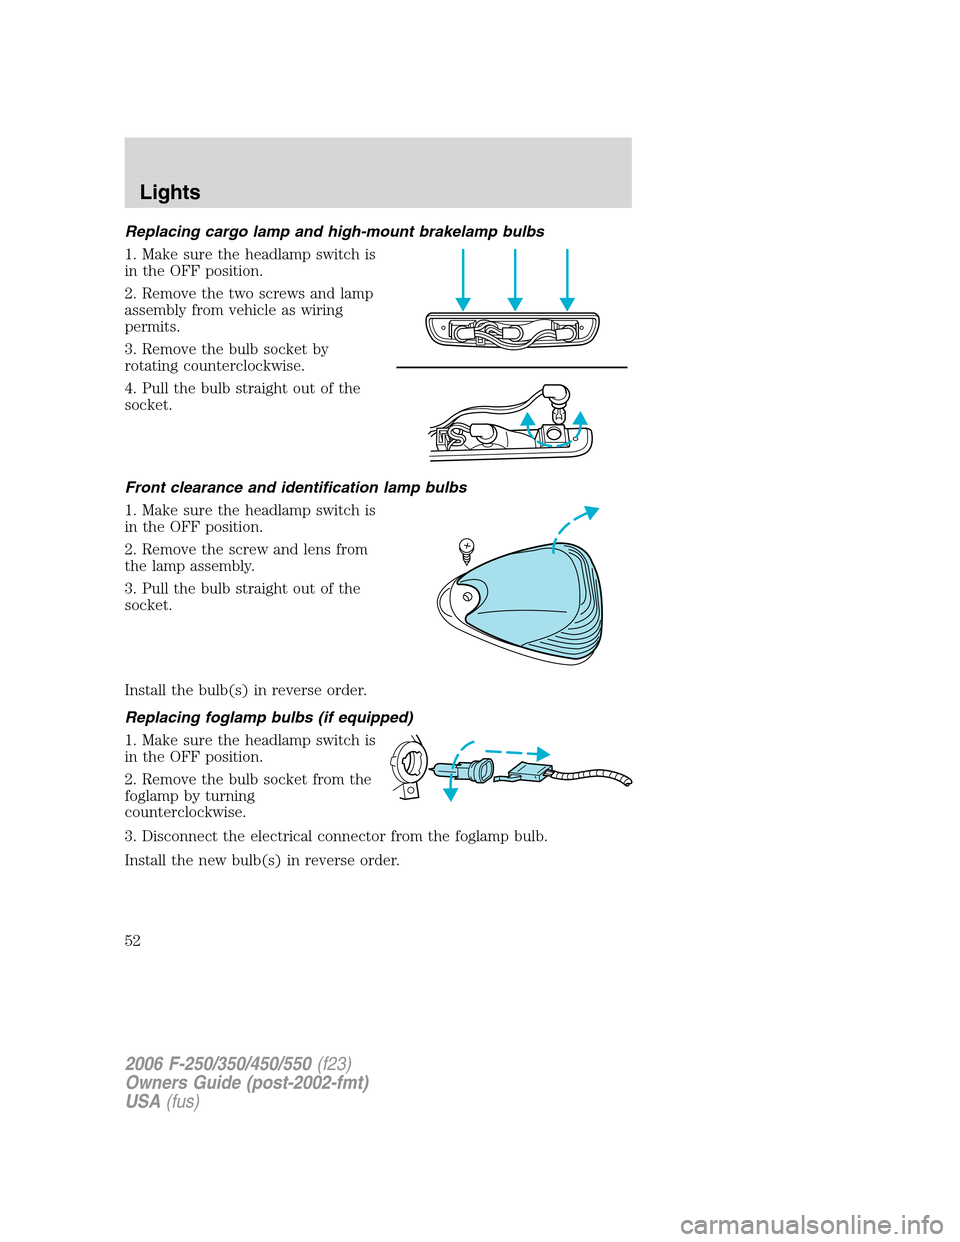
Replacing cargo lamp and high-mount brakelamp bulbs
1. Make sure the headlamp switch is
in the OFF position.
2. Remove the two screws and lamp
assembly from vehicle as wiring
permits.
3. Remove the bulb socket by
rotating counterclockwise.
4. Pull the bulb straight out of the
socket.
Front clearance and identification lamp bulbs
1. Make sure the headlamp switch is
in the OFF position.
2. Remove the screw and lens from
the lamp assembly.
3. Pull the bulb straight out of the
socket.
Install the bulb(s) in reverse order.
Replacing foglamp bulbs (if equipped)
1. Make sure the headlamp switch is
in the OFF position.
2. Remove the bulb socket from the
foglamp by turning
counterclockwise.
3. Disconnect the electrical connector from the foglamp bulb.
Install the new bulb(s) in reverse order.
2006 F-250/350/450/550(f23)
Owners Guide (post-2002-fmt)
USA(fus)
Lights
52
Page 53 of 312
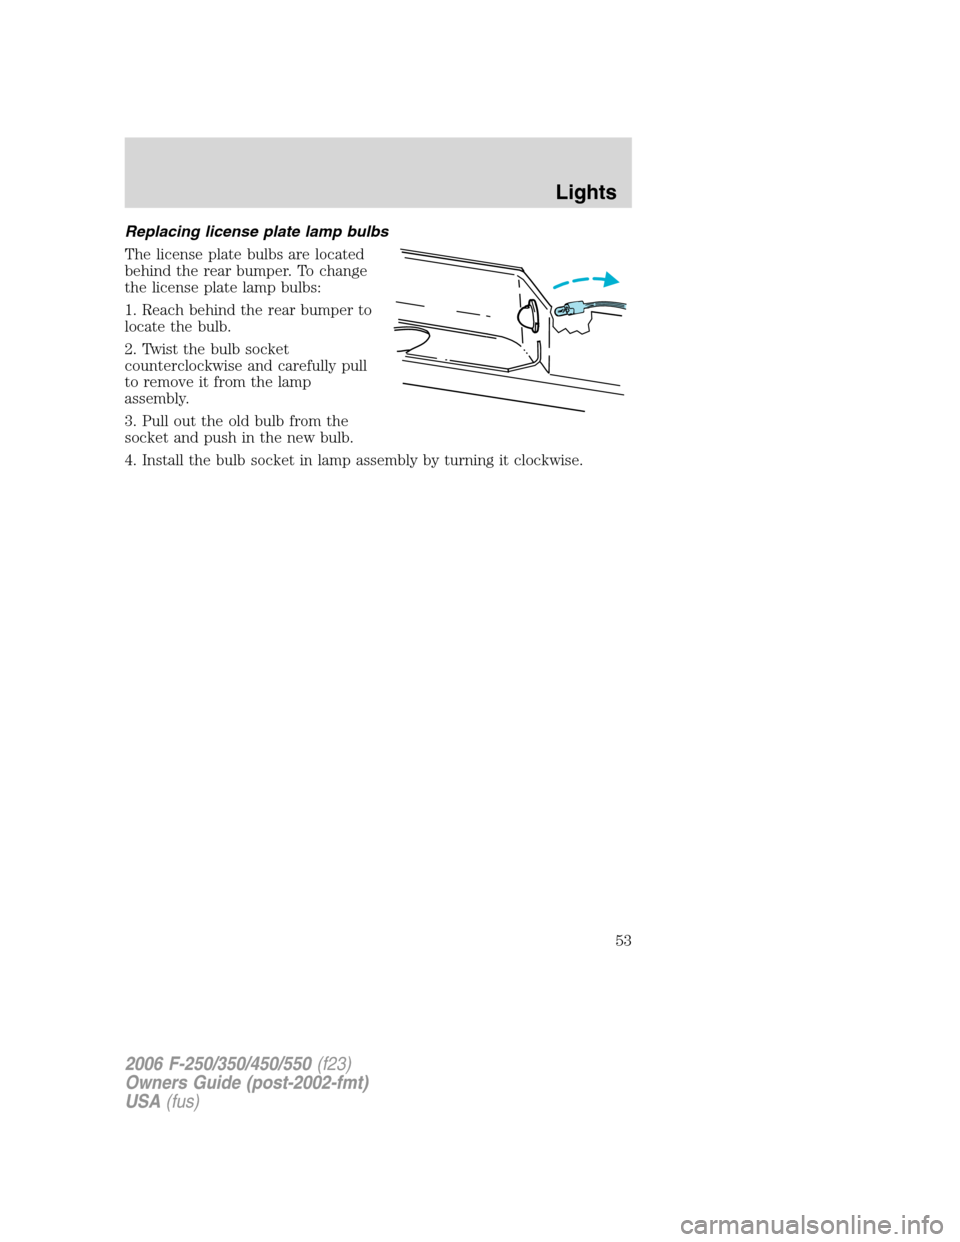
Replacing license plate lamp bulbs
The license plate bulbs are located
behind the rear bumper. To change
the license plate lamp bulbs:
1. Reach behind the rear bumper to
locate the bulb.
2. Twist the bulb socket
counterclockwise and carefully pull
to remove it from the lamp
assembly.
3. Pull out the old bulb from the
socket and push in the new bulb.
4. Install the bulb socket in lamp assembly by turning it clockwise.
2006 F-250/350/450/550(f23)
Owners Guide (post-2002-fmt)
USA(fus)
Lights
53
Page 55 of 312
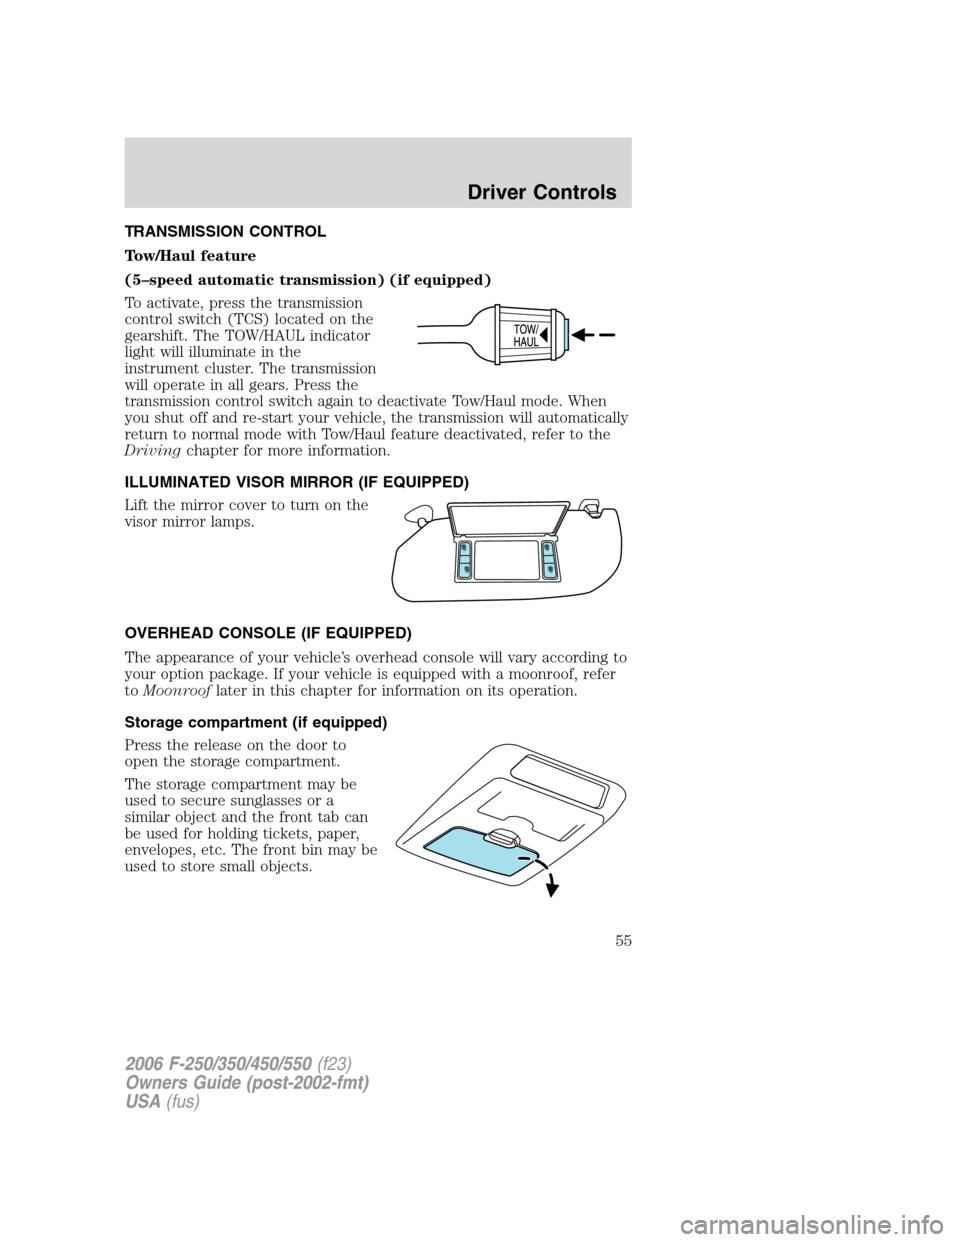
TRANSMISSION CONTROL
Tow/Haul feature
(5–speed automatic transmission) (if equipped)
To activate, press the transmission
control switch (TCS) located on the
gearshift. The TOW/HAUL indicator
light will illuminate in the
instrument cluster. The transmission
will operate in all gears. Press the
transmission control switch again to deactivate Tow/Haul mode. When
you shut off and re-start your vehicle, the transmission will automatically
return to normal mode with Tow/Haul feature deactivated, refer to the
Drivingchapter for more information.
ILLUMINATED VISOR MIRROR (IF EQUIPPED)
Lift the mirror cover to turn on the
visor mirror lamps.
OVERHEAD CONSOLE (IF EQUIPPED)
The appearance of your vehicle’s overhead console will vary according to
your option package. If your vehicle is equipped with a moonroof, refer
toMoonrooflater in this chapter for information on its operation.
Storage compartment (if equipped)
Press the release on the door to
open the storage compartment.
The storage compartment may be
used to secure sunglasses or a
similar object and the front tab can
be used for holding tickets, paper,
envelopes, etc. The front bin may be
used to store small objects.
2006 F-250/350/450/550(f23)
Owners Guide (post-2002-fmt)
USA(fus)
Driver Controls
55
Page 56 of 312
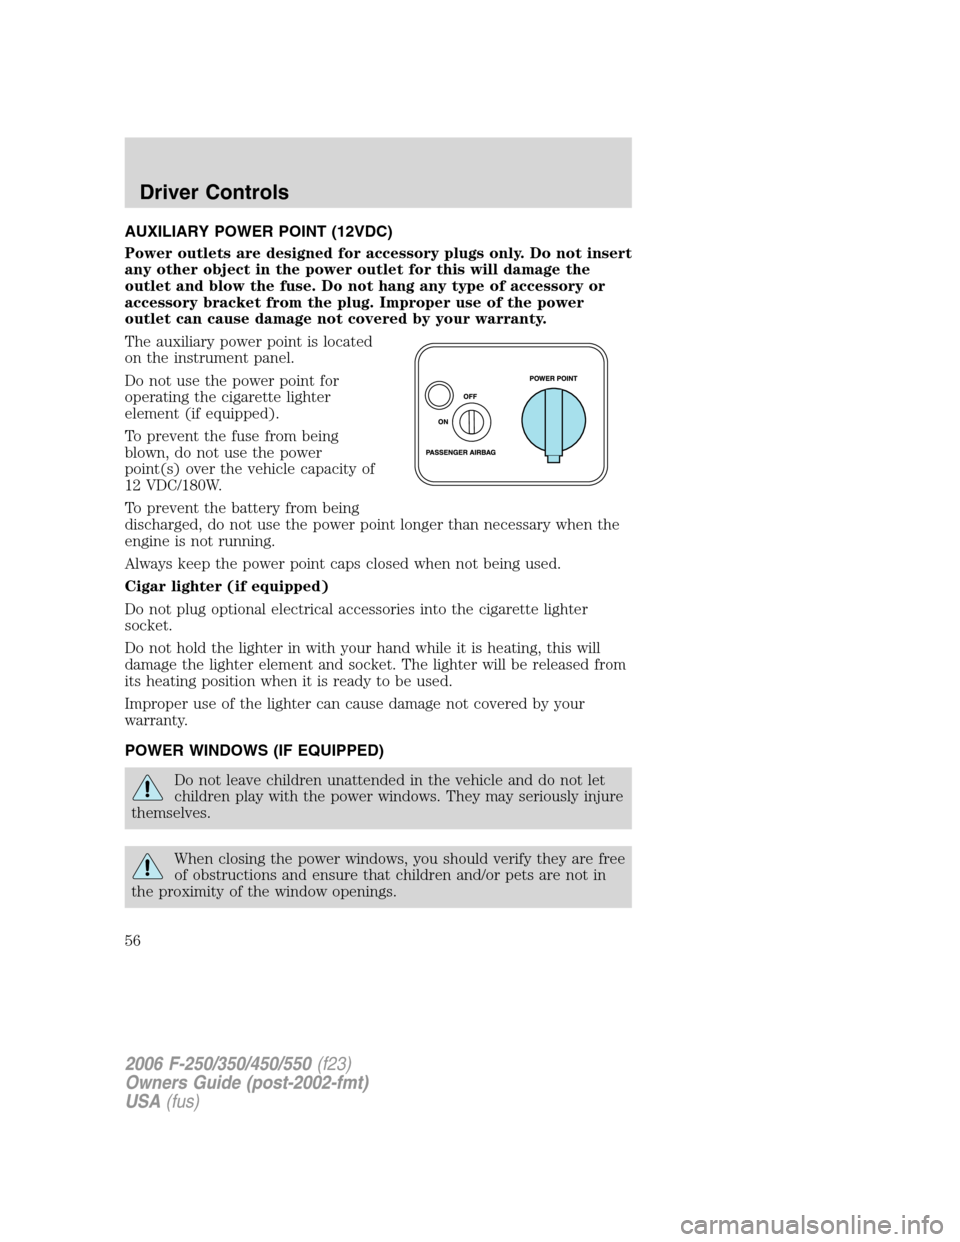
AUXILIARY POWER POINT (12VDC)
Power outlets are designed for accessory plugs only. Do not insert
any other object in the power outlet for this will damage the
outlet and blow the fuse. Do not hang any type of accessory or
accessory bracket from the plug. Improper use of the power
outlet can cause damage not covered by your warranty.
The auxiliary power point is located
on the instrument panel.
Do not use the power point for
operating the cigarette lighter
element (if equipped).
To prevent the fuse from being
blown, do not use the power
point(s) over the vehicle capacity of
12 VDC/180W.
To prevent the battery from being
discharged, do not use the power point longer than necessary when the
engine is not running.
Always keep the power point caps closed when not being used.
Cigar lighter (if equipped)
Do not plug optional electrical accessories into the cigarette lighter
socket.
Do not hold the lighter in with your hand while it is heating, this will
damage the lighter element and socket. The lighter will be released from
its heating position when it is ready to be used.
Improper use of the lighter can cause damage not covered by your
warranty.
POWER WINDOWS (IF EQUIPPED)
Do not leave children unattended in the vehicle and do not let
children play with the power windows. They may seriously injure
themselves.
When closing the power windows, you should verify they are free
of obstructions and ensure that children and/or pets are not in
the proximity of the window openings.
2006 F-250/350/450/550(f23)
Owners Guide (post-2002-fmt)
USA(fus)
Driver Controls
56
Page 58 of 312
AUTOMATIC DIMMING INSIDE REAR VIEW MIRROR (IF EQUIPPED)
Your vehicle is equipped with an inside rear view mirror with an
auto-dimming function. The electronic day/night mirror will change from
the normal state to the non-glare state when bright lights (glare) reach
the mirror. When the mirror detects bright light from front or behind, it
will automatically adjust to minimize glare.
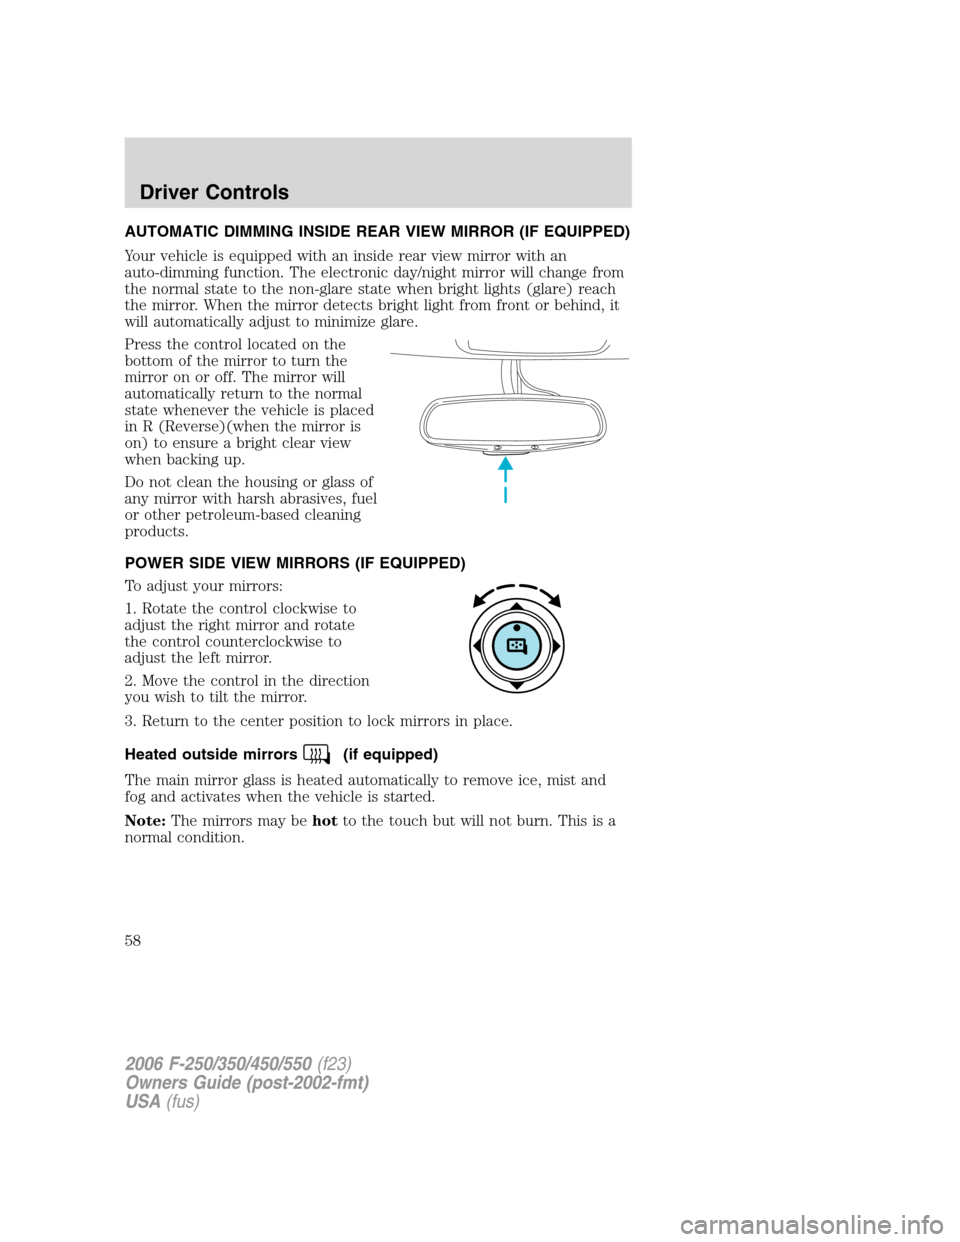
Press the control located on the
bottom of the mirror to turn the
mirror on or off. The mirror will
automatically return to the normal
state whenever the vehicle is placed
in R (Reverse)(when the mirror is
on) to ensure a bright clear view
when backing up.
Do not clean the housing or glass of
any mirror with harsh abrasives, fuel
or other petroleum-based cleaning
products.
POWER SIDE VIEW MIRRORS (IF EQUIPPED)
To adjust your mirrors:
1. Rotate the control clockwise to
adjust the right mirror and rotate
the control counterclockwise to
adjust the left mirror.
2. Move the control in the direction
you wish to tilt the mirror.
3. Return to the center position to lock mirrors in place.
Heated outside mirrors
(if equipped)
The main mirror glass is heated automatically to remove ice, mist and
fog and activates when the vehicle is started.
Note:The mirrors may behotto the touch but will not burn. This is a
normal condition.
2006 F-250/350/450/550(f23)
Owners Guide (post-2002-fmt)
USA(fus)
Driver Controls
58
Page 62 of 312
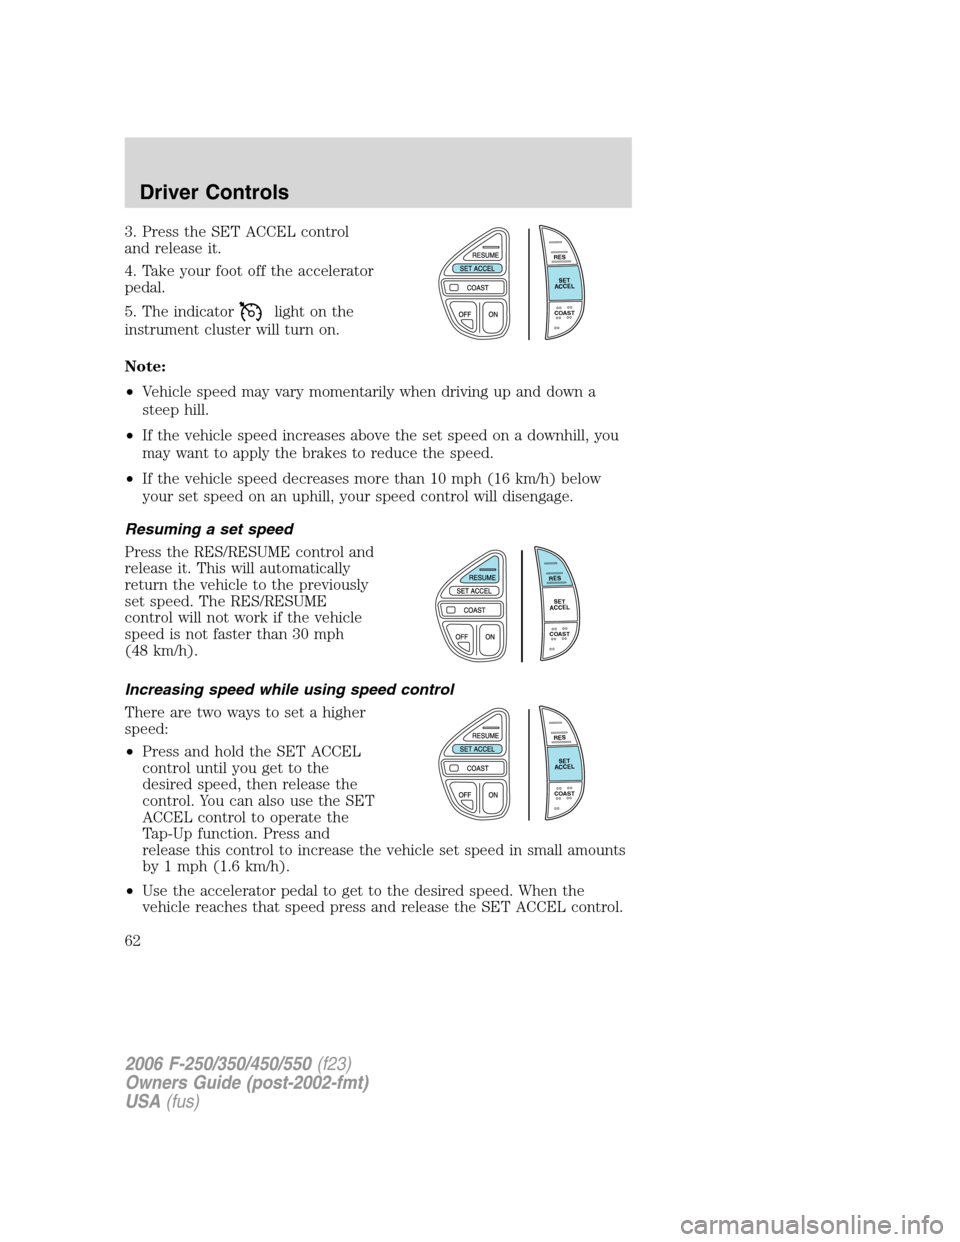
3. Press the SET ACCEL control
and release it.
4. Take your foot off the accelerator
pedal.
5. The indicator
light on the
instrument cluster will turn on.
Note:
•Vehicle speed may vary momentarily when driving up and down a
steep hill.
•If the vehicle speed increases above the set speed on a downhill, you
may want to apply the brakes to reduce the speed.
•If the vehicle speed decreases more than 10 mph (16 km/h) below
your set speed on an uphill, your speed control will disengage.
Resuming a set speed
Press the RES/RESUME control and
release it. This will automatically
return the vehicle to the previously
set speed. The RES/RESUME
control will not work if the vehicle
speed is not faster than 30 mph
(48 km/h).
Increasing speed while using speed control
There are two ways to set a higher
speed:
•Press and hold the SET ACCEL
control until you get to the
desired speed, then release the
control. You can also use the SET
ACCEL control to operate the
Tap-Up function. Press and
release this control to increase the vehicle set speed in small amounts
by 1 mph (1.6 km/h).
•Use the accelerator pedal to get to the desired speed. When the
vehicle reaches that speed press and release the SET ACCEL control.
R
E
S
S
E
T
A
C
C
E
L
C
O
A
S
T
R
E
S
S
E
T
A
C
C
E
L
C
O
A
S
T
R
E
S
S
E
T
A
C
C
E
L
C
O
A
S
T
2006 F-250/350/450/550(f23)
Owners Guide (post-2002-fmt)
USA(fus)
Driver Controls
62
Page 63 of 312
Reducing speed while using speed control
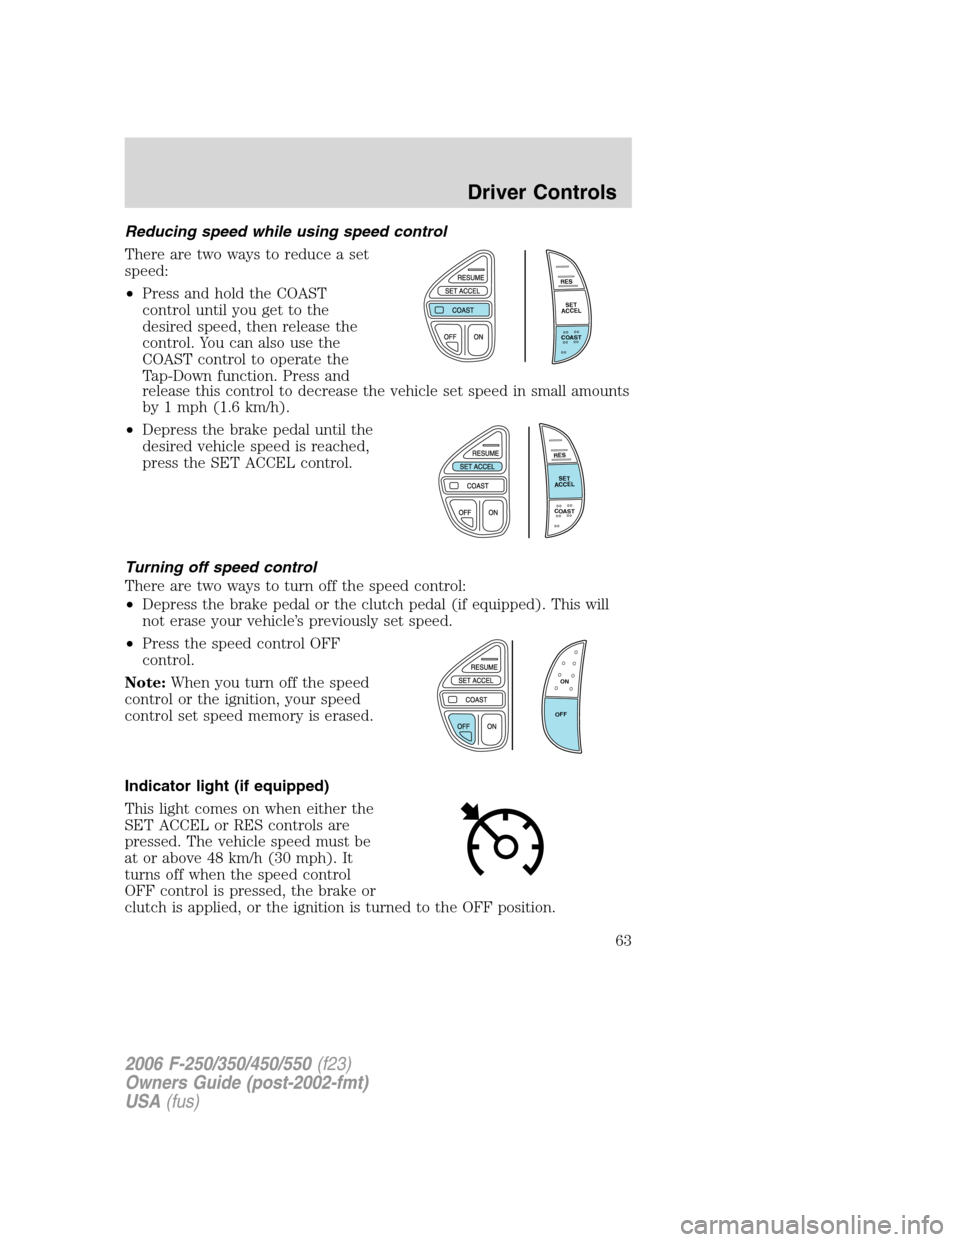
There are two ways to reduce a set
speed:
•Press and hold the COAST
control until you get to the
desired speed, then release the
control. You can also use the
COAST control to operate the
Tap-Down function. Press and
release this control to decrease the vehicle set speed in small amounts
by 1 mph (1.6 km/h).
•Depress the brake pedal until the
desired vehicle speed is reached,
press the SET ACCEL control.
Turning off speed control
There are two ways to turn off the speed control:
•Depress the brake pedal or the clutch pedal (if equipped). This will
not erase your vehicle’s previously set speed.
•Press the speed control OFF
control.
Note:When you turn off the speed
control or the ignition, your speed
control set speed memory is erased.
Indicator light (if equipped)
This light comes on when either the
SET ACCEL or RES controls are
pressed. The vehicle speed must be
at or above 48 km/h (30 mph). It
turns off when the speed control
OFF control is pressed, the brake or
clutch is applied, or the ignition is turned to the OFF position.
R
E
S
S
E
T
A
C
C
E
L
C
O
A
S
T
R
E
S
S
E
T
A
C
C
E
L
C
O
A
S
T
ON
OFF
2006 F-250/350/450/550(f23)
Owners Guide (post-2002-fmt)
USA(fus)
Driver Controls
63
Page 65 of 312
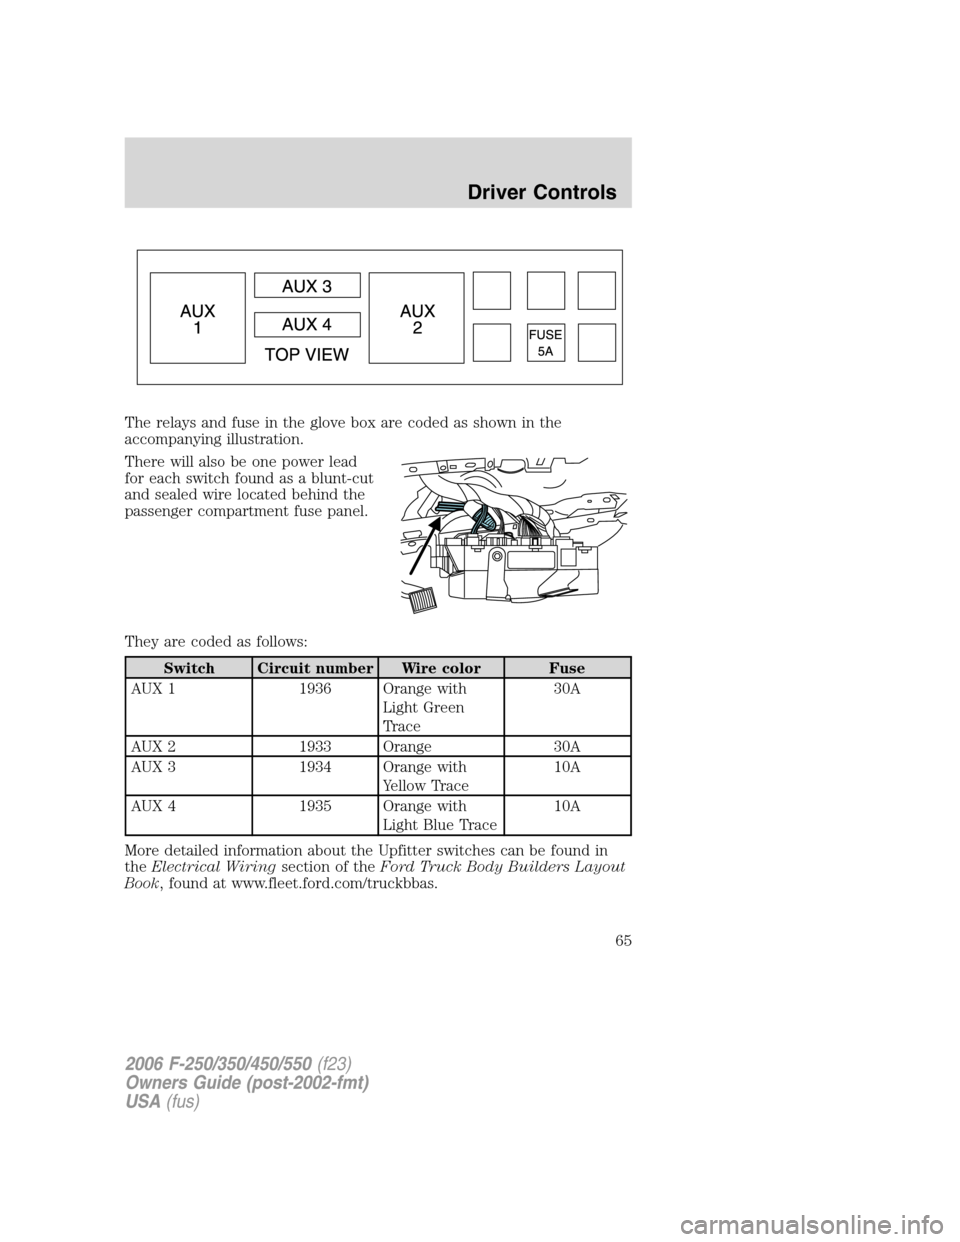
The relays and fuse in the glove box are coded as shown in the
accompanying illustration.
There will also be one power lead
for each switch found as a blunt-cut
and sealed wire located behind the
passenger compartment fuse panel.
They are coded as follows:
Switch Circuit number Wire color Fuse
AUX 1 1936 Orange with
Light Green
Trace30A
AUX 2 1933 Orange 30A
AUX 3 1934 Orange with
Yellow Trace10A
AUX 4 1935 Orange with
Light Blue Trace10A
More detailed information about the Upfitter switches can be found in
theElectrical Wiringsection of theFord Truck Body Builders Layout
Book, found at www.fleet.ford.com/truckbbas.
2006 F-250/350/450/550(f23)
Owners Guide (post-2002-fmt)
USA(fus)
Driver Controls
65
Page 68 of 312
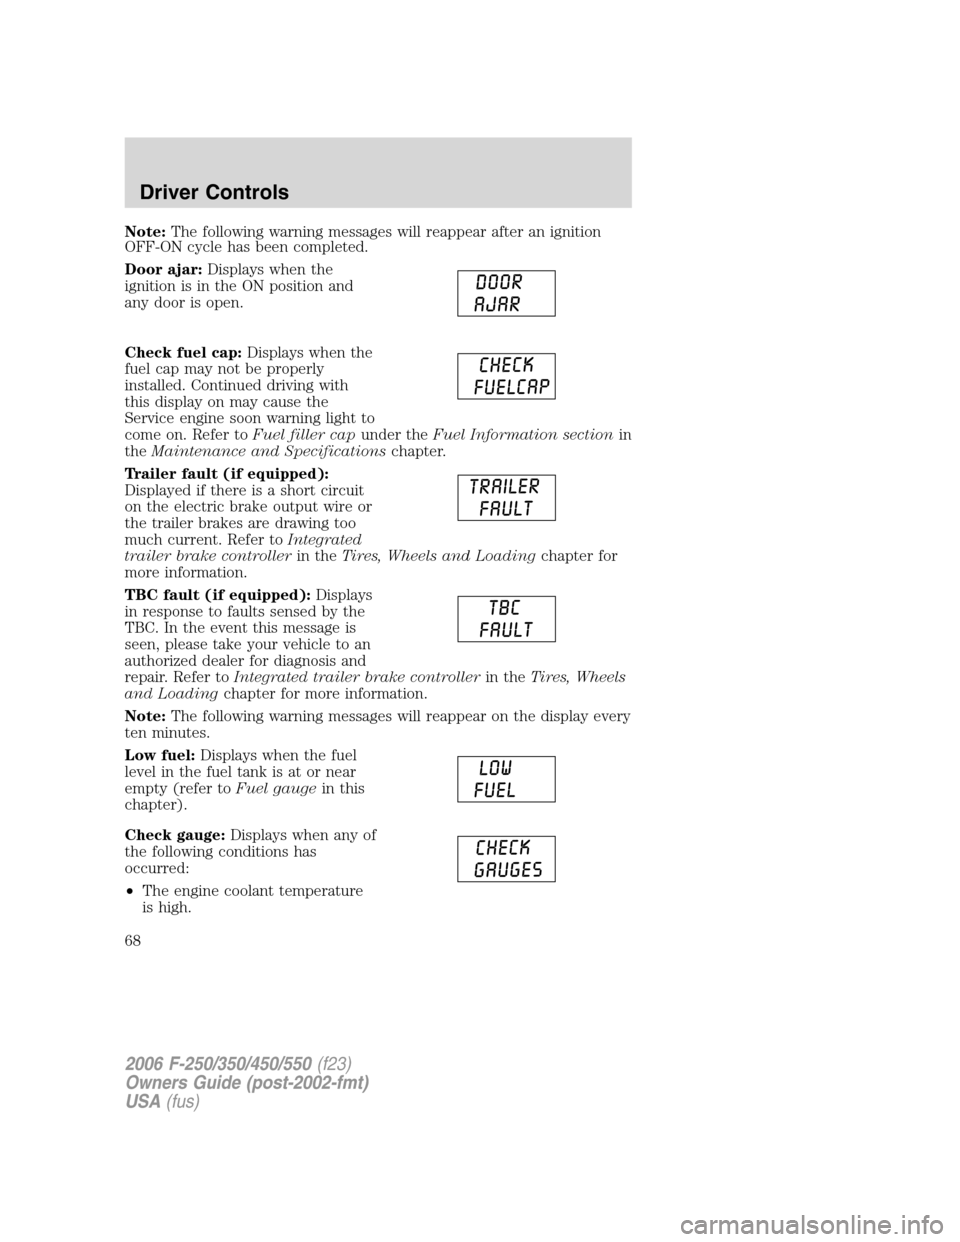
Note:The following warning messages will reappear after an ignition
OFF-ON cycle has been completed.
Door ajar:Displays when the
ignition is in the ON position and
any door is open.
Check fuel cap:Displays when the
fuel cap may not be properly
installed. Continued driving with
this display on may cause the
Service engine soon warning light to
come on. Refer toFuel filler capunder theFuel Information sectionin
theMaintenance and Specificationschapter.
Trailer fault (if equipped):
Displayed if there is a short circuit
on the electric brake output wire or
the trailer brakes are drawing too
much current. Refer toIntegrated
trailer brake controllerin theTires, Wheels and Loadingchapter for
more information.
TBC fault (if equipped):Displays
in response to faults sensed by the
TBC. In the event this message is
seen, please take your vehicle to an
authorized dealer for diagnosis and
repair. Refer toIntegrated trailer brake controllerin theTires, Wheels
and Loadingchapter for more information.
Note:The following warning messages will reappear on the display every
ten minutes.
Low fuel:Displays when the fuel
level in the fuel tank is at or near
empty (refer toFuel gaugein this
chapter).
Check gauge:Displays when any of
the following conditions has
occurred:
•The engine coolant temperature
is high.
2006 F-250/350/450/550(f23)
Owners Guide (post-2002-fmt)
USA(fus)
Driver Controls
68