instrument panel FORD SUPER DUTY 2006 1.G Special Off-Road Package Supplement Manual
[x] Cancel search | Manufacturer: FORD, Model Year: 2006, Model line: SUPER DUTY, Model: FORD SUPER DUTY 2006 1.GPages: 28, PDF Size: 0.22 MB
Page 2 of 28
BLACKOUT LIGHTING (IF EQUIPPED)
If your vehicle is equipped with blackout lighting it will turn off all
interior and exterior lighting, regardless of ignition position or if any
doors are open.
The switch is mounted on the
instrument panel below the radio.
The courtesy/dome/exterior lights are deactivated when the vehicle is
turned off regardless of which position the blackout lighting switch is in;
these lights are activated when the vehicle's ignition is turned to
on/auxiliary.
Note:Battery saver mode is enabled when the vehicle is turned off.
There is no delayed timer on this feature.
Note:Black-out lighting will conflict with U.S. Federal Motor Vehicle
Safety Standards (FMVSS). By selecting this option, the
customer/operator has and is exercising Governmental Privilege to
exempt vehicles from full FMVSS compliance.
When blackout lighting is enabled, it will turn off ALL interior
and exterior lights (i.e.headlamps, stop lamps, backup lamps,
interior warning lights, etc). Proceed with caution.
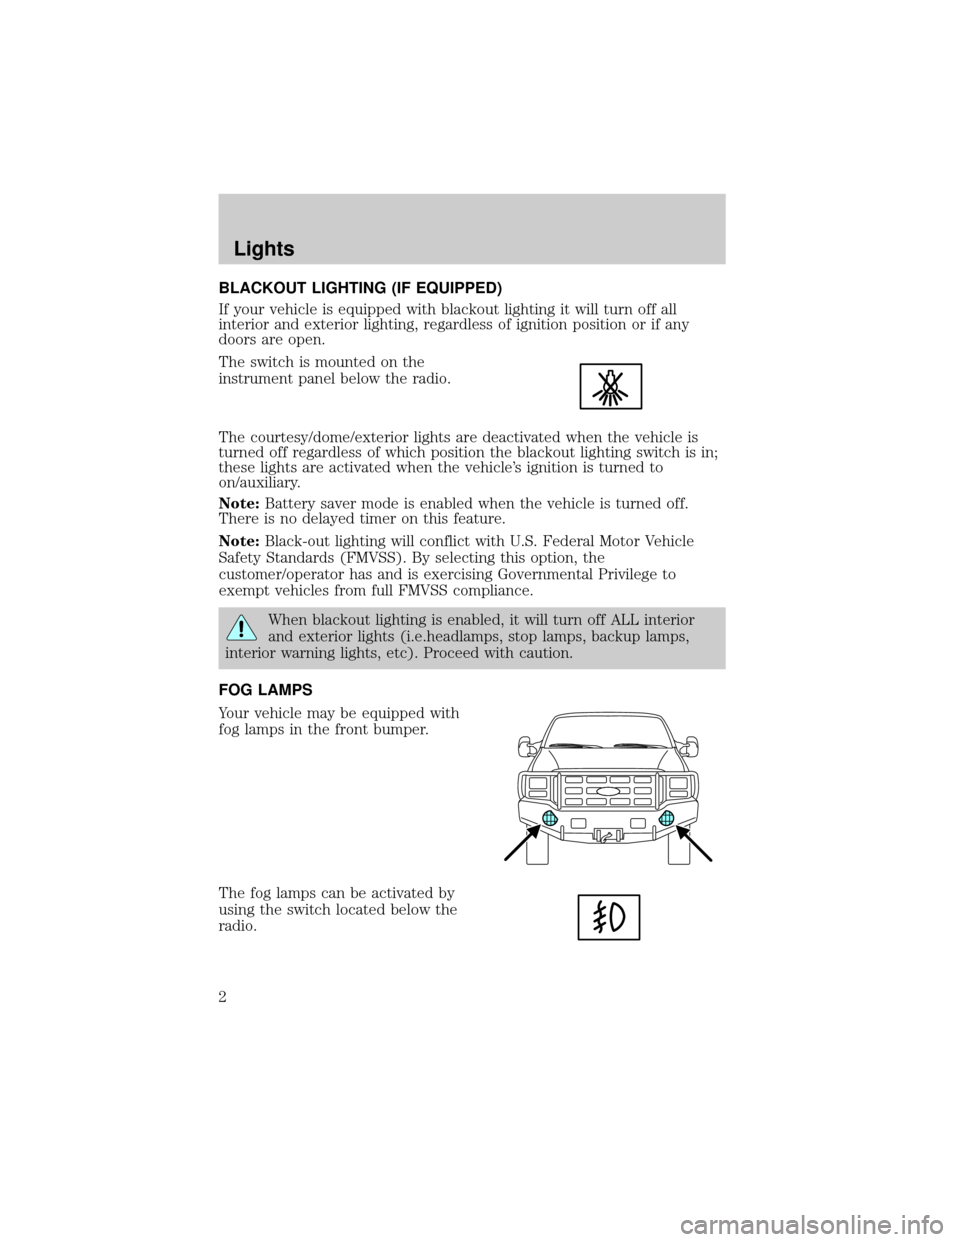
FOG LAMPS
Your vehicle may be equipped with
fog lamps in the front bumper.
The fog lamps can be activated by
using the switch located below the
radio.
Lights
2
Page 16 of 28
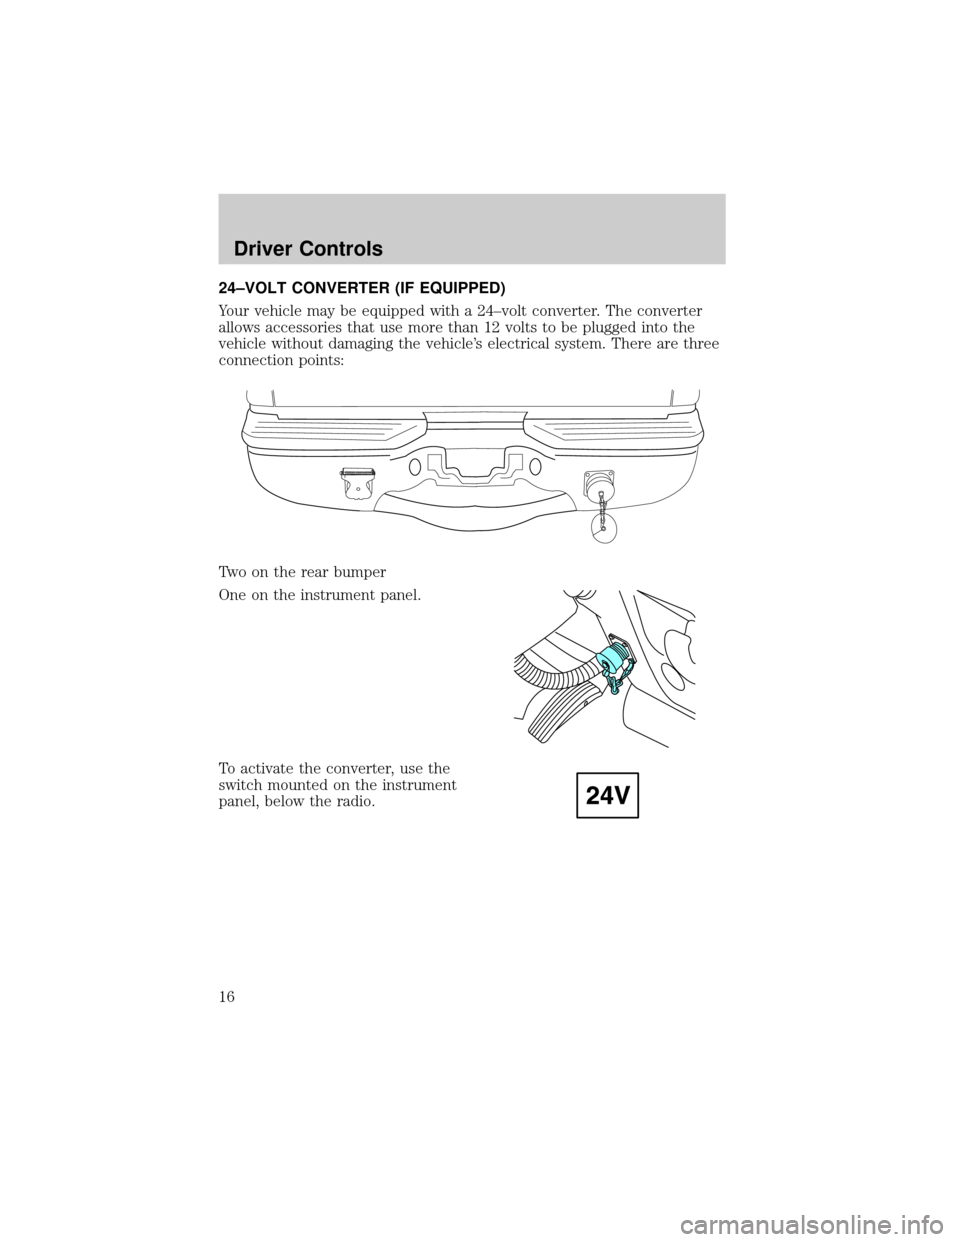
24±VOLT CONVERTER (IF EQUIPPED)
Your vehicle may be equipped with a 24±volt converter. The converter
allows accessories that use more than 12 volts to be plugged into the
vehicle without damaging the vehicle's electrical system. There are three
connection points:
Two on the rear bumper
One on the instrument panel.
To activate the converter, use the
switch mounted on the instrument
panel, below the radio.
Driver Controls
16
Page 19 of 28
2. Push the black buttons on the bleed valves for a softer ride. Separate
bleed valves allow independent adjustment of front and rear shocks.
Note:Do not operate the compressor for more than 30 seconds at a
time. Allow the compressor to cool down for one minute between
operations.
Note:Stop compressor operation when the arrow on the gauge reaches
maximum. Continuing to supply pressure will not make the shocks any
firmer and damage to the system will occur.
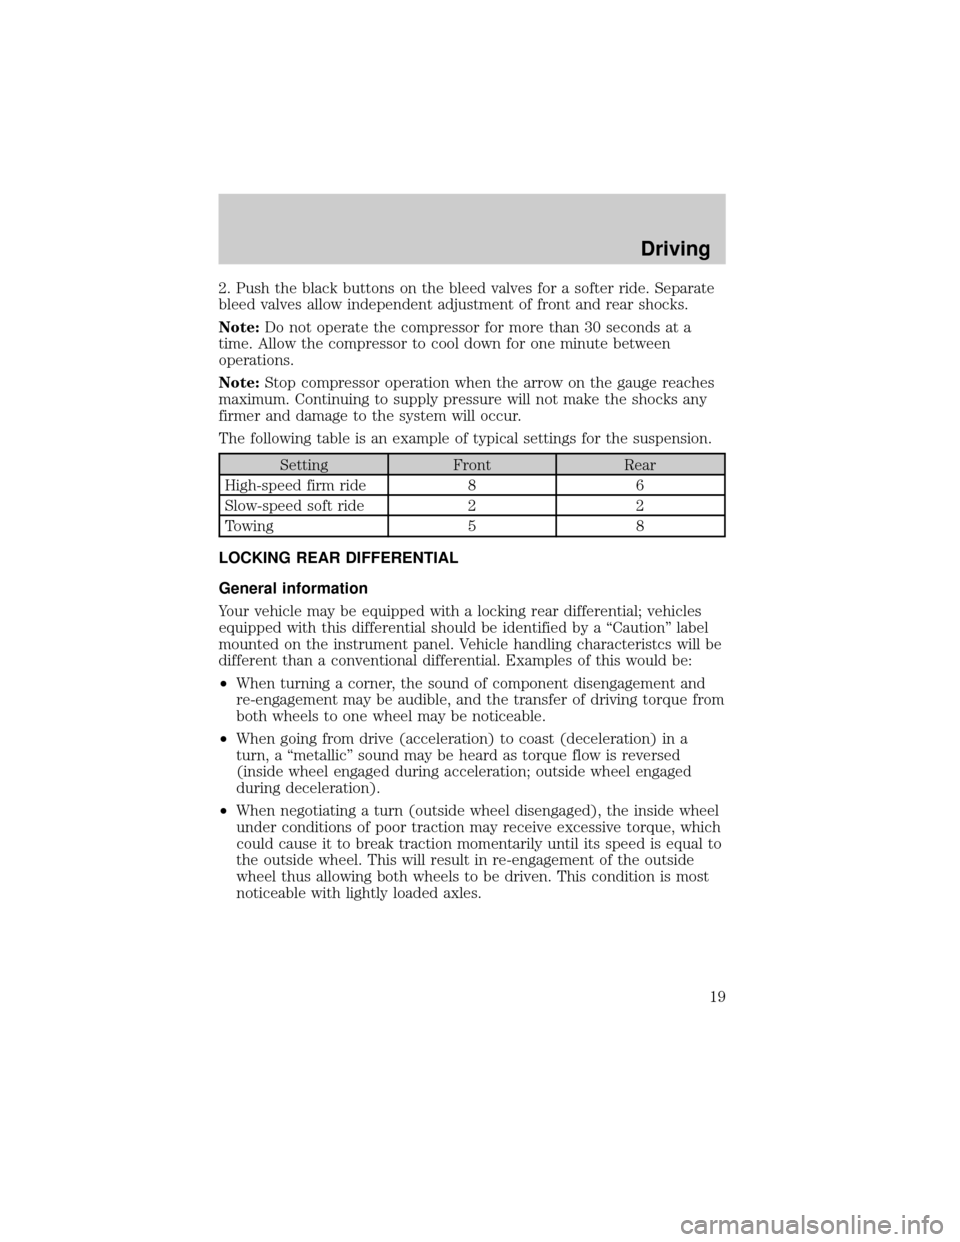
The following table is an example of typical settings for the suspension.
Setting Front Rear
High-speed firm ride 8 6
Slow-speed soft ride 2 2
Towing 5 8
LOCKING REAR DIFFERENTIAL
General information
Your vehicle may be equipped with a locking rear differential; vehicles
equipped with this differential should be identified by a ªCautionº label
mounted on the instrument panel. Vehicle handling characteristcs will be
different than a conventional differential. Examples of this would be:
²When turning a corner, the sound of component disengagement and
re-engagement may be audible, and the transfer of driving torque from
both wheels to one wheel may be noticeable.
²When going from drive (acceleration) to coast (deceleration) in a
turn, a ªmetallicº sound may be heard as torque flow is reversed
(inside wheel engaged during acceleration; outside wheel engaged
during deceleration).
²When negotiating a turn (outside wheel disengaged), the inside wheel
under conditions of poor traction may receive excessive torque, which
could cause it to break traction momentarily until its speed is equal to
the outside wheel. This will result in re-engagement of the outside
wheel thus allowing both wheels to be driven. This condition is most
noticeable with lightly loaded axles.
Driving
19
Page 22 of 28
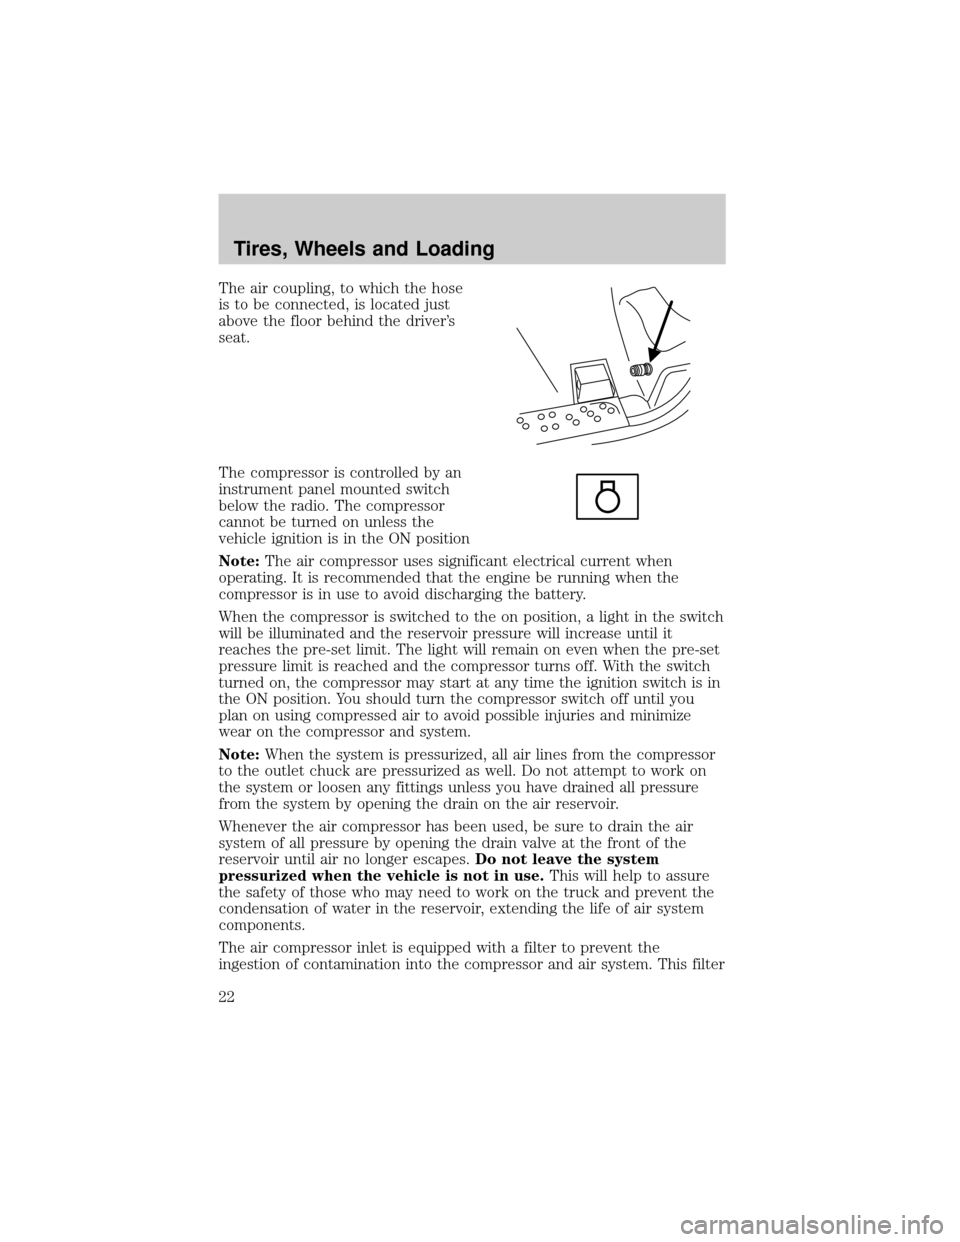
The air coupling, to which the hose
is to be connected, is located just
above the floor behind the driver's
seat.
The compressor is controlled by an
instrument panel mounted switch
below the radio. The compressor
cannot be turned on unless the
vehicle ignition is in the ON position
Note:The air compressor uses significant electrical current when
operating. It is recommended that the engine be running when the
compressor is in use to avoid discharging the battery.
When the compressor is switched to the on position, a light in the switch
will be illuminated and the reservoir pressure will increase until it
reaches the pre-set limit. The light will remain on even when the pre-set
pressure limit is reached and the compressor turns off. With the switch
turned on, the compressor may start at any time the ignition switch is in
the ON position. You should turn the compressor switch off until you
plan on using compressed air to avoid possible injuries and minimize
wear on the compressor and system.
Note:When the system is pressurized, all air lines from the compressor
to the outlet chuck are pressurized as well. Do not attempt to work on
the system or loosen any fittings unless you have drained all pressure
from the system by opening the drain on the air reservoir.
Whenever the air compressor has been used, be sure to drain the air
system of all pressure by opening the drain valve at the front of the
reservoir until air no longer escapes.Do not leave the system
pressurized when the vehicle is not in use.This will help to assure
the safety of those who may need to work on the truck and prevent the
condensation of water in the reservoir, extending the life of air system
components.
The air compressor inlet is equipped with a filter to prevent the
ingestion of contamination into the compressor and air system. This filter
Tires, Wheels and Loading
22
Page 23 of 28
is located underneath the truck, by the forward stake pocket on the left
side of the bed. If operating the air system in dusty areas, periodically
inspect this filter and replace it if found to be clogged or damaged, or if
the time needed to pressurize the system starts to become extended.
Using the air system to fill tires
To fill your tires, first be sure to stop the truck in a safe place. You
should be far enough off the road that passing traffic will not be a danger
to you. You should have an accurate tire pressure gauge to measure the
pressure in the tires and inflate them to the settings on the tire pressure
placard, which is usually inside the door on the truck.
Remove the air hose from under the clamp on the floor of the truck.
Attach the connector end of the hose to the coupling in the trim panel
behind the driver's seat by using one hand to slide the coupling collar
toward the trim panel and the other to insert the fitting on the end of
the hose into the coupling. When the fitting is seated in the coupling,
slide the collar back to its original position.
Extend the hose to reach the tire needing air. Remove the cap from the
tire valve stem and attach the clamp-on air chuck by squeezing the
locking mechanism while placing the chuck over the valve stem. Release
the locking mechanism when the air chuck is seated on the stem. Air will
flow from the system to the tire until you remove the chuck. Be sure to
use your gauge to set the pressure according to the placard. When the
tire pressure is correct, disconnect the hose and re-stow it under the
clamp on the floor behind the passenger seat. Do not forget to re-install
the cap on the valve stem.
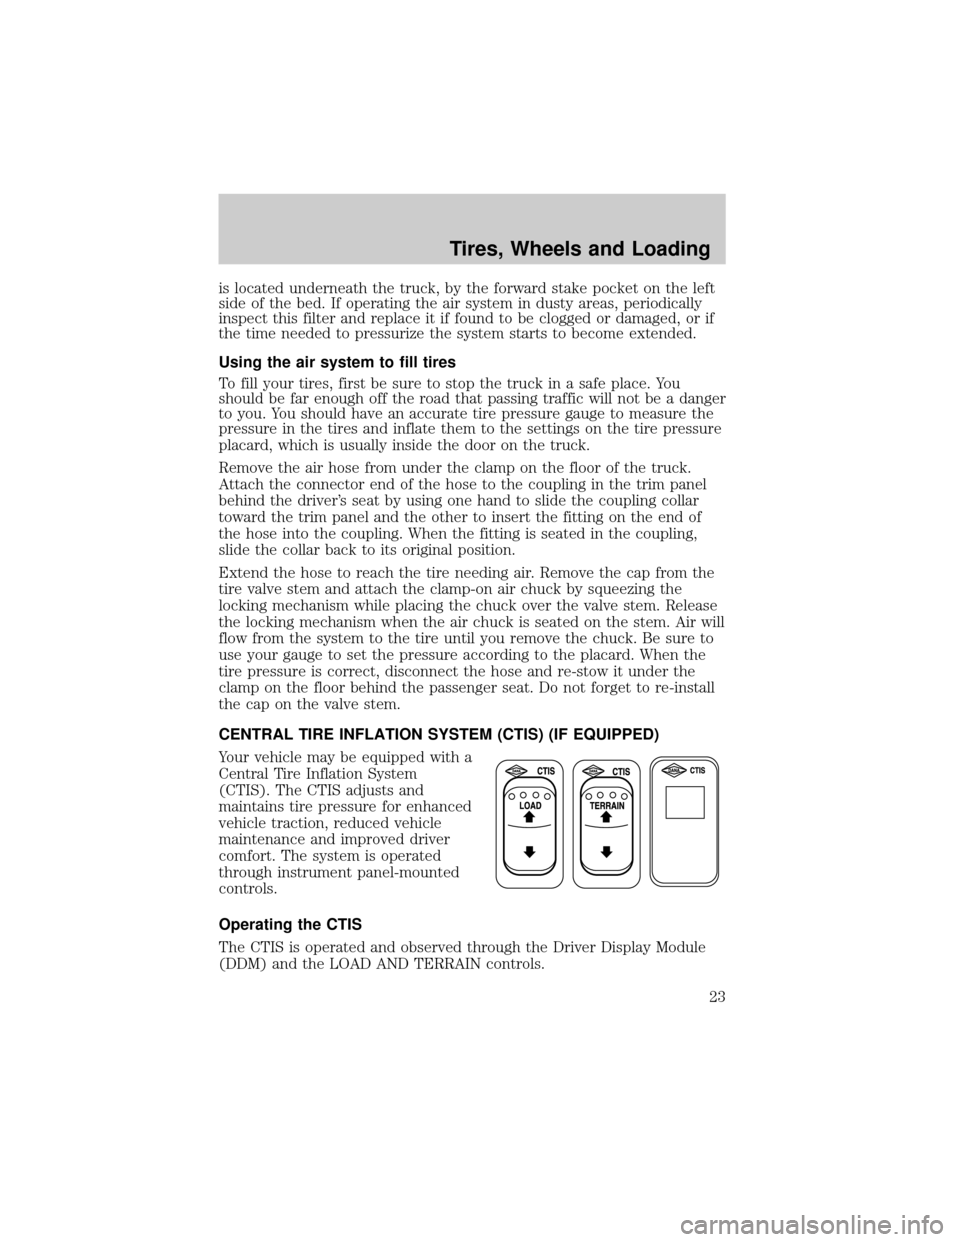
CENTRAL TIRE INFLATION SYSTEM (CTIS) (IF EQUIPPED)
Your vehicle may be equipped with a
Central Tire Inflation System
(CTIS). The CTIS adjusts and
maintains tire pressure for enhanced
vehicle traction, reduced vehicle
maintenance and improved driver
comfort. The system is operated
through instrument panel-mounted
controls.
Operating the CTIS
The CTIS is operated and observed through the Driver Display Module
(DDM) and the LOAD AND TERRAIN controls.
Tires, Wheels and Loading
23
Page 28 of 28

CHANGING A FLAT TIRE
Refer to yourOwner's Guidefor the tire changing procedure. Follow the
F-350 Dual Rear Wheel (DRW) jacking instructions.
FUSING
Note:Fuse 29 in the instrument panel box, located below and to the left
of the steering wheel, should be a 15A mini fuse. Always replace the fuse
you removed with a fuse with the same amperage rating.
Roadside emergencies
28