check engine FORD SUPER DUTY 2007 1.G User Guide
[x] Cancel search | Manufacturer: FORD, Model Year: 2007, Model line: SUPER DUTY, Model: FORD SUPER DUTY 2007 1.GPages: 312, PDF Size: 3.1 MB
Page 177 of 312
Note:If your vehicle is equipped with a manual transmission, the engine
may be required to run while power accessories operate and the parking
brake is set. It is recommended that wheel chocks be used during this
operation.
If you’re parking your vehicle on a grade or with a trailer, press and hold
the brake pedal down, then set the parking brake. There may be a little
vehicle movement as the parking brake sets to hold the vehicle’s weight.
This is normal and should be no reason for concern. If needed, press and
hold the service brake pedal down, then try reapplying the parking
brake. Chock the wheels if required. If the parking brake cannot hold the
weight of the vehicle, the parking brake may need to be serviced or the
vehicle may be overloaded.
STEERING
To help prevent damage to the power steering system:
•Never hold the steering wheel at its furthest turning points (until it
stops) for more than three to five seconds when the engine is running.
•Do not operate the vehicle with a low power steering pump fluid level
(below the FULL COLD mark on the dipstick).
•Some noise is normal during operation. If excessive, check for low
power steering pump fluid level before seeking service by your dealer.
•Heavy or uneven efforts may be caused by low power steering fluid.
Check for low power steering pump fluid level before seeking service
by your dealer.
•Do not fill the power steering pump reservoir above the FULL HOT
mark on the dipstick, as this may result in leaks from the reservoir.
If the power steering system breaks down (or if the engine is turned
off), you can steer the vehicle manually, but it takes more effort.
If the steering wanders or pulls, check for:
•an improperly inflated tire
•uneven tire wear
•loose or worn suspension components
•loose or worn steering components
•improper steering alignment
If any steering components are serviced or replaced, install new
fasteners (many are coated with thread adhesive or have prevailing
torque features which may not be re-used). Never re-use a bolt or nut.
Torque fasteners to specifications inWorkshop Manual.
2007 F-250/350/450/550(f23)
Owners Guide (post-2002-fmt)
USA(fus)
Driving
177
Page 231 of 312
may have firm and/or soft shifts. This operation is considered normal and
will not affect function or durability of the transmission. Over time, the
adaptive learning process will fully update transmission operation.
1.Use only a 12–volt supply to start your vehicle.
2. Do not disconnect the battery of the disabled vehicle as this could
damage the vehicle’s electrical system.
3. Park the booster vehicle close to the hood of the disabled vehicle
making sure the two vehiclesdo nottouch. Set the parking brake on
both vehicles and stay clear of the engine cooling fan and other moving
parts.
4. Check all battery terminals and remove any excessive corrosion before
you attach the battery cables. Ensure that vent caps are tight and level.
5. Turn the heater fan on in both vehicles to protect any electrical
surges. Turn all other accessories off.
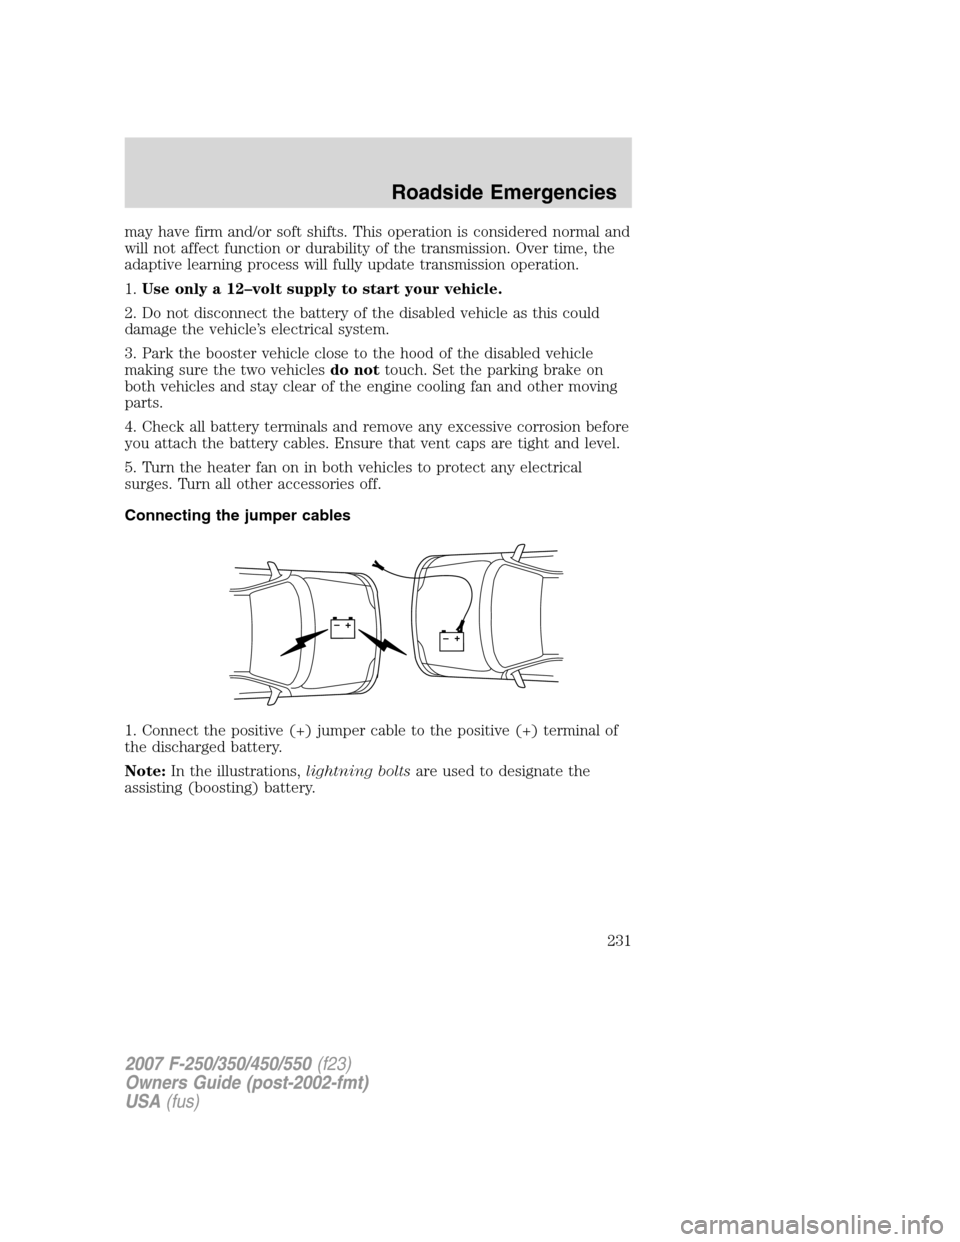
Connecting the jumper cables
1. Connect the positive (+) jumper cable to the positive (+) terminal of
the discharged battery.
Note:In the illustrations,lightning boltsare used to designate the
assisting (boosting) battery.
+–+–
2007 F-250/350/450/550(f23)
Owners Guide (post-2002-fmt)
USA(fus)
Roadside Emergencies
231
Page 253 of 312
SERVICE RECOMMENDATIONS
To help you service your vehicle:
•We highlight do-it-yourself items in the engine compartment for easy
location.
•We provide a scheduled maintenance guide which makes tracking
routine service easy.
If your vehicle requires professional service, your authorized dealer can
provide the necessary parts and service. Check yourWarranty
Guide/Owner Information Guideto find out which parts and services
are covered.
Use only recommended fuels, lubricants, fluids and service parts
conforming to specifications. Motorcraft parts are designed and built to
provide the best performance in your vehicle.
PRECAUTIONS WHEN SERVICING YOUR VEHICLE
•Do not work on a hot engine.
•Make sure that nothing gets caught in moving parts.
•Do not work on a vehicle with the engine running in an enclosed
space, unless you are sure you have enough ventilation.
•Keep all open flames and other burning (cigarettes) material away
from the battery and all fuel related parts.
Working with the engine off
•Automatic transmission:
1. Set the parking brake and shift to P (Park).
2. Turn off the engine and remove the key.
3. Block the wheels.
•Manual transmission:
1. Set the parking brake, depress the clutch and place the gearshift in 1
(First).
2. Turn off the engine and remove the key.
3. Block the wheels.
Working with the engine on
•Automatic transmission:
1. Set the parking brake and shift to P (Park).
2007 F-250/350/450/550(f23)
Owners Guide (post-2002-fmt)
USA(fus)
Maintenance and Specifications
253
Page 258 of 312
4. Poor wiper quality can be improved by cleaning the wiper blades and
the windshield; refer toWindows and wiper bladesin theCleaning
chapter.
5. To prolong the life of the wiper blades, it is highly recommended to
scrape off the ice on the windshield before turning on the wipers. The
layer of ice has many sharp edges and can damage the micro edge of the
wiper rubber element.
ENGINE OIL
Checking the engine oil
Refer to thescheduled maintenance informationfor the appropriate
intervals for checking the engine oil.
1. Make sure the vehicle is on level ground.
2. Turn the engine off and wait a few minutes for the oil to drain into the
oil pan.
3. Set the parking brake and ensure the gearshift is securely latched in P
(Park) (automatic transmission) or 1 (First) (manual transmission).
4. Open the hood. Protect yourself from engine heat.
5. Locate and carefully remove the engine oil level indicator (dipstick).
2007 F-250/350/450/550(f23)
Owners Guide (post-2002-fmt)
USA(fus)
Maintenance and Specifications
258
Page 260 of 312
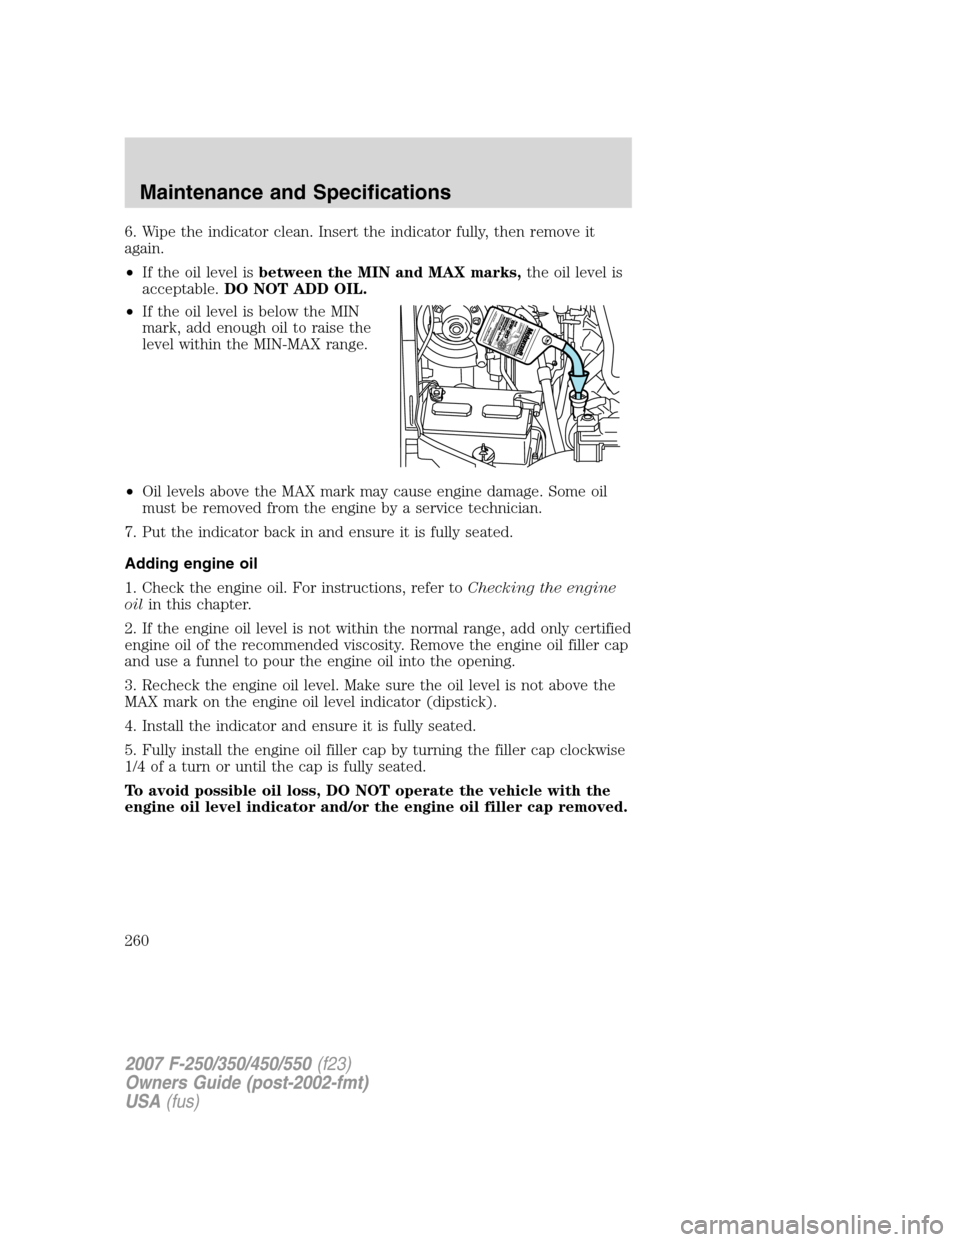
6. Wipe the indicator clean. Insert the indicator fully, then remove it
again.
•If the oil level isbetween the MIN and MAX marks,the oil level is
acceptable.DO NOT ADD OIL.
•If the oil level is below the MIN
mark, add enough oil to raise the
level within the MIN-MAX range.
•Oil levels above the MAX mark may cause engine damage. Some oil
must be removed from the engine by a service technician.
7. Put the indicator back in and ensure it is fully seated.
Adding engine oil
1. Check the engine oil. For instructions, refer toChecking the engine
oilin this chapter.
2. If the engine oil level is not within the normal range, add only certified
engine oil of the recommended viscosity. Remove the engine oil filler cap
and use a funnel to pour the engine oil into the opening.
3. Recheck the engine oil level. Make sure the oil level is not above the
MAX mark on the engine oil level indicator (dipstick).
4. Install the indicator and ensure it is fully seated.
5. Fully install the engine oil filler cap by turning the filler cap clockwise
1/4 of a turn or until the cap is fully seated.
To avoid possible oil loss, DO NOT operate the vehicle with the
engine oil level indicator and/or the engine oil filler cap removed.
2007 F-250/350/450/550(f23)
Owners Guide (post-2002-fmt)
USA(fus)
Maintenance and Specifications
260
Page 264 of 312
•Always dispose of automotive
batteries in a responsible manner.
Follow your local authorized
standards for disposal. Call your
local authorized recycling center
to find out more about recycling
automotive batteries.
ENGINE COOLANT
Checking engine coolant
The concentration and level of engine coolant should be checked at the
mileage (kilometer) intervals listed in thescheduled maintenance
information. The coolant concentration should be maintained at 50/50
coolant and distilled water, which equates to a freeze point of -34°F
(-36°C). Coolant concentration testing is possible with a hydrometer or
antifreeze tester (such as the Rotunda Battery and Antifreeze Tester,
014–R1060). The level of coolant should be maintained at the “FULL
COLD” level or within the “COLD FILL RANGE” in the coolant reservoir.
If the level falls below, add coolant per the instructions in theAdding
engine coolantsection.
Your vehicle was factory-filled with a 50/50 engine coolant and water
concentration. If the concentration of coolant falls below 40% or above
60%, the engine parts could become damaged or not work properly.A
50/50 mixture of coolant and water provides the following:
•Freeze protection down to -34°F (-36°C).
•Boiling protection up to 265°F (129°C).
•Protection against rust and other forms of corrosion.
•Enables calibrated gauges to work properly.
L
E
A
D
RETURN
RECYCLE
2007 F-250/350/450/550(f23)
Owners Guide (post-2002-fmt)
USA(fus)
Maintenance and Specifications
264
Page 265 of 312
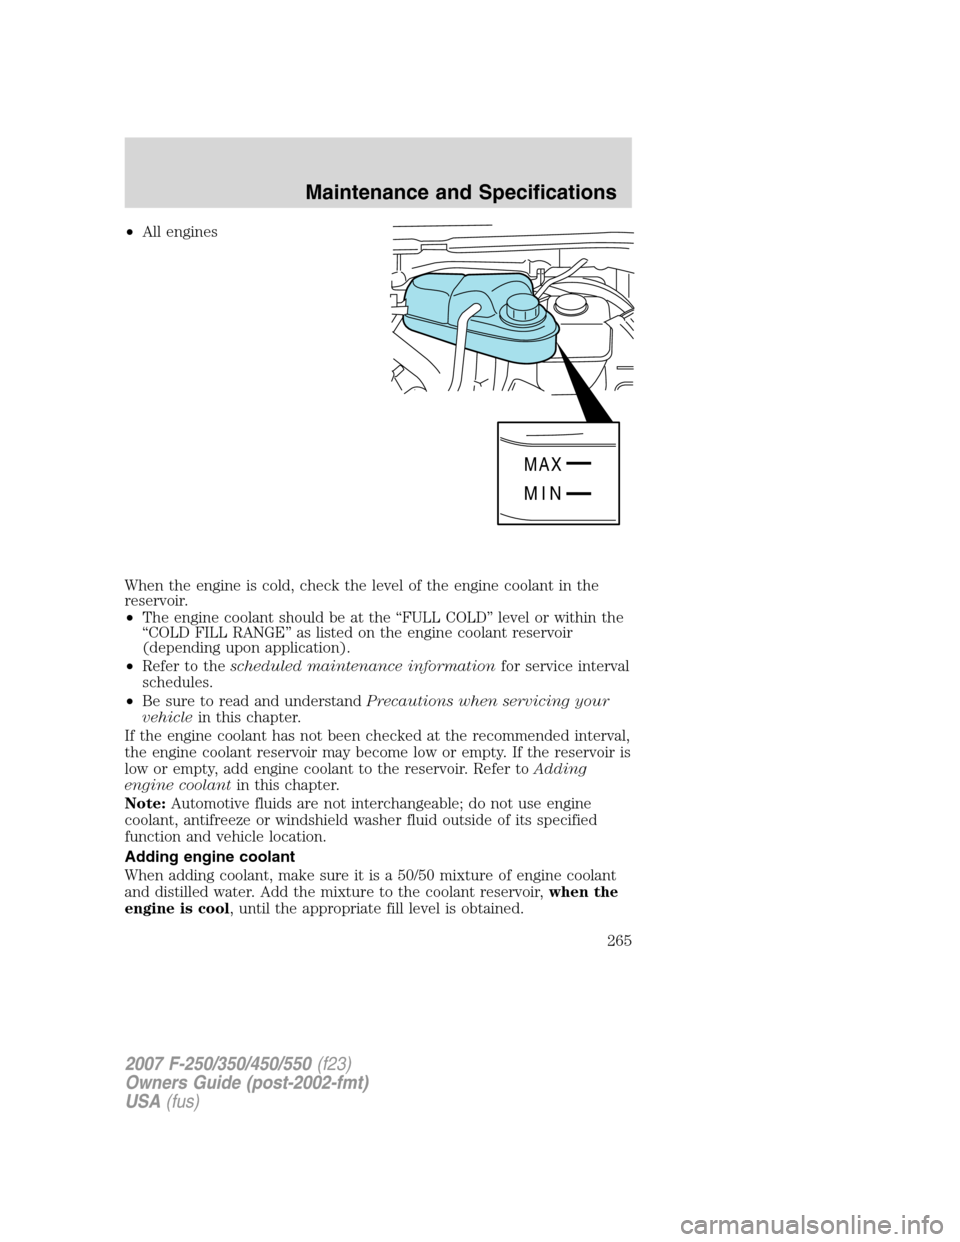
•All engines
When the engine is cold, check the level of the engine coolant in the
reservoir.
•The engine coolant should be at the “FULL COLD” level or within the
“COLD FILL RANGE” as listed on the engine coolant reservoir
(depending upon application).
•Refer to thescheduled maintenance informationfor service interval
schedules.
•Be sure to read and understandPrecautions when servicing your
vehiclein this chapter.
If the engine coolant has not been checked at the recommended interval,
the engine coolant reservoir may become low or empty. If the reservoir is
low or empty, add engine coolant to the reservoir. Refer toAdding
engine coolantin this chapter.
Note:Automotive fluids are not interchangeable; do not use engine
coolant, antifreeze or windshield washer fluid outside of its specified
function and vehicle location.
Adding engine coolant
When adding coolant, make sure it is a 50/50 mixture of engine coolant
and distilled water. Add the mixture to the coolant reservoir,when the
engine is cool, until the appropriate fill level is obtained.
MAX
MIN
2007 F-250/350/450/550(f23)
Owners Guide (post-2002-fmt)
USA(fus)
Maintenance and Specifications
265
Page 267 of 312
To reduce the risk of personal injury, make sure the engine is
cool before unscrewing the coolant pressure relief cap. The
cooling system is under pressure; steam and hot liquid can come out
forcefully when the cap is loosened slightly.
1. Before you begin, turn the engine off and let it cool.
2. When the engine is cool, wrap a thick cloth around the coolant
pressure relief cap on the coolant reservoir (a translucent plastic bottle).
Slowly turn cap counterclockwise (left) until pressure begins to release.
3. Step back while the pressure releases.
4. When you are sure that all the pressure has been released, use the
cloth to turn it counterclockwise and remove the cap.
5. Fill the coolant reservoir slowly with the proper coolant mixture (see
above), to within the “COLD FILL RANGE” or the “FULL COLD” level on
the reservoir. If you removed the radiator cap in an overflow system, fill
the radiator until the coolant is visible and radiator is almost full.
6. Replace the cap. Turn until tightly installed. (Cap must be tightly
installed to prevent coolant loss.)
After any coolant has been added, check the coolant concentration (refer
toChecking engine coolant). If the concentration is not 50/50
(protection to –34°F/–36°C), drain some coolant and adjust the
concentration. It may take several drains and additions to obtain a 50/50
coolant concentration.
Whenever coolant has been added, the coolant level in the coolant
reservoir should be checked the next few times you drive the vehicle. If
necessary, add enough 50/50 concentration of engine coolant and
distilled water to bring the liquid level to the proper level.
If you have to add more than 1.0 quart (1.0 liter) of engine coolant per
month, have your authorized dealer check the engine cooling system.
Your cooling system may have a leak. Operating an engine with a low
level of coolant can result in engine overheating and possible engine
damage.
Recycled engine coolant
Ford Motor Company does NOT recommend the use of recycled engine
coolant in vehicles originally equipped with Motorcraft Premium Gold
Engine Coolant since a Ford-approved recycling process is not yet
available.
2007 F-250/350/450/550(f23)
Owners Guide (post-2002-fmt)
USA(fus)
Maintenance and Specifications
267
Page 270 of 312
2. Arrange for the vehicle to be taken to a service facility.
3. If this is not possible, wait a short period for the engine to cool.
4. Check the coolant level and replenish if low.
Never remove the coolant reservoir cap while the engine is
running or hot.
5. Re-start the engine and take your vehicle to a service facility.
Driving the vehicle without repairing the engine problem
increases the chance of engine damage. Take your vehicle to a
service facility as soon as possible.
FUEL FILTER
For fuel filter replacement, see your authorized dealer. Refer to the
scheduled maintenance informationfor the appropriate intervals for
changing the fuel filter.
Replace the fuel filter with an authorized Motorcraft part. The
customer warranty may be void for any damage to the fuel system
if an authorized Motorcraft fuel filter is not used.
WHAT YOU SHOULD KNOW ABOUT AUTOMOTIVE FUELS
Important safety precautions
Do not overfill the fuel tank. The pressure in an overfilled tank
may cause leakage and lead to fuel spray and fire.
The fuel system may be under pressure. If the fuel filler cap is
venting vapor or if you hear a hissing sound, wait until it stops
before completely removing the fuel filler cap. Otherwise, fuel may
spray out and injure you or others.
If you do not use the proper fuel filler cap, excessive pressure or
vacuum in the fuel tank may damage the fuel system or cause
the fuel cap to disengage in a collision, which may result in possible
personal injury.
Automotive fuels can cause serious injury or death if misused or
mishandled.
2007 F-250/350/450/550(f23)
Owners Guide (post-2002-fmt)
USA(fus)
Maintenance and Specifications
270
Page 273 of 312
If the “Check Fuel Cap” indicator comes on and stays on after you start
the engine, the fuel filler cap may not be properly installed. Turn off the
engine, remove the fuel filler cap, align the cap properly and reinstall it.
If you must replace the fuel filler cap, replace it with a fuel filler
cap that is designed for your vehicle. The customer warranty may
be void for any damage to the fuel tank or fuel system if the
correct genuine Ford or Motorcraft fuel filler cap is not used.
The fuel system may be under pressure. If the fuel filler cap is
venting vapor or if you hear a hissing sound, wait until it stops
before completely removing the fuel filler cap. Otherwise, fuel may
spray out and injure you or others.
If you do not use the proper fuel filler cap, excessive pressure or
vacuum in the fuel tank may damage the fuel system or cause
the fuel cap to disengage in a collision, which may result in possible
personal injury.
Choosing the right fuel
Use only UNLEADED fuel or UNLEADED fuel blended with a maximum
of 10% ethyl alcohol. Your vehicle was not designed to run on E85 fuels
that is blended with a maximum of 85% ethyl alcohol. The use of leaded
fuel is prohibited by law and could damage your vehicle. Do not use fuel
containing methanol. It can damage critical fuel system components.
Your vehicle was not designed to use fuel or fuel additives with metallic
compounds, including manganese-based additives. Studies indicate that
these additives can cause your vehicle’s emission control system to
deteriorate more rapidly. In Canada, premium grade fuel generally
contains more metallic additives than regular fuel. We recommend using
2007 F-250/350/450/550(f23)
Owners Guide (post-2002-fmt)
USA(fus)
Maintenance and Specifications
273