ECU FORD SUPER DUTY 2008 2.G Special Service Package Supplement Manual
[x] Cancel search | Manufacturer: FORD, Model Year: 2008, Model line: SUPER DUTY, Model: FORD SUPER DUTY 2008 2.GPages: 25, PDF Size: 0.2 MB
Page 7 of 25
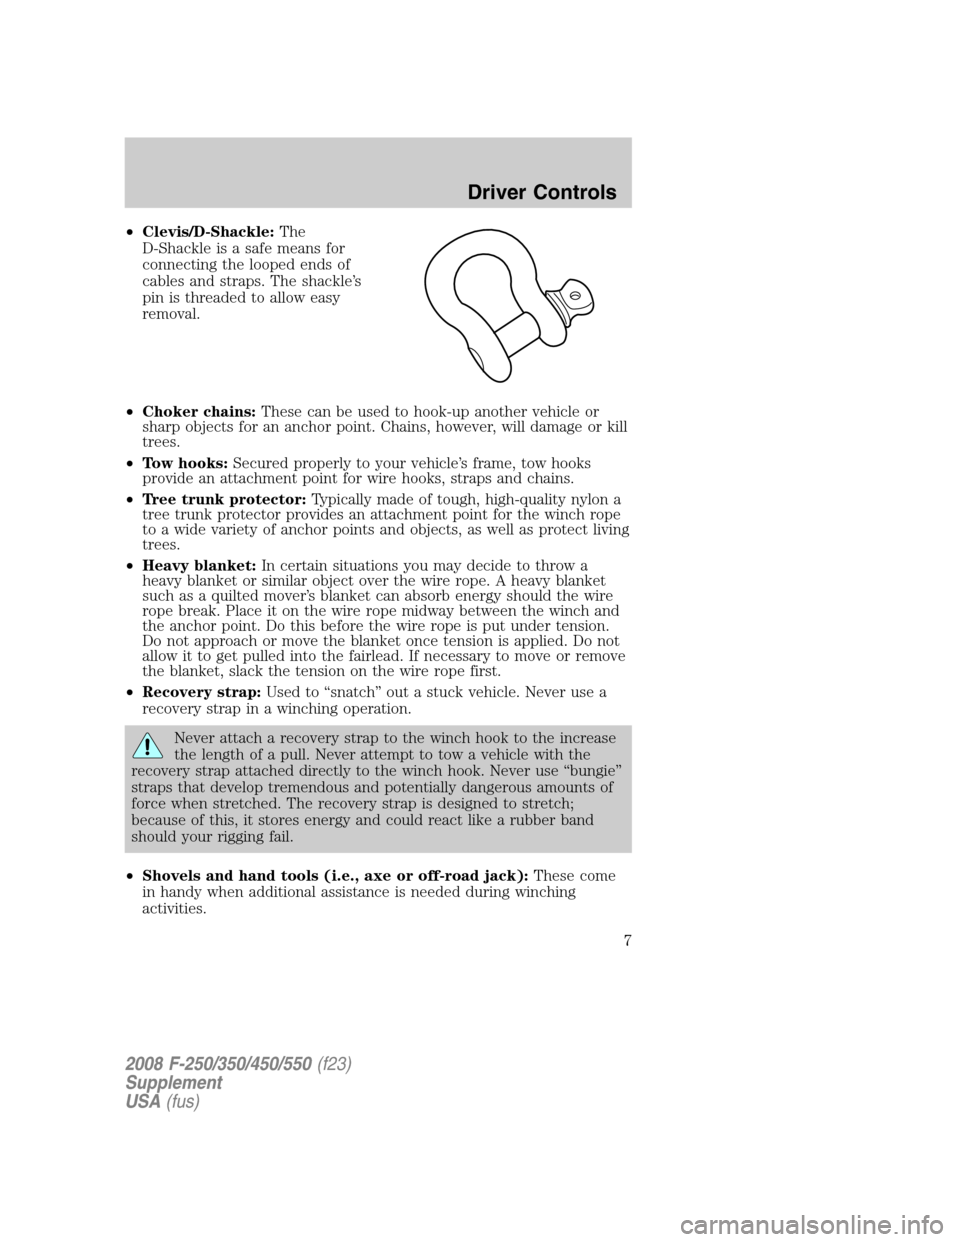
ŌĆóClevis/D-Shackle:The
D-Shackle is a safe means for
connecting the looped ends of
cables and straps. The shackleŌĆÖs
pin is threaded to allow easy
removal.
ŌĆóChoker chains:These can be used to hook-up another vehicle or
sharp objects for an anchor point. Chains, however, will damage or kill
trees.
ŌĆóTow hooks:Secured properly to your vehicleŌĆÖs frame, tow hooks
provide an attachment point for wire hooks, straps and chains.
ŌĆóTree trunk protector:Typically made of tough, high-quality nylon a
tree trunk protector provides an attachment point for the winch rope
to a wide variety of anchor points and objects, as well as protect living
trees.
ŌĆóHeavy blanket:In certain situations you may decide to throw a
heavy blanket or similar object over the wire rope. A heavy blanket
such as a quilted moverŌĆÖs blanket can absorb energy should the wire
rope break. Place it on the wire rope midway between the winch and
the anchor point. Do this before the wire rope is put under tension.
Do not approach or move the blanket once tension is applied. Do not
allow it to get pulled into the fairlead. If necessary to move or remove
the blanket, slack the tension on the wire rope first.
ŌĆóRecovery strap:Used to ŌĆ£snatchŌĆØ out a stuck vehicle. Never use a
recovery strap in a winching operation.
Never attach a recovery strap to the winch hook to the increase
the length of a pull. Never attempt to tow a vehicle with the
recovery strap attached directly to the winch hook. Never use ŌĆ£bungieŌĆØ
straps that develop tremendous and potentially dangerous amounts of
force when stretched. The recovery strap is designed to stretch;
because of this, it stores energy and could react like a rubber band
should your rigging fail.
ŌĆóShovels and hand tools (i.e., axe or off-road jack):These come
in handy when additional assistance is needed during winching
activities.
2008 F-250/350/450/550(f23)
Supplement
USA(fus)
Driver Controls
7
Page 8 of 25

ŌĆóBackup parts:Extra items such as an extra clevis/D-shackle or a
remote control unit should be carried in case of emergency. For
severe and/or continuous winch use, you may want to consider
including an extra wire rope and winch hook.
ŌĆóToolbox items:Always bring along hand wrenches, screwdrivers,
pliers and tools to change wire rope.
ŌĆóJumper cables:ItŌĆÖs always a good idea to carry jumper cables in case
your battery becomes drained during a winching operation. Also, a
dual battery system and a battery isolator kit can be installed to
prevent draining the electrical source during winching operation.
A fully charged conventional automotive battery with a minimum of 650
cold cranking amp is recommended to obtain peak performance from
your winch. Make sure all electrical connections are clean and tight.
Winch operation
Before you pull
Make sure the new rope is stretched before its first use. Unspool the
wire rope, leaving five wraps on the drum. Apply at least 500 lbs.
(227 kg) of tension. This can be done by setting up an anchor point and
pulling your vehicle to it at a slightly inclined, flat surface and letting the
vehicle roll.
Before you use your winch, remember these key points:
1. Think safety at all times.
2. Always take your time to assess your situation and plan your pull
carefully.
3. Always take your time when using the winch.
4. Use the right equipment for your situation.
5. Always wear leather gloves and do not allow the wire rope to slide
through your hands.
6. You and only you should handle the wire rope and operate the remote
control switch.
7. Practice. Practice and practice the steps.
Choosing an anchor point
A secure anchor is critical to winching operations. The anchor must be
strong enough to hold while winching. Natural anchors include trees,
stumps and rocks. Hook the rope as low as possible. If no natural
anchors are available, when recovering another vehicle, your vehicle
2008 F-250/350/450/550(f23)
Supplement
USA(fus)
Driver Controls
8
Page 11 of 25
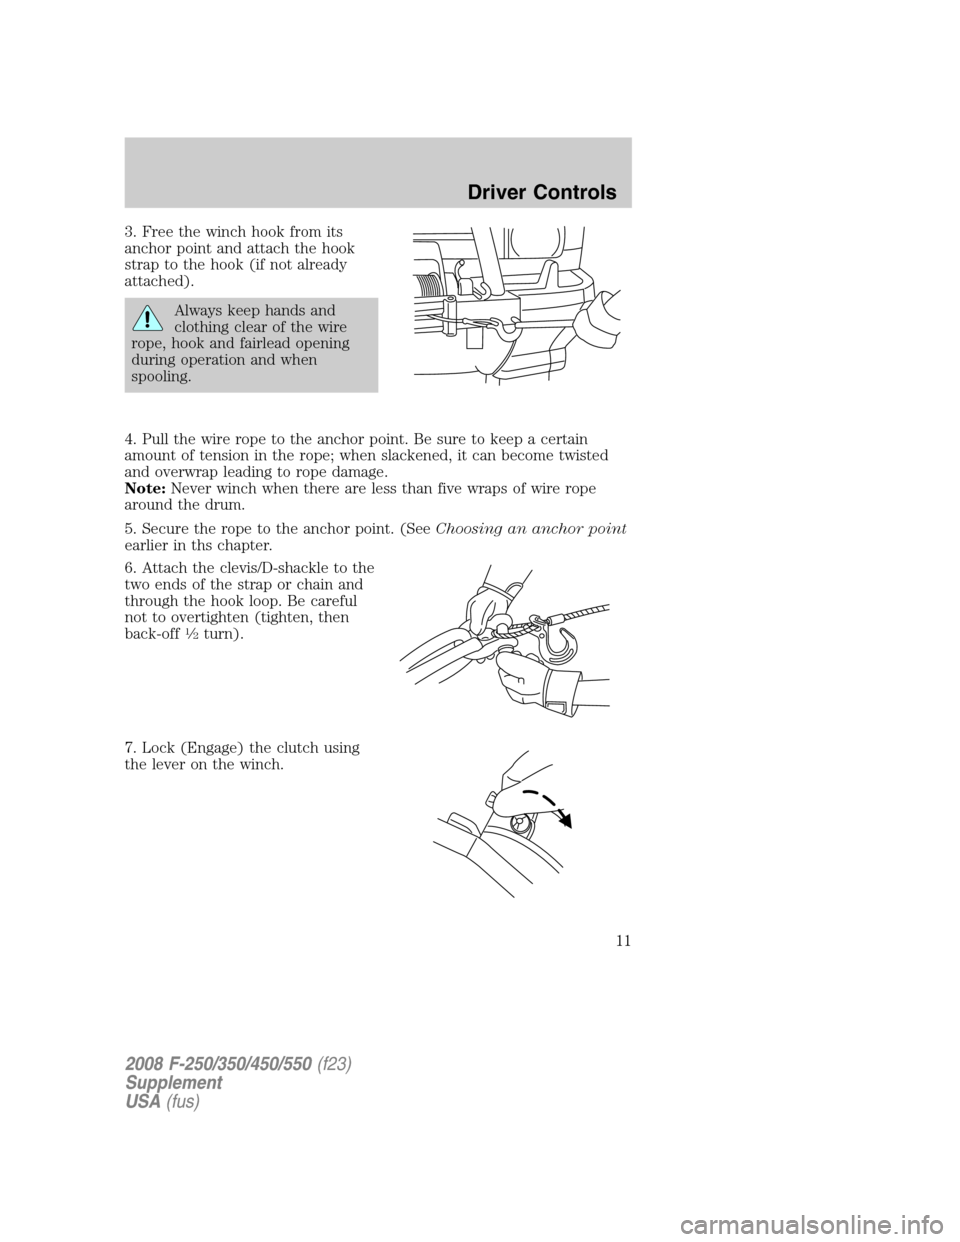
3. Free the winch hook from its
anchor point and attach the hook
strap to the hook (if not already
attached).
Always keep hands and
clothing clear of the wire
rope, hook and fairlead opening
during operation and when
spooling.
4. Pull the wire rope to the anchor point. Be sure to keep a certain
amount of tension in the rope; when slackened, it can become twisted
and overwrap leading to rope damage.
Note:Never winch when there are less than five wraps of wire rope
around the drum.
5. Secure the rope to the anchor point. (SeeChoosing an anchor point
earlier in ths chapter.
6. Attach the clevis/D-shackle to the
two ends of the strap or chain and
through the hook loop. Be careful
not to overtighten (tighten, then
back-off
1�2turn).
7. Lock (Engage) the clutch using
the lever on the winch.
2008 F-250/350/450/550(f23)
Supplement
USA(fus)
Driver Controls
11
Page 12 of 25
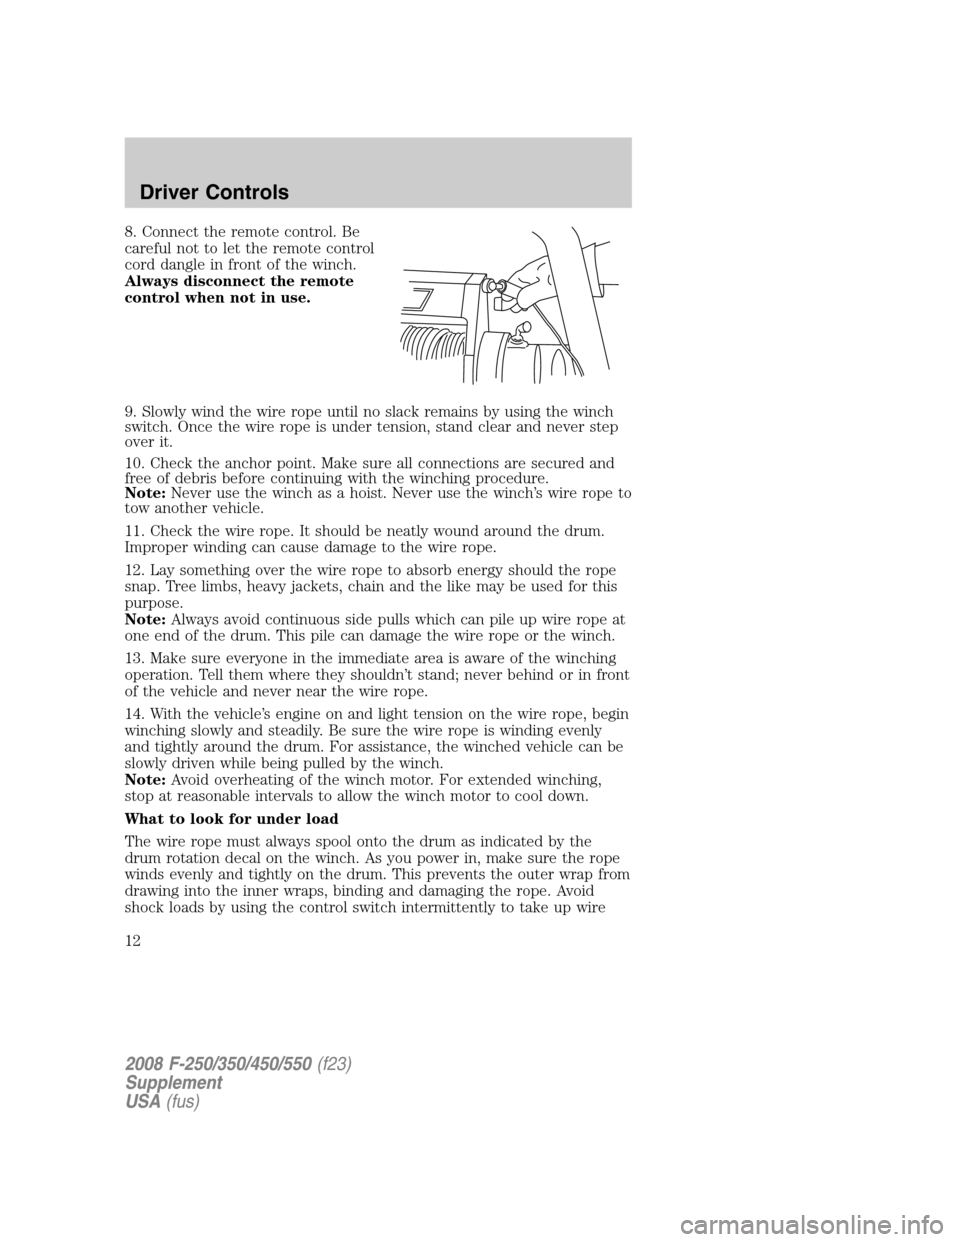
8. Connect the remote control. Be
careful not to let the remote control
cord dangle in front of the winch.
Always disconnect the remote
control when not in use.
9. Slowly wind the wire rope until no slack remains by using the winch
switch. Once the wire rope is under tension, stand clear and never step
over it.
10. Check the anchor point. Make sure all connections are secured and
free of debris before continuing with the winching procedure.
Note:Never use the winch as a hoist. Never use the winchŌĆÖs wire rope to
tow another vehicle.
11. Check the wire rope. It should be neatly wound around the drum.
Improper winding can cause damage to the wire rope.
12. Lay something over the wire rope to absorb energy should the rope
snap. Tree limbs, heavy jackets, chain and the like may be used for this
purpose.
Note:Always avoid continuous side pulls which can pile up wire rope at
one end of the drum. This pile can damage the wire rope or the winch.
13. Make sure everyone in the immediate area is aware of the winching
operation. Tell them where they shouldnŌĆÖt stand; never behind or in front
of the vehicle and never near the wire rope.
14. With the vehicleŌĆÖs engine on and light tension on the wire rope, begin
winching slowly and steadily. Be sure the wire rope is winding evenly
and tightly around the drum. For assistance, the winched vehicle can be
slowly driven while being pulled by the winch.
Note:Avoid overheating of the winch motor. For extended winching,
stop at reasonable intervals to allow the winch motor to cool down.
What to look for under load
The wire rope must always spool onto the drum as indicated by the
drum rotation decal on the winch. As you power in, make sure the rope
winds evenly and tightly on the drum. This prevents the outer wrap from
drawing into the inner wraps, binding and damaging the rope. Avoid
shock loads by using the control switch intermittently to take up wire
2008 F-250/350/450/550(f23)
Supplement
USA(fus)
Driver Controls
12
Page 13 of 25
rope slack. During side pulls, the wire rope tends to stack up at one end
of the drum. This stack can become large enough to cause serious
damage to the winch. Line up pulls as straight as possible and stop
winching if the wire rope comes close to the tie rods or mounting plate.
Note:To fix an uneven stack, spool out that section of the rope and
reposition it to the opposite end of the drum; this will free up space for
continued winching.
15. For vehicle recovery, continue pulling until the vehicle is on stable
ground. If the vehicle is able to be driven, the winching operation is
complete.
16. Once recovery of the vehicle is complete, be sure to secure the
vehicleŌĆÖs brakes and put the transmission in P (Park) (automatic
transmission) or 1 (First) (manual transmission). Release tension in the
wire rope.
17. Disconnect the wire rope from the anchor.
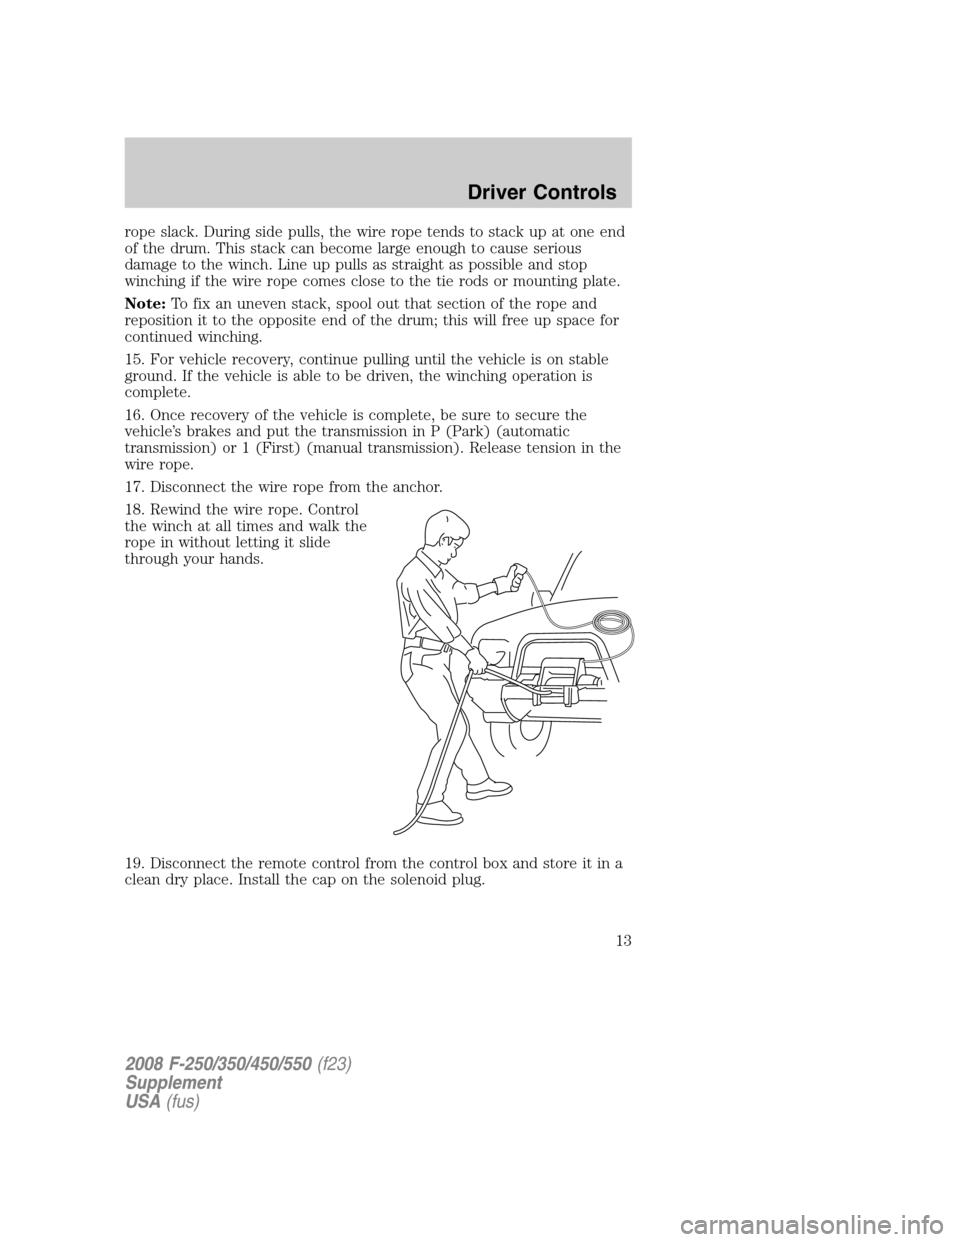
18. Rewind the wire rope. Control
the winch at all times and walk the
rope in without letting it slide
through your hands.
19. Disconnect the remote control from the control box and store it in a
clean dry place. Install the cap on the solenoid plug.
2008 F-250/350/450/550(f23)
Supplement
USA(fus)
Driver Controls
13
Page 14 of 25
How to spool under no load
Arrange the remote control lead so it cannot be caught in the winch.
Arrange the wire rope so it will not kink or tangle when spooled. Be sure
any wire rope already on the spooling drum is wound tightly and evenly
layered (unspool and tighten and layer evenly, if necessary). Keep the
wire rope under light tension and spool the wire rope back onto the
winch drum in even layers. Stop frequently to tighten and straighten the
layers as necessary. Repeat this process until the winch hook is the same
distance as the full length of the remote control from the winch. Attach
the hook strap, then walk the wire rope toward the fairlead, carefully
spooling in the remaining rope by pulsing the remote control switch.
Store the hook at the fairlead or tensioned to a suitable location to the
side.
If you do not have the hook strap, use a length of cord or something
similar.
To help prevent serious injury,neverput your fingers inside the
hook area as you are powering in.
Rigging techniques
Various winching situations will require unique winching techniques.
These could range from too little distance to achieve maximum pull
using straight line rigging, simply increasing pulling power or maintaining
a straight-line pulling situation.
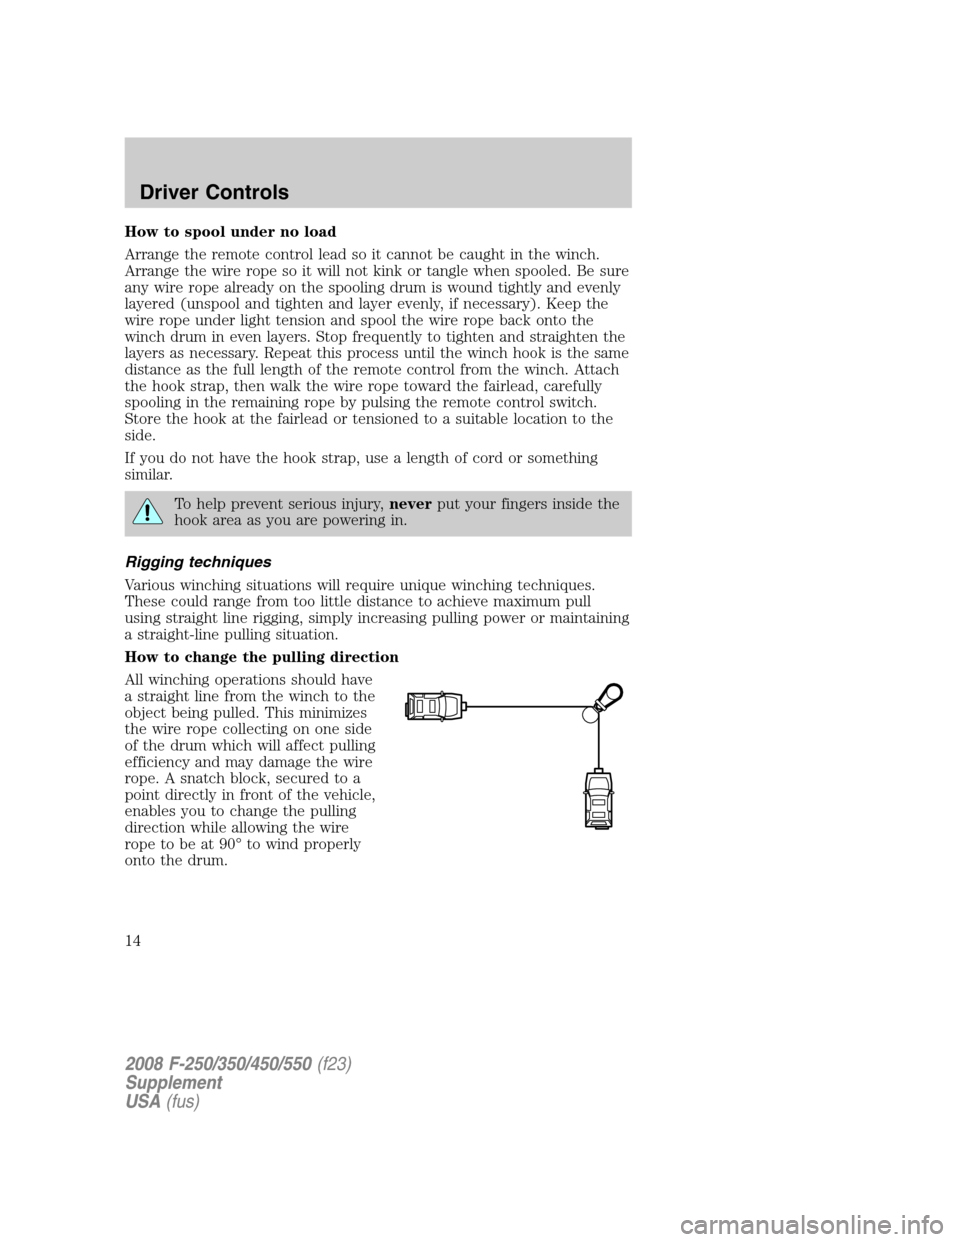
How to change the pulling direction
All winching operations should have
a straight line from the winch to the
object being pulled. This minimizes
the wire rope collecting on one side
of the drum which will affect pulling
efficiency and may damage the wire
rope. A snatch block, secured to a
point directly in front of the vehicle,
enables you to change the pulling
direction while allowing the wire
rope to be at 90┬░ to wind properly
onto the drum.
2008 F-250/350/450/550(f23)
Supplement
USA(fus)
Driver Controls
14
Page 15 of 25
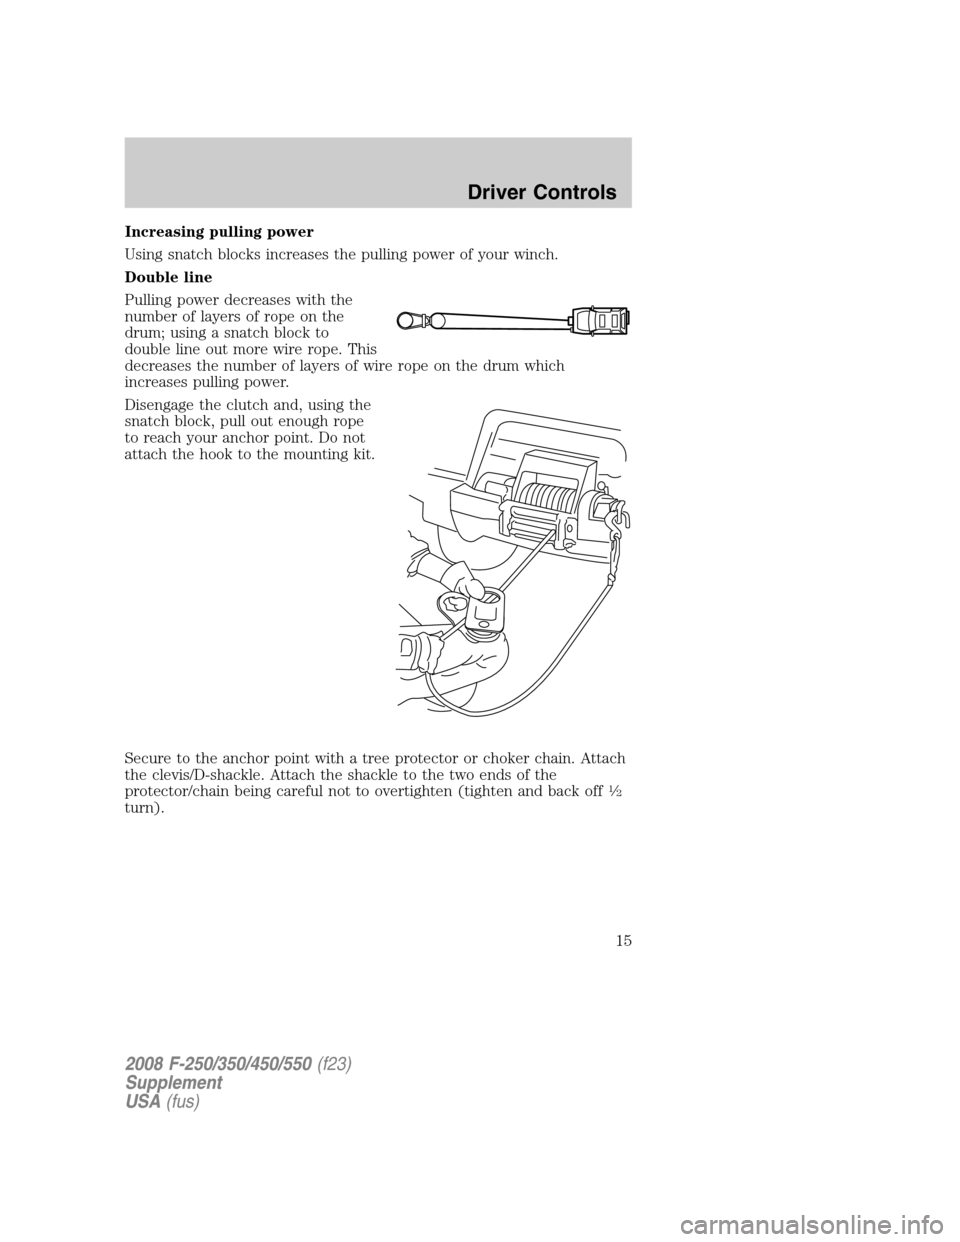
Increasing pulling power
Using snatch blocks increases the pulling power of your winch.
Double line
Pulling power decreases with the
number of layers of rope on the
drum; using a snatch block to
double line out more wire rope. This
decreases the number of layers of wire rope on the drum which
increases pulling power.
Disengage the clutch and, using the
snatch block, pull out enough rope
to reach your anchor point. Do not
attach the hook to the mounting kit.
Secure to the anchor point with a tree protector or choker chain. Attach
the clevis/D-shackle. Attach the shackle to the two ends of the
protector/chain being careful not to overtighten (tighten and back off
1�2
turn).
2008 F-250/350/450/550(f23)
Supplement
USA(fus)
Driver Controls
15
Page 16 of 25
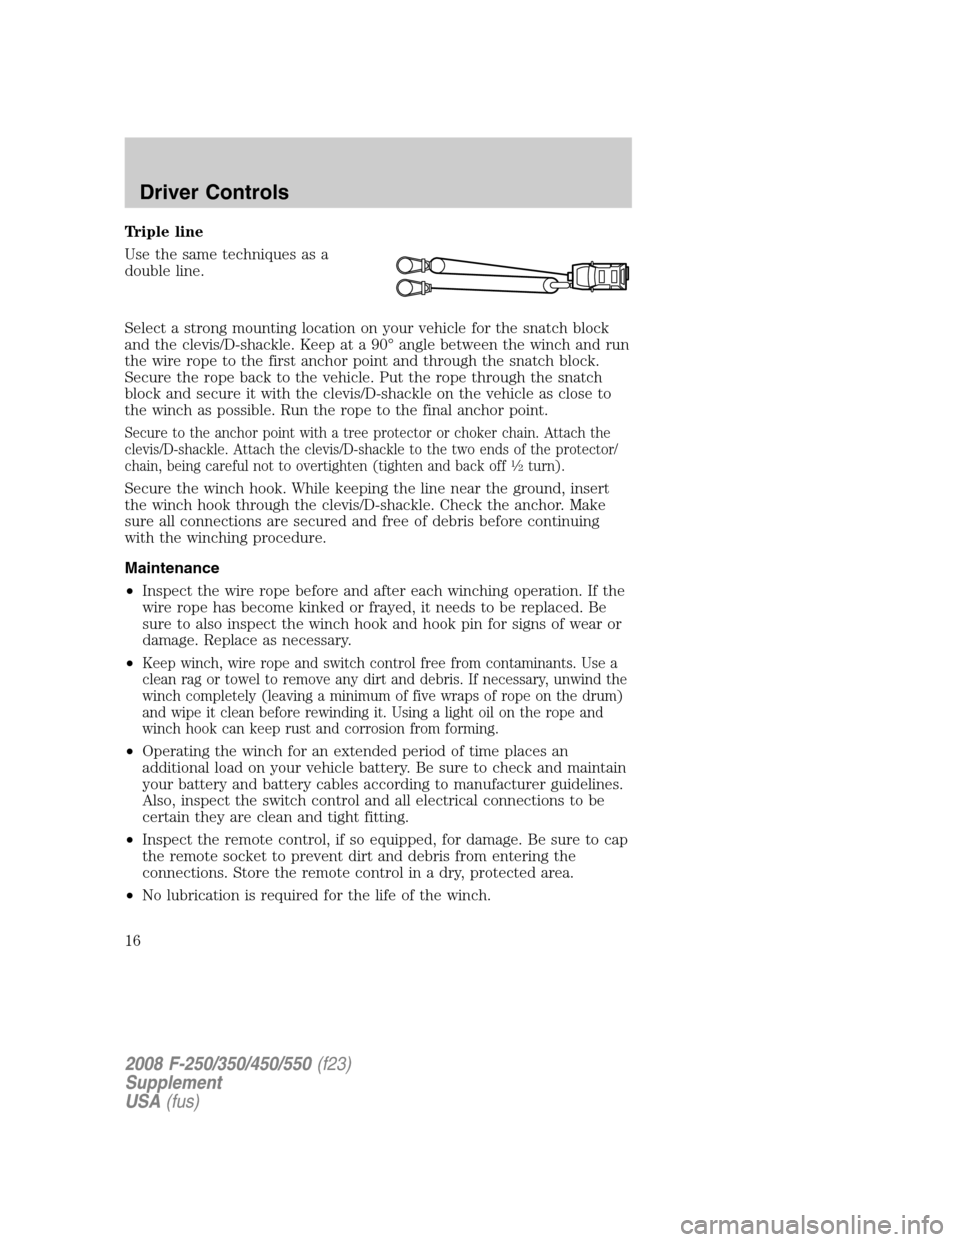
Triple line
Use the same techniques as a
double line.
Select a strong mounting location on your vehicle for the snatch block
and the clevis/D-shackle. Keep at a 90┬░ angle between the winch and run
the wire rope to the first anchor point and through the snatch block.
Secure the rope back to the vehicle. Put the rope through the snatch
block and secure it with the clevis/D-shackle on the vehicle as close to
the winch as possible. Run the rope to the final anchor point.
Secure to the anchor point with a tree protector or choker chain. Attach the
clevis/D-shackle. Attach the clevis/D-shackle to the two ends of the protector/
chain, being careful not to overtighten (tighten and back off
1�2turn).
Secure the winch hook. While keeping the line near the ground, insert
the winch hook through the clevis/D-shackle. Check the anchor. Make
sure all connections are secured and free of debris before continuing
with the winching procedure.
Maintenance
ŌĆóInspect the wire rope before and after each winching operation. If the
wire rope has become kinked or frayed, it needs to be replaced. Be
sure to also inspect the winch hook and hook pin for signs of wear or
damage. Replace as necessary.
ŌĆó
Keep winch, wire rope and switch control free from contaminants. Use a
clean rag or towel to remove any dirt and debris. If necessary, unwind the
winch completely (leaving a minimum of five wraps of rope on the drum)
and wipe it clean before rewinding it. Using a light oil on the rope and
winch hook can keep rust and corrosion from forming.
ŌĆóOperating the winch for an extended period of time places an
additional load on your vehicle battery. Be sure to check and maintain
your battery and battery cables according to manufacturer guidelines.
Also, inspect the switch control and all electrical connections to be
certain they are clean and tight fitting.
ŌĆóInspect the remote control, if so equipped, for damage. Be sure to cap
the remote socket to prevent dirt and debris from entering the
connections. Store the remote control in a dry, protected area.
ŌĆóNo lubrication is required for the life of the winch.
2008 F-250/350/450/550(f23)
Supplement
USA(fus)
Driver Controls
16
Page 22 of 25

WHEELS
Your vehicle may be equipped with two-piece bolt-together beadlock
rims. Beadlock rims allow the tires to survive operating at lower air
pressure which provide greater traction due to the larger tire-to-ground
contact area during slow, off-road operation. Always reinflate the tires to
the tire manufacturerŌĆÖs recommendations when no longer in slow,
off-road driving conditions. The beadlock also acts as a safety device
ensuring that the tire does not unseat from the rim or rotate on the
wheel when tire pressure is reduced, while also preventing the entry of
foreign objects, debris or water into the tireŌĆÖs air chamber.
Note:The wheel/tire assemblies should be serviced only by trained
personnel who have read and understand the wheel
assembly/disassembly information contained within theWorkshop
Manual.
TIRES
Your vehicleŌĆÖs tires may be equipped with a Variable Function Insert
(VFI) which is mounted into each tire. The VFI inserts and tires are then
fitted around the beadlock rim assembly, providing a higher level of tire
protection due to the dense rubber material in the tire assembly and
maximum all-terrain mobility.
SNOW CHAINS
Tire chains cannot be used on vehicles equipped with M/TR tires.
ON-BOARD AIR SYSTEM
Your vehicle is equipped with an on-board air system which has been
designed to provide compressed air for multiple uses, including the
addition of air to the vehicleŌĆÖs tires. The system uses a 25 ft. (7.6m)
length of air hose equipped with a clamp-on style air chuck. When not in
use, this hose is secured to the floor of the truck. A compressor,
mounted to the frame under the truck on the passenger side frame rail,
is included along with an air reservoir on the driver side. When the
compressor is on, the output pressure at the air tank is limited to 80 psi
(552 kPa).
2008 F-250/350/450/550(f23)
Supplement
USA(fus)
Tires, Wheels and Loading
22