FORD SUPER DUTY 2011 3.G Owners Manual
Manufacturer: FORD, Model Year: 2011, Model line: SUPER DUTY, Model: FORD SUPER DUTY 2011 3.GPages: 441, PDF Size: 3.3 MB
Page 291 of 441
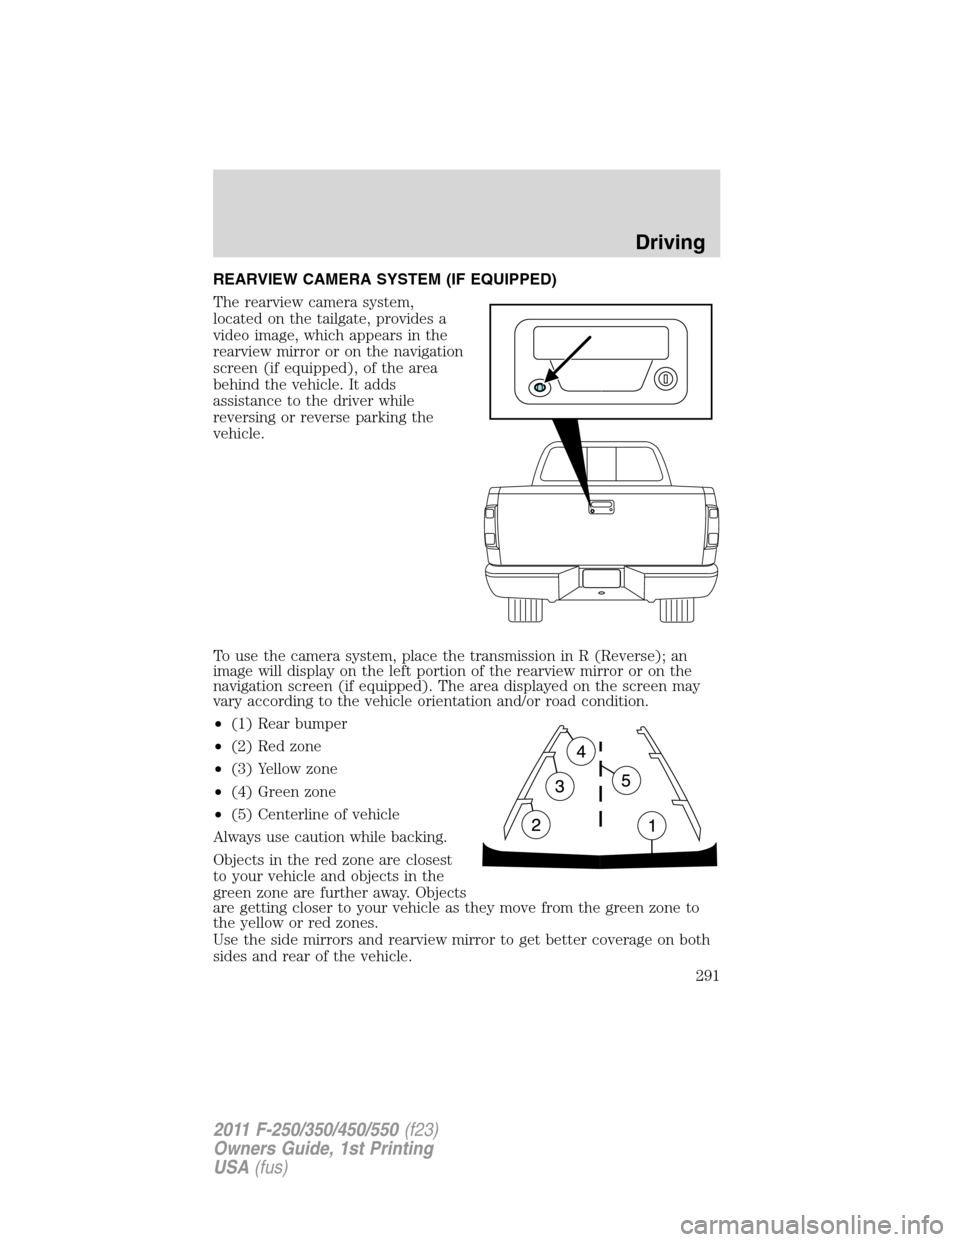
REARVIEW CAMERA SYSTEM (IF EQUIPPED)
The rearview camera system,
located on the tailgate, provides a
video image, which appears in the
rearview mirror or on the navigation
screen (if equipped), of the area
behind the vehicle. It adds
assistance to the driver while
reversing or reverse parking the
vehicle.
To use the camera system, place the transmission in R (Reverse); an
image will display on the left portion of the rearview mirror or on the
navigation screen (if equipped). The area displayed on the screen may
vary according to the vehicle orientation and/or road condition.
•(1) Rear bumper
•(2) Red zone
•(3) Yellow zone
•(4) Green zone
•(5) Centerline of vehicle
Always use caution while backing.
Objects in the red zone are closest
to your vehicle and objects in the
green zone are further away. Objects
are getting closer to your vehicle as they move from the green zone to
the yellow or red zones.
Use the side mirrors and rearview mirror to get better coverage on both
sides and rear of the vehicle.
Driving
291
2011 F-250/350/450/550(f23)
Owners Guide, 1st Printing
USA(fus)
Page 292 of 441
Image delay if displayed through the rearview mirror:
When shifting out of R (Reverse) and into any other gear, the image in
the rearview mirror will remain on for a few seconds before it shuts off
to assist in parking or trailer hookup.
Image delay if displayed through the navigation screen:
After shifting out of R (Reverse) and into any gear other than P (Park),
the image in the navigation screen will remain until the vehicle speed
reaches 5 mph (8 km/h), only if the rear camera delay feature is on, or
until any navigation radio button is pressed.
Note:The default setting for the rear camera delay is off. Press the
“Settings” button found on the navigation screen (if equipped) to set the
rear camera delay feature to on or off.
When towing, the camera system will only see what is being towed
behind the vehicle; this might not provide adequate coverage as it
usually provides in normal operation and some objects might not be
seen.
The camera lens for the camera is located on the tailgate. Keep the lens
clean so the video image remains clear and undistorted. Clean the lens
with a soft, lint-free cloth and non-abrasive cleaner.
Note:If the camera system image is not clear or seems distorted, it may
be covered with water droplets, snow, mud or any other substance. If
this occurs, clean the camera lens before using the camera system.
WARNING:The camera system is a reverse aid supplement
device that still requires the driver to use it in conjunction with
the rear view mirror and the side mirrors for maximum coverage.
WARNING:Objects that are close to either corner of the
bumper or under the bumper, might not be seen on the screen
due to the limited coverage of the camera system.
WARNING:Back up as slow as possible since higher speeds
might limit your reaction time to stop the vehicle.
WARNING:Do not use the camera system with the tailgate
open.
If the back end of the vehicle is hit or damaged, then check with your
authorized dealer to have your rearview camera system checked for
proper coverage and operation.
Driving
292
2011 F-250/350/450/550(f23)
Owners Guide, 1st Printing
USA(fus)
Page 293 of 441
Night time and dark area use
At night time or in dark areas, the camera system relies on the reverse
lamp lighting to produce an image. Therefore it is necessary that both
reverse lamps are operating in order to get a clear image in the dark. If
either of the lamps are not operating, stop using the camera system, at
least in the dark, until the lamp(s) are replaced and functioning.
Servicing
•If the image comes on while the vehicle is not in R (Reverse), have
the system inspected by your authorized dealer.
•If the image is not clear, then check if there is anything covering the
lens such as dirt, mud, ice, snow, etc. If the image is still not clear
after cleaning, have your system inspected by your authorized dealer.
FOUR-WHEEL DRIVE (4WD) OPERATION (IF EQUIPPED)
WARNING:For important information regarding safe operation
of this type of vehicle, seePreparing to drive your vehiclein
this chapter.
When four–wheel drive (4WD) is engaged, power is supplied to all four
wheels through a transfer case. 4WD can be selected when additional
driving power is desired.
4WD operation is not recommended on dry pavement. Doing so could
result in difficult disengagement of the transfer case, increased tire wear
and decreased fuel economy.
Manual Shift On Stop (MSOS) 4x4 system (if equipped)
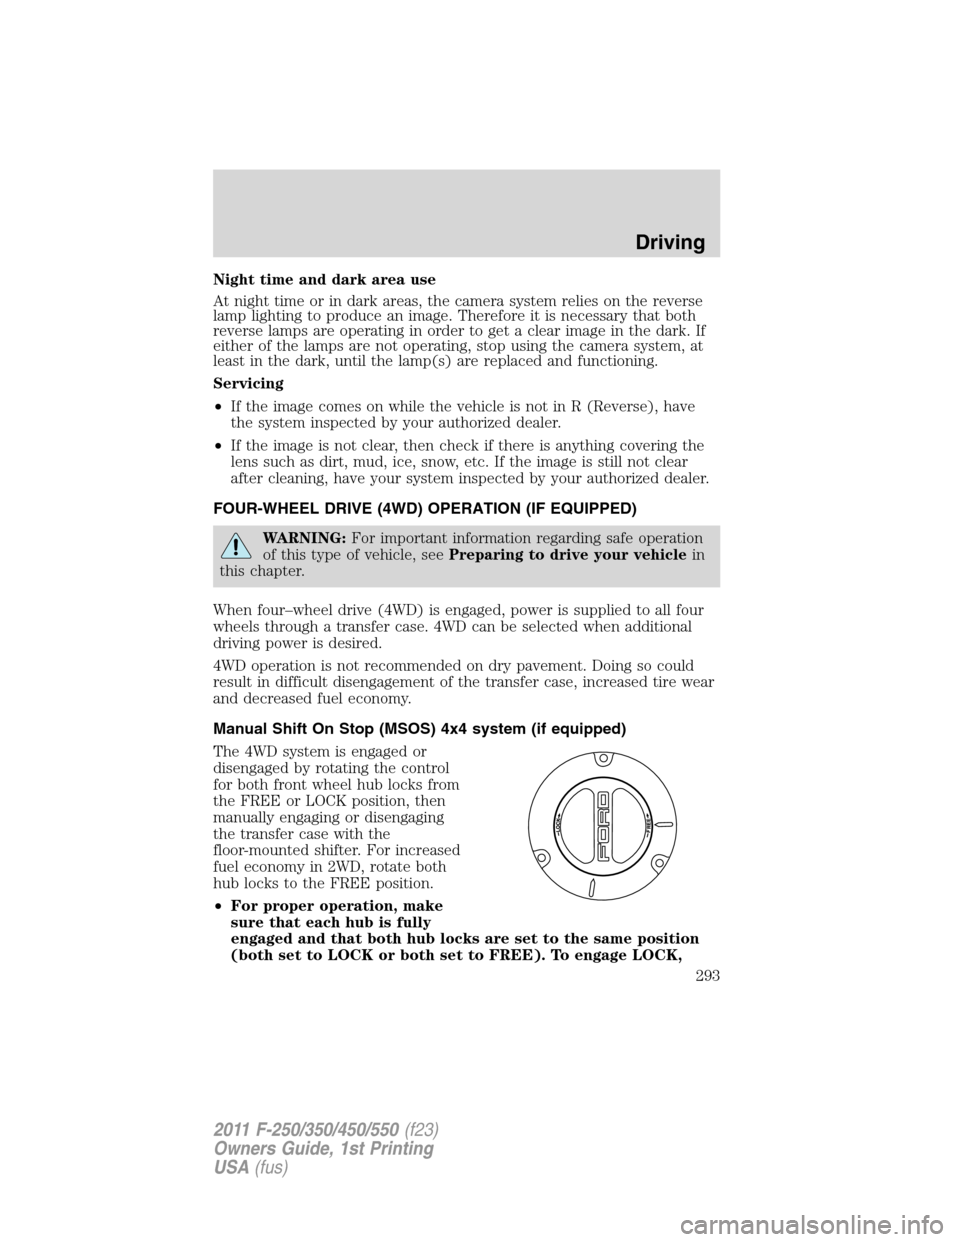
The 4WD system is engaged or
disengaged by rotating the control
for both front wheel hub locks from
the FREE or LOCK position, then
manually engaging or disengaging
the transfer case with the
floor-mounted shifter. For increased
fuel economy in 2WD, rotate both
hub locks to the FREE position.
•For proper operation, make
sure that each hub is fully
engaged and that both hub locks are set to the same position
(both set to LOCK or both set to FREE). To engage LOCK,
Driving
293
2011 F-250/350/450/550(f23)
Owners Guide, 1st Printing
USA(fus)
Page 294 of 441
turn the hub locks completely clockwise; to disengage the hubs
(FREE), turn the hub locks completely counterclockwise.
•The vehicle should not be driven in 4X4 High or 4X4 Low
modes with the hub locks set to FREE as this condition may
damage driveline system components.
•Some vehicles may be equipped with wheel ornaments that cover the
4x4 manual hub lock. These ornaments must be removed to access
the manual hub locks.
Electronic Shift On the Fly (ESOF) 4x4 system (if equipped)
If equipped with the electronic shift 4WD system, and 4X4 Low is
selected while the vehicle is moving above 3 mph (5 km/h), the
4WD system will not perform a shift. This is normal and should be
no reason for concern.Refer to Shifting to/from 4L (4X4 Low) for
proper system operation.
The ESOF 4WD system:
•provides 4x4 High engagement and disengagement while the vehicle is
moving.
•is operated by a rotary control located on the instrument panel that
allows you select 4x2, 4x4 High or 4x4 Low operation.
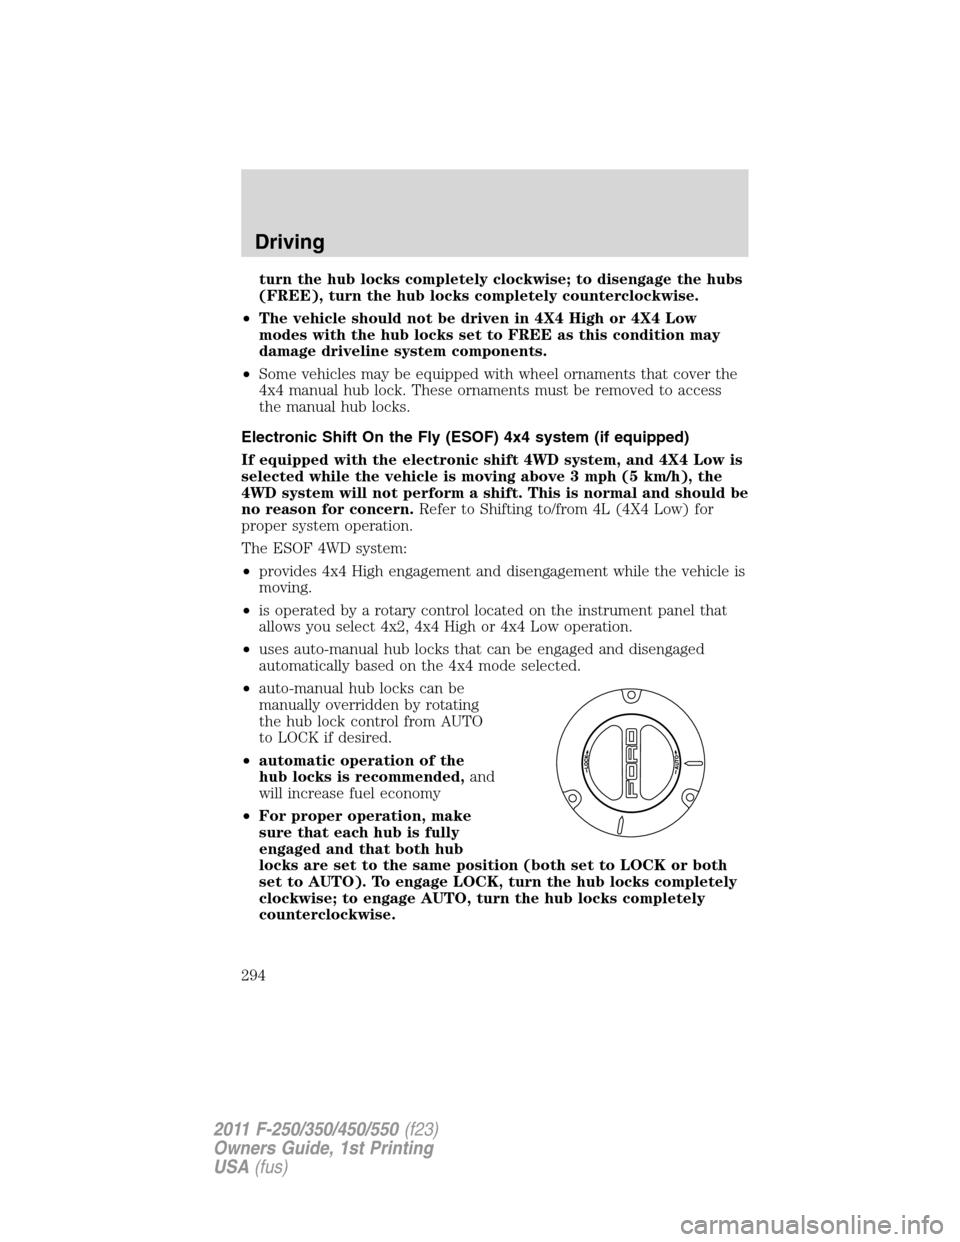
•uses auto-manual hub locks that can be engaged and disengaged
automatically based on the 4x4 mode selected.
•auto-manual hub locks can be
manually overridden by rotating
the hub lock control from AUTO
to LOCK if desired.
•automatic operation of the
hub locks is recommended,and
will increase fuel economy
•For proper operation, make
sure that each hub is fully
engaged and that both hub
locks are set to the same position (both set to LOCK or both
set to AUTO). To engage LOCK, turn the hub locks completely
clockwise; to engage AUTO, turn the hub locks completely
counterclockwise.
Driving
294
2011 F-250/350/450/550(f23)
Owners Guide, 1st Printing
USA(fus)
Page 295 of 441
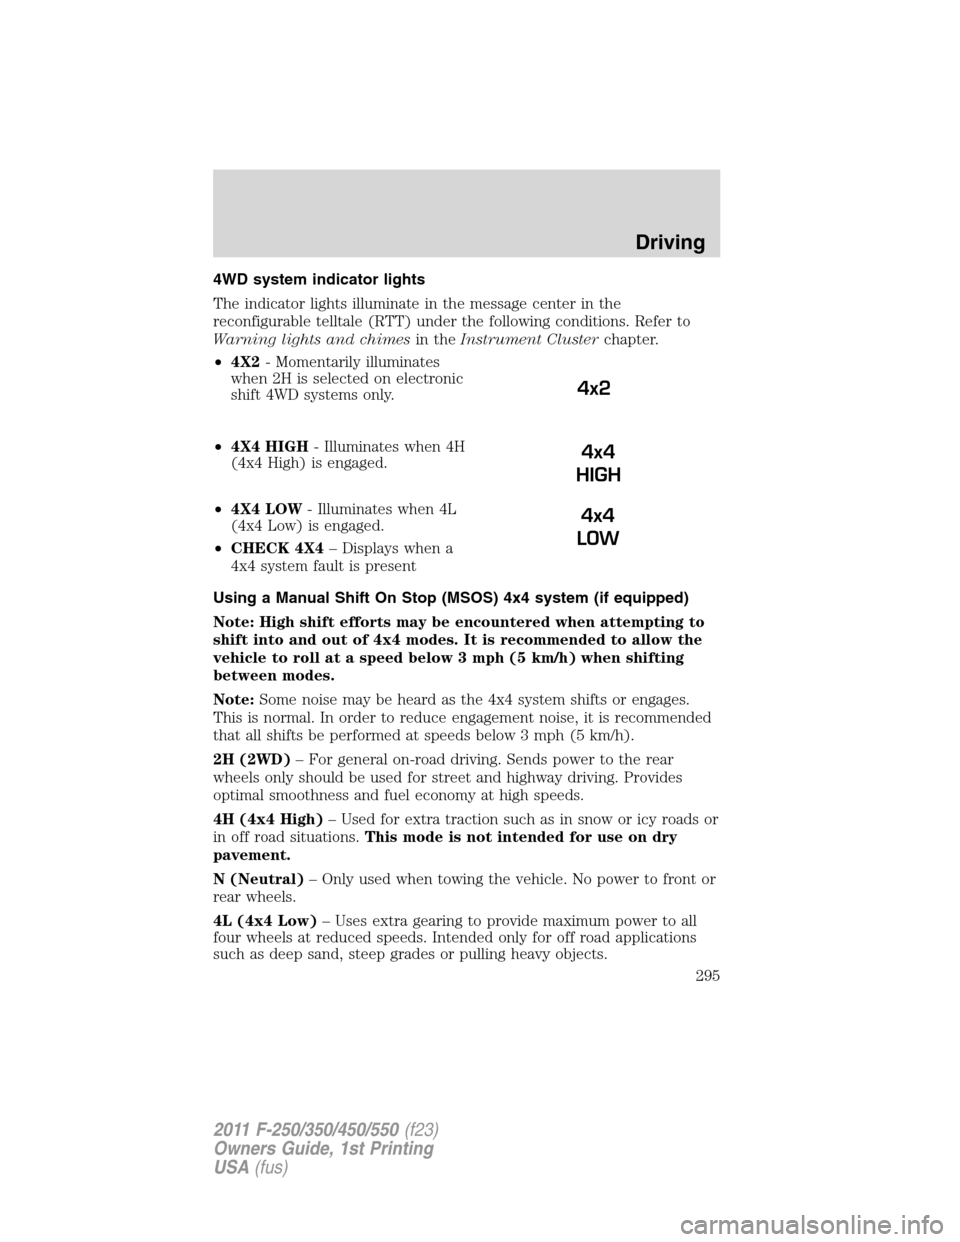
4WD system indicator lights
The indicator lights illuminate in the message center in the
reconfigurable telltale (RTT) under the following conditions. Refer to
Warning lights and chimesin theInstrument Clusterchapter.
•4X2- Momentarily illuminates
when 2H is selected on electronic
shift 4WD systems only.
•4X4 HIGH- Illuminates when 4H
(4x4 High) is engaged.
•4X4 LOW- Illuminates when 4L
(4x4 Low) is engaged.
•CHECK 4X4– Displays when a
4x4 system fault is present
Using a Manual Shift On Stop (MSOS) 4x4 system (if equipped)
Note: High shift efforts may be encountered when attempting to
shift into and out of 4x4 modes. It is recommended to allow the
vehicle to roll at a speed below 3 mph (5 km/h) when shifting
between modes.
Note:Some noise may be heard as the 4x4 system shifts or engages.
This is normal. In order to reduce engagement noise, it is recommended
that all shifts be performed at speeds below 3 mph (5 km/h).
2H (2WD)– For general on-road driving. Sends power to the rear
wheels only should be used for street and highway driving. Provides
optimal smoothness and fuel economy at high speeds.
4H (4x4 High)– Used for extra traction such as in snow or icy roads or
in off road situations.This mode is not intended for use on dry
pavement.
N (Neutral)– Only used when towing the vehicle. No power to front or
rear wheels.
4L (4x4 Low)– Uses extra gearing to provide maximum power to all
four wheels at reduced speeds. Intended only for off road applications
such as deep sand, steep grades or pulling heavy objects.
4x2
4x4
HIGH
4x4
LOW
Driving
295
2011 F-250/350/450/550(f23)
Owners Guide, 1st Printing
USA(fus)
Page 296 of 441
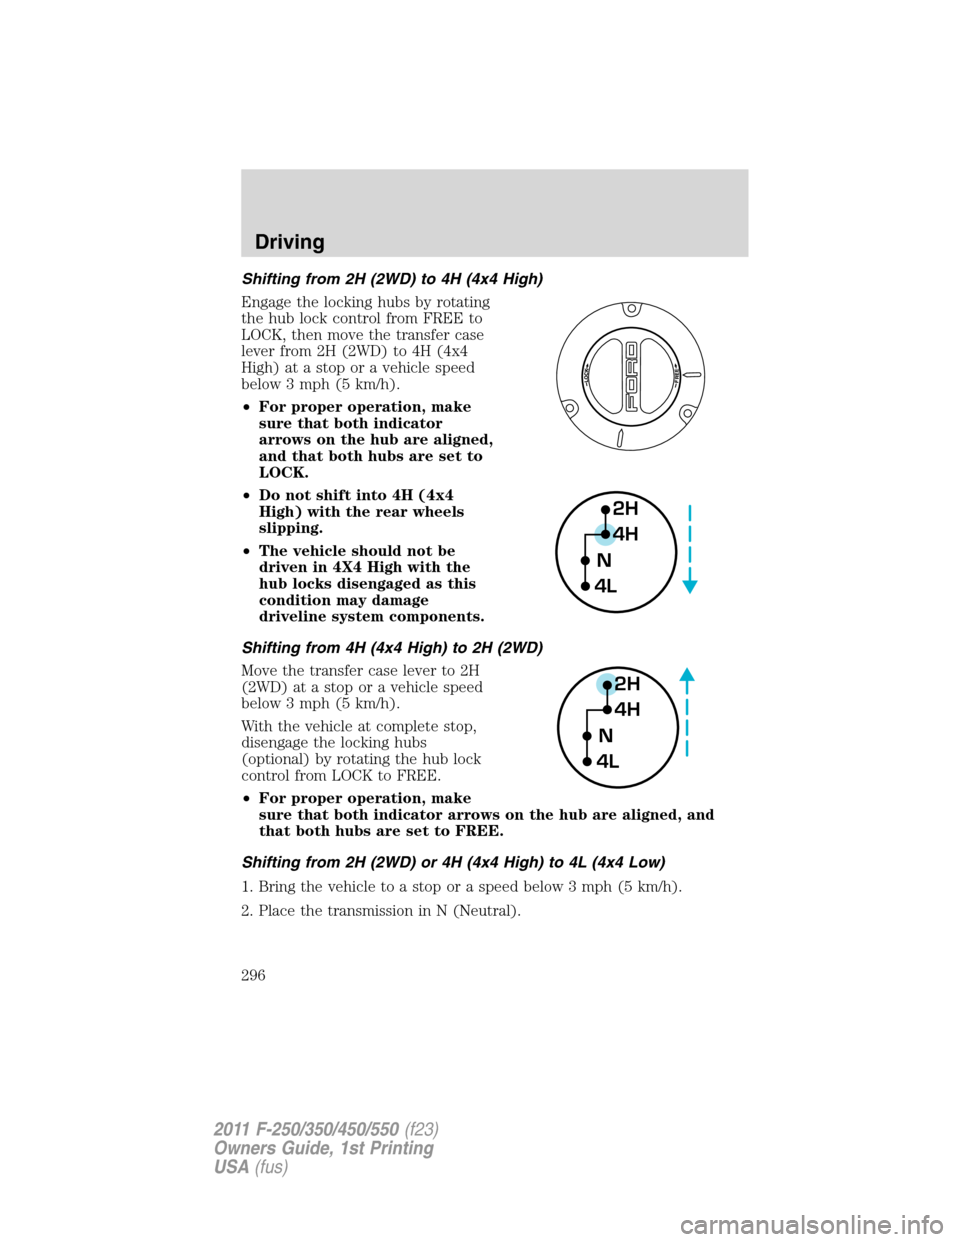
Shifting from 2H (2WD) to 4H (4x4 High)
Engage the locking hubs by rotating
the hub lock control from FREE to
LOCK, then move the transfer case
lever from 2H (2WD) to 4H (4x4
High) at a stop or a vehicle speed
below 3 mph (5 km/h).
•For proper operation, make
sure that both indicator
arrows on the hub are aligned,
and that both hubs are set to
LOCK.
•Do not shift into 4H (4x4
High) with the rear wheels
slipping.
•The vehicle should not be
driven in 4X4 High with the
hub locks disengaged as this
condition may damage
driveline system components.
Shifting from 4H (4x4 High) to 2H (2WD)
Move the transfer case lever to 2H
(2WD) at a stop or a vehicle speed
below 3 mph (5 km/h).
With the vehicle at complete stop,
disengage the locking hubs
(optional) by rotating the hub lock
control from LOCK to FREE.
•For proper operation, make
sure that both indicator arrows on the hub are aligned, and
that both hubs are set to FREE.
Shifting from 2H (2WD) or 4H (4x4 High) to 4L (4x4 Low)
1. Bring the vehicle to a stop or a speed below 3 mph (5 km/h).
2. Place the transmission in N (Neutral).
2H
4H
4LN
2H
4H
4LN
Driving
296
2011 F-250/350/450/550(f23)
Owners Guide, 1st Printing
USA(fus)
Page 297 of 441
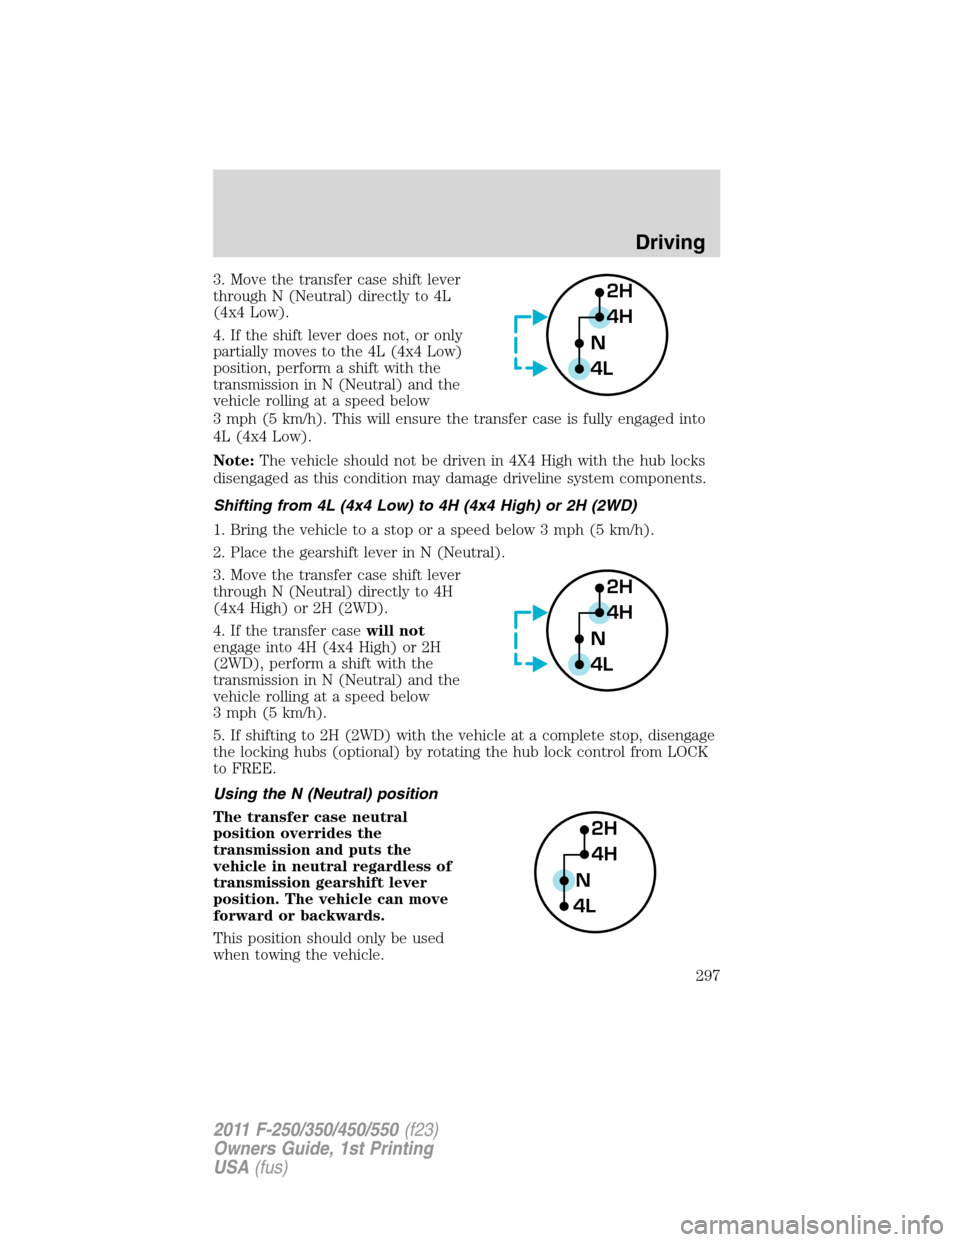
3. Move the transfer case shift lever
through N (Neutral) directly to 4L
(4x4 Low).
4. If the shift lever does not, or only
partially moves to the 4L (4x4 Low)
position, perform a shift with the
transmission in N (Neutral) and the
vehicle rolling at a speed below
3 mph (5 km/h). This will ensure the transfer case is fully engaged into
4L (4x4 Low).
Note:The vehicle should not be driven in 4X4 High with the hub locks
disengaged as this condition may damage driveline system components.
Shifting from 4L (4x4 Low) to 4H (4x4 High) or 2H (2WD)
1. Bring the vehicle to a stop or a speed below 3 mph (5 km/h).
2. Place the gearshift lever in N (Neutral).
3. Move the transfer case shift lever
through N (Neutral) directly to 4H
(4x4 High) or 2H (2WD).
4. If the transfer casewill not
engage into 4H (4x4 High) or 2H
(2WD), perform a shift with the
transmission in N (Neutral) and the
vehicle rolling at a speed below
3 mph (5 km/h).
5. If shifting to 2H (2WD) with the vehicle at a complete stop, disengage
the locking hubs (optional) by rotating the hub lock control from LOCK
to FREE.
Using the N (Neutral) position
The transfer case neutral
position overrides the
transmission and puts the
vehicle in neutral regardless of
transmission gearshift lever
position. The vehicle can move
forward or backwards.
This position should only be used
when towing the vehicle.2H
4H
4LN
2H
4H
4LN
2H
4H
4LN
Driving
297
2011 F-250/350/450/550(f23)
Owners Guide, 1st Printing
USA(fus)
Page 298 of 441
WARNING:Do not leave the vehicle unattended with the
transfer case in the N (Neutral) position. Always set the parking
brake fully and turn off the ignition when leaving the vehicle.
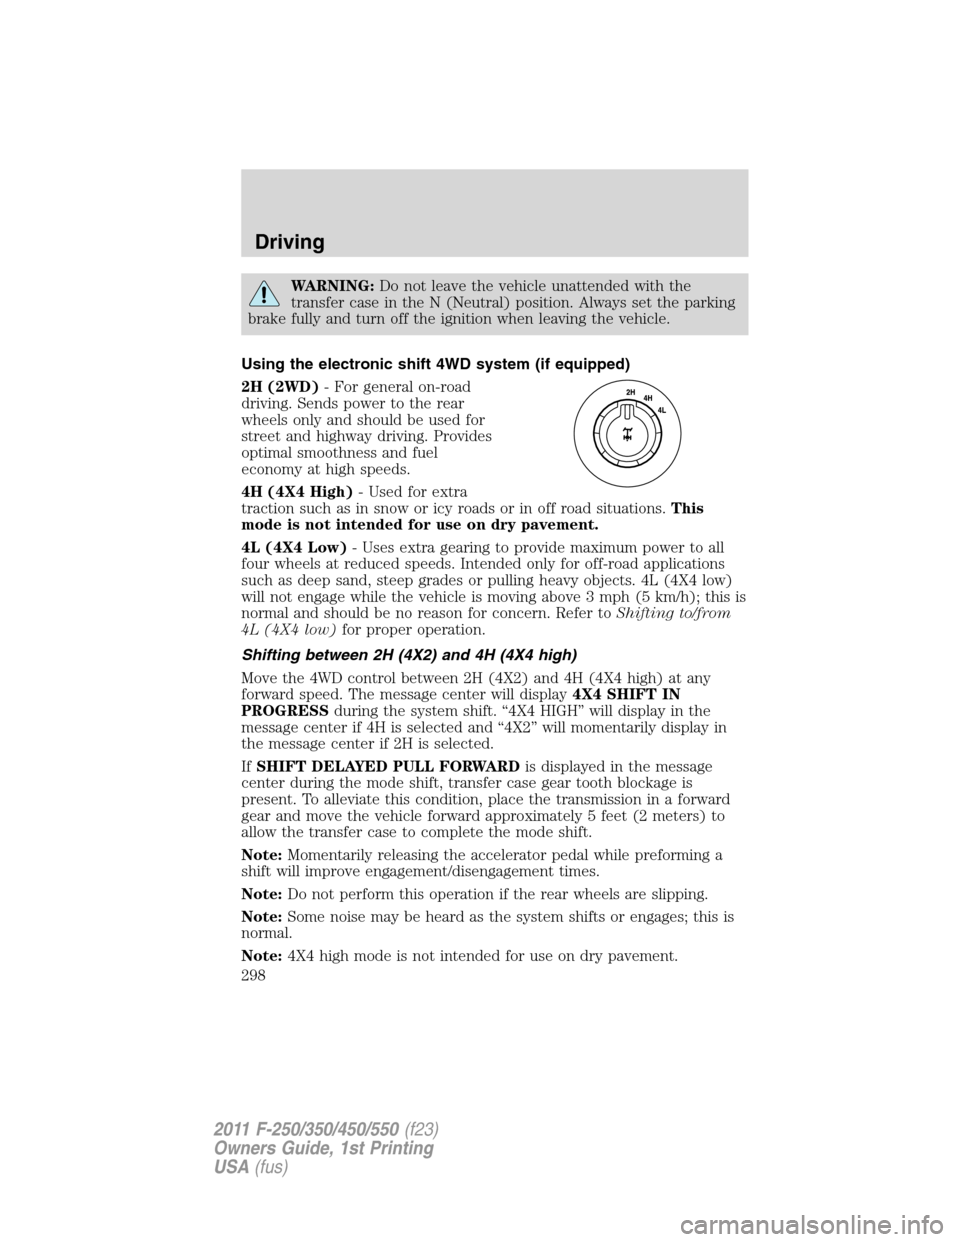
Using the electronic shift 4WD system (if equipped)
2H (2WD)- For general on-road
driving. Sends power to the rear
wheels only and should be used for
street and highway driving. Provides
optimal smoothness and fuel
economy at high speeds.
4H (4X4 High)- Used for extra
traction such as in snow or icy roads or in off road situations.This
mode is not intended for use on dry pavement.
4L (4X4 Low)- Uses extra gearing to provide maximum power to all
four wheels at reduced speeds. Intended only for off-road applications
such as deep sand, steep grades or pulling heavy objects. 4L (4X4 low)
will not engage while the vehicle is moving above 3 mph (5 km/h); this is
normal and should be no reason for concern. Refer toShifting to/from
4L (4X4 low)for proper operation.
Shifting between 2H (4X2) and 4H (4X4 high)
Move the 4WD control between 2H (4X2) and 4H (4X4 high) at any
forward speed. The message center will display4X4 SHIFT IN
PROGRESSduring the system shift. “4X4 HIGH” will display in the
message center if 4H is selected and “4X2” will momentarily display in
the message center if 2H is selected.
IfSHIFT DELAYED PULL FORWARDis displayed in the message
center during the mode shift, transfer case gear tooth blockage is
present. To alleviate this condition, place the transmission in a forward
gear and move the vehicle forward approximately 5 feet (2 meters) to
allow the transfer case to complete the mode shift.
Note:Momentarily releasing the accelerator pedal while preforming a
shift will improve engagement/disengagement times.
Note:Do not perform this operation if the rear wheels are slipping.
Note:Some noise may be heard as the system shifts or engages; this is
normal.
Note:4X4 high mode is not intended for use on dry pavement.
Driving
298
2011 F-250/350/450/550(f23)
Owners Guide, 1st Printing
USA(fus)
Page 299 of 441
Shifting to/from 4L (4X4 low)
1. Bring the vehicle to a speed of 3 mph (5 km/h) or less.
2. Place the transmission in N (Neutral).
3. Move the 4WD control to the desired position.
The message center will display4X4 SHIFT IN PROGRESSduring the
shift. The message center will then display the system mode selected. If
any of the above shift conditions are not met, the shift will not occur and
the message center will display information guiding the driver through
the proper shifting procedures.
IfSHIFT DELAYED PULL FORWARDis displayed in the message
center, transfer case gear tooth blockage is present. To alleviate this
condition, place the transmission in a forward gear, move the vehicle
forward approximately 5 feet (1.5 m), and shift the transmission back to
neutral to allow the transfer case to complete the range shift.
Note:Some noise may be heard as the system shifts or engages; this is
normal.
Note:4x4 low mode is not intended for use on dry pavement.
Driving off-road with truck and utility vehicles
4WD vehicles are specially equipped for driving on sand, snow, mud and
rough terrain and have operating characteristics that are somewhat
different from conventional vehicles, both on and off the road.
Your vehicle may be equipped with a long front air dam that may become
damaged (due to reduced ground clearance) when taking your vehicle
off-road. This air dam can either be removed or a shorter air dam can be
purchased from your authorized dealer. In either case, if the air dam is
to be removed (or replaced) before going off-road, refer to the
Workshop Manualfor the procedure or have your authorized dealer
perform the work for you.
How your vehicle differs from other vehicles
Truck and utility vehicles can differ from some other vehicles. Your
vehicle may be higher to allow it to travel over rough terrain without
getting hung up or damaging underbody components.
The differences that make your vehicle so versatile also make it handle
differently than an ordinary passenger car.
Maintain steering wheel control at all times, especially in rough terrain.
Since sudden changes in terrain can result in abrupt steering wheel
motion, make sure you grip the steering wheel from the outside. Do not
grip the spokes.
Driving
299
2011 F-250/350/450/550(f23)
Owners Guide, 1st Printing
USA(fus)
Page 300 of 441
Drive cautiously to avoid vehicle damage from concealed objects such as
rocks and stumps.
You should either know the terrain or examine maps of the area before
driving. Map out your route before driving in the area. To maintain
steering and braking control of your vehicle, you must have all four
wheels on the ground and they must be rolling, not sliding or spinning.
Basic operating principles
•Do not use 4WD on dry, hard surfaced roads. Doing so will produce
excessive noise, increase tire wear and may damage drive components.
4WD modes are only intended for consistently slippery or loose
surfaces.
•Drive slower in strong crosswinds which can affect the normal steering
characteristics of your vehicle.
•Be extremely careful when driving on pavement made slippery by
loose sand, water, gravel, snow or ice.
If your vehicle goes off the edge of the pavement
•If your vehicle goes off the edge of the pavement, slow down, but
avoid severe brake application, ease the vehicle back onto the
pavement only after reducing your speed. Do not turn the steering
wheel too sharply while returning to the road surface.
•It may be safer to stay on the apron or shoulder of the road and slow
down gradually before returning to the pavement. You may lose
control if you do not slow down or if you turn the steering wheel too
sharply or abruptly.
•It often may be less risky to strike small objects, such as highway
reflectors, with minor damage to your vehicle rather than attempt a
sudden return to the pavement which could cause the vehicle to slide
sideways out of control or roll over. Remember, your safety and the
safety of others should be your primary concern.
WARNING:Vehicles with a higher center of gravity such as
utility and four-wheel drive vehicles handle differently than
vehicles with a lower center of gravity. Utility and four-wheel drive
vehicles arenotdesigned for cornering at speeds as high as passenger
cars any more than low-slung sports cars are designed to perform
satisfactorily under off-road conditions. Avoid sharp turns, excessive
speed and abrupt maneuvers in these vehicles. Failure to drive
cautiously could result in an increased risk of loss of vehicle control,
vehicle rollover, personal injury and death.
Driving
300
2011 F-250/350/450/550(f23)
Owners Guide, 1st Printing
USA(fus)