clock FORD SUPER DUTY 2015 3.G Diesel Supplement Manual
[x] Cancel search | Manufacturer: FORD, Model Year: 2015, Model line: SUPER DUTY, Model: FORD SUPER DUTY 2015 3.GPages: 84, PDF Size: 13.36 MB
Page 21 of 84
Note:
If you drain the diesel fuel conditioner
module while the system is running air will
enter into the fuel system. The engine will
not operate properly if air enters the system.
Note: With fuel tank levels above 3⁄4 tank
it may be necessary to loosen the bowl 3
turns before opening the drain. This will
actuate an anti-siphon valve at the fuel and
water separator inlet and prevent the fuel
from siphoning out of the tank.
Note: A loose drain valve can allow air to
enter the fuel system and cause drivetrain
issues. The engine will not operate properly.
Be sure that you fully tighten the drain valve.
1. Stop your vehicle and shut off the engine.
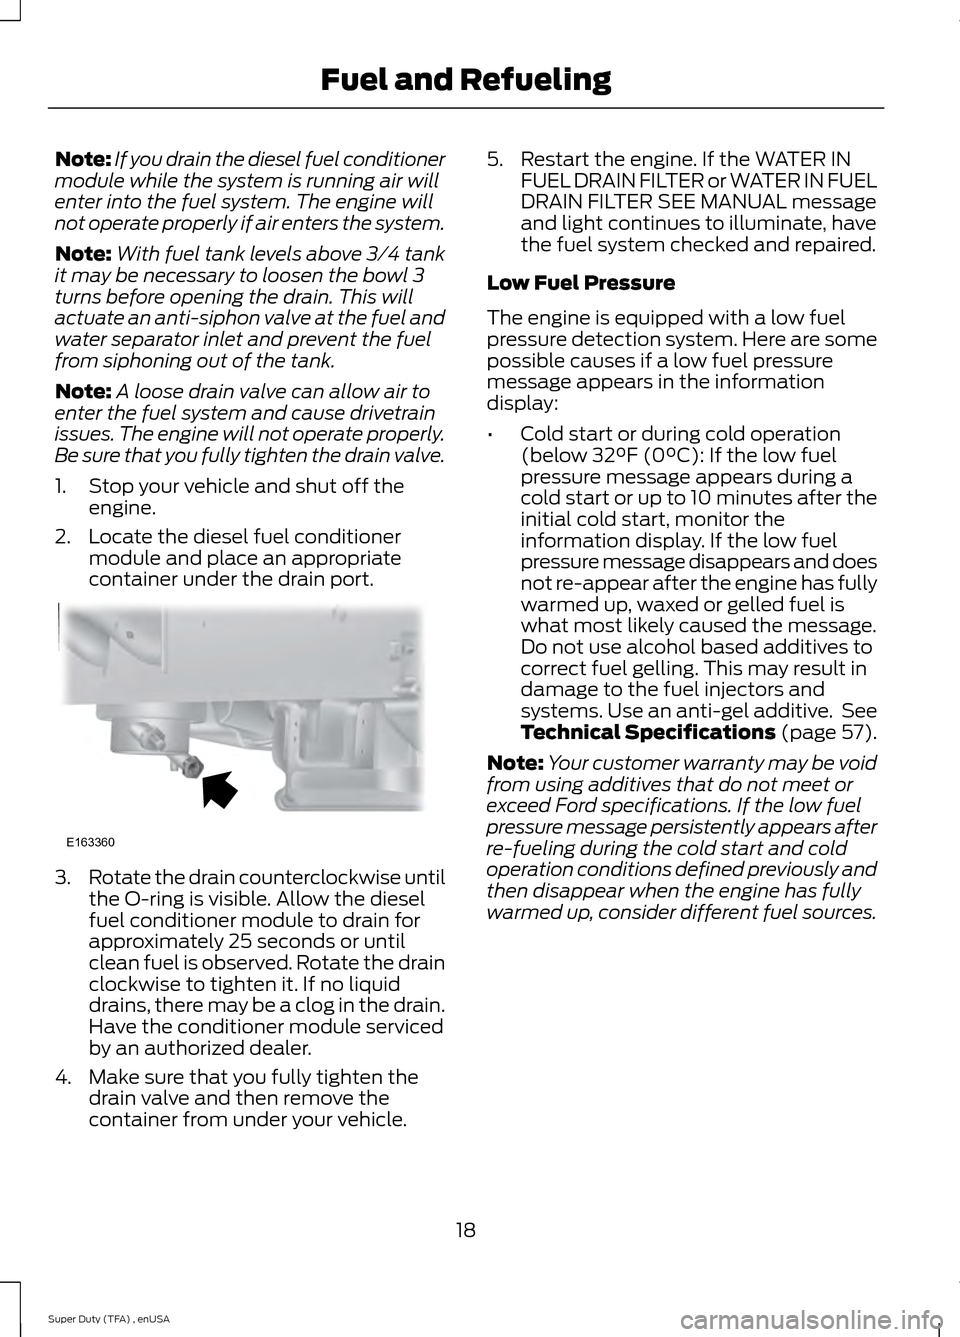
2. Locate the diesel fuel conditioner module and place an appropriate
container under the drain port. 3.
Rotate the drain counterclockwise until
the O-ring is visible. Allow the diesel
fuel conditioner module to drain for
approximately 25 seconds or until
clean fuel is observed. Rotate the drain
clockwise to tighten it. If no liquid
drains, there may be a clog in the drain.
Have the conditioner module serviced
by an authorized dealer.
4. Make sure that you fully tighten the drain valve and then remove the
container from under your vehicle. 5. Restart the engine. If the WATER IN
FUEL DRAIN FILTER or WATER IN FUEL
DRAIN FILTER SEE MANUAL message
and light continues to illuminate, have
the fuel system checked and repaired.
Low Fuel Pressure
The engine is equipped with a low fuel
pressure detection system. Here are some
possible causes if a low fuel pressure
message appears in the information
display:
• Cold start or during cold operation
(below 32°F (0°C): If the low fuel
pressure message appears during a
cold start or up to 10 minutes after the
initial cold start, monitor the
information display. If the low fuel
pressure message disappears and does
not re-appear after the engine has fully
warmed up, waxed or gelled fuel is
what most likely caused the message.
Do not use alcohol based additives to
correct fuel gelling. This may result in
damage to the fuel injectors and
systems. Use an anti-gel additive. See
Technical Specifications (page 57).
Note: Your customer warranty may be void
from using additives that do not meet or
exceed Ford specifications. If the low fuel
pressure message persistently appears after
re-fueling during the cold start and cold
operation conditions defined previously and
then disappear when the engine has fully
warmed up, consider different fuel sources.
18
Super Duty (TFA) , enUSA Fuel and RefuelingE163360
Page 22 of 84
•
Low fuel operation: If the low fuel
pressure message appears when your
vehicle is warm and during low fuel
tank level operation (near empty),
refuel your vehicle. If the message
reappears after fueling, see below. If
the message does not come back, the
low fuel pressure condition was due to
low fuel levels in the fuel tank.
• Normal operation: If the low fuel
pressure message appears during
normal operation when the engine is
fully warm, and fuel level is not low,
you must change the fuel filters
regardless of the maintenance
schedule interval.
• If replacement of the fuel filter does
not remedy the low fuel pressure
message during normal operation as
defined above, take the vehicle to an
authorized dealer.
Changing the Engine-Mounted and
Diesel Fuel Conditioner Module Fuel
Filters
Your vehicle is equipped with two fuel
filters. The first filter mounts on top of the
engine on the driver ’s side. The second
filter, inside the diesel fuel conditioner
module, is mounted on the frame rail under
the driver ’s side floorboard near the
transmission. You should replace both
filters at the same time. Regular fuel filter
changes are an important part of engine
maintenance; failing to keep with the
scheduled maintenance could lead to
engine performance issues and fuel
injection system damage. Refer to the
scheduled maintenance information of this
supplement for more information. See
General Maintenance Information
(page 59). Refer to Motorcraft part numbers in the
Capacities and Specifications chapter for
the fuel filter replacement part number.
See Motorcraft Parts (page 55). This part
number includes filters and seals for both
the engine-mounted and frame-mounted
filters.
Removal - Diesel Fuel Conditioner
Module filter
The diesel fuel conditioner module filter is
located in the lower portion of the housing.
1. Drain the diesel fuel conditioner
module. See Draining the Fuel and
Water Separator earlier in this chapter.
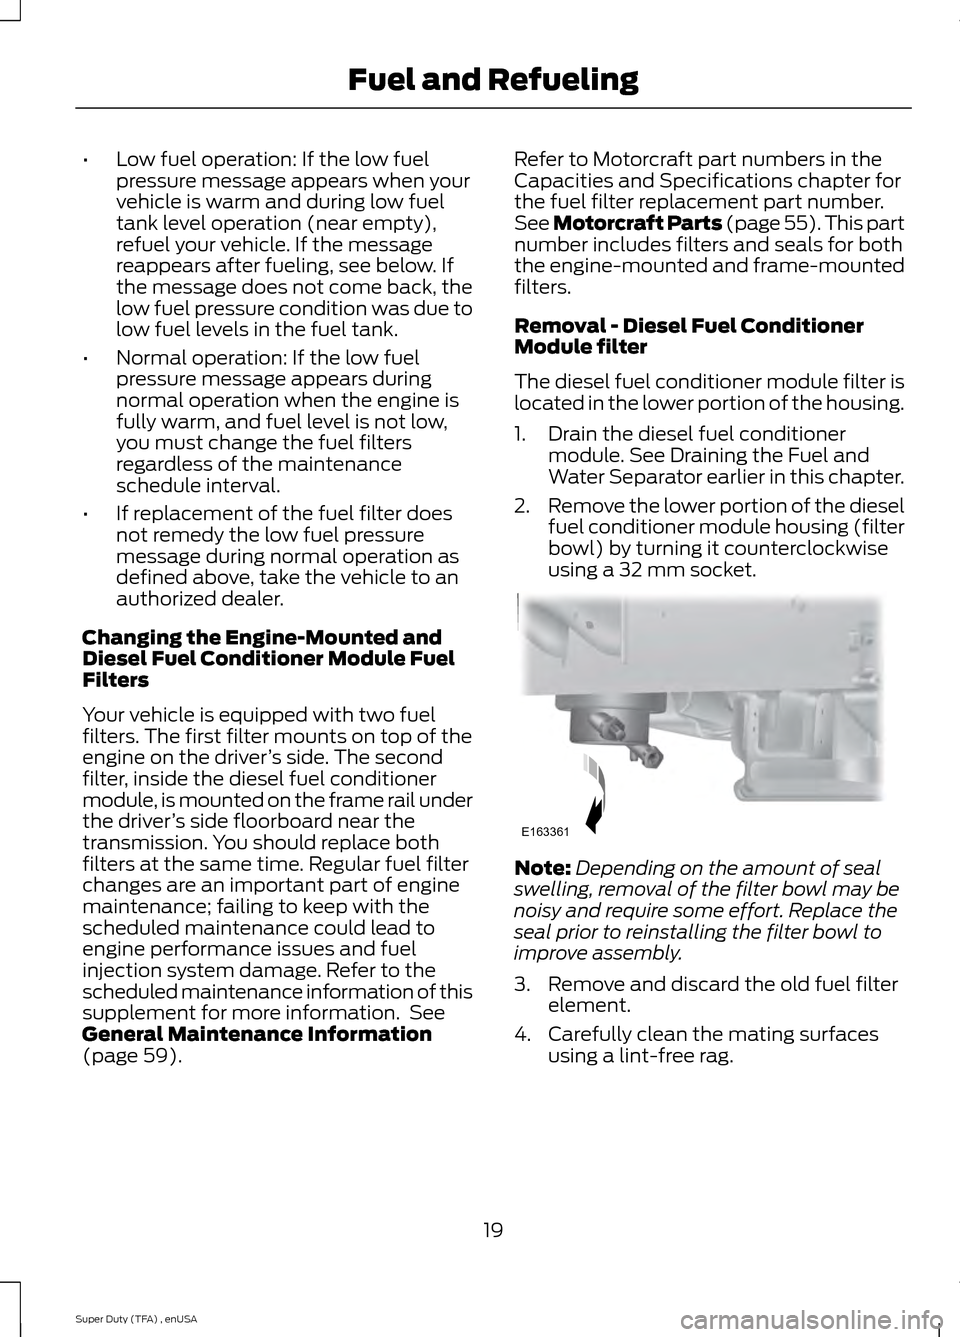
2. Remove the lower portion of the diesel
fuel conditioner module housing (filter
bowl) by turning it counterclockwise
using a 32 mm socket. Note:
Depending on the amount of seal
swelling, removal of the filter bowl may be
noisy and require some effort. Replace the
seal prior to reinstalling the filter bowl to
improve assembly.
3. Remove and discard the old fuel filter element.
4. Carefully clean the mating surfaces using a lint-free rag.
19
Super Duty (TFA) , enUSA Fuel and RefuelingE163361
Page 23 of 84
Installation – Diesel Fuel Conditioner
Module filter
1.
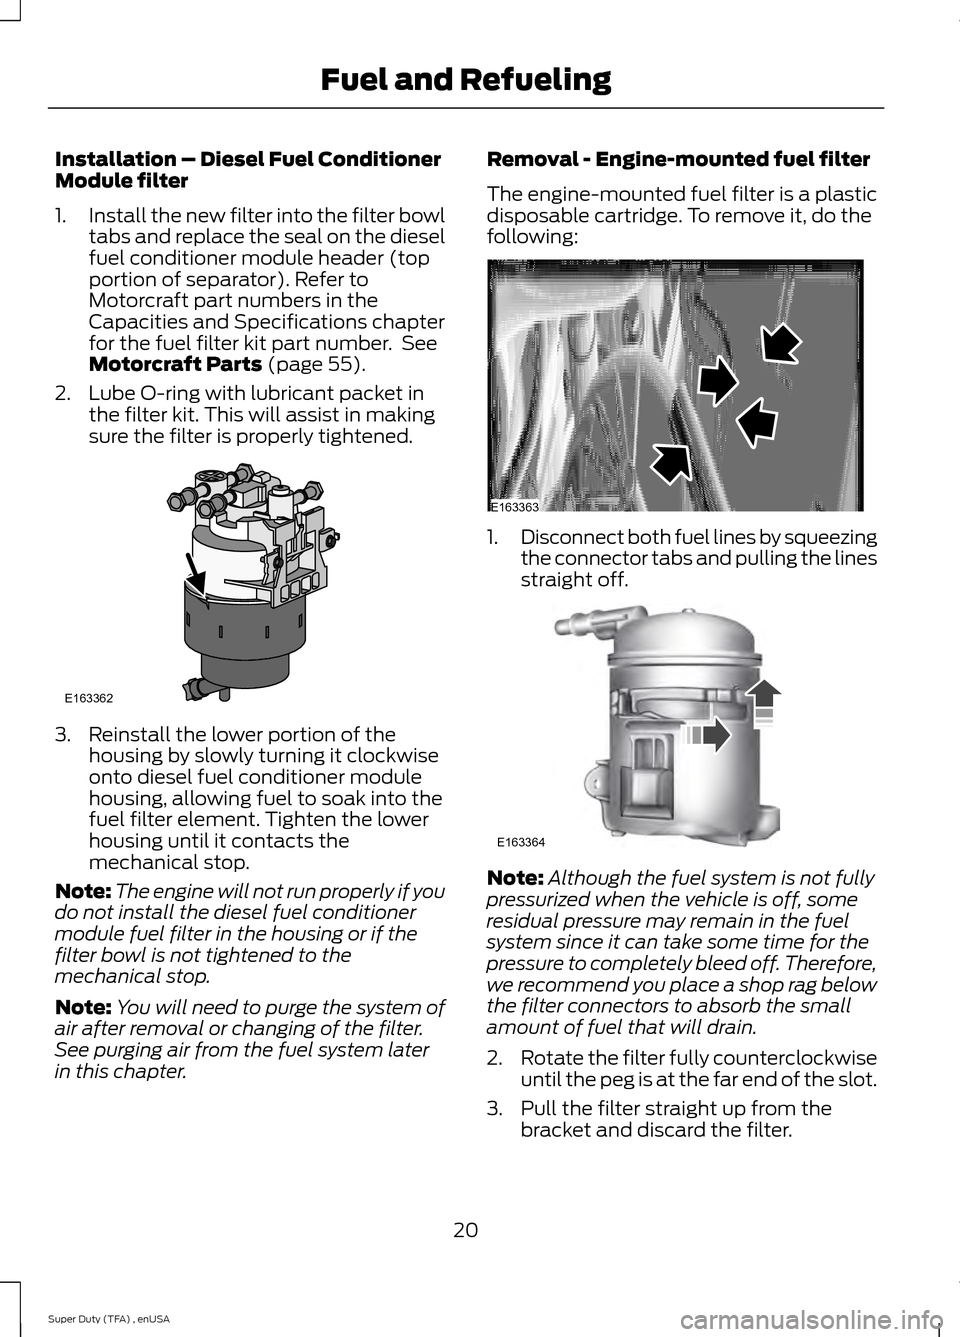
Install the new filter into the filter bowl
tabs and replace the seal on the diesel
fuel conditioner module header (top
portion of separator). Refer to
Motorcraft part numbers in the
Capacities and Specifications chapter
for the fuel filter kit part number. See
Motorcraft Parts (page 55).
2. Lube O-ring with lubricant packet in the filter kit. This will assist in making
sure the filter is properly tightened. 3. Reinstall the lower portion of the
housing by slowly turning it clockwise
onto diesel fuel conditioner module
housing, allowing fuel to soak into the
fuel filter element. Tighten the lower
housing until it contacts the
mechanical stop.
Note: The engine will not run properly if you
do not install the diesel fuel conditioner
module fuel filter in the housing or if the
filter bowl is not tightened to the
mechanical stop.
Note: You will need to purge the system of
air after removal or changing of the filter.
See purging air from the fuel system later
in this chapter. Removal - Engine-mounted fuel filter
The engine-mounted fuel filter is a plastic
disposable cartridge. To remove it, do the
following:
1.
Disconnect both fuel lines by squeezing
the connector tabs and pulling the lines
straight off. Note:
Although the fuel system is not fully
pressurized when the vehicle is off, some
residual pressure may remain in the fuel
system since it can take some time for the
pressure to completely bleed off. Therefore,
we recommend you place a shop rag below
the filter connectors to absorb the small
amount of fuel that will drain.
2. Rotate the filter fully counterclockwise
until the peg is at the far end of the slot.
3. Pull the filter straight up from the bracket and discard the filter.
20
Super Duty (TFA) , enUSA Fuel and RefuelingE163362 E163363 E163364
Page 24 of 84
Installation – Engine-mounted fuel
filter
1. Install the new filter into the filter
bracket. Turn the filter clockwise to
lock it in place.
2. Reconnect both fuel lines.
Note: Using a fuel that has more than
average impurities may require you to
replace the fuel filter more frequently than
the service interval specifies.
Note: You will need to purge the system of
air after removal or changing of the filter.
See purging air from the fuel system later
in this chapter.
Purging air from the fuel system
Turn the ignition key to on for 30 seconds,
then turn it to off. Do this six times in a row
to purge any trapped air from the fuel
system.
After filter service, a no start or rough
running engine may indicate that air is
entering the system through the filter bowl
seal or drain. Make sure the drain is tight
and you tightened the filter bowl to the
mechanical stop.
SELECTIVE CATALYTIC
REDUCTION SYSTEM
Your vehicle is equipped with a selective
catalytic reduction system to help reduce
emission levels of oxides of nitrogen from
the exhaust of the diesel engine. The
system automatically injects Diesel
Exhaust Fluid (DEF) into the exhaust
system to enable proper selective catalytic
reduction function. Importance of maintaining the
Diesel Exhaust Fluid (DEF) level
In order for the selective catalytic reduction
system to operate properly, the DEF level
must be maintained. Generally, the DEF
tank should be filled during the oil change
service interval. See General
Maintenance Information (page 59).
However, certain conditions or driving
styles, such as trailer towing or fast rates
of acceleration, will require the refilling of
the DEF tank more often.
The engine control unit will monitor the
amount of fluid available in the DEF tank.
Running a system check in the information
display will indicate whether the DEF level
is ok or if it is less than 1/2 full. A message
will display in the information display when
the DEF level is low and needs to be
refilled. When you see this message, you
should refill your tank. See the Information
displays chapter of your Owner ’s Manual
for information display functions. For
instructions on refilling your DEF tank, see
filling the Diesel Exhaust Fluid (DEF) tank
in this supplement.
Diesel Exhaust Fluid (DEF)
warning messages and vehicle
operations WARNINGS
Diesel Exhaust Fluid (DEF) must be
refilled when low or replaced when
contaminated or your vehicle speed
will be speed limited to 50 mph (80 km/h).
In these conditions, drive with caution and
refill DEF immediately. If the DEF becomes
empty or contaminated and fluid is not
replaced, your vehicle will become limited
to idle speed only once stopped. In these
conditions, be cautious where you stop
your vehicle because you may not be able
to drive long distances and will not be able
to maintain highway speeds until you refill
or replace the DEF.
21
Super Duty (TFA) , enUSA Fuel and Refueling
Page 28 of 84
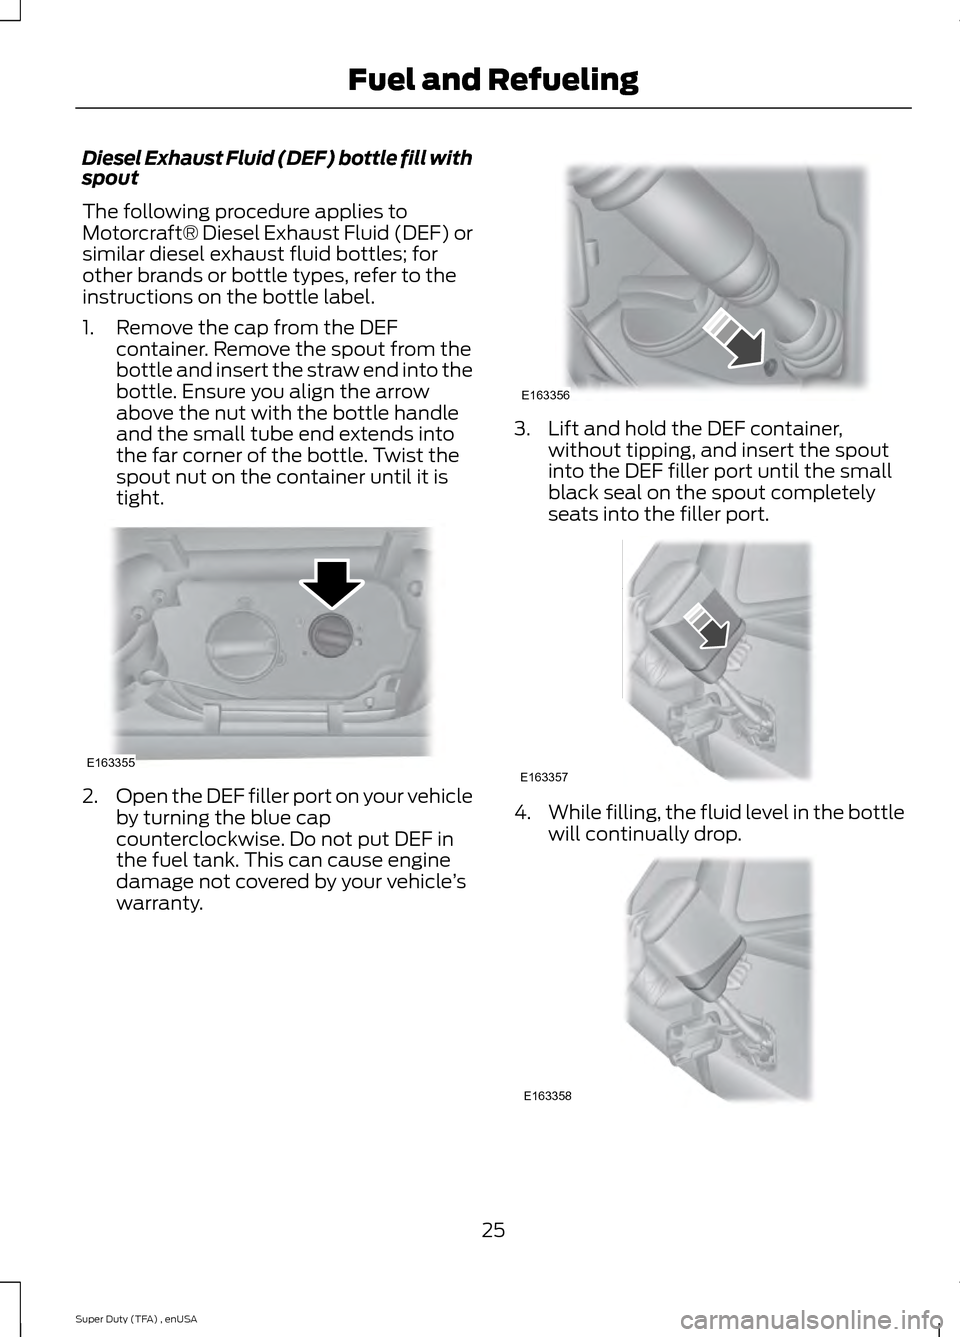
Diesel Exhaust Fluid (DEF) bottle fill with
spout
The following procedure applies to
Motorcraft® Diesel Exhaust Fluid (DEF) or
similar diesel exhaust fluid bottles; for
other brands or bottle types, refer to the
instructions on the bottle label.
1. Remove the cap from the DEF
container. Remove the spout from the
bottle and insert the straw end into the
bottle. Ensure you align the arrow
above the nut with the bottle handle
and the small tube end extends into
the far corner of the bottle. Twist the
spout nut on the container until it is
tight. 2.
Open the DEF filler port on your vehicle
by turning the blue cap
counterclockwise. Do not put DEF in
the fuel tank. This can cause engine
damage not covered by your vehicle ’s
warranty. 3. Lift and hold the DEF container,
without tipping, and insert the spout
into the DEF filler port until the small
black seal on the spout completely
seats into the filler port. 4.
While filling, the fluid level in the bottle
will continually drop. 25
Super Duty (TFA) , enUSA Fuel and RefuelingE163355 E163356 E163357 E163358
Page 33 of 84
Diesel fuel dispensing nozzle fill rate
Your truck is equipped with a fuel fill pipe
that is able to accept fuel up to 20 gallons
per minute from an 11⁄8 fuel-dispensing
nozzle. Pumping fuel at greater flow rates
may result in premature nozzle shut-off or
spit back.
Fuel filler cap
WARNINGS
The fuel system may be under
pressure. If the fuel filler cap is
venting vapor or if you hear a hissing
sound, wait until it stops before completely
removing the fuel filler cap. Otherwise, fuel
may spray out and injure you or others. If you do not use the proper fuel filler
cap, excessive pressure or vacuum
in the fuel tank may damage the fuel
system or cause the fuel cap to disengage
in a collision, which may result in possible
personal injury. Note:
If you must replace the fuel filler cap,
replace it with a fuel filler cap designed for
your vehicle. The vehicle warranty may be
void for any damage to the fuel tank or fuel
system if the correct genuine Ford or
Motorcraft® fuel filler cap is not used.
Your fuel tank filler cap has an indexed
design with a 1/4 turn on/off feature.
When fueling your vehicle:
1. Turn the engine off.
2. Carefully turn the filler cap counterclockwise until it spins off.
3. Pull to remove the cap from the fuel filler pipe.
4. To install the cap, align the tabs on the
cap with the notches on the filler pipe.
5. Turn the filler cap clockwise 1/4 of a turn until it clicks at least once. EMISSION CONTROL SYSTEM
Diesel Exhaust System: Oxidation
Catalyst And Diesel Particulate
Filter System (If Equipped)
Your vehicle is equipped with a diesel
particulate filter. The diesel particulate
filter is an inline filter in the exhaust system
that reduces carbon emissions by trapping
exhaust particles before they reach the
tailpipe. The diesel particulate filter looks
similar to a traditional exhaust catalyst,
except larger, and is part of the exhaust
system under the vehicle. The filter couples
to a diesel oxidation catalyst that reduces
the amount of harmful exhaust emitted
from the tailpipe. As soot gathers in the
system, it begins to restrict the filter. You
need to periodically clean the soot that
gathers inside the filter. You can clean the
soot in two different ways, passive
regeneration and active regeneration. Both
methods occur automatically and require
no actions from the driver. During either
one of these regeneration methods, you
may notice a change in exhaust tone. At
certain times, the information display will
display various messages related to the
diesel particulate filter. See the Information
Displays chapter in the Owner Guide for
more information.
Passive regeneration
In passive regeneration, the exhaust
system temperature and constituents
automatically clean the filter, or reduce
the soot level, by burning (oxidizing) the
soot. Cleaning occurs naturally because of
normal engine operating conditions (at
varying levels, due to driving patterns).
30
Super Duty (TFA) , enUSA Fuel and Refueling
Page 50 of 84
For vehicles with overflow coolant systems
with a non-pressurized cap on the coolant
recovery system, add coolant to the
coolant recovery reservoir when the engine
is cool. Add prediluted engine coolant
(Motorcraft Orange Antifreeze/Coolant
Prediluted) to the FULL COLD level. For all
other vehicles which have a coolant degas
system with a pressurized cap, or if it is
necessary to remove the coolant pressure
relief cap on the radiator of a vehicle with
an overflow system, follow these steps to
add engine coolant.
1. Turn the engine off and let it cool.
2. When the engine is cool, wrap a thick
cloth around the coolant pressure relief
cap on the coolant reservoir (a
translucent plastic bottle). Slowly turn
cap counterclockwise until pressure
begins to release. When you are sure
that all the pressure has been released,
use the cloth to turn it
counterclockwise and remove the cap.
3. Fill the coolant reservoir slowly with prediluted engine coolant to within the
FULL COLD level, or between the MIN
and MAX marks (within the COLD FILL
RANGE), as listed on the engine
coolant reservoir. If you removed the
radiator cap in an overflow system, fill
the radiator until the coolant is visible
and radiator is almost full. If coolant is
added to bring the level within the
COLD FILL RANGE when the engine is
not cold, the system may remain under
filled.
4. Replace the cap. Turn until tightly installed. Cap must be tightly installed
to prevent coolant loss.
Whenever coolant has been added, the
coolant level in the coolant reservoir
should be checked the next few times you
drive the vehicle. If necessary, add enough
prediluted engine coolant to bring the
coolant level to the proper level. If you have to add more than 1.0 quart (1.0
liter) of engine coolant per month, have
your authorized dealer check the engine
cooling system. Your cooling system may
have a leak. Operating an engine with a
low level of coolant can result in engine
overheating and possible engine damage.
Engine and Secondary Cooling
System Refill Procedure
The following procedure should be used
when refilling the engine or secondary
cooling systems after it has been drained
or become extremely low.
1. Before you remove the cap, turn the
engine off and let it cool.
2. When the engine is cool, wrap a thick cloth around the cap. Slowly turn cap
counterclockwise until pressure begins
to release.
3. Step back while the pressure releases.
4. When you are sure that all the pressure
has been released, use the cloth to turn
it counterclockwise and remove the
cap.
5. Slowly add prediluted engine coolant to the coolant reservoir until the
coolant level is within the COLD FILL
RANGE as listed on the reservoir.
6. Reinstall the pressure relief cap.
7. Start and run the engine at 2000 rpm for 2 minutes.
8. Shut engine off, and remove the pressure relief cap as previously
outlined.
9. If required, add prediluted engine coolant to the coolant reservoir until
the coolant level is within the COLD
FILL RANGE as listed on the reservoir.
47
Super Duty (TFA) , enUSA Maintenance