tire type FORD SUPER DUTY 2017 4.G Owners Manual
[x] Cancel search | Manufacturer: FORD, Model Year: 2017, Model line: SUPER DUTY, Model: FORD SUPER DUTY 2017 4.GPages: 636, PDF Size: 10.56 MB
Page 41 of 636
Seatbelt Locking Modes
WARNINGS
After any vehicle crash, the seatbelt
system at all passenger seating
positions must be checked by an
authorized dealer to verify that the
automatic locking retractor feature for
child seats is still functioning properly. In
addition, all seatbelts should be checked
for proper function. The belt and retractor must be
replaced if the seatbelt assembly
automatic locking retractor feature
or any other seatbelt function is not
operating properly when checked by an
authorized dealer. Failure to replace the
belt and retractor assembly could increase
the risk of injury in crashes. All safety restraints in the vehicle are
combination lap and shoulder belts. The
driver seatbelt has the first type of locking
mode, and the front outboard passenger
and rear seat seatbelts have both types of
locking modes described as follows:
Vehicle Sensitive Mode
This is the normal retractor mode, which
allows free shoulder belt length
adjustment to your movements and
locking in response to vehicle movement.
For example, if the driver brakes suddenly,
turns a corner sharply, or the vehicle
receives an impact of about 5 mph
(8 km/h) or more, the combination
seatbelts will lock to help reduce forward
movement of the driver and passengers.
In addition, the retractor is designed to lock
if the webbing is pulled out too quickly. If
this occurs, let the belt retract slightly and
pull webbing out again in a slow and
controlled manner. Automatic Locking Mode
In this mode, the shoulder belt is
automatically pre-locked. The belt will still
retract to remove any slack in the shoulder
belt. The automatic locking mode is not
available on the driver seatbelt.
When to Use the Automatic Locking
Mode
Use this mode any time you install a child
safety seat in a front outboard passenger
seating position in a Regular Cab,
SuperCab, SuperCrew or any rear seating
position of a SuperCab or SuperCrew. The
optional front seat's center seatbelt has a
cinch mechanism. Children 12 years old
and under should be properly restrained in
a rear seat whenever possible. See
Child
Safety (page 17).
How to Use the Automatic Locking
Mode
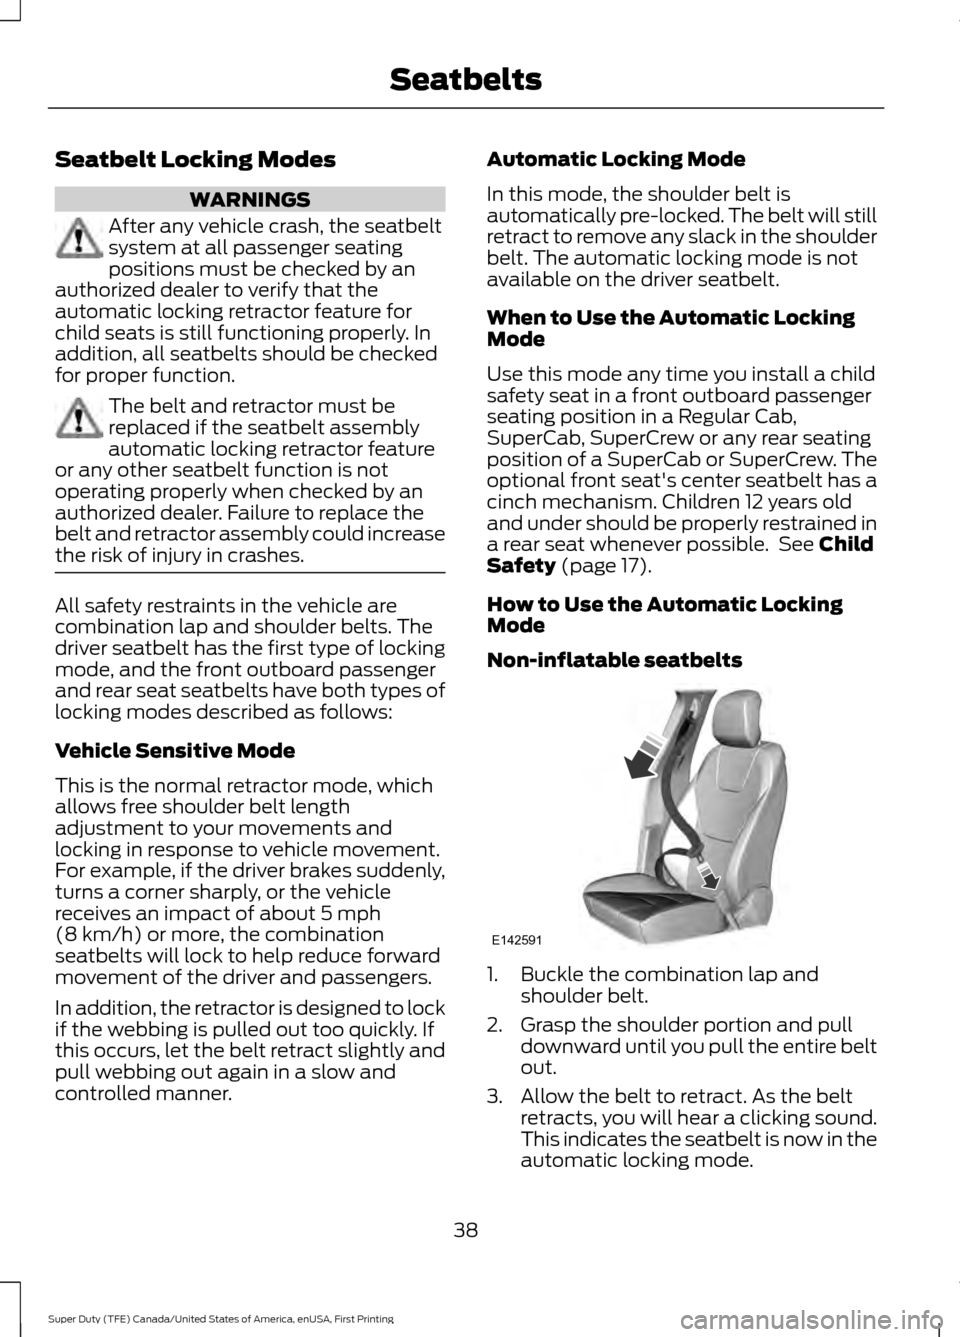
Non-inflatable seatbelts 1. Buckle the combination lap and
shoulder belt.
2. Grasp the shoulder portion and pull downward until you pull the entire belt
out.
3. Allow the belt to retract. As the belt retracts, you will hear a clicking sound.
This indicates the seatbelt is now in the
automatic locking mode.
38
Super Duty (TFE) Canada/United States of America, enUSA, First Printing SeatbeltsE142591
Page 116 of 636
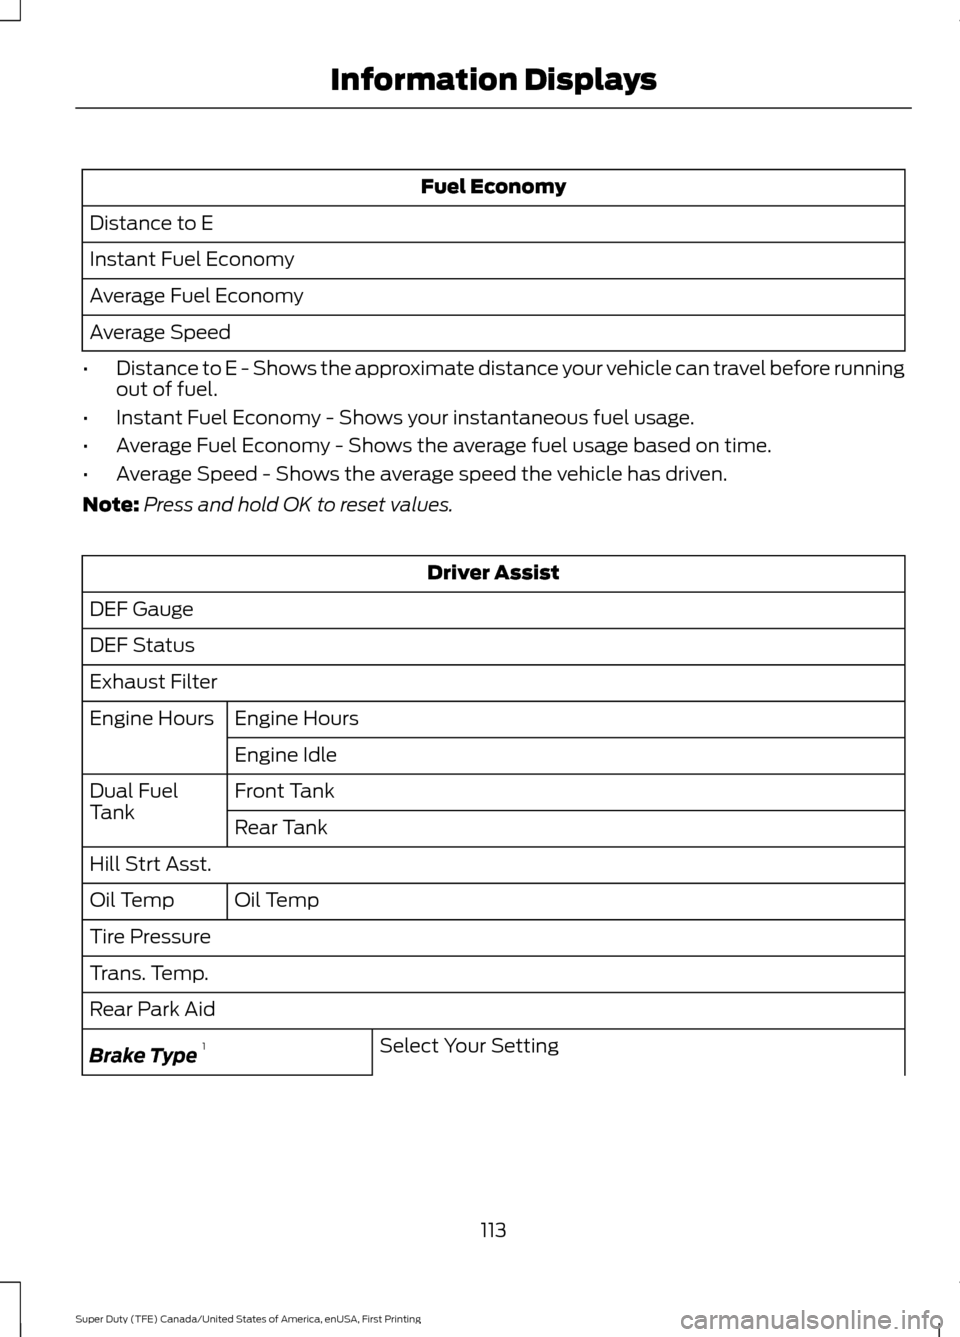
Fuel Economy
Distance to E
Instant Fuel Economy
Average Fuel Economy
Average Speed
• Distance to E - Shows the approximate distance your vehicle can travel before running
out of fuel.
• Instant Fuel Economy - Shows your instantaneous fuel usage.
• Average Fuel Economy - Shows the average fuel usage based on time.
• Average Speed - Shows the average speed the vehicle has driven.
Note: Press and hold OK to reset values. Driver Assist
DEF Gauge
DEF Status
Exhaust Filter Engine Hours
Engine Hours
Engine Idle
Front Tank
Dual Fuel
Tank
Rear Tank
Hill Strt Asst. Oil Temp
Oil Temp
Tire Pressure
Trans. Temp.
Rear Park Aid
Select Your Setting
Brake Type 1
113
Super Duty (TFE) Canada/United States of America, enUSA, First Printing Information Displays
Page 118 of 636
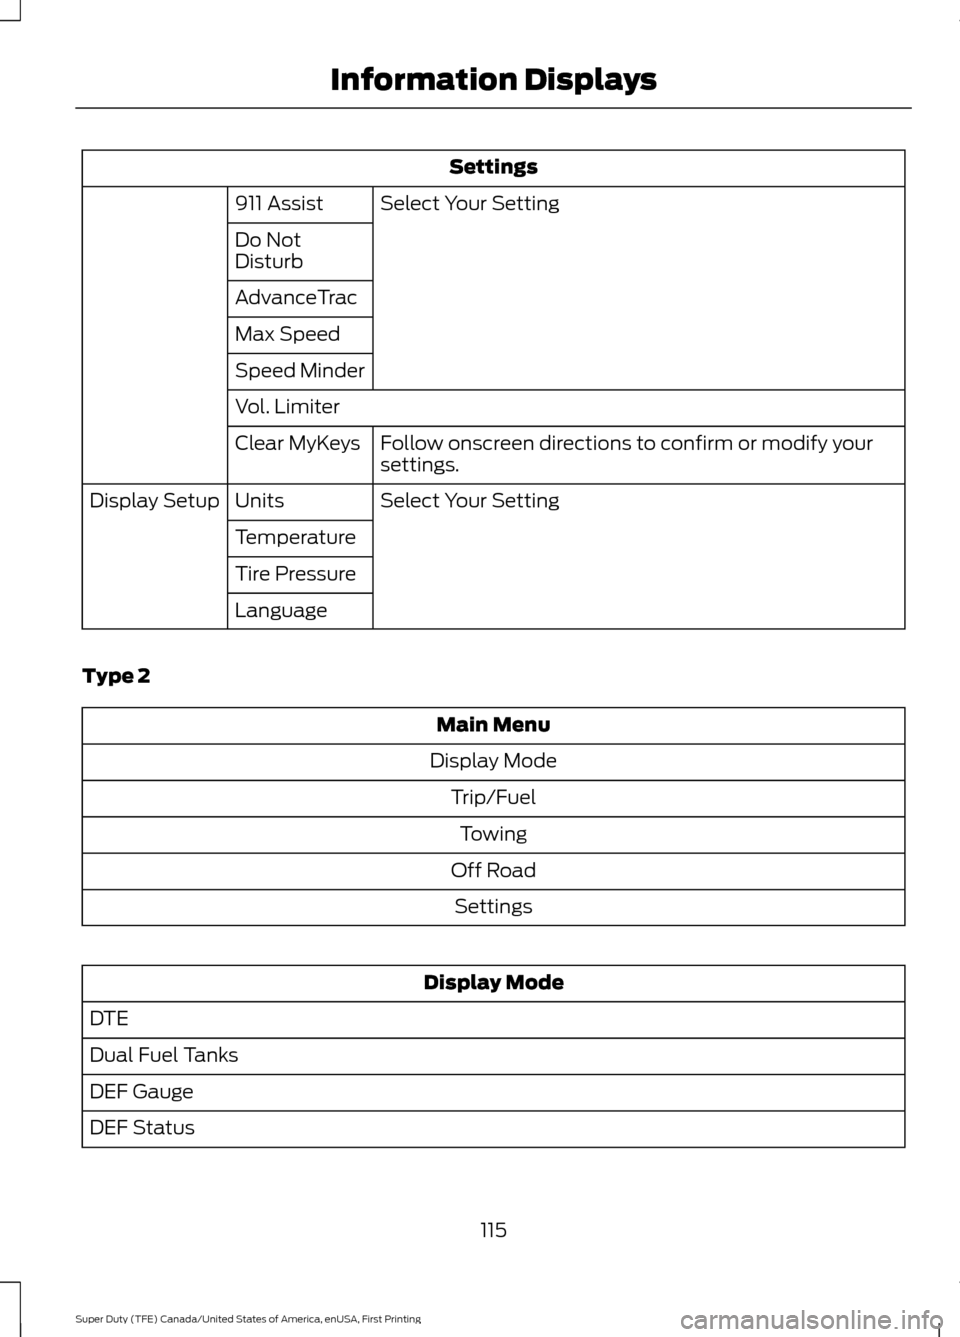
Settings
Select Your Setting
911 Assist
Do Not
Disturb
AdvanceTrac
Max Speed
Speed Minder
Vol. Limiter
Follow onscreen directions to confirm or modify your
settings.
Clear MyKeys
Select Your Setting
Units
Display Setup
Temperature
Tire Pressure
Language
Type 2 Main Menu
Display Mode Trip/FuelTowing
Off Road Settings Display Mode
DTE
Dual Fuel Tanks
DEF Gauge
DEF Status
115
Super Duty (TFE) Canada/United States of America, enUSA, First Printing Information Displays
Page 128 of 636
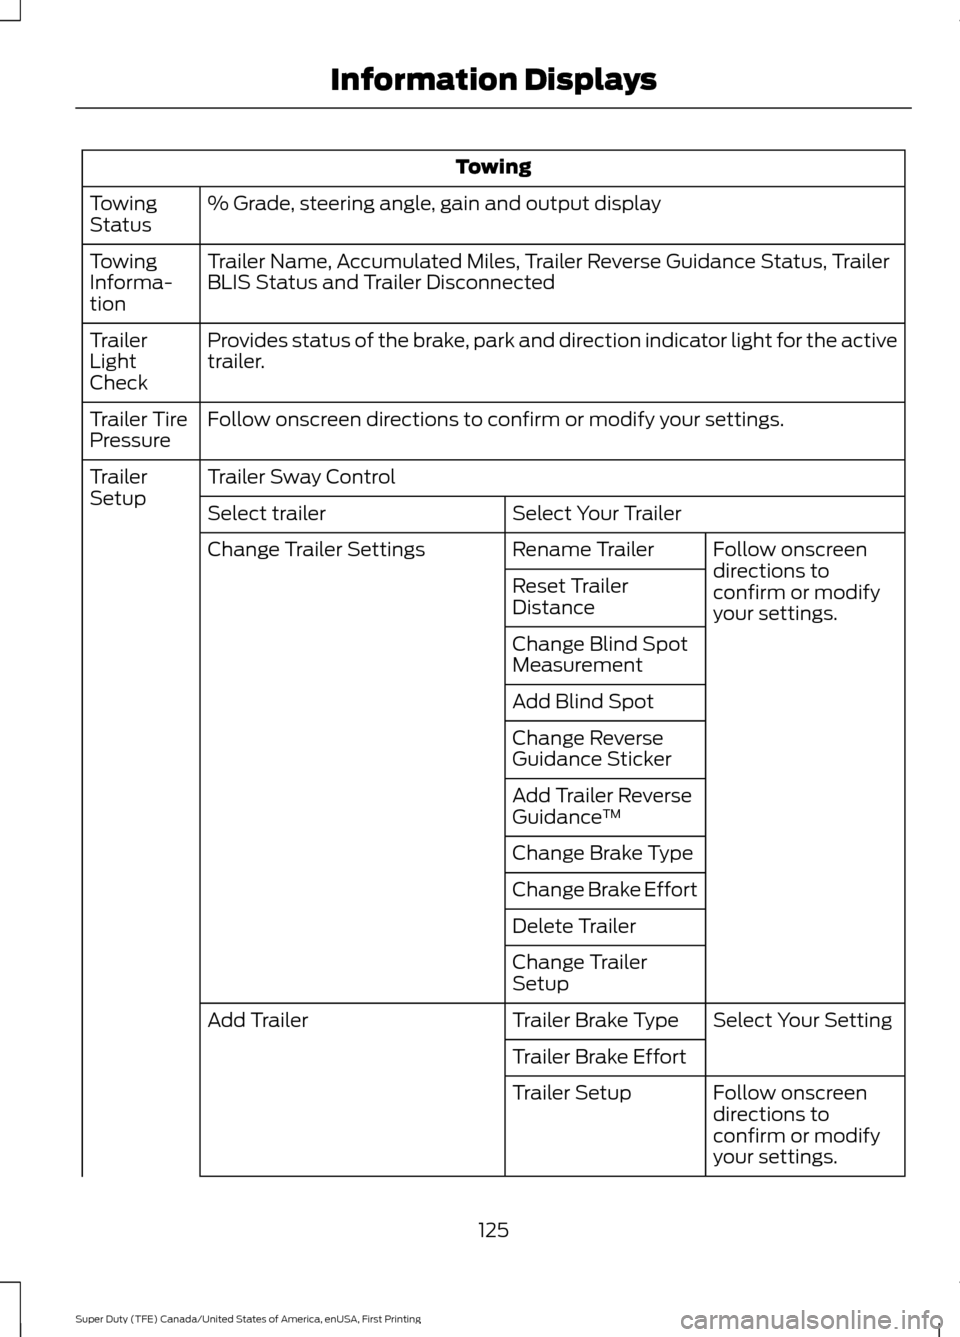
Towing
% Grade, steering angle, gain and output display
Towing
Status
Trailer Name, Accumulated Miles, Trailer Reverse Guidance Status, Trailer
BLIS Status and Trailer Disconnected
Towing
Informa-
tion
Provides status of the brake, park and direction indicator light for the active
trailer.
Trailer
Light
Check
Follow onscreen directions to confirm or modify your settings.
Trailer Tire
Pressure
Trailer Sway Control
Trailer
Setup
Select Your Trailer
Select trailer
Follow onscreen
directions to
confirm or modify
your settings.
Rename Trailer
Change Trailer Settings
Reset Trailer
Distance
Change Blind Spot
Measurement
Add Blind Spot
Change Reverse
Guidance Sticker
Add Trailer Reverse
Guidance™
Change Brake Type
Change Brake Effort
Delete Trailer
Change Trailer
Setup Select Your Setting
Trailer Brake Type
Add Trailer
Trailer Brake EffortFollow onscreen
directions to
confirm or modify
your settings.
Trailer Setup
125
Super Duty (TFE) Canada/United States of America, enUSA, First Printing Information Displays
Page 131 of 636
Settings
AdvanceTrac
Max Speed
Speed Minder
Volume Limiter Follow onscreen directions to confirm
or modify your settings.
Clear MyKeys
Select Your Setting
Units
Display Setup
Temperature
Tire Pressure
Language
INFORMATION MESSAGES
Note: Depending on your vehicle options
and instrument cluster type, not all of the
messages will display or be available. The
information display may abbreviate or
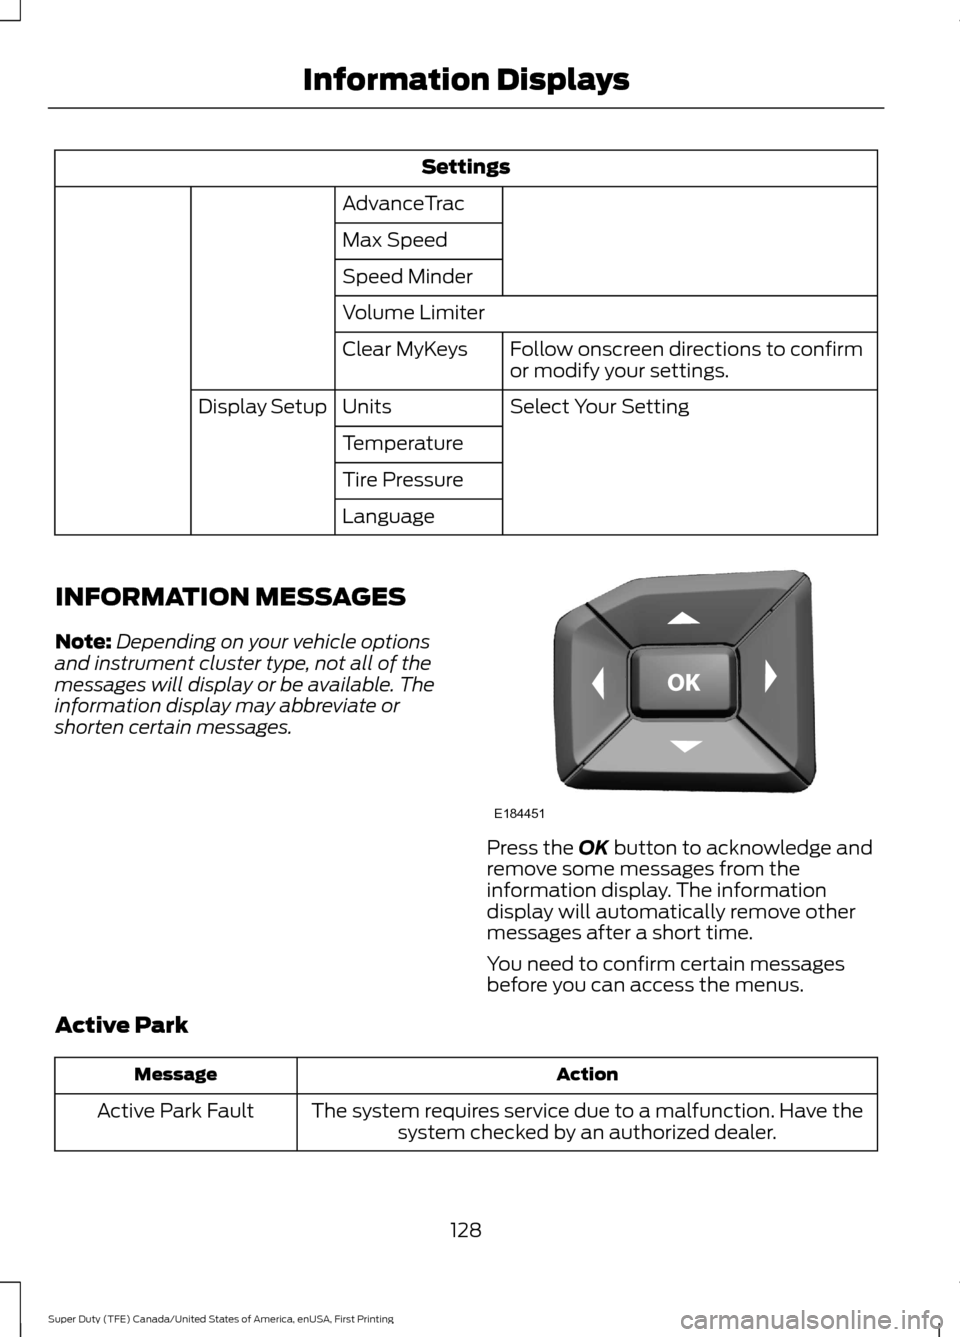
shorten certain messages. Press the OK button to acknowledge and
remove some messages from the
information display. The information
display will automatically remove other
messages after a short time.
You need to confirm certain messages
before you can access the menus.
Active Park Action
Message
The system requires service due to a malfunction. Have thesystem checked by an authorized dealer.
Active Park Fault
128
Super Duty (TFE) Canada/United States of America, enUSA, First Printing Information DisplaysE184451
Page 213 of 636
USING FOUR-WHEEL DRIVE
Note:
For important information regarding
the safe operation of this type of vehicle,
see General Information in the Wheels and
Tires chapter.
Note: Do not use 4H or 4L mode on dry,
hard surfaced roads. Doing so can produce
excessive noise, increase tire wear and may
damage drive components. 4X4 mode is
only intended for consistently slippery or
loose surfaces. Use of 4L mode on these
surfaces may produce some noise (such as
occasional clunks), but will not damage
drive components.
Note: If 4X4 low is selected while the
vehicle is moving above 3 mph (5 km/h),
the 4WD system will not perform a shift.
This is normal and should be no reason for
concern. Refer to Shifting to or from 4L (4X4
Low) for proper operation.
Note: You can switch on and switch off the
electronic locking differential by pulling the
4WD control (4WD vehicles) or turning the
electronic locking differential control (2WD
vehicles). See
Electronic Locking
Differential (page 219).
Manual Shift On Stop (MSOS)
4WD system
(If Equipped)
Note: The vehicle should not be driven in
4X4 High or 4X4 Low modes with the hub
locks set to FREE as this condition may
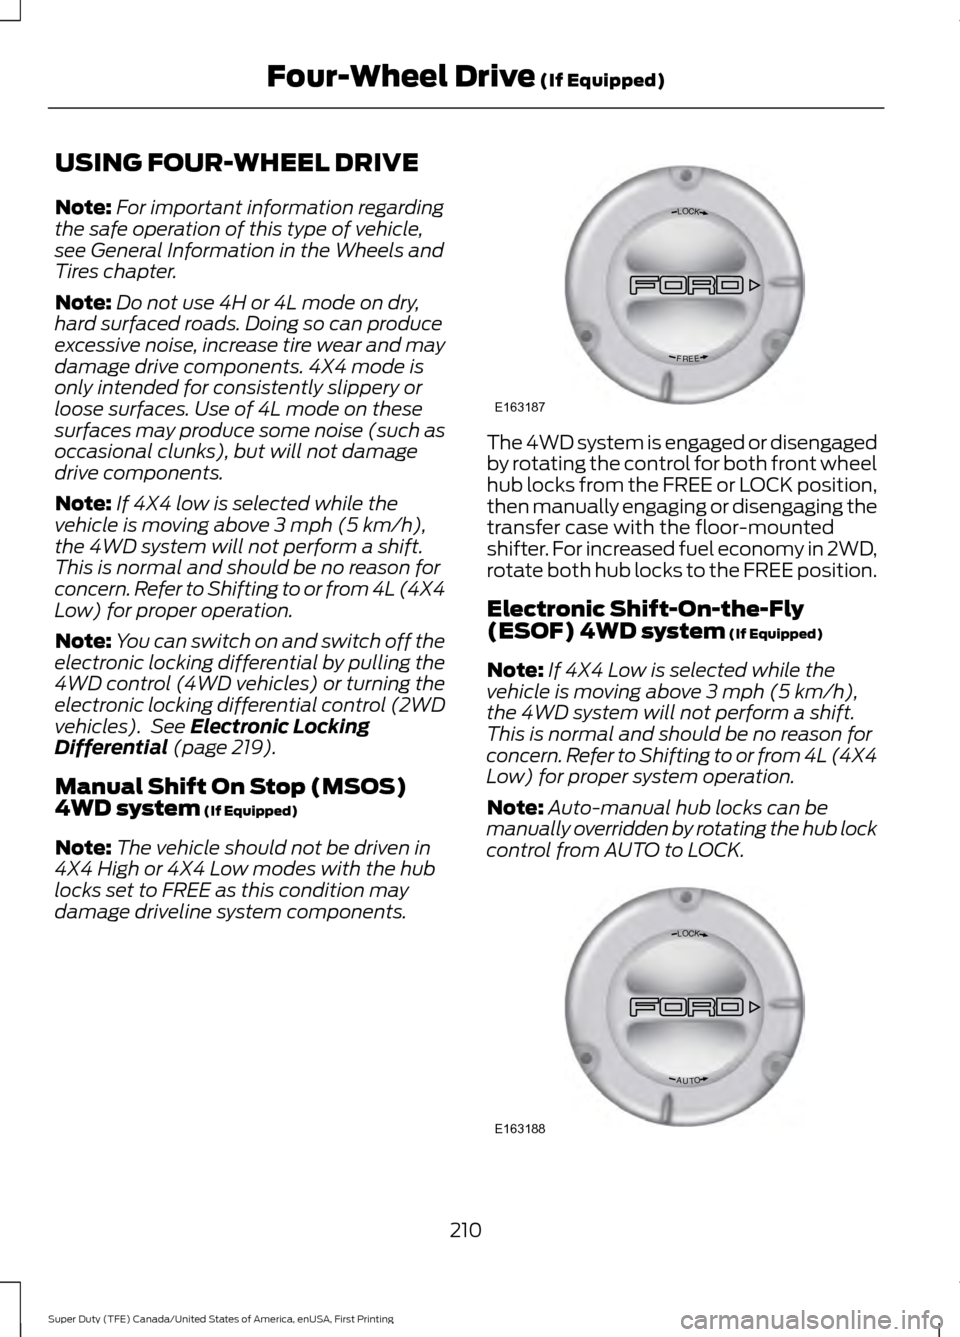
damage driveline system components. The 4WD system is engaged or disengaged
by rotating the control for both front wheel
hub locks from the FREE or LOCK position,
then manually engaging or disengaging the
transfer case with the floor-mounted
shifter. For increased fuel economy in 2WD,
rotate both hub locks to the FREE position.
Electronic Shift-On-the-Fly
(ESOF) 4WD system
(If Equipped)
Note: If 4X4 Low is selected while the
vehicle is moving above
3 mph (5 km/h),
the 4WD system will not perform a shift.
This is normal and should be no reason for
concern. Refer to Shifting to or from 4L (4X4
Low) for proper system operation.
Note: Auto-manual hub locks can be
manually overridden by rotating the hub lock
control from AUTO to LOCK. 210
Super Duty (TFE) Canada/United States of America, enUSA, First Printing Four-Wheel Drive
(If Equipped)LOC K
EERF
E163187 LOC K
OTUA
E163188
Page 218 of 636
Basic Operating Principles
•
Drive slower in strong crosswinds which
can affect the normal steering
characteristics of your vehicle.
• When driving your vehicle on surfaces
made slippery by loose sand, water,
gravel, snow or ice proceed with care.
• Do not use 4H or 4L on dry, hard
surfaced roads. Doing so will produce
excessive noise, increase tire wear and
may damage drive components. 4H or
4L modes are only intended for
consistently slippery or loose surfaces.
If Your Vehicle leaves the Road
If your vehicle leaves the road, reduce your
vehicle speed and avoid severe braking.
When your vehicle speed has been reduced
ease your vehicle back onto the road. Do
not turn the steering wheel sharply while
returning your vehicle to the road.
It may be safer to stay on the shoulder of
the road and slow down gradually before
returning to the road. You may lose control
if you do not slow down or if you turn the
steering wheel too sharply or abruptly.
It may be less risky to strike small objects,
such as freeway reflectors, with minor
damage to your vehicle rather than
attempt a sudden return to the road which
could cause your vehicle to slide sideways
out of control or roll over. Remember, your
safety and the safety of others should be
your primary concern.
Emergency Maneuvers
In an unavoidable emergency situation
where a sudden sharp turn must be made,
remember to avoid over-driving your
vehicle (i.e. turn the steering wheel only as
rapidly and as far as required to avoid the
emergency). Excessive steering can result
in loss of vehicle control. Apply smooth
pressure to the accelerator pedal or brake
pedal when changes in vehicle speed are required. Avoid abrupt steering,
acceleration and braking. This could result
in an increased risk of vehicle roll over, loss
of vehicle control and personal injury. Use
all available road surface to bring your
vehicle to a safe direction of travel.
In the event of an emergency stop, avoid
skidding the tires and do not attempt any
sharp steering wheel movements.
If your vehicle goes from one type of
surface to another (i.e. from concrete to
gravel) there will be a change in the way
your vehicle responds to a maneuver (i.e.
steering, acceleration or braking).
Sand
When driving over sand, try to keep all four
wheels on the most solid area of the trail.
Avoid reducing the tire pressures but shift
to a lower gear and drive steadily through
the terrain. Apply the accelerator slowly
and avoid excessive wheel slip.
When driving at slow speeds in deep sand
under high outside temperatures, use a low
gear when possible. Low gear operation
will maximize the engine and transmission
cooling capability.
Avoid driving at excessive speeds, this
causes vehicle momentum to work against
you and your vehicle could become stuck
to the point that assistance may be
required from another vehicle. Remember,
you may be able to back out the way you
came if you proceed with caution.
Mud and Water
Mud
Be cautious of sudden changes in vehicle
speed or direction when you are driving in
mud. Even four-wheel drive vehicles can
lose traction in slick mud. If your vehicle
does slide, steer in the direction of the slide
until you regain control of your vehicle.
215
Super Duty (TFE) Canada/United States of America, enUSA, First Printing Four-Wheel Drive (If Equipped)
Page 273 of 636
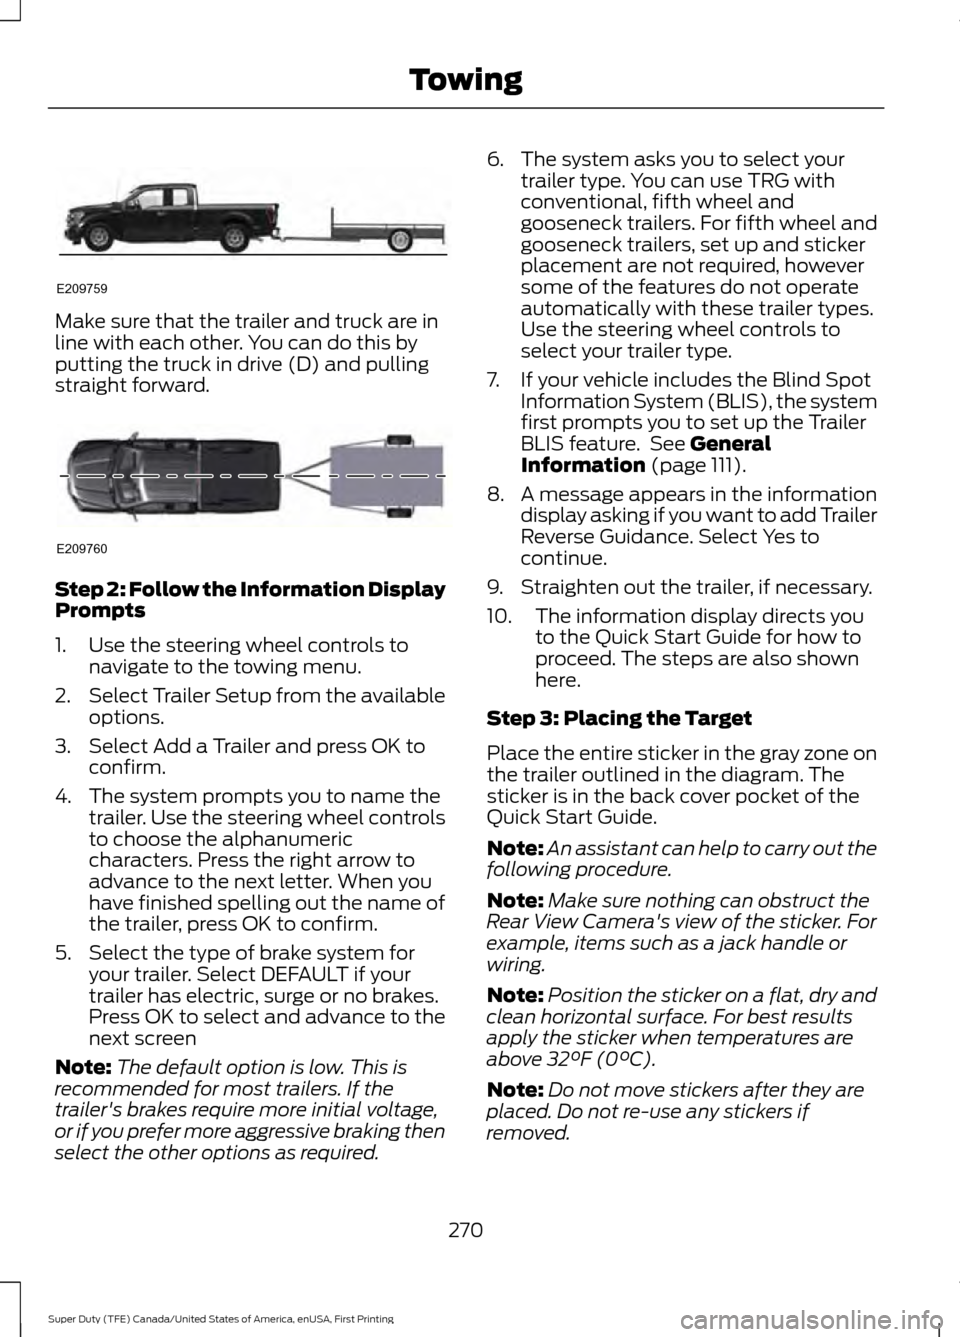
Make sure that the trailer and truck are in
line with each other. You can do this by
putting the truck in drive (D) and pulling
straight forward.
Step 2: Follow the Information Display
Prompts
1. Use the steering wheel controls to
navigate to the towing menu.
2. Select Trailer Setup from the available
options.
3. Select Add a Trailer and press OK to confirm.
4. The system prompts you to name the trailer. Use the steering wheel controls
to choose the alphanumeric
characters. Press the right arrow to
advance to the next letter. When you
have finished spelling out the name of
the trailer, press OK to confirm.
5. Select the type of brake system for your trailer. Select DEFAULT if your
trailer has electric, surge or no brakes.
Press OK to select and advance to the
next screen
Note: The default option is low. This is
recommended for most trailers. If the
trailer's brakes require more initial voltage,
or if you prefer more aggressive braking then
select the other options as required. 6. The system asks you to select your
trailer type. You can use TRG with
conventional, fifth wheel and
gooseneck trailers. For fifth wheel and
gooseneck trailers, set up and sticker
placement are not required, however
some of the features do not operate
automatically with these trailer types.
Use the steering wheel controls to
select your trailer type.
7. If your vehicle includes the Blind Spot Information System (BLIS), the system
first prompts you to set up the Trailer
BLIS feature. See General
Information (page 111).
8. A message appears in the information display asking if you want to add Trailer
Reverse Guidance. Select Yes to
continue.
9. Straighten out the trailer, if necessary.
10. The information display directs you to the Quick Start Guide for how to
proceed. The steps are also shown
here.
Step 3: Placing the Target
Place the entire sticker in the gray zone on
the trailer outlined in the diagram. The
sticker is in the back cover pocket of the
Quick Start Guide.
Note: An assistant can help to carry out the
following procedure.
Note: Make sure nothing can obstruct the
Rear View Camera's view of the sticker. For
example, items such as a jack handle or
wiring.
Note: Position the sticker on a flat, dry and
clean horizontal surface. For best results
apply the sticker when temperatures are
above
32°F (0°C).
Note: Do not move stickers after they are
placed. Do not re-use any stickers if
removed.
270
Super Duty (TFE) Canada/United States of America, enUSA, First Printing TowingE209759 E209760
Page 291 of 636
When Towing a Trailer
•
Check your hitch, electrical connections
and trailer wheel lug nuts thoroughly
after you have traveled 50 mi (80 km).
• Do not drive faster than 70 mph
(113 km/h) during the first 500 mi
(800 km).
• Do not make full-throttle starts.
• When stopped in congested or heavy
traffic during hot weather, place the
gearshift in position P to aid engine and
transmission cooling and to help A/C
performance.
• Turn off the speed control with heavy
loads or in hilly terrain. The speed
control may turn off automatically
when you are towing on long, steep
grades.
• Shift to a lower gear when driving down
a long or steep hill. Do not apply the
brakes continuously, as they may
overheat and become less effective.
• If your transmission is equipped with a
Grade Assist or Tow/Haul feature, use
this feature when towing. This provides
engine braking and helps eliminate
excessive transmission shifting for
optimum fuel economy and
transmission cooling.
• If your vehicle is equipped with
Adaptive Steering and you have
enabled Tow/Haul, the Adaptive
Steering system adjusts the steering
response to match your vehicle ’s load.
The system reduces vehicle sensitivity
to steering inputs at higher vehicle
speeds while it maintains the ease of
parking and maneuverability at low
speeds. •
If your vehicle is equipped with
AdvanceTrac with RSC, this system
may turn on during typical cornering
maneuvers with a heavily loaded trailer.
This is normal. Turning the corner at a
slower speed while towing may reduce
this tendency.
• If you are towing a trailer frequently in
hot weather, hilly conditions, at the
gross combined weight rating (or any
combination of these factors), consider
refilling your rear axle with synthetic
gear lubricant (if the axle is not already
filled with it).
• Allow more distance for stopping with
a trailer attached. Anticipate stops and
brake gradually.
• Avoid parking on a grade. However, if
you must park on a grade:
1. Turn the steering wheel to point your vehicle tires away from traffic flow.
2. Set your vehicle parking brake.
3. Place the automatic transmission in position
P.
4. Place wheel chocks in front and back of the trailer wheels. (Chocks not
included with vehicle.)
Your vehicle may be equipped with a
temporary or conventional spare tire. A
"temporary" spare tire is different in size
(diameter or width), tread-type
(All-Season or All Terrain) or is from a
different manufacturer than the road tires
on your vehicle. Consult information on the
tire label or Safety Compliance label for
limitations when using.
Launching or Retrieving a Boat or
Personal Watercraft (PWC)
Note: Disconnect the wiring to the trailer
before
backing the trailer into the water.
Note: Reconnect the wiring to the trailer
after
you remove the trailer from the water.
288
Super Duty (TFE) Canada/United States of America, enUSA, First Printing Towing
Page 373 of 636
GENERAL INFORMATION
Use only approved wheel and tire sizes,
using other sizes could damage your
vehicle. If you change the diameter of the
tires from that fitted at the factory, the
speedometer may not display the correct
speed. Take your vehicle to an authorized
Ford dealer to have the system
reprogrammed. If you intend to change the
size of the wheels from that fitted by the
manufacturer, you can check the suitability
with an authorized dealer.
Additional information related to the
functionality and maintenance of your tires
can be found later in this chapter. See Tire
Care (page 373).
The Ford recommended tire inflation
pressures can be found on the Tire Label,
which is located on the B-pillar or the edge
of the driver's door. This information can
also be found on the Safety Compliance
Certification Label (affixed to either the
door hinge pillar, door-latch post, or the
door edge that meets the door last post;
next to the driver ’s seating position).
Ford strongly recommends maintaining
these tire pressures at all times. Failure to
follow the tire pressure recommendations
can cause uneven treadwear patterns,
reduced fuel economy, and adversely
affect the way your vehicle handles.
Note: Check and set the tire pressure at the
ambient temperature in which you are
intending to drive your vehicle and when the
tires are cold.
Note: Check your tire pressures at least
once per month.
Set the pressure for your spare tire to the
highest value given for your vehicle and tire
size combination (if equipped). Notice to utility vehicle and truck
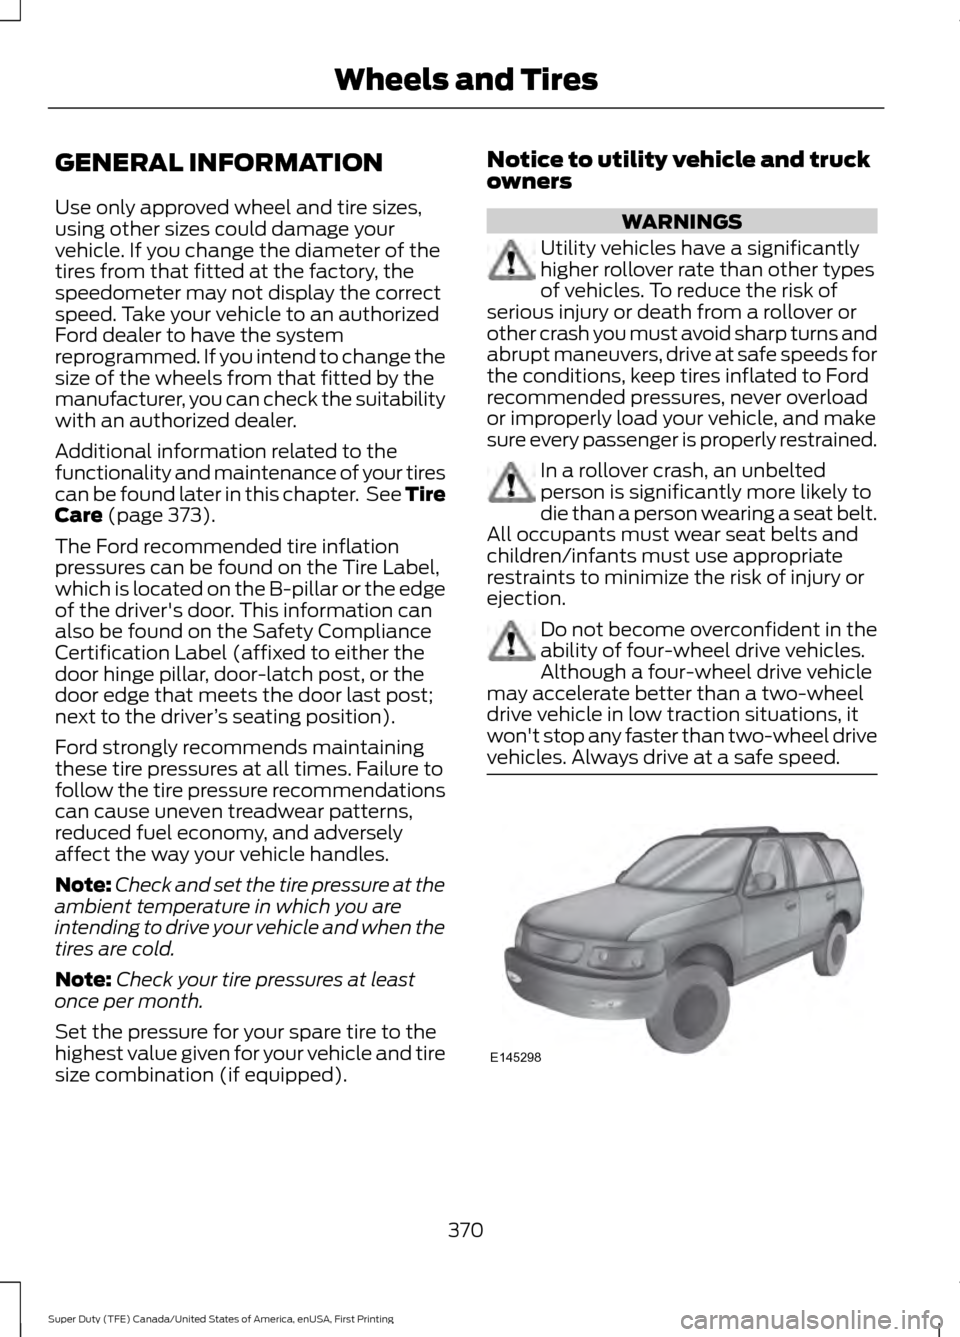
owners WARNINGS
Utility vehicles have a significantly
higher rollover rate than other types
of vehicles. To reduce the risk of
serious injury or death from a rollover or
other crash you must avoid sharp turns and
abrupt maneuvers, drive at safe speeds for
the conditions, keep tires inflated to Ford
recommended pressures, never overload
or improperly load your vehicle, and make
sure every passenger is properly restrained. In a rollover crash, an unbelted
person is significantly more likely to
die than a person wearing a seat belt.
All occupants must wear seat belts and
children/infants must use appropriate
restraints to minimize the risk of injury or
ejection. Do not become overconfident in the
ability of four-wheel drive vehicles.
Although a four-wheel drive vehicle
may accelerate better than a two-wheel
drive vehicle in low traction situations, it
won't stop any faster than two-wheel drive
vehicles. Always drive at a safe speed. 370
Super Duty (TFE) Canada/United States of America, enUSA, First Printing Wheels and TiresE145298