deactivate FORD TAURUS 2002 4.G Owners Manual
[x] Cancel search | Manufacturer: FORD, Model Year: 2002, Model line: TAURUS, Model: FORD TAURUS 2002 4.GPages: 248, PDF Size: 2.12 MB
Page 29 of 248

Tape direction select
Press SIDE 1±2 to play the alternate
side of a tape.
DolbyTnoise reduction
Dolbytnoise reduction operates
only in tape mode. Dolbytnoise
reduction reduces the amount of
hiss and static during tape playback.
Press the
control to activate (and deactivate) Dolbytnoise
reduction.
Dolbytnoise reduction system is manufactured under license from
DolbytLaboratories Licensing Corporation. ªDolbytº and the double-D
symbol are registered trademarks of DolbytLaboratories Licensing
Corporation.
Compression adjust
Compression adjust brings soft and
loud CD passages together for a
more consistent listening level.
Press the COMP control to activate and deactivate compression adjust.
Shuffle feature
The shuffle feature operates in CD
mode and plays all tracks on the
current disc in random order.
If equipped with the CD changer, the shuffle feature continues to the
next disc after all tracks are played.
Press the SHUFFLE control to start this feature. Random order play will
continue until the SHUFFLE control is pressed again.
Entertainment Systems
29
Page 35 of 248

Fast forward
The fast forward control works in
tape and CD modes.
²Pressing the control for less than
three seconds results in slow forward action. Pressing the control for
more than three seconds results in fast forward action.
²You can cancel the fast forward mode by pressing TAPE, or the FF
control.
Compression adjust
Compression adjust brings soft and
loud CD passages together for a
more consistent listening level.
Press the COMP control to activate and deactivate compression adjust.
Shuffle feature
The shuffle feature operates in CD
mode and plays all tracks on the
current disc in random order.
If equipped with the CD changer, the shuffle feature continues to the
next disc after all tracks are played.
Press the SHUFFLE control to start this feature. Random order play will
continue until the SHUFFLE control is pressed again.
CD CHANGER (IF EQUIPPED)
Your CD changer is either located in the trunk, the console or the right
side cargo area storage compartment.
1. Slide the door to access the CD
changer magazine.
Entertainment Systems
35
Page 52 of 248
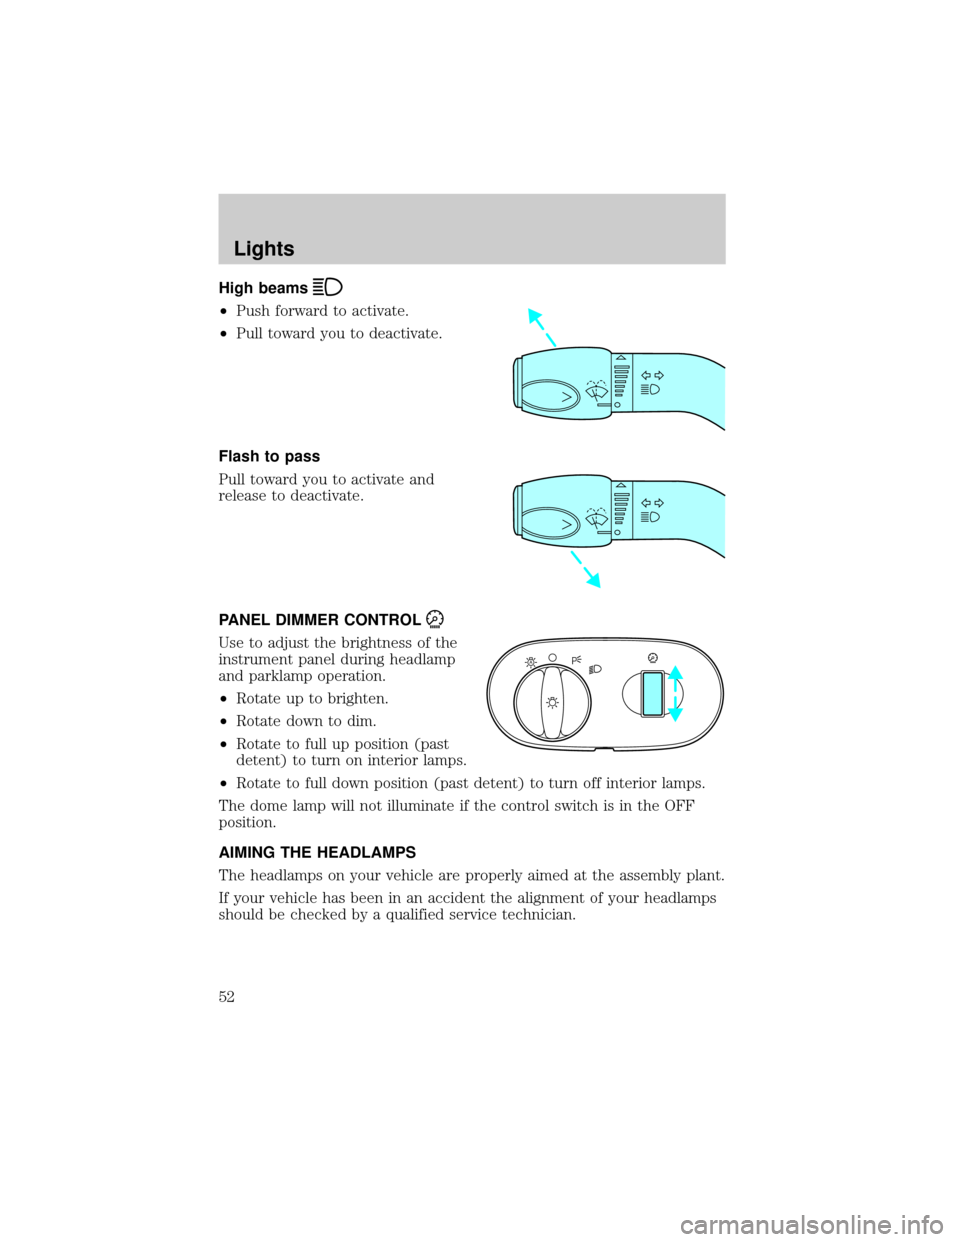
High beams
²Push forward to activate.
²Pull toward you to deactivate.
Flash to pass
Pull toward you to activate and
release to deactivate.
PANEL DIMMER CONTROL
Use to adjust the brightness of the
instrument panel during headlamp
and parklamp operation.
²Rotate up to brighten.
²Rotate down to dim.
²Rotate to full up position (past
detent) to turn on interior lamps.
²Rotate to full down position (past detent) to turn off interior lamps.
The dome lamp will not illuminate if the control switch is in the OFF
position.
AIMING THE HEADLAMPS
The headlamps on your vehicle are properly aimed at the assembly plant.
If your vehicle has been in an accident the alignment of your headlamps
should be checked by a qualified service technician.
A
Lights
52
Page 88 of 248
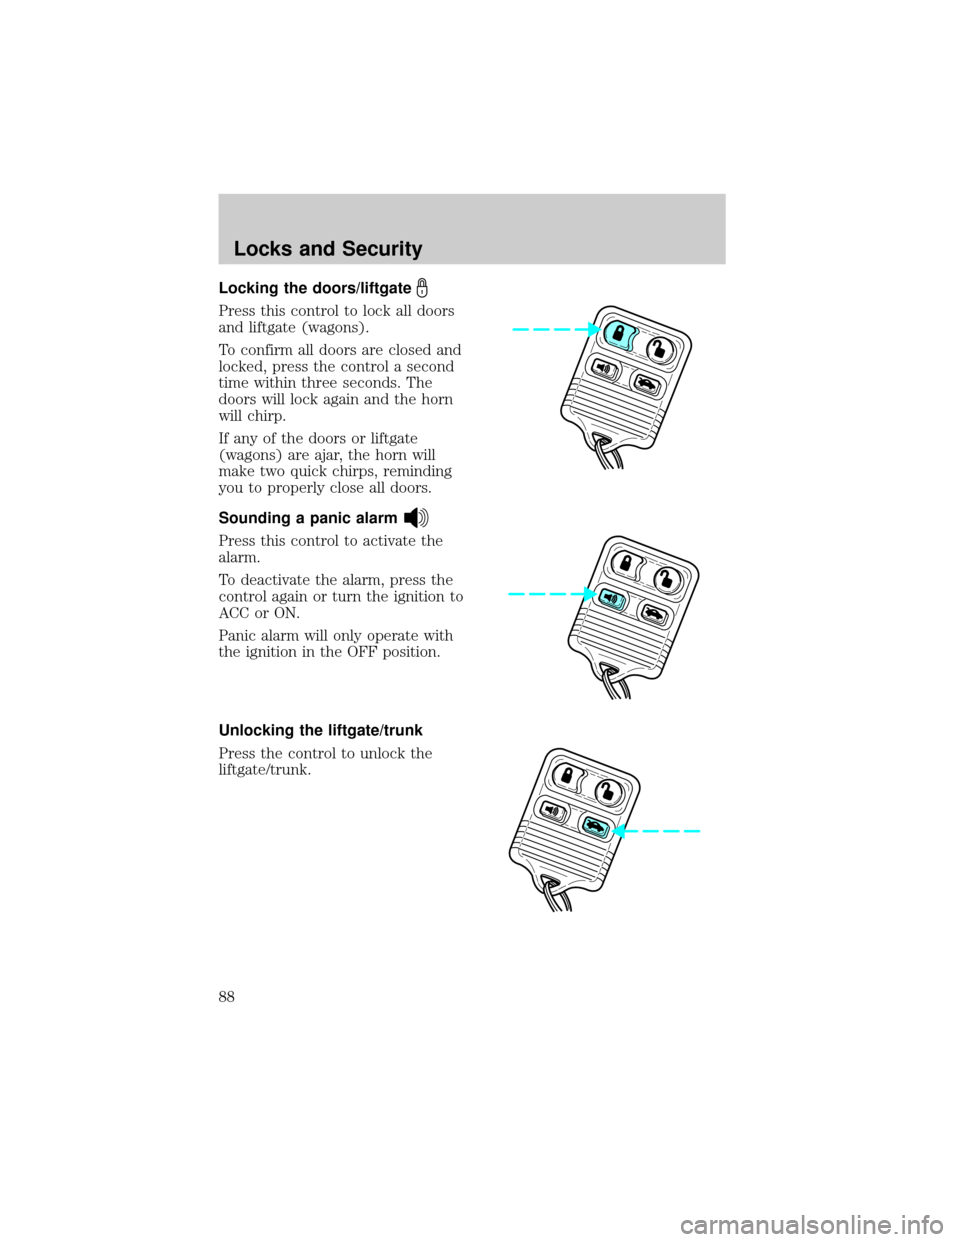
Locking the doors/liftgate
Press this control to lock all doors
and liftgate (wagons).
To confirm all doors are closed and
locked, press the control a second
time within three seconds. The
doors will lock again and the horn
will chirp.
If any of the doors or liftgate
(wagons) are ajar, the horn will
make two quick chirps, reminding
you to properly close all doors.
Sounding a panic alarm
Press this control to activate the
alarm.
To deactivate the alarm, press the
control again or turn the ignition to
ACC or ON.
Panic alarm will only operate with
the ignition in the OFF position.
Unlocking the liftgate/trunk
Press the control to unlock the
liftgate/trunk.
Locks and Security
88
Page 91 of 248
Perimeter lamps illuminated entry
The exterior lamps illuminate when the vehicle is unlocked by the
remote entry key fob. Vehicles equipped with auto lamps, the puddle,
head, park, and tail lamps illuminate. Vehicles not equipped with auto
lamp, only the puddle, park and tail lamps illuminate.
The system automatically turns off after 25 seconds or when the ignition
is turned to the ON or ACC position.
The battery saver will shut off the exterior lamps 10 minutes after the
ignition has been turned to the OFF position.
Deactivating/activating perimeter lamps
There are 2 methods to enable/disable this feature. One through your
dealer and the second with a power door lock sequence using the
following instructions:
1. Turn the ignition key to RUN, then press the power door UNLOCK
control button 3 times.
2. Turn the ignition key to OFF, then press the power door UNLOCK
control button 3 times.
3. Turn the ignition key to RUN, within five seconds press the power
door UNLOCK control button 2 times.
The user should receive twohorn chirpsto indicate the system had
been altered.
Note:Puddle lamps cannot be deactivated, only the head, park, and tail
lamps will be deactivated/avtivated.
²Turn ignition to OFF to exit.
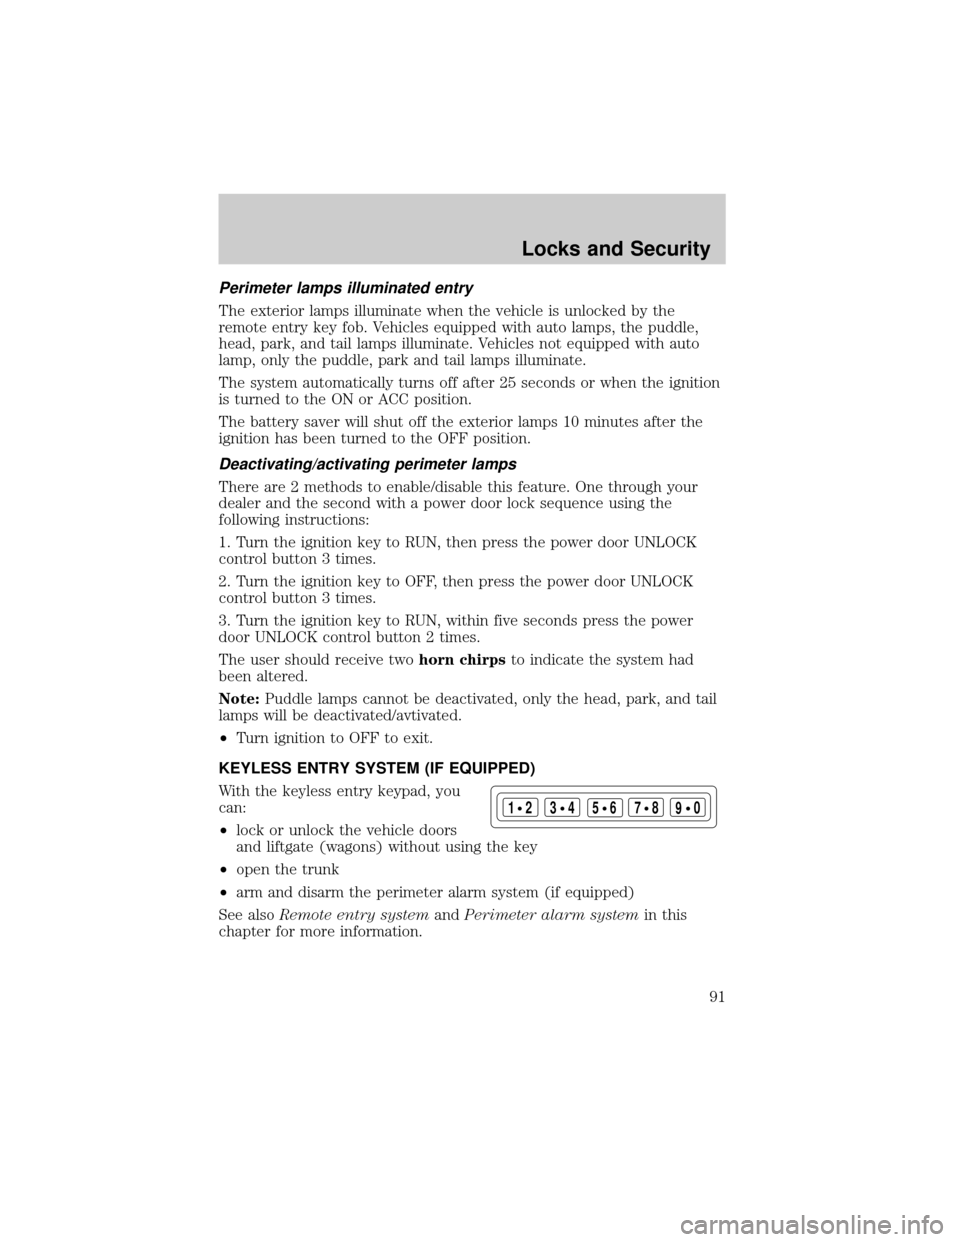
KEYLESS ENTRY SYSTEM (IF EQUIPPED)
With the keyless entry keypad, you
can:
²lock or unlock the vehicle doors
and liftgate (wagons) without using the key
²open the trunk
²arm and disarm the perimeter alarm system (if equipped)
See alsoRemote entry systemandPerimeter alarm systemin this
chapter for more information.
123
45678
90
Locks and Security
91
Page 118 of 248
Reasons given... Consider...
ªBelts wrinkle my clothesº Possibly, but a serious crash can do
much more than wrinkle your clothes,
particularly if you are unbelted.
ªThe people I'm with don't
wear beltsºSet the example, teen deaths occur 4
times more often in vehicles with
TWO or MORE people. Children and
younger brothers/sisters imitate
behavior they see.
ªI have an air bagº Air bags offer greater protection when
used with safety belts. Frontal airbags
are not designed to inflate in rear and
side crashes or rollovers.
ªI'd rather be thrown clearº
Not a good idea.Peoplewho are
ejected are 40 times more likely to
DIE.Safety belts help prevent ejection,
WE CAN'T ªPICK OUR CRASHº.
Do not sit on top of a buckled safety belt to avoid the Belt
Minder chime. Sitting on the safety belt will increase the risk of
injury in an accident. To disable (one-time) or deactivate the Belt
Minder feature please follow the directions stated below.
One time disable
Anytime the safety belt is buckled and then unbuckled during an ignition
ON cycle, BeltMinder will be disabled for that ignition cycle only. The
safety belt needs to be latched for a minimum of 3 seconds before belt
minder is disabled.
Deactivating/activating the BeltMinder feature
Read steps1-9thoroughly before proceeding with the
deactivation/activation programming procedure.
The BeltMinder feature can be deactivated/activated by performing the
following procedure:
Before following the procedure, make sure that:
²the parking brake is set
²the gearshift is in P (Park) (automatic transmission)
Seating and Safety Restraints
118
Page 119 of 248
²the ignition switch is in the OFF position
²all vehicle doors are closed
²the driver's safety belt is unbuckled
²the parklamps/headlamps are in OFF position (If vehicle is equipped
with Autolamps, this will not affect the procedure.)
To reduce the risk of injury, do not deactivate/activate the Belt
Minder feature while driving the vehicle.
1. Turn the ignition switch to the RUN (or ON) position. (DO NOT
START THE ENGINE)
2. Wait until the safety belt warning light turns off. (Approximately 1±2
minutes)
²Steps 3±5 must be completed within 60 seconds or the procedure will
have to be repeated.
3. Buckle then unbuckle the safety belt three times, ending with the
safety belt unbuckled. This can be done before or during BeltMinder
warning activation.
4. Turn on the parklamps/headlamps, turn off the parklamps/headlamps.
5. Buckle then unbuckle the safety belt three times, ending with the
safety belt unbuckled.
²After step 5 the safety belt warning light will be turned on for three
seconds.
6. Within seven seconds of the safety belt warning light turning off,
buckle then unbuckle the safety belt.
²This will disable BeltMinder if it is currently enabled, or enable
BeltMinder if it is currently disabled.
7. Confirmation of disabling BeltMinder is provided by flashing the safety
belt warning light four times per second for three seconds.
8. Confirmation of enabling BeltMinder is provided by flashing the safety
belt warning light four times per second for three seconds, followed by
three seconds with the safety belt warning light off, then followed by
flashing the safety belt warning light four times per second for three
seconds again.
9. After receiving confirmation, the deactivation/activation procedure is
complete.
Seating and Safety Restraints
119