FORD TAURUS 2005 4.G Repair Manual
Manufacturer: FORD, Model Year: 2005, Model line: TAURUS, Model: FORD TAURUS 2005 4.GPages: 248, PDF Size: 2.66 MB
Page 61 of 248
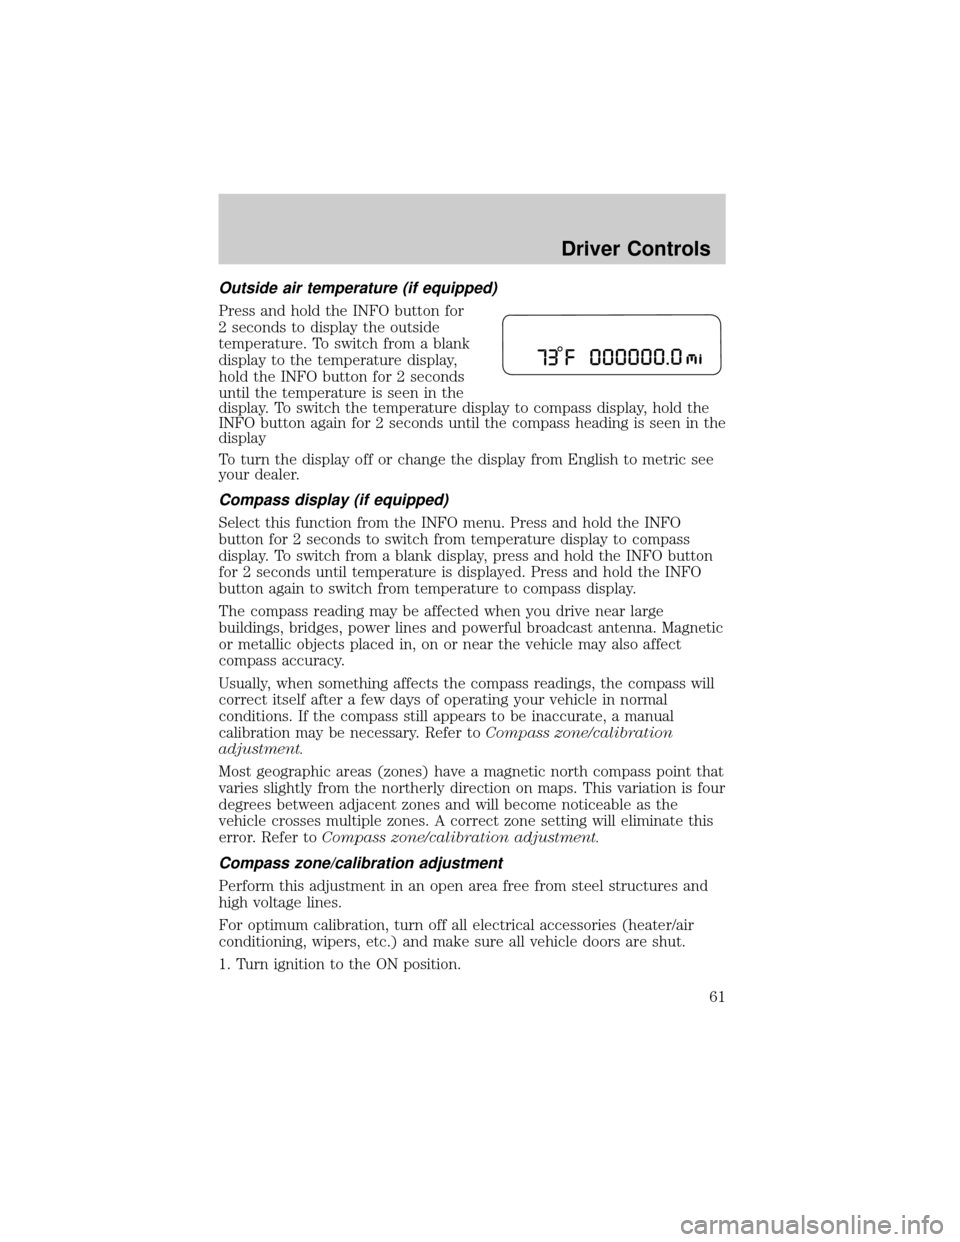
Outside air temperature (if equipped)
Press and hold the INFO button for
2 seconds to display the outside
temperature. To switch from a blank
display to the temperature display,
hold the INFO button for 2 seconds
until the temperature is seen in the
display. To switch the temperature display to compass display, hold the
INFO button again for 2 seconds until the compass heading is seen in the
display
To turn the display off or change the display from English to metric see
your dealer.
Compass display (if equipped)
Select this function from the INFO menu. Press and hold the INFO
button for 2 seconds to switch from temperature display to compass
display. To switch from a blank display, press and hold the INFO button
for 2 seconds until temperature is displayed. Press and hold the INFO
button again to switch from temperature to compass display.
The compass reading may be affected when you drive near large
buildings, bridges, power lines and powerful broadcast antenna. Magnetic
or metallic objects placed in, on or near the vehicle may also affect
compass accuracy.
Usually, when something affects the compass readings, the compass will
correct itself after a few days of operating your vehicle in normal
conditions. If the compass still appears to be inaccurate, a manual
calibration may be necessary. Refer toCompass zone/calibration
adjustment.
Most geographic areas (zones) have a magnetic north compass point that
varies slightly from the northerly direction on maps. This variation is four
degrees between adjacent zones and will become noticeable as the
vehicle crosses multiple zones. A correct zone setting will eliminate this
error. Refer toCompass zone/calibration adjustment.
Compass zone/calibration adjustment
Perform this adjustment in an open area free from steel structures and
high voltage lines.
For optimum calibration, turn off all electrical accessories (heater/air
conditioning, wipers, etc.) and make sure all vehicle doors are shut.
1. Turn ignition to the ON position.
Driver Controls
61
Page 62 of 248
2. Start the engine.
3. Press and hold the INFO button for 2 seconds to select the
Compass/Odometer function. (Do not select Trip, DTE, or AFE. The top
of the message center must be blank).
Note:If the compass displays9CAL 000000.0 mi9instead of heading
information, the compass will need to be calibrated. Slowly drive the
vehicle in a circle (less than 3 mph [5 km/h]) until the9CAL9indicator
changes to display compass heading. This may take up to 3 circles to
complete calibration.
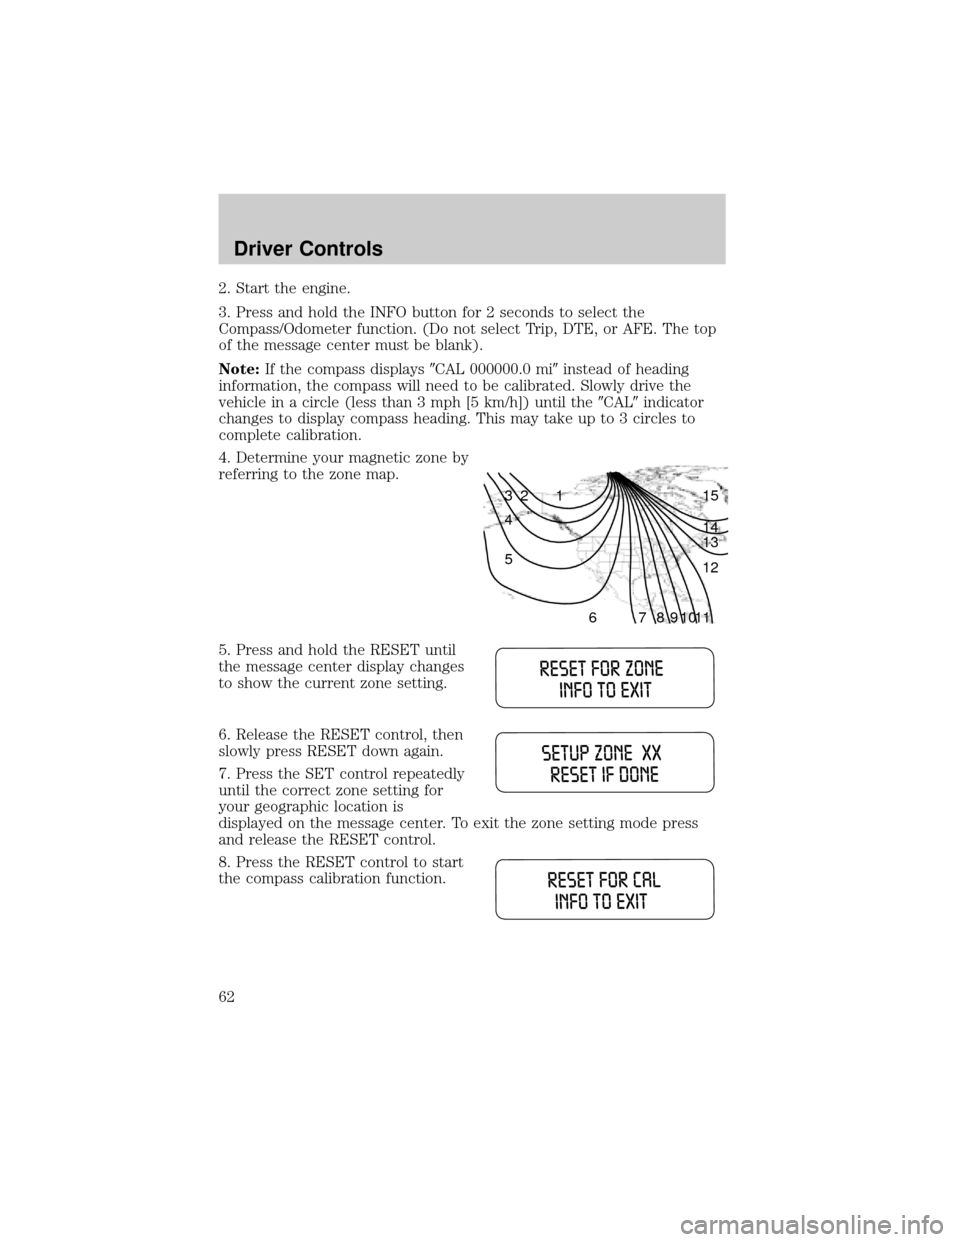
4. Determine your magnetic zone by
referring to the zone map.
5. Press and hold the RESET until
the message center display changes
to show the current zone setting.
6. Release the RESET control, then
slowly press RESET down again.
7. Press the SET control repeatedly
until the correct zone setting for
your geographic location is
displayed on the message center. To exit the zone setting mode press
and release the RESET control.
8. Press the RESET control to start
the compass calibration function.
1 2 3
4
5
6 7 8 9 101112 13 14 15
Driver Controls
62
Page 63 of 248
![FORD TAURUS 2005 4.G Repair Manual 9. Slowly drive the vehicle in a
circle (less than 3 mph [5 km/h])
until the CIRCLE SLOWLY TO
CALIBRATE indicator changes to
CALIBRATION COMPLETED. This
will take up to three circles to complete calib FORD TAURUS 2005 4.G Repair Manual 9. Slowly drive the vehicle in a
circle (less than 3 mph [5 km/h])
until the CIRCLE SLOWLY TO
CALIBRATE indicator changes to
CALIBRATION COMPLETED. This
will take up to three circles to complete calib](/img/11/5379/w960_5379-62.png)
9. Slowly drive the vehicle in a
circle (less than 3 mph [5 km/h])
until the CIRCLE SLOWLY TO
CALIBRATE indicator changes to
CALIBRATION COMPLETED. This
will take up to three circles to complete calibration.
10. The compass is now calibrated.
Setup menu
Press this control for the following
displays:
²Language
²Units (English/Metric)
²System Check
Language
1. Select this function from the
SETUP menu for the current
language to be displayed.
2. Pressing the RESET control
cycles the message center through
each of the language choices.
3. Press and hold the RESET
control to set the language choice.
Driver Controls
63
Page 64 of 248
Units (English/Metric)
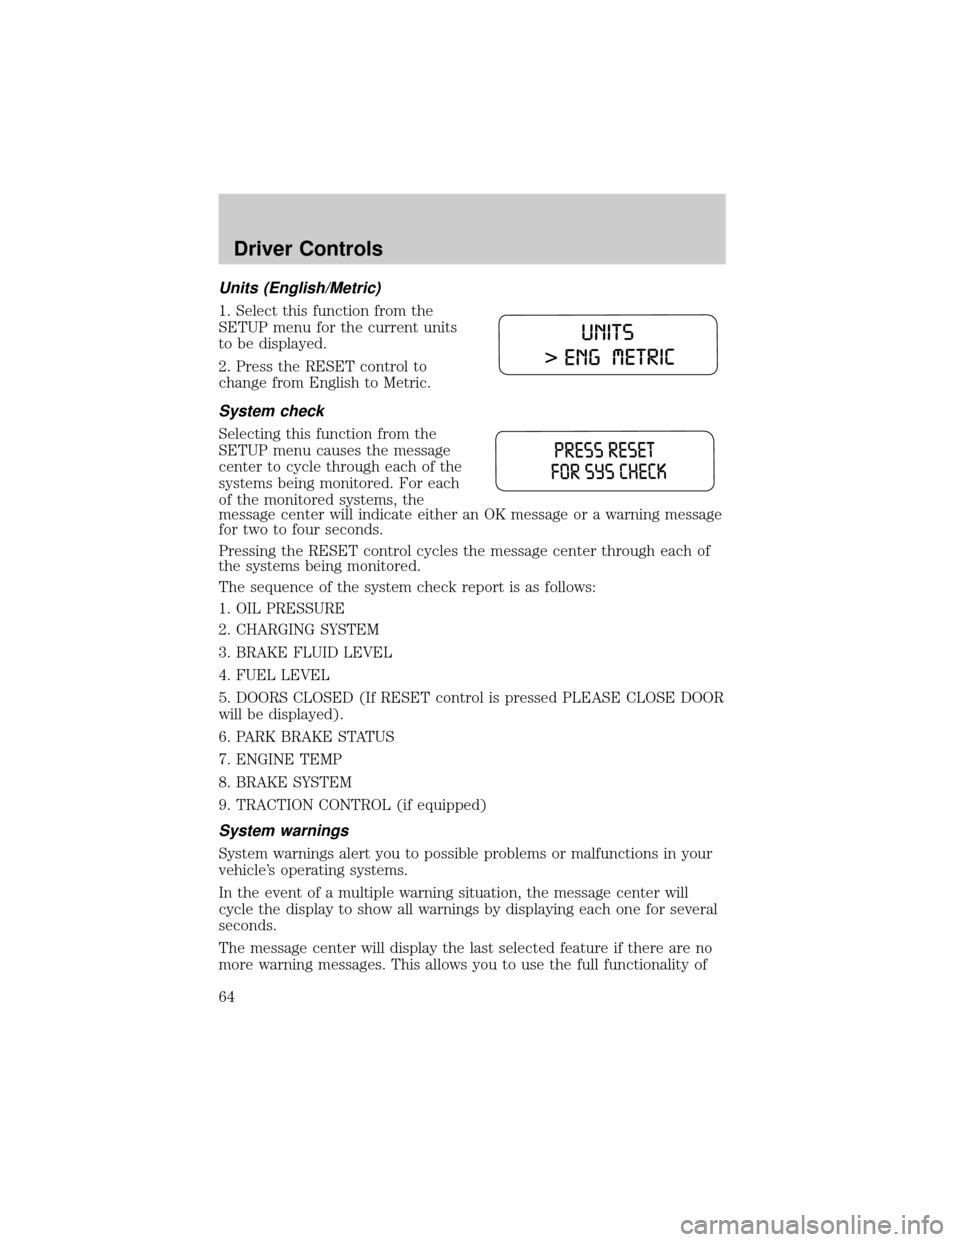
1. Select this function from the
SETUP menu for the current units
to be displayed.
2. Press the RESET control to
change from English to Metric.
System check
Selecting this function from the
SETUP menu causes the message
center to cycle through each of the
systems being monitored. For each
of the monitored systems, the
message center will indicate either an OK message or a warning message
for two to four seconds.
Pressing the RESET control cycles the message center through each of
the systems being monitored.
The sequence of the system check report is as follows:
1. OIL PRESSURE
2. CHARGING SYSTEM
3. BRAKE FLUID LEVEL
4. FUEL LEVEL
5. DOORS CLOSED (If RESET control is pressed PLEASE CLOSE DOOR
will be displayed).
6. PARK BRAKE STATUS
7. ENGINE TEMP
8. BRAKE SYSTEM
9. TRACTION CONTROL (if equipped)
System warnings
System warnings alert you to possible problems or malfunctions in your
vehicle's operating systems.
In the event of a multiple warning situation, the message center will
cycle the display to show all warnings by displaying each one for several
seconds.
The message center will display the last selected feature if there are no
more warning messages. This allows you to use the full functionality of
Driver Controls
64
Page 65 of 248
the message center after you acknowledge the warning by pressing the
RESET control and clearing the warning message.
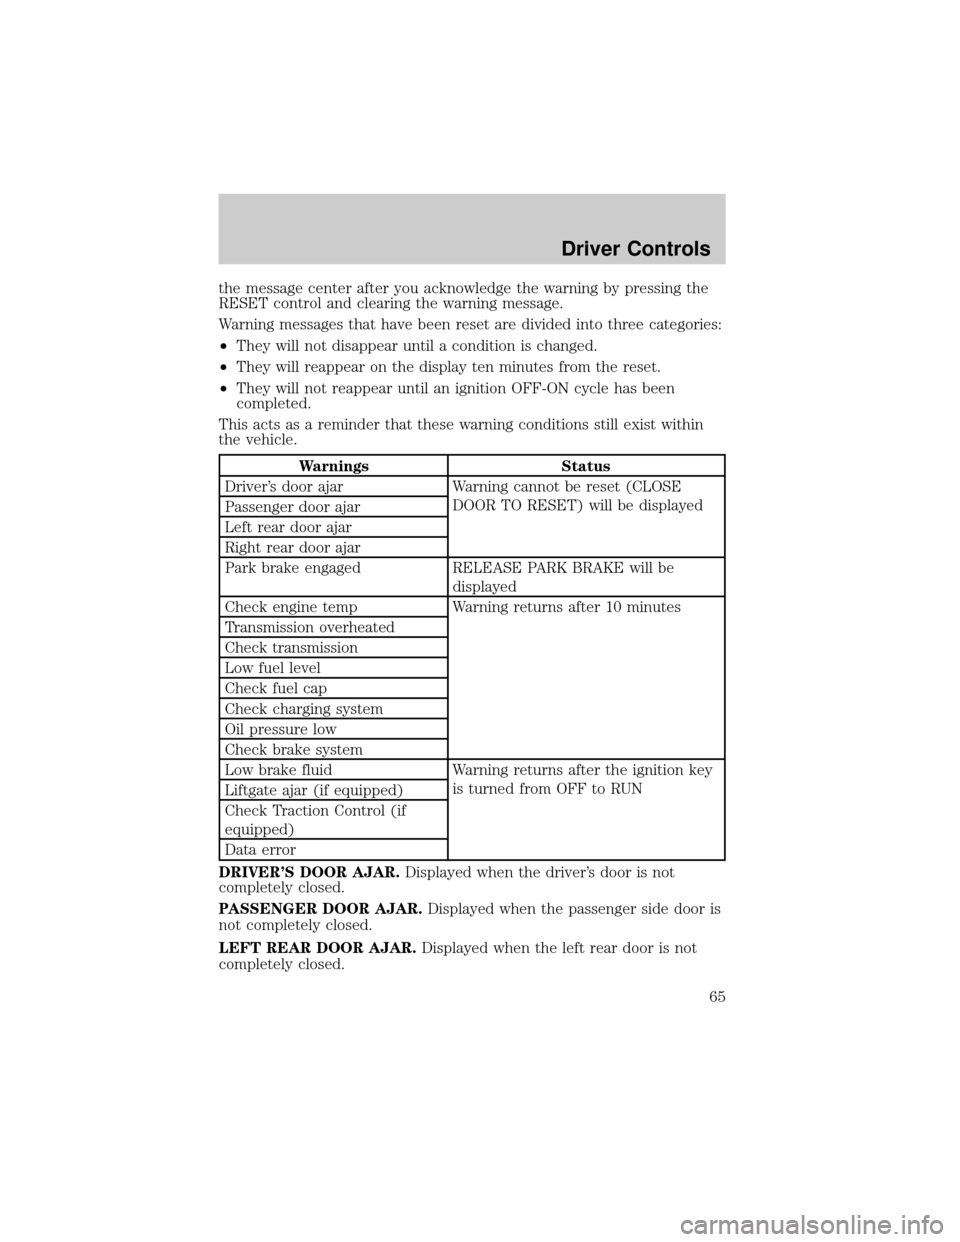
Warning messages that have been reset are divided into three categories:
²They will not disappear until a condition is changed.
²They will reappear on the display ten minutes from the reset.
²They will not reappear until an ignition OFF-ON cycle has been
completed.
This acts as a reminder that these warning conditions still exist within
the vehicle.
Warnings Status
Driver's door ajar Warning cannot be reset (CLOSE
DOOR TO RESET) will be displayed
Passenger door ajar
Left rear door ajar
Right rear door ajar
Park brake engaged RELEASE PARK BRAKE will be
displayed
Check engine temp Warning returns after 10 minutes
Transmission overheated
Check transmission
Low fuel level
Check fuel cap
Check charging system
Oil pressure low
Check brake system
Low brake fluid Warning returns after the ignition key
is turned from OFF to RUN
Liftgate ajar (if equipped)
Check Traction Control (if
equipped)
Data error
DRIVER'S DOOR AJAR.Displayed when the driver's door is not
completely closed.
PASSENGER DOOR AJAR.Displayed when the passenger side door is
not completely closed.
LEFT REAR DOOR AJAR.Displayed when the left rear door is not
completely closed.
Driver Controls
65
Page 66 of 248

RIGHT REAR DOOR AJAR.Displayed when the right rear door is not
completely closed.
PARK BRAKE ENGAGED.Displayed when the park brake is engaged.
If the warning stays on after the park brake is off, contact your dealer as
soon as possible.
CHECK ENGINE TEMPERATURE.Displayed when the engine
coolant is overheating. Stop the vehicle as soon as safely possible, turn
off the engine and let it cool. Check the coolant and coolant level. Refer
toEngine coolantin theMaintenance and specificationschapter. If
the warning stays on or continues to come on, contact your dealer as
soon as possible.
TRANSMISSION OVERHEATED.Indicates the transmission is
overheating. This warning may appear when towing heavy loads or when
driving in a low gear at a high speed for an extended period of time.
Stop the vehicle as soon as safely possible, turn off the engine and let it
cool. Refer toTransmission fluidin theMaintenance and
specificationschapter. If the warning stays on or continues to come on,
contact your dealer for transmission service as soon as possible.
CHECK TRANSMISSION.Indicates the transmission is not operating
properly. If this warning stays on, contact your dealer as soon as
possible.
LOW FUEL LEVEL.Displayed as an early reminder of a low fuel
condition.
CHECK FUEL CAP.Displayed when the fuel filler cap is not properly
installed. Check the fuel filler cap for proper installation. Refer toFuel
filler capin theMaintenance and specificationschapter.
CHECK CHARGING SYSTEM.Displayed when the electrical system is
not maintaining proper voltage. If you are operating electrical accessories
when the engine is idling at a low speed, turn off as many of the
electrical loads as possible. If the warning stays on or comes on when the
engine is operating at normal speeds, have the electrical system checked
as soon as possible.
OIL PRESSURE LOW.Displayed when the engine oil level is low. If this
warning message is displayed, check the level of the engine oil. Refer to
Engine oilin theMaintenance and specificationschapter for
information about adding engine oil.
CHECK BRAKE SYSTEM.Displayed when the brake system needs
servicing. If the warning stays on or continues to come on, contact your
dealer as soon as possible.
Driver Controls
66
Page 67 of 248

LOW BRAKE FLUID.Indicates the brake fluid level is low and the
brake system should be inspected immediately. Refer toChecking and
adding brake fluidin theMaintenance and specificationschapter.
LIFTGATE AJAR (if equipped).Displayed when the liftgate is not
completely closed.
CHECK TRACTION CONTROL (if equipped).Displayed when the
Traction Controlysystem is not operating properly. If this warning stays
on, contact your dealer for service as soon as possible. For further
information, refer toTraction controlyin theDrivingchapter.
DATA ERR.These messages indicate improper operation of the vehicle
network communication between electronic modules.
²Fuel computer
²Charging system
²Coolant system
²Traction control (if equipped)
²Door sensor
²Brake fluid
²Compass (if equipped)
²Outside temperature (if equipped)
²Engine sensor
²Transmission sensor
²Fuel cap sensor
²Seat belt sensor
²Park brake
²Oil pressure sensor
Contact your dealer as soon as possible if these messages occur on a
regular basis.
CENTER CONSOLE
Your vehicle may be equipped with a variety of console features. These
include:
²Utility compartment
²Bin mat (snap-in)
²Cupholders (front and rear)
Driver Controls
67
Page 68 of 248
²Coin holder slots
²Compact disc changer (if equipped)
²Tissue holder
²Rear ashtray (see your Ford, Lincoln Mercury dealer to obtain rear
ashtray
Use only soft cups in the cupholder. Hard objects can injure you
in a collision.
If your vehicle is equipped with the column shift and a bench seat, it has
a center console in the center front seating position.
The center console has similar features as the full console. To open the
storage compartment, raise the armrest and pull the strap on the seat up
and toward the front of the vehicle. The rear seat area is provided with
dual cupholders.
CELL PHONE USE
The use of Mobile Communications Equipment has become increasingly
important in the conduct of business and personal affairs. However,
drivers must not compromise their own or others' safety when using
such equipment. Mobile Communications can enhance personal safety
and security when appropriately used, particularly in emergency
situations. Safety must be paramount when using mobile communications
equipment to avoid negating these benefits.
Mobile Communication Equipment includes, but is not limited to cellular
phones, pagers, portable email devices, in vehicle communications
systems, telematics devices and portable two-way radios.
A driver's first responsibility is the safe operation of the vehicle.
The most important thing you can do to prevent a crash is to
avoid distractions and pay attention to the road. Wait until it is safe to
operate Mobile Communications Equipment.
Driver Controls
68
Page 69 of 248
POSITIVE RETENTION FLOOR MAT
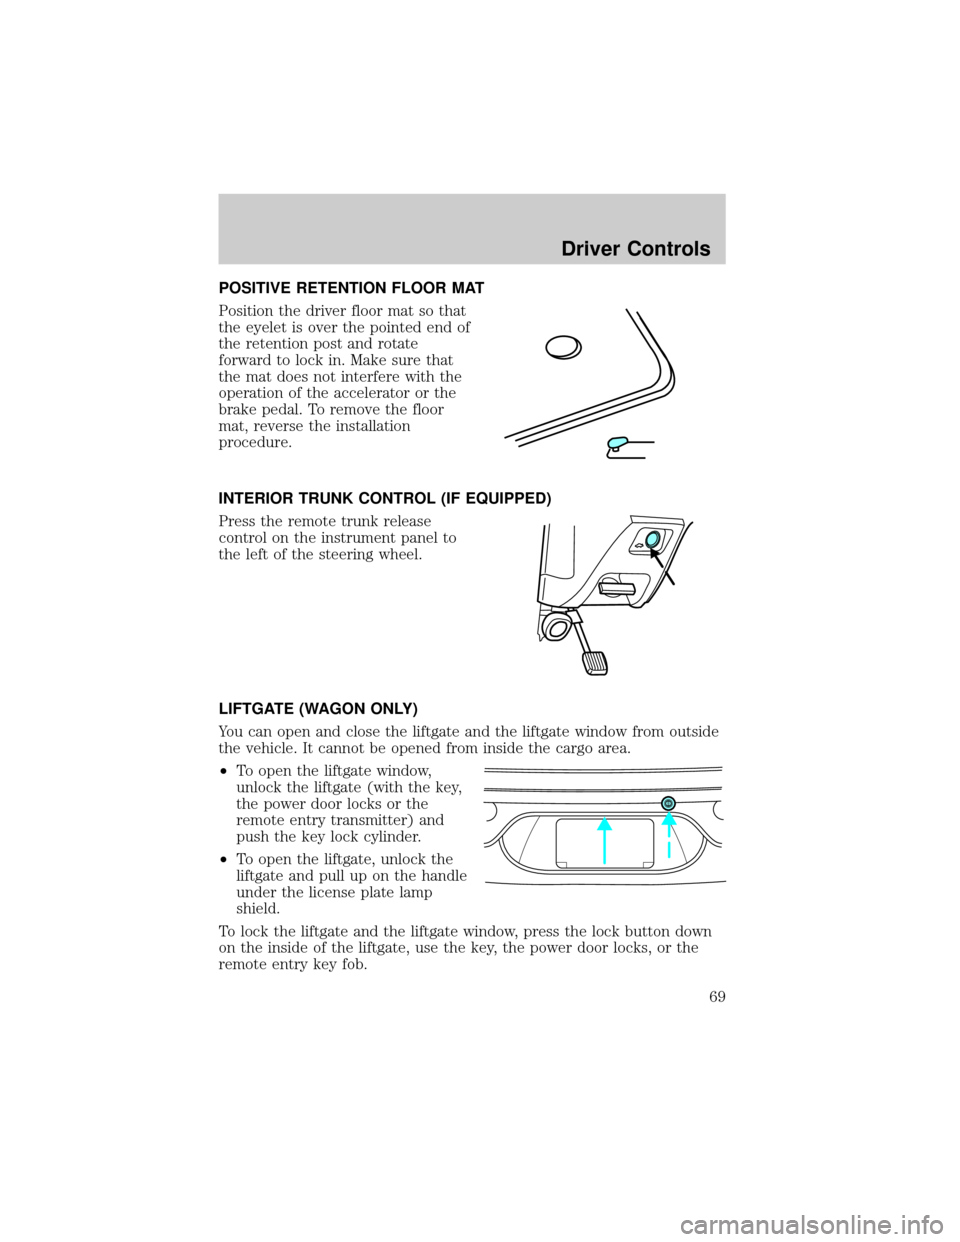
Position the driver floor mat so that
the eyelet is over the pointed end of
the retention post and rotate
forward to lock in. Make sure that
the mat does not interfere with the
operation of the accelerator or the
brake pedal. To remove the floor
mat, reverse the installation
procedure.
INTERIOR TRUNK CONTROL (IF EQUIPPED)
Press the remote trunk release
control on the instrument panel to
the left of the steering wheel.
LIFTGATE (WAGON ONLY)
You can open and close the liftgate and the liftgate window from outside
the vehicle. It cannot be opened from inside the cargo area.
²To open the liftgate window,
unlock the liftgate (with the key,
the power door locks or the
remote entry transmitter) and
push the key lock cylinder.
²To open the liftgate, unlock the
liftgate and pull up on the handle
under the license plate lamp
shield.
To lock the liftgate and the liftgate window, press the lock button down
on the inside of the liftgate, use the key, the power door locks, or the
remote entry key fob.
Driver Controls
69
Page 70 of 248
The liftgate and liftgate window should be closed before driving your
vehicle. If not, possible damage may occur to the liftgate lift cylinders
and attaching hardware.
CARGO AREA FEATURES
Storage compartment (Wagon)
Your vehicle comes equipped with a storage compartment in the floor of
the cargo area. An additional compartment is in the rear trim panel on
the right. Always put the load you are carrying as far forward as possible.
Cargo net (if equipped) (Wagon)
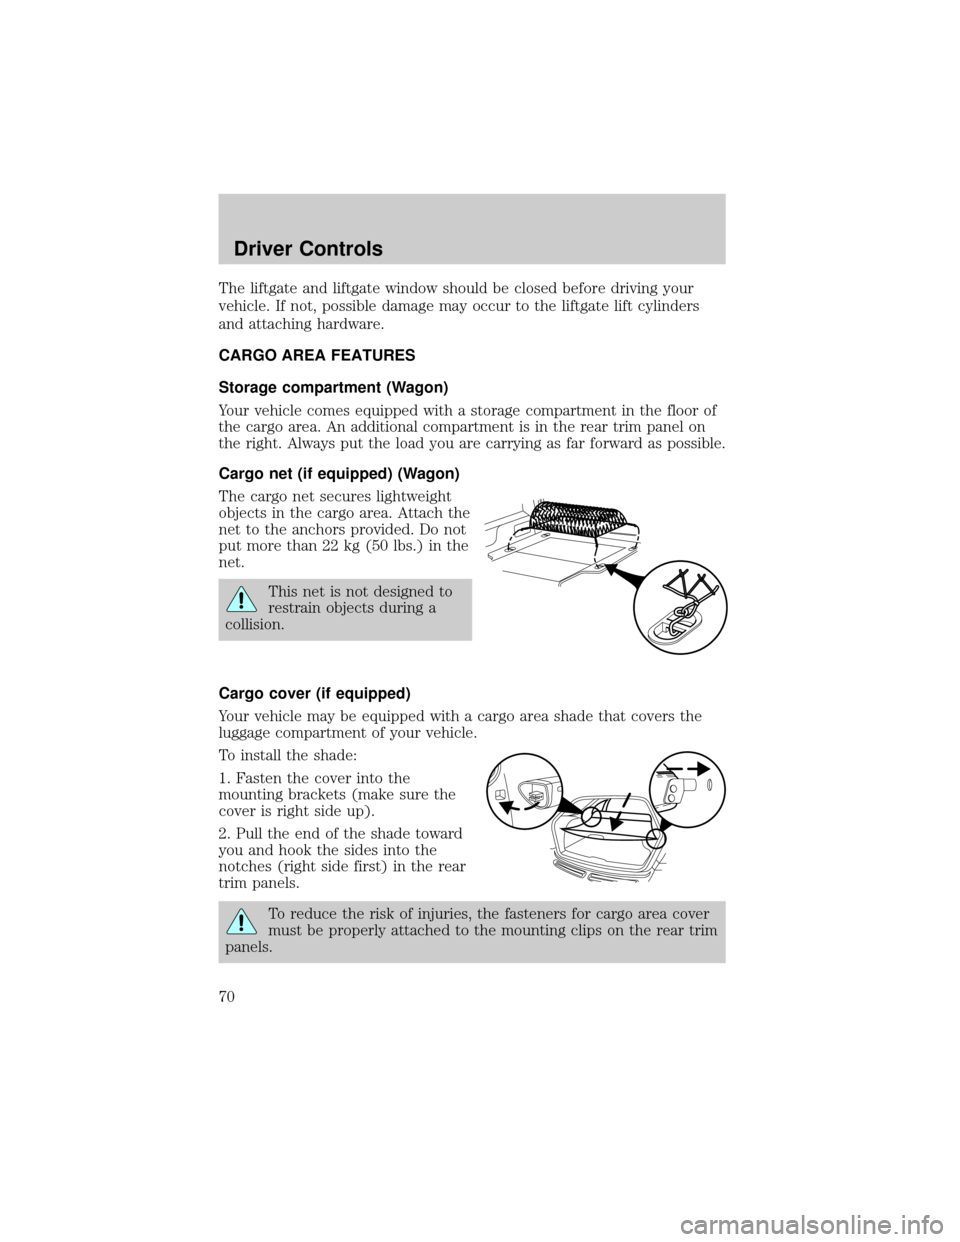
The cargo net secures lightweight
objects in the cargo area. Attach the
net to the anchors provided. Do not
put more than 22 kg (50 lbs.) in the
net.
This net is not designed to
restrain objects during a
collision.
Cargo cover (if equipped)
Your vehicle may be equipped with a cargo area shade that covers the
luggage compartment of your vehicle.
To install the shade:
1. Fasten the cover into the
mounting brackets (make sure the
cover is right side up).
2. Pull the end of the shade toward
you and hook the sides into the
notches (right side first) in the rear
trim panels.
To reduce the risk of injuries, the fasteners for cargo area cover
must be properly attached to the mounting clips on the rear trim
panels.
Driver Controls
70